Step-by-step instructions for wallpapering corners
Internal corner
Depending on the type of wallpaper chosen, it may be necessary to pre-apply adhesive to the surface of the adjacent walls. This can be done using a synthetic roller, lubricating it with an adhesive mixture from a paint bath and “walking” it over all surfaces that will be sealed. In the deepest corners, where the roller cannot reach, you should use a brush and also thoroughly coat everything with glue. Try not to apply too much mixture to avoid the formation of smudges, which can cause bubbles to appear under thin rolls of wallpaper. Make sure that there is an even layer of adhesive in all areas.
To harmoniously apply wallpaper in the inner corners, experts recommend using the method of cutting the roll to the desired thickness. The goal is that it can be applied in a strip that will cover the entire corner and extend onto the adjacent wall by no more than 50 mm. To prevent this from being visible in the future, a strip of wallpaper on the adjacent wall needs to be glued overlapping and closed with it to cover the resulting seam. If you notice that two layers of wallpaper do not fit on the corner, you should use a different method. Using a break-blade knife, make a straight, vertical cut around the perimeter of the corner so that it goes evenly through both layers of sheets. To prevent the cutting line from moving, you can press the strip with a level, rule, or strong ruler, along which it is convenient to guide with a knife blade.
External corner
Otherwise, a preliminary calculation of the length of the wallpaper strips takes place, taking into account the spare distance in order to go around the outer corner without loss. Exceptions include examples of the use of wallpaper with a high density of material. It is not always possible to bend these without loss of appearance and integrity. Therefore, a knife is again used to cut a strip up to 6 mm thick from the edge of the canvas, which will be laid over the seam between two scraps on the adjacent walls of the outer corner.
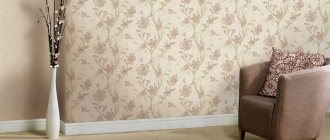
Wallpapering with a pattern
The task of pasting corners is even more difficult if the wallpaper is decorated not with a matte monochromatic color, but with decorative images, be it drawings or photographs. In this case, an unsuccessful “passing” of the corner can disrupt the composition and significantly spoil the appearance of the room’s interior. The reason for such difficulties is the use of the method of overlapping the edge of a corner strip of wallpaper with an adjacent overlapping trim, which displaces the image. This gluing technology is also used here, but requires increased care in order not to spoil the appearance of the products.
Pasting process
Preparation
All preparatory work must be carried out before finishing the corners begins.
The old covering from the walls is thoroughly cleaned, all irregularities and defects are removed. To align the joints, you can use special plastic corners, which are fixed with putty. Then, using a roller or brush, apply a special primer to the wall.
Next, select the angle from which we will start working. We prepare a piece of wallpaper of the required size, spread it with glue, and if necessary, cover the piece of wall for which it is intended. When using plastic corners, they are also coated with the compound. By smearing the wall, you can go a few centimeters beyond the boundaries of the future sheet.
We glue the first strip. If the work is carried out from left to right, then the left side of the strip of wallpaper is applied in the corner. It should be placed perfectly even along its entire length. Using a clean cloth or a special device (plastic spatula or roller), the coating is smoothed over the entire area, moving carefully and gradually, expelling air and removing bubbles. The wall is completely covered up to the nearest corner.
How to glue wallpaper in inner corners
This type of corner is usually found in rooms. For competent and even pasting, you must adhere to the listed recommendations.
The strip is glued so as to cover, along with the corner, several centimeters of the adjacent wall (3-4). It is carefully pressed and smoothed with a clean, lint-free cloth.
Then, on the adjacent wall, using a ruler, the width of the canvas minus the mentioned 3-4 cm is laid off from the upper corner. This is done in order to paste the next strip in relation to the previous one with an overlap.
Using a plumb line or level, a line is drawn down along the entire wall that will serve as a guide. The strip will have to be glued strictly vertically along it.
After this, you can move to the adjacent wall. As already mentioned, the next strip is glued along the line marked on the wall, overlapping the previous one. Just like everyone else, it is carefully smoothed and pressed, especially at the junction of the walls. Then, using a sharp knife, ruler and level, both layers of wallpaper are cut in the corner, and unnecessary trimmings are removed.
This must be done carefully so as not to accidentally remove the desired piece of wallpaper. Then we coat the edges of the canvas with glue, smooth it and press it. Make sure no air bubbles form. If you use this technique to finish corners, you can make the corner joint almost invisible visually.
How to glue wallpaper on outside corners
Meanwhile, along with internal corners, there are also external corners in every residential building. These are, for example, familiar slopes to everyone.
To make it easier and more accurate to paste them over, it is advisable to first level them with plaster. Unfortunately, this is not possible in every case. Then you will have to use the overlapping method.
What is the most convenient way to do this?
As when working with internal corners, first a layer of material is glued to the adjacent wall, to the distance of the previously mentioned 3-4 centimeters.
To ensure that the wallpaper adheres evenly to the surfaces, it is possible to carefully trim it in several places. When the canvas is smoothed, use a blade or sharp knife to cut off the excess along the vertical edge, with the exception of a thin edge
Then, using a large ruler or construction tape measure on the wall, measure a distance equal to the width of the roll plus five millimeters. Using a plumb line from this point, draw a vertical line down.
We will paste the next strip of wallpaper, focusing on it. When gluing two adjacent strips, there will be a slight overlap, which will mask all possible defects formed when cutting the first piece.
How to glue wallpaper with a pattern in the corners
If we have to work with a coating that has a clear and distinct pattern, it is important to make sure that wallpapering in the corners does not distort the existing pattern. It's not as hard to do as it might seem
The main thing is not to forget about the need for some overlap. In addition, the canvas must be glued in such a way that the edge exactly matches the plumb line. Then, along the edge of the corner (edge), the second edge is trimmed.
It is quite difficult to prevent the pattern from shifting completely, and slight distortion may occur. But it will be so insignificant that most likely only you will know about it. Only a careful study of the lines of intersection and connection will allow us to notice it. If you follow all the recommendations for gluing internal and external corners, the individual sheets of material will lie exactly vertically, and a slight distortion of the pattern will not be noticeable.
How to glue, features
Useful video instructions showing the DIY gluing technique:
As a rule, before starting renovations in an apartment, many people who are not high-level professionals are interested in how to properly glue non-woven paper wallpaper. In fact, as already noted, there is nothing complicated in the gluing process. In general, it coincides with the way any other roll wallpaper is applied.
Stages of wallpapering
So, here are the main steps:
- First of all, you need to collect all the selected tools and devices necessary for preparation and gluing: scissors or a knife, a container for glue, brushes (large and small), a plumb line, a pencil, an assembly table, a ruler, a dry clean cloth and a plastic comb for leveling the glued canvases
- Then, using a plumb line, mark a vertical line. Such a plumb line can be purchased at any hardware store. As a last resort, you can make it yourself quite simply. To do this you will need a simple thread and a large nut. Any other weighty, but at the same time, non-volume cargo will do.
- We cut several canvases and begin to spread them with a pre-prepared adhesive composition. The glue is applied using a special brush.
- We glue the first strip, align it with a plastic comb and begin preparing and gluing the second sheet. As a rule, it is glued directly butt to the previous one.
- We continue gluing the sheets in exactly the same sequence.
Ideal for new buildings
In some cases, painting such wallpaper is allowed. More details about how this is done can be found in the manufacturers’ descriptions and instructions, and also from the consultants in the store.
Pasting non-woven wallpaper in the corners
To know the exact rules for gluing non-woven wallpaper in the corners, we recommend watching the corresponding video instructions. The gluing technique is no different from other types of wallpaper:
Step-by-step technique for doing the job
To start pasting, you need to prepare the necessary materials - you should have them all at hand. Wallpapering corners requires the following:
- wallpaper of the required length with a margin of a couple of cm;
- glue diluted in warm water that matches the characteristics of your material;
- roller and brush for applying glue;
- a dry cloth to wipe off excess adhesive;
- brush for leveling panels;
- ruler;
- construction knife;
- a stool to reach the top of the canvases.
How to glue internal corners
Here are the stages of work on how to glue paper wallpaper in the corners:
- Applying glue. Carefully coat the surface of the joint between the walls from top to bottom with the prepared mixture, because there the material comes off easier and more often. Use a roller where needed, and a brush where needed.
- First part. On the side where the material is already glued, glue the next part so that it falls about 4-5 cm beyond the turn, as shown in the photo. Press the edge with a sponge. Press harder on the turning point to secure it more thoroughly.
- Second part. Proceed to the other wall. Knowing the width of your material, measure it on the wall so that one edge of the panel overlaps the previously glued one by 2-4 cm. Draw a line, checking it for verticality. After applying glue to the wall, glue the second canvas. Press the edges with a sponge.
- Trimming excess. Arm yourself with a ruler and a construction knife. Using a ruler, make a vertical cut in the center of the overlap. Carefully tear off the top panel from the wall and remove the lower cut part.
- Final gluing. Carefully coat the part that was turned away with adhesive and re-glue it to the wall, smoothing the edge and removing excess glue. The perfect seam is ready!
How to cover external corners
Protruding parts are more noticeable indoors, so they must be done especially carefully. There are two options for hanging wallpaper yourself:
- The protrusion is perfectly level. Then simply wrap the fabric over the corner joint by 3-4 cm and glue it. Do not cut it, but glue the next one using the usual technology for a straight surface.
- The walls are uneven. You'll have to use another method.
The second method will not differ from the technology for internal corner joints. Here's how to properly glue wallpaper in protruding corners:
- Glue the first strip with an overlap of about 4-5 cm at the corner joint.
- Measure the width of the panel from the protrusion and step back another 5 mm so that when gluing one part overlaps the other a little.
- Using a ruler, make a cut in the middle of the overlap.
- The top part will fall off on its own, and remove the bottom by moving the top sheet and gluing it in place.
Such methods are suggested for those materials that are glued joint to joint and do not produce shrinkage deformations. This way the seam will not come apart and there will be no gaps in the wall. For paper materials, these methods are not suitable - an overlap of 0.5 cm is required, so the first method is used, when the overlap is not cut off, but simply checked for verticality using a plumb line. If deviations are found, draw a line and trim what is unnecessary. For a more aesthetic design, a wallpaper corner is often used.
Do-it-yourself gluing of non-woven wallpaper
The walls should be marked. Non-woven wallpaper has a good edge and is glued end-to-end.
It is best to start marking from the corner. In these places, the panels will be glued overlapping in order to process them correctly (this was mentioned above).
With a roll width of 1.06 meters, you need to put 1 meter on both sides of the corner.
Using a pencil and a level (plumb line), you need to draw a vertical line to a height equal to your height. Using a tape measure, you need to mark 1.06 meters from the drawn line. So, we line all the walls.
Then we spread plastic film on the floor. A roll of wallpaper will roll out face down on it. If there is a pattern on the wallpaper, it must be taken into account when the panels are cut.
If there is no drawing, you need to measure the height of the room with a tape measure in the place where the piece will be glued, and you need to add another 10 cm.
The roll must be bent onto the rolled part so that the edges coincide, then the bend will be even. You need to run your hand along the bend, then cut with a knife. You can use a new utility knife. This way you can prepare wallpaper for the entire room.
The panels should be rolled into loose rolls so that the front part is inside. Thanks to the non-woven base, there should be no problems with handling such wallpapers, as with ordinary ones, which are more whimsical.
Using the instructions, you need to dilute the wallpaper glue. In this case, special glue for non-woven wallpaper is used. Pour water into a bucket, and then pour in the glue in a thin stream, stirring constantly, so that hated lumps do not arise that can interfere with the quality of pasting even non-woven wallpaper.
The glue needs to sit for a bit for it to swell. You can insert a special plastic mesh into the bucket to remove excess glue.
We dip the roller in a bucket, run it along the mesh, and then smear the wall under gluing one panel.
The technology for gluing non-woven wallpaper is that the panel needs to be glued on top.
We take the edge of the canvas and apply it to the wall. We gradually lower the roll down, smoothing the wallpaper from the middle to the edges using a special brush or roller.
You can also use a plastic spatula, but this must be done carefully so as not to damage the wallpaper.
Please ensure that the non-woven wallpaper is pressed tightly against the wall and that there are no bubbles or folds.
When two or more sheets are pasted, each subsequent seam of the wallpaper should be rolled with a roller. The remaining piece of wallpaper at the bottom must be carefully cut off. It's better to do this when everything is dry.
It is necessary to calculate so that the baseboard, which will then be installed, covers the wallpaper completely. At the top of the wallpaper you can use a border of the desired thickness.
Secrets of the masters
External factor
Smooth walls – 50% success
- First of all, so that the question of how to glue wallpaper with a pattern in the corners does not become a dilemma, you will need smooth walls, the angle of which relative to the floor will be exactly 90⁰, without any deviations or allowances (the floor should be set to zero). If all the walls (partitions) in the room are strictly vertical, then each of the room corners, be it internal or external, will be the same along its entire length, regardless of whether it is sharp, obtuse or straight. The same applies to the edges of the slopes, which extend from the window or door onto the wall - both the vertical and the horizontal must be smooth, like the slope itself - to the horizon line the horizontal must be strictly parallel or have 0⁰, and the vertical must be strictly perpendicular and have 90⁰.
- As mentioned above, you can achieve such geometric parameters using beacon profiles, which are installed for plastering or puttying walls and ceilings, as well as metal lathing for plasterboard sheets, which are installed strictly according to the level. Another option is simply impossible and this is not a production instruction, but a mathematical law, which is not humanly possible to break or change. Any deviation of the wall by even one degree will result in mismatched edges at the junctions of the strips.
Secrets of smooth gluing
For the first stripe a control line is required
Even if you have brought the walls to zero, this does not mean that all the difficulties are over, since wallpaper on the outer corner (or on the inner) should be glued strictly according to the level, otherwise all the work on leveling the partitions will not bring you any benefit. The sheet width has a standard of 0.53 m and 1.06 m, which means that when marking we will use the same parameters. Let's imagine that a right-hander is working and we start pasting from the left corner.
The stripes should look something like this
We retreat from the corner approximately 5-10 cm less than the width of the sheet with which we are working and draw a vertical line strictly according to a plumb line or building level for orientation. Now it turns out that when gluing on the right side, the strip will lie under the control line, and on the left, it will wrap around the adjacent wall, and if the corner (internal or external) is even, then the left edge of the sheet will also turn out strictly vertical.
Do not forget that wet wallpaper can stretch slightly when it is glued to the surface, which means you need to check the clarity of the vertical of each edge at least through the sheet so that it does not gradually deviate from the initially specified parameters.
Overlap in the inner corner
Well, how to wallpaper the corners if there is no way to level the walls, or if you did it, but made a mistake due to inexperience? In such cases, it is best to use wallpaper that can be painted or with a pattern that does not depend on the joint (the first option is better). Here it is best to glue the strips overlapping when they do not match at the joints.
The principle of overlap joining
We continue to consider the topic of how to paste wallpaper in the corners and it should be said that overlapping joining does not at all imply gluing one strip to another - pay attention to the picture above. Since we prefer to glue the wallpaper on the corners entirely, we will simply cut off the edges that overlap each other with a paint knife, just try to ensure that the blade is new and does not tear the sheet
You simply remove the extra strips and get an almost perfect fit, only without matching the pattern.
Photo - how to glue corners to wallpaper
You can also hide defects in wallpaper gluing on the corners, as well as protect them from damage, using plastic, and above you see how to glue the corners to wallpaper on the outer corner. But for internal joining, this option will not be the best - in this case, it is best to use a thin ceiling plinth made of the same plastic or even foam plastic (extruded polystyrene foam).
How to make joints invisible
Care must be taken to ensure that the joints of the canvases are invisible during gluing. You need to connect the canvases so that there is no gap between them, but also so that they do not overlap one another even by a millimeter. A perfect match must be achieved.
Move the strip in the desired direction
Since we, alas, rarely see perfectly smooth walls, it turns out that the seam either creeps in a little or diverges. Your task is to move the canvas so that it becomes perfect and invisible. You can move the canvases with your hands - they can slightly stretch and contract. Due to this, you achieve the required match. If the resulting defect is too large and nothing can be achieved by shifting, the strip is peeled off to this place and, having corrected it as necessary, is glued again. Sometimes, if the seam is sticking out a little, rolling it with a special tapered roller can help.
With this technique, it turns out that first the edge is glued, which is joined, and then, from it, they begin to smooth out the rest of the surface of the canvas. If you have examined the seam and are satisfied with the result, take a clean rag and wipe it off any excess glue that may have come out during all these actions.
To learn how to glue meter-long vinyl wallpaper on a non-woven backing and how to make the joint invisible, watch the video.
What types can be glued to uneven walls?
If you don’t know how to hang wallpaper on uneven walls, then you need to learn about the types of materials. The main options include:
- Paper. Due to the structure and thickness, the glued materials do not stretch over the area. This reduces the receipt of manifested flaws. They can be used when various defects are often found in the apartment.
- Vinyl. This option is applicable when small irregularities are encountered. If you need to do finishing, then vinyl materials will not help, but will only aggravate the situation.
- Liquid. They will allow you to carry out detailed finishing work and eliminate defects in the floor materials.
- Non-woven. This is a dense material that will mask small and medium-sized imperfections.
Non-woven fabric is best. It has a dense structure and can mask flaws of different sizes and shapes.
Features of gluing for each type of wallpaper
Technologies do not stand still and the market is ready to offer a wide range to suit every taste and budget. A variety of textures, gluing methods, width of the canvas and a variety of colors and patterns. But in order not to make a mistake with your choice, you should know the disadvantages and advantages of each type of wallpaper. The most popular at the moment are four types.
Paper wallpaper
They are environmentally friendly and low cost. They are the ancestors of all wallpapers. Modern species are also based on them.
You will also have to give up the idea of washing anything on them; after getting wet, the paper becomes deformed and tears.
Non-woven wallpaper
These are paper wallpapers with the use of special additives that turned them into a real find. They can be painted (repeatedly), they do not fade in the sun, they are very durable, waterproof and fire resistant. At the same time, covering a room with them will not be difficult; the glue is applied directly to the wall. The only disadvantage of this type is the high price.
Watch the video on how to glue non-woven wallpaper
Vinyl wallpapers
They are distinguished by reliability, wear resistance and durability. A special feature of the gluing is its two-layer nature. The base (the bottom layer, which is glued to the wall) can be paper or non-woven. The advantage of the first option is the ability to stretch. They are convenient for covering niches and complex openings. But at the same time, you need to apply glue to the surface of the canvas itself and the wall.
After applying the adhesive mass, extreme caution should be exercised, since the paper base can easily tear. The non-woven base is more durable, saves glue consumption (since the composition is applied only to the wall)
It can easily hide minor defects, but due to its rigidity it creates problems when straightening folds and removing air.
Watch a detailed video on how to glue vinyl wallpaper
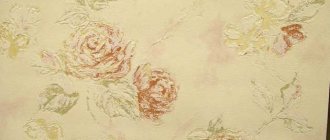
Photo wallpaper
The variety of themes and designs of this type of wallpaper is fascinating. You can find real works of art that can transform the interior beyond recognition. Based on the base material, photo wallpapers are divided into subtypes: paper, vinyl and fabric. The main difficulty in covering walls with such wallpaper is matching the pattern. At the preparatory stage, you need to make precise element-by-element markings on the wall, then remove the white edges from the fragments and only then apply glue.
Detailed video of gluing photo wallpaper
How to properly cover an outer corner?
The repair procedure described above is almost repeated when gluing external corners. The first strip of material is glued in such a way that several centimeters of the segment are wrapped around the corner. Most often, to ensure high-quality fastening, you have to make several cuts along the segment, at the corner. The cuts will help avoid wrinkles and remove excess adhesive from the wallpaper. Using a sponge or roller, press the strip as carefully as possible onto the surface, after which the strip is cut vertically with a knife so that no more than 1 cm of wallpaper remains on the adjacent wall.
When gluing wallpaper to an outer corner, a vertical mark is applied to the wall, along which the adjustment is made
The next strip of wallpaper is attached to the wall, where there is 1 cm of wallpaper. The section is mounted in exactly the same way as the first strip; no more than 5 mm of wallpaper should extend onto the adjacent wall. If installed correctly, the mounting location will be completely invisible.
Decorating corners in a room is not only the most difficult task when tiling surfaces, but also the most important. The overall visual characteristics of the room’s interior depend on how the cladding will look in these places. Therefore, repair work must be carried out very carefully, carefully and slowly. If you do not have much experience in cladding, it is recommended to start with areas of the room that are least noticeable and where defects in the installation of cladding will not adversely affect the beauty of the room.
Tools and Process Steps
To work you will need the following tools:
- Brush. It is used to apply glue to narrow strips or along the edges.
- Foam roller. Rollers with artificial or natural fur can replace it, but this is the most comfortable one. The quality of the pasting largely depends on which roller is used for the job. Before first use, it must be well saturated with water.
- Bath. Necessary for rolling out the roller; it's easier to use than a whole bucket of glue.
- A rag or sponge made of foam rubber.
Stages of gluing:
Carefully study the instructions, all symbols on the roll. Determine application technique. Prepare the composition according to the instructions on the package
It is important to follow the recommendations on water temperature and the duration of swelling of the mixture. A large sieve will help you get rid of lumps, through which you need to pass the entire composition (read more about how to cook and use and where to store the paste here). When applying to sheets, you need to prepare a place for their placement
This can be done on the floor or on a large table. When applying to the walls, you need to make sure that they are clean, free of dust and small debris. Wet the brush and roller with plain water. Spread a protective layer of paper on the floor or table and lay out the linens. It is important that the paper does not fade or print on the roll when wet. This is especially true for white and light wallpapers. Apply glue to the center of the sheet depending on the wallpaper material: a little on thin ones, more on thick ones, allowing for absorption. Spread with a roller along the entire length: from edge to edge of the opposite side. Then move to the near half, apply from edge to edge along the length. Separately coat the edges with a brush. Blot any excess that gets on the front side with a rag or sponge. Thin wallpaper can be pasted. Thick ones - leave to swell, folding the edges towards the center and setting aside for 5-10 minutes. Then stick it on. If it is necessary to apply it to the wall, it is better to do it in two layers. The first serves as a primer, the second is where the wallpaper is directly glued.
Vinyl
Gluing technology:
Prime the wall well. Next, proceed as indicated in the instructions from the roll: Either smear the vinyl sheet and leave it to soak, or lubricate the wall. The only possible method of joining is end-to-end. It is important to note that when saturated, this type of fabric stretches greatly.
Non-woven
Let's consider whether it is possible to apply glue to non-woven covering and what attention should be paid to. Pasting instructions:
No adhesive is applied to this type of wallpaper. It is important to pay attention to careful treatment of the surface for non-woven finishing, where the adhesive is applied in a thick layer, preferably twice. It is important not to miss a single centimeter when applying.
They are glued end to end, without overlap. It is convenient that non-woven wallpaper will not tear, as it is mounted on the wall dry. The sheet is convenient to carry and correct in case of an error.
Paper
Gluing stages:
Apply glue to the inner surface of the canvas, fold the edges towards the center, leave to swell. Straighten the canvas, coat it with glue again, paying attention to the edges and corners. If the sheet curls up, it means it is not ready yet; it needs time to soak. Gluing - overlap.
Tips and tricks
- before choosing glue, study the structure of the trellises;
- dilute the adhesive mixture strictly according to the instructions, it is either on the label or sold in addition to the glue;
- After the glue is applied to the wall, you need to let it dry slightly. This will increase the adhesion of materials.
Pasting internal and external corners can be done in several ways. Experts are divided on which method is better. In any case, the choice is yours. The technology for gluing non-woven wallpaper in itself is not complicated, the main thing is to follow the instructions, then your apartment will have beautiful, even corners.
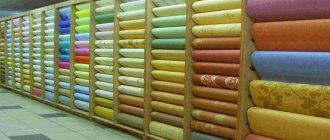
Types of wallpaper
The name "wallpaper" comes from the method of applying the finish. Initially, they were made from fabric that was used to cover walls and ceilings in castles, palaces or wealthy houses. With the advent of stationery presses in Europe and then in Russia, wallpaper made from paper became widespread. They are valued for their environmental friendliness, decorativeness and accessibility.
GOST 6810-2002 classifies materials into groups:
- paper - one- or two-layer (simplex or duplex), light, medium weight, heavy;
- vinyl - on a paper or non-woven basis;
- textile - made of cotton, flax, jute fiber or polyester based on paper or non-woven composite materials.
The front surface can be smooth or grooved. It is decorated with embossing, painting, printing, and silk-screen printing. Structure and volume are added by applying foamed polymer, metal powder, and brushing.
They produce wallpaper that can be painted, is moisture-resistant, sound-absorbing, and anti-vandal. Glass wallpaper is a woven fiberglass material with figured weaving that is durable and non-flammable.
For connoisseurs of natural finishes, wallpaper is made from cork, bamboo, jute, reeds, and seaweed. Exotic species - leaves glued to a non-woven base, tanned animal skin, thin sections of rocks bonded together.
The stores have a wide selection
The minimum roll dimensions are 0.53x10.05 m, although widths of 47 or 75 cm can be found. The maximum length of the strip is 42 m. Standards establish standard values for the resistance of finishing to fading, abrasion, and the release of harmful substances.
Wallpaper is glued using industrial compounds or homemade paste. Some types are self-adhesive, meaning the sticky substance is already applied to the surface. You just need to activate it by soaking it, place the cloth on the base and roll it with a roller.
The variety of materials is great. Where to start and how to properly glue wallpaper are questions that a person faces when renovating or decorating a new room.
How to stick dense materials on uneven walls
When you had to face the problem of how to correctly glue wallpaper on crooked walls, you need to follow the sequence:
- Using a level, markings are made starting from the corner.
- The working surface is treated with glue and dried.
- A piece of canvas is coated with the composition and applied, creating an overlap on another surface.
- Using a knife, a cut is made along the corner.
- The joints are coated with adhesive.
- The whole room is covered.
The work must be done using the following tools:
All processes must be performed using the kit listed above and adding to it a roller and containers.
What glue is best for gluing?
Now there are 2 large categories of glue by type:
- Universal. Even when you decide to glue non-woven adhesive wallpaper, you can do it.
- Special. Used only for one type, for example, for vinyl wallpaper.
Special attention should be paid to the dense base. Often a number of problems arise here, because the wallpaper can collapse under its own weight.
Where to begin
If you want to properly glue wallpaper, then first you need to prepare the surface. This should be done using the following steps:
- Old materials are wetted to make gluing easier. Paint and whitewash are also removed. Sometimes you can glue finishing material onto a painted surface. This also applies to the edges of the glued corner if there are uneven corners.
- If there is no finishing, then pasting is done on plaster. You should first check for the absence of delaminations, and if any are present, then the pieces are removed.
- Cracks are sealed with mortar.
- The base is cleaned of dust and dirt.
- The surface is treated with a metal brush.
- It is preferable to use a primer in all situations. This allows you to reduce the absorbency of the adhesive composition.
Only after completing these procedures will you be able to proceed with further operations.
Features of gluing in corners
In old houses you can find uneven corners. And here there are only 2 ways that help eliminate this disease:
- Preparation by leveling. Here the finishing takes place with plaster , putty, and then wallpaper.
- Pasting on the base that already exists. In this situation, you should take into account the features of the products , because some of them will help eliminate defects, while others will do the opposite.
Particular attention should be paid to the second case. Using a number of simple rules, defects can be eliminated quickly:
- The right choice by type, pattern, texture. Thick wallpaper will look best.
- The corner is glued 2 times. The glue is applied to the place where wallpaper 100 mm wide is subsequently glued. Later they are cut through, and the second strip fills the space.
Let's start wallpapering
You need to cut the wallpaper with an allowance of 5 cm on each side if you consider the pattern to be large. For ordinary relief embossing, a total allowance of 5 cm is sufficient. It is convenient to start gluing wallpaper for painting on the left side of the window, moving clockwise if you are right-handed. But the quality of the entire work depends on how smoothly the first canvas is glued. A regular plumb line or laser level will come in handy here. With its help we will mark a vertical line on the wall. Gluing occurs strictly along this line.
Fold the paper sheet with glue applied in half, trying to prevent the glue from getting on the front surface. The impregnation time is usually indicated on the roll, and if this information is not available, then a soak time of 5–10 minutes is sufficient. You need to smooth the wallpaper with a brush or a plastic wallpaper spatula, pressing the canvas along its entire length, moving from the center to the edges, removing air bubbles and excess adhesive mass. These movements should be quite delicate so that the relief texture of the canvas is not disturbed. Smoothing non-woven wallpaper, which is stronger in structure than paper, can be more energetic. Fiberglass wallpaper can be safely glued even with excessive effort; these dense canvases are almost impossible to tear when gluing.
Recommendations for choosing the right wallpaper
Wallpapers differ in many ways. Most often, the choice is made taking into account the type of stripes, the number of their layers, as well as the pattern and color. When selecting strips that will be glued to an uneven surface, several important points should be taken into account. Let's take a closer look at them.
Recommendations for choosing wallpaper for uneven walls
It is not recommended to buy wallpaper that has a clearly defined pattern. In order to hide wall defects, blurry patterns are best suited. You can also purchase material whose surface has lines diverging in different directions.
Liquid wallpaper does not have to be applied over the entire wall area. If desired, you can apply this material to the most problematic areas. When choosing rolls, you should also focus on the thickness of the material. In this case, the following pattern can be traced: the greater the thickness, the better. However, it is worth remembering that the weight of the strip depends on the thickness, so for such wallpaper you will need to use much more adhesive.
Working with uneven corners
The previous methods work well with standard right angles, but you may encounter less traditional geometries in your space. Then you can overcome the curved corner using the following instructions:
- The height of the wall is measured and 7 cm is added to the resulting value.
- The wallpaper roll is cut into several strips with the required thickness and in the appropriate quantity. If the canvases contain a pattern, take this into account and take fragments from their edges to minimize damage to the composition.
- We treat the walls and corners with glue, if required for the selected brand of wallpaper. Otherwise, apply the adhesive mixture only to the inside of the strips and glue them to the corner. At this stage, there will inevitably be some bumps, which you shouldn’t be afraid of, because... in the future they can be corrected by cutting off unnecessary fragments.
- To avoid “blockages”, you should carefully press the sheets along the entire perimeter of the corner, expelling air accumulations from under them. This will ensure better adhesion of facing products to the surface.
- The corner section with two layers of wallpaper overlapped is carefully trimmed with a knife. After that, the resulting cut is also treated with an adhesive mixture, on top of which a folded fragment of the strip is placed.
Preparing the base for wallpapering
Non-woven and vinyl wallpapers, unlike paper ones, are quite expensive, so they do not stick for 1 year.
To ensure that the rolled material lays flat and does not peel off over time, a number of preparatory measures should be carried out, which include the following steps:
- dismantling old finishing;
- plastering;
- puttying.
Before you start gluing exterior or interior wallpaper in the corners, you need to remove the old trim.
If this is not done, then after a while bubbles and wrinkles will form under the new wallpaper.
And if thin paper wallpaper is used when gluing, then the pattern of the previous cladding may appear on it.
If during the work there are difficulties in peeling them off, then the finishing surface can be treated with heated water and wait 10-20 minutes until the material gets wet.
The next step is to level the walls and corners with plaster.
It is applied in layers.
The thickness of one layer should not exceed 6 mm.
At the same time, the number of such layers depends on the degree of unevenness of the walls.
For this, 2 types of putty are used: starting and finishing.
The second is distinguished by a more saturated white color and less grain.
Video:
After the finishing layer of putty has dried, the walls must be sanded with sanding paper to remove minor defects.
After sanding, the walls are primed again.
In this case, special attention should be paid to the corners, since these places are most exposed to moisture and microbes
Working in corners
When joining wallpaper in the corners, follow the given algorithm of actions:
Preparing the corner. At this stage, the walls are puttied; the corners are equipped with special plastic corners at the bottom of the wall. The corners are attached using putty and your task is to do this conscientiously so that they are securely fastened to the wall surface.
Wallpapering corners. Cut a strip of the required length, then apply glue to the part of the wall where you are going to apply the wallpaper.
Important
Important! Apply glue along the width of the wall and leave an extra 3-5 centimeters on the sides; also be sure to apply glue to the plastic corner.
You can apply wallpaper to the wall. If you are gluing from right to left, then you need to attach the right side to the inside of the corner so that the strip adheres evenly to the wall along its entire length.
Leveling the canvas on the wall
Using a spatula, level the wallpaper and remove any swelling that has formed between the canvas and the wall. The joint between different strips of wallpaper should not be more than 5 mm. And the remains of the wallpaper need to be carefully cut off with a stationery knife.
The video clearly demonstrates how to join wallpaper in the inner corner:
Different color
Combining colors in wallpaper is quite often used when decorating a room. To make the walls look presentable and the colors of the wallpaper to harmoniously combine with each other, you can design the joints in the following ways:
- Classic joint.
- Initially, no glue is applied to the edges of the wallpaper, but the main part of the wallpaper is glued to the wall with an overlap.
- Then take a long ruler or plank, which is leaned against the wall and a line is drawn along the overlap.
- Then, using a stationery knife, the joint is cut off, and the remaining wallpaper is thrown away.
- After all this, you need to lubricate the joints with glue and secure them to the wall. With this algorithm of actions, the joint will turn out smooth.
- Horizontal stripes. In this case, a straight line is drawn on the wall using a level. After that, you cut out the strips you need and glue the top wallpaper first, and then the bottom ones.
- Framing. Here, when framing the joints, various devices are used: baguettes, moldings or borders. When an insert in the form of a stained-glass window made of wallpaper is meant on the wall, the canvas is also framed using these materials.
With an image
It is most difficult to glue wallpaper with patterns, since if it is joined incorrectly, distortions in the form of overlaps or distortion in relation to the floor are immediately evident. To avoid such troubles, use the following tips:
- Make a very slight overlap on the other canvas, it should be barely noticeable.
- If you find any curvature, move it to the top and hide it behind the panels.
- Glue the straight edge along a plumb line, and cut off the excess part using a stationery knife.
On the outside corner
This situation is a little similar to joining wallpaper in the inner corners, but a slightly different algorithm applies here:
Bring the strip around the corner by 5 centimeters, and glue the next strip slightly overlapping this allowance. Take a metal ruler and make a vertical cut in the middle of the overlay between two layers. Attention
Important! When working with a knife, make sure that the ruler does not move, otherwise the cut will turn out crooked. 0.5 centimeters wide
This is due to the fact that paper wallpaper shrinks in width after drying.
The advantage of this method is that after the glue dries, the seam does not separate, and the bare wall will not be visible between the two canvases. But still, when sticking paper wallpaper, follow the technological overlay 0.5 centimeters wide. This is due to the fact that paper wallpaper shrinks in width after drying.
The folded edge should be strictly vertical; if it deviates, draw a line and cut off the excess wallpaper. The next strip is overlapped by 0.5 centimeters.
The video clearly shows how to properly glue wallpaper on the outer corners:
Process of pasting corners
To prevent wall decoration from turning into real flour, you need to first prepare the surface and only then proceed to decorating the room.
Preparation
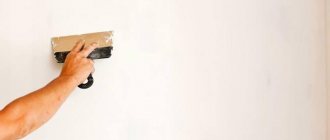
At this stage, the old coating is removed from the surface of the walls, all irregularities and defects are eliminated. To level the joints, it may be necessary to apply both putty and plaster. For example, in Khrushchev the corners are far from ideal. Therefore, in such apartments it is impossible to do without preliminary leveling of the surface.
Often the junction of two walls is leveled with plastic corners. They are fixed using putty or plaster. Corners are available for both internal and external corners. After the surface has dried, it is treated with sandpaper. Then the walls are primed with a roller and a special compound.
What to do if the docking needs to be done in curved corners that cannot be leveled? In such a situation, you need to approach the issue of choosing the wallpaper itself as carefully as possible. As a rule, low-density materials are used to finish uneven surfaces, since they will have to be glued overlapping and the place of overlap should be invisible. One of the suitable options in this case would be wallpaper on a non-woven basis with a small pattern or plain.
You can hide crooked corners using fiberglass materials designed for painting.
Before you start pasting, you need to complete the following steps:
- Prepare tools and materials.
- Calculate the area that needs to be covered and purchase the required number of rolls of wallpaper.
- Select the adhesive composition according to the purchased wallpaper and dilute it according to the instructions.
List of what is needed:
- roulette;
- pencil;
- plumb line;
- metal ruler;
- knife;
- roller and brush;
- ladder;
- clean rags.
They retreat 3-4 cm from the joining point and draw a line with a pencil along a plumb line on the wall. Since wallpaper is most often glued joint to joint, the correctness of drawing this line and gluing the first strip will determine how smoothly the subsequent canvases will lie.
To be completely sure, draw lines for each of the stripes.
Wallpaper is cut into strips with a margin of 2 cm, since after drying the canvas becomes shorter. For convenience, the material is rolled out and cut on the floor.
The wall (especially the corners) is carefully covered with adhesive. If heavy vinyl wallpaper is used for finishing, then you need to cover them with glue as well.
Before you start wallpapering curved walls and corners, it is advisable to familiarize yourself with the video below.
How to glue an inner corner
Most often, such corners are found in residential premises. To ensure that the wallpaper is applied evenly, you must follow certain instructions.
The strip is glued so that, in addition to the corner, the wallpaper is applied 3-4 cm to the adjacent wall.
On the adjacent wall, using a ruler from the upper corner, measure the width of the strip minus the indicated centimeters, which is required to create an overlap. Using a plumb line, a line is drawn down along the wall as a guide: the canvas will be applied along it.
Then they move to the adjacent strip and glue the wallpaper along the intended line. The canvas is smoothed well and air is expelled, especially in the corners. Using a metal ruler, use a sharp knife to carefully cut two layers of wallpaper in the corner and remove the scraps. Then glue is applied to the edge of the finishing material, the canvas is leveled and pressed. If you adhere to the steps listed above, the wallpaper in the corners can be joined almost perfectly.
How to glue an external corner
Finishing the outer corner has its own characteristics:
- Measure the distance from the applied wallpaper to the adjacent wall. About 20 mm is added to the obtained values.
- Cut the strip with 20 mm added.
- Apply glue to the walls and wallpaper.
- The straight edge is glued to the previously fixed wallpaper on the wall, and the cut side should be launched onto the adjacent surface.
- Draw a vertical line on the adjacent wall along the pasted strip, making an indentation of 10 mm.
- Glue is applied to the new canvas and the wallpaper is applied to the line. As a result, the new strip will overlap the previously pasted one by 10 mm.
- The joints are glued and ironed with a roller, and then the top layer is cut off along a ruler and both layers are joined together.
Work progress
Let's look at all the angles in order, from simple to complex.
Corners above and below
Everything here is quite simple, even if you can’t hide the material under the baseboards:
- we cut the wallpaper with an allowance higher (or lower) than the baseboard by 6-8 cm;
- glue and bend the allowance along the line of the plinth, which is convenient to do with a wide spatula;
- then, using a spatula as a guide support, cut the allowance along the entire length with a knife;
the work must be done while the glue has not yet set; this will allow a small residue of 1-2 mm to be carefully inserted behind the plinth line with a knife.
Corner inside
Here, first we provide ourselves with two reliable verticals on both joining surfaces:
- first we glue the wallpaper on one side so that an area at least 2 cm wide goes to the adjacent wall;
- wait for the glue to dry completely;
- Usually, to glue the adjacent piece, a 2 cm allowance will be enough, if you made more and it holds well, then there is no need to cut it off, otherwise, be sure to cut it using a sharp knife and spatula as a guide;
- glue a piece on the adjacent wall close to the corner and smooth it with a special roller for wallpaper;
There is always a temptation to avoid such a hassle, bend the piece in half along the width and try to create an “ideal” corner from one piece; but, as practice shows, in the future the wallpaper will begin to run together and the entire corner will simply move away; however, we advise you to keep this method in mind; If you have very high-quality wallpaper that does not fade over time, and even under glue, then this option will be simply ideal.
Corner outside
Here everything is much more complicated and responsible, and that’s when the question of how to glue the corners with non-woven wallpaper is really resolved:
- First, we glue the roll on one side, ensuring a bend of 6-8 cm onto the wall being joined;
- then, (1), “around the bend” we glue the roll, not reaching the corner 2-3 cm;
- mark the invisible vertical edge of the bottom roll;
- exactly in the middle between the edges of the two rolls, (2), cut off both pieces, the rest of the top one is no longer needed,
- and the cut section of the lower one remains on the wall (3), ensuring a smooth joint.
How to tape corners
To successfully overcome the problem of corners, both external and internal, it is necessary to prepare a set of tools that will allow you to complete this work with less effort. The following tools will be needed for gluing paper, non-woven and vinyl wallpaper:
- a plumb line or level to determine the vertical mark;
- a wide spatula as a basis for evenly cutting wallpaper;
- stationery knife;
- brush 150 mm wide;
- roller, preferably with a long handle;
- pencil;
- scissors;
- rubber roller for rolling wallpaper;
- container for diluting glue and primer;
- bath with a cuvette for working with a roller.
The technology for gluing internal and external corners in a room, proposed below, is valid only for plain products without a pattern, which do not require matching the image.
Domestic
It is best to seal internal corners using overlapping technology. To do this, you need to prepare a sheet with a width exceeding the width of the wall at the junction with the corner by 3-4 cm. This piece is intended for gluing the corner and slightly extending onto the adjacent wall.
After gluing the sheet, it is necessary to draw a strictly vertical line along this strip at a distance of 0.5 cm from the corner. This mark will serve as a guide for sticking the second sheet on the adjacent wall. To obtain a vertical line, use a plumb line or a laser level.
The second sheet is glued so that its edge coincides with the vertical mark. If the seam is invisible, you can proceed to further pasting of the walls; if it protrudes noticeably, you will have to make a leveling cut, for which you use a utility knife and a wide metal spatula as a guide surface for the knife.
After trimming, the excess strips are removed, the wallpaper is slightly spread at the joint and additionally coated with glue, after which it is joined again.
External
Modern projects practically do not provide for external corners in the apartment space, but in previous series such corners exist, so you should consider the step-by-step instructions for pasting such walls:
- As in the case of the internal corner, it is necessary to prepare a trellis with a width exceeding the wall space up to the corner by 4-5 cm;
- The wallpaper sheet and the surface that is planned to be pasted over are coated with glue;
- The trellis is glued to the main place and carefully leveled, removing air pockets;
- After strengthening the sheet on the main wall, begin to fold the wallpaper along the corner. If necessary, small incisions can be made to smooth out wrinkles that form when the surface is uneven;
- The next step is to make markings on the strip, departing from an angle of 0.5 cm. The markings must be strictly vertical, for which it is recommended to use a plumb line or a laser level;
- Apply glue to the second sheet and the wall, after which, aligning the edge of the sheet along the line, stick it on;
- Using a guide (a wide spatula, a long metal ruler or profile), a vertical cut is made in the middle part of the connected parts;
- The cut strips are removed, and the joint is additionally coated with glue and rolled with a rubber roller.
Non-woven base: to be or not to be
Technical characteristics and advantages:
- The roll width is 1.06 m. This allows you to significantly reduce the number of joints in the finishing.
- Increased wear resistance of the material and abrasion resistance.
- The ability to hide various cracks and other defects on the surface.
- When dismantling, they can be easily removed from the wall in a dry state and do not require additional time and effort for soaking.
- They have high light fastness.
- Possibility of wet cleaning.
- They allow air and steam to pass through, but unlike conventional paper ones, they do not change their structure and size.
- Possibility of multiple painting, which will allow you to change the interior of your room as often as you want.
This finish is made from environmentally friendly raw materials and also meets high sanitary standards. They can be glued not only for decorative finishing of walls, but also on the ceiling.
Types of wallpaper - choosing the latest materials
Paper wallpaper is an eternal renovation classic. Their unfading popularity is due to two factors - low cost and wide range. However, it should be understood that rolls of paper, no matter how beautifully decorated they are, remain a very short-lived material, and there is no point in gluing them in the hope of a long service life.
In just a year or two they will lose their former attractiveness, and if there are small children or animals in the house, this process can speed up significantly. However, this minus can be used to your advantage in cases where you need to make light cosmetic repairs in a rented apartment, or when you like to experiment with the interior.
Paper-based vinyl wallpaper is a more durable finishing option. The front side, which bears the bulk of all operational loads, in this case is performed by a layer of polyvinyl chloride. And he has a lot of positive qualities:
- it can be washed repeatedly, even with the use of detergents;
- foamed vinyl can be painted up to 10 times;
- vinyl does not fade, does not allow moisture to pass through;
- the decorative effect in the case of silk-screen printing or thick wallpaper (varieties of vinyl) is comparable to the most expensive finishing materials.
Paper-based vinyl wallpaper lasts much longer. Among the disadvantages, you should remember about the airtightness of vinyl; however, if you wish, you can find more modern types of finishes on the market that do not have this problem. Vinyl rolls on a paper base are glued in the same way as regular paper wallpaper, so for most people it will not be difficult to glue the canvases without special preparation.
Just keep in mind that the vinyl layer significantly increases the weight of the canvas, therefore, ordinary wallpaper glue will not work here; you need glue for heavy wallpaper.
Vinyl wallpaper on a non-woven base is an elite type of finish, which is particularly durable due to the non-woven material used as a lining for the vinyl. Interlining is an advanced paper that consists of modified cellulose fibers. It is tear-resistant, does not absorb moisture, and does not shrink, which means that such wallpaper can be glued end to end. Actually, the technology for gluing such canvases is fundamentally different from gluing paper wallpaper and takes significantly less time.
Rules for choosing finishing material and calculating its quantity
According to experienced builders, non-woven linen is the most common wallpaper option for domestic use. It can be used in any room. But in order not to make a mistake with the size and appearance, you need to choose the right material.
Before purchasing, check the quality of the products with the seller. As you know, non-woven surfaces consist of cellulose, which is held together with a binder. Such models have several layers. This can be checked by the thickness of the web directly on the roll. Pay attention to the structure of the paintings. If there are children or pets in the house, then it is better to abandon such options. In such cases, it is better to choose smooth type canvases. Give preference to an already well-known manufacturer. Usually the wallpaper brand is always written on the label that comes with the roll. The most popular are Vernissage, Palette, Tex, Exclusive. The base of the wallpaper under the pattern should have a uniform shade. If it does not meet these parameters, the authenticity of the quality of such a product can be questioned. Point the wallpaper sheet to the light; if it does not shine through, it means the material is of good density. This model will fit perfectly on the wall surface. Before purchasing the fabric sample you like, you need to calculate the number of rolls. To do this, you need to know such room parameters as length, height and width.
Here it is important not to forget about window openings and doors. Then, in the selected model, specify the width of the roll, as well as its total length
For example, for a room with a total area of 43.2 m² you will need 11 rolls of wallpaper with a width of 53 cm.
PHOTO: krovati-i-divany.ru Non-woven fabric is an expensive material, so before cutting the fabric, you need to check the measurements several times. Otherwise you'll have to run for a new roll
The material is calculated in such a way that there must be a reserve, as unforeseen waste may occur. As for the remaining scraps, do not rush to throw them away. They can be an excellent replacement for an accidentally damaged piece on the wall.
PHOTO: kursk.vseinstrumenti.ruMany types of glue still have the properties of protecting wallpaper from mold
Related article:
Choosing glue for non-woven wallpaper
At first glance, it may seem that choosing adhesive for non-woven wallpaper is very simple. In fact, it is easy to get confused in the variety of compositions. Our editors suggest choosing options from Metylan, Exclusive, Moment, KLEO.
PHOTO: centuryview.ru Wallpaper can be painted without fear, since the glue does not react with the finishing material
Most adhesives are applied directly to the wall with a roller. Therefore, you won’t have to worry about the sheet on the floor accidentally sticking together or getting debris on it. To find out the required amount of wallpaper glue, you need to do the following.
- Calculate the area of all the walls in the room where the pasting will be carried out, not forgetting to subtract the door and window openings.
- Carry out the correct dilution of the glue. Usually such instructions can be seen on the packaging.
- In the description for non-woven wallpaper you can find information about what layer of glue is needed. This indicator may differ depending on the structure of the canvas.
In most cases, to cover a room with an area of 43.2 m², 1.5 packs of glue of 200 g each are needed.
PHOTO: matador-demontazh.ru Try to tear off the wallpaper so that the sharp edges of the spatula do not damage the plaster
Related article:
Preparatory work
- Before gluing vinyl wallpaper, the walls must be carefully prepared for finishing. There should be no visible defects on their surface in the form of potholes and chips. Possible irregularities are sealed with plaster and dried well.
- Dry walls need to be primed. For this purpose, use diluted wallpaper glue or a special deep penetration primer. The soil layer provides better adhesion of the wallpaper to the wall surface, kills harmful bacteria, and protects the walls from the development of mold on them. It is first recommended to additionally treat the walls with an antifungal or any antiseptic composition.
- Wallpaper glue is diluted according to the instructions on the package. It is recommended to choose an adhesive composition with a color indicator. When applied to the surface of canvases or to the wall, its color will show the areas that have not been fully processed. This does not affect the quality of gluing in any way, it simply provides additional ease of use.
- A vertical line is marked on the wall using a plumb line, which is a guideline when gluing the canvas.
- The room must be de-energized and the housings of sockets and switches removed from the walls.
- It is advisable to remove the baseboards, then you will not have to trim the wallpaper below.
Stages of gluing
The entire procedure after purchasing wallpaper and preparing the room for wallpapering can be divided into four stages.
Pasting
This stage is the most basic and important; it must be taken seriously. To begin, make precise markings on the walls for gluing each section. Next, apply glue to the wall and glue the strip.
How to glue wallpaper near switches and sockets?
First of all, turn off the power and remove the boxes from them. Next, glue the canvas and make a cross-shaped cut in the places of sockets and switches. Then wrap the fabric inside and let it dry. After this, trim off the excess with a utility knife, put the boxes in place and connect the electricity.
How to hang non-woven wallpaper and what is needed for this
In order to hang non-woven wallpaper easily and simply, in addition to the desire for change, you will need some tools and some useful tips. As well as a short guide in the form of step-by-step instructions.
So, for work you need the following tools and devices:
- non-woven wallpaper in the required quantity;
- glue for non-woven wallpaper;
- roller for applying glue;
- thin brush for applying glue;
- plastic wallpaper spatula for smoothing wallpaper;
- metal spatula 250-350 mm long for trimming;
- stationery knife;
- regular knife;
- scissors;
- sponge;
- glue tray;
- a plumb line or level to obtain a vertical line;
- roulette;
- pencil, not too soft;
- rubber roller for smoothing wallpaper (optional, as an option);
- small rubber roller for smoothing joints and hard-to-reach places (optional);
- correct putty;
- ladder.
Wallpaper spatula
Preparatory processes
Smooth walls and straight corners
You need to start wallpapering after the walls have been leveled, puttied and the molding under the ceiling has been glued.
It is very important to check the condition of the corners. It is the corners that are quite crooked
A slight unevenness or slope of one wall on the wall itself is not so visible. But when two walls meet, and even with varying degrees of inclination and unevenness, the result is not a very beautiful “perspective”. That is, later you may end up with a very ugly corner that will ruin all the work. At the same time, it can take a lot of time and effort to glue a clumsy corner, but the result will still be unhappy. Therefore, it is important to correctly assess the condition of the corners and, possibly, contact a specialist, because... straight corners are the lot of craftsmen. Of course, if the corner will be permanently covered by a closet or these are the back corners in a narrow room that are practically not visible, then you don’t have to worry about them too much. But if it is an open corner in a visible place, then you need to treat it carefully and correct its defects as much as possible before wallpapering.
Primer of walls
Before wallpapering, the wall must be primed with a deep penetration primer and allowed to dry for the required time (indicated in the instructions for the primer, usually 1-2 days).
If you've just removed old wallpaper and the wall is in good condition, you can probably skip this step.
It is important that the wall has a uniform, strong coating, does not “dust” and has the same “absorption” (degree of moisture absorption). In this case, you can independently decide whether the wall needs to be primed now.
But experts recommend priming the walls before wallpapering.
If the walls are uneven, they need to be puttied. More details here.
Preparation and leveling makes subsequent finishing easier
Correctly gluing wallpaper in corners
When doing renovations in old apartments, I always putty the walls and install perforated corners. They simultaneously serve as beacons and protect the ledges from destruction. I choose cardboard ones if the inner corners have slight unevenness. In all other cases I use a PVC profile.
- I check the verticality of the walls with a laser level. You can use a plumb line. I choose a flatter base surface.
- I putty and embed the profile in the solution, leveling it.
- After drying, I smooth it with another layer of putty. For paper and non-woven wallpaper I use an additional finishing compound.
If customers don’t want to spend money on leveling and corners, then I simply fill up large depressions. I cover the corner with wallpaper, cut a strip 10–12 cm wide. I place it evenly on both walls, making cuts for a tight fit. After this, it is easier to glue wallpaper in the corners. If the top fabric has to be cut or the paper trellises burst, then thanks to the background made of the same material it will not be noticeable.
We glue wallpaper in the corners ourselves
Advice! It’s better to align the corners well once than to fool your head every time you wallpaper a room.
The last strip in front of the corner is cut off so that it extends onto the other wall by approximately 2–5 cm, depending on the curvature. The greater the differences, the wider the approach. It should completely cover the most convex place by at least 8 mm.
For a better fit, I make notches with a sharp knife or just cuts with scissors. It is desirable that they be inclined towards the edge. I cover the corners with wallpaper and smooth out the main part first, then the strip around the corner.
How to glue wallpaper in the corners of an apartment?
Before you start gluing the wall from the corner, measure the width of the trellis and draw a line vertically along the level. I also check the condition of the corner. The side surface of the strip should go along the deepest dent. I paste it strictly vertically, according to the markings. Near the corner the edge lies flat. The protrusions are hidden under the wallpaper that was pasted earlier.
It is better to cut wallpaper with large patterns so that the lines match. A slight shift will not be noticeable.
I cut thick vinyl wallpaper using a ruler at a distance of 2 mm from the edge of the top sheet. Using a sharp knife, I cut both pieces strictly vertically along the entire height. I remove the excess and the canvases lie end to end. For strength, I put a painting mesh.
We glue wallpaper in the corners with our own hands
Advice! Use clear glue.
We start gluing from the door
My friend was able to see everything and now wallpapering in the corners did not scare him. Before you start finishing the room, you should draw vertical lines and check the condition of the corners. If there is no professional level, you can use a weight on a thread.
Further, by analogy with external corners:
- We glue it with an overlap of up to 5 cm on the adjacent wall.
- Smooth the main fabric to the corner and glue it.
- We make cuts and tightly fill all the unevenness with wallpaper.
- We mark the vertical and, taking into account the pattern, glue the next strip end-to-end to the corner.
- Using a ruler, we cut both sheets at a distance of 1–2 cm.
- Remove excess pieces of wallpaper.
- By bending both edges we glue the painting mesh. Coats it with additional glue.
- We connect the strips end to end along the cutting line and press.
Before gluing wallpaper in the corners, make an approximate marking of the location of the stripes on all walls. If a piece of wallpaper ends close to a corner, immediately move the first strip. You can start with a strip cut along the length.