Many people pay great attention to the process of choosing wallpaper, while not attaching importance to proper preparation of the surface before pasting it. And completely in vain. Preparing walls for pasting is an extremely important procedure, on which the success of the undertaking entirely depends. And if it is carried out incorrectly or if this stage is skipped altogether, then the new decorative coating, even if you paid a lot of money for it, will have a very unsightly appearance. Or it won’t stick to the wall at all, which is actually even worse. Be that as it may, the preparation procedure must be carried out very carefully. Which, in fact, is what we want to tell those who don’t know what needs to be done before hanging wallpaper, how to treat the walls, and why do it at all.
What should be the surface for wallpaper?
So, what kind of preparatory work needs to be done before wallpapering, how to treat the walls so that the updated decor of the room not only pleases with its appearance, but also stays well on the wall for a long time? In order to correctly understand the essence of the issue and correctly determine the volume and type of finishing work, you need to start from the opposite. That is, to know what the ideal surface for wallpaper should be.
But first of all, it must be dry. A wet surface will poorly absorb the water contained in the glue, and therefore the composition will not adhere properly to the wall and will not provide the required quality of adhesion of the surface to the decorative coating.
The base must be strong. That is, the presence of flaking surfaces on the wall, areas of plaster that are literally breathing under your hand, old wallpaper hanging in shreds and other unnecessary elements is a direct contraindication to pasting. First, the base coat needs to be polished, as they say, and only then can you begin the pasting procedure.
The surface must be clean. If there are black stains from mold and mildew on it, there is no point in asking the question of whether the walls need to be treated before wallpapering. Here we are not even talking about how the new coating on such a wall will look, but about how you will feel in the near future, because dampness in the room and fungus on the walls negatively affect not only the condition of the wallpaper, but also for your health.
The wall should be smooth and have a uniform color. Only then will all possible and impossible defects appear on the new decorative coating, which will cause not joy from the work done, but bewilderment and annoyance.
Stages of preparing walls for wallpaper and features of the work
In the process of preparing walls for wallpapering, it is not enough to simply buy high-quality materials. It is important to correctly perform the preparation technology, adhering to the following steps:
- Cleaning the wall of old wall materials;
Old wallpaper or painting must be removed 100%. The wall must be perfectly clean.
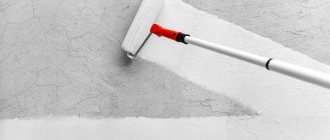
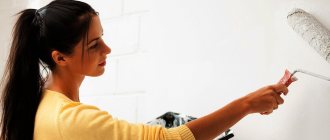
- Initial application of primer. The first layer of primer is applied as an impregnation in order to eliminate microcracks and neutralize the surface from moisture. It will give the surface a slight smoothness and will be completely translucent;
- Sealing cracks and defects;
- We carry out the most important stage - finishing and preparing the wall: we fill existing cracks and chips with a gypsum mixture, plaster the surface and putty;
- Leveling the surface using sandpaper or other abrasive material;
- Secondary application of primer. It can act as the best finishing composition for adhesion of the wall to the wallpaper and gluing dust residues.
After the materials have completely dried, the wall will be white.
The stages are strictly followed and are not interchanged.
Old wallpaper or painting must be removed 100%.
Features of wall treatment depending on their material
It should be noted that each type of wall is prepared individually.
Concrete walls. It is almost impossible to paste wallpaper without treating the walls, since concrete strongly absorbs moisture. Here you need to start preparing by cleaning the surface. Then remove any remaining dust and coat with primer. It is important to pre-finish the wall with putty mixture. This method of wall preparation can also be used on brick walls.
It is important to pre-finish the wall with putty mixture.
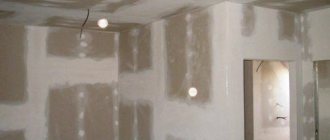
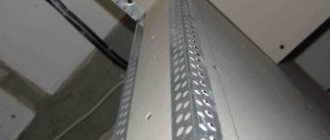
Plasterboard walls. This base is considered one of the best for wallpapering. However, this is not possible without preparation. The joints between the sheets must be sealed with putty mixture. After cleaning the seams, the surface of the drywall must be coated with a primer in order to give a plastic smooth effect.
The joints between the sheets must be sealed with putty mixture.
Plywood, chipboard and other wood tiles. The basis of walls made of similar materials is now becoming more common. Of course, you can glue wallpaper onto such a surface without preparation, but experts advise putting putty on the surface to improve adhesion and prevent the appearance of yellowness.
If the base of wall cladding made of wood materials is not prepared in advance, then later it will quickly swell and become unusable.
Experts advise puttingtying the surface to improve adhesion and prevent the appearance of yellowness.
What is ideal wall preparation?
Home craftsmen do not always carry out thorough preparation. And quite often, not because they don’t know how to treat the walls before wallpapering, but because this procedure itself is quite lengthy and expensive. After all, ideally, the walls need to be rid of the old coating, then an antiseptic treatment of the base should be carried out, after which it should be carefully leveled with plaster, and then puttied, cleaned and primed. There is a lot of work, and a lot of expensive materials will be required. So the craftsmen resort to all sorts of tricks, trying to skip one or another stage of preparation. Sometimes this can be done when there are appropriate prerequisites for this (we will give some tricky tips on this at the end of the article), but most often it is still unwise to do so. In principle, of course, everyone decides for themselves what they need. One person is also happy that a month after the renovation, the wallpaper is hanging in the corners of the room and angrily grinning at the separated seams, while the other begins to almost have a nervous attack at the sight of a small tubercle sticking out from under the wallpaper in a far from the most visible place in the room.
We, in turn, will still allow ourselves to give a few recommendations and will try to describe in as much detail and step by step as possible how to properly treat the walls before wallpapering.
Stage one: general preparation
This is a total cleaning of the wall covering from old wallpaper, paint, whitewash and other coatings that are on it. As well as all kinds of “decorative” additions in the form of orderly rows of driven nails, various dowels, hooks and other unnecessary “decorations”. In general, in the end you should have an absolutely clean, if you can call it that, wall.
Advice from the professionals
If the old wallpaper is held very firmly, there is no need to try to tear it off with a layer of plaster. This will only damage the already fragile foundation. Arm yourself with a bucket of hot water and a brush. And wet the treated area every ten minutes. The wallpaper will become saturated with water and begin to bubble and come off the wall well. If you need to remove vinyl wallpaper, first tear off the top layer of the covering, which will leave a paper base underneath. Also remove it after moistening it with water.
As for oil paint, it should be removed using a drill with a special attachment. The whitewash is removed with a spatula, having first thoroughly moistened the wall with water.
How to remove old wallpaper without much effort
If there are remnants of old wallpaper on the walls or they are completely covered with them, then you need to prepare a tool that will greatly simplify the preparation of walls for wallpapering. You will need:
- - spatula - it is optimal to have both a narrow and a wide one;
- — sprayer or roller/whitening brush;
- - ordinary water;
- - aggressive agents - vinegar, baking soda, dishwashing detergent.
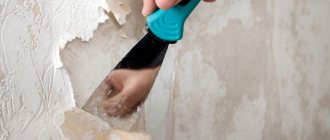
Removing old wallpaper from the walls is easy - in some places it is enough to pull a corner with your hands and remove the sheets, but more often a spatula and water are required.
Wallpaper on the walls should be moistened with water (with a roller, brush or spray), then removed with a spatula. If vinyl/non-woven wallpaper was previously pasted, the process becomes more complicated:
- moisten the wallpaper on the walls with water - this needs to be done quite generously;
- using a spatula, remove the top layer of wallpaper - vinyl/non-woven wallpaper consists of several layers of paper;
- We wet the walls again with water and get rid of the remaining paper.
Fiberglass wallpapers are distinguished by their ease of use, original texture and durability. Craftsmen say that glass wallpaper has to be literally “gnawed out” from the walls - heavy glue is used when applying it. Removing fiberglass wallpaper can be done in two ways:
- using a special solution - it is not cheap, but the result will be achieved quickly;
- use a grinder (you can get by with a grinder) - every man has such a tool in his household, so no financial costs are expected.
If you need to get rid of liquid wallpaper, you will need to prepare a softening solution - dilute 2 tablespoons of any detergent in a liter of warm water. Moisten the surface with liquid wallpaper with this solution so that the naked eye can see how saturated the material is with moisture. It is easy to remove liquid wallpaper softened by the solution from the wall using a spatula. For liquid wallpaper, there is another option - simply sand it off with a special tool. But you need to take into account the nuances :
- To prepare the softening tool, you will have to press it tightly against the surface being treated - considerable physical strength will be required;
- There will be a lot of dust in the room - this is harmful not only for furniture and flooring, but also for humans.
In the process of preparing the walls, liquid wallpaper can be removed even after the surfaces are normally wetted with water - it all depends on how long the old coating has been in use.
You will find tips on how to quickly remove old wallpaper in the video review:
What to do with mold areas
So, you've finally gotten rid of the old coating. But underneath they found intricate drawings of black color and unknown origin. This is mold. And it is imperative to get rid of it. Anyone understands that it is necessary to take some special steps before wallpapering. How to treat the walls in this case? Are there any special means for this or is it enough to just wash the surface to remove black stains? Of course not. You need to either purchase a special composition in the store, or try to somehow make do with improvised means.
Final preparation
The final preparation of the walls includes sanding the putty surface with a metal mesh or sandpaper to remove small irregularities after the putty has completely dried, and final priming until it dries completely with the required number of layers.
This preparation of concrete walls is carried out by gluing paper, vinyl, non-woven wallpaper.
Weapons against fungus
So, you have discovered mold under the old covering, and now you don’t know what to do before wallpapering. How to treat the walls so that this attack does not occur again under a new decorative coating? Go to a building materials store and buy a special antibacterial deep penetration primer. The composition “Ceresit” is considered the most effective. And carefully treat contaminated surfaces with it, after washing off the black coating with a wet cloth. If for some reason it was not possible to buy soil, you will have to use folk recipes. Dilute a glass of bleach in a liter of water. And carefully coat the fungus-infected areas. You can do something even more cunning. Buy a cheap, but so beloved by many housewives, bleaching solution called “Whiteness”. Which contains so much of the chlorine mentioned above that no homemade mold remedy can compare with its composition.
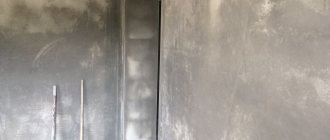
How to treat concrete walls before wallpapering
The fungus seems to have been dealt with. But what should you do if under the old wallpaper you suddenly find not a layer of plaster, but literally bare concrete? What to do in this case? Under no circumstances should modern wallpaper be glued to such a base. In general, this can be understood at first glance. Such a wall has a very unsightly appearance, it is all rough, full of defects and literally brings tears to your eyes with its curvature. How to treat the walls before wallpapering in this case? We answer - nothing! You just need to ignore the notorious savings and wasted time and start plastering the surface. Which, in fact, is the second stage in the process of competently preparing the base for wallpaper.
Stages
The step-by-step process includes:
- Removing boring finishes.
- Cleaning the surface from dust, debris and other contaminants.
- Initial application of the primer layer. This stage involves treatment with a special compound to disinfect and prevent further absorption of moisture.
- Repairing defects. Elimination of visible defects is carried out with a mixture of gypsum, after which the surface is puttied.
- Alignment. To carry out this stage, you will need a special abrasive mesh material. You can level it with sandpaper.
- Final priming. The final stage of preparing the wall for wallpaper. Necessary to ensure good adhesion of the surface to the finishing material. In addition, re-priming will additionally treat the walls with an antiseptic.
Between the main stages of preparing walls for wallpaper with your own hands, there are intermediate ones, such as treating the surface with an antiseptic, wetting, collecting tools, preparing a solution, etc.
Important! The listed steps must be performed strictly in order; the sequence of work cannot be changed!
Plastering
As for the plastering process itself, there are two possible scenarios. In the case of the concrete walls mentioned above (as well as those made of brick or made of silicate blocks), there is no alternative. You will have to plaster the entire surface, from corner to corner. Moreover, in the case of large curvature, be sure to install beacons. By the way, you will be forced to carry out exactly the same procedure if you have a plastered, but also very uneven surface. But if the wall does not cause any particular complaints, but only has minor defects and the areas of curvature on it are relatively small, then it is quite possible to limit ourselves to resuscitation measures. That is, seal all existing defects and cracks with plaster, as well as trim some areas. Then you need to wait for the solution to dry, and then prime the entire surface of the walls with an acrylic primer. After it has dried, you can proceed to the last stage.
Why do you need to prepare walls for wallpapering?
It is imperative to prepare surfaces for wallpapering. With the help of correct and consistent implementation of certain procedures, the following results can be achieved:
- Improve the quality of wallpaper fixation. If the surface has a porous structure, the coating will not stay on it for long. This also leads to the opening of the seams between the strips of wallpaper.
- Level the walls. Even thick wallpaper will not be able to hide the recesses or protrusions of the wall surface.
- Avoid the appearance of dampness and fungi. This problem is caused by the accumulation of condensation in places where cold air enters.
- Improve adhesion of materials. This helps make the repair more durable.
Many people are sure that after 3-5 years the wallpaper needs to be re-pasted. However, proper work and the use of quality materials increases the service life to 10-15 years.
Puttying
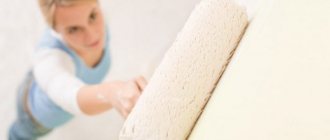
The purpose of this procedure is to make the underlying base white and smooth. After which you can glue any wallpaper, even the most capricious, without fear for the outcome of the matter. As for the process itself, it will not cause any particular problems for those who know how to hold a spatula in their hands. You buy a putty mixture, and it doesn’t have to be very expensive, mix it, apply a thin first layer to the walls, and wait for it to dry. Then you sand it with sandpaper, prime it, then putty it again, sand it again and prime it. At the same time, it is not at all necessary that the surface be perfectly smooth, without a single scratch. Minor minor defects will be hidden under the wallpaper. The main thing is to make it smooth and durable. But to achieve the latter, a primer is used. A little more about her.
What primer to use on walls before wallpapering?
To some, the question may not seem worth attention. Primer – and primer. Bought it, anointed it, done. But things are a little more complicated. The fact is that at the moment there are quite a lot of different compositions. And not all of them are suitable for wallpaper, as they have a special purpose. The primer is designed to give the surface such quality as adhesion. That is, it should ensure maximum adherence of the wallpaper and its adhesion to the wall. And acrylic primer is best suited for these purposes. It is generally considered universal, compatible with all types of surfaces, and dries quite quickly. So when buying soil, don’t be smart. Buy acrylic - you definitely can’t go wrong. The choice on the market is quite large, but the most popular brands are “Ceresit”, “Snezhka” and “Master”.
And remember: after priming, the wall must dry thoroughly. And it’s best not to rush and give her a day to do this. And then you can proceed directly to the pasting process.
It is compliance with all the above rules and carrying out the described procedures that will answer the question of how to properly treat the walls before wallpapering. This is the only way to get a truly even and durable base. And the wallpaper glued to it will stick perfectly to the wall, delighting you with its excellent appearance for many years.
Preparing walls for wallpapering: materials used
Currently, there is a fairly large range of compositions that are used to work with surfaces, depending on the situation. It must be taken into account that each material for processing corresponds to a certain stage of preparing the surface for cladding.
Wall cleaning
The work begins with high-quality cleaning of the walls from the previous decorative layer. Particular difficulties can arise with painted coatings, which often cannot be processed using hand tools. Special washes have been developed for such situations.
After applying the remover, the paint can be easily removed with a spatula
When choosing a composition, pay attention to the following points:
- The product is selected depending on the type of paint used. Of course, there are universal varieties, but they are recommended to be used only when it is impossible to determine the composition of the painted surface.
- The wash only works in the presence of active substances, which evaporate very quickly, so application is repeated several times.
- Many formulations are in the form of a gel or contain paraffin; this significantly slows down the process of evaporation of the active substance, but leads to the fact that the surface must be degreased.
- Much attention is paid to the instructions on the label. The fact is that there are washes that are applied exclusively in one position - horizontal, and this is not always convenient.
Neomid paint remover
For walls under wallpaper, cleaning is carried out according to the instructions:
- The surface is pre-washed and cleaned with a stiff metal brush.
- The liquid is applied to the areas in an amount that depends on the selected composition.
- To enhance the effect, the treated area is covered with plastic film.
- After waiting the required time, the coating is cleaned with a spatula. The old layer is removed without significant effort.
The result is a surface ready for further processing.
Mold removal and prevention
This trouble can befall not only secondary housing; due to violation of construction procedures, more and more new buildings are initially susceptible to the appearance of mold and mildew.
To prevent this defect, the walls are coated with an antiseptic composition. Often preference is given to primers with a special additive. But it should be borne in mind that the concentration of the substance is sometimes not enough to completely protect the room.
Alpina Anti-Mold Primer
If the surface is already contaminated, the work procedure becomes much more complicated. To treat walls before wallpapering, more caustic liquids are used, chlorine is often used. A simple composition can be prepared at home: 200 g of lime per liter of water.
The procedure for cleaning mold is as follows:
- The cause of the defect is determined and eliminated, the affected areas are cleaned. If required, the plaster layer is completely removed.
- A purchased or self-prepared fungicide is applied to the surface.
- The treatment is repeated 6–7 times.
Stages of mold and mildew removal: cleaning the affected areas; treatment with antiseptic composition
Attention! If antiseptic impregnation is not carried out, fungus will appear on the wallpaper and there will be a need for dismantling.
Leveling and correcting imperfections
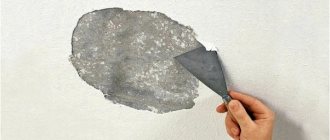
For walls under wallpaper, you need to get a flat surface without cracks and crevices. Such problems are corrected using two main materials: plaster and putty. Each option has its own characteristics.
- Plastering is carried out to correct significant defects. For work, cement-based compositions with various additives are used. The prepared solution is placed on the surface and leveled along the previously fixed beacons.
- Treatment with putty is necessary to finally give the coating evenness. The putty mixture is made on the basis of gypsum. The work is carried out immediately, because the prepared composition dries very quickly.
After such an event, the walls are almost ready for wallpapering.
Padding
Many people do not consider this process mandatory, but it is thanks to it that the surface gets rid of pores, which ensures reliable fixation.
Primers for walls under wallpaper come in the following types:
- alkyd;
- acrylic;
- mineral;
- universal;
- independently prepared on the basis of PVA.
Types of primers
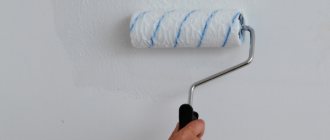
The most preferable is the acrylic version with a deep penetration effect; processing is carried out using a roller or brush. The impregnating composition is applied in 2–3 layers, which are dried after each impregnation.
Surfaces must be treated in any case before gluing wallpaper, because this ensures the quality, reliability and durability of the coatings.
Secrets of the masters
Finally, here are a few tricks and useful tips. If you were unable to achieve perfectly smooth walls, it doesn’t matter. The main thing is that you end up with a durable and well-finished base. In this case, just don’t buy plain or striped wallpaper - buy something colorful, albeit with an unobtrusive pattern.
If you have no way to re-plaster and putty the walls, that is, you are forced to glue on what you have, then in any case, first of all, carefully treat the surface with a primer. And preferably twice, with a break of several hours. And try to disguise any existing defects on the walls with wallpaper. And to cover such problematic surfaces, purchase the most “plump”, corrugated decorative coating, preferably with an abstract pattern.
How to use
The primer is diluted sufficiently liquid, following the instructions. The most convenient tools for processing are a roller and a tray with a shelf.
Important The Miss Clean magazine emphasizes that the instrument should be damp, but should not leak, and drips and stains are not desirable on the hay. On the other hand, dry areas should not remain either.
Working from top to bottom and from left to right, the primer is distributed over all walls and allowed to dry. The exact time is indicated on the packaging (quick-drying ones set in 1-2 hours, adhesive primers usually require 8-10 hours), after which a second layer is applied and again allowed to completely polymerize.
Then you need to take a sample: run your palm lightly along the wall. There should be no crumbs or dust left from the plaster, putty, or concrete. This means that you can glue wallpaper.
We recommend: Do-it-yourself repair of valve, lever and half-turn mixers