Today there are many unique design solutions for apartments. Therefore, the plasterboard ceiling is of interest to many who prefer non-standard ideas for renovation transformations in their own home. Before you finally decide in favor of such an interior item, you need to clearly understand how to make a wave from plasterboard. There are several embodiments and these are:
Design and design of wave plasterboard ceiling
- ceiling with vertical wave;
- ceiling with horizontal wave.
Depending on the skills of the owner of the square meters, one of these options is selected.
Vertical waves
The most difficult part of creating a ceiling with vertical waves is designing, creating and attaching the frame.
In order for the coating to be of the correct shape and neat, you need to put a lot of effort into perfectly executing the symmetrical lines of metal profiles.
If you do not pay due attention to this nuance, then the gypsum board will not be able to be laid evenly. Difficulties may also arise at the stage of attaching plasterboard sheets to the base of the frame. It is necessary to carefully cut out parts of the sheets based on the detailed drawing.
Features and nuances
Example of a ceiling with vertical waves
- In order for the ceiling with vertical waves to turn out smooth and as intended at the planning stage, special attention should be paid to the process of creating the drawing. You can do it either manually or using a special utility;
- Detailed markings should be applied to the ceiling surfaces where the structure is planned to be installed in waves. Even a deviation of 0.5 cm can cause the plasterboard structure on the ceiling to look skewed and with noticeable differences in height;
- Vertical waves on the ceiling surface are quite difficult to assemble. To carry out such a mission, you need to have enough skills in working with drywall. After all, the process of attaching vertical waves from gypsum plasterboard differs significantly from the classics. Such work requires maximum precision, care and caution.
Design option for a plasterboard ceiling with vertical waves
Advantages and disadvantages of plasterboard ceilings
The material is used as cladding and cladding of the surfaces of dry rooms. It consists of two layers of cardboard, between which there is hardened plaster. It is environmentally friendly, not subject to burning or rotting. Plasterboard, like any building material, has positive qualities, but is also not without its drawbacks. Let's consider the advantages inherent in the design:
- Allows you to level uneven surfaces without much effort;
- Differs in moderate weight of sheets;
- Easy to install, a person with minimal construction skills can handle it;
- Inside the frame used for fastening plasterboard sheets, communications (wires, pipes, air ducts) are hidden inconspicuously;
- Allows you to play with shapes, create complex, multi-level ceiling structures;
- An additional thermal insulation layer and sound insulation can be installed in the frame;
- Serves as a good base for lighting elements;
- The plasterboard surface can be painted, wallpapered, or covered with ceramic tiles.
Unfortunately, the material is not without certain disadvantages:
- When using it, the height of the room is significantly reduced, which makes its use unacceptable in a room with a low ceiling;
- To prevent the sheet from losing its original appearance, it is prohibited to store it or install it in unheated rooms with high humidity;
- If the installation technology is violated, cracks may appear.
Horizontal waves
If you don’t have the experience to create a plasterboard ceiling with vertical waves yourself, then it’s better to pay attention to ceilings with horizontal waves. This idea is much easier to implement.
Features and nuances
- when installing a plasterboard ceiling with horizontal waves, many people add different lighting to the levels, which improves the design of the room a hundredfold;
- due to the fact that plasterboard ceilings with horizontal waves are presented in different designs, you can create a unique picture in the interior of your own apartment or house;
- by installing plasterboard structures with waves on the ceilings, that is, under the plasterboard ceiling, hidden communications are often installed, such as electrical wiring, ventilation units;
Ceiling design option with vertical waves - It is necessary to decide on the question of whether a person makes vertical waves or horizontal ones at the stage of planning the repair of a plasterboard ceiling and creating a project. This nuance determines how much you need to prepare for the process and how much materials to purchase.
Benefits of using wave ceilings
Summarizing all of the above, let’s list why such structures are valued:
- originality of appearance with a large number of shapes, textures and colors;
- remarkable elasticity, which is very necessary with the ongoing shrinkage of the building;
- tensile strength;
- absence of dust and condensation;
- moisture resistance and resistance to ultraviolet radiation;
- duration of service life;
- ease of maintenance.
Required materials and tools
To install a plasterboard ceiling with waves, you must first purchase the following plasterboard tools and materials:
- Plasterboard sheets in the required quantity.
- Various types of profiles for drywall.
- Mixtures for priming and puttying plasterboard fixed to the frame.
- Water-based paint for finishing.
- A special pencil for marking the ceiling covering.
- Measuring tape, painting cord.
Scheme for installing a ceiling with horizontal waves - A hammer drill for high-quality fastening of the frame to the ceiling, gypsum board on top of the frame.
- A screwdriver is indispensable for high-quality fastening of metal profiles to the ceiling, for fixing gypsum boards to the frame.
- Scissors for metal. When a design that is different from the classics is planned for a suspended ceiling, special attention should be paid to the choice of this material.
- Spatulas and a brush will be needed for applying leveling mixtures and finishing work.
- Knife for cutting drywall. This tool must be selected with extreme care to ensure it is sharp and functional.
- It is best to take screws, spare drills, butterflies and other fasteners that will help carry out all the necessary manipulations above the ceiling with waves.
An example of attaching plasterboard to a ceiling with waves
Be sure to purchase all of the above materials in advance so that you do not encounter problems during the installation of the frame or fixing the gypsum board.
Marking the ceiling for a plasterboard frame
To do this you need to take the following steps:
Measuring the height of the corners - measure the height of the corners in the room;
— determine the angle with the smallest height.
It will serve as a starting point for marking. After all, we need the structure to be level relative to the horizontal;
Marking the ceiling - make markings.
On the walls for the profiles we mark a straight line. We place dots on the ceiling for direct hanging. There is no need for extra markup; it will only confuse. For these purposes, it is convenient to use a laser level or a water level.
Homemade water levelTip. You can make a water level of the required length yourself using a nylon hose (for example, from a medical dropper) with a diameter of 10-15 mm. and filling it with water.
It may happen that in your room not only the angles are different, but also the length of the opposite sides. In this case, try to level it horizontally first. And then draw a clear pattern on the ceiling and level the structure around the edges. This way you can visually center the ceiling.
Sequence of actions
In order to independently carry out the process of creating a plasterboard ceiling, you should clearly understand the sequence in which to carry out the work. It is as follows:
- Applying markings to the ceiling surface.
- Assembling the first level of the ceiling.
- Assembly of the second level of a multi-level plasterboard ceiling.
- Installation of lighting fixtures.
- Covering the surface with plasterboard.
- Finishing plasterboard walls and finishing work.
Be sure to carry out actions in the correct order. Detailed video instructions for installing a wave plasterboard ceiling.
Planning how to make a two-level ceiling
If the standard solution, when the ceiling is an ideal plane, does not suit you, you need to use an unusual design already invented by someone, or create something of your own. In the first case, it will be easier for you, since most often you can find a diagram for assembling profiles for drywall and calculating the required number of sheets. However, the second option is attractive because upon successful completion of the work you will become the owner of a unique design.
Before you make a two-level ceiling, decide how it will fit into the design of the room. An additional level can serve for various purposes, for example, as a room zoning, and, of course, for placing additional lighting points. Two-level ceilings, as a rule, consist of a base, which can be either the ceiling itself with a perfectly smooth surface or cladding with dry plaster, as well as a box in which the lighting is mounted.
There are two types of securing the entire structure. The first option is rigid fixation, when in addition to the main leveling layer, the second tier is also attached to the walls. The disadvantage of this method is that during earthquakes the frame may deform, which will lead to displacement and cracking of the skin. The second type is a floating structure, without a rigid connection to the walls. Strong in itself, it will only sway slightly during earthquake tremors, without disturbing the casing.
Surface marking
The most decisive thing in the process of installing a plasterboard ceiling with waves is the correct application of markings to the surface. The success of further installations depends on the accuracy of this action. Marking is carried out in two stages:
- first it is done on the inner surface, that is, marks are made on the ceiling itself and the height of the second level is noted;
- the second stage is carried out when the first level of plasterboard has already been fixed to the ceiling.
Features of marking
- Curvilinear figures are made up of arcs. In this case, the circumference of each wave can be drawn on the surface of the ceiling with a special pencil. It is best to make a project for the future ceiling in a special program. You can draw a detailed plan with your own hands, taking into account all the parameters, clearly displaying every centimeter of the future structure on the sheet;
Scheme for marking a curved ceiling - It is important to determine at which points the wave will be recorded. This will help make the most accurate markings indicating points of contact. And this is very important so that the ceiling after finishing work has an aesthetic appearance and becomes a worthy means for transforming the interior design;
- It is important to correctly mark not only on the ceiling itself, but also on the gypsum board. This procedure is not difficult to carry out. It is necessary to correctly calculate the diameter and, using a compass or other available means, draw circles on the plasterboard;
- It is very important to clearly mark the ceiling, and also to correctly cut the first level. The second level should be ideally combined with the plasterboard sheet that is located on the surface of the ceiling;
- It is most convenient to make markings on a flat surface, usually this surface is a table;
Drawing with dimensions for installing a ceiling with waves - Thin plywood can be a handy tool that will help you draw the most accurate wave bends on the gypsum board. A waveform is drawn on it, then transferred across the drywall;
- Having experience in such work, you can cut out shapes from plasterboard sheets by eye. In this option, you may encounter difficulties in the form of uneven surfaces, which can be leveled using a jigsaw or ceiling putty, depending on the visibility of the flaws.
Examples of using
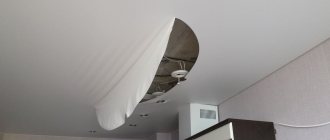
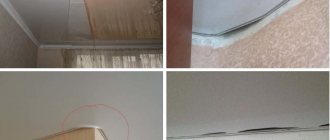
It is difficult to imagine what such a design looks like without visual examples. In order to understand what stretch ceilings look like in waves, below are several photo examples.
Assembling the first level frame
The first level of a plasterboard ceiling in waves requires effort and clarity. To carry out the mission, you will need guide profiles, ceiling beams of profiles, as well as additional suspensions and profiles, the need for which is calculated depending on the design parameters.
Before attaching the frame, markings are applied. Installation of the first-level frame is carried out according to the scheme of a single-level ceiling covering.
Nuances and features
- It is worth understanding that ceiling profiles installed under plasterboard surfaces in waves should be placed on the surface more often than in a situation where the ceiling design is carried out in the “classic” style. The distance between ceiling metal profiles should be no more than forty centimeters.
- Profiles (suspensions) that are located in places where there are differences in level heights must be installed at a distance of no more than 50 cm from each other.
- The first level gypsum board should be fixed with screws located at a distance of 25 cm from each other. In places where there is a wave, screws are screwed in at a distance of 15 cm.
- Metal profiles should be fixed clearly, adhering to the smallest details. Only in this way will the frame withstand the load of the plasterboard and the fasteners that secure it.
The advantages of such decor
The originality of the appearance will already be a sufficient advantage over all other types of design. However, such structures also have other useful qualities:
- The ability to hide very significant floor defects or height differences between opposite walls.
- In the ceiling space you can mark out quite large technical structures and communications. For example, these could be ventilation duct systems or pipes.
- For private houses, such a composition has an additional advantage - it does not deform when the house shrinks.
- Caring for a canvas installed in this way is no more difficult than for its standard type - just wipe the surface with a damp cloth and it will look amazing.
- The structure is not afraid of moisture.
- Does not absorb odors and can be used in kitchen areas.
- You won't be afraid of a flood from above - the film will retain the water.
- The service life reaches ten years.
With all these advantages, there is only one, but rather significant drawback - a lot of space will be required to accommodate such a voluminous composition. However, for those rooms where the height of the walls is limited, you can use a composition with a one-sided wave or choose smaller waves.
Assembling the second level frame
When the gypsum board is fixed at the first level, proceed to the second level. To do this, aluminum profiles with bent ends are fixed along the contours of the first level. The process is carried out by cutting U-shaped elements on the inside of the first level, through which curved aluminum elements are threaded. A second-level sheet of drywall is installed on these protrusions.
Example of ceiling cladding with horizontal waves using plasterboard
Nuances and features
- the frame of the second level is attached with self-tapping screws for the profile, through a through line through the gypsum board of the first level;
- in order for the second level to be symmetrical and of the correct shape, it is necessary to attach spring hangers to the fixed metal profile of the second level;
- When the metal profiles of the second level are fixed, you can begin installing the gypsum boards and installing the backlight.
We calculate the required material
After drawing up the design documentation, they proceed to calculations. All elements and consumables are taken into account here. For clarity, let’s calculate the necessary materials using the example of a rectangular room 6 x 3 meters:
- Work begins with determining the perimeter of the room. To do this, we will use the standard formula P = (a+b)*2, where P is the perimeter, a, b is the length of the walls. In our case, (6+3)*2 = 18. This figure is equal to the number of meters of the UD guide profile, which is mounted on all walls under the ceiling.
- The next step is to calculate the length of the supporting profiles. Standard placement requires a fastening step of 40 - 50 cm. For the first case, 600:40 = 15 pieces of 3 meters (45 meters), for the second, 600:50 = 12 strips (36 meters).
- We count the number of hangers needed. The distance between them is 60 cm. Based on previous calculations, we find that for a fastening step of 40 cm this figure will be 45:0.6 = 75 pieces, in turn, for a step of 50 cm - 36:0.6 = 60 pieces .
- The number of cross-shaped elements used to fix the structure (crabs) is calculated by multiplying the supporting profiles by two. That is, for the calculations performed in the second paragraph, 30 and 24 pieces will be required, respectively.
- At the final stage, it remains to count the number of sheets of drywall. As a sample, let's take a standard sheet measuring 1.2 x 2.5 meters. First, we determine the area of the room and the covering used. S room = a*b = 3*6 = 18 m², it coincides with the perimeter. S gypsum = 1.2*2.5 = 3 m². By doing a simple calculation 18:3 = 6 sheets.
Installing the backlight
When it comes to a multi-level curved structure, you need to think about the options for lighting a plasterboard ceiling in advance. Lighting fixtures are installed in advance, before the ceiling structure takes on its final appearance. Special sockets are fixed to the first level of the ceiling, into which LED strips are placed or spotlights are installed. The placement of lighting fixtures needs to be thought out in advance. After all, this directly determines how best to install metal profiles that fold into a frame, as well as how best to cut drywall.
An example of installing lighting on a ceiling with waves
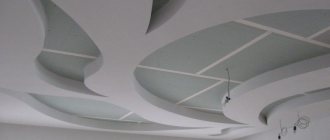
Types of curved tension structures and their diversity
A wave is a ceiling shape that is smooth and reminiscent of wave riffles.
Let us emphasize the fact that in a broad sense, curvilinear tension systems do not mean just one design scheme, but a whole range of products, which may include:
- single-level surfaces combining two or more colors or several textures, including a curved connection;
- multi-level vaulted structures;
- arched structures;
- domed canvases;
- 3D ceilings with various volumetric inclusions.
In a narrower sense, only those that are shaped like a wave are called curved or wavy stretch ceilings. Pure ceiling structures can be designed in several configuration models:
- one-sided. In this case, a flexible baguette, installed in a shape resembling a wave, is attached to only one of the four walls. Consequently, they will be on the canvas only on one side;
- two-sided. The flexible profile is fixed on some two walls;
- multilateral. In such a design, in the form of a bend, they can be located around the perimeter of the entire room. Even if there are more than four walls in the room, it won’t hurt to build wave-like elements along each of them.
Technically, projection dimensions can vary widely. You can calculate a larger or smaller number of ridges, and also change their height from one bend to another.
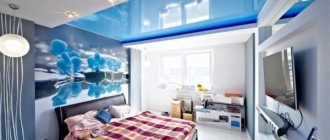
Note : Hilly coverings are made mainly from polyvinyl chloride film of glossy and matte texture. Despite the fact that there are more than 200 colors of stretch fabric, the most popular when making curves on the ceiling are glossy coatings of dark blue color, which best resemble sea wave riffles.
The glossy canvas successfully contributes to the visual expansion of the room and increases its height.
Fastening plasterboard sheets
When the lighting communications are installed, you can begin fixing the second-level plasterboard sheets.
Nuances and features
- It should be noted that in the sheets of drywall that will be fixed on the second level, it is necessary to make cuts through which the lighting fixtures will be installed;
- You don't have to cut out the perfect shape, just choose the right size. Defects in cut parts can be easily hidden with the help of special clamps that will hold the lamps in the desired position;
- Drywall should be fixed with screws at a distance of no more than 15 centimeters. In places where a bend is made, the sheet needs to be fixed more tightly.
Ceiling design and style
There are an unlimited number of options for designing and decorating the ceiling. At the same time, plasterboard allows you to construct multi-level ceilings, which, with the right finishing, in combination with lighting fixtures, will help create a unique interior of the room. The use of building materials is permissible in almost any room, be it a living room, bedroom or hall.
The design of the ceiling is very important; it must be magnificent, while being combined with the overall style of the interior. A huge selection of building materials allows you to combine the appearance with any direction. Let's look at some styles:
- Minimalism. Single-tier ceilings that have a fairly simple appearance, without unnecessary decorative elements, are suitable. For lighting, preference should be given to LED strips and spotlights.
- High tech. A small number of decorative elements are welcome here. The color scheme can be done in both white and dark colors. Glossy finishes are well suited for finishing.
- Classic. You can use multi-level structures, complex arched, figured ceilings. A chandelier will fit well in the center of the room.
- Modern. Light shades are most often used. Direct luminaires can be used. There are no strict rules when designing an interior.
- Loft. The joints between plasterboard sheets are deliberately not sealed with putty. They do not withstand a perfectly flat surface. When painting, stains and roughness. Communications are left open.
Finishing
When all the sheets are fixed, you should begin to putty and finish the surface. Putty needs to be treated with special care. The gypsum board coating must be perfectly smooth, without depressions or gaps.
Option for finishing a plasterboard ceiling with a wave in the bathroom
On top of the treated gypsum board you can apply paint to the ceiling or wallpaper. When it comes to the ceiling, paint is most often used as a finishing coat.
Lighting and ceiling lighting
Lighting plays an important role in the entire design. In addition to the main one, it also performs a decorative function. Depends on the correct choice of each lamp, LED. It can emphasize the ceiling, or make it unsightly and tasteless. Lighting for plasterboard ceilings can be: open, closed, combined.
The following types of lamps are chosen as the main lighting:
- hanging chandeliers;
- overhead lamps;
- fluorescent lamps, as well as daylight;
- LED strips;
- built-in spotlights;
- combined lighting.
To further decorate the room, lighting is used, which is not independent lighting. This can be done using different sources. The most popular of them are diode (strips, duralight) lighting, neon tubes, and fluorescent lamps.