8496 0 1
Vadim June 13, 2017
What façade putty for exterior use is currently on the market? Let's find out together what types of putty exist, what these or other compounds are used for, and what brands make a quality product. And for the DIYers, I’ll tell you how to putty the facade of a house for painting with your own hands in two ways.
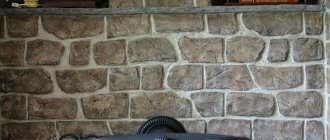
Puttying the facade is one of the main stages of home improvement.
Types of mixtures
Putty for external use is classified according to its composition, purpose, and nature of application. The initial color of the mixture is white. Shade is given by adding pigments or tinting compounds, so decorativeness does not affect the choice.
By purpose
Finishing and starting putty differ in grain size.
Mixtures for external work are divided into starting, finishing and universal.
- Starting putty is a coarse-grained mixture with a high degree of adhesion. It serves as a base for finishing and fills in minor irregularities and chips. The starting mixture is applied in a layer 5–20 mm thick. Not suitable for sealing large cracks, but will hide small ones.
- Finish – fine-grained material, elastic and more liquid in consistency. Apply a thin layer of 3–6 mm, occasionally 10 mm. In the latter case, a reinforcing mesh is required. The task of finishing is to give the surface a visible evenness and smoothness. It is not suitable for sealing cracks, since the consumption increases sharply, and the cost of the finishing putty is high.
- Universal - a finely dispersed mixture or with a medium fraction, which, thanks to special modifying additives, retains the volumetric structure. Replaces both types of finishes. It fills chips, masks cracks, and creates a fairly even coating. It is inferior in density and strength to finishing putty.
Universal formulations are recommended for use in regions with mild climates.
By composition
Cement putty
The putty composition is standard: binder, filler and solvent - water. Ground quartz sand – marshalite, marble dust – is used as a filler.
The binder may vary. Putties are divided into cement and polymer.
Cement - based on high grade Portland cement - not lower than M400. Cement is one of the materials that hardens at the highest humidity. So the putty is not afraid of rain, snow, or sea water. The coating is durable, vapor-permeable, and easy to maintain. The price of the mixture is low. However, the composition shrinks when dried, so if the technology is violated, the coating becomes covered with cracks.
Polymer – based on polymers, most often latex and acrylic.
- Acrylic – based on acrylates or compounds including acrylates. It has a very high speed of complete drying - usually 2-3 hours, and does not shrink. The mixture is elastic and easy to apply in a thin layer. The strength is quite sufficient. However, acrylic putty can only be applied in a thin layer, so it does not level out defects more than 3 mm deep.
- Latex - available only in finished form. The mixture is plastic, easy to apply, and does not shrink. Latex putty is odorless, does not contain toxins and can be used for interior work. Waterproof and frost-resistant. Suitable for northern regions. The disadvantage is the high cost.
In no case should you use putties based on gypsum or chalk to finish facades.
Criterias of choice
The mixture is selected taking into account the following parameters:
- compatibility with wall paintwork;
- setting and hardening times;
- consumption per 1 m² - the smaller the grain of the filler, the thinner the layer can be applied;
- operating conditions – frequent rains, direct rays of sun, sea coast.
Preferable compositions that can be tinted. In this case, there is no need to paint the finish.
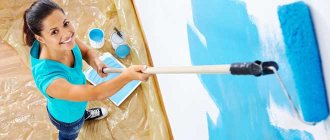
Working with putty
Well, now you need to figure out how to work with putty. Starter putties are offered in the form of dry mixtures or ready-made solutions. Both are prepared and opened only before starting work, otherwise after 45 minutes the solution will be spoiled.
This is exactly how long it takes for the composition to set.
In the video you can see how façade walls are puttied; the putty is applied with a compressor.
It should be applied to the wall using a large (60 cm or more) spatula, onto which a small (20–25) spatula is applied. Those who are finishing a façade using this technology for the first time begin to level and smooth the putty layer already at this stage. But there is no need to do this at all, since you can leave places with depressions that will additionally need to be sealed with a starting solution.
If small tubercles remain from the spatula, they are removed after the layer has dried using an abrasive mesh, the grain size should be 120. This layer dries in approximately 6–8 hours, the time is indicated on the packaging, and only after that you can start sanding.
Some people believe that when starting putty, minor defects can be avoided if a thinner layer is applied. But by applying a thin layer, you can leave bald patches that will spoil the appearance of the painted wall.
After sanding, large particles of the starting putty still remain on the wall; they can be removed using the finishing layer. The finishing solution is applied in the same way as the starting solution. To create a perfectly smooth surface, the treated wall also needs to be sanded.
The process is carried out after complete drying.
In this case, an abrasive mesh with a smaller grain size is used; the markings on it can be 60–80. It must be remembered that this layer protects the plaster or starting putty from paint penetration, so during sanding you should not rub too hard so as not to rip off the finishing solution.
Recommendations for use
Working with façade waterproof putty is easy. But there are some rules that need to be followed.
- The facade is prepared for finishing: cleaned of dirt, oil stains, and primed. Preference is given to antiseptic primers.
- The dry mixture is prepared according to the instructions.
- Use and prepare the solution in small portions, since the setting time of the putty is short - from 40 minutes to 2 hours.
- Before puttying, large defects are sealed with plaster.
- If the composition is applied in several layers, each previous layer is completely dried and primed.
Do not carry out work in extreme heat or during rain. This reduces the quality of the finish.
Putty process
In order to know how to putty the facade of a house, you need to study some of the features of this process. Finishing the external walls of a building with plaster necessarily involves puttingty. Such work can be divided into several main stages. Namely:
- wall surface preparation;
- primer;
- applying the primary layer of putty;
- applying a second layer;
- finishing putty;
- drying and grouting.
The main task of preparing facade surfaces is to remove old layers of paint and putty that have already collapsed. You should also clean the walls of various dirt and traces of rust. Places where mold is localized must be treated with special compounds.
At the next stage, you need to treat all the walls of the facade with a primer. This will provide the surfaces with greater strength and better adhesion of the putty mass, thanks to their better adhesion. The primer should be applied with a special roller or wide brush. This treatment of walls provides their surfaces with a thin bonding layer that prevents the development of mold and fungi.
After this, you can begin to putty the walls. To do this you will need two spatulas - medium and large. Use a smaller spatula to scoop out the mixture from a container with putty, and a larger tool should be used to smooth the solution over the wall.
Note! When applying putty, do not apply too thick a layer at one time. It is better to run the tool over the surface several times, carefully smoothing the putty mass. After applying the first layer, it must be given a certain time to dry, after which it should be finished with a finishing compound.
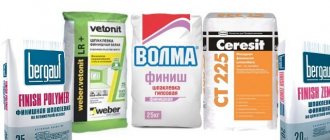
Review of manufacturers
The rating of putty manufacturers includes domestic and foreign companies. The most famous include:
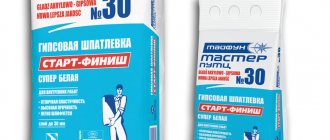
- Bergauf Glatte Zement is the best starting mixture. The composition is plastic, with increased resistance to cracking. Operates at temperatures from -50 to +70°C.
- “Rusean TT” is a façade finish with high vapor permeability, moisture-resistant and durable. Can be used for interior decoration.
- Knauf Multi-Finish is a cementitious facade putty with a very high drying speed. Can be used on untreated surfaces.
- Litokol Litofinish Fasad is a frost-resistant, shrinkable mixture. Performs well under the harshest operating conditions.
Features and types of building materials
The working material, putty (or putty), is a homogeneous mixture of chalk, flour glue, varnish, gypsum, drying oil, and dyes. Depending on the specifics of the application, this composition can vary significantly and be supplemented up to fine sand. For the optimal choice of facade treatment, numerous types of putties have been created, differing in their basis:
- cement - used for concrete facades with cracks; advantages in low cost, unpretentiousness and wear resistance; disadvantages in possible cracking during hardening;
- latex - for cool/humid environments; advantages in high stability and durability; disadvantages: if technologies are not followed, there is a high probability of cracks appearing;
- gypsum - conditions of use, as for latex; advantages in low price and durability of the preparatory composition; disadvantages in increased demands on air humidity during drying;
- silicate - for shell facades; advantages in high protection against moisture and dust; disadvantages: the need to strictly follow the technology, the likelihood of cracks;
- oil-glue - for decorating a previously treated surface, including wood; advantages of low price with high aesthetic quality; disadvantages of increased density and heaviness, as a result of which application to walls requires skill;
- acrylic - for the design of the treated surface; advantages in high resistance to moisture and elasticity; deficiencies in the need to protect the respiratory tract with a respirator;
- silicone - for decorating a previously treated surface; advantages in maximum protection from moisture and dust; disadvantages of high cost.
For the best selection of options for preparing and treating walls, starting putty and finishing façade putty should be studied according to the manufacturer’s inscriptions on the product packaging.
Manufacturers recommend the use of putty for the start and finish of the same brand. In this case, better adhesion (adhesion) of the layers of putty occurs to each other and the same expansion/compression coefficient is achieved upon drying.
Manual and mechanized devices are used to putty walls. The first includes a spatula, roller, sanding mesh, brush, etc. The second includes a drill with a special attachment for stirring the solution, and a liquid putty sprayer.
Dry mixtures and ready-made solutions are available for sale. In most cases, dry putties are diluted with water in stages, in small doses, to match the thickness of sour cream. Basically, a 20-liter bucket requires no more than eight liters of water. Before using the solution, you should find out its hardening time. Based on the size of the facade and the conditions for its processing, ready-made solutions are prepared in small volumes. To do this, either use a factory plastic bucket-container immediately, or prepare a certain dose in a separate trough.
Cement, gypsum and some other mixtures can be prepared with your own hands, which will save money. For a gypsum-chalk mixture (concrete facades), a gypsum to chalk ratio of 1:3 will be required. The well-mixed solution is gradually added to five percent wood glue. This putty dries quickly and does not allow for delays “for a smoke break . For wooden facades, a mixture of drying oil and chalk is prepared in a ratio of 1:2 plus 250 ml of drier. After thorough mixing, the solution is boiled briefly and cooled in air. It is advisable to apply it to walls in a slightly warm state.
Finishing
When finishing the facade, the putty solution is applied to the wall with the usual wide spatula, but at the same time the mixture is pulled out of the bucket with a narrow spatula 7-15 cm, after which it is applied to the entire blade of a wide spatula. It all depends on the skills and skill of the worker. Someone treats the coating with one spatula so that after that there is no need to sand it. To speed up the application process, someone uses a construction rule in their work, and then finishes the plane with a spatula.
Finishing the façade with putty
The most important thing when finishing is not to stop the process of applying any surface , that is, any area on the wall should not have joints with the wet area that was applied earlier, so that after completion of the work there are no seams on the surface. Transitions to any protrusions on the wall, as well as the finishing of another wall, have nothing to do with this.
The final stage
The process of finishing work is no different from the starting work. After the primer has dried, the finishing putty is applied in an even layer, the final thickness of which should not exceed three millimeters. It is carefully smoothed with a spatula during application. The appearance of the facade will depend on the thoroughness of this work.
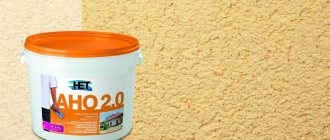
Do not apply putty to walls that are very hot from the sun . To add color to the outer layer, special paints can be added to the finishing putty (please read the instructions). They can also be applied with a spray gun after the facade has dried. If desired, you can create an original wall design.
When working with decorative types of putty, various construction tools may be required:
- Building level.
- Putty knife.
- Roller.
- Grater.
- Fabric material for removing errors.
To create a unique surface design, it is not necessary to resort to the services of a professional designer. Putty for facade work is easy to use; you just need to stock up on the necessary materials and tools, recommendations and your imagination. If the work is carried out correctly, the result will be amazing.