Finishing ceilings and walls with plasterboard allows you to make the leveling process as simple as possible. But even such a smooth surface needs adjustment, which will significantly simplify subsequent finishing and decorative finishing. In this case, the question of which putty to choose for drywall becomes relevant, since the service life of the finishing coating and the aesthetics of the interior depend on the quality of the putty material.
Features of putty compositions for gypsum boards
Before finishing work, it is necessary to decide in advance which putty to putty on the drywall so that the finishing coating lies on it efficiently and evenly. The modern building materials market offers a wide selection of putties for leveling plasterboard surfaces, so finding the best option will not be difficult.
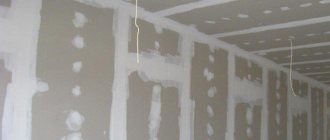
When finishing walls with sheets of plasterboard, joints, seams and cracks are formed, which represent a risk factor for the entire structure. Harmful microorganisms can spread in the recesses and cracks of gypsum boards, and mold appears, which leads to deformation and destruction of the finishing coating. Such consequences lead to significant costs for eliminating defects and repeated repair work, so at the planning stage it is very important to correctly understand which putty is best for drywall.
If complete puttying of drywall is not always advisable, then sealing the joints must be done
In some cases, sheets of drywall can be fitted as tightly as possible, and the joints are practically invisible. However, even in this case, you should not neglect putty, since drywall tends to move when exposed to moisture and temperature changes. Therefore, you should choose a putty for drywall that is characterized by high strength and elasticity. It is also necessary to pay attention to the drying time and environmental friendliness of the composition.
Review of manufacturers
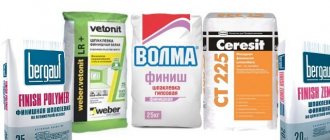
There are currently several major brands on the market.
Knauf
A popular manufacturer producing high-quality mixtures. To seal joints the following are used:
- "Fugen". Includes three groups of solutions: universal, ordinary and moisture-resistant. The seam is covered in 2 layers, the thickness of each is 1–3 mm. The composition contains gypsum and special modifiers responsible for plasticity. During site preparation, priming is mandatory.
- "Uniflot". This mixture from Knauf outperforms other types. Suitable for puttying any edges, it is waterproof and elastic, which prevents cracking. Naturally, such parameters increase the cost.
Among Knauf products intended for working with plasterboard, the Uniflot mixture has proven itself best, but when purchasing putty you should be careful, as fakes are often found
Volma
A fairly common option, characterized by a reasonable price and good quality. The mixture consists of gypsum and various fillers. It has excellent adhesion, taking into account the composition's lifetime of 35–40 minutes.
For work with drywall and gypsum boards, a variety marked “Seam” is used. The process involves mandatory priming of the joint and thorough drying. Laying is done in two layers followed by sanding.
A specialized mixture for joints is good because the joint does not need to be reinforced, but in dry rooms you can use standard compounds, which are much cheaper, and for rooms with high humidity there is a special putty
Prospectors
To seal the gaps between the slabs, a finishing variety is used. A special feature of the product is the need for installation in dry rooms with stable humidity. The mixture contains gypsum and polymer additives. Available in the form of a dry substance, the solution is suitable for use within 50 minutes. The manufacturer indicates the possibility of laying a thick layer, but it is recommended to divide the process into two stages with mandatory preparation.
Dry mixes from the Starateli brand have a good price-quality ratio, but the short setting time will be a problem for the home craftsman
Vetonit
A universal variety that is also suitable for sealing joints in objects with constant humidity. Due to the fact that polymer glue acts as a binder, it is possible to achieve excellent adhesion, but this increases the drying time (at least a day).
To work with drywall, a superplastic dry mixture and ready-made putty for painting are usually used; the second option is easier to work with.
Sheetrock
The products of this manufacturer are highly reliable. For DIY work, a polymer variation is used, which can be dry or ready-made, depending on the group. Excellent for damp rooms, drying time – 24 hours.
High-quality polymer putty from Sheetrock
For puttying, it is better to purchase compounds that have been recently manufactured.
Selecting material according to purpose
Standard work on puttying plasterboard walls includes processing of joints, sheet fastening areas and corner junctions, as well as leveling treatment, which is designed to create a flat plane suitable for finishing. If you plan to cladding or wallpapering the walls, one layer of putty will be enough, but provided that the surface does not have significant flaws. The surface required for painting is as smooth as possible, so several layers of material will be required until the result is optimal.
Important! For each stage, it is necessary to select a putty with certain functional characteristics. Some are used to eliminate cracks and grout joints, others for leveling, and still others for decorative finishing of walls and ceilings.
Each type of drywall putty, intended for a specific stage, has its own characteristics.
| Type of putty | Purpose | Characteristics |
| Starting (leveling) | Treatment of seams, noticeable depressions, large cracks and other surface defects | Coarse-grained mixture, which is used exclusively for rough primary processing. Available in white, gray, brown and other colors |
| Finish | Applying the finishing layer, eliminating remaining imperfections and achieving the most even surface possible for painting or wallpapering | Fine white mixture |
| Universal | Has the functions of basic and finishing putty, can be used for sealing seams, eliminating defects, leveling walls and other putty work | Dry powder or ready-made mixture of white color, which is characterized by increased strength and good adhesion |
Types of putty mixtures
Putty mixtures are quickly hardening, fine-grained compounds used for the final leveling of wall and ceiling surfaces. During the application process, an ideal surface is obtained, ready for decorative finishing.
It is necessary to choose the right material that can provide good adhesion to the surface being treated and ultimately will not be noticeable, for example, after decorative painting of walls.
Putty mixtures vary in purpose, composition, and readiness for use. Based on the general classification, we will try to find out which putties are suitable for finishing work on drywall.
Readiness for use as a selection criterion
Drywall putty can be purchased ready-made or dry, each of which has its own advantages and disadvantages. The finished composition does not require preliminary preparation - you just need to stir it thoroughly, and then immediately start working. In contrast to the dry mixture, ready-made putty has a higher cost and a shorter shelf life when packaged. The finished putty can be used intermittently - it can be stored for a relatively long time in a tightly closed container without losing its properties. The dry mixture becomes unsuitable for puttying within half an hour after mixing, so the amount of material must be calculated in advance.
To putty drywall, you can use both dry mixtures and ready-made compounds
Powdered compositions, due to their low price, are widely popular in cases where it is necessary to putty a large area. Dry mixtures can be used in doses and stored anywhere, since temperature conditions do not affect their quality.
For inexperienced finishers, dry putties are not the best option, since they require preliminary mixing using a construction mixer or a drill with a special attachment, and it may also be difficult to determine the correct consistency.
How to properly putty?
Above we looked at which putty is suitable for drywall, now let's proceed to the leveling itself. At the preparatory stage, it is necessary to clean the surface, apply a primer, let it dry for a certain amount of time, and then proceed to puttying.
The technology for puttingtying drywall involves several stages:
1. Preparation of the solution. If you purchased a dry mixture, it must be diluted with water in the proportion specified by the manufacturer and left to harden for half an hour. The finished putty just needs to be mixed thoroughly.
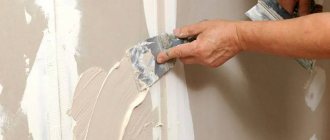
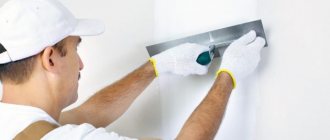
2. Putty joints. Take a wide and narrow spatula, using the small one, scoop the mixture onto the large one, the last one to apply the solution to the surface and level it. To obtain the correct result, pull the putty with a tool along the entire length of the seam, filling it with solution.
3. Putty self-tapping screws. The operation is carried out using the cross-shaped method - applying the solution across and along the screws to fill the upper part of their cap.
4. Puttying internal and external corners. The procedure is carried out in several stages - first, one side of the corner is filled with the solution, then the other. For convenience, use special corner spatulas (internal and external).
5. Final alignment. To do this, use the appropriate putty. The mixture should be applied evenly over the entire surface of the drywall in a very thin layer.
6. Surface grinding. After the finishing layer has completely dried, it is necessary to sand the resulting coating using sandpaper or a special grater until it is perfectly smooth.
Gypsum mixture is an ideal solution for drywall
Construction and repair specialists claim that for finishing plasterboard walls, a gypsum-based mixture is one of the most optimal options. This putty is made on the basis of natural material and fillers that improve performance characteristics.
Gypsum putty is the best option for puttying gypsum boards
Among the advantages of the gypsum mixture are the following characteristics:
- does not shrink when drying;
- adheres well to the surface of drywall;
- has high plasticity;
- easy to apply and level;
- dries quickly and adheres firmly.
To prepare the putty, you just need to add the required amount of water to the plaster in accordance with the manufacturer’s recommendations indicated on the packaging.
Important! The only drawback of gypsum is its low resistance to moisture, so in rooms with high humidity, preference should be given to other putty materials.
What is putty and its classification
Starting mixtures are used for the initial leveling of the wall.
These are powder or paste building compositions.
They are necessary for leveling gypsum boards before finishing them (paint or wallpaper).
According to its intended purpose, putty is classified as:
- Starting. It has a large grain size and is used for initial leveling of planes, sealing cracks and seams.
- Finish. Fine-grained in structure, used if there is a need to apply the final layer before wallpapering. It is used for final plastering and correction of previously unnoticed defects. Creates a perfectly smooth white surface, making it possible to create any decorative tones.
- Universal. Necessary for both leveling and creating a decorative effect. It can be used almost always. There is only one limitation: if there are obvious and large irregularities, it is better to resort to a different type.
Gypsum mixtures dry quickly and do not shrink.
The second important classification occurs according to the main element of the composition:
- Gypsum putty. According to experts, this is the most convenient and practical option, because the basis of a plasterboard sheet is gypsum and fillers, making it more durable and stable. Gypsum mixtures do not shrink, are easily and simply leveled, and dry fairly quickly. To use it, just pour water into the plaster (consumption can be calculated from the table below). Among the disadvantages of this mixture is the fairly rapid absorption of any liquid. When dried again, it begins to crack, so it cannot be used in damp areas.
- Cement. The most moisture-resistant and durable, therefore quite common among professional teams. Thanks to its main component, it tolerates sudden changes in temperature well. Suitable even for damp apartments and houses, so it can be used in the kitchen or bathroom. Among the disadvantages: quite a large shrinkage, therefore, if new irregularities and cracks form at the first stage, the process will have to be repeated again.
- Polymer putty. Professionals believe that it is more convenient to use than others. This type is used everywhere. It practically does not shrink, so its layer can be used as a finishing layer before applying a decorative layer.
Features of cement putty
Cement-based putty is a material with the highest water resistance; in addition, it can withstand temperature changes well, so it is suitable for finishing facades and for any type of room, including kitchens and bathrooms. Thanks to its properties, the material reliably protects the base from water and evaporation, reducing the risk of deformation and destruction of the structure. The advantage of cement putty is considered to be its high resistance to mechanical stress after drying, however, when working with this material you must be extremely careful, since correcting defects on a dried surface will be problematic. The disadvantage of this mixture is strong shrinkage during the drying process, as a result of which numerous cracks can appear in the finish, so puttying should be done several times. This type of putty is not used for decorative finishing in residential premises, but it is perfect for rough work in bathrooms and technical rooms.
It is advisable to use cement putty only for wet rooms
Selection and purchase of putty
Which putty should I choose? Last but not least, the quality of the putty itself is important. At the preparation stage, they get acquainted with the reviews of experienced repairmen and amateurs who have used the compositions of certain manufacturers. It is better to purchase in a specialized store with consultation from the seller. Preferably well-known brands such as Knauf.
Due to its cost, polymer putty is used for finishing. Therefore, less of it will be needed. The consumption of the composition per square meter of drywall surface is taken into account. The approximate consumption of gypsum and cement mixture is up to 1 kg per meter, and polymer mixture is about 0.5 kg. If you are doing the repair yourself, and even for the first time, it is better to take dry mixtures. This will allow you to save money and gain valuable experience working with finished products.
You learned how to putty drywall, how to choose the right putty for this and prepare it correctly. All that’s left to do is to put this into practice. Most importantly, do not forget about the details, such as puttying drywall seams.
Polymer putty is the key to a durable finish
The polymer mixture is considered the most convenient putty to use, which is used in various fields and has the following advantages:
- high moisture resistance;
- strength;
- no shrinkage when drying;
- convenient application.
The only drawback of this material is its relatively high cost, which leads to a significant increase in the cost of finishing work, especially in large premises.
Polymer putty provides the highest quality coating
Polymer-based putty is used with equal success for leveling plasterboard surfaces in any room, be it bathroom walls or kitchen ceilings. Polymer leveling compounds are most often used as finishing putty, as they effectively eliminate even the smallest imperfections, providing a perfectly smooth surface. The putty is applied in a thin layer of up to 1 mm, this will be enough to achieve an even plane and prepare the wall for further painting or wallpapering. High-quality finishing mixtures are easy to apply and stretch along the wall, providing economical consumption. Even non-professionals can easily handle this material, getting maximum results in interior design. In addition, by choosing a polymer product, you can forget about repeated repairs for a long time.
Drywall puttying technology
The quality of work with putty directly depends on following the manufacturer’s recommendations. Before applying the putty, prepare the surface appropriately.
It is cleaned, degreased, and primed (preferably in two layers). Adhesion and consumption of the composition depend on whether preliminary priming has been carried out. Alkyd primer cannot be used for drywall - it will deform the paper layer.
The primer is selected depending on the type of finishing. If drywall is planned under tiles or tiles, then an adhesive compound is used. If under the wallpaper, then deep penetration is better.
Applying putty
Before applying putty, make sure that all screws are screwed in correctly, and that there are no peelings of paper from the gypsum core at the joints of the sheets. If necessary, they are cleaned with a drywall knife and treated with sandpaper. If there is no edge on the sheets, then it is formed by cutting the edges with the same knife at an angle of 45 degrees.
After this, begin applying the putty:
- First the seams are closed. This is done using two spatulas - narrow and wide. First, a small amount of solution is applied to the second and applied to the surface. During the process, make sure that lumps and unevenness do not form, and that the solution is applied evenly, covering the entire seam. This will save you from unnecessary hassle with sanding. We must not forget about reinforcement with paper tape or sickle tape. Serpyanka is glued before applying mortar to the seam. The paper tape is pressed into the existing layer and covered with another layer on top.
- Then the holes from the screws are sealed. The composition is applied with a spatula crosswise - lengthwise and crosswise.
- After this, the corners are puttied. First, remove one side of the inner corner, and after the putty dries, the other. Aluminum corners are attached to the outer corners and coated with a solution on top.
- After the rough layer has dried, they move on to the finishing putty. This is best done with a wide spatula. Laying several thinner layers is allowed.
Sanding the putty
After drying, the surface is sanded until smooth. If any flaws remain, apply an additional layer. There is no need to putty the entire surface. Drywall itself is a flat and smooth material. Check whether additional putty is needed by applying a wide spatula or lath to the surface. If there are no gaps, the surface is flat.
The video shows how to putty correctly:
Useful tips
You can easily putty drywall by following the advice of experts:
When choosing a putty, pay attention to which room needs to be finished. If this is a children's room or bedroom, then you should spare no expense by choosing environmentally friendly and safe putty
If this is a kitchen or bathroom, you should pay attention to a putty that can withstand high humidity and high temperatures;
- Antibacterial substances in the soil or putty prevent the appearance of mold and fungi;
- The putty hardens quickly, so you need to calculate the amount of solution for 20 - 30 minutes of work;
- Using excess putty, you can immediately seal the holes from the self-tapping screws;
- Small holes (for example, holes from self-tapping screws) are puttied with a “criss-cross” motion;
- It is better for an inexperienced builder not to use putty that dries too quickly, since due to inexperience the process of application and smoothing will be longer than for an experienced craftsman;
- To ensure better adhesion between the starting and finishing putty, it is better to use solutions/mixtures from the same manufacturer;
- To finish plasterboard coverings, under no circumstances should you use soil mixtures containing alkyds, since the paper layer will come off the plasterboard sheet and the entire structure will become unusable;
When reinforcing seams between sheets of drywall, you cannot use PVA glue, since it is water-based and, if it gets on the screws, it will cause rust, which over time will appear on the finished finish in the form of yellow spots; When mixing the putty solution, be sure to use clean containers and clean water at room temperature.
This is especially important before gluing wallpaper.. To learn how to properly putty drywall, see the following video
To learn how to properly putty drywall, see the following video.
Plaster
Most experienced builders recommend using gypsum putty for finishing drywall, since the gypsum base is more preferable for fragile and plastic materials. A distinctive feature of the best putty for drywall is its environmental friendliness and high durability.
Also, the advantages of using gypsum putty mixtures in finishing work include the absence of long-term shrinkage on the surface, ease of leveling and quick drying of the solution. Gypsum putty is very popular due to the ease of its preparation: to putty drywall, you need to add a small amount of water to the mixture and carefully place it.
READ MORE: Weber Vetonit putty: what it is, composition, how to dilute the mixture, application
The disadvantages of this type of mixture include insufficient water resistance, which is why cracks and chips may appear on the surface after its application.
Note! It is not recommended to use gypsum plaster in bathrooms and other rooms with high levels of air humidity.
Puttying seams (joints) of drywall
The technology for filling joints is as follows:
- Carefully inspect all irregularities in the area where the sheets join. If any of the screws protrude, then they will need to be screwed in.
If some turn out to be recessed by more than 5 mm, then they should be unscrewed and screwed in again at a distance of up to 50 mm from the previous place. Alternatively, you can replace such a self-tapping screw with a longer one and not make another hole in the sheet. Cut the cut edges of the plasterboard at a 45-degree angle to a width of 3-5 mm. If the edge of the sheet is in the area of the junction, then there is no need to trim it. This is done to increase the surface adhesion area to the putty.
Don't forget to prime the cut edges! Plasterboard putty begins after this layer has dried.
Another layer of putty is applied on top of it with great pressure on the spatula. It should be recessed into the material so that during grinding it does not jump out as excess. For the last layer of putty, it is better to use a ready-made paste.
It is more flexible and the result of its use is much more attractive. The finishing layer of putty must be applied precisely at the level of the sheets themselves.
Apply only with a wide spatula with smooth edges. Working at this stage with an old tool is simply barbaric: it will leave scratches that you tried to avoid in all previous stages. The next, final stage begins after 4-6 days, when all layers of putty have dried. Sanding putty joints (seams) is done first with sandpaper, and then with its softer version - sandpaper.
Why putty drywall before painting?
Budget options for drywall, which are used in most cases, do not have as smooth a surface as it might seem. If you do not putty them, all the flaws begin to appear after painting. These may include wavy changes, dents and scratches.
Unputtyed drywall cannot be painted with water-based compounds, as moisture will be actively absorbed into the surface, which will lead to defects due to swelling of the material.
Also, puttingtying the entire wall area allows you to save on painting drywall, as material consumption is reduced. If you putty only the joints of the sheets and screws, the paint will apply unevenly. Drywall absorbs paint and varnish materials more strongly than putty, and they dry faster on it. This means that the color and texture will differ in different areas. To achieve uniformity, you will need more layers of paint.
