The question seems to be simple - “what to do after plastering the walls?” does not arise from the fact that the homeowners have not yet decided for themselves whether to paint the wall or wallpaper it. It appears due to ignorance of the technology for preparing freshly plastered surfaces for applying paint or gluing wallpaper. We decided to provide information on how to level walls with putty.
Drying conditions for plaster
The first thing to do after plastering the walls is to allow it to dry naturally. Part of the solution water is used to create artificial stone (gypsum, lime or cement), depending on the plaster used. Another part is needed as a medium in which reactions, for example, polymerization, take place. Excess moisture gradually evaporates from the surface of the layer, which cannot be prevented. According to the standards, the surface before wallpapering or painting should have a humidity of no more than 8%.
The drying time of the plaster coating depends on:
- type of solution;
- consistency of the solution;
- weather;
- base material;
- How thick is the layer of plaster?
Most often, walls are leveled with cement-based mortars, followed (in popularity) by gypsum and lime mortars. From construction experience, a pattern of drying progress was identified. So, regardless of the composition (with the exception of gypsum), it takes a day for 1 mm of outdoor plaster coating to dry; a 2 mm layer dries indoors in a day.
Stretch film is used to retain moisture in DSP plaster
Cement coatings require at least 4 weeks to gain strength. Less time is allocated for drying, since the main share of free water evaporates earlier. Indoors, mortars with a cement binder, as well as cement and lime, often take 6-7 days to dry, however, during this time only the surface layer dries. During this time, the room is not ventilated, since higher humidity creates better conditions for hardening of cement coatings.
It’s better to take your time and let the solution gain good strength.
Solutions based on lime or lime and gypsum spend less time on drying. For normal strength gain, these compounds require 10-15 days, and the room must be ventilated frequently - 2-3 times per hour (especially the first few days). According to KNAUF recommendations, a layer of 15-20 mm of gypsum plaster will dry for 7 days (at a temperature of +20 degrees, 60% humidity); layer 5 cm – 14-16 days. For puttying work, 10 days may be enough.
These are the times for drying inside buildings, where conditions can be created and controlled. This is impossible to do on the street. Therefore, choose the time for plastering facades according to the normal weather conditions of your climate. For work, it is better to use dry periods, when precipitation occurs less frequently and the temperature does not fall below 8 degrees and does not rise above +30. Ideally, if the temperature is 18-20°C.
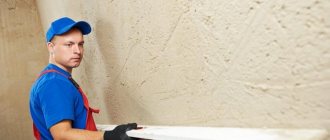
Preparation of putty
To prepare the solution with your own hands, you need the following tools, materials and equipment:
- container for diluting the solution; it must have sufficient volume to freely mix the mixture using a mixer;
- mixer; it can be done by inserting a screw attachment into the drill chuck;
- dry putty mixture;
- water at room temperature.
Prepare the mixture as follows:
- Water is poured into the container.
- The powder is gradually poured into the water. At the same time, the solution is mixed with a mixer.
- Stirring is continued until a paste-like mass is obtained.
Water and dry mixture are added in the proportion specified in the instructions. If there is none, add the dry powder by eye until you get a solution with a consistency similar to sour cream.
Putty kneading
Preparing plastered walls for putty
Before applying paint, the surface must have a certain smoothness, which is difficult to achieve with conventional plaster. Therefore, when the plaster dries, the walls are puttied. But the putty is not applied to the plaster right away. First, the surface is primed. For what purpose are they doing this?
There are several options:
- it is much easier to apply putty onto a primed surface and distribute it evenly;
- when the primer hardens, a film forms on the surface, preventing various stains from appearing on the surface;
- various components of the primer increase the anti-mold, moisture-proof and other properties of the finish;
- the primer partially smoothes the surface and reduces putty consumption.
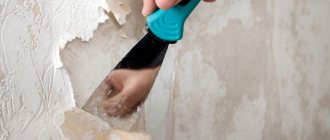
Before application, remove dust from the walls.
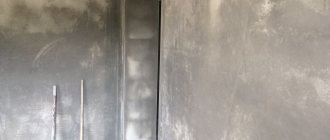
Leveling for putty
If the first layer begins to dry out, but does not have time to harden, then it is time to level the wall for putty. All defects are rubbed over with a solution; in terms of consistency, it is necessary to use a mixture that is thinner. Application is done with a large spatula and leveled using the beacon rule. Thus, the entire perimeter is covered, it is better to make the layer thin and the base turns out to be close to ideal. This stage is necessary so that the putty consumption is minimal.
If the solution is like thick plasticine, the beacons are removed by prying them up with a screwdriver at the bottom. Next, the seam is filled with putty and the wall is leveled with a spatula; if necessary, the seam can be trimmed, because when the mixture is not completely hardened, it cuts perfectly.
READ Kitchen walls DIY finishing options
Important! During leveling, you need to ensure that the plane remains level. This completes the alignment of the walls. Next, you can carry out interior finishing work, painting the walls in different colors, gluing wallpaper on them, laying tiles and other finishing materials.
What to do after plastering walls
So, we found out that the main operations after applying leveling plaster will be:
- removal of beacons;
- drying the coating;
- dust removal;
- surface primer;
- puttying.
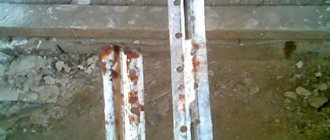
Lighthouses
Often, after plastering, beacons remain in the coating. Beacon strips that are not subject to corrosion can be left in the plaster. However, the coefficient of thermal expansion of beacon materials and plaster coatings is different. This may cause cracks to appear. So it is better to remove the beacons and seal the resulting grooves with gypsum (in dry rooms) or cement (in wet rooms and on facades) mortar.
Leveling and priming
If after plastering work there are drips and frozen splashes of mortar on the walls, and various other protruding irregularities, they need to be removed. Before starting work, check the evenness of the surface according to the rule. All flaws in the plaster must be eliminated before filling.
To do this, defects (shrinkage cracks, dents) are primed and then covered with starting putty. To ensure that the solution penetrates deeper, the cracks are opened. After jointing, the surface of cracks and dents is covered with a primer, and then with a layer of putty (in the case of large cracks, using a reinforcing mesh).
After the wall has dried and leveled, it is sanded with sandpaper or paper, or a grinder with an appropriate disc is used. After sanding, the walls are covered with dust, which can be removed with a vacuum cleaner or washed off with a damp cloth. A day later, the main primer is applied.
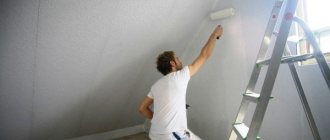
In order for the overall quality of the finish to be high, the primer composition is applied in two passes with each layer drying daily. The type of primer composition is selected according to the type of plaster and the place of application (outdoor or indoor).
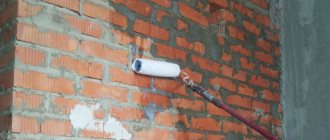
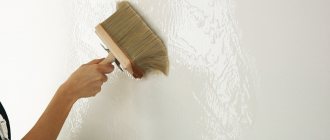
For application use a roller or brushes. The primer is applied crosswise: vertically in the first pass, horizontally in the second.
Plaster beacons
Another very important point that is often neglected during repair work. The fact is that all lighthouses are made of steel, and sooner or later corrosion begins to spread on their surface, which is quite capable of leading to cracking, or even destruction of the plaster layer. Experts always advise removing beacons and sealing the grooves formed in their place with putty.
Important! Even galvanized beacons do not guarantee that corrosion will not begin. Of course, an additional layer of zinc will significantly increase the service life, but sooner or later rust will eat away the protective layer.
Beacons should be removed very carefully, and even before the plaster has completely dried. Of course, it will not be possible to avoid chipping, but the more carefully the removal is performed, the less effort will have to be spent on removing the formed grooves.
Choosing putty for walls after plastering
The consistency of the putty is a pasty mass. The purpose of which is to level the walls after plastering before finishing, which requires a particularly even surface.
According to their structure, putty compositions are divided into:
- Starter grades, characterized by a larger grain size, are used for the initial processing of plaster coatings. Filler – quartz sand. Used to seal cracks, holes and large recesses.
- Finishing ones are distinguished by fine grinding of the filler, greater plasticity and ease of installation. They are used on top of the starting putty with a layer of 0.5-2 mm to create almost glossy surfaces. Easy to sand.
- Universal ones are used as finishing and starting paints, applied in a single layer. The cost is more expensive than other putties.
When choosing a putty, pay attention to the basis of the composition, which may be significant for the application.
Acrylic putties are applied only in a thin layer, which is not permissible for leveling. They also have a narrowed range of application temperature conditions (not lower than +10°C), and are not used in rooms where coatings are supposed to breathe.
Popular putties:
- on polymer binders;
- gypsum;
- with cement.
Cement putty
Like cement plaster, it is most popular for finishing interior and facade surfaces. The popularity is deserved by the durability of the created coating, accessibility for the mass consumer and other advantages. It is suitable for damp rooms and unheated buildings. Putty is used to level surfaces and “heal” cracks and potholes.
Manufacturers divide putty compositions with cement into:
- façade;
- used for interiors;
- thermal insulation (used for thermal insulation coatings in combination with other means).
Cement of various types serves as a binder. For example, there are white cement putties (expensive). In addition to cement, the composition includes: polymer additives and mineral fillers. The coatings are smooth and durable. Starting and finishing pastes are produced according to their intended purpose.
Starting putty with quartz sand is used for single-layer leveling of walls with differences of up to 20 mm. The finishing mixture contains finer sand, which gives a smooth surface. There are two types on sale: ready-made (in buckets) and dry mixtures.
Gypsum putty
Even high-quality finishing cement paste does not provide such a smooth surface as gypsum putty. In addition to gypsum, the composition contains modifiers and additives (polymer and mineral).
The filler fraction, for example, sand or marble flour, determines the purpose of the gypsum composition:
- Finishing (used for smoothing), a perfectly smooth wall after puttying has a snow-white color;
- starting (can be used to level surfaces with minor unevenness and without plastering);
- universal.
The material for dry rooms is easy to sand and install, has less weight, forms a breathable coating, and does not form shrinkage cracks. A significant disadvantage is that it is not resistant to water. There are ready-made and dry mixtures.
Polymer putty
These are latex, polycement and acrylic compounds. There are many differences with cement and gypsum “classics”. They form elastic coatings, therefore they are in demand in earthquake-prone regions and in areas located near railway tracks. Such putties and shrinkage of buildings are not afraid.
High adhesiveness is inherent in all polymer compositions. They form breathable, durable finishes. What is attractive for beginners is that polymer compounds have a long lifespan - up to 12 hours. The main disadvantage is the high price.
A new product in the range of polymer compounds is polymer cement (polycement). This is a universal finish that can be applied in layers up to 30 cm, that is, in one pass it can be used to level curved surfaces.
Composition of putty mixtures
Based on their composition, putties are divided into three groups:
- gypsum;
- cement;
- polymer.
Plaster
Gypsum gives the solution increased plasticity. Thanks to this property, it is possible to achieve a very even plane of the walls. When making the next batch of gypsum putty, you need the correct measure of the volume of the solution. The liquid solution hardens quickly, so it is necessary to balance the volume of the finished mixture with the time of its production.
On the packaging of the powder, the manufacturer indicates the time for producing a certain volume of the finished mixture. Gypsum putty is used only for interior work.
Cement
Cement plaster is used in rooms with high humidity. In bathrooms, toilets and kitchens, the walls are leveled using cement putty. Tiles are laid over the cement finish.
With cement putty after plastering, you can immediately treat large areas of walls with your own hands in one batch. It takes much longer to harden than the gypsum composition requires.
Polymer
Polymer-based putties are called universal compounds. The main advantage is the virtual absence of shrinkage. Among putty mixtures, universal is the most expensive material.
All of the above is presented in this table:
Table of properties of basic putty compositions
| № | Putty composition | Application | Flaws |
| 1 | Cement based | Sealing irregularities | Takes a long time to dry |
| 2 | Plaster | Final formation of a smooth surface | Gives more shrinkage |
| 3 | Polymer | No shrinkage | High price |
Putty for “wet” rooms
If you use ordinary putty, which is afraid of water, in “wet” rooms, repairs will soon be needed. Therefore, moisture-resistant compounds are chosen for puttying bathrooms and other wet rooms. Such compositions are specially developed for extreme conditions, such as constant humidification when water enters or condensation forms.
Paint applied to moisture-resistant putty will remain smooth and will not lose color, and pockets of mold will not appear under the ceramic tiles. Such compounds are expensive. But they quickly pay off. Among the compositions of the mixture are cement-based, polymer-based, oil-adhesive. Moisture-resistant putties gain strength within 24 hours.
There are two types:
- hydrophobic (repellent water);
- waterproofing (not allowing moisture to pass through due to density).
The first ones are always applied in two layers.
Leveling a plaster wall with your own hands: how to carry out the work correctly
When applying two or more layers, do not forget to moisten the previous layers with water after they have dried. The first two layers, if three-layer plastering is intended, are usually not leveled, leaving them rough. And the third layer is brought to perfection.
Is it possible to level plastered walls with plaster?
Yes, if the walls are uneven. It is better to level a plaster wall using gypsum-based plaster.
What to do
If the unevenness is more than 3 cm, then you can cut off the bumps with an angle grinder. It is recommended to cover the depressions with putty.
What materials are best for leveling?
Plaster with gypsum can be applied in a fairly thick layer, but it will still be durable. Because of this, using a similar composition, it is possible to make walls with large defects smooth.
Preparing walls for painting or wallpapering
What to do after plastering the walls If you chose wallpapering as the final finishing of the walls, then it is not necessary to achieve an ideal surface. Wallpaper panels can easily hide small pores and microcracks. Apply a starting putty mixture under the wallpaper (vertically and horizontally - 2 layers), then two layers (in the same direction) of finishing putty. Particularly thin wallpaper requires the application of three layers of the finishing mixture (two vertical and one intermediate - horizontal).
Putty for painting is applied in 6 layers: five, as for wallpaper, the sixth is finishing putty with acrylic composition.
If the tool is held at an acute angle, the applied coating is thicker. An increase in angle leads to a decrease in layer thickness. After the first layer of the starting mixture has dried, it is sanded with fine sandpaper. All others do not sand - just walk over the dried coating and clean the surface with a spatula.
To level the corners with putty, use perforated aluminum corners, which are installed after applying the second layer of the starting mixture. The corners are placed on the finishing solution and puttied with it.
Applying putty
After selecting and purchasing the mixture, you can proceed to its application. First, apply the first coat to the wall. To do this, use a thick spatula. It is better to start the process from the corners of the wall; you can move in any direction.
After it dries, you will need to check the evenness of the walls again. You will also need to grout again. It is better to use sandpaper with a fine fraction. Next, the final layer of putty is applied. After it has dried, you can move on to painting or wallpapering. We invite you to watch the following video:
Painting
After applying the last putty layer, 24 hours later, the walls are inspected under oblique lighting and sanded with sandpaper (zero). The wall is cleaned of dust with a vacuum cleaner and a hair brush. If a non-acrylic putty is used for finishing, then check for moisture absorption: run over the surface with a damp sponge. If the surface has darkened and absorbed moisture, a primer is needed.
The primer composition is selected according to the paint manufacturer's recommendations. Priming and painting are carried out according to the manufacturer's instructions.
Wall painting
Before painting, putty walls are primed. The modern building materials market offers a wide selection of paints that can be used to create original interiors. The combination of different colors and their shades forms colorful and soft panels and accent vertical planes in the home.
There are interior and exterior paints. According to their composition, paints can be oil (based on natural drying oil), acrylic, water-dispersion, pentaphthalic, nitro enamels and others. Each type of dye meets one or another requirement of the homeowner.
Many factors influence the choice of paint:
- quick drying;
- resistance to the negative effects of fungi and microorganisms;
- durability;
- immunity to moisture and ultraviolet radiation;
- ease of application;
- environmental friendliness (no harmful fumes);
- paint consumption rate per 1 m2 of wall;
- price;
- When buying paint, you need to pay attention to the presence of the inscription on the container “For walls”.
Wallpapering
Often, starting to putty the wall under wallpaper is enough after finishing plastering the walls. You can check this by gluing a piece of wallpaper to the surface and see if yellowish spots appear. If everything is fine, then sand the wall, remove dust, apply a layer of wallpaper glue, and dry it (you can apply another layer and let it dry). After this, the battles are pasted in the usual way.
But it’s better to do the finishing putty. A good result is obtained by applying a white primer to the putty.
Mistakes when performing plastering and priming work on walls
The disadvantage is that metal beacons are left in the plaster. They oxidize over time, causing the coating to crack, even if it is thoroughly primed. If, due to corrosion of the beacons, cracks appear on the wall after plastering, then it is almost impossible to correct this with additional putty, because the cause of the problem will remain.
Also, the appearance of cracks is a sign of haste in work. Instead of applying plaster in several layers, the coating is made in a single layer and rough. Under the influence of gravity, the solution slides to the base of the walls, begins to harden and crack. To avoid this, plastering the walls should be carried out in several stages; you cannot immediately apply a huge mass of material.
When starting to prime and putty the surface, you need to take into account the drying time of the walls after plastering. Starting work prematurely is a violation of technology and will lead to destruction of the finish after drying. It is impossible to correct this error without repeated repairs.
If the wall cracked after plastering and even changed its geometry, this indicates a lack of professionalism of the craftsmen who carried out the plastering without making sure that the material was applied correctly. At the same time, if the wall turns out smooth the first time, then it won’t even require puttying before painting or wallpapering.
Decorative plaster
If the finishing coating is decorative plaster, then with smooth walls and the use of structural decorative compounds, it is not always necessary to plaster the walls, since a thick layer of coating can hide unevenness. But it is necessary to clean and prime the walls. Leveling is done using putty on dried soil. A primer is also applied on top of this layer.
If the unevenness is large or thin-layer decorative plaster, for example Venetian, is used for finishing, then the wall is leveled using rough compounds. Then, as described above, it is dried, primer is applied, putty is applied and primed again. Decorative plaster can be made from ordinary putty.
The moment has come when the plastering work is completed. You learned about what to do next after plastering the walls from the article. All the work described can be done with your own hands. They are no more difficult than plastering. If you are interested in nuances that are not covered in the article, please leave your wishes in the comments.
Sequence of putty work
- First of all, beacons are removed from the walls. The fact is that iron is susceptible to corrosion and with strong humidity, stains may appear on the walls over time. Some experts recommend leaving beacons in the walls, but it's up to you. At least in those rooms where there is excess moisture, it is better to remove beacons.
- Rough puttying is carried out. Roughly, a layer of up to 20 mm of putty is applied to the walls, thereby covering all the grooves, holes, etc.
- We wait some time until the starting layer dries. During this period, drafts should not be allowed to prevent the putty from cracking.
- Next, a finishing layer of putty is applied, which should not exceed 5 mm. It is necessary to apply the putty slowly, forming all corners as accurately as possible.
- We wait 2-3 days until the finishing putty is completely dry. Do not rush to apply a decorative layer to the walls. Let your walls rest and remove excess moisture so that you can calmly start decorating, knowing that your walls are completely ready for this process.
Ceramic tile
With the help of tiles it is very easy to visually expand or reduce space.
Walls in the interior in combination with floor and wall ceramic tiles
The use of small, cold-colored tiles narrows the space. Spaciousness is provided by large tiles in warm colors.
Tip: choose the color of the grout for the joints two shades lighter than the tile itself.
Puttying cracks in walls
To hide cracks in the walls, we recommend using gypsum mixtures for putty. The material santegypsum is much more elastic in work, but hardens much longer. Advice from competent specialists: at first it is recommended to slightly widen the crack, slightly increase its depth and thickness. To increase the roughness, you can scratch it with a knife or other sharp object along its entire length. Then carefully treat it with a primer. Only after this should you begin to putty.
Repairing cracks for putty.
Surface preparation and priming
Concrete walls or walls made of brick and other materials must be prepared before leveling. It makes no difference which type is chosen. Preparation consists of the following sequence:
- The old coating on the walls is removed, especially those that are weak.
- Cracks in the wall need to be repaired, then inspected and assessed how crooked the wall is. If the protrusion is large and very prominent, then it is removed with a hammer and other equipment.
- If you have old plaster that is firmly attached to the wall, you can assess its condition and the need for removal. It is enough to knock on the wall; if there is a dull sound, there is a void between the plaster and the wall, so when leveling, there is a high probability of the wall collapsing. It is recommended to beat everything down to the very foundation so that the old material does not spoil future work.
Alignment of problem areas
- If there are large depressions, you will need to seal them separately. A very thick layer of mortar or putty can fall off, due to this, defects are sealed, and the protrusions simply get knocked down.
- If the walls are painted, the paint may peel or simply fall off in pieces due to its perfect evenness. A primer will help solve the problem, namely its type - concrete contact, which makes the surface rough. In this case, the putty holds well and nothing falls off.
- To improve the adhesion of materials, notches on the wall are used. Previously they were made with an axe, today they use a grinder. For 1 sq.m. About 100 notches will be enough.
Based on the choice of putties, a primer is selected. The main purpose of the soil is to improve the adhesion of the plaster to the wall. The instructions on the packaging will allow you to make the right choice, and will also familiarize the person with the correct application to the walls. Often the compositions are ready-made, but there are also those that need to be diluted. You can apply the primer to the walls with a roller or other device. The preparation is simple, but the leveling process will be more difficult.