The stove is a practical and reliable source of heat. The installation of stove heating requires taking into account many nuances, including the issue of external decoration. Extreme operating conditions, with constant alternation of heating and cooling cycles, place strict demands on the composition of plaster mixtures, which must withstand temperature fluctuations while maintaining decorative qualities. Today we will talk about how to properly make a mortar for plastering a stove so that it meets all the requirements for this type of building materials.
photo from the site https://1pokirpichy.ru
Mortar for plastering the stove: quality characteristics
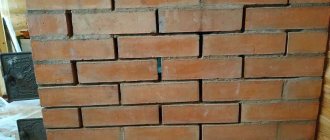
Finding a good stove maker is not an easy task. But when he finished the work, the next problem arose in full force, because now the stove needs to be lined. Seams in masonry and surface irregularities tend to accumulate dust and dirt. As a result, not only cleanliness suffers, since when heated, contaminants tend to burn, filling the room with an unpleasant odor. In addition, over time, the masonry will lose its tightness, and smoke will be drawn into the room.
photo from the site www.rmnt.ru
The simplest and most affordable way to finish a stove is plastering. When choosing which solution is needed for plastering the stove, it is necessary to take into account the characteristics that the coating should have after hardening, namely:
- Heat resistance. The ability to withstand heating to sufficiently high temperatures without consequences is a basic requirement, without which all other qualities are meaningless. The outer surface of the oven, based on sanitary standards, heats up to 95⁰C. In practice, thin-walled stoves or stoves made with improper masonry techniques can be heated to 120⁰C at certain points.
- Thermal conductivity. Do not forget that the main function is heating, which means the conduction of heat from the walls into the room must be preserved, and mixtures with thermal insulation abilities are absolutely not suitable.
- Plastic. After drying, the coating should have the property of slightly stretching, repeating the change in volume of the masonry when heated. Non-plastic plasters will crack, requiring systematic restoration of the finish.
- Environmentally friendly. If the solution contains toxic components, then when the temperature rises they will be released into the air, which is undesirable for both residential and non-residential premises.
Thus, you need to choose the composition of the solution for plastering the stove responsibly, because the efficiency of heating, the durability of the coating and the health of the people living in the house depend on it.
photo from the site https://www.liveinternet.ru
Defects and their prevention
The components are carefully measured.
Cracks occur due to incorrectly selected concentrations of the plaster components. Measure ingredients carefully to avoid this. When drying the layer, heating with a small amount of fuel is allowed. Overheating leads to layer shedding.
Cracks appear when the stove shrinks. The foundation parameters are correctly calculated so that the heater does not move in height over time. Sometimes the integrity of the plaster suffers due to improper technology for distributing internal hot flows. This can be avoided if you correctly design the location of channels and caps in the body of the hearth.
What not to plaster a stove
Asbestos cannot be used in Russian sauna heaters or in living rooms, since the substance releases harmful substances into the air. The material is replaced in solution with other fibers and threads.
Cement-sand mortar, which is used for other construction work, is also not used to cover stove masonry. The plaster will be durable, but will lack plasticity, so it will not last long.
You cannot use ready-made Rotband mixture. In the instructions for it there is a point where it is indicated that the operating temperature has an upper limit of +30°C. The furnace wall heats up higher.
Plaster mortar for stoves: composition and varieties
Traditionally, clay-based solutions were used for plastering the stove, which ensured the necessary plasticity of the material. The masters selected the recipe and the ratio of components experimentally, largely focusing on their own experience, and using small tricks that they were reluctant to share. Today, the building materials market offers many options for replacing the usual clay composition, giving the consumer the opportunity to choose.
The following solutions are most often used for plastering stoves:
- Simple clay.
- Lime-gypsum.
- Cement-clay.
- Lime-clay.
- Ready-made heat-resistant plasters.
Regardless of the chosen recipe, the components used must meet certain requirements:
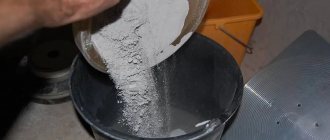
- Clay. Before preparing the solution, it is recommended to soak the clay for 24 hours, after which it is necessary to add water so that light impurities and contaminants float to the surface. Excess water is drained, and the clay is stirred until soft and homogeneous, after which a mixture of dry ingredients is added.
photo from the site https://kharkovbeton.kh.ua
Controlling clay fat content
You can check how fatty the clay you are using is using the Shepelev test. To do this, you need to roll it into a ball the size of a walnut and squeeze it with your fingers. Normally, cracks on the surface of the ball form when compressed by 1/3, but clay that is too oily is more plastic and requires more compression.
- Sand. Fine river sand is used, which must be sifted through a 10 mm sieve to remove shells and other unwanted impurities. The amount of sand directly depends on the fat content of the clay - the higher this indicator, the more sand you will need. If wet sand is used, this must also be taken into account, since the recipes indicate proportions for the dry state. To avoid mistakes, the sand should be dried.
- Water. At the construction stage, water of insufficient quality is often used, which is unacceptable in the case of preparing plaster. The water should have no musty or muddy odor, and the iron content in it should also not exceed the norm. If the water turns yellow after settling, this is an indicator of high iron content and should not be used.
- Binder. To give strength to the finished finish, a binder is needed, which is usually asbestos or crushed fiberglass. Some craftsmen prefer to use fine straw or hemp for this, appealing to the environmental friendliness of these materials.
photo from the site priusadebka.ru
Proportion of sand and clay for laying the stove
The burning temperature of firewood is 500–1050 C. Not every stone and mortar can withstand such a load. The furnace is constructed from refractory fireclay and clay bricks, and instead of ordinary cement, a clay composition is used. The proportions of clay and sand in the stove mortar must be strictly observed, otherwise the masonry will be fragile and the stove will be short-lived.
Sand to clay ratio
The volume and ratio of ingredients vary widely. The optimal combination is the proportion of sand to clay 1:2 or 1:1. The volume of water is approximately ¼ of the amount of mineral.
In fact, the proportions are determined by the fat content of the mineral. With high fat content, 2 parts of clay may contain 4 parts of sand. If the material is thin, the proportion of sand is halved.
How to prepare a solution for plastering a stove?
When preparing the solution, the main attention should be paid to the ratio of the components and the order of their mixing to obtain a uniform consistency. The standard preparation method is to mix the dry ingredients, followed by adding liquid until the required thickness is obtained, but it is worth considering the nuances that depend on the type of plaster chosen.
Simple clay mortar for oven plaster
To prepare such a solution you will need the following components:
- Clay – 1 volume part.
- Sand – 2 volume parts.
- Asbestos (fiberglass or straw) – 1/10 by volume.
When preparing clay mortar for plastering a stove, the proportions may change. If the clay you received has a high fat content, the volume of sand must be increased to 3 or 4 parts, based on the results of the Shepelev test or your own experience.
The secret of seasoned masters
Experienced craftsmen advise adding 200 g of salt to a bucket of solution to avoid the appearance of cracks in the future. This advice has a logical basis - salt is hygroscopic and slows down the setting of the plaster, making it dry evenly. Subsequently, when heated, hygroscopicity prevents drying out and cracking of the coating.
Lime-gypsum mortar for stove plaster
photo from the site https://nashaotdelka.ru
The components for this type can be purchased at any construction supermarket:
- Slaked lime – 2 parts by volume.
- Gypsum – 1 volume part.
- Sand – 1 volume part.
- Asbestos fiber 2/10 by volume.
Keep in mind that gypsum sets very quickly, and you need to prepare the amount that you can use within half an hour, because it will not be possible to dilute it after preparation.
Do-it-yourself cement-clay mortar for plastering a stove
The addition of cement is intended to give strength to the coating. The following ratio of components is recommended:
- Portland cement – 1 volume part.
- Clay – 1 volume part.
- Sand – 2 volume parts.
- Asbestos – 1/10 part by volume.
For mixing, it is convenient to use a drill with a mixer attachment, which will allow you to mix the components evenly without forming lumps.
Lime-clay mortar for plastering a stove: proportions
photo from the site https://myshtukaturka.ru
To prepare this composition you will need:
- Lime – 1 part by volume.
- Clay – 1 volume part.
- Sand – 2 volume parts.
- Asbestos – 1/10 part by volume.
As you can see, the differences with the previous composition are small, but thanks to the addition of lime, this clay solution for plastering the stove will be lighter, which means that fewer layers of paint will be needed to give the finished look.
Ready-made heat-resistant plasters
A limited number of manufacturers produce such highly specialized products, but in general, buying heat-resistant plaster will not be a problem, and the cost of domestically produced plasters is quite affordable.
photo from the site https://granstroy.ru
The following brands are available on the Russian market:
- Terracotta is a Russian company with a very affordable pricing policy. The prepared solution retains its properties for 60 minutes, giving even novice craftsmen time to develop.
- ORTNER is an Austrian brand specializing in materials for the construction of fireplaces and stoves. High quality is consistent with the cost of building mixtures.
- Rath HefnerPuts is another representative of Austria, the undoubted advantage of which is the fact that the mixture is not produced in dry form, but in the form of a solution, without requiring dilution.
- Plitonite is a domestic plaster that contains reinforcing fibers. The hardening time of Plitonit fireproof plaster is 30 minutes, which is also quite a decent indicator.
- The stove is a clay-cement mixture in which the optimal proportions have already been met, and all that remains is to add water. This eliminates the need to think about how to prepare a clay mortar for plastering the stove.
As you can see, the choice is quite wide, and allows people with any financial capabilities to choose their own option. Ready-made fireproof plasters can withstand temperatures of 400-600⁰C, so they can be used for the exterior of a stove without fear.
How to fire a stove correctly to avoid cracks
As mentioned above, one of the common causes of cracking of masonry is the so-called overheating. This happens when the oven is operated incorrectly, heats up too much or suddenly cools down. The most susceptible to this are stoves in country houses, where the owners come only occasionally in winter.
But you can also reheat the stove of a residential building, which operates throughout the winter. Smooth heating, ignition at full throttle and with the ash pan and damper open, as well as the use of the correct fuel, guarantees a long service life of the stove and no cracks.
Method one: stretch your legs
Soak the clay for 2-3 days in a strong, wide trough. When it gets wet, put on rubber boots and start kneading it with your feet, gradually adding sand . The solution must be kneaded to a homogeneous consistency. Break up any large lumps you come across, and if that doesn’t work, throw it away. When the mixture is ready, check it with your hands and make sure that all the pieces have been removed. If the solution is prepared correctly, it slides off the shovel, leaving behind a slight trace. A greasy solution greatly stains the shovel, while a thin solution leaves no traces.
READ How to coat polymer clay after baking with varnish
Proportions and preparation of masonry mortar
Since the clay hardens for quite a long time, the entire volume for masonry can be prepared for work at once. To bind 50 bricks you will need about 20 liters. For a Russian stove, the solution will need 15-20% more.
The material must be pre-crushed and soaked for at least a day. You can soak it immediately in the container in which the solution will be prepared. After this, the required amount of sifted sand is added to it, and everything is thoroughly mixed. This can be done with a construction mixer, drill or wooden spatula.
The proportions of clay and sand may vary depending on the fat content of the former. For 1 part of clay, 2 to 5 parts of sand can be added.
To find the correct ratio, prepare several samples of mortar with different amounts of sand. Roll balls with a diameter of 5 cm from each and throw them from a height of 1 m onto a hard surface. After falling, a ball made from the “correct” clay solution should not change shape or crack. If it flattens, the mixture is too fatty. Add sand . If it is cracked, add more clay.
How to prepare the mixture for masonry is shown in the video.
The right job with the right solution
The characteristics of plaster are important for the quality of the coating, but without following the application technique, even an expensive solution will certainly crack during use. Therefore, if you do the work yourself, strictly follow the algorithm of actions.
Photo from the site: homemasters.ru
Preparatory stage
- After completion of the masonry, the stove should stand for at least a month until the end of the initial shrinkage.
- Join the joints, deepening them by 5-10 mm to increase the area of contact with the solution.
- Clean the wall from dust and dirt using a brush and heat the oven to 50-60⁰C.
- Moisten the masonry thoroughly with water so that the brick does not absorb moisture from the plaster, speeding up its drying.
Reinforcement of the finishing layer
photo from the site https://obustroeno.com
It is necessary to reinforce the surface, and there are several options for performing this stage:
- Metal soft mesh. The metal must be galvanized so that the contours of the mesh do not show rust stripes. You need to take care of attaching the mesh at the stage of masonry, leaving wire outlets for it. If this has not been done, then the mesh will have to be secured with screws or nails into the seams.
- Burlap or gauze. Opponents of this method of reinforcement point to the flammability of burlap, while supporters talk about environmental friendliness and the impossibility of ignition in clay. Having decided to reinforce the plaster with burlap, it is cut into squares, dipped in a liquid solution and glued to the wall after spraying.
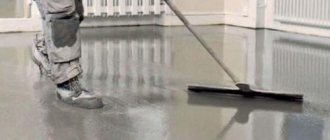
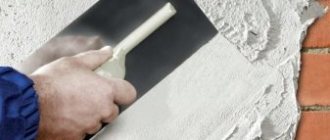
Plastering
photo from the site https://kursremonta.ru
The plastering stage will require work to be performed in the following sequence:
- Padding. You need to use deep penetration primers and prime the surface before applying each layer.
- Spray. To spray, use a brush and the same solution as for plaster, only diluted with water to the consistency of liquid kefir. This is done to fill small irregularities and roughness, so as not to leave air voids that will lead to cracks.
- Plaster. The solution is applied using a trowel and smoothed with a trowel, the thickness of each layer is 2-3 mm, while it is advisable to keep the total thickness of the plaster within 10-15 mm.
- Covering. It is also done with a liquid solution, after which it is rubbed with a trowel. In the case of clay mixtures, grouting can be done with a rag soaked in the solution.
- The stove cannot be lit for the next three days, and the first heating should not exceed half the maximum power of the stove.
If the finished plaster does crack, the crack must be repaired. To do this, it is expanded with a spatula, the surface is wetted and filled with the same composition that was used during the main work. Don't forget about primer and grout.
Now you know exactly how to make a mortar for plastering a stove, and let it please you with its impeccable appearance and cozy warmth for many years to come.
Selection and preparation of sand
To construct different parts of the furnace, different sand . The highest combustion temperature is observed in the combustion chamber. For the firebox, a mixture of clay and fireclay sand is prepared. It is made by crushing fireclay bricks. Essentially, it is crushed clay after low-temperature firing.
Since sand includes different fractions, it must be sifted before work. The solution requires a medium and fine fraction: large particles lead to severe shrinkage of the solution upon drying. In addition, the material must be washed. To do this, you will have to make a device from a metal pipe with a cone-shaped end.
Sources:
https://setafi.com/bytovaya-tehnika/pechi/kak-razvesti-glinu-dlya-zamazki-pechi/ https://rsk-kontur.ru/kak-razvodit-glinu-s-peskom-dlya-pechki/ https://strojdvor.ru/otoplenie/proporciya-peska-i-gliny-dlya-kladki-pechki/
Preparation of the composition
Since the clay solution can withstand temperatures of 100°C, it must have good plasticity.
To prepare a clay solution, you need the following ingredients:
To make a sufficiently high-quality solution, you must use clean and soft water, without mineral additives.
- If you use hard water, then salts can subsequently come to the surface and pass through the whitewash. The best option is to use rainwater when mixing clay mortar.
- Sand is also prepared before mixing. Initially, it is cleaned of large fractions and debris by sifting the sand through a fine sieve. Such actions make it possible to obtain a thin seam. How much sand to use for the solution depends on how fatty the clay itself is.
Attention: Clay mortar for plastering a stove is applied only to a properly prepared surface, you can read about this on our website.
Clay mortar for plastering a stove can be made in several versions; all the work is done with your own hands, and the price is not high.
The need to plaster the stove
A stove without external decoration has a number of negative qualities:
- The appearance of the structure cannot be called pleasant;
- Dust and various debris gradually accumulate in the gaps of the brickwork;
- The oven is very difficult to clean;
- A working stove emits a rather unpleasant odor;
- Through microcracks present in insufficiently high-quality masonry, smoke and carbon dioxide will leak into the room - a mixture quite harmful to human health.
Furnace finishing is used to level out these problems. The choice of finishing materials is purely individual - tiles, concrete coating or a suitable plaster mixture for the stove will be equally effective. However, preference is often given to plaster - it is much cheaper.
To decide how to plaster the stove in the house, you need to choose a finishing coating, which can be made of:
- Evenly laid ordinary brick;
- Facing brick.
Both materials, with proper quality of work and competently carried out jointing, make it possible to achieve a good appearance of the stove even without plaster. To enhance the visual quality of the structure, you can use a water-based varnish that creates the effect of wet stone. All this will prevent peeling of the plaster, which sometimes occurs over time.
The situation is much more complicated with an existing stove, especially if it is laid out crookedly and from uneven bricks. In this case, you will have to decide very carefully what is the best way to plaster the stove, because a mistake will certainly lead to cracking of the coating.
Before plastering a Russian stove, you need to understand the main reasons for peeling of the coating, which come down to the following list:
- Incorrect choice of thickness of masonry joints;
- Violations of the furnace order;
- Regular overheating of the oven.
To prevent these problems, you can use a reinforcing metal mesh with a cell size of no more than 1 centimeter. This mesh is laid on top of the stove and attached to it with 3 mm wire, which is inserted into each row of brickwork during the construction of the structure.
All about clay composition
Making clay mortar for plaster is not so difficult, but the plasticity of the composition and its durability depend on the correct preparation. Let's figure out step by step what to do and how to do it correctly.
Characteristics of clay composition
Clay plaster mortar is quite oily and therefore plastic.
Now, what types of clay material is divided into:
| Fat | They have increased ductility, but can crack when dry. |
| Skinny | They have weak ductility, and when dry they lose strength. |
| Normal | These solutions are moderately plastic, and when dry they become durable. |
Solutions to the problem
Cracked plaster is removed and plastered again.
Sometimes only the plaster cracks, multiple damages are observed, but they do not affect the masonry. In this case, the layer is knocked down and the finishing is done again. If there are few cracks, repair each one separately. They prepare special grouting compounds that can be used to coat the brick stove inside the house to prevent it from cracking.
As an option, use ceramic or marble tiles to cover the outer area:
- porcelain stoneware;
- clinker;
- tiled, tiles.
The material is durable and contributes to the integrity of the plaster layer underneath. Before laying tiles, deep and minor damage to the surface of the stove or fireplace must be repaired.
Popular brands of plaster mixtures
The most popular plaster compositions for the construction of stoves and fireplace installations are the following brands:
- PC400 W oven;
- Typhoon Master;
- Kalina Master;
- Terracotta;
- Stove maker, etc.
Heat-resistant ready-made plaster (thermal plaster) for stoves and fireplaces
When purchasing heat-resistant plaster compositions, it is important to consider the following nuances:
- established limit of operating temperature conditions;
- environmental friendliness of ingredients;
- hardening time;
- moisture resistance;
- resistance to sudden temperature changes;
- purpose of mixtures (for interior or exterior decoration);
- integrity of packaging, production date, etc.
PC400 W oven
The heat-resistant plaster material Osnovit PECHFORM PC400 W is used to treat areas near the hob, side walls of the fireplace, and stove. Permissible operating temperature is up to +400°C. After treatment with the mixture, no additional puttying of the base is required. When using shaped spatulas and rollers, you can make a relief base. The material is universal and is intended for interior and exterior decoration.
The composition is used to treat surfaces made of the following materials:
- concrete;
- composite slabs;
- limestone;
- bricks.
The mixture has an adhesion level of 0.5 MPa, the maximum fraction size is 0.315 mm. The frost resistance of the plaster is 35 cycles of freezing and thawing. The thickness of 1 application layer is 2-15 mm, mass consumption for a 10 mm layer is 12-13 kg per 1 m². Compressive strength reaches 5 MPa.
The mass is applied at a temperature in the range of +5…+35°C. The diluted solution is suitable for application within 2 hours. Coloring is allowed after 2 weeks.
Typhoon Master
The heat-resistant plaster mixture is produced by a domestic enterprise and is used for finishing chimneys, barbecues, and barbecue structures made of brick. The material is based on fireclay clay. The composition is universal and is used for interior and exterior decoration. The mixture is heat-resistant, withstands high humidity, plastic, and easy to apply. Material is consumed at the rate of 1.6-1.8 kg per 1 m².
Kalina Master
Fireproof plaster material is characterized by high strength, because... contains Portland cement. The coating can withstand changes in temperature conditions, surface heating, and is resistant to mechanical damage. When applied, the solution hardens quickly and has good adhesion properties.
Pechnik
Heat-resistant plaster for stoves and fireplaces of the Pechnik brand contains fireproof fireclay clay, cement powder, gypsum, and modifying polymer additives. The material is used for laying stoves and finishing them, repairing old structures, and hardens quickly. The mixture is easy to apply, does not deform when the device shrinks, can withstand heat, and the fire resistance parameter reaches 6000.
Heat-resistant adhesives
To fix tiles when finishing stoves, it is recommended to use adhesive bases with heat-resistant characteristics. Materials must have good adhesion, withstand high humidity and mechanical damage. Heat-resistant adhesives and mastics are produced by Pechnik, Hercules, etc.
Terracotta
Reinforced heat-resistant adhesive is used in finishing stoves, barbecue areas, baths and other heated surfaces with natural stone. ceramic tiles or facing bricks. The material contains kaolin fireclay dust, chemical additives, and astringent components.
The adhesive base has high adhesion characteristics to the surface, withstands heating up to +400°C, and is resistant to high air humidity. The glue is used for finishing surfaces made of aerated concrete blocks and fireclay bricks. The optimal layer thickness is up to 8 mm; the composition can be adjusted within 15 minutes.
Dry powder is diluted with water in a ratio of 1 kg per 260 ml. The material can also be used for leveling chips and adjusting brickwork. The optimal application thickness is up to 1 cm.
Mixture for plastering the Hercules stove
The composition is heat-resistant, used for finishing furnace structures and devices that heat up. The mixture is optimal as an adhesive base for fixing decorative ceramic tiles. The manufacturer offers the material in packages of 5-25 kg. The coating can withstand temperatures ranging from -50...+1200 °C. The adhesive is used for fixing low-porosity tiles and glazed tiles with increased bending strength.
Ready mixes
Plaster can withstand high temperatures for a long time, does not crack or crumble.
The building materials market is filled with various types of fire-resistant products that allow you to plaster stoves yourself. The most popular, well-deservedly recognized, are the heat-resistant compositions “Fireproof”, “Terracotta”, “Pechnik”.
“Fireproof” mixture, available in three modifications:
- smooth plaster;
- simulated mixture;
- composition for tiled surfaces.
When using a modeled variety, it is possible to obtain a textured surface onto which any pattern can be easily applied. The smooth composition is ideal for painting most stoves.
“Terracotta” is another dry mixture, which includes clay and fine fireclay sand with fireproof additives. The solution is intended for treating surfaces made of ceramic and fireclay bricks and can withstand heating temperatures up to 200 ºC.
The composition called “Kilnmaker” includes lime and sand, as well as gypsum, cement, asbestos and clay.
Ways to decorate sauna stoves and fireplaces
After plastering the stove is completed, decorative finishing is performed.
Available types of work:
- painting or whitewashing surfaces;
- applying decorative plaster mixture;
- facing with ceramic tiles.
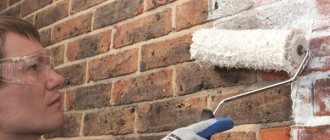
How to paint a stove after plastering
After plastering, surfaces can be painted or whitened. Substrates must be primed before painting. The work is performed using brushes.
When using ready-made paints, experts recommend using water-based products and synthetic materials. The compositions must be heat-resistant.
When used to paint fireplaces, oil paints will quickly darken because... are not resistant to elevated temperatures.
The traditional way of finishing stoves and fireplace installations is whitewashing. A recommended method for plastering with a solution containing lime. Processing is performed in several layers. For every 10 liters of whitewash solution, 100 g of salt is used. You can give a bluish tint to the mixture by adding a small amount of blue to the composition.
Tile laying
Stove structures and fireplaces are lined with terracotta or ceramic tiles. The elements are fixed to a special adhesive base designed for treating surfaces that can withstand heat. Standard glue is not recommended for use, because... the lining will quickly fall off.
Tiles are not suitable for finishing stoves, because... will not withstand temperature increases. Tiles can be used to adjust the corner parts of structures.
The gluing of tiles is carried out in compliance with horizontal and vertical levels. The uniformity of spaces between elements is taken into account. The color scheme and texture of the tiles are chosen to suit the stylistic design of the rooms or country house.
Decorative plaster
Manufacturers produce specialized decorative plaster for fireplaces and stove devices. The material must have high thermal and wear resistance and strength. When using standard decorative plaster mixtures, gauze fabric can be used as an additional layer.
Decorative plasters with acrylic, silicate, silicone, mineral, and heat-resistant bases are recommended for finishing stoves. The mixture, ready-made or diluted in water, is applied using spatulas. The dried coating is treated with varnish or special wax.
Repair of stove plaster
Incorrect oven design has a negative impact on operation. Often for this reason, cracks appear on the surface. Adjacent areas may heat up unevenly, the temperature is often too high, the material where the doors are attached is destroyed, and the structure becomes loose.
If there is no need to reposition the stove or remove the outdated coating, you can perform the following steps:
- the topcoat is removed;
- The crack is widened with an ax or chisel;
- the surface is treated with a brush with metal bristles;
- the base is covered with a primer;
- the solution is mixed;
- the surface is pre-moistened with water, then the damaged areas are covered.
The installation site of the valves is cleaned. Holes are made for thick metal wire. An asbestos strip is attached around the perimeter of the door frame. Then the metal door is put in place and tied with wire. The final finishing is done with clay mortar.
The strength of the seal is affected by the correct mixing of the solution.
Do-it-yourself solution for plastering a stove: step-by-step instructions
The technology for preparing the plaster mixture yourself depends on its composition and proportions.
Clay mortar
First of all, select the clay itself. For lining stoves, the best choice would be a yellow, not very greasy material.
- There should be no foreign inclusions in the clay - debris and stones. Therefore, grind it and sift through a fine-mesh steel mesh.
- Next, pour the clay into a suitable container and fill it with water. The material will be saturated with it and become homogeneous. The acidification time for clay is about a day.
- Prepare river quartz sand - dry it and then sift through a fine sieve.
- Carefully extinguish the lime. To do this, place it in a suitable container and fill it with water. By the time the solution is prepared, the chemical reaction should completely stop.
- Place sand, lime, clay and asbestos fiber in a suitable container in a ratio of 2:1:1:0.2. Mix the dry mixture well.
- Then fill the solution with water. Stir it until the consistency is similar to sour cream.
- After this, check the quality of the resulting material. To do this, dip a wooden strip into the solution. If there is a layer of solution on the stick of less than two millimeters, add a little sand to the material. If the layer thickness is greater than the specified figure, add clay to the container.
To increase the quality of the mixture, it should be prepared not by hand, but using an electric drill with a mixer attachment. This way the solution will be homogeneous, without unmixed areas.
Cement mixture
If you want to plaster the stove with cement mortar, then M-400 grade material is suitable for this. It starts to set after 20 minutes.
Slaked lime must be added to the cement mortar. Such a mixture will have sufficient ductility and strength, and it will be convenient to apply it to the base. Algorithm for preparing the solution:
- First, dry cement is mixed with sifted river sand and asbestos in a ratio of 1: 2: 0.2.
- One volume fraction of slaked lime is diluted with water to a creamy consistency.
- Next, a cement-sand mixture is poured into it. All this is thoroughly mixed until smooth.
Why plaster the stove?
Plaster for a brick oven allows you to extend its service life and ensure its safe use. Ready-made finishing solutions are selected depending on the base material and the required thermal conductivity.
The stove in the house is plastered to solve the following problems:
- increasing structural strength;
- closing cracks and cracks, ensuring tightness;
- preventing the appearance of new cracks;
- the old stone is plastered before creating decorative cladding;
- improvement of external qualities;
- leveling the base;
- finishing reduces the likelihood of fungus and microorganisms appearing in cracks;
- to increase the heat capacity of the furnace.
Plaster allows you to paint or whitewash the stove.
Plaster will not only make the stove decorative, but will also significantly extend its service life.