Techniques for plastering wooden ceilings
The process is carried out in three stages:
- surface preparation;
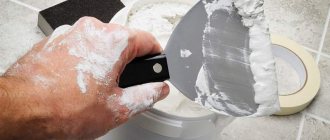
- throwing the composition onto a plane with a spatula and then leveling it;
- sealing and eliminating minor defects with finishing grout.
When performing work, special attention is paid to the areas where the ceiling and wall meet. If this area is not even, special perforated corners are used. The parts are inexpensive, are firmly fixed and hold the corner shape.
On a note! If you need to plaster a large area, it is more convenient to work with a machine.
Before starting work, the type of ceiling is assessed. If it is a log surface, you won’t be able to plaster it right away; there will be a lot of cracks left.
To eliminate holes and the likelihood of the composition collapsing, craftsmen use:
- Grid. This is a simple chain-link that is fixed onto a plane, and plaster is thrown onto it. The mesh provides traction and reinforces the compound.
- Lining made of shingles or plywood.
The composition is also poured onto a solid base without gaps, then leveled.
Types of plaster for wooden ceilings
There is a wide range of compositions on sale, but you can make the mixture yourself.
The following types of mixtures are used:
- Plaster. Suitable for finishing in any room, adheres well to wood, fits comfortably and is leveled. There are different types of gypsum plasters for external and internal use and universal ones - the type is indicated on the packaging.
- Clay. Low cost, environmental friendliness are advantages. Long drying time is a minus. But such mixtures are flexible, easy to apply and can be used in any room.
Important! Drying clay plaster using heaters is prohibited. Forced injection of heat will disrupt the ripening process. This ceiling will crack during the drying process.
With their own hands, craftsmen prepare mixtures based on cement and sand. For plasticity and strength, dry lime is added; for areas with a risk of fungus, copper sulfate and borax are added. Depending on the component composition, cement plasters can be used in areas with high humidity.
Ceiling decoration with decorative plaster and cost
Advice! To make the cement-sand mortar soft, plasticizers are added to it. Ingredients with water-resistant qualities enhance the durability of the finished finish.
How to strengthen a shingle wall for a hanging bedside table?
Renovation of a Stalin-era bathroom built in 1937, where there will be a sink with a hanging cabinet, a flimsy shingle wall. Please advise how to strengthen it so that it can withstand the load and how to hide water supply pipes and sewerage? A box under a hanging cabinet is not the best option, is there another? Thank you!
I don’t see any problems with this work. Take an ordinary circular saw and a vacuum cleaner so that there is less dust, cut it to the size of the pipes according to the mark. To strengthen it, cut out a rectangle 5-6 cm deep with a reserve and place an installation frame made of boards 4 cm wide there, attached with metal plates or screws with old boards and all this is plastered in combination with a mesh of cement plaster with the addition of tile adhesive. But if the old boards are still alive, and they are probably still alive, then screw the cabinet to these boards with long self-tapping screws.
Preparing the surface for plastering
The preparatory stage involves a number of necessary actions:
- Visually assess the evenness of the surface. For ceilings made of timber, with the presence of cracks and chips, an option with a mesh or hemming is used.
- Trim protruding corners and fill voids with planks.
- If there are cracks in the old finish, remove the decor to the base. Clean all areas and level by sanding.
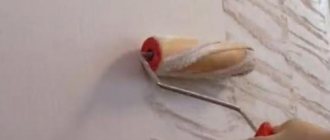
- After leveling, the surface is primed with a deep penetration composition with antiseptic components.
Primer should be applied in at least two layers. First dry the first layer, then apply the second.
Advice! If there is mold on the ceiling, thoroughly clean the areas, treat with a solution of copper sulfate and dry.
Drywall on shingles. Drywall in the bathroom on wooden walls
What we have is a wall made of wood, occasionally pierced with nails, why occasionally, because when they built the wall and covered it with shingles, it was nailed with one nail and the shingles and the board that held the shingles. The boards are punched through one at a time. I screwed all the boards so that they would hold onto the bars, then
Using a laser, we beat off the desired plane so that at least a layer of drywall would fit, because I had a large recess I had to screw in 2 or even 3 pieces of drywall.
Since this wall is located in close proximity to the bathtub and so that it does not sag, in addition to the vertical ones (10 cm wide), I also installed horizontal plasterboard pieces that remained after previous repairs.
We glue the sheet onto pearlfix. Moreover, it is necessary to calculate so that to the right of the sheet there is space left for attaching the next sheet. For precise fastening by level, you can use a regular bubble level (with which you will screw yourself by peering into the bubble, together with the rule, or screw the screws in advance using a laser so that you don’t crush the sheet. I did it as follows, on the floor and on the wall on the left , marked the line where the sheet should be located, when attaching it to the wall, I first pressed the sheet with the 2m rule to these marks and then the laser located on the left helped to install the sheet finally in the plane. If you made a slight mistake and threw in little solution and the sheet did not grab in this place and the sheet bends in a given place, then take foam, make several holes in this place and pump in mounting foam so that the sheet does not bulge, secure with self-tapping screws. I applied the solution using a laser so that the top of the solution's lip was slightly higher than the level of the intended plaster fastening After gluing, it is necessary to fill the seam around the perimeter of the sheet so that there is no deflection at the joints.
And yes, when I pressed the sheet to the mortar, sometimes I have to hit the wall hard with the rule; it is convenient to use the rule with cutouts for the arms. It’s not wise to hit the sheet with your fist, an undesirable slope may appear, which you will then have to straighten either with adhesive or apply tile adhesive there again, so that later you can piss with boiling water if your tiles fly off)
Additionally, I then screwed the sheet itself with self-tapping screws.
I simply glued it onto a brick wall and primed it twice with Serizite St17.
If the sheet bends by a fraction of a millimeter somewhere, then again this is not a big deal, because this can be leveled out either with waterproofing, by applying more tile glue in this place, or with tile adhesive, by spreading tile adhesive onto the tile itself.
Why did I choose this option? Yes, it would be more correct to tear down the wall and put it up again, but behind the wall the renovations in the kitchen have already been done. The worst thing is when you are doing renovations in a residential apartment and there is no way to move out of the apartment during the renovation. Therefore, I am doing renovations in each room step by step. On the other hand, if I had the money, I would live in Miami. Yes, we could move out and renovate the entire apartment at once.
Tools and materials for work
The master will need the following set:
- container for mixing the composition;
- dry mixture or ready-made;
- water for dry powder;
- drill with a nozzle for mixing;
- set of spatulas;
- rule;
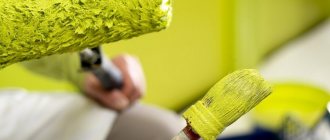
- brushes and roller;
- construction trowel;
- primer with antiseptic;
- level or beacons.
The work is supposed to be carried out at height; a stepladder and personal protective equipment will be useful. To level the finished surface, use a construction float or sandpaper of fraction No. 120.
Technique for applying plaster composition
When figuring out how to plaster a wooden ceiling, owners can leave the surface treated with a primer for a long time. It is not recommended to throw the mixture onto a dry surface, so the surface is sprayed with a spray bottle or primed again.
You need to add the mixture in three steps, the algorithm is as follows:
- The first layer is the thickest. Local cracks and openings are filled and sagging is eliminated. Level out unevenness with a wide spatula; the edges of the filled areas should be in the same plane as the general surface.
- While the first layer is not dry, add a second layer. It is thinner than the first, applied over the entire surface, then carefully leveled. The thickness is selected according to the level or installed beacons.
- The third layer is applied only after the second has set. There is no need to wait for complete drying; the thickness of the last layer depends on the finish.
Features of applying the third layer:
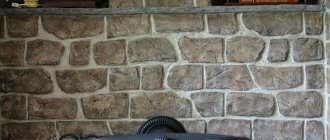
- If the ceiling is covered with textured plaster, the last layer plays the role of decoration. In this case, the pattern is formed during the process of leveling the composition.
- When facing with piece slab material, a third covering layer is not needed - the finishing is laid out on the second leveling layer of plaster.
- Wallpaper or painting requires maximum surface evenness. The third layer of plaster is applied as thinly as possible, dried and sanded until smooth.
Advice! Sanding the ceiling after plastering is only necessary for finishing wallpaper, painting, and whitewashing. If the surface under the cladding has dried, it is primed - this will increase adhesion to slab or wallpaper adhesive or paint.
How to plaster on beacons correctly
First of all, it is worth noting that leveling the ceiling with plaster is not an easy task, requiring some skill and experience from the master. A person who has never held a trowel in his hands before will most likely suffer a fair amount of work before he can get a more or less acceptable result. It is often wiser to leave the work to professionals rather than try to save money.
The technology for plastering the ceiling will be discussed using the example of gypsum plaster on beacons up to 20 mm thick. At the end of the list there are nuances for other cases.
Required tools: usually a spatula, a trowel, a plaster trowel, a roller, a large bucket, a stepladder, a construction mixer or drill with an appropriate attachment, a laser level or level.
General technology for applying gypsum plaster to the ceiling along beacons:
- The old finish is removed from the ceiling with a spatula right down to the concrete floor slabs and rustications (joints).
- The surface is carefully primed.
- Using a laser level attached to the ceiling, beacon installation lines are marked.
- The solution is stirred in a bucket with a mixer. The ratio of dry mixture and water is taken according to the instructions on the package. The consistency of the solution, ready for application, should be similar to thick sour cream.
- Blobs of gypsum plaster are thrown along the beam.
- The beacon is installed in a given plane and leveled.
- Between two beacon profiles, a plaster solution is applied to the ceiling.
- Using a rule or a trowel, the solution is pulled together and leveled.
- After about an hour, the excess plaster is trimmed with a spatula.
- The process is then repeated until the entire ceiling area is treated.
- When the solution has set, it is moistened with a sponge and smoothed with a metal spatula (grouting).
- Beacons are removed. The remaining channels are covered with the same plaster.
- The ceiling surface is ready for finishing. This can be decorative plaster, wallpapering or painting.
The given plastering technology is most often used when decorating living rooms where the ceiling does not have significant differences in height. Under the best initial conditions, when the difference between the most convex and concave point in height is within 3–4 mm, the surface is leveled with putty.
Application of gypsum and cement plaster with a thickness of more than 20 mm requires installation of a reinforcing mesh on the ceiling after the first layer has set. Material: fiberglass or metal. The second type is chosen if the thickness of the finish is more than 30 mm and when working with cement mortar (it is heavy and causes significant shrinkage).
Wooden walls and ceilings under plaster are reinforced not with mesh, but with shingles.
If the unevenness of the ceiling is more than 50 mm, gypsum board or suspended ceiling should be preferred to plaster.
The final stage of processing the plastered ceiling
The choice of cladding options depends on the capabilities of the user.
How to properly putty a ceiling for painting with your own hands and the cost per m2
There are several finishing methods:
- Whitewashing or dyeing. The option is budget-friendly and quick in terms of time.
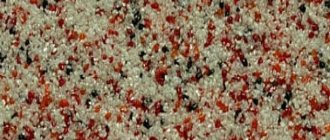
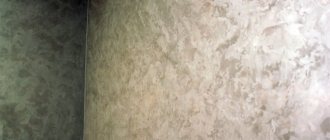
- Decorative plaster. A simple method allows a beginner to cope with the job. For the finishing layer, a special composition is purchased.
- Wallpapering. A perfectly flat and smooth surface is required so that defects do not appear under the fine finish.
On a note! Venetian textured plaster looks beautiful. The finish lasts a long time, has heat-protective properties and tolerates moisture well.
Application of putty
Sometimes plastering the surface is not enough; you need to putty. The mixture is used to give the ceiling ideal evenness, for example, before painting and wallpapering. Ceiling putty is applied in a thin layer. It has high ductility rates.
On a note! Thin plaster and finishing putty are not the same thing. The grain in plaster is always larger than in the putty mixture. Therefore, you cannot replace one composition with another if we are talking about fully leveling the surface for finishing with wallpaper.
Number of layers applied
The putty mixture is usually applied in several layers, and their number depends on the unevenness of the surface to which they are applied. Evenness, as a rule, is checked by the building level.
If the surface difference is less than 3 mm, then to level the ceiling with putty you will only need one thin layer of material. But the ceiling surface is first treated with a deep penetration primer.
If the difference is 3-10 mm, then the putty will have to be applied in several layers. Please note that in this case it is necessary to prime not only the surface of the ceiling, but also each applied layer of putty after it has completely dried.
If the surface difference is more than 1 cm, then experts recommend using a reinforcing mesh as a fastening element installed between the layers. Polyester mesh is used as standard - durable and reliable. Some craftsmen use serpyanka mesh. But in any case, the reinforcing frame is attached using PVA-based glue.
In general, experts try not to level differences of more than 5 cm with putty mixtures - for this they usually use other materials. For example, plaster or drywall. But this is already a thing of the past, because a completely unique leveling material has appeared on the market - “rotband” putty.
Leveling the ceiling with a rotband is a modern way to do without complex and time-consuming processes. This is European class quality and simplicity of technology.
Features of choosing putty for wooden ceilings
To select a high-quality mixture, a number of nuances are taken into account:
- there should be no toxic components;
- the more plastic the solution, the more uniform the coating will be;
- dilute dry mixtures only according to the instructions;
- It is more convenient to work with ready-made putties.
Types of putties for ceilings:
- Plaster. Soft mixture with high adhesion properties.
- Adhesive. It costs more than gypsum, but can be of different colors.
- Latex. Applied in an extremely thin layer, it resists water and fungus.
- Oily. Used in areas with high humidity.
- Acrylic. It can be of different colors, does not turn yellow over time, and is flexible.
Advice! There are different types of putty: starting, finishing and universal. The first is used to seal defects up to 0.5 cm, the second is applied in a layer of no more than 2 mm. Universal suitable for all types of work.
Application technique
When choosing putty, the purpose of the room is taken into account. An acrylic composition is suitable for areas with high humidity; the mixture does not smell, is quickly applied and stretches well.
We putty the wooden ceiling like this:
- prepare the mixture;
- treat the ceiling with a primer, do not dry it;
- apply the putty with a spatula, stretch it to a layer thickness of 2 mm;
- hold the spatula at an acute angle to the plane, this makes it more convenient to apply;
- If the first layer only leveled out minor defects, after drying it, apply the second one.
As soon as the surface is dry, sand it with a construction float or sandpaper. Then remove dust, prime and dry the surface. What remains is the stage of finishing decoration with any chosen material.
Conclusion
Using wooden shingles for plastering work reduces costs. It is not difficult to work with it, the main thing is to choose the right strips and fill them onto the surface. When applying the solution, its maximum thickness must be observed, otherwise it will cause rotting of the load-bearing structures.
The video in this article will provide an opportunity to expand your knowledge on this topic. If you have any questions while reading the publication and after it, please ask them in the comments, we will be happy to answer them.
To level the ceiling surface and prepare it for finishing, traditional plastering is still used. Plastering a wooden ceiling is relevant in private buildings made of wood materials. Compared to other methods of leveling the ceiling surface, plastering offers many advantages. The cost of the plaster mixture is much lower than the price of drywall and materials for making the frame. The main advantage of leveling with plaster is maintaining the height of the room.