Glossy ceiling paint is an option only for perfectly smooth surfaces. Gloss will highlight imperfections; the higher the gloss level, the stronger. There are no special ceiling shiny paints and varnishes (paint and varnish materials), but you can use compositions intended for painting walls and floors. There are no fundamental differences in the preparation of the base and application technology between glossy or matte ceiling paints.
Advantages and disadvantages of glossy ceiling paint
Advantages of glossy paint:
- wears out slowly;
- easy to clean;
- looks attractive;
- visually expands the space (light shades only).
Disadvantages of shiny coatings:
- highlights defects;
- pollution is immediately noticeable.
Attention! The price of glossy and matte paintwork materials is the same, but preparing the surface for applying a glossy coating takes much more effort and time. If you hire professionals to do painting work, the final cost will be higher.
Types of glossy paint
Based on the type of thinner, paint and varnish materials are divided into two main groups:
- Organo-dispersive - on organic solvents (drying oil, gasoline, white spirit, etc.).
- Water-soluble - water-dispersion or water-emulsion. They are most often used for interior decoration.
Two more types of paints are powder and solvent-free. They are not used when painting ceilings.
Paintwork materials also differ in the type of film-forming component - resin. It makes no sense to list all the types, since there are a lot of them. The names do not give any idea of the final result. It is best to read the manufacturer's performance information on the label. The following parameters are important: consumption, drying speed, hiding power. For the kitchen, bathroom, toilet, waterproof compounds with antiseptic additives are needed. Among facade paints you can find self-cleaning, dirt-repellent, etc.
Attention! Finding glossy paint (especially water-soluble paint) is difficult. Latex paintwork materials with shine are not produced at all. If you couldn’t buy the desired glossy color, then the only way out is to paint the ceiling with matte paint and coat it with shiny varnish.
Water-based glossy ceiling paint
Advantages of water-based coatings:
- no unpleasant odor, low toxicity;
- dry quickly;
- You can get almost any shade by tinting;
- easy to apply, simply clean off from tools.
Disadvantages of glossy water-based ceiling paint:
- work can only be performed at temperatures above +5°C;
- You cannot wash a ceiling painted with water-based emulsion; the coating will gradually wash off.
Acrylic gloss paint
This type of water-dispersed paints and varnishes is most often used for painting all surfaces inside the house. The film-forming component in them is acrylic resins. Paints of this type have all the advantages of water-based paints, do not fade, are affordable, and fit well on almost any base. Advantages - durability, water-dispersion coatings (including acrylic) can be washed frequently.
Acrylic gloss paint
A type of acrylic gloss paint for the ceiling is aerosol. It is sold in cans, suitable only for wooden and metal surfaces, and is relatively expensive. It is difficult to apply, you must wear a mask, but the palette contains brilliant colors, including metallic ones.
Another type of acrylic paint with glitter is decorative pearlescent (with the effect of natural silk). It is applied over two layers of primer, tinted to match the color of the base coat. “Silk” compositions are not suitable for painting wallpaper. Option for a ceiling with unevenness - add special pearl beads for paints to the composition with a silk effect.
Organosoluble gloss paint and enamel
For interior work, paintwork materials of this type are used if there is no choice. Disadvantages: pungent odor, toxicity (the room must be well ventilated), fire hazard. This group includes:
- Oil paints (on drying oil). They are used to protect wood. According to the main characteristics, these compositions are not inferior to water-soluble ones, but they dry longer and do not allow air to pass through.
- Alkyd enamels and aerosols. These are artificial analogues of oil paints based on alkyd resin and solvent. They dry faster and are suitable for coating wood, concrete, and metal. Alkyd aerosols, like acrylic ones, are rarely used for painting ceilings.
- Polyurethane enamels. They are suitable for coating concrete, stone, brick, wood, and metal. The advantage of coatings based on polyurethane resins is their resistance to chips, scratches, and abrasion.
The only advantage of organic-dispersive paint compared to water-soluble paint is a large selection of glossy shades.
"Snowball"
This paint has the best price-quality ratio among all those mentioned. The paint is suitable for any type of surface. Thanks to its high hiding power, it allows painting in one layer. The composition allows high-quality combination of materials with different textures, which in some cases is necessary.
Almost all compositions of this paint are not resistant to moisture, but they are environmentally friendly and hypoallergenic. It is important to remember that the specified paint consumption parameters, which are indicated by the manufacturer, differ by 2 times from the actual ones.
The paint is water-based and provides high-quality surface coverage. The composition is not expensive in terms of cost, which makes it accessible for use by home craftsmen.
Among the negative features are low coverage, high consumption and strict requirements for priming the base surface.
Preparatory work depending on the type of surface
The first step to a flawless painting result is surface preparation. General rules:
- Remove furniture, household appliances, and other items from the premises. Cover heavy items with film. Remove the lighting fixtures.
- Remove old coating.
- Apply primer. It reduces paint consumption and improves adhesion to the surface. The primer is selected taking into account what material needs to be painted, and on the same basis as the paint and varnish. For example: an alkyd enamel was chosen for a concrete ceiling - buy an alkyd primer for concrete.
Drywall and gypsum fiber sheet (GKL and GVL)
Preparing gypsum plasterboard and gypsum fiber board ceilings for painting:
- Using a spatula, move it along the places where the sheets of drywall are attached and push down the heads of the screws on which it will catch.
- Wipe the ceiling with a dry cloth.
- Apply acrylic putty primer to all corners using a brush.
- Apply primer to the entire surface with a roller. After drying, apply a second layer.
- 24 hours after completion of priming, prepare the seams between the sheets for filling with putty. Jointing is often required.
- Cover the joints with putty mixture and seal with serpyanka or reinforcing tape. Apply a second layer of putty to the seams, wait until it dries, and sand with sandpaper.
- Caulk all the drywall. After drying, remove any unevenness with a spatula. Cover the floor and walls with film, put on a mask or respirator, and sand the ceiling with a special grater.
- Apply the second (finishing) layer of putty. The surface should be perfectly flat. Another coat may be needed. After drying, sand the ceiling again with a float or sandpaper with the finest grain. For glossy paint, sand especially carefully.
- Remove dust.
- Apply a coat of paint primer and leave to dry for 24 hours.
Concrete ceilings
Preparing to paint a concrete ceiling:
- Inspect the surface. Knock down the protrusions with a hammer or hammer drill, and widen the cracks with a knife.
- Prime all defects and fill with repair mortar. You can use painting fiberglass.
- Apply 2 coats of primer (the second after the first has dried).
After priming, complete the preparation of the ceiling in the same way as a plasterboard ceiling (see points 7 - 10).
Wooden surface (plywood, chipboard, fiberboard)
Preparing to paint a wooden ceiling:
- Sand the surface with coarse sandpaper, an angle grinder or a drill with a special attachment.
- Apply impregnation - antiseptic (against rot, mold, etc.), if necessary, fire- and moisture-proof.
- Fill cracks with wood putty.
If the ceiling is new, without defects, then two layers of primer or drying oil (under oil-based paints and varnishes) are sufficient for the paint. If there is damage, the wood is puttied in several layers, carefully sanding each one. A paint primer is applied over the finishing layer of putty.
Ceilings made of plywood, chipboard and fiberboard are prepared in the same way. First, (as on drywall), the heads of the screws are recessed. Putty is used on wood, a special primer is used for chipboard, fiberboard and plywood.
Attention! Glossy paint for ceilings made of wood, plywood, boards based on shavings and sawdust is the worst option, since it is impossible to achieve a perfectly smooth surface on them.
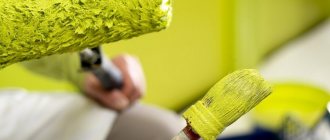
What tools are needed to paint the ceiling?
What you will need to paint the ceiling:
- ladder;
- bath (tray) for paint;
- paint rollers for doing the main part of the work - “fur coats” with short pile are suitable for glossy paint, foam rubber and velor are not suitable;
- flat paint brushes of different widths for treating hard-to-reach places;
- masking tape (tape) to protect surfaces in contact with the ceiling.
Ceiling painting tools
It is better to finish a large area ceiling using a hand-held spray gun. You can rent a machine for mechanized painting. The layer applied by spray is thinner and smoother than when using rollers. The possibility of fibers sticking to the painted surface is excluded.
Technology of applying glossy paint to the ceiling surface
Painting the ceiling with glossy paint is a particularly important task. Coating defects remain visible. It is much more difficult to achieve a flawless result without experience using a glossy coloring composition than with a matte one.
Painting the ceiling with glossy paint using a lamp
Useful information: “What and how to paint the ceiling in the bathroom”
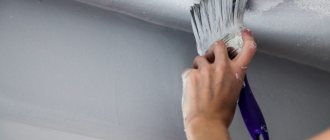
Step-by-step instruction:
- Install lighting to immediately see and correct any defects. Use a 15 W energy saving lamp. Attach it to the ceiling on a temporary tripod, to the side of the paint strip, and move it as the work progresses.
- Prepare the coloring composition according to the manufacturer's instructions. For the first layer of solvent, add more. Pour paint into the tray correctly in small portions.
- Apply paint with a narrow brush to the corners and along the walls.
- Dip the roller into the bath. Roll several times to evenly distribute the composition in the “fur coat”. If you don't do this, there will be stains on the ceiling. After the pile becomes saturated during work, lower the tool into the tray and draw less paint. This will help avoid the appearance of “sagging”. You can roll out the roller on a sheet of hardboard or a piece of linoleum.
- Apply paint from the window across the direction of the light rays. The movement of the roller should be zigzag, reminiscent of the Latin letter W or N. The next letter is drawn next to it, with a slight overlap into the adjacent strip.
- After completing the first layer, remove excess paint with a dry roller.
- Apply a second coat of paint (preferably with a new roller), this time moving along the direction of the sun's rays.
How to paint a ceiling with a roller
Usually two layers of paint are enough, but three can be done. The last layer is always applied along the direction of incidence of sunlight - then unpainted areas and marks from the roller are less noticeable.
Important working points
It is better to start applying paint from the window, and then gradually move deeper into the room. To properly cover the ceiling, you may need from one to three layers, but in most cases two are sufficient. If you want to achieve a truly bright, effective and dazzling gloss, polish the surface after drying. This procedure can be carried out from time to time throughout the life of the coating.
Layers can be oriented in different ways during painting.
- You can place them crosswise - for example, if you applied the first along the room, then the second should be placed across. This option will allow you to get the most even coverage.
- The Finnish method provides that the paint is applied parallel to the window, that is, perpendicular to the direction of the rays.
- With the Swedish painting method, on the contrary, the composition is placed parallel to the rays of the sun that enter the room through the window.
Since a glossy paint composition reflects light well, it is worth paying attention to the issue of how to orient the layers, because this type of coating, unlike matte, actively interacts with the sun throughout its entire service life. This property must be used to the maximum to give the room the desired look.
Each new layer should be applied only after the previous one has completely dried.
Before applying the first layer of paint, do not forget to let the putty or other material that you used to level the ceiling dry thoroughly, and then thoroughly dry the previous one before applying each subsequent layer. Thanks to this, you can avoid the appearance of cracks, bubbles and other defects in the paint, which can greatly spoil the appearance of the surface. To the point where the paint will have to be removed and new applied.
Even if you have never used glossy paint to cover anything before and this is the first time you have thought about painting the ceiling with it, do not be afraid to choose this option. And if your ceilings are already smooth or you are willing to spend a little time and money to remove all the flaws, bringing the condition of their surface to ideal, then you can get an excellent result by putting gloss on them.
How to paint the ceiling in an apartment?
You will find the answer to the question in this article! You will also probably be interested in learning how to whitewash a ceiling using old whitewash.
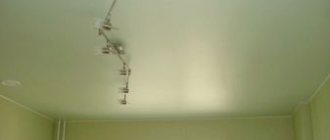
Any room with such a ceiling will truly be transformed: it will sparkle and shine, it will begin to seem larger and more spacious. If it has a window, the sun will play on the glossy paint, filling the room with additional light. Due to the fact that the glossy paint coating is also durable, moisture-resistant, abrasion-resistant and easy to clean, it will be an excellent ceiling finishing option that can breathe new life into your interior and delight you, your family members and house guests for many years.
Difficulties that arise with painting the ceiling with glossy paint and their solutions
To make ceilings painted with glossy paint look perfect:
- Buy paintwork materials from one batch, with a reserve. There may be differences in shade between different supplies, even from the same manufacturer.
- Do not thin the glossy paint for plasterboard ceilings too much. Excess liquid may soak the top paper layer.
- When applying, maintain uniformity and direction, otherwise you may end up with stripes that have a shade different from the main one.
- To correct paint defects, wait until completely dry and apply another coat. If this does not help, then you will have to completely remove the paint with sandpaper and redo the whole job.
Do not use electrical appliances to speed up drying. It is better to immediately choose quick-drying paint.
Caparol
This paint and varnish composition is highly durable, therefore it is most often used for painting surfaces in country houses, as well as in the bathroom. The manufacturer specializes in the production of silicone compounds that, when applied correctly, can hide minor surface defects.
The covering power of the material is quite high, which allows for perfect coverage even in 1 layer. The finished surface is easy to clean and has dust- and dirt-repellent properties. Moreover, it is also water-repellent.