Technology and benefits
The structure of the putty's liquid consistency is similar to paints and varnishes that promote self-leveling.
Production technology allows:
- spread evenly, forming a perfectly flat surface;
- fill all irregularities and small cracks.
It is presented by different manufacturers, the components included in its composition may differ, but it is usually created on the basis of polyester resins.
Advantages of liquid putty:
- plastic coating for the wall, leveling the last layer more evenly than the previous ones;
- eliminates minor roughness, which is especially important before decorative painting of walls;
- creates a quality finish, on which the quality of decorative finishing processed on top and based on it depends.
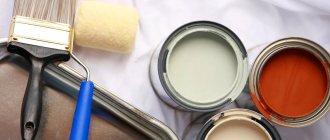
It is sold ready-made in construction and finishing materials stores in a plastic container, and after opening it is stored for 2 to 4 months if the container is tightly closed and air does not penetrate inside.
Work progress
But you will have to pay to use this technology.
Preparation
Proper organization of work will be very important:
- firstly, it is necessary to carefully prepare the entire working surface, it must be perfectly flat;
- secondly, choose such a liquid consistency of the putty that it easily sticks to the roller, but does not drip from it; Experimentation is indispensable here.
Helpful advice! If you do not yet have enough experience in creating such a putty, then we advise you to go from thick to liquid gradually, constantly testing the achieved result. Prepare a test board and test for ease of use, gradually increasing the liquid state of the mixture.
Puttying walls with a roller when it comes to decoration may not seem like it at first, but you have to “endure” and then you won’t be able to stop
Job
The first steps of the finishing process will not differ at all from future work with a spatula, so you will still have the opportunity to decide what to use in the end.
So:
- thoroughly clean the entire work area;
- We carry out wet cleaning even from dust and let the surface dry completely;
- then we prime all joints, cracks and fastener entry points, if putty is supposed to be applied in one layer;
- if the putty is in three layers, when the reinforced mesh goes next to the putty, then we prime the entire working surface;
Puttying with a roller is also possible on the ends - it’s all just a matter of choosing the right size of the roller itself
Helpful advice! You have no choice as to how many layers to apply if Venetian plaster is your goal next. Here, it is definitely necessary to make 3 layers, the middle one from the mesh, or 3-5 layers of just preliminary plaster.
- when the primer is completed, wait for it to dry completely, but in the meantime we prepare and test the putty;
- Then let's get down to the main thing:
- dip the roller into the plaster and
- with active movements we begin to move the roller along the surface to be treated;
- Don’t be upset that the first pass will produce stripes of putty;
- Vigorous movements back and forth will eventually make the surface uniform;
In the end, you can create your own drawing - this is another unexpected plus of the roller
- when uniformity is achieved in one direction, say horizontally, sweep vigorously vertically several times;
- as a result, the surface should acquire a uniform color without grains of the mixture;
- Thus, it will not be possible to work over the entire surface at once, so we advise you to divide it into “squares” and work on them, finished with the first, proceed to the next, and so on;
- as you work, you gain confidence that you are doing everything correctly, and most importantly, confidence in your movements, motor skills are developed quite quickly;
- and this is very important, because in this way it will be necessary to putty two or even three times, but this already depends on subsequent tasks; Let's say that for painting one layer will be enough, for wallpaper, most likely, two will be needed, and for subsequent decorative plaster - three, and no less.
Puttying drywall with a roller will allow you to create a surface of any texture, if only you had the right tool at hand
Liquid putty for repairs
Puttying with a spreading compound is carried out when finishing walls on already prepared surfaces using other primer products.
Individual compositions for liquid putty are produced depending on the specific type of wall covering.
Liquid coating can be used for:
- wooden structures;
- plasterboard surfaces;
- plastic surfaces;
- metal;
- aluminum;
- polyester and others.
You should select the required type of liquid putty for the surface, and also decide on the type of work that you plan to carry out.
Types of mortar and types of putty:
- latex solution eliminates small cracks and seams on drywall sheets during finishing, convenient for processing arches and niches. Contains fine-grained particles that promote uniform distribution on the coating;
- acrylic composition is used for internal and external surface treatment of concrete and plasterboard, leveling significant damage;
- The façade type of putty is waterproof and prevents the formation of mold or mildew. Designed for the restoration of facades, walls and areas exposed to precipitation and when priming rooms with a high concentration of humidity, for example, a bathroom.
This mixture is applied with a layer thickness of no more than 1-2 mm, and in some places less than 1 mm is sufficient on the starting layers of any type of plaster or other types of putty mixtures.
Roller application
Before applying the liquid mass yourself, you need to choose the right type for the type and material of the wall.
When applying putty you must:
- read and follow the instructions for use;
- clean surfaces from dust;
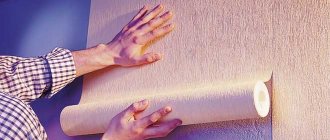
- Use a roller for application.
To apply the liquid mass evenly with your own hands, you must use a roller.
However, you cannot putty the corners with a roller, and the applied layer will be too thin, so if there are rough spots, 2 or 3 of them will be needed after the previous one has dried.
Other application methods
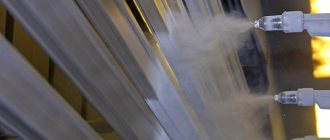
When applied by spray, the layer is thinner, and even with a layer thickness of less than 1 mm, due to its elasticity, the dried mixture does not crack and lasts 10 years without loss of properties.
When choosing the type of composition, you should consult with the seller regarding the size of the spray nozzle.
How to apply liquid putty to walls: with a roller, brush or other method
Putty in liquid form creates a uniform layer on the wall when renovating a room, and is relevant for use among other primers before painting walls. The liquid finishing material dries from 4 to 7 hours, depending on the thickness of the layer when applied and at a temperature of + 6 to +25 degrees and air humidity of 50% and above. Helping to create a smooth surface, this type of primer is also used today when renovating a room for walls before their subsequent painting.
To get a high-quality result, a little mixture is enough for finishing putty, without resorting to additional mechanical stress to level the wall surface. Liquid putty serves as the most acceptable type of finishing before painting walls, where the cosmetic layers of materials must be thin, and the base for applying paint to the surface must be perfectly smooth. This is the simplest decorative surface finish, but it looks great, which is why it has been popular for many years.
Let's figure out how to organize the workflow in this case.
- The main working tool is a roller; the texture that you get in the end directly depends on it. There are two main options - fur, which leave a larger texture on the surface, and foam rubber, which make walls or ceilings very textured. To make it clearer, below is a diagram with application samples using different devices; choose what is best suited for your situation;
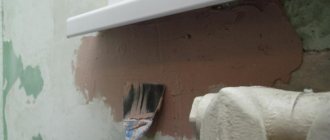
When applying putty to drywall, its working surface should be pre-prepared. The joint is primed and a mesh is glued on. A special solution is used to fill the seams and cover the screw heads.
It is necessary to remove excess composition. This application of putty with a roller will allow you to achieve high-quality leveling of the treated surface. You will get rid of defects and roughness and create a uniform, smooth coating.
- if it is necessary to process an already leveled surface. For the purpose of further painting or wallpapering;
- for decorative cladding.
Drywall these days has firmly established itself in a leading position of popularity among other construction and finishing materials. It is used for leveling walls and installing partitions, creating suspended ceiling structures and other original interior elements. It can become an excellent basis for any decorative finish - it can be wallpaper, paint, ceramic tiles and even artificial stone.
The advantages of water-dispersion solutions also include the possibility of using them on unprepared surfaces, that is, they do not have to be too thoroughly cleaned of dust from the walls and ceiling. After drying, the primer penetrates the pores of the material and creates a thin coating on its surface, on which the putty solution will fit well.
Useful video
Applying putty requires skill and not everyone gets it right the first time. But it is necessary to gain the necessary experience, since for a private builder, mastering a trowel, brush and roller is no less necessary than working with complex tools, screwdrivers and hammer drills, and the ability to lay bricks and blocks. Finishing work, plastering and puttying are an important part of the construction process and require professionalism. But there are also simplified methods for applying putty, for example, applying putty with a roller. This is a method for puttying smooth walls, including plasterboard and plywood cladding. It must be said that to level walls with significant curvature and defects, applying putty with a roller is not enough, even in several layers with drying. The roller is used for decorative putty, local leveling of plaster and applying thin layers of putty on drywall under wallpaper - to even out the color base for light finishes, seal seams and holes in self-tapping screws, and also protect the gypsum layer from moisture and deformation. It makes sense to take a closer look at performing thin putty with a roller.
Putty with a roller
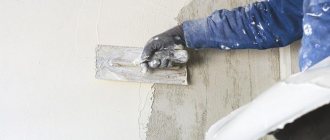
Stripping putty is a method that any novice craftsman can master. The main condition is a perfectly flat surface, for example, plasterboard cladding. The advantage of this simple method is low putty consumption and speed. Using a roller and a scraping spatula, you can prepare walls for painting and wallpaper. Sequence of work for plasterboard bases:
- Sealing seams and correcting local defects - cracks, improper fastening with self-tapping screws, chips of the gypsum base, and so on. This work is not difficult and can be done quickly. The putty is applied with a spatula and leveled, and after drying you can sand down the unsuccessful areas with sandpaper;
- Dry the putty completely, and then treat it with a penetrating primer to strengthen the base and increase the adhesion of the finishing layers. The soil must dry completely before the next operation - applying putty;
- Next, a plastic solution is applied to the wall using a short-pile fur roller (pile 3 mm). The solution is made more liquid than for conventional putty. The best choice of material is a ready-made dry mixture with modifying additives that increase the life of the solution. For example, thin finishing putty. The work itself is not much different from painting: dip a roller in a ditch with a solution and roll the mixture over the base. Next, you will need a large spatula (working surface length from 600 mm). The surface texture turns out to be very interesting, and in some cases they stop there. The base for painting is decorative and completely ready, and there is no need to use a spatula. But if you need a flat surface for wallpaper, then you need to peel it off - almost literally: hold a metal spatula perpendicular to the base and peel off the entire mortar mixture. In this case, a thin, even layer of putty will remain on the surface; all cracks, pores and minor defects will be covered with the solution. You can repeat this operation as many times as is rational for a better result. It is important to perform each subsequent peel crosswise to the previous one.
After drying, the putty can be sanded - for the ideal smoothness required for fine painting, use a sander; under the wallpaper, just lightly walk with fine-grained sandpaper or a fine-mesh plaster mesh. Marks from corners and spatula blades are also easily removed. The peeling method is excellent not only for leveling on drywall, but also for sanding on a plastered wall in order to cover all the rough edges and create a solid one-color base for finishing. It is also possible to repeat the putty by stripping until a layer of the required thickness is created. Although this method takes longer than the usual application of the mixture with a spatula, the quality is guaranteed to any finisher, even an inexperienced one, and thin layers with drying will be even stronger than one thick one. As for the classic application of putty to the desired thickness, this task is for a professional.
We simplify puttying activities
Let us answer - it is possible and even necessary if you use a roller for the job and putty the walls under wallpaper or other finishing materials with this very tool. Of course, you will have to pay for your happiness and saving two hours of time, but the payment will only be for the benefit of the common cause.
The photo shows a whole family of rollers for applying decorative putty with your own hands - no instructions for use are required here
The fact that a roller is an excellent tool can be understood by two common situations in which it is used:
- when painting, when time is saved significantly, especially when working with large areas;
- and when applying decorative plaster - and here, frankly speaking, it turns out almost “according to Lenin” - we say decorative plaster and we mean rollers of the most different shapes and with a variety of patterns on the surface.
And these two situations are part of the positive baggage that pushes you to use a roller when applying putty.
Negative baggage
But there are also negative aspects to this baggage:
- the main one is the high labor intensity of puttying large areas with a conventional spatula;
- further, you constantly have to level the created surface with a spatula, with the understanding that everything can finally be leveled only with a grinding machine.
These two points simply force you to use a roller when puttingty.
Applying putty with a roller requires some skill, which is best practiced beforehand.
Advantages and disadvantages
So, the advantages are obvious:
- great time savings;
- it is much easier to carry out work on the ceiling, and when using a roller with a long handle, it is also safer - there is no need to use sawhorses.
Here is an excellent answer to the question whether it is possible to apply putty with a roller - no, it is possible, but it is necessary, when it simplifies and speeds up the whole process so much
But, he will say frankly, roller plastering also has its disadvantages:
- firstly, it is more difficult to control the consumption of finishing (construction) materials, or rather, let’s say more definitely - overconsumption cannot be avoided ;
- secondly, as a rule, one layer of putty is not enough; after drying each previous one, you have to apply two, or even three;
- thirdly, a perfectly flat surface is required; at least, there should be no trace of self-tapping screws sticking out from under the drywall;
- fourthly, not every putty is suitable; here you will have to choose from a large list only those that can be used in liquid form;
Another argument in favor of an affirmative answer to the question of whether it is possible to putty with a roller on the ceiling, of course - it is also safer
- fifthly, the work still requires vigorous action, it is not for those who grab their lower back every five minutes, it’s better for them to “poke” with a spatula;
- sixthly, the roller is not a magician, it will not take difficult places, so you will still have to keep a spatula and a thicker batch on hand;
- seventh, after all, the roller is not for corners, both internal and even external; Let’s not forget that to strengthen external corners, special mounting corners, paper, plastic or metal, are often used, but here we only work with a spatula;
- Well, and eighth, you will not have the opportunity to use a roller on concrete, on any surface that requires denser plaster, and most importantly, greater thickness; For reference, on concrete a putty layer thickness of 10 mm is common, but quite often the entire 20-30 mm .
Putty with a roller in difficult places is, of course, impossible; here a spatula will come into play
Advantages and disadvantages of roller putty
In practice, roller putty has a certain number of advantages compared to other application options. Let's take a closer look at the main advantages of correctly plastering walls with an appropriate roller:
- In this case, there are no traces left from a spatula or other auxiliary tool used.
- When using regular putty and this application option, you get a thin layer that hardens quickly.
- After applying the putty with a roller, there is no chance that the coating will crack under its own weight.
- Unlike other application methods, there is an opportunity to significantly save on material.
- There is no need to subsequently carry out special leveling of the surface after arrangement.
Despite a number of advantages, this method also has some disadvantages. Requires the use of a small container. You should choose the right tool. It is necessary to apply several layers of coating. It will take more effort and time.
Important. To perform such work, it is recommended to use a tool made of natural material, since synthetic materials can quickly become unusable.
Pros and cons of putty
Putty is a building material that acts as a protective barrier against the negative effects of moisture and other phenomena. A roller is the most suitable tool for applying the mixture. However, this roller putty process has a number of features.
- After application, no spatula or brush marks remain.
- This method allows you to create a thin layer that hardens quickly.
- The coating does not crack over time due to its own weight.
- The material is consumed more economically than when using other tools.
- If the surface is uneven or has defects, apply the putty with a roller in several layers.
- It will take more time and effort.
- The material requires a large container.
- Special attention will have to be paid to the choice of tool.
To obtain a high-quality coating, you should apply the putty in several layers (from 2 to 4).
Workflow Description
When performing the corresponding process, you will need to adhere to a certain order of step-by-step actions. Typically, the process is performed in the following order:
- first of all, you will need to prepare everything necessary for carrying out the appropriate surface treatment;
- Next, you need to thoroughly mix the putty that will be used for application;
- subsequently it is necessary to pour a small amount of solution into the prepared container;
- The next step will be to uniformly apply the composition to the previously prepared surface.
The entire process is performed in several separate layers. In this case, complete drying of each individual coating is necessary, which, as a rule, occurs within two to three hours.
Important. In order to carry out high-quality installation, in practice, several layers of coating are used (usually from two to four).
Tips and tricks for work
In the process of arranging a structural element, it is recommended to adhere to the following series of useful tips from specialists and manufacturers of the relevant material:
- when working, the formation of excess composition should be avoided, as this may contribute to further troubles;
- when working, you should ensure that the composition is in the optimal concentration for the condition;
- here it will be necessary to avoid gaps where there will be a lack of material for putty;
- It is imperative to promptly change the solution in the small container used.
Post-processing of the wall
After all the necessary coating has been completed, the surface must be treated. Especially for this purpose, the following step-by-step actions are performed during arrangement:
- a sufficient amount of time is previously allocated for the surface to completely dry;
- the next step will be to remove excess putty applied to the structural element;
- Next, you need to properly sand the coating to create a uniform, smooth layer on the surface;
- also, depending on the subsequent arrangement, it may be necessary to apply a certain primer.
As a rule, this treatment option is used to ensure that the substance applied to the surface does not begin to crack and crumble under the influence of harmful factors. These kinds of events make it possible to eliminate those excess compositions that are not required.
Important. When sanding the coating, it is recommended to use soft sandpaper with a minimum value so as not to damage the base layer of the coating.
Putty with a roller for scraping
In this case, we are talking about a common option for arranging structures. As a rule, when performing such technology, you need to correctly do the following:
- You first need to correctly and efficiently apply the initial layer of material;
- the next stage will be the complete drying of this coating and the formation of the corresponding effect;
- then a new layer of putty is applied evenly, after which it is peeled off with a spatula;
- in such a situation, the spatula is placed perpendicular to the surface to eliminate the possibility of deepening.
After this procedure, the surface is smooth and even, which is why it does not need to be subjected to additional processing using auxiliary materials.
Decorative putty with a roller
In this case, we are talking about an appropriate coating, which is subsequently not subject to additional processing. A special tool is used here, as well as the correct application technology. As a rule, in practice there are two main options for such arrangement: fur coat and texture. In each individual case, it is necessary to use a specific tool without subsequent appropriate processing using sandpaper or a spatula.
Important. During the work process, a fairly thick layer of the substance will have to be applied, which is why it is not recommended to immediately cover large areas.
Here we are talking about creating a surface that partly resembles a fur coat. Rollers with long pile are used especially for this purpose. A sufficiently large amount of material is applied to the surface, after which corresponding villi are formed, partially reminiscent of wool. This coating option is applied only to the prepared surface, since a large amount of the composition is used. For work, a solution that has already begun to harden can be used.
Types of putty for roller application and workflow
It is almost impossible to level walls that are too crooked with a roller. It is worth using it if the base is already quite flat, or if you need to make decorative cladding.
Leveling putty
For beginners, the stripping roller puttying method is ideal. It is suitable for finishing smooth plasterboard walls or well-leveled bases. First, they prepare the walls or ceiling - remove dirt, eliminate any, even small, defects and seal seams and joints. Then apply a primer and let it dry thoroughly. This step will help improve the adhesion strength of the base to the putty and bind any remaining dust, as well as strengthen the rough coating.
Then they work like this:
- dip the roller in putty and carefully roll it over the surface;
- they try to fill all the pores with material so that not the slightest dry area remains on the wall;
- after finishing 1-2 square meters of surface, take a spatula and, as it were, rip off the mortar from the wall, holding the tool at an angle of 90 degrees (this stage is needed to fill even tiny defects and leave only a thin layer of material on the wall);
- pass with a roller over the remaining areas, then use a spatula in the same way;
- Allow the material to dry; if necessary, repeat all stages of work again, but peel in the opposite direction.
For this technology, putty with a more liquid texture than usual is suitable. Solutions with a long hardening period, which are sold in finished form, are ideal for this purpose. If, after drying, small imperfections remain on the wall, they can be removed by sanding with fine sandpaper.
Decorative putty
Applying decorative materials is considered a simpler method, so even a beginner can handle it. You can work with a roller on a base that is not too smooth - all defects will still be hidden, although, of course, there should be no serious flaws.
The material is applied as follows:
- prime the walls, wait until the soil is completely dry;
- take a ready-made solution or dilute a dry mixture, tint it in any suitable shade;
- apply putty in an even layer, distributing it over the entire surface;
- take a roller with a decorative pattern, move it along the wall, applying a pattern in the form of an ornament.
Another suitable option for decorating walls is applying chaotic strokes with a roller, which will also help create an interesting textured coating. After the plaster has dried, paint or other protective coating is applied to extend its service life.
Craftsmen often perform decorative coating “fur coat”. To produce it you will need a long-haired roller or a fur tool. They move in different directions, which gives the surface a beautiful relief. If you want to smooth out the relief a little, you can go along the wall with a spatula, as if pressing the bulges. It is important to perform all actions quickly so that the composition does not have time to set, so there is no need to immediately cover too large areas.