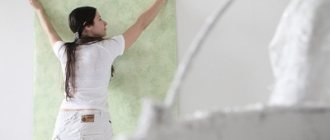
Non-woven wallpaper is an ideal option for those who have never tried gluing this finishing material. Thanks to their properties and characteristics, the process is greatly simplified. After pasting, the room is transformed and is ready to delight its owner for decades.
Wallpaper has always been considered one of the most popular options for decorating a room. And if earlier these were the most budget options, today the level of quality of paintings has increased significantly. But how to properly glue non-woven wallpaper? The whole process can be divided into several stages. Depending on the size of the room and the skills of the worker, pasting can be completed in a few days.
Features of non-woven wallpaper
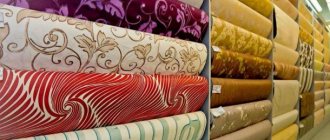
First you need to find out all the strengths of the canvases, as well as the features of gluing non-woven wallpaper. This is a rolled type of material, which consists of 70% cellulose fibers. 30% is polymer impregnation. The price of products depends on the type and quality. There are single-layer and multi-layer options, made entirely of non-woven fabric, or made on the basis of non-woven fabric with the addition of other material (paper, textiles, vinyl).
In appearance, the products are smooth and embossed. The first ones are easy to wash and can be painted. Other product features (wear resistance, sun protection, moisture protection, etc.) are indicated on the packaging. There is also information about the width, texture and correct joining of patterns.
Pasting non-woven wallpaper is a simple process, as this material has the following advantages:
- High density and strength of products.
- Non-woven wallpaper is quite elastic and can stretch a little.
- They are vapor permeable, the walls have the ability to breathe, and condensation will not collect.
- Protection from moisture, and washable options are practical when dirty.
- Easy to stick and remove.
- Ecological cleanliness.
- Low consumption of wallpaper glue, since it only needs to be applied to the surface of the wall.
- Long operational period.
There are much fewer disadvantages:
- High cost, but it is compensated by the best quality.
- The surface needs to be constantly cleaned with a damp cloth and vacuum cleaner.
- Non-woven wallpaper is susceptible to mechanical damage.
After analyzing all the pros and cons, you can choose non-woven wallpaper for yourself. Now let's look at how to glue products so that they last for decades.
Why non-woven wallpaper?
Non-woven wallpaper is environmentally friendly
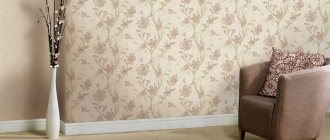
Non-woven wallpaper is available in two types: consisting entirely of non-woven material and on a non-woven base with vinyl coating. They compare favorably with paper, vinyl, acrylic and other types due to their advantages:
- are produced on the basis of cel
- yulose fibers, environmentally friendly;
- have a beautiful textured surface that imitates plaster or has a pattern;
- most often produced for painting with acrylic or water-dispersion compositions;
- easy to clean, does not absorb odors;
- do not support combustion.
Even a beginner can hang such wallpaper well, but the technology for performing the work has its own nuances that need to be studied before starting pasting.
Preparing tools
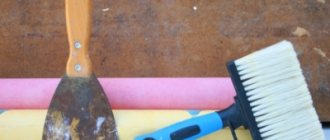
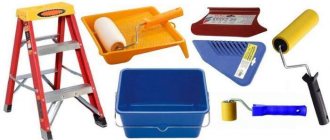
First you need to decide on the arsenal for the work. The good news is that the tools for gluing non-woven wallpaper are inexpensive and accessible:
- construction level (regular or better laser);
- 5m tape measure;
- a plastic spatula with a special soft edge, which can be used to ideally roll trellises;
- long-haired roller;
- a regular roller with a tray and a paint brush for priming walls;
- a brush that is convenient for smoothing glued trellises;
- assembly knife for cutting sheets;
- pencil;
- non-woven wallpaper glue;
- narrow metal spatula;
- two containers that are needed for water and glue;
- sponge.
But, before you hang non-woven wallpaper with your own hands, you need to buy the right amount of material, which would be enough for the upcoming amount of work.
Tools and materials
When gluing non-woven wallpaper, the following must be present at the workplace:
- rolls of non-woven trellises;
- specialized wallpaper glue for non-woven fabric;
- plumb line or laser level;
- tape measures at 3 m;
- rules;
- wide metal spatula;
- a knife with a removable blade;
- a simple pencil;
- hand towels;
- ditches for glue or a special mesh for removing excess glue from the roller if it is dipped into a container with glue;
- a lint roller (foam roller applies glue unevenly to the wall);
- a rubber roller for rolling out wallpaper (you can use a special plastic spatula for trellises);
- cone-shaped roller for processing joints;
- foam sponges;
- plastic bucket for clean water.
Calculating the number of rolls
All products have standard sizes. The sheet width can be 0.53, 0.7 and 1.06 m. It is most convenient to use meter-long non-woven wallpaper, since the work is done faster and there are fewer joints left. Rolls contain 10.05 m of products. It is worth taking into account the step of the drawing, if there is one. For example, the step may be 64 cm. Now let's start counting:
- First, the perimeter of the room is determined. It is equal to the sum of all the walls. For example: 6m + 5m + 6m + 5m = 22 m.
- Based on the perimeter, we find out the required number of canvases (strips), starting from the width: 22 m (perimeter) / 1.06 (width of the trellis) = 20.75 canvases.
- Next, we determine the height for one canvas, it will be equal to the height of the canvas + pattern pitch: 2.8 (ceiling height) + 0.64 (pattern pitch) = 3.44 m.
- The next step is to find out the number of whole canvases that are in one roll. To do this, the length of the roll is divided by our ceiling height with a pattern step: 10.05 (footage in 1 roll) / 3.44 (ceiling height with a pattern) = 2.92. Round up, we get 3 canvases (strips).
- Knowing the total number of panels required to hang wallpaper, as well as the number of panels in one roll, you can calculate the required number of rolls to purchase. It is enough to divide these values: 20.75 (strips per perimeter) / 3 (strips in one roll) = 6.91. Round up to 7 rolls per room with a perimeter of 22 m.
However, you need to take into account that the room has doors and windows. True, experts usually recommend buying material with a 10% margin. Therefore, 7 rolls will be enough, and those 10% of the reserve will be equal to the size of the windows and doors.
You will need less wallpaper without selecting a pattern, since there will be virtually no waste from it. In this case, you can skip the third point, and in the fourth, divide the footage on the roll by the actual height: 10.05/2.8 = 3.58 (4 strips). Then we divide the total number of strips into strips in one roll: 20.75/4 = 5.18 rolls.
Algorithm for gluing on walls with your own hands
It is important not only to carefully prepare for repairs, but also to carry them out correctly. Step-by-step algorithm for finishing work:
- A day before repair work, the room is ventilated, then the doors and windows must be tightly closed.
- Wall measurements are taken and markings are made.
- Wallpaper is cut into sheets of the required size, plus 8-10 cm for tolerance.
- The glue is loosening.
- Select the place from which pasting will begin. Experts recommend starting from the corner, making an indent of 4-5 mm.
- Apply glue to the base using a roller. The layer should be slightly wider than the trellis.
- Next you need to glue the first canvas.
- After this, you need to roll over the canvas on the wall, moving from top to bottom, from the middle of the glued wallpaper to the edges. If excess glue protrudes, it must be removed with a sponge.
- The next sheet is glued in the same way, but end-to-end. If gluing fails or the pattern does not match, the sheet can be removed and re-glued.
- Then, using a roller with a rubber tip, air is released and excess glue is removed. The joints are rolled.
Wallpaper is cut into sheets of the required size, plus 8-10 cm for tolerance.
Choosing glue
Even before gluing non-woven wallpaper, you need to choose the appropriate adhesive. How well and long the products will serve directly depends on the quality and adhesion properties of the adhesive. It is better not to spare money on its purchase.
The best option for gluing non-woven wallpaper is special substances based on dry modified starch. They need to be prepared immediately before gluing non-woven wallpaper. The substance is mixed until homogeneous.
There are a number of requirements for glue for such wallpaper:
- High level of adhesion to both canvas and wall.
- Thickness, which makes it easier to apply the composition thinly and evenly on the wall.
- After drying, it should not turn yellow or show any color.
- The substance should not react with coloring pigments if it is wallpaper to be painted.
The market provides many options for good adhesives. The best adhesive for non-woven wallpaper can be selected from this list:
- Quelyd “Special non-woven fabric”. Its peculiarity is in additives that protect the wall and trellises from the development of bacteria and fungi. The walls will not mold and deteriorate. And due to the fact that in its finished form it glides well, when gluing it is easy to adjust the wallpaper butt to each other. A good option for working with dense products for further coloring;
- Metylan "Ultra premium non-woven fabric". Contains starch and polymer additives. This ensures good adhesion to any surface. This includes drywall without prior puttying and cork. To prevent it from drying out quickly, it is better to make it more liquid than indicated on the package;
- KLEO Extra Non-woven is another option with antifungal additives. It is used for regular wallpaper and for non-woven wallpaper for further coloring. It is better not to glue white products with them, as yellow spots may appear from under them.
Other types of adhesive compositions are also commercially available. But the above are some of the best and most proven, and non-woven wallpaper is hung using them.
Glue preparation
The durability and quality of wall decoration with non-woven wallpaper directly depends on the type of adhesive chosen. He must:
- have good adhesion to trellises;
- diluted to a thick consistency, which allows it to be applied in a thin layer without smudges;
- do not leave marks when drying - do not turn yellow.
Only specialized glue satisfies such requirements - universal glue does not hold even light non-woven trellises well. Let us note here that there are two types of special glue: for light and heavy wallpaper.
Attention: heavy trellises are made of vinyl with a non-woven backing (vinyl trellises). Therefore, here we are talking only about glue for light (pure non-woven) types of wallpaper.
Which glue to choose
On the shelves of construction stores you can see a huge variety of brands of wallpaper glue for non-woven fabrics. But, due to the lack of reliable information about the quality characteristics of unfamiliar brands, it is better to buy popular brands.
"The Interlining Moment." The cheapest glue from recognizable brands, which is due to its Russian origin (pack of 250 g from 200 rubles, 500 g from 399 rubles). Suitable for all types of non-woven wallpaper, including heavy vinyl wallpaper.
Provides good sliding of the wallpaper sheet along the wall during joining. Contains additives against mold and mildew. Can be stored diluted for up to a week. At the same time, it also has disadvantages:
- Dilutes poorly - it is difficult to obtain a homogeneous mass;
- not suitable for trellises with a three-dimensional pattern - it requires dense rolling, which cannot be done with a rubber roller on embossed wallpaper (a wallpaper spatula cannot provide such force).
"Methylane Interlining ultra premium." Product of the famous German company Henkel. It is made from methylcellulose and natural resins, which provide reliable adhesion of all types of non-woven wallpaper to various types of walls (plasterboard, concrete, cork, brick, etc.). Easy to divorce.
Does not leave stains when applied to the front side. It has an important feature: it must be diluted to a thinner consistency than indicated on the package, as it dries quickly. It is in the middle price category - a pack of 250 g from 290 rubles. up to 350 rub., packaging weighing 500 g from 535 rub.
"Quelyd Special non-woven fabric". Produced in France. It has the highest price among all brands of glue for non-woven wallpaper (a 450 g package costs from 360 rubles). However, the price fully corresponds to the quality - professional finishers consider it an ideal means for gluing trellises:
- perfectly holds light and heavy wallpaper, with a smooth and voluminous pattern;
- easy to divorce;
- does not smell;
- does not flow down the wall during spreading;
- does not leave marks when it gets on the front side, etc.
The “PUFAS” line of adhesives for wallpaper with a non-woven base (5 types on sale) provides better adhesion between the trellises and the wall surface. It has a color indication, which helps with spreading - no omissions are allowed. When purchasing glue from this brand, you can choose a product for a specific wallpaper: smooth, corrugated, light, heavy.
In addition, we can recommend: “FliziLex”, “Exclusive Non-Woven”, “Kleo Non-Woven”.
How to calculate the number of glue packs
An important feature of glue for non-woven trellises is that the packaging indicates its consumption not per number of rolls of wallpaper, but per wall area in m2. Therefore, the calculation is done a little differently.
First, the area of the walls to be covered is determined. Then the result obtained is divided by the consumption in m2 indicated on the packaging. The result is rounded up.
How to divorce
To dilute the glue you will need:
- 10-12 liter capacity (plastic bucket, basin or bowl);
- warm (40-45°C) water (it will not dissolve in cold water; in hot water it will coagulate into insoluble lumps);
- an object that can be used to stir the glue (stick, whisk, mixer, electric drill, etc.);
- a tablespoon or measuring cup (an error of just 50 g of the powdery mass leads to complete rejection - the mixture is poured into the toilet).
The instructions are simple:
- warm water is poured into the basin (bucket) in the volume specified in the instructions - no more, no less;
- the required amount of powder mixture is measured;
- the water is stirred until a funnel forms with a stick or hand (power tools cannot form a funnel);
- the glue is slowly poured into the center of the swirling water;
- in this way the glue is stirred for another minute after all the dry mixture is in the water;
- It is advisable to carry out further stirring with a mixer or a drill with an attachment - they will break up all the small lumps, which is difficult to do by hand;
- After stirring is completed, the glue is allowed to brew and swell (14-16 minutes is enough), during which time it will take on a working consistency - it will look like jelly or thick sour cream.
Professional finishers recommend adding another 200 ml of water and mixing thoroughly (thick glue dries quickly). You need to add water within half an hour after starting stirring. If you violate this requirement, you will end up with water with floating jelly-like clots. That's it, the resulting glue is ready for use.
Preparing the walls
Do I need to prime the walls before wallpapering? Yes, if this is not done, even the highest quality glue will not help improve adhesion. The peculiarity of non-woven wallpaper is that it can be glued to any surface: concrete wall, plaster and putty, plasterboard, pressed wood boards (OSB, plywood, fiberboard). However, before gluing non-woven wallpaper for painting, the walls are prepared according to the following scheme:
- Cleaning of previous finishes: wallpaper, plaster, whitewash or paint.
- Checking the evenness of the walls using a rule or level. If differences of more than 10 mm per 2 m of area, recesses and protrusions of more than 5 mm are found, then leveling of the walls is required. Regular putty will do for this. After drying, the surface is sanded with sandpaper.
- Next, the walls are cleaned of dust and dirt, stains, if any, are removed.
- The final stage of wall preparation is priming. The primer will help improve adhesion between the wall and non-woven wallpaper, strengthen the base, and also reduce glue consumption.
The primer will close the pores in the wall, so the wall will not absorb moisture from the adhesive so intensely. The primer is applied in two layers with breaks for drying. To work you need a roller and a brush. The entire surface is treated, even hard-to-reach places.
All further work can begin after the second layer of soil has completely dried. This completes the processing of the walls before gluing.
Surface preparation
Before gluing meter-long non-woven wallpaper with your own hands, you need to pay sufficient attention to preparing the base. This material can be glued to any surface (wooden, concrete, plastered), but only on a perfectly smooth wall is it possible to achieve an even coating.
To prepare the surface for gluing, it is necessary to carry out the following work:
- the old coating should be removed;
- cracks, pits, peeling - remove by leveling the surface with putty;
- It is advisable to carry out a general leveling of the wall using putty, and then smooth out the unevenness with sandpaper;
- The leveled surface is covered with soil.
In this way, the walls are sequentially prepared for pasting in the living rooms, kitchen and hallway.
Is it possible to glue it to old wallpaper?
Methods for gluing surfaces with roll materials vary. What is acceptable for paper products is unacceptable for non-woven material. Thus, gluing on old wallpaper is not recommended for non-woven products .
Usually, denser non-woven fabrics have a decent weight, which is why a weak base with paper may simply not withstand the load and fall off the wall. In addition, the darker colors of the old wallpaper, located under light wallpaper, will show through, changing the appearance of the material.
Markings on the wall
The peculiarity of non-woven wallpaper is its smooth and high-quality edge. Thanks to this, there is no need to glue them overlapping, only end-to-end. This option is better, since the joints will not be very noticeable; the joint will not even be visible. And thanks to the fact that we have meter-long non-woven wallpaper, the number of joints is reduced to a minimum. But first, it is important to make markings on the wall to simplify the task in the future.
It is recommended to start the entire process from the window of the room. Marking is reduced to drawing strictly vertical lines in increments of 1 m relative to each other. Particular attention should be paid to the first line, it is the starting line. The work uses a level and a pencil. Thanks to the markings, you can be sure that the strips of non-woven wallpaper will be glued perfectly evenly.
What it is?
Advice
Non-woven wallpaper is a multi-layer roll material designed for interior decoration. It is made from modified cellulose fibers (70%) and binders (30%).
Non-woven wallpaper differs from plain paper in several ways: it has higher strength, abrasion resistance, and increased fire resistance. It feels like elastic fabric, the structure is typical fiberglass.
There are 3 types of wallpaper:
- Fully non-woven . They consist of several layers of material, are impregnated with a special binder, do not get wet, do not shrink and do not lose their appearance. The most expensive.
- With non-woven base . The top of this type is decorative and can be made of anything: vinyl, textiles, paper. Vinyl coating gives the material a special sophistication, which is why they are a leader in sales.
- Paintable wallpaper . They give the walls additional sound and heat insulation and they can be repainted not just once, but a dozen times. The cheapest. We talked about what other types of wallpaper are suitable for painting here.
Preparation of canvases
Pasting walls with non-woven wallpaper includes preparing it and cutting it into convenient strips. Experts recommend cutting blanks not just for one, but for all the walls in the room at once. The only difficulty may arise with the formation of the pattern. If it is not there, everything will be much easier. From our example, the ceiling height is 2.8 m. Therefore, it is enough to take a tape measure, measure this height and cut a strip of wallpaper.
Advice! It's best to make sure the ceiling height is the same all around.
If the picture is present, you need to make a selection. The fitting size is indicated on the product packaging. We considered the option with 64 cm. Having cut off one strip, you need to attach it to another, checking whether the pattern matches. When cutting non-woven wallpaper one by one, put them aside in the same order so as not to mix them up.
Since wallpaper can be damaged or dirty when cutting, it is important to prepare your work area. Ideally, lay a clean polyethylene sheet on the floor or clean and wash the floor. After which the roll is rolled out face down. The required height is measured from it and a notch is made with a mounting knife.
Important! Experts recommend making a margin of 5 mm on each side. The remainder will then be cut off with a mounting knife, and the joint will be formed perfectly even.
The canvas is bent along this notch, its evenness is controlled. All that remains is to cut the non-woven wallpaper along the line with a mounting knife. Further strips are cut in a similar order.
Preparing wallpaper
When purchasing wallpaper in a store, it is recommended to pay attention to the release date and article number; if wallpaper with the same pattern was produced in different batches, there may be a slight difference in tone.
To prepare the working strip, it is necessary to measure the distance from the floor to the ceiling and increase it by 3-5 cm for correction margin. If it is necessary to adjust the pattern, you can try on the second strip, placing it next to the first on the floor, and cut it taking into account the height adjustment.
The sheet should be cut with a sharp knife or spatula, after first bending the sheet, aligning the side surfaces of the bottom and overlay sheet.
Quantity calculation
To calculate how many rolls to buy, you should find the total surface area that you plan to cover and divide it by the area of one roll, increasing to a whole number.
If the wallpaper is plain and does not require adjustment to the pattern, the value found will be correct; if the wallpaper needs to be adjusted, it is recommended to increase the calculated value by 5% to purchase a safety stock.
Preparation of glue
We know what glue to use to glue our products. But how to prepare the substance? This must be done immediately before gluing. Usually the packaging contains simple instructions that will help you achieve the best results. However, it may be different for each manufacturer.
How to dilute wallpaper glue? Preparation technology: water is poured into a bucket (the amount is indicated in the instructions), dry powder is gradually poured into it. In this case, you need to thoroughly mix all the contents. No lumps should form in the composition. When all the powder is dissolved in water, you need to give the composition time to infuse. After a while, the glue is mixed again, and if lumps appear, they are removed. Everything is ready to go.
What tools will you need?
You should prepare in advance. You will need equipment and tools. Before you start working with non-woven materials, you need to think about what kind of glue to use and what you will need for this. The process cannot complete successfully without:
- wide brushes or rollers for applying adhesive;
- wallpaper knives and a wide spatula for cutting the ends of the strips;
- special equipment (electronic levels, plumb lines or levels);
- containers for preparing glue;
- clean dry rags for smoothing the surface of the wallpaper;
- stationery scissors;
- narrow rubber rollers for rolling seams (joints);
- pencils or ballpoint pens for marking.
All of the above must be available. The list does not indicate the tools necessary for the preparatory work.
Non-woven wallpaper gluing technology
Now we have come close to the question of how to properly glue non-woven wallpaper. The entire preparatory stage has been completed, only a small matter remains. Below are step-by-step instructions:
- Be sure to read the manufacturer's instructions. It indicates some of the subtleties of working with this particular type of wallpaper, for example, is it possible to glue non-woven wallpaper onto old non-woven wallpaper or where exactly to apply the glue: only on the wall or on the wall and the canvases themselves.
- Using a brush or roller, glue is applied to the rolled out fabric (if required by the instructions). Glue is applied to the wall. In order for the edges to adhere well to the surface, it is recommended to coat not exactly 1.06 m, but a little with a margin.
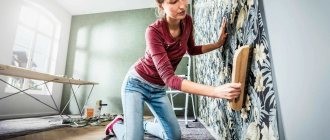
- All that remains is to paste the non-woven wallpaper onto the wall. The strip is fixed at the top according to the markings, after which it gradually straightens down. If necessary, the edge is adjusted to the markings by shifting the strip. This will allow you to paste the wallpaper perfectly evenly.
- Now air and excess glue are expelled from under the trellis. This can be done with a roller or a soft plastic spatula. A roller is needed for textured wallpaper with a pattern, while it is convenient to smooth out smooth wallpaper with a spatula. Remains of glue are removed immediately with a sponge or wet cloth. Since we have a margin of 10 mm, the remainder, if any, is cut off with a mounting knife. A wide spatula can be used as a guide.
- The further technology for gluing wallpaper is similar. The wall is coated, the canvas is straightened and fixed in place butt to the first strip. It is leveled, the air is expelled from it, and the remains are cut off. The work is carried out until all the walls are glued.
All you have to do is wait for it to dry and the work is complete. During this time, windows should not be opened to avoid drafts. Otherwise, the products may fall off the wall and the work will be done in vain. Now everyone knows how to properly glue non-woven wallpaper.
Pasting instructions
For non-professional finishers who want to decide how to properly glue non-woven wallpaper, it is recommended to use the following step-by-step algorithm:
- They start painting the room from the window. To glue the first sheet, which will serve as a vertical guide for all subsequent sheets, you need to make markings. To draw a vertical line at a distance of 1000 mm from the corner, it is advisable to use a laser level, which will allow you to maintain a strict perpendicular to the floor.
- The prepared adhesive solution is applied with a roller to the wall, treating the surface required for placing the canvas, with a small allowance towards the larger side.
- The canvas is glued to the wall, focusing on the vertical mark. If everything is done correctly, subsequent sheets will fit together perfectly.
- Next, you can apply glue to the wall for two or three stripes at once.
- Each canvas must be carefully smoothed with a rubber roller or a plastic rule, getting rid of bubbles, removing excess glue and adjusting the joints.
- When marking the wallpaper along the length, leave a small allowance to align the top edge. The edge of the canvas at the junction with the ceiling or ceiling plinth is carefully folded and cut with a knife, using a wide spatula as a guide base.
- The lower edge is cut with scissors or a knife, leaving a small distance to the floor, which will be covered with a fillet or plinth.
- If it is necessary to adjust the pattern, marking the wallpaper is done with a large allowance in height.
- It is advisable to prevent glue from getting on the surface of the canvas, since low-quality and cheap solutions can leave yellowish stains.
- It is better to paste corners using the overlapping technology.
How to tape corners correctly
It is not easy to do high-quality gluing of non-woven wallpaper in a corner without some experience. The success of this procedure depends on the preliminary preparation of the base.
If the corner has been leveled before pasting the room, there will be no special problems when gluing wallpaper end-to-end or when covering the corner with a whole canvas in this place. As a corner leveler, you can use plastic corners, which are installed at the time of preparing the base and then plastered.
It is more difficult to make an even angle on a poorly prepared base. In this case, it is recommended to overlap the corner.
First, glue one strip overlapping the corner by two to three centimeters, then glue the strip along the second wall, also with an overlap, after which you need to make a vertical cut, pressing a ruler or a long spatula close to the corner. Excess strips are removed and the seam is smooth.
What to do if the wallpaper bubbles
How to glue non-woven wallpaper with your own hands in such a way as to avoid the appearance of bubbles? A common mistake novice finishers make is violating the recommended dosage of glue. It is the incorrect preparation of the adhesive composition, as well as high (more than 25°C) room temperature and draft that cause the wallpaper to peel off from the wall.
It is also important when gluing the canvases to carefully straighten and squeeze out air pockets and avoid crooked joints. Compliance with these rules will help you avoid annoying defects in your work.
When can you open windows after pasting?
To avoid problems with the quality of pasting, you need to understand how long you can’t ventilate the room after finishing work. It takes at least a day for the adhesive and material to adhere securely, but for some types of wallpaper it may take up to 72 hours.
Premature ventilation will lead to uneven drying, which will lead to non-woven wallpaper peeling off, strip joints to diverge and the formation of uneven edges near the ceiling and in the corners.
Covering the doorway.
At what temperature to glue wallpaper
Modern materials retain their quality characteristics at temperatures from 10 to 25°C , which allows work to be carried out both in summer and in winter, when central heating performs the function of maintaining the optimal temperature in the apartment.
It is not recommended to paste wallpaper at lower or higher temperatures, since the work production technology will be disrupted, and the quality of gluing will not be guaranteed.
How long does it take for wallpaper to dry?
How long it takes non-woven wallpaper to dry after gluing can be read in the instructions on the glue packaging. Typically this period ranges from 12 to 20 hours, but experienced finishers recommend keeping the room closed for 24 hours . Only after this period is it permissible to ventilate the room.
When you touch it with your palm, you can determine the condition of the wallpaper. If humidity is felt, ventilation cannot be carried out; if the surface is dry and a day has passed since pasting, you can proceed to the next work.
How to glue wallpaper in corners
I would like to pay special attention to working with corners. There are several ways to glue non-woven wallpaper in the corners. The simplest of them is this: a strip of wallpaper should overlap the corner by 5–7 cm. The wallpaper in the corner is fixed with an overlap. Then the remains are cut off. To prevent a gap from forming, the two layers are pressed well using a spatula, and a perfectly straight vertical line is drawn in the corner using a mounting knife. The cut strips are removed and the edges are glued again.
Door and window openings are not as difficult to process as they seem. Especially if selection of a pattern is not required. In this case, the wall is glued on one and the other side of the frame. Only the untreated area above the door and above/under the windows is left. These areas will be covered later, after measurements have been taken. This is how you can glue corners with non-woven wallpaper and other hard-to-reach places.
How to hang non-woven wallpaper and what is needed for this
In order to hang non-woven wallpaper easily and simply, in addition to the desire for change, you will need some tools and some useful tips. As well as a short guide in the form of step-by-step instructions.
So, for work you need the following tools and devices:
- non-woven wallpaper in the required quantity;
- glue for non-woven wallpaper;
- roller for applying glue;
- thin brush for applying glue;
- plastic wallpaper spatula for smoothing wallpaper;
- metal spatula 250-350 mm long for trimming;
- stationery knife;
- regular knife;
- scissors;
- sponge;
- glue tray;
- a plumb line or level to obtain a vertical line;
- roulette;
- pencil, not too soft;
- rubber roller for smoothing wallpaper (optional, as an option);
- small rubber roller for smoothing joints and hard-to-reach places (optional);
- correct putty;
- ladder.
Wallpaper spatula
Preparatory processes
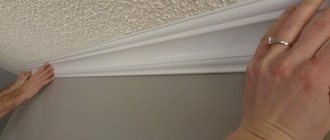
Smooth walls and straight corners
You need to start gluing wallpaper after the walls are leveled, puttied and the molding under the ceiling is glued. It is very important to check the condition of the corners. It is the corners that are quite crooked. A slight unevenness or slope of one wall on the wall itself is not so visible. But when two walls meet, and even with varying degrees of inclination and unevenness, the result is not a very beautiful “perspective”. That is, later you may end up with a very ugly corner that will ruin all the work. At the same time, it can take a lot of time and effort to glue a clumsy corner, but the result will still be unhappy. Therefore, it is important to correctly assess the condition of the corners and, possibly, contact a specialist, because... straight corners are the lot of craftsmen. Of course, if the corner will be permanently covered by a closet or these are the back corners in a narrow room that are practically not visible, then you don’t have to worry about them too much. But if it is an open corner in a visible place, then you need to treat it carefully and correct its defects as much as possible before wallpapering.
Primer of walls
Before wallpapering, the wall must be primed with a deep penetration primer and allowed to dry for the required time (indicated in the instructions for the primer, usually 1-2 days).
If you just removed old wallpaper and the wall is in good condition, you can probably skip this step. It is important that the wall has a uniform, strong coating, does not “dust” and has the same “absorption” (degree of moisture absorption). In this case, you can decide for yourself whether the wall needs to be primed now. But experts recommend priming the walls before wallpapering.
If the walls are uneven, they need to be puttied. More details here.
Brief recommendations for working with non-woven wallpaper
Non-woven wallpaper is glued end-to-end and it makes no difference how you glue it - from the window or to the window. The main thing is to choose the correct order of gluing so that it is convenient to glue and there is an optimal cutting of the wallpaper.
It is better to start from a corner or from the doorway in order to get a strictly vertical first stripe.
To properly glue the canvases, you need to make markings on the wall in the form of a vertical line. It is advisable to draw the vertical line in such a way that the edge (joint) of the wallpaper does not run along the line, but with an indentation of 2-5 mm, so that the line does not fall into the seam. You should also try to draw a neat line; you can make it in the form of strokes. It is better to use a harder and well-sharpened pencil.
If the wallpaper is without a pattern or is plain, then trimming the wallpaper to height can be done while gluing. If a selection of designs is required, then it is better to cut the wallpaper into canvases in advance.
It is necessary to pay attention to the fact that trimming the top of the wallpaper under the baguette is done immediately after gluing each canvas, and not after completing the gluing of the entire wall or even the room. You need to cut the top while the glue has not yet hardened, then you can get a smooth edge that is ideal for a baguette.
Removing the wallpaper under the baguette
The wallpaper is bubbling, what should I do?
In this case, action must be taken immediately, since this defect is unacceptable and can affect both the appearance and further operation. Bubbles usually form due to adhesive waste. It is important to follow the instructions and apply it as much as needed according to the instructions. Then there will be no such problems under normal conditions. If this happened, perhaps the work was carried out in a draft, or the temperature in the room during work reached 24 degrees or more.
When wrinkles and folds form (they do not indicate careless smoothing), all that remains is to carefully peel off the strip, straighten it and glue it back. However, if non-woven products were glued on top of others, it will be impossible to tear them off without damage!
We recommend that you read: What to do if the wallpaper comes off.
What wallpaper is suitable for uneven walls?
Of course, the walls in the room can be leveled, but not every person will undertake such work. If you have no desire to deal with this issue, then you should choose the right material for gluing. There are several types of wallpaper that are best used for uneven walls and crooked corners. Let's look at them in more detail:
- paper;
- vinyl;
- non-woven;
- liquid.
The first type is widely used in the domestic market. Such wallpapers have a unique structure, due to which they do not stretch after gluing. As a result, the number of visible flaws is reduced. Most often, this material is used when the walls have a large number of defects.
Vinyl wallpaper is also quite popular. The advantage of this material is its versatility and wear resistance. The service life of vinyl strips can reach 10 years. This material is most often used when there is a need to visually hide small irregularities in the walls.
Vinyl wallpapers
Non-woven wallpaper also does not stretch after gluing, so it can be used to eliminate large and minor unevenness. This material is often used for painting.
Non-woven wallpaper
A rather interesting way to independently hide various wall defects involves the use of liquid wallpaper. This material is applied to the walls using a spatula. This method is ideal for uneven surfaces.
How long does non-woven wallpaper take to dry?
How long does non-woven wallpaper take to dry after gluing? The peculiarity of non-woven fabric is its quality and reliability. But it will be like this if you follow all the recommendations. So, drying time is about 24 hours. During this time, the formation of drafts, as well as a strong increase in temperature, should not be allowed. To check for dryness, just touch the canvas and feel how dry it is. In this case, the drying time does not depend on the thickness of the products.
We looked at how to properly hang non-woven wallpaper on a wall. Even a beginner can cope with this task, especially if there are such clear and detailed instructions. The main thing is to follow all the rules and subtleties, be careful and not rush. Having the tools for wallpapering, as well as the material itself, you can process the room within a day and a day later enjoy the luxurious renovation of your apartment. Fast, practical and cheap when compared with other types of finishing.
Glue selection
Choose compositions strictly for non-woven wallpaper
When choosing an adhesive, be sure to make sure that it is written on the pack that this adhesive composition is suitable for gluing walls with non-woven wallpaper.
Let us consider in the table the most common types of adhesives for non-woven wallpaper and their characteristics:
| № | Glue brand | Characteristics |
| 1 | Metylan | It is made on the basis of methylcellulose and contains additives that improve adhesion to the surface. Has antifungal protection. Resistant to temperature changes. The adhesive is slippery, so you can move the wallpaper if it is applied incorrectly. |
| 2 | Quelyd | Glides well, has antifungal protection, and is easy to apply to the surface. Has low consumption. |
| 3 | Kleo | It is produced on the basis of modified starch and includes antifungal additives. It is manufactured in three types: Optima, special and professional. The latter is suitable for pasting in hard-to-reach places. |
| 4 | PUFAS | It has high adhesion, is transparent after drying, and does not require special preparation of the walls. Available in 5 types, suitable for manual application and use in wallpaper-lubricating machines. |
When choosing a glue, you need to pay attention to the following indicators:
- density and structure of wallpaper;
- surface quality;
- glue consumption.
Before pasting, the surface of the walls must be leveled, all depressions and cracks must be eliminated, as air bubbles and peeling may form in them. It must be diluted strictly following the instructions.
Vinyl and non-woven lining will help hide crooked walls
It’s hard to believe that wallpaper for uneven walls can give not only beauty, but also the appearance of a completely flat surface. Often and densely, people try to cover uneven walls with furniture so that they do not catch the eye. But this is just not right.
Unevenness on the wall should be masked not with furniture, but with vinyl and non-woven wall coverings. And, of course, everyone agrees that a large amount of furniture in a room makes it feel cramped, but one would like space.
Wallpaper is the best option both for creating a unique interior in the house and for covering uneven walls.
Vinyl is a type of paper covering, the top layer of which is coated with a polymer material or polyvinyl chloride. They consist of two layers: a paper or non-woven layer and a layer of polyvinyl chloride. It is this top layer that not only creates unique designs, but can also hide all defects.
Types of vinyl:
- Compact - vinyl. Such trellises have a pronounced surface in the form of heavy materials: textured plaster, stone, textiles. Quite durable and resistant to mechanical stress. Due to the fact that they have a textured top layer, they are great for hiding all the unevenness;
- Silkscreen printing. The most extensive variety of vinyl wall materials available. Having a huge range and unique design, the look has gained immense popularity among consumers. Its texture is subtle; the silk effect on the wallpaper is created using smoothed vinyl;
- Thick vinyl trellises. They have excellent resistance to mechanical stress and do not fade when exposed to direct sunlight. They are not afraid of moisture and can be washed.
Non-woven coverings are a material based on textile and cellulose fibers. This material perfectly covers all cracks and irregularities on the wall.
They can be glued to different types of finishing materials. plaster, concrete, drywall, paper, wood. They do not need to be lubricated with glue and wait until they are soaked. For high-quality service, it is enough to apply glue to the surface of the wall itself.
Types of non-woven fabrics:
- The first type consists of one non-woven fabric. There is no relief on such trellises. The drawing is applied using printing;
- The second type is a material in which non-woven fabric is the primary base, and a pattern is applied to it. They are often called vinyl with a non-woven backing.
Wallpapering uneven walls
The initial stage of gluing involves marking stripes on the wall. You can glue strips from a window or corner. The second option is more correct. Position the strip so that its edge touches the adjacent wall. This way the corner will be closed.
Note! Experienced craftsmen advise to provide a small supply of wallpaper, since there is a high probability of damage to several strips during the work process. For these purposes, add 1 roll to the calculations.
Next, you should apply glue to the wall and the strip itself and wait a while for it to dry a little. The second fragment should also overlap. Subsequent stripes are arranged end to end. This is a very important point.
It is not worth gluing all the fragments overlapping. This is due to the fact that then the joints of the individual stripes will be noticeable. If you have selected high-quality material, then there should be no problems in your work.
Interesting: Getting rid of mold on the walls in the apartment
Preparing for wallpapering
Before you start gluing the walls, you need to do some preparation. It includes several stages. First you will need to purchase all the necessary materials and tools. Let's consider what tools you will need to glue uneven surfaces:
- putty knife;
- building level;
- yardstick;
- knife;
- pencil;
- container for glue and water.
You also need to remember that gluing wallpaper in an apartment with high ceilings is quite problematic. Using a stepladder can solve this problem. After acquiring the above tools, you can begin preparing the walls for gluing. This operation is performed in several steps. First of all, you will need to moisten the curved surfaces. This will simplify the process of wallpapering.
Wallpaper of any type should be applied to curved walls correctly. If the surface of the walls was painted, then it’s okay. You can glue the stripes over the paint. This applies not only to flat areas, but also to corners.
Important! The wall surface should not be dirty. Before gluing, it is worth applying a special compound to the wall that enhances adhesion - a primer.
When gluing wallpaper onto plaster, it is recommended to use a level. This will allow you to identify the most problematic areas. If desired, differences can be eliminated, but only if the area cannot be hidden behind furniture or any other decorative element.
Interesting: Hole in linoleum: how to repair it
Features of the wallpaper pattern
Diagram of lines when combining wallpaper.
Before choosing wallpaper, you need to study the behavior of many ornaments when pasting.
Floral motifs. Wallpaper with plant motifs requires a clear connection in the seam lines, and sometimes the continuation of the pattern on another canvas does not match, and the integrity of the picture is lost. You have to tear the canvas off the wall and re-glue it, moving it down or to the side. When choosing such an ornament, you should measure the wallpaper with a small margin in order to be able to select the pattern end-to-end. Geometric ornament. Some types of wallpaper, when wet, have the ability to stretch, which makes the figures on them no longer look perfectly even, and diamonds or circles, stretched in width, give the room the visual effect of low ceilings. When choosing geometry, you need to give preference to heavy non-woven wallpaper
Caution with geometric patterns should be exercised in rooms with uneven walls and a large number of protrusions and corners, since at the joints it is difficult to adhere to the accuracy of the ornament. Plain wallpaper. Gluing wallpaper without a textured pattern is quite simple
The only caveat is to be careful when applying the glue. Any errors and excess glue will be visible on a plain surface, depriving it of its integrity. Asymmetry. Drawings that are arranged in a chaotic order are the easiest to use. Even a beginner can glue wallpaper of this color, with the least worry about the safety of the composition. Classic drawing. It is a monogram that, intertwined in a diamond pattern, creates a complete ornament. With this type of ornament, you should be careful when pasting the next canvas. As in the case of floral, a clear joining of lines is required. Stripes. Stripes on wallpaper can be horizontal or vertical. If the lines are arranged vertically, there should be no difficulties when gluing, whereas gluing wallpaper with horizontal stripes is much more difficult. When cutting wallpaper into sheets, you can use the lines of the pattern, and the wallpaper should be joined with millimeter precision. This type of ornament is suitable for a narrow room with a high ceiling; the walls must be perfectly smooth.