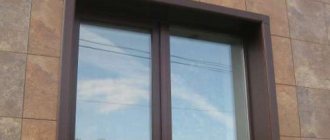
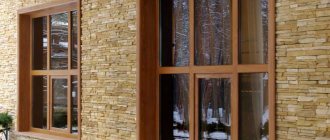
Sealing slopes after installing plastic windows
As a rule, replacing any windows leads to the destruction of the adjacent section of the wall. The question arises: what should be done to make the window structure look beautiful and reliably protect from noise, wind and other troubles of the street? The answer is simple: in this case, repair work cannot be avoided. There are various options for sealing slopes, but to choose the right option, you need to consider them in more detail.
- About slopes
- The following functions are assigned to the slopes:
- Basically, one of the following repair options is selected:
- Preparing the window opening
- Plastering slopes
- The slopes will be of high quality if you follow the advice of experts.
- If you have any questions, watch our video:
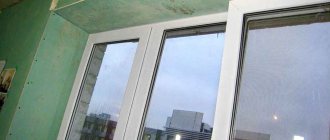
- Covering slopes with plastic
- The following sequence is selected for work:
- Sandwich paneling
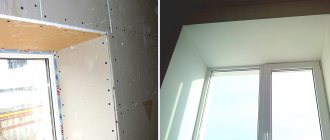
- Drywall installation
Application of the solution
Do-it-yourself plastering of slopes is most often done using the common “rule” method. It is good because it allows you to return the slopes to a neat appearance, regardless of whether a major repair was carried out or just replacing windows.
To level the slope plane, a beacon is installed in the corner. First, a solution is poured into the recess, then I press the beacon into it, controlling the depth by level. A rule will help limit the outer angle. It is installed vertically, making a protrusion towards the window at the distance required to form the thickness of the slope. Then they are secured with dowels or self-tapping screws. You can use a metal profile, level it and secure it. The upper slope is also prepared.
Before applying the solution, you need to make sure that all elements are positioned correctly. The plaster is applied in three layers: spray, primer, covering. Applying the solution begins from the upper slope, moving from its edge to the window. It is recommended to install reinforcing mesh on the upper slope. The solution is applied to it by pressing and simultaneously gluing the mesh to the base.
A liquid solution is used for spraying. Its task is to create a reliable base for the base layer and firmly bind it to the wall. The main layer - the soil - is made with a solution, the thickness of which is similar to the thickness of good sour cream. They throw it on the spray and give it time to set. Then the excess solution is removed, moving from bottom to top, using a grater or a rule.
After finishing applying the primer, give it time to dry. Carefully remove the rule, moving it not toward you, but to the side. The remaining areas are rubbed with the solution and the corners are plastered. You can start working on them after the layer on the slope itself has dried. To do this, use the same solution, applying it with a trowel or trowel to a pre-moistened surface. The mixture is leveled from the bottom up and to the sides, creating a single surface. The dried plaster is primed and puttied, using it instead of a covering.
Plastering external slopes is done in a similar way, and even a little simpler. Usually the outer part is much less damaged than the inner part. Therefore, first they check the quality of sealing the cracks and cut off the foam. After moistening it, cover the slope with a layer of plaster. The painting completes the job.
Causes of cracks between the frame and the slope
reasons for the occurrence of cracks between the frame of a plastic window and the slope , but the main ones are the following:
- Poor quality installation of plastic windows. The thing is that when installing windows, the gaps between the frame and the wall are usually sealed with polyurethane foam. It often happens that installers skimp on this, as a result of which, due to lack of insulation, a gap may appear.
- Over time, polyurethane foam tends to crumble under the influence of various factors, such as sunlight. For this reason, when the foam becomes insufficient, a gap forms between the window and the wall, and as a result, strong air begins to blow from the crack in the slope of the plastic window .
- Plastered or plasterboard slopes almost always develop cracks between the frame and the window due to the properties of the material. This occurs due to temperature differences between indoors and outdoors.
Reasons for damage and dismantling of plastic windows
Such a need may arise in a number of cases. During operation, plastic windows may lose their original attractive appearance and high level of tightness, and may also stop opening and closing properly.
High-quality window systems, when used carefully and in suitable climatic conditions, can last up to 50 years, which is why replacing them prematurely is quite rare, for example, if you want to increase the thermal insulation and sound insulation of a room or if there is mechanical damage to the glass or the frame itself. In addition, the following may lead to such a need:
- Poor quality components. If they are present, various types of breakdowns may occur during operation, as well as jamming and jamming of various mechanisms, creating inconvenience. In some cases, they can even cause internal glass fogging.
- House shrinkage. This is inherent in buildings whose construction is made of wood, for example, from logs or timber. In buildings with a large number of floors, this can happen in cases where the free space between the wall and the window frame is sealed with cement mortar, excluding the expansion joint.
- Assembly with violation of technology. Errors, for example, distortions, can be made during the manufacture and installation of mechanisms.
- Careless use. Premature wear and damage to various structural elements can be caused by over-tightening of mechanisms, improper maintenance, as well as closing the doors with excessive force and many other similar reasons. Careless handling of various objects at home also often contributes to this.
- Deterioration in appearance. Poor-looking frames are often replaced, because few people like to constantly look at windows covered with scratches or stains received during repair work or as a result of other circumstances.
Note! Contamination of the window structure can occur not only from the inside, but also from the outside, when neighbors living above, for example, paint something or plaster the walls with the same bark beetle, during which drops of paint or other building mixture can fall down, including and on her.
How to repair slopes using the plastering method, and what slopes provide
Well, firstly, it is the slopes that protect the seams from moisture. In addition, they provide good thermal insulation. Among the advantages is tidying up the overall appearance of the window.
We looked at one of the possible ways to put the slopes in order.
But today it is possible to choose from several types of finishing - plastering, installation of PVC sheets or drywall.
We offer you some tips to help you do everything right if you decide to do plastering:
- Repairing window slopes with your own hands will require your time, experience and knowledge. It is better to use the services of specialists.
- If you have new plastic windows at home, then before you start plastering, do not forget about thermal insulation - otherwise the windows will begin to “sweat” in winter.
- If during the process of dismantling the old surface, the edge of the slope being removed has crumbled, then you need to install metal corners.
- Plastering slopes should be carried out using beacons (and not “by eye”). Plaster beacons can be wooden or metal.
- It is better to deal with window slopes using the plastering process in the case of restoration or major repairs.
- If we are talking about cosmetic repairs, then it is better to use other materials. After all, when plastering and puttying, the coating around the window will definitely be damaged or dirty.
- The beacons should be located at the same distance from each other (along the entire perimeter of your window opening).
- The gypsum plaster solution can also be applied in a thick layer. How thick it will be depends on the surface you are working with.
- If you add sand (and you will definitely need it in the solution), it is better to sift it.
- All external slopes on windows can be treated with a cement mixture (you can also use façade starting putty with water-repellent additives).
- For the plastering process, you can use dry gypsum plaster (we are talking about indoor slopes).
- Each applied layer of plaster (and there should be several of them) requires good drying.
- After the mixture, the surface is puttied to make it smooth. Just keep in mind that you cannot apply putty in a thick layer. You can apply a new one only after priming the previous one.
- The finishing putty becomes lighter after drying.
- If you have reached this stage, then you need to go through the sanding machine. Sanding will correct all the unevenness.
DIY window slope repair – PVC windows, balconies, glazing, accessories
If you installed the window yourself, or paid only for the installation of the frame, but decided to make the slopes yourself, then you need to know several features of this process. So let's get started!
Since you need to figure out which type of slopes is better, let’s talk about how to make each type yourself.
Plastering slopes
One of the manufacturing options is plastering and subsequent puttying and painting.
Using a self-made rule
This type of work is quite simple, but lately they have been trying not to use it, since it usually takes 2-3 days, and, to be honest, there will be a lot of dirt.
It is also necessary to take into account that this option of do-it-yourself window slopes is relevant for major repairs, but not for cosmetic ones, since everything around (window sill, wall decoration) will be damaged.
So, you will definitely need to get the tools.
List of tools
- Plaster beacons
- Masking tape
- Painting knife
- Two spatulas
- Rule
- Container for the mixture
- Window slat
- ironer
- Polyethylene film
- Level
The process itself
Well, let's find out how to make plastered slopes on windows.
If you have an old rule that is not very sorry, then you need to “correct” it a little - cut off on one side exactly the distance that will interfere with the free movement of the tool along the entire slope.
However, if the rule is a pity, any other material will do - a block, leftovers from a plastic window sill, which can also be perfectly adapted for work.
So, now everything is simple - throw the solution onto the slope, level it with the rule, pressing it firmly against the installed guides (the role of which is played by the profiles).
Look carefully, if there is a notch somewhere, add the mixture and level it again.
Once the mixture has set, remove the excess with a trowel, and then go through the additional rule, only this time vertically.
Drywall slope - frameless fastening
And in general, in this process, in many respects you will have to work, focusing on the “sixth sense” - you need to judge solely by the mixture itself, if you have to apply a large layer, then you won’t be able to do it at once, let the mixture set, and how it sets - here “fill” the recesses with mortar.
Important! When plastering slopes with your own hands using gypsum mortar, you will need to grout with a special grater with a sponge slightly moistened with water.
Next, you will have to putty the window.
Works with drywall
The do-it-yourself option for plasterboard slopes for windows is the most common, since it is not only easy to do it yourself, but it is also quite unpretentious in operation, especially if, as here, its installation will be done using a frameless method.
So, how to make slopes on plasterboard windows? Let's find out!
Plastic trim
The easiest way to make slopes on your windows yourself is, of course, to purchase plastic panels.
Plastic is easy to use, quite unpretentious in operation, there is no special care, it is not afraid of condensation.
Conveniently, this type of finishing is applicable for both major and cosmetic repairs.
Let's take a look at the installation and tools.
Tools for work
- Assembly knife
- Screwdriver
- Hammer
- Self-tapping screws
- Glue
- Additional elements
- The panels themselves
Repair of window slopes: do-it-yourself plaster slopes, plastic and plasterboard slopes
After installing a door or window unit, repair of the slopes is mandatory. This stage of work can be done with the help of specialists or with your own hands. There are several options for finishing slopes, which we suggest reading below.
repair of window slopes - Photo 1
Absolutely all door and window openings have slopes located between the frame and the wall of the house. It is important to know that the width of the slopes may vary, but does not exceed 60 cm.
Plaster slopes: a simple and inexpensive way
One of the most famous methods of repairing slopes is plastering.
Source: https://plastokonnik.com/remont-otkosov-okon-svoimi-rukami/
What is important to understand
Materials
Most people wonder how to do the work.
From a large selection of mixtures, it will be more rational to choose one that meets the following criteria:
- Cost-effectiveness - if the composition is required only for leveling, then there is no point in taking those that are expensive, if there are other options that will provide environmental friendliness, strength and fire safety at a lower cost.
- Strength.
- Suitability for plastering facades (for solutions used externally).
- Environmental friendliness (an important factor for interior decoration).
All these qualities are found in mineral plaster, which is made on a gypsum basis (for indoor use) and cement based (for outdoor use). Moreover, lime-cement materials are often used for interior work. If the building has not yet gone through the shrinkage stage or is located in a seismic region, then mineral compositions will not be suitable, because they are not resistant to vibration loads, and then silicone or acrylic-based compositions will help you out, because they are more elastic.
Tools
Plastering slopes requires the use of special tools. You will need spatulas (at least two - 9 and 35 cm), a construction mixer, a grater, a roller, a brush, usually masking tape, a plumb line, a square, caulk, a hammer, a construction/stationery knife and a chisel,
Tips and tricks
It is worth considering some recommendations from professionals in order to get a good repair as a result.
- If you are just an amateur in the field of repair, it is better to use auxiliary materials and tools.
- Use a primer to ensure good adhesion of the applied mixture to the surface.
- Wait for the previous layers to dry, otherwise everything will crack or fall off.
- Use branded ready-made mixtures.
Plastering corners is quite a painstaking job. If you don't know some secrets, you can ruin the final appearance of the room. To do such work, you should carefully prepare and have the necessary tools.
In order for everything to hold up and be done conscientiously, you need to use additional materials. To create a strong bond between dissimilar layers, adhesive additives are used. As a result, if you have the desire and even a little skill, even novice builders can make even husks or stubs.
DIY window slopes
Once upon a time, slopes were simply plastered, but now, thanks to modern finishing materials, everything can be done much faster and with better quality. If you make slopes using the plastering method, you will have to spend a lot of time on such repairs, since you need to apply several layers of plaster and wait until each layer dries separately, which is the main disadvantage of such a finish. Specialists will not bother for so long, unless they are doing a complete renovation of the apartment, which takes a lot of time.
For this reason, slopes are made of plastic or plasterboard, which saves a lot of time. Slopes made of plastic lining or plasterboard are used to decorate both internal and external spaces near the window. After installing drywall, it should be puttied and painted, and PVC panels should simply be installed and the places where the material is cut should be hidden with special decorative corners.
What material to use for finishing
It is clear that when finishing slopes, everything depends on the window opening and its condition, as well as on the material from which the window is made. If the window opening is smooth and even, then plastic or plasterboard for the slopes may not be used. In this case, the window fastening points can be blown out with polyurethane foam and covered with plinths made of pressed paper or polystyrene foam, and the easiest way to putty and paint a flat concrete surface.
If the quality of the opening leaves much to be desired, then an irreplaceable option would be to install window slopes from suitable building materials.
Use of plastic elements
Sealing the slopes of plastic windows with your own hands will not cause difficulties and will not take much time if you use plastic elements. They go well with window structures made of a similar material, are easy to install, do not take much time, and do not require specific skills when working. The plastic will not need to be painted after installation, as the material can be purchased in any color. It is sold ready-made in construction stores.
The panel can be easily cut with a regular hand saw for metal or wood, so you can cut the part to the desired size. It is convenient to attach the panels with glue, and the joints are sealed with waterproof sealant. Plastic slopes are not afraid of moisture, temperature changes, and last quite a long time, although they are not aesthetically combined with all materials.
DIY instructions for repairing window slopes
Once the plaster has been applied, it needs to be given some time to completely harden. Now you can proceed to the installation of drywall. It sits on mounting adhesive. When carrying out work, be sure to take into account that the glue is not applied to the drywall, but directly to the slope. This is due to the structure of the drywall. This material is quite porous. Glue is applied to the slopes with blobs. Only in those places where there is direct contact with air can it be applied in a continuous layer. This will allow you to escape from the flow of cold air that enters the apartment in winter.
You should start gluing the parts from the top of the slope. It will be more clear this way. You can use a level to level the drywall. It allows you to achieve a truly even arrangement of all elements. A plumb bob may also be needed. It performs leveling in a vertical position. This is exactly how the entire surface is covered with drywall. After this, you can begin further work.
Plastering window slopes
To make it easier to clean up dirt after work has been done, window frames, glass and the area around the window should be covered with protective cellophane film, which can simply be thrown away after completion of work. If, when dismantling old window frames, the edge of the slope is damaged, it is necessary to install an ordinary corner. Which one to choose, plastic or metal, you decide for yourself.
Tools and materials
To make plaster slopes with your own hands, you will need the following tools and materials:
- roulette;
- pencil;
- putty knife;
- Master OK;
- containers for water and mixing the solution;
- pick;
- malka (by the way, you can make it yourself);
Using a small tool you can make the same angle of inclination on all slopes
- deep penetration primer (you can make it yourself by mixing PVA glue with water in a ratio of 1:2);
- cement (or ready-made plaster mixture);
Using ready-made mixtures will greatly facilitate the work and allow you to obtain a high-quality solution
- rail for level output;
- building level (you can use a plumb line);
- brush or roller;
- water-based paint;
- putty (finishing);
- sandpaper (fine grain) or paint mesh.
Do-it-yourself technology
We find the zero level and set beacons for plaster around the entire perimeter
Before starting all work, it is necessary to prepare the surface for applying the solution. Then we find the zero level and place beacons for plaster along the entire perimeter of the future slopes of the window frame. Installing wooden slats will make the work easier.
We prepare the solution for slopes in accordance with the instructions on the packaging. It must be thoroughly mixed to ensure uniformity in all layers. After setting all the landmarks, they begin to treat the surfaces of the slope with a primer (or a mixture with PVA).
It is best to repeat the finishing several times with short breaks.
We begin to treat the surface with a primer. When the desired level is reached, the last movements of the spatula should be carried out from the window towards the room
After preparing the solution, take a spatula and apply the first layer of solution. If you need to make high plaster slopes, then the solution should be applied in layers at short intervals, during which the layer dries out a little. We begin to apply the solution from bottom to top, focusing on beacons or wooden slats
When “expelling” the required height, it is important to apply the solution correctly: first vertically, and then horizontally. When the desired level is reached, the last movements of the spatula should be carried out from the window towards the room
It is better to apply the solution in small portions, especially in the upper part of the slopes
For high-quality plastering of the upper slope, many recommend increasing the number of layers and at the same time reducing the volume of mortar applied with a spatula. Malka will be useful to you when making plaster slopes with an angle, if this angle should be the same on all surfaces. Using this tool is simple: install one end on the window frame, and the other on a wooden strip, which is fixed to the edge of the slope.
All irregularities are removed with fine-grained sandpaper.After this, a layer of finishing putty is applied. All irregularities are removed with fine-grained sandpaper or paint mesh. The finished, dried slopes are coated with water-based paint in several layers, drying between approaches.
Finished slopes have an excellent appearance and improve thermal insulation
The cheapest - plaster
The slopes of plastic windows can be sealed using plaster. This is the most economical way. However, that's where its advantages end. The disadvantages include a short service life (the plaster will begin to crumble over time), high thermal conductivity and labor-intensive installation.
You can purchase a ready-made mixture (for example, “Emaco”) or make it yourself, using cement and gypsum in a ratio of 1x3. We carry out the work in the following sequence:
Plastering the surfaces of window and door slopes
Plastering window and door slopes is carried out using the same technology. If you theoretically know how to plaster slopes on windows, it’s not difficult, anyone can do it. Before plastering the side part, preparatory work is carried out and mastic is prepared.
Preparation of the solution
The quality of work, strength and durability of the coating depends on the solution. Plaster can be purchased ready-made or made independently using gypsum, cement, filler, and binder material.
In construction, there are two types of mortar:
- Simple - consisting of gypsum, water and sand.
- Complex - slaked lime is added to the solution to prevent the surface from swelling.
Mastics with slaked lime are used for wooden and stone surfaces.
To extinguish you will need:
- Quick slaking lime is poured into a container, pour water to cover the material completely. Leave for 5 minutes for the reaction to take place, after which you can add liquid and mix well until a homogeneous mixture without lumps is obtained.
- Medium slaking lime is diluted with less water. It should be 2 times less than lime. Evaporation lasts half an hour, so do not touch the lime for about 40 minutes.
- Slow-slaking lime is distinguished by an even smaller amount of water: 2 liters of water are taken for half a bucket of lime. Leave for at least an hour to react.
To obtain a homogeneous solution without lumps, a construction mixer is used to mix materials.
To make a high-quality slope with your own hands, you need to follow the proportions when preparing the mastic. If you do not follow them, the solution may be too dense, which will lie in uneven pieces or liquid, spreading and thin. A high-quality mixture clings to the trowel and does not flow down when it is in a vertical position. If the solution flows, it means it is liquid and it is recommended to add a little gypsum or sand to it. If it is difficult to mix the container manually, this indicates excessive density; such mastic is also not suitable for plastering and leveling.
Gypsum for plaster
Construction gypsum is often used for plastering slopes, walls, ceilings and sealing cracks.
It has many advantages:
- low price;
- simple preparation of the solution: water is added to the plaster and stirred until a homogeneous mass is obtained;
- it does not dry quickly, so it is easy for beginners to work with;
- the material is plastic, does not spread;
- When dry, it creates a durable layer;
- suitable for any type of material - wood, stone, drywall;
- Any cladding can be applied to gypsum - wallpaper, paint, snowflakes, decorative plaster (bark beetle, lambskin).
Cement for plaster
Cement is the strongest material that can be used for plastering walls. It is durable and easy to prepare, just like plaster. Cement is a hypoallergenic and antibacterial material that does not grow mold. It sets quickly, in 15-20 minutes, and dries completely in 10 hours.
To prepare durable mastic, mix cement and sand in a proportion of ¼, add water and stir so that there are no lumps.
This mastic has the following advantages:
- the surface does not absorb moisture;
- it does not harbor parasites;
- cement-sand mortar is suitable for all types of work;
- it can be used to seal cracks and plaster smooth walls with a thin layer;
- Slopes made of cement last for many years, the material does not swell or fall off.
You can also use ready-made tile adhesive for slopes inside and outside. It is also based on cement with the addition of fillers. Glue is better for outdoor use because it can withstand temperature changes and does not crack or swell. Apply the glue carefully with a spatula in a thin layer of 1 mm. If more layers are required, the next one is applied when the previous one is completely dry.
A filler is added to the solution - sand, this is its base. Take river water, small, sifted from stones and debris. Sea sand is not suitable because it contains a lot of fragments of shells and salt, which creates an uneven and not durable layer.
Plastering
Sealing slopes with plaster is the cheapest existing option. To work, you will need a dry finishing mixture (gypsum, alabaster), a small set of tools (bucket, spatulas, roller) and water-based paint.
This method has several disadvantages. Firstly, you will have to put in enough effort to get a flat surface. If you have little experience, this may require a lot of time, since you will need to carefully study the plastering technology and watch a lot of videos. Secondly, cracks may appear, which occurs for various reasons.
The technology for applying plaster is as follows:
- The dry mixture is diluted in the required amount of water. It must be taken into account that the work must be completed quickly enough so that the solution does not lose its properties.
- The composition is collected with a spatula and transferred to the surface. If the area has significant potholes, then they should be covered first. The fact is that a thick layer of plaster will not adhere well and will also cause cracking of the material.
- To achieve perfect evenness, use beacons or even wooden blocks.
- Check the sealed area for level.
Plastering window slopes
Advice! You can use a little trick that will help keep the surface unharmed. To do this, use a narrow spatula. The purpose of the event is to create a small depression between the window frame and the applied layer. The instrument is placed at an angle and quickly moved from top to bottom.
This option is suitable when the slopes on the windows have minimal damage. That is, it is only necessary to restore the damaged areas and, after removing the old paint, cover the surface with a new composition. Please note that painting is carried out after preliminary priming.
Painting of plastered slopes is carried out only after applying the primer twice and allowing it to dry completely.
What material to choose for constructing slopes?
There are many options that allow you to make the front door slopes yourself.
Plaster. This finishing material is used everywhere. It must be taken into account that this option has the lowest cost. All work is carried out independently, without the use of special tools. More recently, this method was one of the main ones, but recently its popularity has begun to decline. There are many reasons for this, among which stands out - not the most beautiful visual appearance. Of course, this state of affairs can be easily corrected if you use decorative and textured plaster. Plastered slope
Drywall. The popularity of gypsum boards is only growing. This material allows you to complete all work quite quickly. But this is true for large areas. If you only finish the slopes of the front door from the inside, then there will be a need for additional manipulations. The fact is that during installation, numerous cracks (joints) appear that need to be filled with putty. Drywall slope during installation
MDF panels. This includes laminate flooring. Such products are excellent for finishing work. The panels are installed very simply, the resulting surface has an excellent decorative appearance. But there is one drawback: if the width of the opening is greater than the material used, then it becomes necessary to join. Laminate creates less noticeable seams, but they also impair visual perception. Finishing the MDF entrance door opening
Natural wood. Of course, making door slopes using natural wood is a rather expensive procedure. But we must not forget that the result is a very beautiful coating that has unlimited durability. If necessary, restoration work can be carried out. All activities must be carried out in compliance with numerous technological nuances. Door slopes made of natural wood
Laminated chipboard materials. This option allows you to veneer even very wide openings. Many people mistakenly perceive laminated chipboard as exclusively a material for making furniture. In fact, thinner sheets are used for cladding areas adjacent to the front door, which have very impressive characteristics. Finishing the slope of laminated chipboard PVC panels. Plastic slopes are an option that is more suitable for working with window openings. The fact is that this type of product often comes into disharmony with the material of the entrance structures. Of course, modern technologies make it possible to choose a suitable solution, but this is not always possible. Door slopes made of PVC panels
Decorative stone and brick. There is an opinion that this method is rapidly going out of fashion. In reality, the situation is not so sad. This material allows you to obtain an individual and reliable surface. Please note that laying out the parts will require a lot of time.
Many craftsmen point out that in the future it will be very difficult to complete finishing work on the walls. After all, to work you will have to use a limited set of options
So, for example, cladding with any types of panels will be difficult - they are difficult to fit under the masonry. Decorating the entrance doorway with decorative stone
Extras. This material is most suitable for mounting slopes on interior doors. A box of such designs assumes the use of this option. Therefore, door manufacturers are developing a whole line of extensions that are completely identical in color and texture to the door leaf. Slope of extensions
Do-it-yourself plastering of window slopes
How to plaster slopes on windows? Initially, you will need to spray the walls with a primer to ensure good adhesion of the materials. A liquid solution is thrown onto the wall to ensure better adhesion of the further mixture. This procedure is performed over the entire surface, which will give a positive result. This method works well if the layer of putty is thick. Next, you need to plaster the window opening like this:
- It is necessary to install slats made of wood or metal, beacons that are sold in any store. They are mounted on mortar, but this does not guarantee strength, so you can use screws or dowels if the house is brick. Correctly installed slats serve as a guide for installation.
Installation of beacons on slopes
- The beacons are attached plumb so that they do not move, due to this the slope will be good and even.
- The main beacons have been installed, now we need to make special beacons that will level the surface of the window slope and give shape to the edges.
- The device is easy to make. A nail is nailed from smooth wood, 10-15 centimeters longer than the slope, on the back side, and it is better to bite off the head using nippers so that the outer or internal slope does not get scratched. The nail is driven in at a distance of 4-7mm from the lath.
Plastering process
- Next, the ready-made solution is placed on the slopes, and the layer can be leveled with a small tool, moving the bar from bottom to top, bringing the surface to a level state. The remainder of the solution is removed and the slope is left to dry. This way you can plaster the window slope in one layer, but the work doesn’t end there.
- While the plaster composition is not completely dry, it is rubbed down. The work is carried out from the top to the bottom, using translational movements.
- After drying the solution, the slats are removed; you need to seal the holes that came from the slats with a small amount of material. After which the window slope is grouted again.
Leveling the surface
- Next, you need to bring the surface to a perfectly smooth state; for this you need to properly plaster the walls using a special spatula. The solution is applied in several layers, each of which is rubbed down. When applying the first layer, it will be correct to install a plastic perforated corner around the perimeter of the window so that the slope has the correct shape.
- Next, the window slope is painted in several layers.
During work, while the solution has not yet dried completely, it is necessary to use a spatula to make a furrow between the window and the slopes; the width and thickness should not be more than 5 mm. Next, a sealant or liquid plastic is used to fill the void. This move is necessary for plastic windows, since high temperatures cause them to expand and increase in volume, so cracks and breaks often appear in the slopes, even if the plastering was perfect. The sealant will not allow the slope to deform.
At the end, you can stick a decorative corner around the perimeter of the window, which will add beauty, and in the summer you can cover the window with foil so that heat does not enter the house or apartment. It is necessary to insulate so that the window does not freeze in winter and the warmth does not leave the house. You can choose a window design from a photo on the Internet, and you can learn in detail about the work, solution and DIY technique using the video:
Preparatory stage
Before starting work on the production of plaster slopes, it is worth paying due attention to the preparatory stage. If you have a “new building”, then the slopes are made only after finishing plastering of the remaining walls
In this case, you should wait a few days until the plaster on the walls dries.
If you have a “new building”, then the slopes are made only after finishing plastering of the remaining walls. In this case, you should wait several days until the plaster on the walls dries.
The area under the slopes must be well prepared, cleaned of dirt, dust and any grease deposits. Mortar protruding from the brickwork or beads of concrete should be removed.
Protruding foam residues must be removed
To improve the adhesion of the mortar to the wall, the brickwork must be embroidered in advance to a depth of at least 10 mm. To improve thermal insulation, it is necessary to caulk or blow with foam (which is more convenient and faster) the gaps between the window frame and the wall.
If you have wooden window frames, then you need to lay a special insulating material that will protect the wood from absorbing moisture and subsequent rotting.
In the case of metal-plastic windows, it is recommended that after applying the solution and drying it, make a small notch up to 5 mm wide between the slope and the frame. Then fill it with silicone sealant. This notch will serve as compensation for thermal expansion of the frame and guarantee the absence of cracks on the surface of the window slopes.
Finishing of plastered slopes
If the slope is then painted, the putty will be leveled perfectly. To do this, apply two layers: starting and finishing. The starting putty has a coarser grain; it can be laid in a layer of up to 1 cm. With its help, all defects that are difficult to remove with cement mortar are eliminated. After the finishing putty has dried, all irregularities and protrusions are sanded with a special mesh. Afterwards a layer of finishing plaster is applied. It is even more plastic than the starting one, and can be applied in a very thin layer. With its help you can achieve perfect smoothness.
For a beginner plasterer, getting a perfectly flat surface for painting is very difficult. It is much easier to level the slope for wallpapering. In this case, you can stop at the starting putty.
If, when installing the door, the old slopes were not damaged much and can simply be restored, there will be less work. You just need to pour the solution into the depression and level it with a long trowel (trowel).