Ceramics and cookware are an important part of your kitchen decor and their appearance actually goes a long way in shaping your mood. Agree, breakfast will be much nicer if it is served in beautiful painted plates or cups.
Let's look at a few master classes for beginners that will help you use acrylic paints to transform your ordinary plain plates into small works of art with your own hands.
We will look at 3 main techniques for painting ceramics with acrylic: plates, cups and mugs using a stencil, as well as a beautiful combination of marker and paint.
We talked about dot painting of plates in this article!
How to hang souvenir and decorative plates on the wall 6 ways
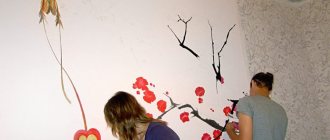
Master class No. 1: painting with black acrylic on a white plate
For this master class you will not need a lot of acrylic paints, just one color is enough. But ceramics painted in this way will not look any less impressive.
Materials:
- cups, ceramic plates, saucers (it is best to use porcelain or earthenware),
- tassel,
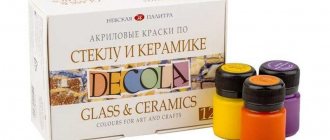
- black acrylic paint Pebeo Porcelaine 150 (or similar),
- damp cloth or towel.
Painting technology:
- First , practice making a drawing on paper so that you don’t have to make unnecessary adjustments on the dishes later. But if there is a mistake on the dishes, it can be corrected with a damp cloth.
- Apply the design to the dishes. These could be flowers, stars, polka dots, small lines, or anything else that comes to your mind.
- The paint is translucent , so for a clearer look, apply more than one coat.
- Leave to dry for 24 hours .
- After this time, place the dishes in a cool oven, set the temperature to 150° C. When the oven reaches the set temperature, set the timer for 30 minutes and leave to bake.
- When the time is up, turn off the oven and let the dishes cool before removing.
- The result is beautiful dishes that only you have!
Painting dishes
Using acrylic, you can make beautiful imitations of ancient Russian painting in the style of Gzhel, Khokhloma, Zhostovo dishes. Sometimes a stencil pattern is applied to the surface of the mug or children's drawings from circles and sticks are copied. Acrylic paints are non-toxic, but not very durable, so it is better to decorate the dishes from the outside or use them only for kitchen decor.
Acrylic is used both for painting glass plates and ceramics.
Painting plates
When considering porcelain sets with floral painting, it is worth paying attention to the fact that the flower petals are made with 1-2 strokes. This technique is called spindle-shaped and is most often used when decorating dishes by painting masters.
To apply a spindle stroke, the tip of a brush moistened with the desired shade of paint is applied to the starting point of the petal and a straight or slightly curved line is drawn. In this case, the brush gradually lowers onto the surface of the plate and the width of the line becomes larger.
Approximately ¾ of the length of the petal begins to tear the brush away from the base, without stopping moving it. The stroke ends with a rounded, narrowed part (if you do not draw the line with the tip) or a point (if you draw a little with the very end of the pile).
When drawing a flower like a daisy, strokes are made from the circle in the center. A rose is painted with arched strokes, and sometimes a petal is created from two adjacent fragments with a sharp beginning and a wide rounded top. When drawing a flower using the Zhostovo technique, 2 shades of color are applied to the pile. When moving the brush, they blend smoothly, creating a volume effect.
Spindle-shaped strokes are also used in other styles of painting with acrylic paints on glass.
Gzhel
Gzhel painting is characterized by its blue patterns applied on a white background. Unpainted plates and dishes are used for imitation. The composition is based on several large flowers (sometimes fantastic birds are painted, etc.).
For a large flower-cup, draw a circle. Then a smaller circle is made on the top of the future corolla, and several small strokes or dots along its perimeter to get a wavy edge.
Flower-kupavka is a traditional design for Gzhel painting.
The bottom of the flower is decorated with spindle-shaped strokes, placing them on both sides of the circle (drawn from bottom to top), as well as several short strokes from the junction of the base of the first (drawn from top to bottom).
The result will be a flower resembling a rose or a bathing suit. Sometimes large flowers are painted with several curved, spindle-shaped strokes emerging from 1 point, like a fan.
When large elements of the composition are indicated, they are connected by smooth stem lines, leaves, curls, buds, etc. are drawn. Use paint of only 1 shade of blue (cobalt), diluting it with water if necessary. A shade gradient is created by moving the brush. Before starting to work on ceramics, it is better to practice making different types of strokes on paper.
Khokhloma
Khokhloma painting is used to decorate wooden utensils and consists of flowers, leaves, stems on a black or red background (rarely on another dark one). Flowers come in different shapes and intricacies. Most often, several strokes of different sizes curved towards the center are made, and the bottom is supplemented with 2 short and pointed “curls”.
Khokhloma painting is used to decorate wooden dishes, but some elements and ornaments can also be borrowed to decorate glass.
There are methods of drawing in a circle, as in Gzhel painting. Red and golden petals are most often painted on a black background, complemented by thin strokes of black paint.
The Khokhloma pattern necessarily includes clusters of large scarlet and small yellow (golden) berries. These are circles and large dots. Large berries are sometimes marked with a dot or small circle on the top. The leaves can be trifoliate (like strawberries) or elongated, with well-defined thin black veins.
The elements of the design are applied without preliminary marking, but you can draw a sketch on paper or copy the pattern you like. When large details are drawn, smoothly curved stems are drawn with small leaf strokes (curls or curved thin strokes).
Unlike Gzhel painting, Khokhloma painting is multicolored, combining green, red, gold and other colors. The blue gamma is almost never used.
Fluid art is a modern technique for painting glass, ceramics, wood and other materials.
Contemporary paintings on glass and ceramics
It is also not difficult to depict a picturesque panel without the skills of an artist. Silhouette drawings are often used in a solid color that contrasts with the background. Letters, figures of birds and animals can be applied by printing and cutting out stencils. The paint is applied with a sponge, carefully covering the surface through the slots of the template.
It’s easy to create an avant-garde canvas as recommended in the master class on fluid art technique in the video:
- cover the surface of a tile or other flat surface with background paint;
- mix several pre-prepared paints in a small plastic glass;
- quickly turn the container over onto the base, let the paint flow onto the surface and remove the cup.
When the mass spreads on the surface, an abstract color picture will be obtained. It can be used as a background for a contour drawing or as an independent piece.
A variant of the technique is fantasy flowers. They are drawn with a thread moistened with a contrasting dye. The thread is laid on a surface covered with fresh paint in smooth waves: at the top with a small amplitude, at the bottom with a maximum amplitude. When everything is laid out, you need to pull the end at the bottom of the picture. As the thread turns shift, they will leave streaks in the form of petals.
Master class No. 2: painting mugs and cups with acrylic paint
A fairly simple drawing will be used here, which does not require special artistic skills , so you only need desire, materials and a little time.
Materials:
- white cup (mug) and saucer (ceramic or porcelain),
- marker Pebeo Porcelaine 150,
- several colors of acrylic paints (blue, sapphire, white, rainbow colors),
- one or two brushes,
- palette for mixing paints (you can use a plate),
- several cotton swabs (to correct mistakes),
- alcohol or glass cleaner, a regular kitchen stove.
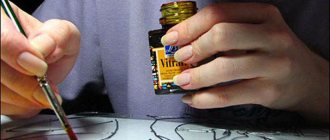
Painting technology:
- First, you need to clean the ceramics and dishes from fingerprints or grease with alcohol or window cleaner
- We draw raindrops on the cup and saucer (except for the center of the saucer where the cup is placed), that is, their outlines. Draw a rainbow in the center of the saucer.
- Thus, it turns out that when the cup is on the saucer, the rainbow will not be visible, but when the cup is lifted from the saucer for tea, there will be a pleasant little surprise, rainbow in the literal and figurative sense of the word. Remember that the paint dries in 5-10 seconds.
TIP: If you have never used a marker before, you need to make the paint start to flow out of it. To do this, you need to shake it for about 30 seconds, and then press the tip onto a sheet of paper until the paint begins to flow. Once the paint has gone, you can start painting.
- Use a medium sized brush to paint the raindrops. Use blue paint. You can paint right away with the paint in the bottle, or you can add a little water so that the color is not so saturated. Do not shake the paint, this may create bubbles which will reduce the quality of the painting.
If you have gone a little beyond the contours and the paint has not yet dried, this can be corrected with a cotton swab or napkin. If the paint has already dried, first moisten a cotton swab with alcohol, and only then correct the mistake. If you made a big mistake while painting and you want to start over, then rinse the dishes under warm water or wipe with alcohol and let them dry well before starting to paint again.
- These paints mix well with each other, so you can paint some of the droplets with blue, then mix with sapphire and paint the rest. You can paint some of them with just paint, or often with paint mixed with water.
- It is important to wash and dry your brush well when switching to each new paint color.
- After you finish drawing the raindrops, move on to the rainbow. To do this, use a very thin brush so that the design is neat and does not go beyond the contours.
- Remember that green can be obtained by mixing yellow and blue, and orange can be obtained by mixing red and yellow.
- The drawing is already finished, but this dish is not ready for use yet. Leave to dry for 24 hours.
- After this time has passed, place the dishes in a cool oven, set the temperature to 150° C. When the oven has warmed up to the set temperature, set the timer for 30 minutes and leave to bake. When the time is up, turn off the oven and let the dishes cool before removing.
- That's it now. You can enjoy your tea!
In general, with the help of these same tools you can draw any other drawing that appears in your imagination.
Master class No. 1: Watercolor on a mug made of nail polish - decor in 5 minutes
Let's start with, perhaps, the simplest, fastest and most accessible technique of applying a drawing with your own hands, which will at the same time be very creative and stylish.
- Nail polish remover, as well as cotton pads and swabs - for degreasing the surface and correcting the pattern;
- Nail polish – 1-3 pcs. different colors (can be thickened);
- A container of warm water – a plastic container or plastic/ceramic plate will do;
- Toothpick - to stir the varnish in the water;
- Napkins - to wipe away excess water.
Drawing technique:
- Degrease the surface with alcohol or acetone;
- Add a little varnish to a container with warm water. If you want to make a more transparent coating, then add only 2-3 drops, and to create a more saturated shade - 5 or more.
After the first polish, immediately add a few drops of the second and then the third polish (if desired).
- Now you need to take a toothpick and lightly mix the paints as shown in the photo above in the lower right corner;
- And finally, we lower the cup into water with paint - you will see how the varnish instantly covers its surface with “marble” stains;
- If necessary, correct the resulting pattern on the mug with nail polish remover, and then leave it to dry for 2 hours.
Well, that's all, the decor is ready!
If you wish, you can add painting with contour or acrylic paints, and use special markers for ceramics to write a congratulation, a funny inscription, a monogram, etc. But keep in mind that it is not advisable to wash such dishes in the dishwasher and heat them in the microwave.
Despite the fact that this is a master class on painting a ceramic mug, you can make drawings on glasses in the same way.
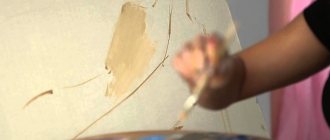
Master class No. 3: Painting a plate using a stencil
If you are worried that you won’t be able to immediately draw something on a plate, then a stencil can help you. It is also useful if you want to make a set of dishes from several identical plates or cups, then a stencil will help save time and achieve identity.
There is one trick worth knowing about this method: the stencil must be removed before the paint begins to dry, since it can then be removed with part of the paint.
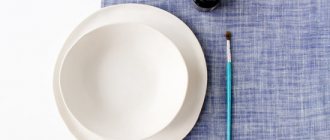
Materials:
- porcelain, ceramic plates or even paper,
- acrylic paint,
- stationery knife,
- contact paper for stencil,
- brushes,
- oven.
Manufacturing stages:
- You can draw the stencils yourself, or you can take ready-made designs and print them on contact paper.
- Place patterned contact paper on a plate.
- Carefully cut out the design with a utility knife.
- Using a brush, apply paint to the plate inside the stencil . If you mixed paints of different colors, make sure you get enough paint for all the plates so that they are all the same.
- Leave to dry for 24 hours.
- After this time, place the dishes in a cool oven, temperature to 150° C.
- When the oven reaches the set temperature, set the timer for 30 minutes and leave to bake. When the time is up, turn off the oven and let the dishes cool before removing.
The set of dishes is ready!
All dishes painted with these paints can be used for food. But it can also be used in room decoration. Either way, she's beautiful and unique!
We paint the mug and sing along
Spring came! They sing. CATS!
Unlike people, cats do not hide their feelings and impulses. They don't care if they have hearing and a voice, or if anyone will listen to them. The soul asks to sing and they sing. If your soul is also singing, and your hands are asking you to do something spring and positive, I suggest taking ceramic paints and painting your favorite mug.
My goal is not to teach you how to get a specific thing. I would like to describe the technology with which you can do something “your own”. During the master class, I will talk in detail about what materials I use and what steps you will need to go through if you want to paint your mug. It is not necessary to use the same paints, it is important that they are bakeable (not acrylic). The design on the mug can be anything, but of course I will draw my favorite cats.
A mug for painting can be of any color, shape and size. It is important that there is no design on it initially. I will be painting a white ceramic mug of a special shape, reminiscent of the body of a cat with paws and a tail-handle. Such mugs can sometimes be found in souvenir shops or in online stores selling souvenirs.
Experience shows that those contours and paints that do not require baking turn out to be very unstable and dishes painted with them cannot be used for their intended purpose. Therefore, I recommend using special baked paints that can be fired in a regular home oven at a temperature of 150-180 degrees. Such paints give a bright and durable design, and dishes painted with them can be used for their intended purpose for many, many years. The only restriction is that painted dishes cannot be washed in the dishwasher. In addition, it is not recommended that the design applied with such paints come into contact with food, so you can only paint the outside of the product.
From the point of view of what is used as a binder in the paint base, all ceramic paints can be divided into two groups: water-soluble and those that require a special solvent to work with. The first ones are more convenient to use, because you don’t need to worry about how to wash your brushes or how to correct a blot made during the painting stage - the brushes and drawing are easily washed off with water before firing. However, in my work I usually use oil-based paints from the Italian company Maimeri, Idea Forno Casalingo series. These paints adhere better to the surface of the mug, give brighter colors and a very durable design (subject to the firing rules).
2. Before I started painting, I prepared a sketch of the image that I plan to put on the mug. It will be a funny cat with a guitar.
3. Wash the mug thoroughly and wipe dry. Soak a cotton swab in alcohol-containing liquid and wipe the mug. The surface must be degreased so that the paint adheres well. If there is no alcohol-containing liquid, the mug can be thoroughly washed with ordinary detergent. This stage is very important.
4. Use a cotton swab to pick up some black paint and apply it to the palette. Using a thin brush, draw the outlines of the future cat on the mug. The drawing can be adjusted during operation with a cotton swab dipped in solvent. In principle, the drawing can be applied with a special pencil that draws on glass.
5. Mix some orange and “Indian yellow” paint on your palette.
6. Take a little paint onto a cotton swab and apply the main tone of the cat’s body using tamping movements.
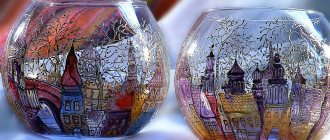
Ideas for painting ceramics
Below are some ideas and designs for ceramic tableware decor and inspiration. These handmade plates are a great gift for New Year, Birthday or Valentine's Day.
The difference between acrylic and stained glass paints
Acrylic paint for glass is coating, that is, it creates an opaque coating that can be made either matte or glossy. It contains pigments (both natural and artificial), as well as water and binders, thanks to which even a beginner can paint with acrylic paints on glass. The paint goes on smoothly and is considered almost indelible. It is waterproof and resistant to direct sunlight.
During the drawing process, the above option is also good:
- the image does not slide off the glass when creating a painting;
- the color palette is quite bright and varied;
- you can add glitter.
The materials are absolutely safe and suitable for joint creativity with children. However, it is not recommended to decorate windows with acrylic - the paintings will prevent daylight from entering the room, which can increase energy costs and harm the eyesight of household members.
There are transparent paints called stained glass. They have a completely different composition and are used somewhat differently. Such compositions are baked - they are applied to the film using stencils and left for a day. When the dye dries, the image is transferred to the glass.
To firmly fix the design, the object being decorated must be heated to a high temperature, which is why it is called “baked”. Agree, such a process is quite complicated and unsafe. Therefore, unfortunately, stained glass paints are not suitable for children. At the same time, their aesthetic qualities are in no way inferior to acrylic, and sometimes even surpass it.
On video: painting on glass with stained glass paints.
Stencils for painting
The easiest way to paint is, of course, a stencil. If you really don’t know how to draw or don’t like to draw, take a ready-made drawing, print it out, cut it out and attach it to a plate with tape. Paint it in the desired color.
Here are the simplest and most popular stencils for plates.
Glass painting
Glassware (for example, glasses) can be painted using another technique, applying convex dots with an acrylic outline in tubes. The surface resembles bead embroidery. Using the same contour lines you can imitate lace or frosty patterns. For this technique, even sketches or templates are often not used.
The dotted method is often used to decorate opaque ceramic and glass-ceramic dishes.
Thin wine glasses made of smooth glass are painted like a glass jar, with a sketch placed inside the container if the design is complex. For a simple ornament, no preliminary preparations are often used, drawing all the lines by hand. You can also decorate a glass using a stencil.