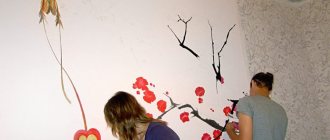
Ceramics and cookware are an important part of your kitchen decor and their appearance actually goes a long way in shaping your mood. Agree, breakfast will be much nicer if it is served in beautiful painted plates or cups.
Let's look at a few master classes for beginners that will help you use acrylic paints to transform your ordinary plain plates into small works of art with your own hands.
We will look at 3 main techniques for painting ceramics with acrylic: plates, cups and mugs using a stencil, as well as a beautiful combination of marker and paint.
We talked about dot painting of plates in this article!
Master class No. 1: painting with black acrylic on a white plate
For this master class you will not need a lot of acrylic paints, just one color is enough. But ceramics painted in this way will not look any less impressive.
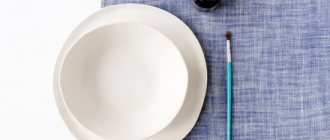
Materials:
- cups, ceramic plates, saucers (it is best to use porcelain or earthenware),
- tassel,
- black acrylic paint Pebeo Porcelaine 150 (or similar),
- damp cloth or towel.
Painting technology:
- First , practice making a drawing on paper so that you don’t have to make unnecessary adjustments on the dishes later. But if there is a mistake on the dishes, it can be corrected with a damp cloth.
- Apply the design to the dishes. These could be flowers, stars, polka dots, small lines, or anything else that comes to your mind.
- The paint is translucent , so for a clearer look, apply more than one coat.
- Leave to dry for 24 hours .
- After this time, place the dishes in a cool oven, set the temperature to 150° C. When the oven reaches the set temperature, set the timer for 30 minutes and leave to bake.
- When the time is up, turn off the oven and let the dishes cool before removing.
- The result is beautiful dishes that only you have!
Master class No. 2: painting mugs and cups with acrylic paint
A fairly simple drawing will be used here, which does not require special artistic skills , so you only need desire, materials and a little time.
Materials:
- white cup (mug) and saucer (ceramic or porcelain),
- marker Pebeo Porcelaine 150,
- several colors of acrylic paints (blue, sapphire, white, rainbow colors),
- one or two brushes,
- palette for mixing paints (you can use a plate),
- several cotton swabs (to correct mistakes),
- alcohol or glass cleaner, a regular kitchen stove.
Painting technology:
- First, you need to clean the ceramics and dishes from fingerprints or grease with alcohol or window cleaner
- We draw raindrops on the cup and saucer (except for the center of the saucer where the cup is placed), that is, their outlines. Draw a rainbow in the center of the saucer.
- Thus, it turns out that when the cup is on the saucer, the rainbow will not be visible, but when the cup is lifted from the saucer for tea, there will be a pleasant little surprise, rainbow in the literal and figurative sense of the word. Remember that the paint dries in 5-10 seconds.
Let's start with the basics
Spot painting can be used on any objects made of various materials. With special contour paints you can do spot painting on glass, leather, wood, ceramics, etc.
Let's look at how you can paint a bottle, plate, glasses and box using a stencil.
First of all, you need to prepare the following materials and tools:
- contour paints in tubes of any colors;
- liquid for degreasing surfaces (glass or ceramic), for example, alcohol or nail polish remover;
- a prepared picture or a ready-made cut out stencil;
- scotch;
- cotton swabs to remove excess paint and correct mistakes;
- needle for cleaning the tube.
There is no need for brushes, since the paint is applied in contours and dots directly from the tube spout.
It is worth noting that the diameter of the point depends on the force of pressure on the tube: the stronger and longer the pressure, the larger the point.
Before work, it is recommended to practice placing dots of different sizes at equal distances on paper. You can try to draw a simple geometric pattern, a circle, a wave. It is necessary to ensure that the points do not merge into one line, but also do not look scattered.
Painting a ceramic or glass plate is easier than other objects, since the surface of the plate is usually relatively flat and smooth. If you plan to use the plate for its intended purpose, then it is better to take a glass one and paint on the outside. In any case, painting on a ceramic plate is done on the inside. If this plate is intended for food, it must be coated with a special acrylic varnish in several layers to protect the painting from water and mechanical stress.
Related article: How to clean grease from different surfaces of kitchen furniture
A plate made of any material – ceramics, glass, wood – can be used as decoration. It can be painted from any convenient side. As a rule, such plates are very flat, without raised sides.
Progress:
- Degrease the surface of the plate;
- Select a stencil with a round pattern according to the size of the plate and secure it with tape;
- Start painting along the contours of the drawing, placing dots at a large distance from each other (they will serve as a guide);
- Let the paint dry and peel off the stencil;
- Add dots to the drawing, changing their size and color;
- Leave the finished craft to dry;
- Coat with acrylic varnish if necessary.
Stencils for plates can be like this:
Decorating bottles is a popular activity among novice craftsmen. Finding an unnecessary glass bottle is not difficult, and there is plenty of room for imagination here.
Dot painting can be one of the ways to decorate a bottle, or it can be an addition to other types of decoration. For example, a bottle can be painted with acrylic paints and the finishing done with dot painting. Or you can use colored dots to create decoupage.
It is recommended to select stencils with an elongated pattern or in the form of a wide ribbon. Drawings and ornaments in any style are suitable for the bottle. For example, you can use these:
Small stencils depicting vegetation or simple patterns are suitable for painting glasses. You can also draw a sketch by hand. If contour drawings are used, they must be secured on the inside of the glass using tape or tape.
When the template is well secured, you should begin painting, guided by the lines of the drawing.
Spot painting on glasses can be used as an additional decoration for a picture made with acrylic paints.
Master class No. 3: Painting a plate using a stencil
If you are worried that you won’t be able to immediately draw something on a plate, then a stencil can help you. It is also useful if you want to make a set of dishes from several identical plates or cups, then a stencil will help save time and achieve identity.
There is one trick worth knowing about this method: the stencil must be removed before the paint begins to dry, since it can then be removed with part of the paint.
Materials:
- porcelain, ceramic plates or even paper,
- acrylic paint,
- stationery knife,
- contact paper for stencil,
- brushes,
- oven.
Manufacturing stages:
- You can draw the stencils yourself, or you can take ready-made designs and print them on contact paper.
- Place patterned contact paper on a plate.
- Carefully cut out the design with a utility knife.
- Using a brush, apply paint to the plate inside the stencil . If you mixed paints of different colors, make sure you get enough paint for all the plates so that they are all the same.
- Leave to dry for 24 hours.
- After this time, place the dishes in a cool oven, temperature to 150° C.
- When the oven reaches the set temperature, set the timer for 30 minutes and leave to bake. When the time is up, turn off the oven and let the dishes cool before removing.
The set of dishes is ready!
All dishes painted with these paints can be used for food. But it can also be used in room decoration. Either way, she's beautiful and unique!
Master class on stained glass painting: Plate “Sunny Mood”
Author: Anastasia Arvest
Author's store
For work I found the following useful:
- Two plates (ideally, they should be the same);
- Beautiful template with Art Nouveau ornament;
- IDEA stained glass paints (including thinner);
- Stained glass paints Hobby Line;
- Gold enamel Plaid;
- Liquid for cleaning brushes (I use a cleaner for polyurethane foam);
- Pebeo stained glass contour, gold shade;
- Brushes (squirrel, pony, synthetic);
- Plastic palette for diluting paints, covered with foil;
- Masking tape;
- Toothpick;
- Degreasing alcohol and cloth.
First of all, I prepared a “pie” for painting: I put a pre-cut template on a plate and covered it with another plate (painting will be done in the reverse technique). I made sure that the motif was located strictly in the center and secured everything with masking tape. Usually I draw templates for painting myself, but here I used a ready-made one, I really liked the pattern.
Next, I begin to degrease my plate for better interaction of the paints with the surface. To do this, I usually use either a napkin or a lint-free cloth. I don’t like cotton pads; they leave “hairy” residue, which then interferes with the painting.
Having degreased the glass until it squeaks, I begin painting. I carefully trace every detail, trying to split long lines into shorter ones - this way the outline comes out more even.
An important detail: when I notice that the line is losing volume or thickening, I clean the contour nose with a napkin. Paint that has hardened on the spout can stain your work.
The end result should look something like this:
The long awaited paint job! I don’t like the brown shade from the jar, it’s too dense and opaque. In order to lighten it, I mix in a thinner. Thinner is like water in watercolor painting - the more water, the lighter the paint. I try not to overdo it, a pleasant shade of cinnamon is quite enough for me.
I'm starting to fill in the background. Trying not to get confused in a bunch of fragments, I fill it detail by detail with brown paint. At the same time, I use a toothpick to get into narrow, hard-to-reach places for the brush; it will be thinner than even a zero or three-zero brush. I work with the background sequentially, and not from piece to piece. In paints based on alkyd resins, it is important to quickly cover the entire area of the painting with paint so that the paint does not have time to “set”, otherwise an unsightly stain will form at the junction of the strokes.
I put the brush aside for a couple of minutes and admire the play of the sun’s rays on the surface.
In the end the background should look like this:
So, the background for our bouquet is ready. Now I start painting the green stems. At the same time, I try not just to paint all the leaves in one tone, but to give the painting some liveliness. To do this, I try to use as many shades of green as possible.
First I take the green one straight from the jar:
Then I complicate the task and mix olive and green on the palette:
On glass it will look like this:
Now, using a thinner, I prepare a light, watercolor-delicate green color and add it to the work:
And thus I add more and more new shades of green: emerald, light green, yellow-green... Until I finish painting the stems. This is what I ended up with:
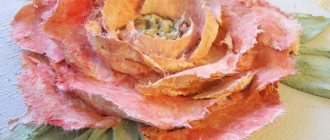
Now I have unpainted flowers. I decided to make them red, and for painting I took 2 shades: scarlet and purple. Even though the work is decorative, I still want to give the petals depth and create some semblance of chiaroscuro. Like this:
I turn the plate over and admire my “semi-finished product”:
Not bad, but this is still only half the work. Now I use masking tape to form the border of the plate. I cut out arches from it and glue it along the edge. Then I outline everything that I pasted:
The border outline is ready. To enhance the effect, I decided to add a brown “bead” of contour to the depth of each “arch.” But this is not at all necessary, I just wanted it that way.
Now I completely leave my contours alone and fill the border ornament with paint. I fill the stripes with olive oil, and add scarlet to the triangles:
The border is ready. I leave the plate to dry for a while (if the paint was applied in a thin layer, a couple of hours will be enough). Then I once again degrease those areas of the plate that were left without painting. This way the golden enamel will stick better.
Now it's time for the gold enamel. Of course, with gilding, this plate would have been simply gorgeous, but I didn’t have any gold on hand, so I decided to go this route. I will apply the enamel with a homemade sponge made from a dishwashing sponge. First I apply it in one layer, using patting movements. At the same time, if bubbles appear, I try to “nail” them a little with a sponge:
And thus I apply the enamel in several layers, while allowing time to dry between layers. I achieve the effect of a dense background; the paint under the enamel almost does not show through, with the exception of bright red flowers. Something like this:
I leave the plate to dry for a couple of days and cover it with varnish. To do this, you can take glass or shellac, most importantly water-based, not alcohol-based, otherwise it will begin to dissolve the painting. And here she is, our beauty:
Stencils for painting
The easiest way to paint is, of course, a stencil. If you really don’t know how to draw or don’t like to draw, take a ready-made drawing, print it out, cut it out and attach it to a plate with tape. Paint it in the desired color.
Here are the simplest and most popular stencils for plates.
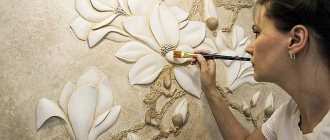
One of the types of fine art is painting plates with acrylic paints; You can not only hang chic plates made by yourself on the kitchen wall and enjoy the beauty of the design, but also get great pleasure from your work, develop your imagination and improve your emotional state. Entertaining master classes will help novice artists understand the technique of decorating ceramic dishes and other kitchen utensils.
Tips for working with acrylic on ceramics
Acrylic has some specific features , so when using paints you must follow the recommendations:
- Decorated plates are decorative. They are not intended for food products. In order to eat food safely and calmly, without worrying about your own health and the safety of the painting, you purchase special baked paints. Products painted with a special composition are fired in ovens at 800°C.
- Work with paint only in a well-ventilated area. The workplace should be illuminated, the light rays are directed from the left side, the tools are located on the right for good visibility of the colors on the palette.
- The coloring composition contains water in the base and dries quickly. To add transparency, you can add acrylic thinner for ceramics and glass. When diluted with water, wash resistance decreases.
- When using markers at the end of the creative process and during work breaks, they are closed with caps to prevent the tip from becoming clogged. Store ink pens horizontally.
- The density of acrylic is medium; the paint should not spread or be too thick. You can test it in the following way:
- Dip the art brush into the container with the coloring agent: if the substance drips from the tip of the brush, the mixture is too liquid; too thick material does not fit well on the surface;
- paint in tubes comes out easily, but is washed out - it has a liquid consistency; difficult to squeeze out of the tube - too thick.
- If the applied composition has not yet dried, the drawing can be corrected. It is washed off with water or the incorrectly painted area is removed with a soft cloth.
- To better protect the painting and fix the paint, the ceramics are coated with a protective layer of acrylic varnish. There is another method:
- dry the painting for 3 days;
- Heat for half an hour in the oven at 100°C.
- To prevent the dishes from cracking when heated, they are placed in a cold oven and then heated. After firing, do not remove the hot product; wait until it cools in the oven.
- Acrylic has a translucent tone, so it is best applied to white and light-colored surfaces. To reduce transparency, white is added to the composition.
- If you plan to paint with a wide range of colors, start painting with the lightest shade.
- Intermediate drying of the layers is at least 12 hours.
Stencil painting of plates
The stencil method is suitable for beginner artists and children, as it does not require special drawing skills. The template is printed, holes or shapes are cut out with a stationery knife. In art stores you can buy ready-made self-adhesive stencils.
The following tools and materials are required for the creative process:
- Acrylic paints for glass and ceramics.
- Synthetic brushes.
- Alcohol or degreaser.
- Cotton pads.
- Scotch.
- Stencils.
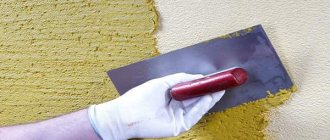
Screen painting of ceramic dishes with acrylic paints is performed as follows:
- Wipe the surface to be treated with a brush or sponge with an abrasive cleaner or alcohol to remove dirt.
- Wipe and dry the dish.
- Some craftsmen recommend sanding the product using steel wool or sandpaper to remove the glossy finish. After this, be sure to wash off the dust formed during processing from the plate with a rag.
- Secure the finished template to the surface with tape.
- Using a brush or sponge, apply the coloring material to the stencil with a pattern, painting over empty spaces, drawing small details and contours.
- Remove the tape and stencil before the paint dries, leaving only the image.
- Dry the product. To speed up drying, you can use a hairdryer.
- The ceramic product is calcined in the oven.
The good thing about stencil painting is that one image can be copied several times. In this way you can create many identical plates.
Second option
The boxes are somewhat more difficult to paint, since all sides and edges need to be processed. This may take some time, but the result will definitely please you.
Article on the topic: Knitted dress for a girl with knitting patterns and description: practicing knitting for a baby
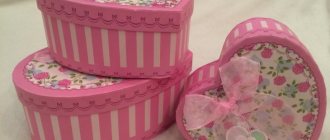
It is not necessary to take the box directly for painting. It can be any tin or wooden box with a lid. Beautiful and original painting will help transform a simple box into a real box.
Progress:
- Make a stencil to size. It is necessary to select round, square or rectangular patterns for the lid and walls of the box. Then the pattern is transferred to a plastic corner folder and carefully cut out with a stationery knife.
- Attach the finished stencil to the box and mark the contours of the design elements with rare dots. Let the paint dry and remove the stencil.
- Proceed with spot painting, focusing on the designated points. It is advisable to fill the pattern with dots in different colors.
- Also paint the sides of the box and leave to dry. Afterwards, you can coat the product with varnish to better fix and protect the paint.
Such an elegant box can be an excellent gift and a convenient place to store small items.
Below are examples of stencils of patterns and designs for dot painting.
Ideas for painting ceramics
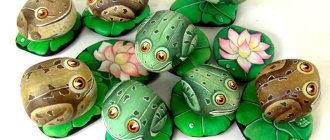
For beauty, the painted ceramic dish is decorated with various decorative elements. Some craftsmen use PVA glue to attach rhinestones, beads, half-beads, cabochons and other decor in the form of hearts, butterflies, stars, as well as beads and multi-colored, finely chopped, crumbly sparkles. To decorate the dining table and create interesting compositions, decorative dummies of vegetables and fruits, which are difficult to distinguish from real fruits, are placed or glued onto painted plates.
Congratulatory inscriptions in Russian or English are applied on plates and cups with a marker and acrylic paint. Such handmade work will be a good gift for any holiday. For the New Year, snowflakes, New Year trees, fairy-tale characters are suitable as drawings, for March 8 - beautiful flowers and plant branches, for St. Valentine's Day - angels with arrows or hearts. You can sprinkle gold or metallic pollen on top of the dishes for shine.
There are many ideas for drawing. They depend on the desire and inspiration of the master. To expand your creative potential and develop creativity, you can watch fascinating videos with lessons from masters on painting ceramic plates with acrylic paints.
Good day to all!
Girls! Dear ones, I have a question. Anyone who does this has been involved in painting dishes or is just in the know.
I had a desire to draw a picture on a plate for my daughter, so that it would be more interesting for her to eat. But I don’t know if there are paints specifically for this purpose. If so, which ones?
My husband says that this is impossible to do, because constant contact with water will wash off the paint + contact with hot food. Will it be possible for a child to eat from such dishes?
Share your experience and knowledge, please.
Z.Y. I told my husband that I would find out from the girls on the SM site)), and then we would argue and discuss))
>
DIY New Year's souvenirs. Painting plates using the “STAINED GLASS” technique
Nowadays even children can practice stained glass painting.
There is nothing particularly complicated about this. You don’t even need special talent, just an unbridled flight of imagination. Therefore, I want to offer you another souvenir idea for the New Year. Moreover, I have already promised to tell you about painting plates using the “STAINED GLASS” technique. You can create New Year's souvenirs with your own hands quite quickly and simply. Agree, you can’t always find what you want in stores, despite the huge assortment. And creating souvenirs by hand is much more enjoyable. Now is the time for gifts. There are impassable lines in the stores, especially in the evenings, when everyone has already gotten off work and started pre-New Year shopping. And sometimes you don’t even have enough money for gifts, to be honest. So let's make New Year's souvenirs with our own hands. And if you are inspired by the idea of painting a plate and giving it as a New Year's souvenir to one of your friends, then join us.
Children's souvenirs for the New Year
You can also involve your child in this fun activity. Painting plates with stained glass paints is not just an interesting activity. It promotes the development of fine motor skills, artistic development, the development of spatial thinking and instills design abilities in the child. Your baby will definitely like it. And children are always happy to create New Year's souvenirs with their own hands.
Children sometimes get bored with drawing on paper, so invite your artist to paint a plate. If you are worried about the safety of the material for your child, then I hasten to reassure you. Special materials for children's arts and crafts have been available for a long time. Buy your child some children's stained glass paints and glitter gels (they are very interesting to work with).
To make a stained glass pattern on a plate, you can use pictures depicting fairy-tale characters or cartoon characters. But, if your child has a desire to portray something of himself, then it’s always “please”! Let him be the sculptor of his own exclusive painting. Perhaps your son or daughter wants to please his grandmother, aunt or godmother and make her a wonderful New Year's souvenir with his own hands.
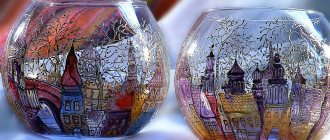
Souvenirs for the New Year - painted plates using the STAINED-GRADE technique
To get started you will need stained glass paints and a transparent plate. The plate needs to be degreased. You already know how to do this if you read the article about painting plates with acrylic. But, just in case, I’ll write again: degrease the plate with a napkin moistened with alcohol or acetone.
Choose a design that you will depict on the plate or draw a sketch yourself. Take a blank sheet of paper, trace the outline of your plate with a pencil and draw a sketch of the future picture inside the paper circle. Trace the outline of the drawing with a black felt-tip pen. Place a transparent plate on top of the finished sketch and transfer the outlines onto the plate using black stained glass paint. You can draw on the side of the plate that is comfortable for you.
When you have transferred the outlines of the drawing, it's time to color. To begin with, you can bring the drawing to life on a sketch with colored felt-tip pens or pencils, and then paint the plate in accordance with the sketch.
Of course, such a plate can be used purely for decorative purposes. And giving such creations is a joy for both the giver and the recipient of such a wonderful souvenir for the New Year. Well, I think that now you can create a New Year’s souvenir with your own hands and please your loved ones with a wonderful gift.
Valentina Loncunova specially for the site Women's Conversations