How to make wood panels for the wall
Traditional wood construction takes its rightful place in the interior of premises, delighting people with beautiful wooden cladding. Over the last three decades of the last century, decorating walls with wood panels has gained wide popularity and was used in public and private buildings. Now the fashion for this is being revived and more and more people are deciding to transform the walls of their home by creating a design based on wood, which gives a special green comfort.
If you are handy and want to make and install wood paneling in your home yourself, see below for tips. If your experience does not yet allow you to do this, then you can always contact specialists in this field in your city.
Material selection
The first step you must take if you decide to get wooden panels on the wall in an apartment or in another room is the choice of material. The market offers overlays with various patterns and profiles. The materials from which they are made also vary. The most widely used materials are spruce and pine. There are solid oak panels, but they are more expensive.
Prepare the wooden grate
The most difficult part when installing wood panels is preparing the wall. There are different opinions on how slats should be installed. Some craftsmen believe that they can be glued directly to the surface. The traditional method, however, involves placing a wooden pallet on which the future wood panels rest.
The lattice is created from slats that lie across the cladding boards. This means that if you want your new wood panel boards to run horizontally, the slats will need to run vertically. The most important thing in the production of wood lattice is the accurate measurements of the wall. Note that the ceilings often diverge in the corner. So, you need to be careful and careful to be accurate.
There are two options for mounting the stand on the wall. The first is more complex and involves installation directly. The second option is to mount it on the wall using pins and screws. This will leave a gap of several centimeters between the wall and your new wood paneling. This is a great opportunity to install the insulation of your choice.
How to install a panel on a wall
Once you've made the stand, check the dimensions again to make sure everything is correct.
The hardest part must be over. Most wood siding trims are sold with scalloped side grooves so that each one fits into the one before it. The exception is wider wood panels, which are designed to be installed with a gap between them. If you end up with these, follow the manufacturer's instructions to ensure the distance you need to leave between the slats.
If the heads on pyronite that will inevitably be visible annoy you, there is a way to hide them. When cutting the letwite for the lamperiat, sawdust probably remained. Mix them with clear wood glue and... So if you manage to hide them, and after varnishing or painting, the irregularities will not be visible at all.
If the nail heads that will inevitably be visible bother you, there are ways to hide them. When cutting the lamellas for sheathing, of course, sawdust remained. Mix them with clear wood glue and apply a thin layer to the holes. This way, you will be able to hide them, and after varnishing or painting, the irregularities will not be visible at all.
Final Notes
The last step that you can take with pride that you are installing oak or other wood panels yourself is to lay down skirting boards that will hold the structure firmly. For this purpose, both ready-made standard and planks with other necessary profiles can be used. Installation depends on the specific option you choose.
Follow these tips and you should have no problem placing these beautiful slabs. In case the whole process seems too complicated for you, look for a professional in the field.
Source
Features of wooden panels
Let's consider what main features can be distinguished from wooden wall panels:
The main feature, perhaps, should be noted that wood is a natural, and therefore anti-allergenic material. Thanks to this, such wood products are especially appreciated by customers.
Also, each tree is unique in nature, and it is simply impossible to find panels with exactly the same pattern; the pattern is always different from the previous one and you don’t get tired of looking at it. This type of decoration intended for the ceiling has at all times been a sign of aristocracy, which dates back to ancient times.
By using wood trim, you will fill your home with the essential aroma of tree resin, which is very beneficial for your health, and will also ensure a comfortable room temperature because wood is a natural insulator.
Wood panels are antistatic and do not emit harmful substances, which is very important in the modern world.
Wooden wall panels
Every owner wants to make the design of the room unique when moving into a new apartment or doing a major home renovation. There are many materials on the construction market for wall decoration, from ordinary wallpaper to 3D models. Wooden wall panels are relevant not only because of their safety, but also because of their unique design and unique colors. With such panels the room becomes cozy and warm.
Where to buy wood panels for walls?
Most people who dream of decorating their home interior with wood panels ask this question. Despite the huge amount of this type of finishing made from non-natural materials, wood is in great demand among buyers in Russia.
Professionals who know their business create amazing and unique wood plates in different styles: Renaissance, classical, oriental, modern or custom-made.
The result is an exclusive interior design that adds an elegant and sophisticated style to your home.
Wood panels for wall decoration: varieties and classification
There are many finishing materials made of wood on the construction market, which are classified according to the following criteria:
Cladding has different costs. It depends on the material being made - it will be a valuable type of wood or chipboard.
Decorative slatted
These are long slats, up to 3.7 meters long, up to 30 cm wide, their thickness varies. They are made from wood, PVC, fiberboard and other materials containing wood shavings.
They are used to decorate small rooms where there are many protrusions (corners). If the decoration is light in color, its use visually enlarges and brightens the room or corridor.
Fixing the slats horizontally stretches the room lengthwise; vertically fixes it to visualize a high ceiling. Installation is carried out on the frame base with staples or self-tapping screws.
Made from natural wood
Cladding material made from various types of wood is valued for its unique pattern, shades and play of colors, as well as for its warmth and comfort.
During processing, the wood is handled carefully to preserve its textured pattern and shade. In most cases, the panels are not painted, but coated with colorless varnish for expressiveness and protection from external factors. Wood material can be called capricious - it does not tolerate moisture or sudden temperature changes. Constant exposure to hot air is also unacceptable. Humidity and temperature must be optimal.
Pressed panels
Cladding made from pressed wood chips today is non-toxic.
Thanks to new technologies, the composition does not contain phenol glue. Production takes place under great pressure. The pricing policy has not changed. The panels are still affordable to the middle class and perfectly decorate the premises. The facing material is produced in various colors, with patterns or “wood-like”, plain.
Some of them are coated with clear varnish, while others can be painted yourself, adding individuality and achieving the desired result.
There are three ways to mount the material on a rough base: frameless: with glue, screws and a frame.
Artificial wood-look wall panels
The cladding is made of polyvinyl chloride. Painted to match the color of wood. The textured pattern can be exactly like a tree in cross-section. These panels are used for finishing wet rooms, balconies, corridors, living rooms in private houses, loggias and attics. In places where natural wood may swell or crack, PVC will retain its original appearance for a long time.
Self-adhesive panels
Self-adhesive panels are made from PVC and MDF.
They are easy to install (without dirt, dust, without reducing the space of the room), and they are also durable. The material has a number of features, including the influence of humidity is unimportant, improved sound insulation, long service life without loss of appearance.
The shape is different: slats, squares. Mounted on the entire wall or partially, chaotically.
Types of coatings for wood panels
To make wooden panels even more durable and reliable and give them a more attractive and radiant appearance, various types of coatings are applied to walls made of wooden panels:
To prevent the negative effects of moisture on wood panels, wax, various types of varnishes and other compounds that are safe for health are used. To give the panels additional strength, embossing, or in other words pressing, is performed. Using a hot press, various designs and ornaments are applied to the panels, which are later painted during manufacturing. Laminate, that is, a decorative laminating film that primarily protects the surface of the panels on the walls from fading under the influence of ultraviolet rays and protects against various types of influences, for example, mechanical, thermal or chemical.
Decorating walls with wooden panels in an apartment: masonry options
The finishing material can be fixed to the walls at different angles. It all depends on the chosen design, as well as the priorities of the owner. A decorated room looks individual because there are many options for decorating the interior with wood. The wall will be finished with slats diagonally or vertically, but there will be no repetition, because there are different textured patterns, shades, wood types that have their own shades.
Herringbone
An interesting way to fix slatted material.
There are 2 types of herringbone installation: fixing the slats at an angle to each other (a herringbone pattern is created on the wall, the branches from below look up, and the length of the “branches” depends on the size of the wall and the room), the second method is to lay the slats one on top of the other horizontally . Slats are used in various widths and lengths. After installation, the herringbone can be painted in a color that matches the interior, or it can be coated with colorless varnish. However, they sell slats on the market that are processed and painted, so they only need to be fixed on a rough base.
Horizontally
If you mount the slats horizontally, the room visually becomes longer. I use 2 methods of fastening: on a frame base or glue. In the first case there is a benefit:
The second method has the following advantages:
Each method has its drawbacks, however, when choosing a fixation method, practically no attention is paid to them.
Horizontally fixed slats have different widths - this is of great importance in the overall picture of room arrangement.
Basically, cladding is done up to half the wall from the baseboard, combined with wallpaper, painting and other finishing materials. They create a contrast in the form of “dark-light” or stick to one tone, emphasizing the overall color scheme of the room.
Vertical
The slats are fixed according to the same scheme as in horizontal cladding.
The vertical position increases the height of the ceiling, so installation is carried out from bottom to top. The slats have different widths, colors, and patterns. They are used on balconies and corridors.
If the room is dark, choose light colors. Sometimes one wall is highlighted with decoration, on which there is a niche and illuminated shelves. This makes the room interesting, it is divided into zones: watching TV, a place for necessary significant things.
DIY installation algorithm for MDF wall panels
- Installation starts from the corner. MDF panels are cut to the required sizes and in the required quantity, the cut is made with fine sandpaper;
- The tongue ridge is removed from the first panel and installed in the corner using nails; Clayers secure the lock from the groove side;
- The next panel and all the others are attached using the same technology; a ridge is inserted into the groove. Thus, the installation occurs until the last two rows remain;
- The ridge of the last panel is rounded and half removed;
- After installing the remaining panels, they will need to be inserted “housewise” until the required click;
- The last panel is attached using self-tapping screws.
Take your time to complete the last two steps, some experience is required here, practice first on scraps of material.
The same algorithm is used to finish the slopes. If the slope is less than 1.8 times the width of the finishing material, then the cladding will be done across; in the case of a wide slope, any method can be chosen. There should be no problems with finishing corners and crevices; there is a wide range of skirting boards and corners. All that is necessary is to correctly cut, round, sand the sections and install.
Options for covering walls with wood panels in an apartment
There are 3 ways to attach the cladding to a rough surface.
The most popular is lathing. For this type of fixation, there is practically no need to prepare or level the rough surface. Electrical wires and cables for the Internet and television are hidden behind the panels. They are insulated with mineral wool, which also contributes to better sound insulation.
When installing with glue, the rough surface must be flat, without obvious slopes or defects. In this case, the room should have moderate humidity and no sudden temperature changes (the wall should not be cold and wet).
When using staples, there should be no holes or bumps on the wall, no blown plaster or cracks.
Before gluing, the wall must be thoroughly inspected for cracks. If there are differences of more than 5 mm, plastering and puttying work must be carried out.
Purchase glue designed for working with wood and follow this plan:
If glue gets on the front side of the cladding, it must be removed immediately with a sponge or rag. After drying, this will be difficult to do, and the appearance may be ruined.
Staples
To fix the wooden cladding onto the brackets, you need to make markings on the rough surface. Using this marking, the staples are secured with self-tapping screws.
The first panel is installed in the corner of the surface and secured with a bracket. The next one is adjusted under the first one and to the end of the wall.
Profile
The cladding is also carried out on a metal profile.
This is the most time-consuming option, but it has advantages. To create the lathing, the surface is treated with an antiseptic.
After this, markings are made and a metal profile is attached to it. Sequence of work:
The panels begin to be installed from the corner to the end of the wall. After fixing the surface, you can carry out further work: paint, stick a film, wipe off dust.
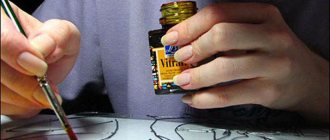
How to choose azure for walls: 3 tips from Belinka
- When choosing a decorative product for wood, in addition to matching its application, think about the level of gloss you want to achieve. For this project, we could recommend a more glossy toplazure or even a varnish with glitter, but designers and psychologists recommend using matte finishes in interiors: it’s more psychologically comfortable.
- If you need just a little bit of glaze of different colors, you can save money: buy 2-3 jars of different colors and mix them in different proportions, eventually getting 2-5 intermediate shades.
- The same wooden wall can be made in the kitchen or even in the bathroom, but for wet rooms, do not forget to initially treat the wood with an antiseptic primer that protects against microorganisms, mold and rot.
Three!
Now we begin to cut the boards to the sizes we need and place them on screws, starting from the floor. It’s better to place each board against the wall, measure and only then cut: even the smoothest walls turn out to be imperfect, so it’s better to play it safe. Alternate boards of different shades, periodically step away to evaluate from a little distance what is happening.
In the photo, the last panel is painted with white wood enamel and decorative hooks have been added, which, however, turned out to be practical: climbing plants in white pots look especially impressive against the background of such a wooden wall.
By the way, want more cool ideas? Read the article “A wooden wall that will completely transform the interior!”
Wall cladding with wooden panels: stages of work
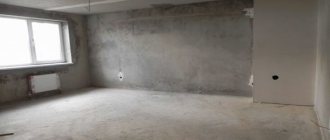
Before finishing the surface, it is necessary to carry out a number of preparatory work. They are not complicated and do not require much time, but the quality of the facing surface and its service life depend on them.
Preparing the surface for installation of wooden wall panels
The surface must be free of dust. Primed and free of cracks and chips. Otherwise, the cracks will expand and increase over time, and the chips will begin to crumble.
It is necessary to prime with an antiseptic to avoid the appearance of fungus and midges.
If there are cracks, they are reinforced and puttied. Chips are also repaired with putty.
Panel Layout
After purchase, the facing material is unpacked and each panel is checked for defects.
Next, you need to designate the material for step-by-step fixation. This is especially important when installing with glue. It hardens quickly. In order not to look for which edge to fix upwards, you need to make a layout. That is, lay them out the way they will be on the wall.
Fastening
The material is fastened using glue intended for this purpose.
Liquid nails are also used. They dry quickly, hold together well and have many positive properties. In some cases, polyurethane foam is used. But we must remember that it expands as it dries. This may damage the cladding. When fixing to the sheathing:
Fixation is carried out carefully, without damaging the front side. All screws and nails are hidden in the joints. When placing and inserting one element into another, the fasteners are not visible.
Grouting the seam
There are unfinished panels. After fixing them, finishing is carried out - gluing with self-adhesive tape, painting. They have no grooves or tenons. They are secured with self-tapping screws and nails. After this, the fastening points are covered with putty in the color of the panel, and the seams are covered with strips. They are plastic and have a slight difference in color.
Technique for installing adhesive-based wood panels
Installation this way is much easier, however, it requires absolutely flat walls. Thus, if there are differences in the depth of more than 5 millimeters on the walls of the room, then it is better to abandon this option of self-installation of wood panels. This method is as follows:
The surface of the walls is pre-cleaned and treated with a primer. A special adhesive mixture is applied to the wall prepared in advance. Using a spatula, roller or brush, spread the glue over the surface. Similar to the previous version with lathing, the first panel is installed in the corner, and all subsequent ones are installed in its groove, knocking it through the block with a hammer. At the final stage, the coated surface is left until the glue is completely dry.
How to install on solid wood walls
The walls inside the house can be covered with solid boards.
For this, valuable wood species are used. The processing is carried out in such a way that a parquet board is obtained, a velvety base. Oils, varnishes, and wax are used for this. Almost the entire board is fixed using the tongue-and-groove method. It is also applicable for fixing lining. There are also fasteners sold as a set.
Planken and locking connections are used.
For each type of board, a special type of connection is provided, which firmly fixes the material to the surface.
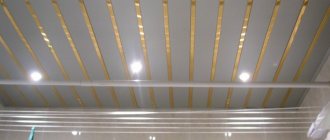
Can it be attached to the ceiling?
Wooden panels are attached to the ceiling.
For this purpose, rack, typesetting, and sheet forms are used. Sizes may vary. Three-layer sandwich panels are also used. They are made of coniferous trees, the top layer is valuable wood. The layers are glued together with an adhesive or resin. The surface is carved, embossed, and glossed.
The wooden surface is easy to care for. Simply wipe the surface with a damp microfiber. Then rub with a dry cloth.
If the surface is corrugated, use a vacuum cleaner with a soft attachment.
Prophylaxis is performed once every 6 months. To do this, use wood polishes that do not contain aggressive substances: alcohol, ammonia. Use polishes with beeswax.
Wooden panels are varied in shape - slats, squares. They have a varied palette of colors and shades. There are also various methods for attaching panels not only to the wall, but also to the ceiling. Each fastening is made based on many factors.
The main types of wood panels for walls
There are several types of wooden wall panels. All of them are classified in several directions.
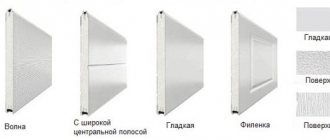
Classification of wooden panels by shape
The different shapes of the panels allow you to expand the scope of application of the coating. Lath panels are produced in lengths from 2.4 to 3.7 m and widths from 125 to 300 mm. They are made in the form of planks with a thickness of 8 to 12 mm.
To connect the elements to each other, grooves and tenons are made in the panels. On the wall, slatted panels are placed at arbitrary angles. Often used for finishing high walls.
Preparing to install wood panels
Before you start decorating walls with wooden panels yourself, it is necessary that the material itself has time to acclimatize. To do this, you simply need to unpack the purchased cladding and leave it in the room where the repairs will be carried out for at least 24 hours. Thanks to such actions, the material will be able to adapt to the microclimate that exists in a given room, getting used to its temperature and degree of humidity. Next, the appropriate method for fastening the cladding products and wood is selected, and the remaining actions are carried out according to the instructions for the specific installation option.
Technology for installing wooden panels on the wall
The panels are attached in three ways: on the lathing, on glue, on construction staples. Review typical surface decorating instructions to learn how to attach wood panels to a wall.
Preparatory work before covering walls with panels
The choice of material fastening option depends on several factors - the condition of the wall surface, the partition material, and the characteristics of the panels.
The use of a frame allows installation without preliminary leveling of the wall surface; only the front sides of the slats are aligned in one plane.
Panels can only be glued onto flat surfaces, so plastering and puttying work is carried out before work. To fasten the panels with construction staples, the wall must also be perfectly flat.
On a brick wall, the panels are mounted on the lathing. Panels thinner than 6.4 mm are laid on a flat substrate.
The amount of material for wall finishing is calculated as follows:
Work is performed at room temperature; Windows and doors in the room must be closed; the walls are primed and dried.
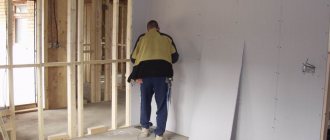
Fastening wood panels to sheathing
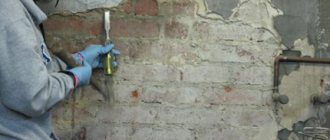
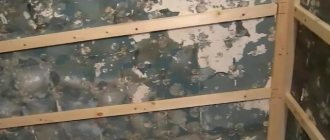
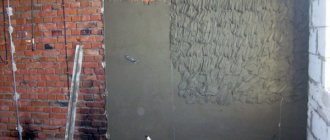
Installing wooden panels to the wall using this method requires assembling a frame from wooden slats or metal profiles. First, inspect the wall for cracks, peeling plaster and other flaws. The partition does not need to be completely leveled, but only the defects can be eliminated so that the wall behind the panels does not collapse. Plaster cracks and dents with cement mortar. After leveling, coat the wall with antiseptic agents and prime.
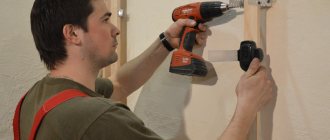
Installation of the sheathing begins with placing vertical slats (beacons) at the corners of the walls. They are installed strictly vertically and are attached temporarily. The position of the bars is controlled using a plumb line. A cord is stretched between the beacons and the curvature of the wall is checked. If the cord touches the surface, the beacons move away from the wall. To eliminate deflections between the slats and the wall, spacers are installed every 50-60 cm, which are made locally. The spacers should protrude 3-5 cm away from the slats; horizontal bars will be installed on them.
The fastening of the sheathing depends on the wall material. The slats are attached to walls made of wood or gas silicate block with self-tapping screws. The slats are attached to brick or concrete walls with tubular anchors with countersunk heads. After fastening, a deflection appears in the places where the fasteners are installed. To eliminate it, the fasteners are loosened, and the resulting gap is filled with a gasket. After attaching the horizontal and vertical slats, the joints are processed with a plane.
To create a metal sheathing, you will need narrow “UD” and wide “CD” profiles. The installation rules are the same as for attaching wooden slats. The parts are connected to each other and to the walls with self-tapping screws. Dowel nails are not used for fastening metal profiles; the slats can “lead”.
After arranging the frame, you can attach the panels. Decorating walls with wood panels starts from the corner of the room. The panel is applied to the slats and oriented so that the strip with the longitudinal groove faces the master. In this position, the panel is secured with nails.
There are several ways to hammer nails. The panels may have special grooves into which hardware is hammered. In this case, the nails should be the same color as the front of the panel. The heads can be cut off so that they are not conspicuous. If there are no grooves, the nails are driven at a 45-degree angle into the bottom of the groove until the heads are completely embedded in the wood.
The second plate is installed with a tenon in the groove of the first, knocked with a hammer until the gaps are eliminated and fastened in a similar way. All strips are attached in a similar way. The gaps between the panels and perpendicular walls are masked with decorative strips.
Installation of wooden panels on an adhesive base
You need to stock up on glue that is specifically designed for working with wood panels. The corresponding note is on the product packaging. Finishing with this method is done quickly if the wall is smooth. In a similar way, you can quickly decorate a wall with tiles, without dismantling the old covering.
The presence of differences on the wall with a depth of more than 5 mm requires mandatory plastering and puttying work. In this case, gluing the products is not recommended. If there are no defects on the wall, glue the panels as follows:
The advantage of finishing with wooden plates
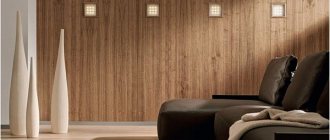
The most common option for wall finishing is wooden panels, which have a number of advantages over finishing with plastic wall panels. Wall decoration with wood panels is an ideal solution for any interior. This will emphasize the exclusivity and sophistication of a residential space, hotel, restaurant and even office. The convenience of installing such material is that, unlike plaster, wallpaper and other types of wood finishing, in this case there is no need to level the walls. Typically, such wall decorations are used in the English interior style, but now many designers are successfully using them in Oriental or Art Nouveau interiors. Thanks to this type of finishing, the walls of the room breathe, noise is perfectly insulated, heat loss is reduced and a constant temperature is maintained.
A special decorative element that will create the integrity of the interior in wood is the finishing of the ceiling with wooden plates made of valuable species. Truly unique interior design will be created by multi-level structures with ceiling beams or squares formed from wooden slats on the ceiling.
This article will talk about the characteristics of modern wooden wall panels.