Primer on plaster and before plastering: choosing the optimal solution taking into account parameters, types
In this article we will look at how necessary a primer is for plaster and before plastering, as well as what materials are used and how it is applied.
These are the questions asked by many compatriots who have planned repair and finishing work on a limited budget. Indeed, despite the fact that the price of primer compositions is low, these costs increase the cost of finishing work in general.
It’s easy to prepare plaster for subsequent painting.
Do I need to prime the walls before plastering?
Purpose of primers:
- strengthening loose foundations (binding dust);
- increased grip;
- sealing pores;
- protection against microorganisms.
In other words, primers (or primers) are used for various purposes, the main thing is to ensure a reliable, strong interlayer connection of building materials. Where materials are easily connected to each other without intermediaries, primers are not needed.
The use of impregnations leads to a reduction in the consumption of plaster mixtures for leveling.
Let's look at the possible problems that the primer is designed to solve:
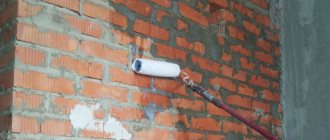
- A loose, porous base that has low strength and generates dust (stains your fingers when touched) needs to be strengthened. If you apply a plaster composition to it, then, having wetted and bound the upper part of the base, the solution does not obtain reliable adhesion to the wall. The strength of the solution itself is higher than that of the base material, so peeling will occur in the contact area as the plaster mixture gains strength. The primer, penetrating deep into the loose base, binds its individual particles, increasing strength.
- The porous base is capable of absorbing moisture from the solution through its pores. And water is necessary for chemical reactions, due to which crystallization and strengthening of the plaster mortar occurs. If the mixture loses water, strength will not be gained. By plugging the pores, the primer prevents the “leakage” of water from the solution.
- Where moisture is possible on one of the contact sides, colonies of microorganisms can develop, leading to stains and deterioration of the finish. To prevent this, the base is impregnated with fungicidal compounds. These compositions are especially in demand for wood bases.
- Prevents the formation of efflorescence. There are special types of waterproofing compounds that form a dense film that does not allow water molecules to pass through.
- Increased adhesion on smooth substrates. Quartz sand of a certain fraction is added to the impregnation composition. Grains of sand make it possible for the plaster mixture to cling to them.
Beginners are also interested in which primer is best to use before plastering walls.
Rules for applying primer for decorative plaster
Decorative plaster is a modern way to protect and decorate buildings, however, at the same time it is a very responsible job. If the material is applied with high quality, the appearance of the house will be attractive, moreover, the consumption of the composition will be minimal, and its durability will be maximum. In order for the solution to adhere very firmly and efficiently to the surface, before applying decorative plaster, it is necessary to use a special primer that is treated with the building. Experts in the field of construction and finishing say that a primer for decorative plaster must be used, and it must be applied correctly, in accordance with the technology.
Extension of service life
In order for the plaster layer to have maximum service life, it is necessary:
- qualitatively level the surface vertically and horizontally;
- apply the finishing type of putty to seal all cracks and irregularities;
- apply a special primer to the surface of the walls, thanks to which the decorative finish will adhere well;
- make the base surface strong enough for further finishing work.
To carry out all of the above work, you first need to find out what materials the building is constructed from and assess the technical condition of the walls. For example, if the base is porous, made of brick, concrete or wood, and also if it is an internal surface, then it must be treated with deep penetration soil. This composition allows the surface to be vapor-permeable, and at the same time, the finishing material adheres well to the base coat. To perform external facade finishing work, completely different types of soil are used. It is advisable to purchase primers containing antiseptic additives, thanks to which mold and fungi will not appear on the surface of a building finished with plaster. If the walls are loose, then primer compositions that have a strengthening effect are used. Thanks to them, the density will be significantly increased and the adhesive characteristics will increase significantly. These types of soil can even be used for applying to a lime layer, because if this is not done, then after a few years the finishing material will begin to deteriorate.
Alignment
Before carrying out finishing work, the area must be leveled. This can be done in various ways, but the hanging method is considered the most effective and efficient. First, the area is marked diagonally using dowels, then a measuring thread is pulled between the driven dowels. Then, using this thread, you can see where the surface needs to be leveled and how much. Before plastering, you can smooth out the gaps using putty. When it is completely dry, it needs to be primed. If there are large protrusions and excess mortar, they can be knocked off with a hammer or chisel. Thanks to high-quality and scrupulous leveling, the consumption of expensive decorative plaster will be significantly reduced. In the event that the surface is very uneven, when the gaps are 4-5 centimeters or more, then experts recommend leveling not by plastering, but by other methods:
- creating a smooth metal frame;
- upholstery of walls with wooden shingles.
We recommend: Types, properties and rules for applying primers of the PF series
The metal frame, of course, significantly increases the load-bearing capacity of the wall area, but it is used less often than wooden shingles. Why? Because metal is significantly more expensive, and it also needs to be coated with an anti-corrosion compound to extend its service life.
Primer selection
The primer applied under decorative plaster can be divided into several categories:
- alkaline, acidic or neutral;
- various indicators of adhesive properties;
- different viscosity of the composition;
- suitable for a certain type of plastering.
If there are many external defects on the walls, such as rust stains, salt deposits, and others, then you need to purchase primer with a high alkaline composition, the pH of which is 8 or more, to hide these defects you need to use a deep penetration primer. This mixture neutralizes any salts, even very deep ones. Rust must be removed, as it reduces the adhesion rate, destroys the wall and the primer if the mixture is chosen incorrectly. Low pH soils are suitable for application inside buildings where air humidity is low. In this case, the soil consumption will be much less than outside the house.
Puttying
When the walls are plastered, they must be puttied, be it external or internal surfaces. You need to select putty depending on the type of plaster or the type of building materials used to construct the building. In order for decorative plaster to be durable and hold firmly, you need to choose the right primer mixture, otherwise the layer of plaster will peel off completely or partially. To prevent this from happening, it is necessary not to use putty consisting of highly viscous substances, as well as those that do not absorb moisture well, for example, you should not use oil putty, glue, or primers based on alabaster.
Correct priming
Before applying a layer of decorative coating, the following conditions must be met:
- prime the area at least twice, the thickness of the layers should be approximately 1 centimeter, more is possible. If you prime with a thin layer, then such protection will be insufficient; it will poorly hold heavy plaster on the wall. Naturally, the thicker the layer, the greater the material consumption;
- The primer can be applied either with a wide brush or with a roller. You should not use narrow brushes, because the layer of soil will lie unevenly, and it will be difficult to maintain the same thickness. Also, experts do not recommend using a spray gun, vacuum cleaner or spray gun, because due to the use of these devices, the quality of the coating will suffer and soil consumption will increase. In addition, deep penetration soils will not be able to penetrate deep enough into the walls if spraying devices are used. The consequence of this will be peeling of the decorative coating some time after application;
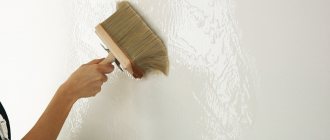
- Upon completion of priming, it is necessary to wipe down the treated areas. This operation must be performed for external and internal work. Thanks to grouting, the soil layer is significantly compacted, this will enable the decorative coating to adhere well to the surface;
- The soil should not be allowed to dry out, so before plastering it is periodically moistened. This can be done with plain water, which can be applied with a spray bottle. Decorative types of plaster are of much higher quality and are easier to apply to slightly damp walls. It is very important to do this, especially for interior walls.
Drying time
Before using the primer mixture, it is important to read the instructions on the package. There you can also find the time it takes for it to dry, since this parameter differs for different soils. But it may be that there are no technical specifications on the packaging. In this case, the experience of professionals suggests that the acrylic version dries in about 3 hours.
For contact and oil soils this time extends to 24 hours. However, everything depends on air humidity and temperature. For example, if the room is more than +25 degrees, the mixture will dry faster, but if at this time the humidity exceeds the threshold of 65%, you will have to wait 3 times longer.
Requirements for puttying
After plastering, any internal and external surfaces are puttied. The composition of the putty is also selected according to the degree of its affinity with the plaster material.
An important parameter that determines the durability of decorative plaster is the compliance of the selected primer with it. Otherwise, after priming, partial or complete peeling of the plaster composition may occur. In order not to run into such trouble, you need to avoid using putties that contain highly viscous substances that have little absorption (for example, oil putties, alabaster-based putties, adhesives).
How to calculate the required amount of soil
To determine the amount required to treat surfaces made of different materials, you need to know the consumption per square meter:
- For concrete, the average consumption is approximately 200 – 300 ml/sq.m.
- For drywall, given that it will have to be treated once in a thin layer, the consumption is approximately 100 ml/sq.m.
It should be remembered that consumption may vary for different types and manufacturers. By calculating the area, it is easy to determine the quantity.
Kinds
The primer can be subdivided depending on different indicators. One of them is the peculiarity of the impact. The mixtures differ in composition, and each additional ingredient affects certain properties of the final product:
- The adhesive composition is used for better contact with materials that do not absorb moisture well. These may include plastic, glass, tiles or metals. Thick coatings are not able to adhere to the plaster on their own.
- Deep penetrating mixture . It must be used for porous substrates such as concrete, plasterboard, brick, and areas of plastered walls. The composition increases the strength of the wall, saves plaster consumption by reducing its absorption.
- Insulating compounds . The need for their use arises when there are visual color defects on the base of the walls: various stains, rust and paint.
The primer forms a layer that prevents dirt from appearing on the finished material or can be used to separate the layers of the rough and finish coating.
- Antifungal and anti-mold compounds. First of all, their use is justified in bathrooms, toilets or kitchens and other rooms with high humidity. They will prevent damage to walls from microorganisms and guarantee a healthy environment in the rooms.
- A universal primer combines several types to improve the quality of the base and facilitate the application of plaster on it.
The compositions of primers are different; therefore, several types can be distinguished:
- Acrylic compositions. This is a universal type of primer used for various types of surfaces and for many finishing coatings, including emulsion paints. The environmental properties of acrylic determine the popularity of the application and provide advantages to the composition: it dries quickly, has no odor, and increases adhesive ability. Such mixtures are not suitable only for metal substrates: they can contribute to the appearance of rust.
- Alkyd primers have sufficient versatility for use on different types of substrates. The only exceptions are walls made of porous materials with increased absorbency: concrete, brick, plasterboard, etc. If the mixture contains phosphates, then it should be used mainly under acrylic paint.
The glypthal subspecies is used mainly for dry rooms. It is coated with hydrophobic materials (moisture resistant).
- PVA soils. Many people try to prepare such solutions themselves. They have a number of disadvantages: they provide insufficient adhesion, can contribute to the detachment of the plaster if the mixing proportions are not correct, and can cause yellow spots on the final finish.
However, there are still several advantages. The low cost of the composition prevents it from losing its relevance during repair work. The adhesive base forms a moisture-proof film on the wall surface.
- Mineral solutions. They are intended for porous bases: gypsum, concrete, walls made of gas silicate blocks, brick or covered with a layer of plaster.
Their main task is to reduce the moisture absorption of the surface, and therefore save the applied solution. This is especially true before wallpapering or applying decorative plaster.
- Polystyrene primer. It is used for wooden and plastered walls. But this composition cannot be used indoors due to its toxicity.
To improve the properties, components that form a film layer or accelerate the drying of the surface can be added to various types of primer mixtures. The type of base is often mentioned in the characteristics of the primer. Therefore, it is appropriate to separate primer materials for:
- wood;
- metal;
- glass;
- plastics;
- mineral bases.
Tools for work
Tools for painting and plastering
Before starting priming, you must prepare all the tools in advance:
- Scoop and broom. Will be needed for cleaning walls. Analog – industrial vacuum cleaner;
- A stepladder if you have to work at height;
- Personal protective equipment: gloves, hat, glasses;
- A damp cloth, if streaks suddenly appear on the wall and floor;
- Chisel, hammer and sandpaper. Will be needed if surface defects are discovered during work, for example, drops of putty, humps;
- Dilution container;
- Paint bath;
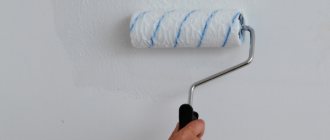
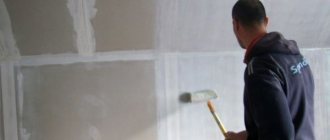
- Brush, roller;
The brush is great for priming a small area. It allows for maximum penetration into small cracks and recesses. A paint roller is primarily used for processing large, flat surfaces. It has a much larger contact area.
There is an option to pick up a sprayer, but it is more advisable to use it for treating large areas, for example, warehouses. In any case, on the canister of each manufacturer there are recommendations for application, which should not be neglected.
A special tray is used together with a roller to prime the walls. It has a corrugated sole made at an angle, on which the roller is rolled and the excess is squeezed out of it.
Why do you need façade primer?
External walls are constantly exposed to various negative influences, which lead to the destruction of materials. Moreover, this applies not only to plastered or painted surfaces, but also to facades covered with plastic and metal. The biggest problem is moisture: it saturates the plaster, penetrates into the pores of the walls, under the sheathing, as a result of which the finish peels off, corrosion and mold appear. It is the primer that gives the walls reliable protection from moisture, forming a thin but very durable water-repellent layer. After impregnation with a primer, the surfaces do not absorb water even during periods of prolonged rain.
Priming the walls
We recommend: Properties and features of the use of primer AK-070
In addition to increasing water resistance, primer compositions also perform other functions:
- provide stable adhesion between the base and the finishing coating, allowing for a more even distribution of the finishing material over the surface;
- strengthen foundations prone to crumbling by deep penetration and filling pores;
- reduce the consumption of decorative materials when finishing the facade;
- Thanks to special additives, they provide additional protection against fire, corrosion of metal elements and the development of fungi.
Why prime the façade of a house at all?
Common Mistakes
Even though the task is not too difficult, common mistakes are common. The first of them is the use of dispersion and water-emulsion pigmented paint. It does not perform all the functions that are required. Also, you should not use it even as a second layer - this leads to the formation of various stains. The main mistake is applying one layer, because almost always two are required.
Not everyone knows whether it is necessary to prime a wall before plastering, so they do not do this work. This approach is also wrong.
Remember that priming the walls always precedes plastering. This is the only way the walls will be able to keep the coating for years. Treating the surface with a strengthening mixture is a common practice for many advanced builders.
Primer tips from experts (2 videos)
Primer work and tools (22 photos)
How to choose the right primer for walls and ceilings, application methods
The use of primer mixtures during repairs is quite justified, because any finishing material must adhere to the base very firmly and reliably. A primer is used for this, and this article will help you choose which one for the walls and flow.
Types of modern primer
Modern manufacturers offer a huge number of primer mixtures. Choosing the necessary types of primers for concrete, plaster, and putty is not always easy. For this purpose, you must first of all know the varieties.
types of primer
Depending on the area of application, types of primers for walls and ceilings are divided into the following groups:
- Alkyd: used only for wooden surfaces and metal structures;
- Acrylic: have universal properties and are therefore suitable for different surfaces. Compositions from this group penetrate 1 cm deep. This property allows the use of acrylic primers for deep impregnation of the base;
- Aluminum: used only for wood. With their help, the wood is completely isolated from moisture, thereby minimizing the occurrence of such unpleasant phenomena as mold or mildew;
- Polyvinyl acetate: used only when using paint of a special composition for priming concrete, wood, metal, plaster;
- Shellac: helps prevent wood from releasing resin and is therefore used as a type of primer for ceilings and walls;
- Epoxy: suitable for deep impregnation of metal and concrete surfaces. Their main advantage is corrosion protection and sufficiently strong adhesion.
Based on the classification presented above, before choosing a primer for walls, it is necessary to determine the material of the surface to be primed and only then purchase the mixture.
When choosing a primer, pay attention to the manufacturer, price and technical specifications. The deeper the level of soil penetration into the base, the better it is for any purpose.
All about acrylic compositions
The most common primer you can choose in different cases is acrylic. It is universal and makes the final finish high quality and durable. In turn, the types of acrylic primers also have their own classification and, depending on the conditions of use and purpose of the primer, are divided into:
1. Universal: used on all surfaces and in all conditions. This primer is equally suitable for both interior and exterior finishing work. If you don’t know how to choose a primer for wallpaper, what to use for subsequent tiling or just painting, take a universal one. The solution of this mixture is slightly cloudy, almost colorless.
A special place in the wide range of universal acrylic primers is occupied by the very popular paint primer today. Its use helps solve several problems at the same time: securely fasten surfaces, get rid of the possible appearance of mold and fungal bacteria, and apply a layer of paint.
The composition is white and the surface is not only primed, but also painted.
Tip: you can buy primer-paint at any store. You can achieve the desired color by adding dye to the soil. For example, after priming, it is planned to paint the wall blue. Add blue dye and the first layer of paint is ready.
We recommend: DIY wall primer: an affordable way to prepare the composition
2. Deep penetration compositions have all the characteristic qualities of acrylic primers. However, primers of this type penetrate much deeper into the surface being treated, smoothing it, thereby bonding the base more strongly.
The absorption length reaches 1 cm. In the question of whether to choose a deep penetration primer or a regular universal primer, primacy should be given to the first group. The smoothing effect makes the surface perfectly smooth, as small particles, sand and dust stick together. This is an excellent option for priming walls under wallpaper, plaster and even tiles.
3. Adhesive: the composition contains a quartz impurity, which makes the surface a little rough, which, in turn, glues heavy finishing materials much stronger. This is a good solution when you don’t know what to prime the walls with before plastering.
Methods of application: when and how to do it
The method of applying primer is no fundamentally different from the methods of applying other finishing materials. The surface is cleaned, sanded, sanded and degreased if necessary. The question of how many times you need to prime the walls or ceiling requires an individual approach, but at least twice.
The following tools are used for application:
- Roller.
- Brush.
- Pulvezer.
Applying the composition with a roller
In each specific case, the tool is selected individually. For example, it is better to apply the primer on a brick surface with a brush, but on a flat ceiling or drywall - with a roller. A spray bottle is used less often, since it is not easy to clean the entire room after using it.
Ceiling preparation
When starting to repair the ceiling on your own, you need to study information on how to properly prime the ceiling. Indeed, despite the apparent simplicity of the work, there are certain rules:
- Having determined what to prime the ceiling with, try to do it evenly. Incorrect distribution will be immediately visible after painting. The area where the primer is applied thicker will be darker than the entire surface.
- Before priming the ceiling before painting, choose the direction in which the fastening material will be applied. With one layer of primer, this is done along the room, perpendicular to the wall with the window. When applied in two layers, the first layer goes parallel to the wall with the window, the second – perpendicular to it.
Preparing the walls
It is necessary to prime the walls in any case. Another question is what is the best way to prime the walls, but more on that later. Before priming, the surface requires mandatory preparation: it is necessary to remove the old coating, smooth out uneven areas, fill cracks, remove dust and dirt.
When working, you should adhere to technology, and not do everything in haste. The first coat of primer must be dry before a second coat can be applied. It must be distributed evenly. Particular attention should be paid to the moment when you need to prime the walls for heavy wallpaper. In such cases, you cannot use wallpaper glue as a primer (as many people advise).
Of course, one might argue, why do you need to prime the walls if they will be sealed anyway? First of all, the wallpaper will hold tighter and will not bubble when glued. And in the future, no dirty tricks in the form of mold or mildew will appear on such walls.
How and what to prime walls for painting
Priming the walls is mandatory, and when asked what to prime the walls with before painting, we can safely say - a universal primer. It has all the necessary properties and is suitable for different situations.
Very often you have to decide whether to prime before painting? Some people think not: when the primer mixture dries, it leaves streaks that stand out clearly after painting.
Dust and dirt can be removed with a vacuum cleaner. Others, on the contrary, argue that this must be done. Here you will have to decide for yourself.
If you want a practical repair, prime it; if you want to save money, don’t prime it.
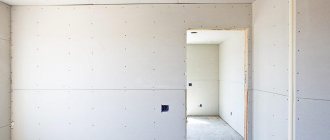
Often the walls are made of plasterboard, as it is an affordable and practical material. Usually it is perfectly flat and, accordingly, many are interested in whether it is necessary to prime drywall? Yes, it is necessary, because the priming process not only levels the walls, but also serves as an excellent factor in the adhesion of the base to the finish.
In this case, again use a universal primer, performing the work in the following sequence:
- Primer for the first time;
- Putty;
- Prime again.
Only after complete drying do they begin to paint the surface.
Advice: when working with primer, the room temperature should be within 5-20 degrees Celsius, air humidity up to 75%! and no drafts.
Surface preparation
Before proceeding directly to the priming process, it is necessary to perform some preparatory work.
For drywall, the simplest preparation is puttying. Applying over putty can only be done after it has completely dried.
Preparing a concrete wall involves removing its roughness. To do this, use a wide spatula at an acute angle to scrape off all the dirt and dust.
If we are talking about bricks, the protruding beads of cement are knocked down, the seams between the bricks are cleaned of dirt and loose particles of cement mortar. An ordinary broom or industrial vacuum cleaner is used.