ps They helped us a lot, so advertising is free))
Published on 11/01/2018 by Stroitel
Reducing the cost of construction for many is a key factor when choosing building materials. The desire to save money always fights with the desire to build a beautiful and reliable house.
Installation of foam plastic
Each material performs only one function, some serve for insulation, others for beauty. But there is something that unites both of these qualities. This is facade foam, and I would like to tell you more about this unique material.
Foam plastic for finishing
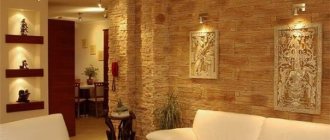
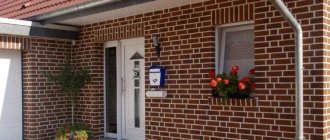
Facade decor of a building with polystyrene foam
Many are accustomed to perceiving polystyrene foam solely as insulation - it is fragile and flammable, and also has an exclusively white surface. In fact, this is a common misconception; modern technologies make it possible to make dense, non-flammable slabs with a wide variety of surfaces from polyurethane foam.
Today in stores you can find polystyrene foam of three markings:
- Psb-15
- Psb-25
- Psb-35
Psb is an abbreviation for the words polystyrene block, and the numbers indicate the density of the board and the size of the foam fraction.
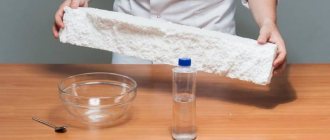
Expanded polystyrene
Basically, polystyrene foam is labeled PSB-35. This is a high-density board that is absolutely not afraid of temperature changes and even open fire. And for installation you only need glue.
Reinforced facade foam is already covered with decorative plaster or, more correctly, polymer concrete, which greatly simplifies the work process. As a rule, imitation brick is applied to such slabs. The wall of the house retains its natural appearance, but without flaws or construction flaws.
Someone reading this article now will think that they have found the ideal finishing material, but I hasten to disappoint you - it also has a number of its own shortcomings:
- Despite its resistance to fire, when melted it emits caustic, toxic smoke, which should never be inhaled.
- The foam facade can be damaged by any sharp or heavy object, after which the entire segment will have to be replaced.
- Mice love to live in warm façade foam boards, so the walls must be pre-treated with special products.
- Polystyrene for the facade does not breathe at all and does not release condensation that accumulates on the walls.
- It is not advisable to use facade foam boards on wooden houses. Accumulating condensation has a negative impact on the tree.
Facade decor of a private house made of polystyrene foam
Fortunately, there are still more positive qualities:
- Does not require additional finishing.
- Does not rot or form mold.
- Does not require additional vapor barrier.
- Significantly saves home heating costs.
- Durable.
- Cheaper than many finishing materials.
- Simple and easy to install.
Tip: when choosing reinforced foam plastic in a store, you need to carefully check the quality of the coating of each block. Chips or scratches will significantly reduce service life.
If the choice is made in favor of facade foam, then you can move on to installation technology.
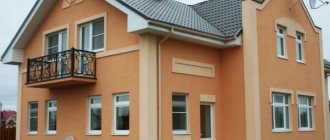
Example House Facade Decor
In this fragment of architectural decoration of the facade of a private house, the under-roof space is also filled with a combination of two separate stucco elements. The height of the composition is greater than its overhang on the roof, which gives a strong effect that lowers the overall height of the house.
Facade stucco molding for windows
The second floor windows are framed by two separate moldings. There is a flat profile along the edge of the slope, with a symmetrical convex element around it. Brackets are embedded into the outer window molding to support the massive top of the window. The profile of the top of the window is made with a bevel, which makes it possible not to cover it with additional metal. The windows of the first floor are complemented by a window sill profile and a figured top with an angular trim.
Decorating the corner of the house
The corners of the house are decorated with rustications of different sizes with chamfers on four sides. Rusts are located at a short distance from the corner.
Interfloor separation
In this example, one strip goes along the line of the window sills of the second floor, and the other along the floor slab of the first and second floors. This technique helps to significantly reduce the visual height of the building.
Finishing the basement of the house
The plinth element is located with the thin part up to smooth out the difference in thickness of the plinth and the main wall.
Wall finishing materials
The main wall decoration is bark beetle or decorative plaster. The finishing coating of the walls is applied after the installation of decorative stucco. This helps to further isolate the joint where the decorative elements are glued to the wall. The basement part is decorated with marble or granite.
Step-by-step installation
Facade decor made of polystyrene foam
Like any finishing work, installation of facade foam must begin with the preparation of materials and tools. For work we will need:
- Primer for facade or impregnation.
- Adhesive for polystyrene.
- Set of spatulas.
- Jigsaw.
- Pencil.
- Roulette.
- Building level.
- Roller.
- Plastic container.
- hammer
If everything from the list is at hand, you can proceed to the installation of façade foam blocks.
The first step is to thoroughly clean the façade surface. Remove everything unnecessary from it: sills, ventilation grilles, gutters, lighting fixtures.
Insulation using foam plastic
If the façade surface was previously plastered, then it needs to be tapped all over with a hammer. Poor quality or old coating should fall off. All protruding irregularities and defects are also removed.
Ideally, degrease the entire facade using gasoline or solvent. This will remove possible oil and grease stains from the surface, as well as remove contaminants in the form of dirt and dust.
Important: if you install facade slabs on a non-greased surface, the glue will not obtain proper adhesion to the wall and will quickly lose its qualities.
When the facade surface is completely cleaned, it must be treated with deep penetration primer and impregnations that protect against fungus and mold. After this, the wall must dry completely, otherwise the glue will not set.
When the facade surface is completely cleaned, it must be treated with deep penetration primer and impregnations that protect against fungus and mold. After this, the wall must dry completely, otherwise the glue will not set.
Now you need to dilute the glue. To do this, pour water into a plastic container and, stirring constantly, add the mixture until it reaches a thick consistency.
Tip: you need to prepare the glue in small portions so that you have time to use it before it hardens. Drying time is approximately 30-40 minutes, based on this, you need to calculate the amount of the finished solution.
After a portion of the solution is thoroughly mixed, it should be allowed to brew for 5-10 minutes, after which it should be mixed thoroughly again. As you work, the mixture will thicken and will need to be stirred again, and perhaps add a small amount of water.
Using a notched trowel, apply glue to the surface of the foam facade block. The solution should cover the entire surface in as even a layer as possible.
Tip: when applying the solution to the block, you should leave about 5 cm on each edge, then when you press it against the wall, you won’t have to remove the excess.
Next, the facade foam block is pressed tightly against the wall, in this position it needs to be fixed for 10-15 seconds, this time is enough for the glue to set. If excess has come out from under the foam, it must be removed so that it does not interfere with subsequent joining. Now you can move on to the next slab.
Insulation of a private house using polystyrene foam
The next foam segment must fit tightly to the previous one with as little gap as possible, otherwise the joints will have to be removed with joint grout, which is extra work and additional costs.
When the façade finishing is completed, holes are drilled in all the necessary places and items removed before finishing are installed. Now all that remains is to secure the decorative elements in the form of stucco molding and cornices. They are made from exactly the same reinforced facade foam, which means their installation is no different from the installation of slabs.
Advice: decorative facade elements and the foam blocks themselves must be from the same manufacturer, then their colors and textures will not differ.
At this point, the finishing and insulation of the facade are completed, and you can forget about them for the next 30 years, and this is exactly the warranty period that manufacturers give for foam plastic facade slabs.
Example House Facade Decor
In this case, the main distinguishing feature of this composition is the massive, volumetric frame of the windows. The under-roof cornice is made of two separate elements. mounted at a distance from each other. The gap between the top. The main cornice and smaller strip on the wall are painted in the color of the decor, which visually gives a single composition.
Exterior window design
The windows of the first and second floors are finished with small moldings along the perimeter. Moreover, a figured frame is created from it into which the brackets are inscribed. On the first floor, a straight top window with a large profile was added. In addition to this, there is an arched element on the second floor.
Decorating the corners of the house with polystyrene foam
The corners of the house are decorated with rusticated simple rectangular shapes of the same size. Such execution is usually carried out by façade workers on site or from a molded product.
Dividing, interfloor strip
There is a voluminous, protruding dividing strip between the floors. Its dimensions and volume create additional relief on the facade of the house.
Finishing the basement of the house
The plinth element is located with the thin part up to smooth out the difference in thickness of the plinth and the main wall.
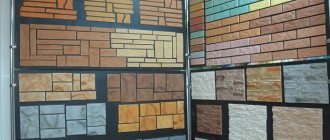
Facade slabs, their types and sizes
Cladding with expanded polystyrene panels has two purposes:
- improving the appearance of the house;
- insulation of walls to reduce energy consumption and create more comfortable indoor conditions.
The outer decorative layer is responsible for the aesthetics of the finish: various materials imitate brickwork, natural stone masonry, textured plaster, and valuable wood.
Facade panels made of expanded polystyrene are one-, two- or three-layer slabs for exterior decoration with simultaneous insulation. Since there is no state standard for the sizes of slabs, each manufacturer produces them in its own line of sizes, designing its own locking connections to prevent the appearance of cold bridges.
Single-layer tiles are made of expanded polystyrene and have an outer thin protective layer of film or acrylic putty. Since EPP decomposes in light, the presence of a finishing layer is mandatory.
Two-layer slabs consist of insulation with a thickness of 40...100 mm and an outer facing layer. This type of finishing panels is often called “thermal panel”. Such slabs are very diverse in color and surface texture. Three-layer panels are nothing more than sandwich panels with polystyrene foam insulation.
Example House Facade Decor
In this example of the design of the facade of a country house, the under-roof cornice consists of two separate elements, forming a massive filling.
Decorating the corner of the house
The corners of the house are decorated with rusticated chamfered stones. The rustics at the corner do not join each other, but are mounted each on its own side.
Window decor, slope
The second floor windows are framed with 12 cm wide molding along the wall. The top of the window is complemented by a profile with an angular trim, as well as a keystone. On the first floor windows, in addition to the molding, a decorative window sill profile is used.
Decorative division
In this case, a double interfloor division of the facade was used. One strip goes along the line of the window sills of the second floor, and the other along the floor slab of the first and second floors. This technique helps to significantly reduce the visual height of the building. Decorative frames with a thin façade profile are used between the dividing strips.
Basement design
The plinth element is located with the thin part up to smooth out the difference in thickness of the plinth and the main wall.
Wall finishing materials
The main wall decoration is bark beetle or decorative plaster. The finishing coating of the walls is applied after the installation of decorative stucco. This helps to further isolate the joint where the decorative elements are glued to the wall. The basement part is decorated with marble or granite.
Properties of foam boards
Expanded polystyrene (EPS) is one of the most effective insulation materials; a slab 80 mm thick, glued to a 38 cm brick wall, is enough to reduce heating costs by 30%. PPP has several significant disadvantages:
- it cannot withstand sunlight;
- fire hazardous - flammability group G3-G4;
- does not allow moisture vapor to pass out;
- rodents live in it.
The facing layer reduces the fire hazard, protects the heat insulator from sunlight, and prevents rodents from chewing through passages; however, it further impairs vapor permeability. In a house lined with thermal panels or a sandwich, forced ventilation will be required.
To increase the vapor permeability of PPS, leading manufacturers use an asymmetric perforation technique that guarantees normal air exchange, so you should not buy cheap panels from unverified manufacturers.
Production of thermopanels from foam plastic
For the production of thermal panels, large manufacturers use the highest quality EPS boards with a density of 35 kg/m3. The slabs are cut on high-tech computerized machines into pieces of the required size, giving them a complex geometric shape with locks for joining and guides for laying finishing tiles.
The finished base is fed to the finishing gluing line, where a special adhesive composition is applied to the face-down layer of tiles or other material and the EPS board and they are pressed together. After the glue has set, the thermal panels are packaged on pallets for shipment to the consumer.
For the production of cheaper thermal panels, foam is used. Foam boards can be made using two methods.
Method 1: The tiles are placed on the bottom of an aluminum mold with guide grooves, back side up. The back of the tile should have a dovetail groove. The top of the mold is filled with polystyrene granules. The mold is closed, and hot steam under pressure is supplied into it through technological holes.
Swelling, the granules fill the entire space of the mold, fastening together and firmly grasping the facing layer due to the groove.
Method 2: This method involves first making a foam board of the desired shape, onto which the finishing layer is then glued. When choosing thermal panels, it is necessary to take into account the composition of the base and the manufacturing method.
ATTENTION: Polystyrene foam is a short-lived packaging material with low strength, vapor permeability, frost and light resistance. The standards prohibit the use of polystyrene foam with a density of less than 35 kg/m3, as well as polystyrene foam, for insulation of buildings.
Foam plastic as insulation under facade plaster
Foam plastics are a group of materials that are foamed and hardened polymer mass. The main volume is occupied by gas, so their density is very low. The structure consists of tiny closed bubbles, which provides high thermal insulation properties.
During production, raw materials are heated to a plastic, almost liquid state. Then the mass is mixed with foaming agents and sent for pressing, pouring or extrusion (extrusion through special molds).
After drying, the material acquires a cellular structure, has low thermal conductivity, and practically zero vapor permeability. It does not decompose in the ground, is resistant to fungi, moisture and many aggressive substances.
Polystyrene foam belongs to group G4, that is, highly flammable materials. Moreover, the main danger lies in the fact that during combustion, deadly substances are released, leading to death.
Fire retardant additives reduce flammability, making the insulation self-extinguishing. Without a fire source, the flame goes out. This group is designated as G3. It is no longer so dangerous and less toxic to humans.
These properties limit the scope of foam plastic. It is used for insulation:
- underground structures - foundations, basements, blind areas, pipelines;
- above-ground - plaster facades, plinths, floors on the ground, walls with external non-combustible cladding, internal structures under fire-retardant finishing.
The main condition when using materials is that the operating temperature should not go beyond the range from -50°C to +70°C. If this regime is not followed, thermal destruction and destruction occurs.
polystyrene foam for wall insulation
Installation of foam sandwich boards
Sandwiches with large format EPS insulation are attached to the façade with self-tapping screws or dowel screws, depending on the wall material. The fastening pitch is 30 cm.
Smaller sandwich panels are often sold under the name “composite panel”; special glue can be used to cover such panels. The sequence of work includes preparing the walls, marking guides or slabs and installing the panels themselves.
Installation of a monolithic facade
After preparing the wall, which consists of removing the old paint layer, marks, mortar residues or peeling plaster, marking the position of the slabs by level is applied to the wall.
A perforated profile is mounted - a starting strip around the perimeter of the house; its shelf should be 2 cm below the junction of the foundation or plinth and the wall. The starting strip serves as a support for the bottom row of panels and prevents rodents and insects from entering the slab.
To give corners a neat look, some manufacturers produce special corner panels. If such panels are not provided, it is necessary to secure brackets for hanging strips at the corners. Installation of finishing panels is carried out from the corner, from bottom to top. If necessary, the slabs are trimmed with a grinder. An adhesive composition is applied to the back surface of the slab along the perimeter, 2 cm away from the edge, and in the center; the panel is placed in place, pressing firmly.
For greater accuracy of finishing, it makes sense to pull the cord at the level of the width of the cladding. The correct position of the slabs is verified by a long rule. When gluing the slabs of the next row, the joint of the panels is shifted to the middle of the slab of the previous row. After the installation of the panels is completed, flashings and window sill ebbs are attached to the corners and slopes of the openings.
Installation of a ventilated facade
Finishing panels made of PPS can be used to create a curtain wall. To do this, after preparing the surface of the walls, a supporting frame is installed. The frame can be made of timber or galvanized metal profiles can be used.
A vapor-permeable film or super-diffusion membrane is attached to the surface of the walls, then a beam with a cross-section of 40x40 mm is mounted in increments of 40–60 cm, at the corners of the building and around the openings. A counter-lattice with a cross-section of 40x25 mm is attached to the beam with a step equal to the height of the panels in the horizontal direction.
The slabs are attached to the counter-lattice with self-tapping screws in the grooves, slightly recessing the heads into the body of the insulation. Otherwise, the installation of a ventilation facade made of thermal panels repeats the sequence of work when gluing the finish.
PLEASE NOTE: From the point of view of heating engineering, a ventilated facade made of thermal panels is not insulation, since when calculating the layers it is not taken into account due to the presence of a gap ventilated with cold air. However, if there is no gap, there is a high probability of fungus or algae forming on the wall.
Example House Facade Decor
This set of architectural stucco elements can be described as more complex in geometry and complete with decorative elements. Techniques were used to bypass additional thicknesses to create greater relief and volume.
Window decoration outside the house
The windows of the second floor are framed with a wide relief molding 18 cm wide. Additional reliefs under the moldings imitating brackets are formed from the window sill profile by cutting at 45 degrees. The top of the window also has a complex relief due to cutting at an angle. The keystone is set into part of the window top profile.
Exterior finishing of house corners
The corners of the house are decorated with rusticated simple rectangular shapes of the same size. Such execution is usually carried out by façade workers on site or from a molded product.
Dividing, interfloor strip
There is a voluminous, protruding dividing strip between the floors. Its dimensions and volume create additional relief on the facade of the house.
Finishing the basement of the house
The plinth element is located with the thin part up to smooth out the difference in thickness of the plinth and the main wall.
Wall finishing materials
The main wall decoration is bark beetle or decorative plaster. The finishing coating of the walls is applied after the installation of decorative stucco. This helps to further isolate the joint where the decorative elements are glued to the wall. The first floor is made with trusses. This type of finishing is carried out by facade workers when insulating walls. Grooves are made in the insulation, which are then reinforced together with the main wall using corners. The basement part is decorated with marble or granite.
What kind of material is this?
Manufacturers of building materials offer a whole lot of materials as insulation. But polystyrene foam is the most attractive among them in technical terms . It is lightweight, has a high thermal insulation coefficient and is resistant to negative environmental influences.
Polystyrene foam is foamed polystyrene. Most of its volume (98 percent) is occupied by air.
Directly for insulation you need facade foam. It is specially marked with the letter “F” in its name . It differs from the usual one in its density and the presence of technical additives, which are designed to increase its rigidity and prevent the occurrence of dents during installation and operation.
Is it possible to carry out work in winter?
Most homeowners think about insulation already with the onset of frost .
But the most surprising thing is that many companies agree to install foam plastic during this period, which is a gross violation of the technology for insulating a living space.
Let's figure out at what temperature outside you can start insulating a private house. The minimum acceptable conditions are from +5 degrees and above, under which the technical qualities of the glue used are maintained. We should not forget about the expansion of materials when heated.
Although polystyrene foam is elastic, this does not apply to plaster or holes for dowels, which will wear out over time.
And despite the fact that some manufacturers produce specialized “winter” glue, there is no need to use it. Firstly, it costs more, and secondly, its adhesion is significantly worse.
Do-it-yourself technology for insulating walls with foam plastic from the outside
External insulation of a building can significantly reduce energy losses and save on heating costs. This method requires the use of durable and moisture-resistant material. The cost of thermal insulation should not constitute a significant part of the construction budget. Experts recommend insulating walls with foam plastic, and the work is easy to do with your own hands. Expanded polystyrene boards are characterized by low thermal conductivity, strength and durability. In order for the installation of insulation to have a noticeable effect, it is necessary to strictly follow the installation technology.
Characteristics and properties of polystyrene foam
Polystyrene foam is a universal insulation material; it can be used on any part of the external walls of a house from the foundation to the roof. It is a white slab with a pronounced granular structure. The closed gas-filled pores that form the basis of the material provide it with optimal performance characteristics:
- thermal conductivity – 0.038-0.042 W/m*K;
- density – 15-40 kg/m3;
- water absorption – 2% of volume;
- operating temperature – from -55º C to +75º C;
- vapor permeability coefficient – 0.05.
The material is environmentally friendly and has no toxic emissions. Its surface is not exposed to mold and fungi. The low weight of polymer products makes it easier to transport, do-it-yourself installation and load on the structure.
Polystyrene foam is produced with the following slab parameters: 100×100 cm, 100×50 cm, thickness is 1-10 cm. To effectively insulate the walls from the outside, you will need material at least 4 cm thick.
The strength and durability of polystyrene foam depends on its density; the higher this indicator, the more reliable the insulation. External wall insulation involves an increased load in the form of a finishing layer of plaster, so slabs with a density of 25-35 kg/m3 will be required. The affordable price of expanded polystyrene has made it the most popular heat insulator in private housing construction.
Disadvantages of using foam plastic
When choosing which insulation to install on the outside of the walls, you need to study all the pros and cons. Foamed polystyrene boards have several disadvantages:
- high flammability class - G3-G4, the material is highly flammable and releases toxic gas when burned.
- damage to the structure by solvents and paint;
- attractive to rodents.
The high fire hazard is compensated by placing insulation under a layer of non-combustible mineral finishing or decorative siding.
Extruded polystyrene foam - differences and similarities of materials
Extruded polystyrene foam (EPS) is a fine-pored insulation with a uniform and dense structure. This type of foam boards has better resistance to moisture, fire, and mechanical stress. The edges of sheets of individual brands of insulation are made with sampling. This design reduces the likelihood of cold bridges forming. The thickness of the slabs is 20-50 mm, they are recommended for installation under siding. The cost of EPS is 1.5-2 times higher than polystyrene foam, therefore, which type of insulation is better - each buyer decides individually.
Calculation of materials for thermal insulation
You can calculate the required amount of insulation by calculating the area of the external walls of the building. To do this, the length is multiplied by the height and the area of the existing window and door openings is subtracted.
Polystyrene foam slabs have a convenient size of 1×1 m and 1×0.5 m, which means 1 sq. m and 0.5 sq. m respectively. The number of products must correspond to the area. It is better to add 10% to the calculated amount of materials for fitting. The size of the mesh for reinforcement is also equal to the area of the walls of the house.
The foam is fastened with plastic dowels; each sheet will require 5 pieces. The amount of adhesive and plaster mixture depends on the thickness of the applied layer and the manufacturer. The packaging of the compositions always indicates the consumable mesh.
The procedure for insulating walls with foam plastic
Preparing the surface for thermal insulation
Universal foam insulation is suitable for installation on any surface of the house: brick, concrete, cinder block. Preparation of the wall surface is divided into several stages:
- Do-it-yourself dismantling of decorative elements, ebbs, water pipes from the surface of the walls.
- Inspect the façade and cover any cracks found with cement or adhesive.
- Checking the horizontal and vertical plane of the walls using a building level. The depressions on the surface are sealed, and the protrusions are knocked down. The difference in plane should not exceed 2 cm; this is important when installing slabs, especially under siding.
- If the surface has been painted, the paint is removed from it. The base is thoroughly cleaned of dust and dirt.
- The walls are covered with a penetrating primer. This layer will improve adhesion to the adhesive and protect them from mold development. The tool for applying the primer is selected depending on the area of the house - a small building is treated with a brush or roller, and a large building is treated with a spray gun. They begin to insulate the external walls with their own hands after the composition has dried.
- If it is intended to install sheets of extruded polystyrene foam with a smooth surface, then it is necessary to apply perforation to it. Otherwise, the material will not stick well to the wall. You can make the slab rougher with a needle roller or a wire brush.
Installation of ebb tides and insulation of slopes
It is better to fix the ebb on the plastic window before installing the insulation. It is mounted so that the edge protrudes beyond the finished wall by 3-4 cm. This placement protects the finishing of the house from flowing rainwater. At the same time, the window slopes are insulated. For this, a distance of 2-3 cm is provided. Facade heat insulation is not suitable due to its excessive thickness; it is necessary to use thinner material. The connection with the general insulation of the external walls will be facilitated by a 1 cm protrusion of the foam.
Methods for installing foam plastic
The technology of insulating walls with foam plastic from the outside offers several ways to fix the slabs on the walls with your own hands:
- Adhesive - a universal or special composition is used for gluing polystyrene foam, for example, Ceresit CM 83. The dry mixture is poured into a bucket of cold water and stirred with a construction mixer or a drill with an attachment.
- Nailing - plastic dowels with a wide head are used, they are called “umbrellas”, “fungi” or disc dowels. A metal or polymer insert is hammered inside the fastener. One slab requires 5 pieces - 4 at the edges and 1 in the middle.
- Combined is the most reliable and widespread method; it combines the two previous methods.
The procedure for attaching dowels
Bonding foam
To do the work yourself you will need:
- spatula 80 mm;
- large spatula 200 mm;
- bucket for solution;
- mixer;
- level.
The special adhesive dry mixture Ceresit CM 83 is diluted in a bucket according to the manufacturer's instructions. The consistency of the solution should not be liquid, otherwise the foam sheets will move down, and excessive thickness will complicate installation. The normal consistency can be selected after the first kneading. You should not mix a lot of solution at once; it may harden before it is completely used up.
Apply the mixture using two spatulas - the small one takes it from the bucket and places it on the large one. You can apply the glue to a polystyrene foam board or to the wall of a house. The first method is recommended if there is a flat surface without significant differences. The solution is applied in a dotted line along the perimeter of the slab, with a distance of 2-3 cm from the edge. Random patches of 6-8 pieces are placed in the central part. The disadvantage of this method is that the foam becomes heavier; installation of the entire insulation will require significant labor costs.
If the wall is crooked, the thermal insulation will not fit well. Unevenness can be corrected by applying the adhesive mixture directly to the insulated surface. Using this method, the thickness of the solution is changed, decreasing or increasing it in different areas.
Installation and joining of slabs
The process of insulating the external walls of a house with polystyrene foam begins with the installation of a starting strip. It is installed around the entire perimeter of the building using anchors or dowels. The horizontal position of the fastening is checked with a level. The profile will keep the insulation sheets from slipping until the adhesive mixture dries.
Do-it-yourself installation of slabs begins from the bottom of the corner of the house. After applying the adhesive mixture, the insulation is pressed against the wall and leveled. The plane is controlled by applying a level. The slabs are laid with bandaged seams using the bricklaying method. The joints must remain dry, without glue. Having filled the entire surface of the outer wall with insulation, it is left for 3 days to dry.
Fastening with plastic dowels
Disc dowels are a universal and convenient fastener. With their help, the foam is securely held on external walls, allowing you to apply a layer of plaster or install siding. The length of such a “fungus” should exceed the thickness of the insulation by 4-5 cm in order to ensure a strong attachment to the supporting structure. To install a plastic dowel in the foam and the wall, a hole is drilled with a punch with a margin of 2 cm. The fastener is inserted without a nail and hammered flush with the surface of the thermal insulation. It is better to use a plastic core with insulation; it will eliminate the appearance of a cold bridge. If the nail protrudes above the dowel head, it must be cut off. “Mushrooms” are placed in two ways:
- on the surface of one slab.
- one in the center, the rest at the joints of adjacent sheets of foam.
Which scheme is better is up to everyone to decide for themselves, but experts recommend the second method. In this case, the fasteners press the joints, and the slabs fit more tightly to the wall.
Treatment of seams and fastening points
After nailing all the foam, inspect the joints of the plates; if there is a gap between them of more than 5 mm, it is filled with polyurethane foam. When the foam hardens, the protruding part is cut off. Holes of 2 cm or more are filled with foam scraps. When one of the foam plates protrudes at the joint, the protrusion is removed with a grater. When using EPS, the joints are corrected with a construction knife.
The joints of the slabs and the heads of the disc dowels are puttied with an adhesive mixture, trying to smooth out all the irregularities.
Insulation reinforcement
To reinforce the insulation of the external walls of the house, you will need a fiberglass mesh and a special mixture, for example, Ceresit CT 85. An adhesive mass is applied to the entire surface of the thermal insulation. The reinforcing mesh sheet is distributed over the surface without folds and embedded in the solution. Adjacent strips are laid with an overlap of 5-7 cm, at the corners the mesh is placed on the adjacent wall. To strengthen the corners, the use of perforated metal corners is effective. The solution is applied with a wide spatula in a layer of 2-3 mm. When applying the mesh in parts, leave a dry area of up to 10 cm. It is coated with a reinforcing mixture when applied under the next piece of mesh. After waiting for the composition to dry (1-2 days), rub the surface with your own hands and apply a leveling layer.
Finishing of thermal insulation of external walls
Applying a decorative layer of plaster will help give your home an aesthetic appearance. Before finishing, the surface is treated with a primer. Next, paintable putty or decorative plaster is applied. After insulating the external walls, finishing material can be installed on them.
Features of insulating a brick wall under siding
Insulating a house with polystyrene foam is often done under metal or vinyl siding. In this case, the installation of heat-insulating boards occurs after installing a frame made of wood or a metal profile. The choice of material depends on climatic conditions - in dry conditions the tree will last a long time, in humid conditions a galvanized profile is preferable. The size of the lathing depends on the thickness of the insulation, usually it is 50 mm. The foam is fixed between the vertical guides using glue and dowels. The installation technology is similar to that described above. The joints are coated with the construction mixture. In cold regions, it is recommended to lay insulation in two layers.
A membrane is stretched over the thermal insulation layer, protecting it from getting wet and exposed to wind. An air gap created by stuffing the sheathing is left between it and the foam. On top of the protective sheet, you need to install the siding under the siding yourself. Its installation is carried out according to the manufacturer's instructions.