Let's examine the surface
If the old paint coating on the walls is really old - it swells, peels and crumbles, then there is nothing left to do but remove the old layer. But often the painted surface looks quite tolerable, and then there is little hope of avoiding tedious and dirty work.
To find out if you can putty over paint, you need to do a little research; you need to determine what kind of dye is applied to the walls. To do this, moisten the surface area with a brush or sponge and leave for 15-20 minutes. As a result, one of the following pictures can be observed:
- The paint foams and can be removed with a spatula without much hassle. This is a water-based composition that will have to be removed (although this is not difficult to do). If you putty over such a coating, it will simply draw moisture from the fresh layer, and it will soon begin to crumble.
The water-based composition is washed off with water Source domstrousam.ru
- The coating has a durable glossy film that is not washed off with water. This is oil paint or enamel. If the coating was applied with high quality, it is not easy to get rid of it, and, in the case of particularly strong adhesion to the wall, it is not necessary. True, before applying the putty, the old layer is treated in a certain way.
- The water had no effect on the finish. Acrylic and latex paint demonstrate a high level of moisture resistance. If they are firmly placed on the surface of the walls or ceiling, cleaning may be a problem. Then you can putty on the walls with paint, but in damp rooms it is risky: the bottom layer may deform over time. In any case, the surface is sanded, cleaned and primed before applying the finishing coat.
If the painted layer does not react to water in any way, its strength is additionally checked. To do this, just take any metal tool (the same spatula) and press along the wall. If cracks appear and the paint begins to peel off, it will have to be removed completely.
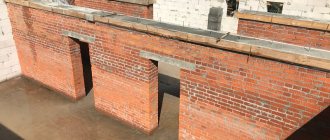
Complete dismantling is required Source parketnayadoska.com
See also: Catalog of companies that specialize in finishing materials and related work
Removing paint from a wall
There are several removal methods. Each of them is good in its own way and removes paint equally well, so the choice is made based on the availability of the necessary devices.
The first and most difficult is the method of mechanical removal. To remove paint from the wall, you can use a spatula or sander. But working with a spatula will take a very long and painful time, and not every home has a sanding machine; in extreme cases, you can rent one from hardware stores.
A simpler method is chemical. In the same hardware stores you can find solutions for oil paint or use acetone. But for those suffering from upper respiratory tract diseases, this method is strictly contraindicated.
Secondly, after applying the solution to oil paint, it will still have to be removed with a spatula when it softens. If this method suits you, you must use protective gloves, a respirator, and good ventilation of the room.
The thermal method is considered to be the most effective. The paint melts under the influence of temperature and can be removed with a spatula. To do this, you can rent a hair dryer or use a blowtorch, directing its flame towards the wall.
But you need to work carefully and wear thick work gloves.
Water-based paint can be removed with ordinary hot water, but it will take a long time to spread it over the surface; the process is reminiscent of washing whitewash, so it is better to use one of the methods given above.
How to delete an old layer
The easiest way to get rid of water-based paint is to wash it off with water and wait until the surface is completely dry. In other cases, resort to one of the following methods:
- Mechanical. Old paint is removed with a spatula; The grinding machine will greatly facilitate the work and increase productivity. In any case, the method is considered labor-intensive and dirty. If the paint cannot be completely removed, additional treatment with a primer solution (concrete contact) will be required to improve adhesion to the finishing material.
- Chemical. The coating is softened with a chemical reagent and then removed with a spatula. The product is applied with a roller or a brush of medium thickness, working in a respirator; During operation, the room needs high-quality ventilation. It is difficult to get rid of paint this way, especially if there are several layers on the wall. In addition, the use of chemistry is always expensive.
Mechanical cleaning of the wall Source gidpokraske.ru
- Thermal. The old coating is heated with a construction hairdryer to a temperature of 500-600 °C. The paint begins to rise and form bubbles. The peeled coating is removed with a spatula. Work requires caution: after warming up, you must work carefully, use a respirator or mask, and do not keep flammable liquids nearby.
How to apply putty to oil paint?
When carrying out renovation work in old premises, it becomes necessary to treat old surfaces, remove the finishing or hide it. Previously, it was customary to paint walls - it was fashionable, beautiful and in the spirit of the times.
Nowadays, such wall decoration is unlikely to suit any interior design, so you need to get rid of the old cladding.
Wall preparation: primer
Even if the old layer is considered suitable to become the basis for future decor, it is not worth plastering over paint without prior preparation. Before starting puttying, is the surface of the walls treated as follows?
- First, the wall is carefully sanded with sandpaper to get rid of the remaining fragments of paint and varnish material.
- Remove dust and degrease the surface with an alkaline solution (a solution of laundry soap is suitable) using a sponge, then rinse with clean water.
The finish will lie flat and last a long time if the quality of the substrate is the same over the entire surface of the wall; such a characteristic as porosity is especially important.
Ceresite primer for smooth surfaces Source kolorit.ru
Is it possible to apply putty on paint: rules of work
Often, when renovating an apartment, you have to level the walls. Especially if it was purchased on the secondary market and located in the old center. The walls in such apartments are not always in perfect condition. Previously, people did not bother themselves much with repairs. Bathrooms and toilets in such houses are painted. Entrances of residential buildings, office premises in city authorities with the same problem.
How to make quality repairs in such a situation? Is it necessary to remove paint before applying putty? Or not to do this? There's no need to rush.
Putty
If the preparation is carried out correctly, applying putty to paint does not cause problems. The surface, dried after priming, is first checked for quality. If small cracks appear, paint mesh for interior finishing work is used to level and further strengthen the finish. In this case, perform the following sequence of actions:
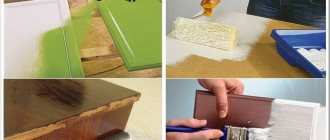
- Apply a layer of putty to a dry wall using a wide spatula.
- While the layer is not dry, lay a painting mesh on top, helping yourself with a spatula.
- A second layer of putty is applied on top.
Leveling the wall with starting putty Source kraski-net.ru
Correct application of putty
Putty is applied to the paint from the corner of the surface, moving to the opposite edge. The corners are striking and are treated with the utmost care. Irregularities in the main areas are covered with longitudinal strokes along the line of formation. For cracks, use a special mesh for putty.
To smooth out uneven surfaces, a tool called a “rule” is used. It is used to check the alignment of the wall in different directions. Puttying the corners is done using a corner spatula. True, it requires special skill.
To finish walls for wallpapering and painting, there are different types of putty and a different number of layers are required. For painting - up to 5-6, and for wallpaper less - only 2-3 layers. They shouldn't be thick. After drying, each layer is carefully sanded with sandpaper.
Puttying under the wallpaper is done with a spatula 60-80 cm wide. For grouting, sandpaper P80 or 120 is used.
When preparing walls for painting, sanding should be done “under a light bulb” - with quality control when an electric light bulb is brought to the area. This way all defects are visible. They putty with a spatula no wider than 60 cm, and use fine-grained sandpaper (P120 or 150).
When working in the putty, air bubbles form. After the base layer has dried, they are sanded with sandpaper. But you can’t overdo it - unevenness will form, which will have to be puttied again.
The video shows sanding walls for putty:
Briefly about the main thing
Very often during repairs it is necessary to apply putty to the paint. To get a high-quality result, you must first examine the walls. This will help you understand what dye was used previously. Depending on the results of the study, further actions are selected.
If the old layer is unreliable, it is removed using one of the available methods. The wall is then prepared for priming and primed, using paint mesh if necessary. A putty mixture is applied to the dry wall; After drying, the surface is sanded, roughened with sandpaper and primed with a thin layer.
Ratings 0
Padding
Puttying of painted walls is carried out after priming. The work uses special solutions that increase surface adhesion. The liquid components of the primer mixture penetrate deeply into the painted layer, providing a durable, even coating under the starting or finishing putty.
When deciding whether putty can be applied to paint without a primer, experts recommend taking into account the properties of the latter.
Priming, performed before puttingtying walls and ceilings, allows you to solve the following problems:
- strengthening the foundation;
- reducing the level of absorption of moisture from the surface by finishing materials;
- leveling walls and ceilings;
- elimination of cracks, chips;
- degreasing panels;
- protection of the putty layer or wallpaper planned for wallpapering from the appearance of dark spots;
- protection of the base from the negative effects of ultraviolet rays;
- preventing the appearance of fungus and mold;
- protection against rust formation on combined surfaces (combining wood and metal fasteners, steel inserts).
The following primers are applied over old paint layers:
- primer compositions for primary treatment of the base;
- standard primers designed to increase adhesion;
- universal primers that help strengthen old, crumbling painted surfaces.
Experts recommend choosing mixtures according to the type of base material. The most popular primers are mineral, acrylic, alkyd, etc.
Primers with a mineral base are intended for preparation for puttying of brick, concrete, and plastered substrates. Alkyd primer is optimal for treating surfaces made of wood, fiberboard, fiberglass, etc. The material is characterized by quick drying, strength, durability, and resistance to mechanical damage.
The primer will need to be stirred to a uniform consistency. It is recommended to dilute an excessively thick solution with water and leave for 2-3 hours. Before use, the primer composition is stirred again.
The primer is applied with a roller. Movements on the surface are performed from bottom to top. During the process, the flow of the composition is controlled. Hard-to-reach areas are treated with a compact brush. The primer is applied in 2 layers, each coating is thoroughly dried.
When performing work in a room with a high level of humidity, it is recommended to additionally treat the surfaces with antifungal compounds. The primer is allowed to dry for 24 hours before applying the putty mixture.
Recommendations from experts
Experienced plasterers adhere to the following rules:
- Use a thick primer. Liquid flows down a smooth painted surface.
- Wallpaper putty is purchased dry. Ready for paint. This variety produces a smoother, more uniform surface.
- Structures made of plywood, metal or plastic are covered with putty with polyester fibers, used in auto repair. The same is done with the door frame and other elements that operate under conditions of vibration and temperature changes.
If the type of paint is not suitable for puttying
Water-based compositions are unsuitable for applying putty, since they soften upon contact with moisture. Other types also have to be removed if they are laid poorly or contain a large number of defects.
To level the surface, cleared of paint and varnish materials, use a standard cement-based putty, for example Vetonit TT and LR. The first one is the starting one, the second one is the finishing one.
If the wall is external and poorly insulated, use putty with perlite filler “Unis Teplon”. It will prevent condensation from forming on the inner surface of the structure in winter.
Putty "Vetonit TT" and LR.
Where to begin
Sometimes a layer of paint is found under the wallpaper removed from the wall, and sometimes it is the finishing coat. Further work with the surface depends on the type of paint applied. If the base is conducive to applying materials on top, you don’t have to get rid of it.
There are two criteria that decide whether it is possible to putty on top:
- coating strength;
- type of paint.
If there are many cracks and chips on the surface, it most likely will not hold up. If the surface looks strong enough, we move on to the second stage of testing and check the paint. To do this, moisten a small section of the wall with water at a temperature of 35-40 degrees to observe the reaction.
If foaming appears on the surface, reminiscent of soap stains, then water-based paint was applied to the wall. If there is no reaction, you are dealing with oil paint.
When not to putty painted walls
First of all, it should be said that there is no clear answer to the question of whether putty can be applied to paint. Building regulations require that the wall be completely cleared of the old coating before applying a new coating. But experienced finishers assure that putting putty on paint is quite acceptable. The main thing is to comply with a number of technical requirements and application features, and the putty will last on the wall for quite a long time.
Oil formulations
It is strictly forbidden to putty walls coated with oil paint using drying oil. Putty and drying oil-based paint interact very poorly with each other, as a result of which the putty mixture can lose its qualities and peel off from the surface.
Oil enamel
In this regard, the answer to the question whether it is possible to putty on oil paint made on the basis of drying oil will be negative. This is also due to the peculiarity of walls painted with oil enamels: they have a very smooth, glossy surface. It is very difficult to achieve reliable adhesion of the finishing solution to it. Before you putty such a surface, it should be pre-treated to give it a rough structure.
Water emulsion
Water-based compositions are extremely popular today - they are used to paint the interiors of both residential and public buildings. They are divided into two types:
- Moisture resistant.
- Non-moisture resistant.
Special additives are added to moisture-resistant solutions to give them water-repellent properties. Non-moisture resistant paint does not have this advantage - such painted walls are afraid of wet cleaning. When water comes in contact with water-based paint, it gets wet and peels off the wall. A similar effect can be observed when applying a putty solution to non-moisture-resistant paint: the paint will absorb moisture from it and get wet, peeling off along with the putty.
Based on the above, to answer the frequently asked question “Is it possible to putty over water-based paint?” Possibly positive. But only if waterproof paint was used for finishing. Otherwise, the walls will have to be cleaned of the water-based composition.
Other cases
It is also unacceptable to putty on paint in cases where the wall covering has visible mechanical defects - cracks and peeling. If you apply the solution to such damaged areas, it will very soon fall off along with loose fragments of the paint layer.
Before you putty the surface, loose fragments should be removed. Another case when painted walls cannot be treated with a putty mixture is if they are damaged by fungus or mold.
Such covering should be dismantled down to the supporting base.
Preparing the construction base
Preparing the base for applying putty is the first stage of work, which consists of freeing the building base from the old coating. However, if the oil paint adheres firmly to the surface, then the walls are cleared of dirt and you can move on to the next stage of work. If the coating was made with a different type of paint or is cracked, work cannot begin until the surface is cleaned. There are three ways to remove material:
- Chemical method. It involves the use of special products that make it easier to remove old paint. The product is applied to the building base for the time indicated on the label. After this, the coating is removed with a spatula. Before performing work, the room is ventilated to avoid intoxication of the body.
- Thermal method. Involves surface treatment with hot air. As a result, the paint softens and is removed with a spatula. The work is carried out with a special construction hairdryer (as in the photo), so the disadvantage of this method is the high price of the tool.
- Mechanical method. It involves removing paint with a spatula or sanding machine. This method of dismantling the old coating is the most cost-effective, but takes a lot of time. The mechanical method can only remove paint that does not adhere well to the surface. It is recommended to free the remaining areas from coating with a special liquid or a hair dryer.
