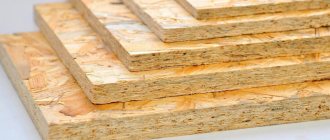
Foam-based products are used for both interior and exterior finishing and insulation work. It is used for heat and sound insulation of interior floors, partitions and walls, and in addition, many parts for decorating the interior of premises are produced from it. Often in the process of finishing work there is a need to paint polystyrene foam for one reason or another.
- What to paint ↓
- Paint requirements ↓
- Painting foam ↓
- Inside the building ↓
- Outside the building ↓
- Tips/recommendations ↓
The first thing you need to think about is why paint polystyrene foam at all ? This operation is performed in two cases:
- Firstly, to create the effect of visual completeness and a holistic, harmonious interior, which consists of a combination of finishing elements, both among themselves and with the style of the room. It is unlikely that there will be connoisseurs of an interior in which white material with a bubble texture would be present as decor. Most, as a last resort, will prefer another type of finishing material that would fit more harmoniously into the decoration, please the eye and be combined with the surrounding environment. But polystyrene foam has too significant advantages over other finishing materials, especially in terms of price and ease of installation, that, as a rule, it is more rational to cover it with a paint coating than to look for a replacement in the form of another material.
- Secondly, a significant reason for painting is undoubtedly the need to protect it from the destructive effects of an aggressive external environment. For example, from exposure to bad weather in the form of precipitation, temperature changes, stormy winds and, ultimately, banal physical deformation of the material. All these factors seriously reduce the lifespan of foam products. As a rule, an unprotected foam coating very quickly, literally in one season, loses its original appearance.
Thus, applying paint and varnish to polystyrene material can be considered a logical continuation of finishing and decoration work.
Gluing instructions
First of all, an adhesive solution is selected. It is determined depending on what the penoplex is glued to; the work is carried out outside or inside the room. The gluing process is as follows:
- The working surface on which the stove will be attached is cleaned of dirt.
- Surfaces are treated with a primer.
- Prepare the adhesive solution and use it according to the instructions. It may be necessary to apply glue to the insulated surface and the penoplex itself.
- The slabs are applied to the surface from bottom to top on the walls or from left to right on the ceiling/floor. The plate must be held until it no longer lags behind the surface.
When the slab is well glued, then you can begin installing the next one.
What paint can be used to paint penoplex without plaster?
Today the issue of home insulation is quite relevant.
Polystyrene foam and penoplex are very popular for maintaining heat in the house. These materials are produced from extruded polystyrene.
Used for thermal insulation of walls both indoors and facade.
Penoplex is used to insulate the foundation, basement, floor, ceiling, roof.
Expanded polystyrene is a unique material whose history begins in France in the 30s of the 20th century.
It is used as a thermal insulation and structural material. They are used both in construction and in aircraft and shipbuilding.
Penoplex
This insulating material has many advantages:
- Excellent thermal insulation characteristics;
- High moisture resistance;
- Withstands severe frosts (down to minus 40 degrees);
- Environmental friendliness;
- Long service life subject to operating conditions;
- Affordable price;
- Easy to process and install.
Video description
Features of fastening foam boards indoors can be seen in the video
Depending on the nature of the work, the glue is applied in three ways:
- continuous layer - over the entire area, evenly, with a distance of 3 cm from the edge;
- stripes - “L”-shaped four stripes in the corners and two long ones in the center;
- point – dense drops are made at a distance of 30 cm from each other.
Having figured out how to glue penoplex to concrete or other surfaces, you need to remember several important nuances of the work. It is better to do all work with an assistant. Be sure to read the glue consumption level and the manufacturer's instructions. Spray adhesives are easiest to work with, but they are not suitable for all surfaces.
Be sure to treat all surfaces with a primer to improve the quality of bonding and protect against fungus. The adhesive solution is applied evenly, in a layer of several millimeters. Immediately after touching, it is imperative to level each slab. Do not forget about safety measures and manufacturers' recommendations.
Each adhesive option is applied differently, this is important to consider during installation of slabs Source obustroeno.com
Plastering penoplex - the first stage of finishing the walls
Whatever one may say, before painting the penoplex, it should be plastered (with the obligatory creation of a reinforcing layer). Protection performed in this way will ensure long-term functional suitability of the thermal insulation layer. Regardless of what material the insulated wall is built from, or how the final painting using Penoplex will be carried out, the decorative finishing algorithm is as follows:
- A plaster solution is prepared, for which the dry mixture is diluted with water in accordance with the manufacturer’s recommendations.
- The thermal insulation layer is cleared of dust and debris to ensure high-quality adhesion of the solution.
- A reinforcing (base layer) is applied to the reinforced heat insulator, namely:
- using a spatula, apply a thin layer of plaster (2 - 3 mm) to an area of no more than 2 square meters;
- a reinforcing mesh is embedded in the applied layer of starting plaster (preferably polymer, since metal is susceptible to corrosion and “cold bridges” may appear);
- the operation is performed by smoothing the polymer fiberglass mesh using a spatula;
- the creation of the reinforcing layer begins from the corners - for this, a strip of mesh is folded in half lengthwise and applied to the corner of the building, so that at least 30 cm of the mesh goes around the corner;
- A polymer fiberglass mesh is sequentially embedded in a thin layer of starting plaster over the entire insulation area.
| Paint application: |
- The dried surface must be treated with a primer, which makes it possible to improve the adhesion of the finishing layer of plaster to the base.
- The finishing layer of plaster is applied, leveled, and, if necessary, sanded.
- Penoplex is painted with facade paints, the choice of which is carried out in accordance with the chemical characteristics of the insulation.
Such a simple scheme for creating a finishing coating, followed by painting the penoplex, makes it possible to ensure a long service life of the insulation. But you should not rush, since not every paint can be used for extruded polystyrene foam.
The best manufacturers
How to glue penoplex to concrete and other surfaces, which manufacturer of the composition to choose? Many experts prefer well-established and well-known companies. Among such manufacturers are Teploskrep, Kleiberit, Penoplex, Technonikol and some other companies. The products of these manufacturers were developed specifically for foam boards. It can be liquid, foamed or dry. The market offers products from domestic and foreign manufacturers in different price categories.
How to choose paint for foam plastic?
First, you need to note that not every surface of the foam can be painted. Don't try to paint plastic laminated ceiling tiles, this is just an example.
So, before choosing a paint, you need to decide on the characteristics it should have:
- It must be waterproof.
- Have sufficient density.
- Must be resistant to various chemicals.
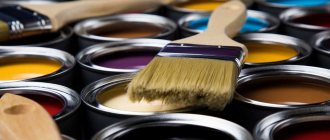
Based on this, we can say with confidence that painting polystyrene foam can be done with acrylic paint and water-based paint.
Advantages of acrylic paint:
- It is odorless and safer.
- She is elastic.
- Vapor permeable.
- It is easy to apply and dries quickly.
- There is a very wide range of colors on the market.
- It has good resistance to dust, temperature changes and moisture.
- The disadvantages of this paint include: fragility and high cost.
Advantages of water-based paint:
- Unlike acrylic paint, this paint is much cheaper.
- The beauty is odorless and harmless.
- Vapor permeable.
- It is also easy to apply.
Its disadvantage is that it is not resistant to dust and is afraid of water.
To choose paint, you just need to pay attention to which side the polystyrene foam will be located on, whether it is inside or outside the room.
Video description
Step-by-step technology for facade insulation with penoplex in the video:
The compositions are designed for external and internal use. Adhesives are resistant to temperature changes, high humidity, and sunlight. When developing the formulations, high-quality materials are used; they are as safe as possible for people and the environment. However, in any case, before starting work, you must carefully study the recommendations and requirements of manufacturers and consult with specialists. Choose an adhesive that will be best suited for a particular surface. Manufacturers also offer special universal adhesives. Some compositions are additional insulation for the basement, roof or foundation.
Compositions for penoplex are developed specifically for slabs and withstand the negative influence of the environment; universal options can be used with different materials. Source stroymat77.ru
Briefly about the main thing
There is no clear answer to the question of how to glue penoplex to each other or to different surfaces. Manufacturers offer specialized adhesive compositions that have the following characteristics:
- high quality adhesives are not afraid of moisture, temperature changes, sun rays and wind;
- the compositions are developed for different surfaces and are applied using several techniques;
- glue is applied in several ways depending on its type and characteristics;
- There are several types of adhesive solutions;
- some compositions are strictly prohibited for use for interior work;
Which one to choose depends on the task at hand and the operating conditions of the insulated object.
With liquid glass things are a little different
The main solvent in this material is simple water, which, as the liquid glass dries, simply evaporates or enters into a chemical reaction. In terms of composition and properties, liquid glass is very close to silicate glue, which was very popular at the end of the last century.
Liquid glass does not contain as many aggressive components as acetone or kerosene, so it does not destroy the structure of penoplex. And the chemical processes taking place in the layer of hardening liquid glass are also practically harmless to penoplex. And the dried silicate becomes almost chemically inert.
Modern experience in the use of liquid glass shows that it can be successfully used for processing penoplex. This silicate composition can be added either to the composition of cement mortars for plastering, or applied directly to the surface of the penoplex, depending on the goals and objectives. At the same time, the surface acquires good protective properties both from moisture and from many chemicals.
The widespread use of modern universal penoplex insulation, which can significantly reduce heat loss, required the development of certain technological schemes, thanks to which insulated walls, after finishing, become a real decoration of the house, and facade insulation with penoplex becomes more and more in demand every day. A question that often arises in this regard is: “Is it possible or not to paint penoplex?” indicates the desire of the owners of private houses not only to increase the level of thermal protection of the building, but also to give free rein to their design ideas, taking advantage of all the possibilities of modern building materials. Unfortunately, before painting penoplex, it is necessary to apply an additional protective layer to it to prevent exposure of the insulating material to ultraviolet rays and direct mechanical impact. It is also necessary to adhere to some rules if you plan to finish the base with bricks after insulation with penoplex.
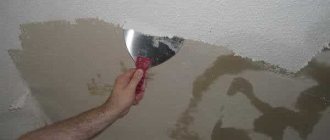
Staining procedure
If there are doubts about the color and adhesion of the composition to the surface, a small test should be carried out. The purchased composition must be applied to a small part of the polystyrene foam sheet and left for two days. Then you should evaluate the result. If the effect is positive, coloring work can begin. Otherwise, the paint will have to be replaced.
When finishing penoplex inside a room, the composition being painted is decorative. The material is thus protected from moisture. Before painting the surface, you should make sure that it is clean and free of greasy stains. When cleaning the surface, make sure that the rag does not leave lint. If there is a large amount of dirt, penoplex is quite easy to wash with warm water.
Paint is applied to penoplex only after the material has been thoroughly dried. In addition, it is applied in layers. They shouldn't be thick. To prevent streaks, it is necessary to work with the tool in one plane. Be sure to wait until the first layer has completely dried before applying the second. Penoplex is not able to absorb paint, so after applying the first layer you should take a closer look - is a second one needed? A good emulsion composition is suitable for painting the surface of penoplex.
- Composition and proportions of mortar for bricklaying
- How to make colored brick mortar
- Size and weight of white sand-lime brick
- Silicate facing brick
Step-by-step scheme of work
Please note that as an illustrative example, we will consider painting polystyrene foam on the facade, and not inside the room. It will be better this way because we will cover all aspects and nuances - after all, the facade is the most vulnerable spot on the house. Due to exposure to ultraviolet radiation, temperature changes and weather conditions.
This is how polystyrene foam is attached to walls
Let's start working with our own hands.
Surface preparation
Naturally, it is assumed that the polystyrene foam is already fixed on the plane and holds firmly. And not only due to the glue, but also due to the umbrella dowels.
What is important to do here is to first level the surface as much as possible, that is, try to level the plane in the area of the seams (usually these are the places where the largest differences are observed), at those points where the dowel heads are located, etc.
Next, you need to clean the sheets from any dirt and dust, and then prime them with a regular acrylic primer. It should be understood that the liquid will not be particularly absorbed inside the polystyrene foam structure, so you can apply it not very carefully. And much of it is pointless to use for the same reason.
Important! Since the primer does not linger on the surface of the sheets, but simply flows down, drips and dried drops will naturally remain on the surface. Therefore, after the soil has dried, you need to walk along the foam with a spatula and remove all these points.
If this is not done, then the paint will seem to repeat the relief of all the droplets, and this will not look nice.
In general, if the sheets are primed and completely dry, then you can start painting them.
Advice: if you do not have the opportunity or time to putty the entire area of the sheets, then try to at least process the seams between them. This is inexpensive and simple - take a roll of putty mesh, glue it along all the seams, and apply the adhesive mass on top of the mesh with a spatula.
This approach will make it possible to better fasten all the foam slabs together and ultimately make the plane as “molded” and durable as possible.
Painting the plane
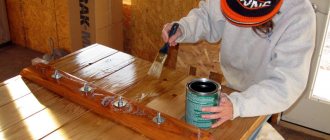
It turns out that painting polystyrene foam itself is a simple and very quick task.
Because the scheme here is quite standard.
- We take a roller, brushes, a paint tray (if possible, it will be faster and better to work with a spray gun).
- We tint the material to the desired color and pour it into the bath.
- Apply paint to the entire surface of the sheets using a roller. At the same time, try to roll the roller in one direction to eliminate the appearance of streaks.
Standard example of facade painting
- We wait until the first layer dries and apply the second. If the color of the surface turns out to be unsaturated, then perhaps it makes sense to paint everything again - it should turn out well.
In principle, that’s all – these are simple instructions.
How to cover insulation without putty and plaster?
Ideally, the surface of the penoplex before painting is covered with a layer of plaster or one of the putty mixtures, but this step can be skipped. In this case, only paint is applied to the insulation. This option is acceptable for ceilings, panels on the walls of rooms or doors. Correctly selected paint not only improves the appearance of penoplex, but also creates a protective layer on its surface that helps extend the service life of this material.
Requirements for the coloring composition:
should not contain organic solvents that destroy polystyrene (acetone, white spirit, gasoline, xylene, etc.); be elastic (hard paint will quickly crack due to temperature changes); must allow air to pass through (this will prevent the formation of condensation between the insulation and the paint layer); have good hiding power (because
usually painting covers large areas); have moisture resistance (this property is important when finishing external walls and rooms with high humidity); after drying, do not release toxic substances.
These requirements are met by water-based compositions, moisture-resistant silicate, acrylic, alkyd and, in some cases, oil paints on drying oil. The latter have a limited scope of application (for example, they are not recommended for painting insulation outside the house).
It is also permissible to use aerosol formulations with acetone, but this is rather an exception rather than a rule. In this case, craftsmen deliberately use the dissolving effect of acetone, as a result of which a dense, water-impermeable sintered layer is formed on the surface of the polymer. In addition, the paint applied in this way forms a single whole with the plastic and is almost impossible to remove.
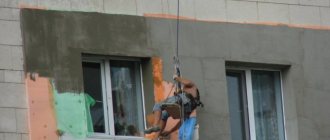
Outdoors (outside the building)
Materials for exterior finishing are subject to such mandatory requirements as frost resistance, good protection from moisture and the ability not to fade in the sun. Most paintwork materials with such parameters contain organic solvents, which will destroy it upon contact with the polystyrene surface. This problem can be solved by creating an additional protective layer between the penoplex and the facade paint. It not only provides a good cosmetic result, but also helps with insulation.
Types of protective finishing:
- plaster;
- putty;
- liquid glass.
For plastering work you will need the following tools: a wide spatula, a drill with a whisk, a spatula about 120 mm in size and a construction knife. The surface insulated with penoplex is inspected and cleaned of all irregularities, for example, excess dried polyurethane foam between the joints. It is better to cut the reinforcing mesh into pieces that are convenient for work in advance. Construction adhesive for tiles is applied to the wall in an even layer and a decorative relief is created on its surface using a special spatula.
Then apply a reinforcing mesh and lightly press it into the thickness of the adhesive layer with light movements from top to bottom and from the center to the edges. The mass that protrudes through the cells is carefully smoothed with a spatula. The glue should completely cover the mesh; if there are gaps, they are covered with additional portions. Subsequent strips of reinforcing mesh overlap the previous one by approximately 10 cm in width.
After complete drying, you can proceed to the final stage - painting. Facade paint is applied either directly to the glue or after puttying.
Indoors
Interior paints should be safe and, if possible, waterproof. For painting ceilings or walls insulated with penoplex, water-based acrylic materials or water-based emulsion are well suited. They dry quickly, do not have a strong odor and do not contain components hazardous to health.
Acrylic-based compositions can be applied directly to the insulation, but this method does not guarantee a durable result. If the finish is intended for long-term use, then it is better to first plaster the surface and paint over the plaster.
What paint should I use on penoplex?
The main thing you need to know is that the material deteriorates its physical properties when exposed to organic solvents. And they (solvents) are the basis for a significant amount of manufactured paint and varnish products. Therefore, you should carefully consider your choice, otherwise bad “incidents” cannot be avoided...
Here is a list of substances that can damage penoplex:
- Gasoline, benzene, kerosene, diesel fuel;
- Acetone, white spirit and other substances from the ketone class. Even their vapors are harmful to the material;
- Ether and all solvents based on it;
- Polyester, which uses epoxy resin as a hardener;
- Tar;
- Oil based paint.
Substances harmless to penoplex:
- Any acids - inorganic and organic;
- Alcohol based paints;
- Water-based emulsion and other paints based on water;
- Lime based on bleach;
- Oil (vegetable and animal origin) and paraffins;
- Cement mortars.
“Paint for penoplex is marked – RS. Manufacturers usually sell colorless substances for tinting.”
How to paint. Correct recommendations
“When there are doubts about adhesion and color, conduct a test test. Apply purchased paint to a small area of polystyrene foam and set aside for 2 days. Evaluate the result. If you are satisfied with the effect, you can continue working with the main product. If not, change the paint.”
Indoors
The paint in this case has a decorative purpose. Protecting the material for the purpose of a water-repellent effect has no practical benefit. Before painting the surface, make sure there is no dust or dirty spots on it. If necessary, “walk” with a dry cloth.
The rag should not leave lint, which could ruin the entire presentation. If it is too dirty, you can wash it with slightly warm water, but before painting the penoplex, dry it thoroughly.
The paint should be applied to the surface in layers. Don't make them too “thick”. To avoid streaks, work with a brush or roller in one plane. Be sure to wait for the first layer to dry. Considering that penoplex practically does not absorb paint, look - is a second layer needed? Apply if necessary. As a paint, a good quality water-based emulsion will do just fine.
On the street
Plastering penoplex
In a professional construction environment, it is considered correct to apply paint to the primer, and not to the insulation. This is quite relevant when finishing external insulation, i.e. to paint the walls. For what? In order to protect penoplex from the effects of solvents included in the façade paint.
I suggest looking at a typical “pie” for an insulated facade. It looks like this (in ascending order):
- a) penoplex panels with a prepared surface (no bumps, dents, etc.);
- b) reinforcement with plaster fiberglass mesh by gluing;
- c) facade putty on acrylic or powder basis;
- d) primer;
- e) facade paint.
When performing the entire cycle, follow the instructions (layer thickness / drying time / operating temperature, etc.).
Paints for external painting of penoplex:
- Mineral. It contains cement and lime. But there are no substances harmful to the material;
- Facade material based on silicate glass.
Paint using a manual or automatic sprayer
However, it is important to move the tool in one direction, otherwise you risk uneven color. A paint roller and a regular brush are also suitable for this creativity. It all depends on the square footage of the areas being painted.
Here everything depends on the square footage of the areas being painted.
“The desired color shade for the paint is given no earlier than an hour before the start of work. In this case, you should filter the suspension, adding the color pigment you need to it.”
Artistic coloring
Tinting options
Before painting, it is advisable to degrease penoplex. Preferably isopropyl alcohol. After drying, apply a layer of water-based emulsion. It will be the basis “for painting”. On the dried surface, draw the outline of your masterpiece with a simple pencil (or using a template).
Color according to the chosen picture. To do this, use gouache. If you are planning a complex painting, then apply the paint sequentially (layer by layer) in several stages.
Here you go. I tried to briefly make recommendations. I hope they will be useful to someone. This raises another question: is it necessary to paint if you can simply cover it with decorative finishing materials? Decide for yourself. And at the end, as always, subscribe and let your good friends read!
An anecdote on the topic: “Vovochka watches dad paint the ceiling, Mom says:
- Study Vovochka, you will grow up, you will help dad... - What, he won’t finish painting by then?
Good luck and reliable painting to your penoplex!
Wisdom Quote: Cunning people despise knowledge, simpletons are amazed at it, wise people use it.
This blog is read by 2000 people, subscribe too!
In construction, work is often carried out related to the insulation of structures, where polystyrene foam is used as the most inexpensive material. Accordingly, the density of such insulation is low, which, when cutting it, leads to the formation of a lot of debris, which is quite difficult to collect, since pieces of foam plastic tend to become electrified and stick to everything that comes their way. To facilitate the process of cutting insulating material, there are many methods and devices that help cut foam without crumbs.
Cut out foam parts with straight cuts
Installation of a wet facade
In addition, this solution allows you to give the building a respectable appearance. The only thing I note is that for a number of reasons this technology should not be used for thermal insulation of wooden houses.
By the way! It will be interesting to know: Is it possible not to caulk the house?
The insulation process consists of several stages:
Work order
Next, I will introduce you to all the nuances of work at each of these stages.
Preparation of materials
First of all, you need to prepare the materials. At this stage, it is extremely important to choose the right glue for penoplex. I recommend using a special adhesive foam for these purposes, for example, FastFix from the same Penoplex .
Adhesive foam FastFix from Penoplex
In addition to glue, you also need to prepare some other materials:
The thickness of the penoplex for insulating the facade should be at least 5 cm. But, it is advisable to lay the slabs in two layers so that the thickness of the insulation is 10 cm.
After preparing all these materials, you can start working.
Treating the wall surface with primer
Preparing the walls
So, before covering the walls with penoplex, you need to prepare them.
This work is carried out as follows:
The primer must be applied in an even, thin layer. After the walls dry, be sure to repeat the procedure. .
This completes the preparation process.
Setting up a starting profile
Gluing penoplex
Now you can start gluing the facade with penoplex.
Instructions for doing this work look like this:
Applying foam adhesive to penoplex
- after this, the adhesive foam is applied to the penoplex around the perimeter and center of the slab, as shown in the photo above. Moreover, it is advisable to apply even a few strips of foam in the center;
- Now you need to glue the plate to the wall. Work starts from the corner - insert the slab into the guide profile and lightly press it against the wall. Be sure to check the position of the insulation with a level;
- then the entire first row is glued using this principle. Try to place the slabs as closely as possible to each other so that there are no gaps;
- then the second row is glued on. It must be mounted offset, i.e. in a checkerboard pattern, and with bandaging of the corners;
Example of dowel placement
- After all the walls are covered with insulation from top to bottom, it is necessary to install penoplex on the slopes. To do this, cut the slabs into panels of the required width and cover the openings of windows and doors with them;
- now it is necessary to additionally fix the slabs of extruded polystyrene foam with special dowels, which are popularly called “umbrellas” or “fungi”. To install the dowel, you need to drill a hole in the wall directly through the insulation. The hole must match the diameter of the dowel, and the length should be 5-10 mm longer .
As for the location of the dowels, it is advisable to install them in the corners at the joints so that one head fixes several slabs at once; in addition, one or two dowels should be placed in the center. Keep in mind that the caps must be recessed.
As for the slopes, there is no need to fix them with dowels.
For complete external insulation of the house, it is advisable to insulate the foundation. The technology is quite simple - the foundation is dug up, cleared of dirt, then covered with penoplex (can be glued to the bridge), and then buried.
This completes the process of gluing the facade.
Penoplex can be processed with a needle roller
Surface preparation
Now it is extremely important to properly prepare the surface of extruded polystyrene foam with your own hands for further finishing.
This operation is performed as follows:
Foaming gaps between slabs
- then you need to fill the gaps between the slabs with the same foam that was used to glue the penoplex to the wall;
- Next, perforated aluminum corners must be glued to all external corners, including slopes, using Ceresit CT 83 glue or its equivalent. When installing the corners, be sure to use a level to ensure that the corners are strictly horizontal or vertical.
After such preparation, you can begin reinforcement.
Reinforcement
Exterior finishing of penoplex begins with reinforcement, which is carried out according to the following scheme:
This completes the surface reinforcement.
Application of decorative finishing
Decorative finishing
Now you can begin decorative finishing, which is carried out as follows:
- treat the facade with a primer according to the scheme described above;
- then the surface is covered with decorative plaster. The composition is diluted in water according to the instructions on the package and applied in an even thin layer;
By the way! It will be interesting to know: Finishing a house with facade plaster: choosing the best mixtures for exterior work and covering the walls using technology
Rubbing decorative plaster
- after 5-7 minutes, when the decorative plaster begins to set, its surface is rubbed with plaster powder. To do this, you should make reciprocating or circular movements;
- After the decorative plaster has dried, the facade must be painted using a paint roller. Let me remind you that the paint is applied in two layers. In order for the coating to look neat, each layer must be applied evenly and without drips.
Here, in fact, are all the nuances of installing a wet facade.
Diagram of the suspended facade
Is it possible to putty penoplex?
Putty is the finishing of walls using special putty mixtures. Most often, acrylic or powder putty intended for facade work is used for this work.
What types of finishing putties are there?
All putties from the Ceresit brand have proven themselves to be the most effective, but if you trust another manufacturer, you can also use putties from another company. The putty should be selected based on the surface it will be applied to. For puttying walls, there are both powder and paste mixtures. Paste mixtures, in turn, are divided into acrylic, adhesive, silicone, latex, oil and combination. For penoplex, acrylic putty and powdered putty have proven themselves well.
When choosing a putty mixture for facade work, first of all, you need to pay attention to the binders contained in it and how high quality these substances are. Depending on the quality of the binding element, the putty can be very resistant or, conversely, unstable to various weather conditions: cold, damp, heat, frost. So, for example, if you subsequently plan to paint the facade, then you can use good quality putty Ceresit CT-225, which is a good base for painting and has such qualities as frost resistance, impact resistance and moisture resistance
By choosing a high-quality putty, you can be sure that over time your finish will not crack or crumble.
Also, when choosing putty for your facade, consult with the seller so that he can help you choose the one that is moisture resistant and not afraid of temperature changes, otherwise you will simply waste money and time on exterior work
It is important to remember that those putties that are intended for interior work are completely unsuitable for the facade, so you should not save so that you do not have to redo the work
The process of applying putty to the wall. Preparing the putty
If you decide to use powder putty, then first you should dilute it. To do this, fill a bucket with water (a little less than half) and carefully add the powder, stirring continuously with a mixer. The consistency should be approximately similar to mashed potatoes. After the mixture reaches the desired consistency, it should be left for 5 minutes in a calm state, and then beat again and you can start working. Acrylic plaster is applied to the wall immediately without prior preparation.
The process of applying putty to the wall
To apply putty, use a very wide spatula, on which the mixture is placed using a small, narrow spatula that fits freely in a bucket
When finishing, it is very important that each new finishing area merges with the previous one, previously puttied. The joints should be almost invisible, so if you are not confident in your skills, then it is better to invite a specialist for this work who will do everything quickly and efficiently
Before applying putty, do not forget to treat the wall with a special primer, which will provide additional waterproofing. The layer of putty applied should not exceed 5 ml; after it has completely dried, the entire surface should be grouted. Rubbing should be done in a counterclockwise circular motion, using an abrasive mesh. Do not forget that grouting should be done no earlier than 3-4 hours after applying the mixture. Having finished grouting, you need to apply the primer again, this will help get rid of dust particles on the surface of the walls and make the surface of the facade perfectly smooth.
Once the primer has dried, the next process of work begins - painting.
Installation of a wet facade
In addition, this solution allows you to give the building a respectable appearance. The only thing I note is that for a number of reasons this technology should not be used for thermal insulation of wooden houses.
The insulation process consists of several stages:
Work order
Next, I will introduce you to all the nuances of work at each of these stages.
Preparation of materials
First of all, you need to prepare the materials. At this stage, it is extremely important to choose the right glue for penoplex. I recommend using a special adhesive foam for these purposes, for example, FastFix from the same Penoplex .
Adhesive foam FastFix from Penoplex
In addition to glue, you also need to prepare some other materials:
The thickness of the penoplex for insulating the facade should be at least 5 cm. But, it is advisable to lay the slabs in two layers so that the thickness of the insulation is 10 cm.
After preparing all these materials, you can start working.
Treating the wall surface with primer
Preparing the walls
So, before covering the walls with penoplex, you need to prepare them.
This work is carried out as follows:
The primer must be applied in an even, thin layer. After the walls dry, be sure to repeat the procedure. .
By the way! It will be interesting to know: How to insulate a facade with foam plastic
This completes the preparation process.
Setting up a starting profile
Gluing penoplex
Now you can start gluing the facade with penoplex.
Instructions for doing this work look like this:
Applying foam adhesive to penoplex
- after this, the adhesive foam is applied to the penoplex around the perimeter and center of the slab, as shown in the photo above. Moreover, it is advisable to apply even a few strips of foam in the center;
- Now you need to glue the plate to the wall. Work starts from the corner - insert the slab into the guide profile and lightly press it against the wall. Be sure to check the position of the insulation with a level;
- then the entire first row is glued using this principle. Try to place the slabs as closely as possible to each other so that there are no gaps;
- then the second row is glued on. It must be mounted offset, i.e. in a checkerboard pattern, and with bandaging of the corners;
Example of dowel placement
- After all the walls are covered with insulation from top to bottom, it is necessary to install penoplex on the slopes. To do this, cut the slabs into panels of the required width and cover the openings of windows and doors with them;
- now it is necessary to additionally fix the slabs of extruded polystyrene foam with special dowels, which are popularly called “umbrellas” or “fungi”. To install the dowel, you need to drill a hole in the wall directly through the insulation. The hole must match the diameter of the dowel, and the length should be 5-10 mm longer .
As for the location of the dowels, it is advisable to install them in the corners at the joints so that one head fixes several slabs at once; in addition, one or two dowels should be placed in the center. Keep in mind that the caps must be recessed.
As for the slopes, there is no need to fix them with dowels.
For complete external insulation of the house, it is advisable to insulate the foundation. The technology is quite simple - the foundation is dug up, cleared of dirt, then covered with penoplex (can be glued to the bridge), and then buried.
This completes the process of gluing the facade.
Penoplex can be processed with a needle roller
Surface preparation
Now it is extremely important to properly prepare the surface of extruded polystyrene foam with your own hands for further finishing.
This operation is performed as follows:
Foaming gaps between slabs
- then you need to fill the gaps between the slabs with the same foam that was used to glue the penoplex to the wall;
- Next, perforated aluminum corners must be glued to all external corners, including slopes, using Ceresit CT 83 glue or its equivalent. When installing the corners, be sure to use a level to ensure that the corners are strictly horizontal or vertical.
After such preparation, you can begin reinforcement.
Reinforcement
Exterior finishing of penoplex begins with reinforcement, which is carried out according to the following scheme:
This completes the surface reinforcement.
Application of decorative finishing
Decorative finishing
Now you can begin decorative finishing, which is carried out as follows:
- treat the facade with a primer according to the scheme described above;
- then the surface is covered with decorative plaster. The composition is diluted in water according to the instructions on the package and applied in an even thin layer;
Rubbing decorative plaster
- after 5-7 minutes, when the decorative plaster begins to set, its surface is rubbed with plaster powder. To do this, you should make reciprocating or circular movements;
- After the decorative plaster has dried, the facade must be painted using a paint roller. Let me remind you that the paint is applied in two layers. In order for the coating to look neat, each layer must be applied evenly and without drips.
Here, in fact, are all the nuances of installing a wet facade.
Diagram of the suspended facade
Gluing the boards together
Penoplex slabs can be made of different hardness and thickness. These are the characteristics that must be taken into account when selecting the right adhesive.
It is especially important to choose a composition that will help connect the slabs together
When performing installation work, you may need to glue the foam boards together. For sheets of popular material, almost any composition can be used
It is important that the glue does not contain gasoline or acetone.
The procedure for installing penoplex on the facade of a house is as follows:
- Surface preparation. During preparation, the surface must be thoroughly cleaned. If there is old finishing material left on it, it must also be removed. The same steps apply to paintwork. To eliminate mold, special compounds must be used.
- Bonding insulation material to the wall. This work should begin by applying adhesive to the foam sheet in the center and along the edges. When glue is applied to the sheet, it can be leveled. While rotating the sheets, you need to apply a little pressure on the base. How correctly the slabs are installed should be checked using a building level.
- If there is excess adhesive, it must be removed. If cracks appear during the installation of foam sheets, it is necessary to fill them with specially cut pieces of material. The use of polyurethane foam is not recommended.
Sheets should be mounted in a checkerboard pattern
You should pay attention to several methods of installing penoplex:
- Insulation of room walls from the inside. The glue dries in such conditions for about 3 days. Then finishing work continues. Penoplex should be secured with dowels. One fastening element secures 2 plates at once. Dowels must be used on 4 sides, as well as in the center of the product.
- External cladding of the building. When choosing this technology, thermal insulation is carried out during the construction of the house. In this case, the thermal insulation of the building from the outside is carried out using a plaster or ventilated facade. In the latter case, there are much more possibilities for design finishing of the facade. Plaster facades allow less steam to pass through.
Such features of installing penoplex on the facade of a building should be learned before work begins. Gluing the boards together is quite simple if you choose the right adhesive composition.
Painting expanded polystyrene foam
Various types of solvents have a very detrimental effect on the structure of polystyrene foam and penoplex. Under their influence, the surface of the polystyrene foam begins to change, and if there is a pattern on it, it simply disappears. Unfortunately, many paints are made based on such solvents. Substances that have a detrimental effect on foam include:
- petrol;
- kerosene;
- acetone;
- White Spirit;
- epoxy resin.
When choosing a paint, you must carefully read the composition to exclude the presence of these compounds. There is a large class of water-based latex paint coatings. Such latex mixtures are absolutely harmless to the surface of expanded polystyrene foam. We are talking about different types of acrylic polymer mixtures.
Water-based emulsion is usually sold only in white. The required color is given to it with special pigments - tints.
Using two or more colors at the same time, you can create complex color solutions. You can do this yourself or ask for a service at a building materials store.
Paints for interior and exterior use
The choice of paint depends on the place of its application and the specific use of polystyrene foam surfaces.
Indoors
Inside buildings, the surfaces are not exposed to precipitation, direct rays of the sun, strong winds carrying dust and dirt, so the choice of paints and varnishes is quite wide. The main condition is the absence of solvents. Then you need to think about the remaining points. For example, will the painted surface be subjected to wet cleaning - in this case, moisture-resistant paint is needed.
The most suitable compositions for interior work are water-based and acrylic. When deciding what paint to paint polystyrene foam, you need to take into account that water dispersions are safe for health, do not smell, apply easily, are inexpensive, but do not withstand moisture well. Therefore, they are not recommended for use in damp rooms and on horizontal surfaces that need to be washed periodically.
What kind of paint can be applied to polystyrene foam?
We touched on this topic briefly, but let's look at it in a little more detail.
Options available on the market:
- Alkyd paints. It is strictly not recommended to use this material, because it is diluted with white spirit, acetone or solvent, and these are precisely “enemies No. 1” for polystyrene foam. Because the surface of the sheets will deteriorate almost immediately.
- Oil paints . They are made on the basis of drying oil, which, in principle, is unlikely to corrode the foam, but the final layer will turn out to be too “glassy” and not very durable.
Please note that oil paints are also bad (in this case) because the dried layer turns out to be inelastic. This means that if the house shrinks or the walls slightly deform, the painted surface will immediately become covered with cracks and chips.
Hence the simple conclusion - paint for polystyrene foam must certainly have such an important property as the ability to slightly stretch the finished layer.
- Water-based paints . In principle, this is the best option for processing such a specific material. Due to the absence of solvents in its composition and due to the fact that acrylic pigments adhere quite well to the surface of the foam. You just need to take into account that such liquids are for interior and exterior use - do not confuse them.
Video description
For an example of painting a ceiling with water-based paint, see the video:
Compositions based on acrylic suspension are moisture-resistant, resistant to temperature changes and environmental influences, so their scope of application is wider. They can be used to paint bathrooms and kitchens, balconies and even be used for exterior work. But they cost more.
Washable acrylic paintSource sovety-stroy.ru
Outside buildings
As already mentioned, acrylic paints are suitable for exterior decoration. But before you decide whether you can paint the foam with the existing product, you need to make sure that it is intended for outdoor use. The compositions are not suitable for interior work - they are not frost-resistant.
If large areas need a protective finish, expensive polymer paint can be replaced with lime mortar. This is the optimal solution for temporary protection of polystyrene foam wall insulation when it is not possible to quickly complete the final façade finishing.
When finishing the exterior of foam plastic products, it is recommended to apply a protective layer to them before painting. There are several options for covering polystyrene foam for strength and creating an impenetrable “shell”:
- putty;
- PVA glue;
- liquid glass and other similar materials.
The presence of such protection allows you to expand the choice of paint and varnish compositions, since they will not come into direct contact with polystyrene and enter into a chemical reaction with it.
Putty elements can be finished with any paintSource amazonaws.com
Why paint foam?
Foam-based products are used for both interior and exterior finishing and insulation work. It is used for heat and sound insulation of interior floors, partitions and walls, and in addition, many parts for decorating the interior of premises are produced from it. Often in the process of finishing work there is a need to paint polystyrene foam for one reason or another.
The first thing you need to think about is why paint polystyrene foam at all? This operation is performed in two cases:
- Firstly, to create the effect of visual completeness and a holistic, harmonious interior, which consists of a combination of finishing elements, both among themselves and with the style of the room. It is unlikely that there will be connoisseurs of an interior in which white material with a bubble texture would be present as decor. Most, as a last resort, will prefer another type of finishing material that would fit more harmoniously into the decoration, please the eye and be combined with the surrounding environment. But polystyrene foam has too significant advantages over other finishing materials, especially in terms of price and ease of installation, that, as a rule, it is more rational to cover it with a paint coating than to look for a replacement in the form of another material.
- Secondly, a significant reason for painting is undoubtedly the need to protect it from the destructive effects of an aggressive external environment. For example, from exposure to bad weather in the form of precipitation, temperature changes, stormy winds and, ultimately, banal physical deformation of the material. All these factors seriously reduce the lifespan of foam products. As a rule, an unprotected foam coating very quickly, literally in one season, loses its original appearance.
Thus, applying paint and varnish to polystyrene material can be considered a logical continuation of finishing and decoration work.
Construction foam is deservedly considered one of the most versatile materials. It is used for insulation, cladding and as a material for the manufacture of most decorative elements.
At the same time, due to its low cost, products made from it have an affordable price:
- Ceiling tiles based on polystyrene foam are an excellent choice as a finishing material for the ceiling, providing an aesthetic appearance and not requiring major investments. It is not afraid of water, so it can be installed in rooms with high humidity, such as a kitchen or bathroom, but unprotected foam itself is very fragile and can be easily damaged even by accident with bare hands. In addition, under the influence of direct sunlight, such tiles will certainly fade and acquire a yellowish tint.
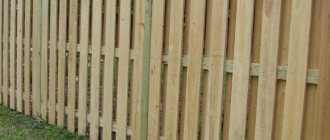
- Also, foam panels are one of the most popular and widespread options for organizing thermal insulation of the walls of residential buildings. As a rule, they cover the outer parts of the house, its facade, which, unlike the premises inside the building, is constantly exposed to the negative influence of nature in the form of frost, ultraviolet radiation, and precipitation. Therefore, such a coating, which has a relatively fragile structure, requires not only careful handling during installation, but protection in the form of a paint coating for the period of operation.
- Today, very often for interior decoration, skirting boards are used for the ceiling, made on the basis of foam plastic. When purchasing, the color of such a decorative element is usually white. But often it is not the most suitable for a particular interior, and almost always the uncoated material is not very practical. Therefore, in some cases there is a need to change its shade to something other than white. In addition, sometimes the surface of such a plinth has defects, which can be especially visible after installation, when the light in the room is on. In this case, painting is the only alternative to redoing all the finishing work and replacing the baseboard. It will not only mask imperfections, but also add strength to decorative elements. One of the features of the plinth that is conducive to painting it is that during its installation, joints are formed between its different parts, which have to be primed with putty, and in order to hide all traces at the final stage, the plinth is covered with paint along the entire perimeter. Sometimes the need for painting arises suddenly, some time after installation, for example, after a roof leak, when stains appear on the white decor that cannot be cleaned. Then either buy and replace decorative elements, or paint everything and forget.
Paint requirements
Despite the huge variety of types of polystyrene-based foam, there is a problem of its compatibility with paints and varnishes. The fact is that this material is susceptible to the negative effects of organic solvents, precisely those that are part of most paints and varnishes. Thus, in order to coat a foam product with paint and give its surface a beautiful structure, without harm to the material itself, you need to know the features of its compatibility with different coloring compositions.
Expanded polystyrene is resistant to most substances; it can be coated with mixtures of bitumen, lime solutions with water, and also painted with compositions that have a water-dispersion base. But compounds included in the class of organic solvents, for example, ethyl acetate, toluene or the well-known acetone, present in many types of paints, cause a change in the properties of this material, leading to its softening, shrinkage and ultimately dissolution.
Therefore, paints and varnishes for polystyrene-based materials must meet the following general requirements:
- the absence in their composition of substances capable of dissolving foam plastics;
- increased adhesion coefficient to penoplex and PSB;
- stability under the influence of destructive atmospheric factors, insolation;
- providing an aesthetic elastic coating.
In most cases, paints based on water emulsion and acrylic suspension are used for painting foam plastic. The choice of one type of paint or another depends on the location of the foam materials: inside or outside the building.
Inside the building, water-based paints and varnishes are almost always used. They are characterized by low cost, about 25-40 rubles per liter, but are unable to withstand moisture and heavy dust, which determined their specific use only for indoor spaces.
When applying such paint to the interior decorative elements of a room, the optimal viscosity of the paint is ensured, allowing you to hide the pores in the material under a uniform layer of coating. Before painting ceiling tiles, moldings, baseboards and rosette decorations, it is recommended to wipe them from cobwebs and dust with a dry cloth.
The joints between elements and technological seams are puttied or sealed with special compounds. To ensure a high-quality, uniform coating with a rich color on the ceiling plinth made of foam plastic, it is recommended to paint it in several layers, without fail starting to apply the next layer only after the previous one has completely dried.
Painting is usually done with a brush and roller. However, in the case of painting decorative elements with a thin and intricate relief, not a brush is used, but a spray gun, which allows you to quickly apply a uniform layer of coloring pigment to the material. To avoid paint getting on the wallpaper, it is best to paint the moldings and foam cornices before installing them.
On the outside, acrylic-based solutions are used, which are highly resistant to the influence of aggressive external environments, but they are much more expensive - from 50 to 50 rubles and are not durable. That is, they need to be updated from time to time.
Coloring Tips
You can paint foam plastic either with a brush or roller, or with spray paint. The choice depends on the surface topography and the location of the finishing work.
It is easier to paint elements that imitate gypsum stucco with spray paint before installing them in place. This will create a thin and even layer of paint without staining adjacent surfaces. This method is great for ceiling rosettes, medallions, pilasters and other piece decorative elements.
It is better to paint cornices, baseboards, moldings and other moldings that are joined to each other during installation in order to disguise the putty joints. Before this, the wall and ceiling are covered with film or masking tape.
What structures need painting?
Painting of polystyrene foam surfaces is required in two cases.
- If these are decorative elements of the interior, exterior or landscape design.
- If they are exposed to mechanical or atmospheric influences and need protection from them.
Expanded polystyrene is used to make decorative ceiling tiles, bricks for wall decoration that imitate real masonry, ceiling skirting boards and various decorative overlays: rosettes, moldings, pilasters, columns, etc. When using them, there is no question of whether it is possible to paint polystyrene foam - this must be done in order to fit such elements into the color scheme of the interior, hide the joints and installation points, and protect them from dust.
Advice! Even if you are happy with the original white color of the foam decor, it needs to be painted, as it turns yellow unevenly over time.
A layer of paint will protect against fading Source suburbansophistication.files.wordpress.com
Outside, this material is most often used to insulate walls, plinths and other structures. As a rule, the insulation layer is covered with plaster, hanging facade panels, and other types of finishing, so it does not need painting. Only those elements that remain visible need a paint coating. These are various exterior decor, small architectural forms used for landscape design. Without a protective coating, they will quickly lose their appearance.
Elements of external decorative finishing require special protection Source fasadel.com
Video description
How and with what to paint a polystyrene foam ceiling plinth is shown in the video:
Regardless of the type of paint and the tool used, each layer is applied to a dry surface, which, if necessary, is cleaned of dust with a dry soft cloth or vacuum cleaner.
What paint to paint polystyrene foam is an important question, and the wrong answer to it can lead to unexpected and unpleasant consequences: deformation and destruction of the surface of the material. This is the result of its chemical interaction with certain solvents found in the paint. Therefore, polystyrene foam can be finished only with water-based and acrylic compounds. Other paints are used if a protective layer of putty or liquid glass is made between them and the polymer surface.
Choosing a coating for penoplex
How to paint penoplex so as not to destroy its universal structure, which can withstand large temperature changes without being affected by moisture, fungal and mold microorganisms? If the answer to this question is found, which was facilitated by plastering the insulation layer, then the question is: “What kind of paint can be used to paint penoplex?” - remains open.
Based on the physicochemical characteristics of Penoplex insulation, the use of some façade paints can destroy the insulating material. This insulation exhibits low resistance to the following chemicals:
What kind of paint can be used to paint penoplex? A large selection of modern coloring substances allows you to select a facade material that would be optimally suited for insulation and does not contain substances that can cause its destruction, for example:
- Mineral paints, which contain cement and lime, can be safely used for the final finishing of the facade.
- The finishing facade material, which is based on liquid silicate glass, can also be safely used as an alternative to oil paint for penoplex.
To the question: “Can penoplex be painted with water-based paint?” experts confidently answer that there are no prohibitions on the use of this type of façade covering. Moreover, modern coloring substances differ:
- environmental safety;
- the coating formed after their application demonstrates high resistance to external aggressive factors;
- they have a water-repellent effect;
- you can create a coating that is resistant to dirt, which makes it possible to make repairs less often;
- Among the physical and operational characteristics of this type of finishing facade coating, experts especially note the low level of water absorption, which makes it possible to safely paint Penoplex with water-based emulsion.