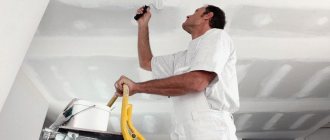
A suspended plasterboard ceiling is the best finishing option, affordable and do-it-yourself. Preparation for cladding does not require careful leveling of the base base, since the structure will hide all unevenness. Another advantage is the ability to decorate the finished surface using any available means. Owners of private houses benefit from the finishing due to the additional insulation of the floors, and to protect them from external influences, the sheets are coated with a moisture-resistant compound. Let's look at how to putty plasterboard on a ceiling for painting step by step with your own hands.
Selection of materials and tools
Before starting repairs, you should purchase the necessary tools, as well as purchase finishing materials. In this case, first you need to choose a mixture - the final result of the work done, as well as the aesthetics of the finish, will depend on its quality. The following explanations will help you choose a reliable composition:
- Mixtures are divided into 2 types: ready-to-use and dry. The first type of materials requires constant and thorough mixing. Dry formulations, in turn, can be stored for years in their original packaging, and therefore are purchased more often.
- Based on its composition, putty is divided into several types: cement, gypsum and polymer. The first type is necessary for finishing rooms with high humidity. Gypsum compositions, in turn, do not tolerate high humidity. At the same time, polymer putty remains universal - it is not afraid of temperature changes and other negative factors.
- According to purpose, putty is divided into three types. The starting mixture is used to eliminate significant defects on the surface. The finishing material finally levels the ceiling for subsequent paint application. Universal compositions, in turn, can be used at any stage of repair.
Important: if you have no experience in preparing dry mixtures, you should purchase ready-made mixtures. Otherwise, the material may be damaged.
How to choose a primer
To improve surface adhesion, the base must be primed before using putty. When choosing a finishing mixture, you should take into account the conditions for finishing the ceiling:
- Surface penetration material is suitable for applying paint. Mixtures with an average level of adhesion are suitable for such work.
- In rooms with high humidity, such as bathrooms, moisture-resistant solutions are used - otherwise the paint will begin to crack and peel.
- Plasterboard bases can be treated with acrylic primer. The mixture will saturate the porous structure of the surface, ensuring good adhesion and breathability.
There is no need to skimp on primer. The use of low-quality compounds will affect the durability of the finish.
Preparing tools
Before puttying plasterboard coverings, you should ensure that you have items and materials that will make the work easier:
- several spatulas of different sizes and shapes (they can be purchased as a set at any hardware store);
- ceiling cleaning brushes;
- stationery knife;
- bucket for mixing the finishing mixture;
- reinforcing tape;
- roller, level, sandpaper.
To mix the material, you can use an electric drill with an attachment or a hammer drill. In this case, the solution should be mixed in a metal container.
Types of putties and their application
There are 3 types of putty according to their purpose:
- Starters. Allows you to seal seams and eliminate other defects on the ceiling (cracks, dents, drops, etc.).
- Finishers. Designed for final leveling of the ceiling surface for painting or plastering.
- Universal. Suitable for starting and finishing putty.
Depending on the purpose, there are several types of putty
Professionals advise finishing ceilings with dry, moisture-resistant mixtures with a long service life.
Preparation
Before starting finishing work, you need to calculate how much putty will be needed for the repair. The volume depends on the type of composition purchased and the characteristics of the coating. To save mortar, it is worth leveling the surface well - then for a millimeter layer per square meter of ceiling you will need no more than one kilogram of mortar.
To prepare the surface for finishing work, you need to perform the following steps:
- Check for the presence of fasteners (for example self-tapping screws) on the surface. To do this, run a spatula along the drywall and screw in the protruding caps.
- Clean the ceiling from dust with a brush.
- Fill the fastener holes and seams with a small amount of primer.
- Cut paper strips along the length of the seam between the sheets of drywall.
To seal the seams evenly, you need to cut them with a utility knife, and then carefully place the solution into the recesses. The composition is applied twice, taking breaks to allow the layer to dry.
Preparation of putty
To understand how to putty a plasterboard ceiling, you should familiarize yourself with the rules for preparing the finishing solution. To do this, the prepared metal container is filled up to 1/3 with water. After this, the composition is slowly poured into it, and the resulting solution must be continuously stirred. There should be no hard lumps in the finished material - it should be uniform. For this reason, two people must prepare the mixture: one adds the putty, and the second stirs it with water.
Once the solution is ready, it needs to stand to soak the lumps. After a short wait, you need to stir it again. Since the putty thickens quickly, it must be prepared in volumes that will be used in the next 20-40 minutes. At the same time, it cannot be mixed continuously - this can lead to deterioration of strength and adhesion.
How to putty a plasterboard ceiling
Choice of putty
Experts recommend purchasing dry mixtures that have a longer service life and are not afraid of temperature changes. Another advantage of dry putty is the ability to prepare measured portions required for work.
According to the type of connecting element, putty can be:
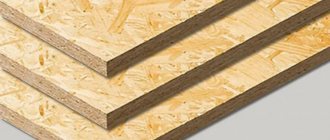
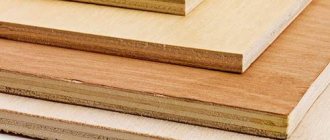
- plaster. This option is best suited for finishing gypsum board ceilings. Natural material and fillers included in the mixture improve its physical properties;
- cement is the most moisture-resistant and temperature-resistant type. The main disadvantage of cement compositions is significant shrinkage after the putty dries and the appearance of cracks on the surface;
- polymer is a universal finishing material with superior properties to the two above-mentioned compositions. Polymer mixtures can be used in any room, regardless of the degree of humidity and temperature.
Primer selection
If you are puzzled by the question of how to properly putty plasterboard ceilings, then you should know that the surface is primed not only after the putty has dried, but also before applying it to the plasterboard to improve adhesive properties.
When choosing a primer for work, consider the method of further finishing of the ceilings:
- for painting or light wallpaper, a primer with surface penetration or medium adhesion is suitable;
- It is better to mount heavy wallpaper and tiles on a surface treated with a primer of maximum penetration;
- in rooms with high humidity it is necessary to use moisture-resistant solutions.
On a note! Typically, a universal acrylic primer is used for standard gypsum boards. It penetrates well into the porous structure of the material, has excellent adhesion and air permeability, and dries quite quickly.
Putty consumption
As a rule, it is indicated on the packaging taking into account the applied layer thickness of 1 mm.
Let's calculate the material consumption using the following formula:
1 m * 1 m * 0.001 m = 0.001 m³
Now we can determine how much mixture is required to putty the ceiling surface of 1 m² with a layer of the required thickness:
0.001 m³ * B (layer thickness) * composition density (kg/dm²) = A kg/m².
The manufacturer indicates the density indicator on the packaging. Standard values for different types of putties range from 0.8 kg/dm² to 1.6 kg/dm². Moreover, the higher the density, the more material you will need.
Number of layers of putty
The mixture is applied to the ceiling using a wide spatula, ensuring uniform distribution of the composition over the ceiling surface. It is necessary to cover the drywall with at least two layers of putty - starting and finishing. The starting putty is applied in a thick layer, and the finishing putty is applied in a very thin layer in one approach and along the entire perimeter of the ceiling, distributing it in such a way that there are no transitions.
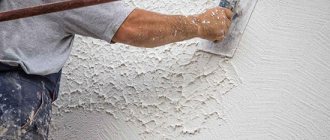
Rough finish
Before using putty and primer, you need to rough-finish the coating. For this, different spatulas are used, as well as the starting composition. The following recommendations will help when performing this work:
- to process difficult areas, such as corners, use a narrow spatula;
- surface treatment begins from one of the corners towards the other;
- for convenience, the composition is collected with a narrow spatula;
- the main instrument is placed at an angle of 20 degrees to the ceiling. This tilt ensures even distribution of the first layer.
- To apply the solution correctly, cross strokes should be made without changing the pressure on the instrument.
At this stage, mesh tape is used. It makes the layer stronger and more durable. It is noteworthy that the instructions presented are only relevant for rough finishing. The main stage will begin after applying the primer.
Preparatory work
Before performing all putty work, it is necessary to check that the surface of the drywall is smooth: fasteners should not protrude much above the surface . During the installation process, screws and self-tapping screws of the appropriate length are screwed in so that deep holes are not left at the same time, but only to secure the fastener tightly.
It wouldn't hurt to check the surface to make sure there are no places where the outer sheets are peeling off from the gypsum core. If this happens, you need to carefully tear off this part from the base or completely cut it with a knife, and clean the remaining part with sandpaper. Otherwise, bubbles, cracks or chips will form in this place.
Padding
Since the ceiling needs to be primed several times, you need to prepare a sufficient amount of finishing mixture. The best result is achieved when using a deep penetration solution - it will ensure reliable adhesion of the paint to the ceiling.
At the same time, when doing the work, you should not get carried away: an excessive amount of liquid will ruin the plaster and cardboard layers.
For the first time, the composition is applied along the long side of the plasterboard sheets. After the first layer has completely dried, a second one is applied across it. To prevent the GLA from getting wet, immediately after using the solution you need to roll the layer with a roller.
Important: wall joints should be treated with a narrow brush.
Main works
As soon as the primer has dried, you can proceed directly to puttying. To obtain a neat surface, it is recommended to cut off the edges of the drywall panels and treat these seams with a sickle.
All work is carried out in several stages:
- stick the serpyanka. Fiberglass mesh is applied to all seams and joints. It has a self-adhesive surface, so it won't take much time. It must be glued so that the drywall seam falls in the middle of the serpyanka tape;
- dilute the putty in small quantities, because it dries quickly;
- Seal the joints of the drywall panels using a putty knife.
It is better to have two devices: medium (12 cm) and wide (15 cm). Some people use a trowel or float to putty the seams of plasterboard surfaces, but this is not the best choice. These tools are more suitable for working with concrete, but drywall requires special care.
In order to putty well, it is recommended to immediately apply a reinforcing layer along the entire seam with a narrow spatula . Then stretch the entire mixture wide to the required distance. The end result should be that the entire mixture fills the joints without any bulges or unevenness. Otherwise, after the mixture dries, it will be difficult to correct the situation.
Puttying screws has its own characteristics . The mixture is applied in a cross pattern to best fill the grooves of the screw heads and completely hide their heads.
But the most difficult thing is puttingty the corners , because... it is no longer a flat vertical surface. Plasterboard sheets converge at a certain angle. It is not always possible to complete this work properly, so it is better to split the whole process into two stages: putty one side, then the other. But you must remember that you need to process the other side when the first one dries.
When all the rough work on processing seams and corners is completed, the further process will not take much time.
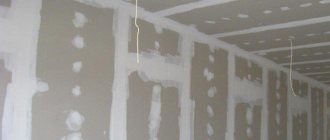
The heads of the screws securing the gypsum boards to the ceiling should be slightly recessed into the surface of the sheets
The technological sequence for processing the main surface is as follows:
- fix the aluminum profiles for the corners of the drywall with a reinforcing mesh, and the outer corners (slopes of doors or windows) with an aluminum corner. The easiest way to do this is with a stapler without construction waste;
- Using a small spatula, strengthen the metal corners by pressing them into the holes in the profile until they are completely filled. This imparts rigidity and resistance to external mechanical damage;
- Using a wide spatula, smooth the surface of the solution. If you plan to putty drywall on arched passages for painting, it would be good to use a special plastic corner. It is stronger than aluminum, so after fixing it with a stapler, it is better to putty the opening in several passes.
It must be remembered that in order to get a smooth, defect-free surface, it is better to wait until the first layer has dried, and only then proceed to the second.
Application of material
If the surface is prepared and treated, the solution is applied by performing the following steps:
- Uniform removal of material with a small spatula along the entire length of a wider tool.
- Spreading the mixture on the ceiling with a spatula. The thickness of the resulting layer should not exceed two millimeters.
- Cleaning the instrument and reapplying the compound.
To eliminate unevenness, you can use the “building rule”. In this case, work can be paused to prepare a new solution.
Note: the construction rule is often used by beginners and experienced craftsmen. It allows you to avoid any roughness that may appear during the application of putty.
Finishing work should be carried out at room temperature not exceeding 30 degrees Celsius. There is no need to ventilate the room until the coating is completely dry. You can conclude that the material is completely dry by the absence of stains. At the same time, it is much more difficult to finish multi-tiered ceilings.
Corner processing
When finishing multi-level structures, you will need a perforated corner on which the tape will subsequently be mounted. First, the tape is attached to the middle of the inner corner, and then a layer of putty is applied. A special spatula greatly simplifies this work.
To attach the corners of the external level, it is worth purchasing metal corners - they are pressed into the still wet layer of putty. Then you need to wait until the material is completely dry. To eliminate the slightest roughness, sandpaper is used. Sanding the surface will enhance paint adhesion and ensure long-term results.
Recommendations from professionals
Advice from experts will help beginners:
- Saving on the quality of compounds will result in poor adhesion. Using old tools will damage the surface - the shell may fall off the roller, and hairs may fall off the brush.
- Read the instructions from the manufacturer, which indicate the drying time of the mixture, viability and other characteristics.
- Polymer mixtures are used for wet rooms, lime mixtures for dry ones.
- You cannot dilute the powder with a large amount of water, only in portions with constant stirring. The starting putty is always thicker than the finishing putty.
- Room temperature +5 C ... +30 C. Dry the sheets before painting without drafts.
- Grinding is carried out until all roughness is eliminated.
If, during the process of applying the decor, it rolls off and does not lie on the base surface, the finishing of the plasterboard ceiling for painting was done incorrectly. Perhaps the problem is a bad primer, accumulations of dust or unevenness - clean the entire surface, perform the stages of priming, puttying and sanding again.
Advice! Complex corner joints are reinforced with serpyanka, puttied, then reinforced with corners made of plastic or metal - they should be pressed into the wet composition, and then the excess should be removed, dried and all the required stages of work should be completed.
Grinding Features
There is a widespread belief that drywall is a smooth material without defects. For this reason, many people neglect to sand the ceiling, which results in a poor-quality finish. Before preparing the ceiling for painting, you should treat every area where unevenness is observed. Even subtle imperfections can damage the paint.
To sand a GLK ceiling, you need to prepare sandpaper and a grater. To comply with precautionary measures, you will need personal protective equipment - goggles and a mask (respirator). Large defects can be detected without careful inspection, but a flashlight will be needed to find minor defects.
To sand, you need to wait until the finishing layer hardens. This process may take several days - the period depends on the microclimate in the room. A smooth surface is necessary for finishing.
Preparing tools
Plastering a plasterboard ceiling involves the use of certain tools and accessories that must be prepared before starting work:
- a container for mixing the material and a drill with a “mixer” attachment (if a dry mixture is used);
- wide brush;
- wide and medium spatulas;
- roller;
- grout mesh and grater;
- construction serpyanka mesh (hides and fastens seams);
- primer mixture and putty;
- flashlight for checking evenness.
Before you start work, you need to provide yourself with the most comfortable working space; for this, it is recommended to cover the floor with oilcloth and remove items and things that are unsuitable for repair.
Finishing work
After considering the question of how to putty a plasterboard ceiling for painting, you can move on to studying the features of the finishing. First, you need to reapply a layer of primer - it is necessary for adhesion of the paint to the putty, as well as for good vapor permeability.
Final finishing may involve sealing seams and screw holes. This is possible in two cases:
- High-quality drywall was used and has no defects or unevenness.
- It was assumed that viscous or textured coloring materials would be used.
As mentioned earlier, for acrylic paints to adhere well, the coating must be smooth. Therefore, the scope of work depends on the selected materials.
Features of putty on ceilings or walls for painting
Preparatory work on putty for painting the ceiling or walls is carried out in exactly the same way as for wallpapering. It is necessary that the surface is perfectly flat, without depressions or protrusions.
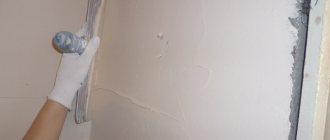
Saving on primer leads to high repair costs
When applying the mixture to sheets of drywall, you must be especially careful: if the panel is saturated with the mixture right down to the core, the outer layer will simply become deformed and become covered with cracks. The general principle is this: putty for drywall should level out all the shortcomings, and the primer should subsequently complete the entire finish.
Drying time
When preparing, all putty mixtures are diluted with water. Their hardness and strength are achieved after complete evaporation of the liquid. The drying time of the solution may depend on several factors, such as the type of surface and environmental conditions. At the same time, the putty dries much faster if applied to porous coatings.
If we talk about different types of solutions, their hardening time will differ:
- Gypsum compositions dry within 3-6 hours. This condition is relevant if the layers were thin.
- The drying time for cement putty is 24 hours, and the thickness of the applied layer should not exceed 4 millimeters.
- Coatings made from polymer solutions dry in 4 hours. For this reason they are the most practical.
As we have already said, when the material hardens, you should not ventilate the room. Otherwise, the coating will swell and crack.
Nuances of finishing corners
A plasterboard ceiling can theoretically be a complex structure with several tiers with external and internal corners. In this case, perforated corners will come in handy, which will serve as the basis for gluing the serpyanka. Initially, sickle tape is fixed along the center line of the inner corner, then putty is passed along the masking tape, leveling the corner joints with a special spatula.
The outer corners will need to be reinforced with metal or plastic corners: they need to be pressed into the wet putty material to the required level. The resulting excess must be removed with a spatula, completing the stage of finishing the corner by puttying from the top corner to the bottom, paying attention to both sides of the joining line. Subsequent layers are applied to absolute evenness after the previous ones have completely hardened.
Advantages of puttying gypsum board ceilings
In addition to the possibility of using paint to finish the ceiling, using gypsum plasterboard provides several advantages:
- Installation of ready-made slabs is not difficult. With their help, you can solve many technical issues that arise when working with rough surfaces.
- There is no need for labor-intensive preparatory work.
- Quickly level the ceiling for further painting.
- Drywall sheets have virtually no defects and provide good adhesion to finishing materials.
The only drawback of gypsum boards is the need to use fasteners. Joints are necessarily formed between individual elements, which require careful processing. Using the described instructions for sealing seams and screws will make the work easier and avoid problems.
How to choose putty for drywall
The plasterboard sheet itself is smooth and even, but, much to our displeasure, it is not monolithic. The joints that formed in the places where the plasterboard panels are attached to the sheathing and the heads of the screws require subsequent putty.
The modern construction market offers a wide range of putty mixtures. There are so many of them that the question itself arises: how to choose the right putty for drywall. Dry mixes are most in demand . They are beneficial in many ways. And above all, their great advantage is that they are stored for a long time, regardless of the climatic conditions of the room.
For ceiling putty, a finer mixture is used than for walls.
Of course, you can always purchase ready-made putty, but in this case, you need to take care to maintain the appropriate storage temperature. Liquid mixtures for drywall putty are subject to all sorts of changes , which is completely inconvenient.
Depending on the material from which the drywall putty is made, it happens:
- cement;
- plaster;
- polymer.
In principle, all three types can be successfully used, but not in every room. So, if you need to putty in a bathroom or kitchen, it is better to use a cement mixture, because... gypsum does not tolerate high humidity, and when it hardens, there is a high probability that cracks will appear on the surface.
Polymer putty is universal and plastic. It is considered to be the best choice for drywall . In addition, this is one of the budget options - its consumption is insignificant. Therefore, it is better to opt for an inexpensive dry polymer mixture of universal use.
Common Mistakes
In most cases, problems with applying the mixture arise due to the inexperience of the master. An even greater number of difficulties arise due to neglect of the rules for applying the finishing material. There are several mistakes that are often made when puttingtying plasterboard ceilings:
- Incorrect grip of the spatula and uneven application of the solution. To avoid such a mistake, you need to gain experience, since this is the only problem that cannot be solved by theory.
- Unputtyed areas of gypsum plasterboard that were not exposed to the solution. Such fragments will accumulate moisture, which can cause the paint to crack or swell over time.
- Additional fastening of an already finished sheet or deliberate omission of places with screws. As a result, the heads of the screws will begin to rust, causing air to penetrate under the drywall. Because of this, repeated repairs will be required.
Another mistake that novice craftsmen encounter is neglecting reinforcing tape. It is necessary for sealing seams - without it, the coating will quickly crack. If the defect does not appear immediately, the putty layer may burst along with the paint after the repair is completed.
The listed situations are not all the problems that craftsmen encounter when finishing gypsum board ceilings. To carry out repairs yourself, you must follow the recommendations regarding all stages of work.
Preparing drywall for putty
The working finishing process most often begins 1-2 weeks after the completion of installation manipulations, when the shrinkage of the building structure has completely finished. Haste threatens to crack the putty layer.
Before you begin to putty the ceiling for painting, you need to level the plasterboard sheets, remove the screw heads that extend beyond the general plane and seal the joints. Self-tapping screws should be screwed into the surface, but do not overdo it, recessing them deeply. In case of exposure to more force than necessary, before the formation of depressions from the screws, the latter will need to be removed, filling the holes with mortar, and repeating the attempt to screw in new screws near the hole.
Recommendations for puttying plasterboard ceilings
For work you need to choose only high-quality compounds. A good solution is easier to work with and has a greater chance of successfully filling the surface yourself. Do not neglect the starting putty. The final result will depend on the quality of work at the initial stage.
You need to check the work carefully, because any minor or small flaw can ruin the entire appearance of the structure after painting. It is better to entrust ceiling putty to professionals. Self-plastering of the ceiling can be done after competent study of the technology and process of working with plasterboard structures.
A few words about painting
Despite the fact that painting a plasterboard ceiling is generally quite simple, there are still some nuances. Therefore, I will tell you how to cope with this task:
- First of all, you need to prepare the paint - shake it, add a small amount of water if necessary and mix. To give white paint any shade, you need to add color to it;
- then pour paint into the roller tray and dip the roller into it. Before painting, be sure to press the roller on the rolling platform;
Painting the ceiling
- Apply paint in the direction of the light from the window. Make sure that the paint is applied in an even, thin layer;
- After the ceiling has dried, apply a second coat of paint perpendicular to the first.
If you are painting your kitchen ceiling, use washable paint. Of course, its price is slightly higher than the usual moisture-resistant water-based emulsion, but you can clean the ceiling from soot and settling fat. Accordingly, the finish will last you longer.
Now the ceiling is ready, all that remains is to glue the baseboards.
Conclusion
As you can see, by finishing the ceiling with plasterboard, you can quite simply and quickly prepare the surface for painting. I also recommend watching the video in this article about installing a gypsum board ceiling. If any points raised questions for you or you encountered any difficulties during the work process, write in the comments, and I will definitely answer you.
Did you like the article? Subscribe to our Yandex.Zen channel
December 5, 2021
Plasterboard systems, Ceiling operations, Ceiling finishing, Finishing materials, Ceilings, Plasterboard ceilings, Ceiling structures
If you want to express gratitude, add a clarification or objection, or ask the author something, add a comment or say thank you!
Sequence of work
The work process consists of the following stages, which also include preparatory work:
- First of all, you need to apply an acrylic-based primer to the drywall using a roller or paint brush.
- Next, putty the joints and the entire surface of the plasterboard sheets.
- If necessary, you need to sand the walls using sandpaper or a special sanding belt. First of all, you should use sandpaper with a larger grit, gradually moving to a lighter abrasive.
- After all of the above, it is necessary to re-open the drywall with 2 layers of primer.
In order not to lose sight of anything important, each point should be analyzed in more detail.
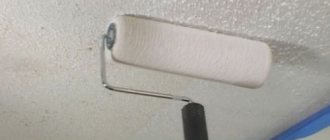
Priming the coating
At the first stage, the surface is opened before painting with a layer of primer, which in the future will ensure maximum evenness of the applied paint and significantly reduce its consumption.
In general, the primer composition is a mixture, which increases the adhesion of the coating with other finishing material. The best option for use is clean soil, which does not contain additional impurities and solvents. A suitable mixture is an acrylic primer, which, due to its properties, significantly improves adhesion and, in addition, it can protect the surface from the negative effects of moisture.
The application of the primer composition itself is carried out in the following sequence:
- The first step is to thoroughly clean the surface of the drywall from construction debris and dust.
- Next, you can apply a primer to the material using a roller or paint brush.
- Priming should be carried out evenly, without wetting the tool with an excessive amount of liquid.
- Full application is recommended several times.
- Before re-opening, as well as before starting the next step, you must wait until the mixture has completely dried.
Applying putty to the base
At this stage, during the preparation of drywall, the coating should be puttied before painting. Applying this mixture will remove all cracks and depressions that are present on the surface of the material, as well as seal the seams.
There are two types of putty:
- Starting.
- Finish.
When preparing drywall, it is necessary to use both types. First of all, it is necessary to apply starting putty in the places where the seams are located. Next, you need to cover the entire base with the finishing mixture.
Sometimes it may be necessary to use ready-made acrylic putty to bring the surface to a perfectly smooth state.
The application itself can be comfortably carried out using metal spatulas of different sizes.
The puttying process requires the following steps:
- The first step is to seal the drywall seams. After applying the first layer of putty mixture, it is necessary to paste the serpyanka, which is located under the mortar at the seams.
- Upon completion of drying, their surface should be covered with a finishing layer.
Note! All work must be carried out with the greatest possible care, since the final result largely depends on the quality of sealing the seams.
- Before proceeding to the next stage, you need to check the screws in the fixation points, which should not protrude. To make sure it is screwed in correctly, simply run a spatula over the surface of the drywall. Smooth and unhindered gliding will indicate the correctness of the procedure. Otherwise, you will need to tighten the fasteners to the desired state, slightly recessing their caps into the material.
- After the seams have completely dried, you can begin to carry out further putty work, using the mixture to level all uneven areas and places where screws are screwed in. To perform this task, you need to use finishing putty, applying it in a layer of 1 mm.
In some cases, the special ready-made compositions used may require a thinner application, which should first be read on the packaging.
Surface grinding
After application is completed and the putty has completely dried, the base must be sanded to give the walls an ideal smoothness, which is absolutely necessary for high-quality painting.
Note! During the work, it is important to wear a respirator, which will protect the lungs from the large amount of dust generated.
The grinding process itself is carried out in the following sequence:
- Using a sanding block, thanks to which you can achieve the most even surface possible, you need to remove excess putty in a circular motion. For greater comfort and increased visibility of all irregularities that need to be removed, you can use the side light.
- Spiral movements should be carried out until the surface becomes smooth.
- It is quite easy to ensure the proper level of evenness. To do this, you need to point the lamp from the side at the surface itself and as a result, all the remaining irregularities on it will appear, reflecting the shadow from the light. Grinding must not be stopped until all of them have been eliminated.
Note! You shouldn’t get too carried away with rubbing, as you can damage the coating of the plasterboard sheets.
- The result should be a perfectly flat surface.
In this case, sanding comes to an end and after that you can begin the last stage of preparing the drywall before painting.
Opening the surface with a finishing primer
After finishing puttying and sanding, you should apply several more layers of primer. This process is performed in the same way as that carried out at the very beginning, but it is necessary to take into account a number of the following features:
- The paper layer of drywall should be abundantly saturated with the composition, so it must be opened 2-3 times.
- When performing this application of primer, extreme care must be taken so that in the future the paint lays as evenly as possible on the surface to be painted.
- Plasterboard located on ceilings must be primed against the light.
- After complete drying, paint can be applied to the surface.
Treating seams with putty
Before you properly putty the drywall for painting, you will need to finish the seams. To complete this work, you will need a container for diluting the composition and a spatula.
Procedure:
- Gypsum and cement compositions are sold in the form of dry mixtures, but polymer ones are ready for use. The reason is the very complex technology for diluting polymer drugs and the need for strict adherence to it.
- To obtain a solution of the required consistency, the dry mixture is combined with water in the proportion indicated in the instructions. Mix everything using a drill with a mixer attachment.
- To obtain a solution of the required consistency, you can add water to the container. It is important that the finished mixture resembles thick sour cream - it is plastic and at the same time viscous. Then you can avoid smudges after applying putty to the wall. It doesn’t matter how the drywall was prepared for painting, because the wrong consistency of the solution will ruin everything.
- Apply the solution using a spatula. Make sure that its width is wider than the groove formed by the edges of the drywall sheets (50 cm on each side).
- You need to start work from the floor, moving the tool from the bottom up. It should be pressed firmly against the sheets to avoid the appearance of lumps and sagging.
- If it was not possible to avoid their appearance, then you need to remove them urgently, otherwise the solution will harden and this will be much more difficult to do.
Final putty
Coating drywall with a finishing mixture is the final stage of ceiling treatment before applying paint. If the puttying is done correctly, the ceiling will be smooth, painting will be easy, and the aesthetics and functional performance of the ceiling will delight you for many years.
The gypsum plasterboard itself is already flat, so applying putty in one layer is enough to avoid adding weight to the structure.
Step by step finishing of the ceiling:
- The ceiling is puttied with a wide spatula, extending the tool and laying the material in a layer not exceeding 2 mm.
- Having completed leveling, clean the tool from excess mixture and apply the solution to another area.
- It happens that a smooth layer is not achieved with one layer, then an additional one is applied, eliminating the excess with another spatula.
In order not to miss even the smallest defects, it is advisable to use the construction rule. The thickness of the layer is directly dependent on the angle at which the tool is held to the base. As the angle of inclination decreases, the applied layer becomes thinner. The standard in such work is 60°. To smooth the solution, you need to fix the blade at an angle of 15o, each subsequent layer overlapping the previous one.
The optimal temperature for performing work is +5Cо-+30Cо. It is advisable not to examine the surface in direct sunlight; the image may be somewhat distorted. It is undesirable to create drafts and leave the room for ventilation - rapid hardening threatens the leveling layer with cracking.