Plastering wooden walls - the need for
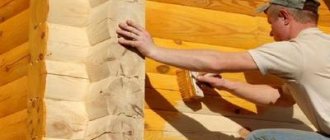
Many modern types of plaster mixtures can be used not only for finishing brick and concrete, but are also suitable for the protective finishing of wooden structures. And yet, various restrictions apply to plastering work on wood: for example, shingles should be attached to them, and only then the mortar itself should be applied.
Why bother plastering wood at all if it involves so much labor? If there are doubts about the need for such actions, it is worth studying the list of tasks that can be easily solved by plastering wooden walls:
- preventing drying and cracking of logs;
- protection from precipitation, dampness, harmful effects of oxygen;
- prevention of rotting, mold, insect infestation, and rodent damage;
- insulation of the building and elimination of even the smallest cracks;
- improving sound insulation and increasing the fire resistance of walls;
- giving evenness to the internal walls for finishing.
Plastering wooden walls
Plaster reliably protects wood from inevitable rotting, which is associated with the absorption of moisture and its slow release. Without additional plastering, after 15-20 years, some rotten areas will have to be replaced. After applying plaster, rotting stops or is greatly slowed down, resulting in a longer service life of the building.
Wood and plaster: combined facade and combination in the interior
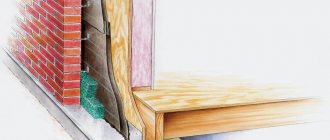
The combination of plaster and wood is not uncommon in the exterior decoration of buildings. Often there is a combination of the facade by floor: the bottom of the house is plastered, and the top is covered, for example, with clapboard or block house. This division is due to the fact that the house itself is built from different materials, when the first floor is stone (brick or aerated concrete), and the second is assembled from timber. The combined facade will be a logical continuation of the combination of wall materials. But this could also just be a design decision.
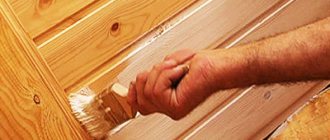
For cladding external walls, coniferous wood is mainly used - spruce, pine, cedar, larch. The boards are impregnated with an antiseptic, then painted or varnished. Dark wood looks beautiful on a light plastered surface.
If the load-bearing walls of a building are made of the same building material, then installing different cladding can cause some difficulties: wooden elements require lathing and a ventilated facade, while plastering is “wet” facade work. The problem here lies in the joining of different types of finishes flush.
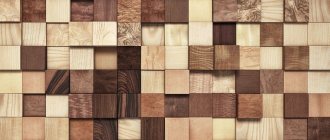
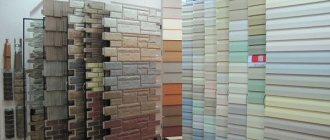
Interior decoration with wood and plaster occurs when the owner wants to emphasize his commitment to simple natural materials. Designers believe that wood fills a room with comfort and tranquility.
Below are a few photos of the combination of these materials in the interior:
Candidate of Sciences, permanent expert of the site, a real, and not abstract (unlike other resources) person.
Wood is an original Russian building material. From time immemorial, ordinary people built their homes from it. A log house is a visiting card of provincial Russia. Princes and boyars lived in stone chambers. The technology of insulating wooden housing and protecting walls from rotting has also come from time immemorial. Clay, straw, water and shingles for the wall are its main components. The name of the method is well known to every modern person - plaster.
Plastering a wooden house inside
Finishing work inside the house, and then outside, should be carried out only after the building has completely settled - after 1-2 years. Plastering includes several mandatory stages - preparation, installation of shingles and beacons, application of mortar.
Materials and tools
To carry out high-quality wall finishing, you need to buy a suitable building mixture or components for mixing it yourself. You will also need clean water, fiberglass or polypropylene fiber to prevent shrinkage of the plaster. Other consumables for plastering work are:
- PVA (to accelerate the setting of cement mortars);
- liquid soap (to reduce the rate of hardening of gypsum and increase the plasticity of cement);
- pine or wooden shingles up to 2 meters long, 3-7 mm thick, 25-40 mm wide;
- metal beacons, screws and fastenings;
- plaster nails 25 and 40 mm long;
- solvent.
In order not to look for tools during work, they should also be prepared in advance. Here is a list of the main devices that a master may need:
- stepladder for working at high heights;
- screwdriver or screwdriver;
- hammer and wood saw;
- Bulgarian;
- plane;
- construction mixer or concrete mixer;
- trowel (trowel);
- long rule;
- plaster ladle or spatula;
- grater and construction grater;
- ironer;
- building level and tape measure;
- durable lace;
- marker or pencil.
Plastering tools and accessories
Preparing the walls
Before starting plastering work, be sure to complete the installation of doors and windows, if it has not been done previously. Check the integrity and correctness of the wiring, remove sockets and switches. Electricity will have to be used by plugging extension cords into outlets in another room.
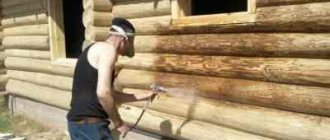
The walls are carefully inspected, the quality of caulking of cracks is checked, and if necessary, polyurethane foam is used. Eliminates all types of contaminants. If you can’t scrub and wash them, use a plane to grind off wood shavings. Fatty, oily stains greatly interfere with the adhesion of plaster to wood, so they must be removed with a solvent.
To improve the adhesion of the plaster to the wall, notches are made on the wood, but most often shingles are attached to them - this method is considered more effective. If you still decide to use the notching method, they are made with an ordinary ax over the entire area of the wall at an angle of 45 degrees. The depth of the notches should be less than 1 cm, the width should be the size of the ax blade. In rooms with high humidity, a layer of waterproofing, for example roofing felt, must be laid.
Fastening shingles before plastering
Wooden shingles are an effective device for plastering walls, which additionally protects the base from cracking. For the manufacture of slats, coniferous wood is chosen, which is less susceptible to rotting. The shingles are nailed directly onto the waterproofing layer (in wet rooms) or directly onto the wood. Along the fibers, the slats are moistened with water - this will reduce the risk of cracking during attachment. Next, the order of work will be as follows:
- Nail the first layer of slats at an angle of 45 degrees in straight lines, fixing them every 4-5 cm at two points with nails (the latter should be thicker than the shingles itself), work begins from the top corner.
- Attach a second layer of shingles (output shingles), and it is better if the thickness of the slats of this layer is 1-2 mm greater than that of the previous one. The shingles are fastened at an angle of 90 degrees, using longer nails every 15 cm.
- As a result, a grid with identical cells is formed. To prevent the slats from cracking when driving several nails into one line, they are shifted relative to each other.
Lining of shingles
Installation of beacons
If you have extensive experience and high qualifications, you can perform plastering without installing beacons. Otherwise, it is better to play it safe so that you can lay the plaster in an even layer and not have to redo everything again. The installation of beacons is carried out in this way:
- Place a dot about 10 cm from the ceiling and 10 cm from the adjacent wall and screw in a self-tapping screw;
- act in the same way at the bottom of the wall, having found a comparable point, as a result the screws must be located strictly in the same plane;
- a pair of self-tapping screws are also screwed in at the opposite end of the wall;
- pull the laces between the screws horizontally, vertically and diagonally;
- find the most convex place on the wall, taking into account the position of the laces;
- by twisting and unscrewing the screws, place the laces so that the height of the found “hump” is about 5 mm (the minimum thickness of the plaster layer);
- using special fasteners, metal beacons are installed, focusing on the position of the laces, the outermost beacons are placed 15 cm from the walls, the rest - every meter from each other;
- start plastering work.
Beacons for plaster on a wooden wall
Preparation of plaster
For interior woodwork, a plaster of 4 parts lime and 1 part gypsum, diluted with water, is well suited. Gypsum and water are added to the lime, mixing a small portion of the solution at a time, since gypsum plasters harden within a short time. To extend the working life of the solution, it is constantly stirred. Lime for plaster is slaked in advance, otherwise the coating will quickly crack due to the gas released.
Also, to work with internal wooden surfaces, you can use plaster based on 1 part cement and 3 parts sand (fraction - up to 1 mm), which are combined together in dry form, and then diluted with 1 part lime milk. You can use standard fiber-reinforced cement mortar. This plaster is mixed for 10 minutes and then applied to the surface.
Preparation of cement mortar with fiber fiber
Instructions for plastering interior walls
Before applying the solution, please note that the humidity of the walls should not exceed 12%. If this condition is not met, mold will settle on the wood, and the walls will continue to rot even under a layer of plaster.
Clay for plaster
This inexpensive material can also be used to decorate a wooden house. The main thing is to choose a clay suitable for creating plaster, which has optimal fat content and plasticity, and also to correctly calculate the amount of sand added. The higher the fat content of the clay, the more sand will be needed to dilute it - from 2 to 5 parts. To determine the properties of raw materials, a small experiment is carried out:
- take a little clay, grind it to get rid of lumps, then fill it with water;
- after 2 days, the water on top of the clay is drained, the material itself is divided into 4 parts;
- add a different volume of sand to each portion (2, 3, 4 and 5 parts), mix all samples well, and add a little water if necessary;
- from each portion of clay and sand, roll “sausages” 50-60 cm long with a diameter of approximately 10 mm;
- wrap “sausages” around the handle of any garden tool and assess their condition.
Determining the fat content of clay for a solution
If the clay has optimal properties and the proportion of sand is selected correctly, the “sausage” will tightly wrap around the handle, and only small cracks will appear on it. When the clay is thin, the “sausage” will begin to crumble; if the clay is too fat, it will become covered with large cracks. The solution that behaves best should become a model for preparing plaster for woodworking.
Before making plaster, the clay is also filled with water, but to speed up its soaking, the container is covered with cellophane and exposed to the sun's rays. After draining the liquid, wipe the mass until it looks like thick sour cream, remove any remaining roots, grass, or other debris.
Preparation of clay-based plaster mortar
In order to give the plaster heat-insulating properties, you can add perlite, pine needles, sawdust, and also fiber into its composition (you can make it yourself by crumbling polypropylene bags). To extend the service life of already applied clay plaster, it is covered with a thin layer of cement on top. This will help give the top layer hardness and reduce the amount of air penetrating into the pores.
Cement
When prepared independently, cement-based plasters will also be inexpensive. For wooden walls, prepare an M75 solution: combine cement with sand in a certain proportion. The amount of sand directly depends on the brand of cement:
- M 200 - 1:2.5;
- M 300 - 1:3;
- M 400 - 1:4;
- M 500 - 1:5;
- M 600 - 1:
It is important to take into account the shelf life of cement for plastering, since already six months from the date of release its quality deteriorates by one value, and the proportion of sand will need to be reduced. Before combining the dry components, the sand is sifted and cleaned of contaminants. Then mix it with cement until the grains of sand change color to gray. If desired, fiber fiber is introduced into the plaster, which will reduce the risk of shrinkage of the layer and prevent it from cracking.
Preparation of cement mortar
The dry ingredients are added to the water in small portions, mixing well with a construction mixer or in a concrete mixer. In order for the solution to gain high plasticity and be easily placed on the tree, a little liquid soap is added to it (60-100 ml per 10 liters of water). If the air humidity in the room is high, lime milk is added to the plaster (lime and water in a 1:1 ratio). After application to the walls, allow the plaster to dry for a month, and only then begin finishing.
Gypsum for plaster
Gypsum solutions are considered the most flexible, lightweight, and easy to apply, but are the most expensive. In addition, they will have to be diluted in small portions, because they harden within 10-20 minutes. It is difficult to mix gypsum or alabaster plaster with the addition of plasticizers yourself; it is better to buy a ready-made composition. It is diluted with water according to the instructions, accurately measuring the amount of powder and liquid. Typically, for every 25 kg of mixture you need 17 liters of water, although you should not mix the entire package at once. After whipping the product with a construction mixer, let it stand for 5 minutes, then mix again and immediately begin plastering.
Mixing gypsum based plaster
Applying plaster
The procedure for performing plastering work is almost the same as when processing ordinary walls on which shingles are not fixed:
- Spray For this layer, a little PVA glue is introduced into the plaster to make the product more plastic. The solution is scooped up with a spatula and applied to the wall with your hands, since it is inconvenient to work on shingles with tools. Plastering begins from the lower left corner of the wall, moving between the beacons to the right. Level the layer as usual, making sure that its thickness does not exceed 1 cm. Allow the plaster to partially set.
- Priming. The solution for this layer is prepared without glue. It should be quite thick, resembling a viscous dough. The primer is applied with a trowel, spatula or hopper bucket, leveled well, ensuring a thickness of no more than 2 cm. After completion of the work, the plaster should be completely level with the beacons. Areas where it was applied in too thin a layer are treated again. On the contrary, in areas with an excessively thick layer, the plaster is removed. After 5 hours, rub the wall with a trowel, moving it in a circular motion counterclockwise.
- Cover. After the soil has completely dried, the last, thinnest layer is applied (up to 2 mm). It is made with a fairly liquid plaster, and a solution based on cement alone (without sand) is ideal for this purpose. After application, the layer is rubbed with a construction float, giving it smoothness. If necessary, use a smoothing pad moistened with water.
Applying clay plaster to the wall
Grouting plaster
Rubbing the walls is an important component of the process of plastering a wooden frame. Without grouting, it is impossible to achieve a smooth surface, which will negatively affect the finish. The grout can be circular or longitudinal. In the first case, the grater is moved in circles with slight pressure, increasing the force over the bulges and weakening over the depressions.
For longitudinal rubbing, the tool is moved from top to bottom, and in the second pass - horizontally. Pre-wet the grater or wall with water. If plaster begins to accumulate along the edges of the tool, remove it with a spatula blade. Grouting is not used at all if you plan to apply decorative plaster or tile the walls.
Preparation of devices
To plaster partitions, you should purchase the following tools:
- Hammer.
- A portable stepladder for working at heights.
- A grinder or a classic hacksaw for metal.
- Phillips screwdriver or screwdriver.
- To shorten the length of the shingles, use a hand saw.
- A container with a construction mixer for mixing the solution.
- Plaster spatula.
- Falcon for supplying solution.
- Construction marker.
- Plumb.
- Fishing line.
- Roulette.
- The rule is more than two meters long.
- Malku.
- Ironing iron.
- Half-grater.
- Grater.
- Self-tapping screws.
- Dranku.
- Metal profiles for lighthouses.
- Plaster nails.
Among the materials are:
- Liquid soap for gypsum plaster compositions.
- Clean water.
- Plaster mixture.
- PVA glue.
- Fiber made of polypropylene or fiberglass.
A must-have set of tools
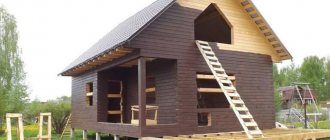
Plastering a wooden house outside
Exterior finishing of a wooden house is carried out after finishing the walls inside the house - this will prevent “locking” of moisture in the wood. The process begins with preparing the walls and filling the shingles. Large cracks and joints of logs are caulked with tow, mineral wool, and slats are hammered into the largest cracks. After they nail down the shingles (some builders replace them with durable plaster mesh), they install beacons, without which it will be difficult to achieve even walls. Apply the plaster in a layer of 15-20 mm, and make the solution more liquid than for interior work, and add a little PVA glue into it.
The plaster is allowed to dry naturally, but is protected from direct sunlight and freezing. To make it easier to comply with these conditions, work is planned for late spring or early autumn. To give the facade an attractive appearance, ready-made decorative plasters are subsequently used, which are applied in a thinner layer. The most common types of plasters are:
- mineral;
- acrylic;
- silicone;
- silicate.
Silicate decorative plaster for facades
The most durable and reliable, but most expensive materials are those based on silicone and silicate. Modern plasters are available in different textures and colors. In addition to decorative plastering, 28 days after the rough finishing, you can use natural or artificial stone cladding.
Preparatory work
You can strengthen the solution using a metal mesh.
Wood does not go well with plaster. Regardless of what the house is built from - timber, logs, wooden bricks - you need to strengthen the surface and provide additional support. This is the main task of the preparatory work.
- Plastering a wooden house from the outside begins with sealing cracks and caulking. The tree shrinks over time. The process is accompanied by the appearance of cracks. They are carefully sealed both outside and inside. They also get rid of bitumen or oil stains.
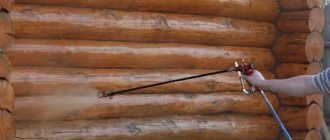
- The surface is treated with antiseptics to prevent the appearance of mold and fungi. If the wooden facade is adjacent to concrete parts, the joints are treated with concrete contact.
- If a bathroom or kitchen is plastered, the walls are additionally waterproofed. Usually, plastic film or roofing felt is sufficient.
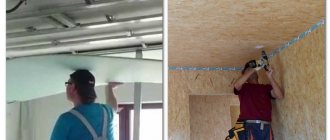
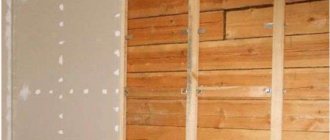
- When finishing the outside, the façade and base are reinforced with metal mesh. It is fixed with mushroom-shaped dowels. When finishing the inside, a reinforcing mesh is placed on the walls and secured with self-tapping screws. The mesh is pulled tightly. Joints are not allowed; the material is overlapped by at least 1 cell.
- If the layer has to be made thicker than 3 cm, in case of unevenness or defects, spray it on top of the first mesh, and then attach the second layer.
- Fix shingles to the wall. The tapes are placed so that they form diamonds measuring 45*45 mm or 50*50 mm. The ends of the shingles are moistened and fixed with nails.
To increase the adhesion of the wooden surface, short notches are applied to it or treated with coarse sandpaper.
Drying plastered surfaces
In the first three days, no methods are used to accelerate the natural course of the process. If you neglect this rule, the top layer will dry out too quickly and will crack in the future. By 4-5 days, you can somewhat speed up the drying of the coating by installing a heat gun or regularly ventilating the room.
Drying plaster with a heat gun
Exterior walls usually dry naturally. During this period, it is important to protect them from precipitation, direct sunlight, and strong winds. For this purpose, a durable polyethylene film is fixed to the walls, which will prevent damage to the plaster layer.
Fixing universal shingles
This wooden slats are stuffed crosswise. The commit process is simple:
- The shingles are immersed in water for at least 3 hours. This is so that it does not split under the nails.
- At an angle of 45°, shingles with a thickness of 4-6 mm are nailed. It's better to start from the top corner. The slats are attached at the same distance from each other.
- A second layer of shingles is carefully nailed on top of the formed structure. It is 2 mm thicker than the slats of the first tier. If there are no slats of the required size on sale, then you can buy shingles of the same thickness. The final dimensions of the structure are at least 5 mm.
Improving adhesive properties using wooden slats
Tips and tricks
To avoid the appearance of defects in the finished finishing and to do all the work efficiently, you should follow a number of tips from professionals:
- use only reliable solutions and tools, do not skimp on their purchase;
- work in compliance with the temperature regime in the house and only in good weather outside;
- before application, check the color, texture, thickness of the plaster in an inconspicuous area, and only then proceed to processing the main area;
- apply subsequent layers of mortar after the previous ones have dried;
- carefully follow the procedure for preparing the base, do not ignore cleaning and degreasing the walls;
- To improve the quality of plaster, use quartz sand rather than river sand.
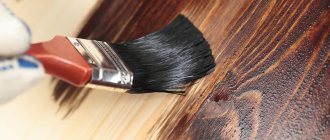
After the plaster has completely dried, it can be painted or treated with a shiny/matte varnish. It is recommended to use skirting boards or baguettes to cover joints. High-quality finishing of a wooden house will last a long time, will not deteriorate and will allow you to insulate the home, while not causing unnecessary financial costs, because it will be done with your own hands.
Fixing universal shingles
This wooden slats are stuffed crosswise. The commit process is simple:
- The shingles are immersed in water for at least 3 hours. This is so that it does not split under the nails.
- At an angle of 45°, shingles with a thickness of 4-6 mm are nailed. It's better to start from the top corner. The slats are attached at the same distance from each other.
- A second layer of shingles is carefully nailed on top of the formed structure. It is 2 mm thicker than the slats of the first tier. If there are no slats of the required size on sale, then you can buy shingles of the same thickness. The final dimensions of the structure are at least 5 mm.
Improving adhesive properties using wooden slats