Drywall bar counters
You can install a gypsum plasterboard bar counter anywhere with your own hands.
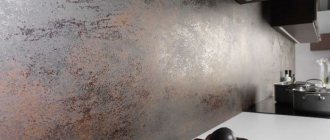
Bar counter made of gypsum plasterboard
Depending on the location, racks are distinguished:
- wall-mounted – one side adjacent to the wall;
- peninsular - as a continuation of kitchen furniture;
- island - located separately, in the middle of the kitchen;
- mobile – retractable, drop-down and other structures.
Kitchen
The wall-mounted bar counter is suitable for narrow and small kitchens. It can be a worthy replacement for a dining table. The location is chosen taking into account the particular arrangement of furniture and the shape of the room. If the stand is adjacent to the wall with its short side, 4-5 people can be seated behind it.
If the kitchen is small, the counter is placed against the wall with the long side of the countertop. This is an option for quick snacks and gatherings with friends in a small circle.
A stand located near the window as an extension of the window sill allows you to save space. Refusal of the dining table allows you to install additional household appliances here.
Wall bar counter
Particularly popular is the peninsular version of the bar counter made of plasterboard, which is a continuation of the set, located perpendicular to the furniture. Materials for finishing are selected similar to the main furniture. Peninsula racks are made straight, curly, with or without a pipe-bracket.
Peninsular bar counter
The most common option is a desktop + stand. On the long side you can place a hob or sink, on the other - bar utensils. The tabletop is made solid or stepped. In the second option, the work area is placed on the lower tier, and the bar area on the upper tier.
An island rack made of plasterboard is ideal for a studio apartment, as it visually separates the living room and kitchen areas. This can be a tabletop on supports or a high console with drawers and shelves.
Island stand
A counter that fulfills its main role is suitable for a luxurious classic interior: storing dishes and preparing drinks.
For a very small kitchen, you can choose a mobile model that appears “out of nowhere” at the right time. This stand can be suspended, folding, or on wheels. The first is suspended from the ceiling and lowered using special mechanisms. The second copies a book-table, and the third requires locks on the wheels to control their rotation.
Bar counter for a small kitchen
Drywall is a universal material that allows you to create structures of different styles and shapes with your own hands. And you can decorate the stand with plastic, chipboard, wood and other materials, or simply give it a suitable color.
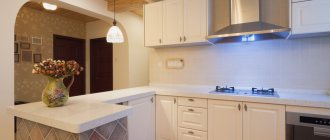
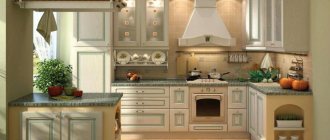
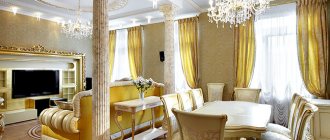
Photos of bar counters in the kitchen
There are a huge number of designer and unusual solutions for bar counters. Everything is supported according to the wishes of a specific family and functionality. So, the photo shows a counter that completes the kitchen unit and separates the living room area from it.
The tabletop can have different shapes, expand, be rounded, and bend. This allows you to save space and provide the rack with additional functions, as in the photo.
The island type bar counter combines a work and dining area. Great for oblong spaces.
A bar counter made of wood looks expensive and natural. Has one support and fastening to the wall. The pillar has been replaced by a board. The photo shows the natural curves and grain pattern of the board.
A bar counter can combine shelves to divide space; in the photo, it performs its natural function as a bar with places to store drinks.
Using your imagination, you can create a compact and unusual stand made of wood.
A drawer in the rack allows you to store cutlery in it, which saves space in your kitchen set.
In the photo, the counter serves as a dining table and additional storage space, because... It has built-in shelves.
A countertop made of artificial stone is self-sufficient and looks expensive. Fits perfectly into modern glossy headsets with right angles and lines.
A two-level tabletop is now very popular; it allows you to zone the space without weighing it down.
I look forward to your comments, how many people have a bar counter in their kitchen?
A kitchen with a bar counter looks modern and dynamic. This is not just an interior decoration, but a useful and functional piece of furniture. When ordering a kitchen set, the production of an additional module can be negotiated separately. But if all the furniture has already been placed and you just want to refresh the interior, a hand-made plasterboard bar counter will help out. There is nothing complicated about it - just start.
How to do
If you have enough time, prepare the materials and tools:
- GKL;
- metal profile;
- fasteners (dowels and screws);
- putty, paint and sealant;
- hammer drill or impact drill and screwdriver;
- knife and spatula;
- building level and cutter;
- brush or roller and tray;
- drywall float;
- protective equipment (gloves, glasses, closed clothing and shoes, hats).
DIY bar counter
Bar
Step-by-step instruction
- At the first stage, the dimensions are determined - parameters of height, length and width that are convenient for the owners.
- Then they create a frame from the profile. It is important to consider their location for maximum rigidity, for example, install the corners from a solid profile. To do this, two walls are cut, and the rest is bent in a straight line. Reinforce with self-tapping screws or a cutter.
- After creating the perimeter of the walls, they are fixed to the floor. Between them, at a certain distance, a transverse profile is installed for rigidity. The profiles are connected perpendicularly with crabs.
- If the project includes lighting, wiring must be done in the frame in advance. According to TB, the cable must be insulated and removed from metal parts.
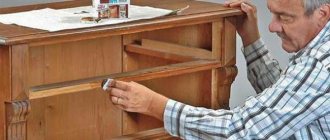
- Sheathing with plasterboard is possible if the stability of the frame is beyond doubt. Pieces of drywall are cut to the size of the frame and screwed into the profile using a screwdriver and self-tapping screws with short pitches. The caps are slightly recessed to disguise them with putty.
- The joints are sealed, the ends are sanded with a float. The holes for the screws are covered with putty, dried, cleaned with sanding paper and primed.
- It is convenient to paint with a roller or brush (in hard-to-reach areas).
- If necessary, install a plinth, and in places where there is a loose fit, treat the seams with sealant.
- Lighting for the bar counter plays a special role. Typically, halogen or LED lamps are used, placed in a beam installed above the tabletop, but lighting can also be provided using a chandelier on the ceiling. It is convenient to equip the lamps with a dimmer, which allows you to adjust the lighting intensity.
- If there are no outlets or a distribution box nearby, you can install an extension cord with a filter.
Bar counter for every taste
About plasterboard bar counters for the kitchen: pros and cons
Bar counters are often used in studio spaces. They are necessary to separate the dining and living areas. Designers distinguish between mini and classic module types. The latter are larger in size, have niches for installing small household appliances, and lighting. Like most custom pieces of furniture, bar counters have certain advantages and disadvantages.
Let's start with the pros:
- Installation in small spaces is allowed.
- The product is used instead of a standard dining table.
- Saving useful space when making corner posts.
- You can equip the interior element with shelves and niches.
- Ideal for quick snacks as no serving is required.
- Chairs can be tucked under the counter when not in use, saving space.
Along with the advantages, there are also disadvantages. There are not many of them, but you should still pay attention:
- installation at a height of more than one meter from the floor;
- Only 2-3 people can dine at the same time;
- impracticality of using a rack in a large family.
When developing a project, take into account all the details, think in advance about the number of drawers, shelves, and hidden niches. Remember that it will only be comfortable to sit on special high chairs with a footrest. It is not always convenient for older people to be in this position, and it is also dangerous for children.
Advantages and disadvantages
Should you install a bar counter (BS) in an apartment or country house or give preference to the usual dining table?
In a large apartment or house there will never be problems with choice - there is an opportunity not to give up one thing in favor of another, because such a design will always be an excellent addition to the main dining area.
If a small kitchen area obliges you to make a choice in favor of one thing, then you need to evaluate all the possible pros and cons.
The bar counter has long ceased to be an original element of the interior. In addition to this, it initially had many other advantages :
- saves space. Under it, you can use the space near a window or wall, or make a built-in set as an extension of the tabletop. This design will be mobile and adaptable to any conditions.
Designer tips
Elena Vasilyeva
Interior designer, teacher at his own interior design school since 2014
For a small family, it can become a complete replacement for the dining table. This is especially true for small rooms up to 7 sq.m.
- zones the space. For kitchen-living rooms and studio apartments, this is one way to divide the room into a work area and a relaxation area;
- allows you to organize a minibar. Monolithic structures with a refrigerator built under the countertop for cooling drinks, lighting and appropriate design allow you to create a cafe atmosphere right in your apartment or house. This solution will definitely appeal to those who like to organize home parties;
- additional work surface. If you connect the BS tabletops and the headset, you can extend the working area.
When should you give up ?
- There are small children in the house. The bar counter in this case will always pose a threat to their safety.
- You often receive guests or have a large family. As a rule, BS is not designed for a large number of people. Its width does not allow organizing a feast for a company.
- This is also a bad idea for older people. High chairs with crossbars for the legs will be, at a minimum, uncomfortable for them.
How to make a kitchen bar counter from plasterboard with your own hands: step-by-step instructions
Plasterboard sheet is a universal material used for interior decoration. Using the profile, a variety of, including complex, geometric shapes and compositions are created. Before you understand how to make a plasterboard bar counter with your own hands, you should prepare for the process.
Advice . Be sure to make a drawing or diagram of the product to scale. If this is difficult for you, contact the services of designers.
Making any piece of furniture requires time, patience and care. The kitchen bar counter is no exception. When the project has been studied in detail, we begin to prepare the workspace and necessary materials:
- plasterboard sheets;
- metallic profile;
- dowels and screws for fastening;
- putty;
- seam tape;
- sealant;
- building level;
- stationery knife;
- drill or screwdriver;
- tool for grouting putty.
Additionally, finishing materials are prepared. When painting, you additionally need a tray and a roller. If you plan to lay tiles, you will need special glue. Protective equipment (mask, gloves, goggles) must be used.
Next, we move on to step-by-step instructions for making a bar counter:
- We determine the length, width, height and depth of the product.
- Transfer the drawing from a piece of paper to the floor (in the place where the rack is mounted).
- We make a frame from an aluminum profile according to the specified parameters and dimensions (the more solid parts, the stronger the structure).
- We fix the product on the floor and install crossbars to increase rigidity (crab fastenings are used).
- We cover the created frame from the profile with plasterboard of the appropriate size (the material is cut effortlessly, with a simple stationery knife or jigsaw).
- We fasten the drywall parts using dowels or self-tapping screws (it is better to use a screwdriver to make the work faster).
- The cap should be screwed in using the recessing method in order to subsequently hide its presence with putty. The pitch width of the screws is 20-30 cm.
- At this stage, we install the wires for the lighting, carefully insulate them, and check the functionality and reliability of the electrics.
- We glue sickle tape onto all the resulting joints, and cover the heads of the screws with putty.
- After drying, we treat the areas with a grouting tool (dry method) until a perfectly smooth surface is obtained.
- Finally, we apply a primer, after which we install the baseboard, if the design requires it.
The main frame of the bar counter in the kitchen is ready. Then we proceed to its final finishing. As a top, you can use laminated chipboard sheets, a countertop, ceramic tiles or glass, mosaic tiles (it all depends on the design). The base is usually coated with paint. It is convenient to do this with a roller, and in hard-to-reach places a brush is used.
Drywall installation and surface finishing
Installation of plasterboard sheets (GKL) on the sheathing begins with marking the sheets. The best option for covering a rectangular bar counter in the kitchen or living room is to install one single piece of material. It is carried out according to the following rules:
- Markings are applied to the drywall according to the features of the frame system;
- The required part of the sheet is cut off;
- The cut out part is applied closely to the surface of the frame and fixed with self-tapping screws (the distance between fasteners should be at least 30-40 cm, and in transition areas - 15-30 cm);
- The table is completely covered with plasterboard (ideally, 4 solid parts of plasterboard are attached to a rectangular frame);
- During installation, the screws are slightly recessed into the surface of the material so that they do not interfere with the finishing process;
- A reinforcing mesh is placed in all seams and transitions, after which they are sealed with finishing putty;
- The fastening points are also sealed with putty;
- After the putty has dried, the remaining mortar is removed from the finished surface using a spatula.
A hand-made plasterboard bar counter is completely ready for applying any type of decorative finish. It can be absolutely diverse, and its choice is made based on the existing interior of the apartment. The design of a living room with a plasterboard bar counter can be seen in the photographs:
What will you need for work?
First of all, you need to purchase materials and prepare tools. But first, it’s worth drawing up a sketch of the future design with all the dimensions, so as not to add too much or forget about important details.
Almost any type of drywall can be used to create a bar counter. Although for a better result, we advise you to understand its varieties and properties:
- Thick gypsum plasterboard wall sheets (12.5 mm) are used to create smooth and durable surfaces that can be covered even with heavy ceramic tiles.
- If you plan to make a radial base for the rack, purchase thinner plasterboard (9.5 mm) - it is easier to bend to get spectacular rounded walls, but it is also quite reliable.
- The bar counter, which will be located next to the work area (for example, with an island arrangement of furniture) can be made of moisture- or even fire-resistant plasterboard. In such a kitchen you will feel completely safe.
Select facing materials for the bar counter taking into account the main decoration of the kitchen. They work well with drywall: paintable plaster, wallpaper, PVC panels and tiles. For decoration, you may also need ceiling moldings, plastic baseboards or any other decorative strips.
Tools and auxiliary materials:
- To work with plasterboard you will need a sharp knife, as well as a drill or screwdriver. You may need a needle roller if you want to make a semi-circular base for the post.
- For cutting and assembling perforated profiles - metal scissors and a hole cutter.
- For finishing work - serpyanka (reinforced tape), putty and spatulas themselves of different widths, emery cloth or a special grater to smooth the top layer of plaster.
A pencil, ruler and level are a must-have set, without which you shouldn’t even start working.
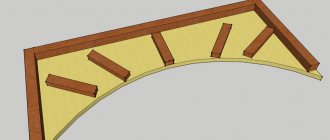
Creating a wireframe
First, you should make a marking on the floor where the rack will be installed, and a counter marking on the wall. Along these lines, the base of the frame made of wooden beams or a guide profile is mounted. The second option is preferable, since metal U-shaped strips provide the structure with greater stability. The mounting rails are rigidly fixed to the floor with dowels.
Sections of horizontal jumpers and vertical rack profiles are attached to the formed contour. They must be located in each corner of the future structure, as well as on a long straight section - as additional stiffeners. The optimal step for installing slats is considered to be 60 cm. But since the bar counter is unlikely to be very large, you can make only one intermediate rib on a straight wall - in the middle.
The vertical frame is assembled from the outside and inside. In this case, the screws are simply fastened at first - they can be finally secured after you have set everything to the level. The outermost slats adjacent to the wall are secured to it with dowels. A short section of a U-shaped profile is also mounted here - it will play the role of a shelf, providing additional support for the cantilever strips under the tabletop.
The next stage of work is connecting the two perimeters of the walls of the bar counter with transverse jumpers. They are also cut from the profile and ensure that the dimensions match exactly. After this, the finished planks are installed in the upper and central parts of the frame between the vertical posts and, after checking with a level, they are screwed to the sheathing.
Longitudinal U-shaped profiles or bars are laid on top of the prepared frame. For reliability, their ends adjacent to the wall are inserted inside the mounted shelf and fixed there with self-tapping screws.
If you plan to make a spectacular bar counter with internal lighting, you need to lay the wiring inside the frame before starting work with gypsum boards.
How to make a plasterboard false wall with your own hands
If you wish, you can easily build this structure yourself. The main thing is to calculate everything correctly and not skimp on materials. It all starts with a design on paper. Make a drawing of the future structure and purchase everything necessary for its construction.
Then a metal profile is cut out according to the diagrams. False wall markings are applied to the floor. A special tape is glued to the lower profile, which is used to glue it to the floor. Then they install the side profiles and attach them with self-tapping screws to the partition and the lower profile. The last to be fixed are the ceiling guides. The base is ready!
Then you can cut the plasterboard sheets and sand their edges well. They should become smooth. Remember that you are working with a fragile material, so use minimal force when cutting it, otherwise it may break. After this, the sheets need to be fixed to the profile, puttied and decorated.
Zoning the kitchen and living room is best done using plasterboard structures: partitions, false walls, arches or a bar counter. They do not take up much space, are easy to install and become an interior decoration, making it interesting and original. You can also experiment with decoration: not just paint the wall, but cover it with wood or tile it with ceramic tiles.
Sheathing the stand with plasterboard
The sheets are marked with a pencil and cut into individual elements in accordance with the drawing. After that, each of them is screwed to the finished slatted sheathing. It is better to place the attachment points in short increments of about 20 cm.
The evenly fixed sheet will have to be “passed” again with a screwdriver in order to recess the heads of the hardware a millimeter into the cardboard.
After covering the frame of the bar counter on all sides, the joints between the gypsum boards are glued with sickle tape. The outer and inner corners can be strengthened with additional plastic pads - but this is optional. All recesses at the attachment points are covered with thick putty. As soon as it hardens, the unevenness is removed with sandpaper, after which the drywall can be primed and proceed to facing work.
Finishing the bar counter
Here the order of work will differ depending on the choice of finishing materials:
The surface of the plasterboard walls is covered with a thin layer of gypsum plaster, rubbed and, after drying, puttied with a mixture for fine leveling. The hardened putty is smoothed with a special grater dipped in water or a wide steel spatula until perfectly smooth.
On top of the finished plaster, 2-3 thin layers of interior paint suitable for use in the kitchen are applied to the bar counter. You can make your work easier and use a decorative structural mixture that does not require special leveling and can be applied directly to primed drywall.
For work on gypsum boards, it is better to choose the thinnest tiles or mosaic tiles of small sizes. You need to glue it from the wall adjacent to the rack, starting from the lowest row. It will create support for all subsequent tiers of cladding.
The tiles are installed on a special adhesive using plastic crosses to maintain a constant joint width. During the installation process, each element is checked by level not only horizontally, but also in relation to the vertical plane of the wall. After a day, the crosses are removed, and all gaps are filled with grout mixture. The surface of the cladding is cleaned of any remaining solution. Install the countertop and your new bar counter is ready.
When all the main work is completed, the joint between the tabletop and the side wall is treated with sealant and a decorative border of suitable width is placed on it. This will simplify the maintenance of the work surface and protect the finish from contamination. The lower part of the stand base can be covered with a plinth or screwed onto screws, covering the screw heads with plastic decorative covers.
Drywall bar counters: do it yourself
Ergonomics in the design of residential premises is now in the foreground. Owners of small Khrushchev apartments combine rooms to visually and functionally increase the usable space. Thus, from two cramped rooms they get one - combined. Most often, redevelopment is done in the living room and kitchen to ultimately obtain a studio kitchen. This method is advantageous in many ways: we get a spacious and multifunctional room with many advantages. However, in order to visually divide a room into several functional zones, it is necessary to draw up a rational design project that involves zoning. To visually delimit zones, different designs are used: decorative partitions, shelving and bar counters. It is about bar counters and their functionality that will be discussed further.
Plasterboard structures between the kitchen and living room
Each owner decides how to distribute space between rooms depending on his needs. Plasterboard structures can be used to divide any room into zones. If the house has a large hall, it is divided into a dining area and a relaxation area. Also often in the bedroom, a GLK structure separates the working area from the sleeping area. But most often this technique is used in small apartments, where, in order to save valuable square meters, the wall between the kitchen and the room is demolished. Studio owners also often face this problem and do not know how to properly separate the kitchen area and living room.
You can divide the room into small areas using one of the following designs:
- arch;
- bar counter;
- false wall;
- sliding partition;
- pass-through rack.
Partitions made of plasterboard for zoning the kitchen and living room are an excellent solution for a standard Khrushchev-era apartment building, in which there is always little space. Before you start remodeling, you should look at photos of design projects and choose the one that is suitable for your apartment.
Arches
For a regular swing door to open and close easily, space is required. But a small apartment does not always have extra square meters, and the wall between rooms is often not allowed to be demolished.
In this case, it is advisable to remove the door and install a plasterboard arch in its place. This compact design has a presentable appearance, does not take up much space and divides the space into zones. It will fit especially effectively into an Italian-style interior.
Before installation, consider the thickness of the arch. You can put a wide one and install decorative shelves inside it, on which it is advisable to place beautiful dishes, figurines, and photo frames. Thus, the arch will turn into a beautiful and meaningful piece of furniture.
Wall imitation
Owners of studio apartments sometimes decide to isolate the kitchen area from the living room. This problem can also be solved using drywall. If you make a wall out of real brick or concrete blocks, it will take up a lot of space. And such work will take enough effort.
A plasterboard wall will be narrow and light and will not create a large load on the floors. You can do it yourself quite quickly. If you need cement to build a brick partition, then you only need sheets of drywall, metal guides and a screwdriver. Such a wall can separate the hallway from the dining room and isolate the work space. It is easy to decorate. But drywall has a drawback - heavy objects cannot be attached to it. You can nail frames with photographs and ceramic plates onto such a partition, but for a large diagonal TV it is better to find a more reliable surface. In private houses, a decorative fireplace is attached to such walls. This solution looks impressive, but is not suitable for standard apartments.
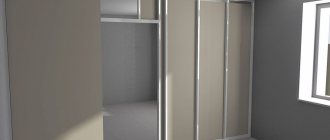
Sliding partitions
Another popular option for interior zoning is sliding partitions. They work on the same principle as wardrobe doors. Guides are attached to the floor and ceiling, into which a wooden, plastic or glass sheet is inserted. A sliding partition in the form of an accordion is suitable for small rooms. Designers offer the most unexpected options for partitions. In order not to interfere with the uniform distribution of light, you can install structures made of colored glass, but wooden ones also look beautiful.
The sliding wall between the kitchen and living room on the right or left can be framed with narrow plasterboard cabinets with open shelves. You will get an additional storage system with a beautiful design. It is better to order sliding partitions from professionals - a beginner is unlikely to be able to install such a design.
Bar counter
Both in a large house and in a typical apartment, you can separate the kitchen from the living room using a bar counter. It can initially come as part of a kitchen set and be a continuation of the work surface. This kitchen is made to order for a specific project.
But there is another, more budget-friendly option. It is advisable to purchase a standard set and make the bar counter separately from plasterboard. It can be of an unusual design and contrasting color. There is no need to place a dining table in a room zoned with such a counter. She will perform his function. Be sure to make a stand with shelves inside - you can put dishes and cans of cereals there. It is better to cover the shelves with frosted glass and make neon lighting inside.
Pass-through rack
A small kitchen and living room should be separated by decorative through shelving. This design does not have a back wall, it consists of through shelves. They can be the same or different shapes - it all depends on the wishes of the customer.
Such a rack divides the space and is used as a storage system. You can put vases, flower pots, beautiful dishes, containers with bulk products, and books in it. The advantage of the structure is that it does not interfere with the spread of light. Therefore, the rack does not need to be filled completely, let it be half empty.
Drywall bar counters in the interior
If you need to visually delimit the kitchen in a studio apartment or make two functional rooms decorated in the same style from a spacious living room, bar counters are used. They can be part of a furniture set or, on the contrary, be a bright accent in the interior.
A bar counter made of plasterboard will be an ideal solution for those who do not like typical designs and can do something with their own hands.
Today, plasterboard designs in the interior have become very popular. Thanks to its versatility, availability and ease of processing, plasterboard has become one of the main materials for interior design. Among the numerous options for plasterboard structures, bar counters occupy far from the last place.
By design, the bar counter can be:
- Island or straight is the simplest rectangular structure, which is installed in the middle of a spacious room, thereby visually dividing it into two functional zones.
- An L-shaped bar counter is more complex in design, but can fit perfectly into the interior of a small kitchen or a small kitchen-living-dining room.
There are even more complex designs of different geometric shapes and sizes, the choice is considerable. How to build such an interior element at home? Where to start and what will it take? Let's touch on the issue in more detail.
Bar counter for the kitchen to divide the space
In studio apartments or living rooms combined with a kitchen, the bar counter copes with the function of zoning and dividing space. Separates the food preparation area from the seating area. Sometimes a sofa is placed close to it and thus partitions off an oblong room without any disruption to the composition of the interior.
Bar counter dividing the space
In small kitchens, the bar counter is often an extension of the window sill, which increases the hostess’s workspace and ideally completes the corner set.
Or it is attached to the wall and fits perfectly into niches and non-standard walls.
Wall bar counter
The rack is chosen due to its small surface width, which allows you to save space while performing all the necessary functions of the tabletop.
Corner bar counter
Modern bar counters are made from various materials, based on the design of the kitchen. It can be made from any solid material, including plywood and glass, however, the most common options are:
- Tree,
- Drywall,
- Fake diamond,
- Pallets.
If you don’t want to spend money on the work of a craftsman, then you can design and assemble a bar counter with your own hands. It can consist only of a table top and a pillar or can also contain shelves. Two-level structures look interesting. This is a modern infusion into familiar classical forms.
Also, bar counters can be of a console type, i.e. without support to the floor, they can stand on one pole or on one support, they can be framed with internal filling or in the form of an island. They can be combined with a window sill or wall.
Bar counter dividing the space
Unique DIY plasterboard bar counter: where to start
First you need to decide on the installation location, as well as the size and design of the product itself. The stand can be blank or have shelves, can include lighting and rails, and have a variety of shapes and design solutions. It is also necessary to draw up a detailed drawing with dimensions, which includes not only the structure itself, but also the locations of contact connections (if any), as well as the necessary communications that will need to be hidden. According to the drawing, the required amount of materials is calculated.
Namely:
- Drywall;
- Metallic profile;
- Everything for the wiring device (if lighting is planned);
- Self-tapping screws and dowels;
- Putty and primer;
- Ready-made countertop or material for its manufacture;
- Finishing material.
You can decorate the bar counter in any style you like: there are many finishing options for this. Wallpaper, paint, decorative plaster or piece material – the choice is huge. In addition to the materials, you need to prepare the tool - more on that later.
Bar counter in the interior of an apartment: the purpose of the design and its varieties
The bar counter, although not a mandatory element of the interior, is still often used to maintain its integrity. Most modern styles involve its use as a delimiter of room space or as a decorative element. Still, the presence of a bar makes the apartment more elegant and emphasizes the modern views of its inhabitants. A photo of the bar counter in the interior can be seen below:
The location, shape and dimensions of bar counters vary. Their main parameters are determined based on the purpose of the rack, existing furniture and the total area of the apartment.
The counter is not always installed in the kitchen. There are interior options in which it is used to separate a balcony or delimit a living room.
Such versatility affected the basic parameters of the object, which acquired many modifications. Today you can find bar counters of various types and sizes, among which the most popular are the following:
- Wall mounted
- Freestanding
- Peninsular
- Mobile
Bar counters differ not only in their location, but also in shape. It can be absolutely diverse, ranging from a traditional rectangle to wavy designs.
Tool preparation
When constructing plasterboard structures, as a rule, one set of tools is always used. It includes everything needed from cutting the profile to finishing the finished structure.
Namely:
- Pencil, tape measure;
- Metal scissors;
- Drywall knife (for shaped cutting - jigsaw);
- Impact drill or hammer drill;
- Screwdriver;
- Construction level, plumb line;
- Milling cutter;
- Wide and narrow spatulas.
Depending on the variation of the design itself and the chosen finishing material, the spectrum may change. It’s better to prepare everything you need in advance so that in the midst of work you don’t have to look for an item you suddenly need.
How to make a bar counter from plasterboard: a simple algorithm
Do-it-yourself installation of a plasterboard bar counter includes several stages of work, which begin with preparing the surface. The place must be cleared of unnecessary items and cleaned.
Further actions:
- Marking. On the floor, on the wall and on the ceiling, according to the drawing, markings are made of the mounting points of the rack profile and guides. It is also necessary to mark on the wall the height of the future structure and the place where the countertop will be located.
- Frame structure. According to the markings, a rack profile is attached to the floor, rigidly fixed to the floor and ceiling with dowels. Next, the frame is installed according to the drawing. At the stage of assembling the frame, it is important to take into account the possible installation of electrical wiring and take care of this in advance.
- Installation of drywall. In accordance with the drawing, markings of the sheathed elements and cutting of material are made on the sheets. Next, each element of the future structure is attached to the sheathing using self-tapping screws. Please note that their caps should be recessed into the cardboard layer no more than 1 - 2 mm.
- Installation of lighting fixtures. If the installation of electrical wiring is planned, it is at this stage that the installation of socket boxes, sockets, switches and lamps is carried out, as well as checking the functionality of all contact connections.
- Rough and decorative finishing. After sealing the joints, a layer of starting or universal putty is applied to the structure; after it has dried, you can begin to decorate the structure and install additional elements (lamps, countertops, crossbars, etc.).
The tabletop can be made to order according to the shape of the structure, it can be tiled, or you can make it yourself from solid wood or MDF. When decorating the bar counter and choosing materials for it, it is important to remember that the design should be harmoniously combined with the overall interior and complement it, and not be an absurd “spot” in the entire design.
Marking and drawing up a frame system
After choosing a location for future construction, the premises are marked. Its purpose is to accurately distribute all structural details and obtain a complete picture of the structure of the object. Depending on the type of object, it can be applied to the floor, walls or even the ceiling. They begin to apply it from the corner of the building, sequentially marking all the details and indicating the location of the racks. Each element must be specified and labeled. Using the existing markings, making a plasterboard bar with your own hands will not be difficult.
Installation of the frame is carried out according to the following plan:
- The CW or UW guide profile is screwed to the floor (during the installation process, you must strictly follow the markings);
- Vertical posts made of CD profile are inserted into the guide profile (the distance between them should be at least 30-40 cm);
- The first profile is carefully aligned using a plumb line and a building level, and then fixed with self-tapping screws (the remaining vertical elements will be oriented towards it);
- Subsequent guides are mounted in a similar way, having previously been adjusted according to the first profile;
- To increase the load-bearing capacity of the structure, the vertical profiles are fastened with cross members (you can make them yourself from an ordinary CD profile);
- Another CW or UW is placed on top of the profile, designed to further connect the structure (if necessary, the racks are additionally fixed with longitudinal profiles running from one side of the system to the other).
The resulting frame must be strong and completely motionless. Therefore, it must be done extremely carefully, securing each profile well and fixing the cross members. Installing drywall will increase the load-bearing characteristics of the system, but you shouldn’t count on this factor too much.