Repair
0
5 020
Share
Finishing a room with plasterboard has become firmly established in renovation traditions - leveling walls, installing arches and ceilings. However, few people know that gypsum plasterboard is used to construct kitchen furniture, which in its quality will compete with the furniture. Do-it-yourself plasterboard structures are intended for craftsmen with imagination who do not want to create stereotypical housing. A DIY plasterboard kitchen is also a possibility. Let's find out about this in more detail.
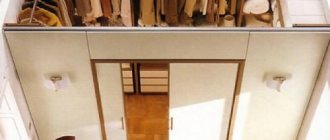
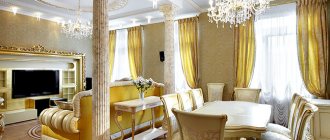
Antique furniture made of light wood matches perfectly with beautiful walls and floors
- Design options for a plasterboard kitchen
- Selection of drywall and tiles
- How to make kitchen furniture with your own hands from plasterboard: step-by-step instructions
- Preparing the wall and calculating the ceiling
- Kitchen cabinet-rack with shelves and space for hood
- Bar counter
- Kitchen arch-rack
Why do we choose drywall for finishing?
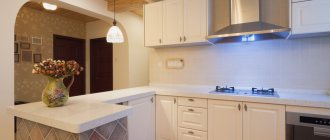
The photo shows the hardware used to attach kitchen cabinets to a plasterboard wall
Advantages of using plasterboard in kitchen finishing:
- Possibility of hidden placement of communications . It’s easy to hide wiring in plaster, but doing the same with an exhaust duct won’t work. Plasterboard cladding of walls and ceilings allows you to install a box for pipes and communications in the gap between the base and the exterior finish;
- Simple instructions for aligning different bases . No matter how uneven the walls and ceilings in your kitchen are, drywall can correct any surface. Moreover, this can be done in a short time;
- Possibility of arranging architectural forms of any complexity . Using drywall in design, you can create structures with any configuration, which is very difficult and sometimes impossible with the use of other materials;
- A wide range of materials that can be used for finishing plasterboard sheathing . Having lined the kitchen with plasterboard, you can apply a wide variety of finishes, including options such as painting, wallpaper, decorative plaster, ceramic tiles, etc.;
- Environmental and fire safety . Drywall, regardless of modification, does not contain carcinogens and does not emit toxic volatile substances into the environment. In addition, this finishing material does not burn and this is very important when arranging kitchens.
How to cover walls
| Illustrations | Installation methods |
| On a pre-arranged frame . This method is relevant if you need to use sheet material to level a raised base. |
The frame is assembled from smooth profiles or wooden planks, which are leveled and mounted through special linings.
The advantage of this solution is the presence of a technological gap in which the hood can be placed.
The disadvantage of frame installation is the protrusion of the finishing surface relative to the rough base. As a result, free space is wasted, which is unacceptable in small kitchens.
Installation of plasterboard ceilings
Finishing the ceiling in the kitchen with plasterboard is done in much the same way as on the walls. That is, a frame is filled according to the level, onto which slabs of material are attached. I do not recommend using adhesive joints on ceiling structures due to its insufficient strength. If you decide to attach the slabs with glue, cut the material into small fragments (no more than 1 × 1 m) and be sure to secure them with self-tapping screws around the perimeter.
| Using mounting adhesive without framing. This method is relevant for small wall reliefs and in the absence of a blocked level of more than 10 mm. The adhesive mixture is applied to the underside of the sheet with your own hands and the finishing material is applied to the previously prepared rough surface. In some cases, polyurethane foam can be used instead of the mounting mixture. In order to prevent slipping, the sheet is temporarily grabbed to the surface with self-tapping screws. This method has a drawback - drywall can only be glued to walls, since gluing it to the ceiling is fraught with collapse. |
| Illustrations | Types of plasterboard ceilings |
| Single-level . This is the simplest plasterboard ceiling design, when the sheathing over the entire floor area is lowered to one level. As a rule, the sheathing is lowered just enough to hide the pipe leading to the hood, communications, and recessed lighting. | |
Multi-level. A two-level ceiling is a complex structure in which an additional level is used to create a decorative effect and for a more rational arrangement of communications.
Lighting in drywall | |
| Recessed lamps . The lamps, as in the photo, are a socket with a lock, which is installed in a hole cut in the drywall. |
The device is positioned so that its front part is flush with the ceiling surface. Such lamps are used for spot lighting when the beam is focused on any functional area of the kitchen.
To achieve diffused light, a diffuser is placed on top of the recessed lamp, which protrudes beyond the level of the ceiling surface.
Hanging chandeliers. These are traditional lamps that are used to create directional or diffuse lighting.Electrical appliances, through holes cut in the drywall, cling to a hook fixed to the rough floor. In some cases, the hook is attached directly to the ceiling cladding. Surface-mounted lamps. This is the widest list of lighting fixtures that can be installed on plasterboard sheathing.
These devices include chandeliers, shades and small lamps that are fixed to the surface with self-tapping screws through a flat platform. Also, overhead lamps include wall lamps and sconces, which can be mounted on walls covered with plasterboard. Hidden backlight. A multi-level ceiling with hidden lighting is a mandatory attribute of most modern apartments.
Illumination, often an LED strip, is attached along the contour of the protruding sides and, when turned on, provides a beautiful diffused light. Hidden lighting is rarely used as the main illumination.
With the help of such lighting, zoning of the room is performed and one or another decorative effect is provided.
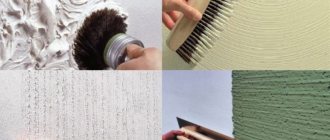
How and with what to finish drywall in the kitchen
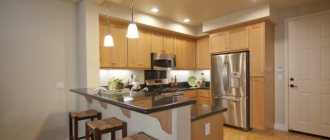
By showing a little imagination and choosing the right finishing technology, you can assemble full-fledged shelves and even a kitchen set from plasterboard
| Illustrations | Methods for finishing plasterboard surfaces |
| Coloring . The essence of the method is that building surfaces covered with plasterboard are puttied and sanded. |
A layer of penetrating primer is applied to the surface prepared in this way, which makes the putty more dense and stable. After the soil has dried, the walls and ceiling are painted with water-based paints.
Putty is a mandatory pre-painting step, since the surface of the gypsum plasterboard sheathing is heterogeneous both in color and texture.
Options for interior finishing with plasterboard
The cardboard surface of the gypsum board represents an ideal building basis for any finishing. In addition, drywall in the kitchen must be covered with a decorative layer to prevent it from getting wet (when absorbing moisture from the kitchen area). How can you decorate cardboard in a gypsum board sheet?
Painting
The modern construction market offers so many painting compounds that you can get confused in them. When choosing a paint, you need to familiarize yourself with its characteristics on the packaging.
If the paint is suitable for painting plasterboard walls, this is indicated on the metal (plastic) container. Therefore, before purchasing paint, you need to make sure that it can be applied to plasterboards and used inside wet rooms.
Painting drywall in the kitchen is done after preliminary priming. Cardboard absorbs moisture strongly, so without a primer the paint layer goes deep into the paper layer. The paint layer is applied unevenly, with alternating stripes and spots.
The choice of glossy or matte coating option depends on the presence of surface defects. Matte paint hides minor imperfections. The glossy surface highlights the errors of incorrect putty.
Decorative plasterboard ceiling
The choice of paint is determined by its characteristics after drying. The walls and ceiling of the kitchen must be washed periodically and wiped with a damp cloth. Therefore, kitchen paint must be moisture resistant. At the same time, for natural ventilation it is necessary that the walls allow steam and moisture to pass through.
The most popular paint for kitchen ceilings is water emulsion. Latex water emulsions are used for kitchen walls and plasterboard ceilings. In addition to them, plasterboard walls and ceilings are coated with silicone, silicate and alkyd paint solutions.
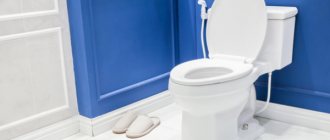
In the kitchen sink area, drywall is coated with silicate paint. The basis of this paint is liquid glass. It can work for a long time in conditions of regular wetness. In addition, the composition contains antiseptic components and prevents fungus from developing.
Plasterboard ceiling with spotlights
Silicone paint combines the advantages of silicate and acrylic paints. It is very elastic (closes cracks 2-3 mm wide), forms a waterproof film, and does not require antiseptic additives.
It is important to know: drywall cannot be painted with oil paint.
When painting gypsum boards, they are guided by the rule: several thin layers of paint are better than one thick one. Use a brush to paint ceiling plinths and corners. Using a roller, paint a flat ceiling surface.
To apply paint, the roller is completely dipped into liquid paint, after which it is rolled out in a special tray or on a paint grid. Rolling is performed after each dipping of the roller.
If the paint is applied in two layers, then the direction of painting the first layer and the second is perpendicular to each other.
If the painting uses two colors, paper is used to form an even border between them (strips of paper are glued to the wall surface to indicate the color border).
Decorative plaster
Decorative or textured plaster differs from ordinary plaster mixtures by the decorative filler (grains, shells, stone chips). Such decorative components form the texture and relief of the surface. Applying them to the wall requires some skill and artistic taste.
Mixtures for decorative plaster are made based on lime with the addition of cement and polymers. Among the various types of plaster materials, the best choice for kitchen finishing would be plaster based on a silicate binder. Thanks to the silicate base, the composition of the plaster mixture will be moisture resistant.
Coating plasterboard sheet with decorative plaster
To increase water resistance after drying, the plaster is impregnated (glazed) with wax or varnished.
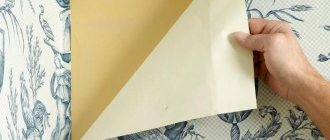
Wallpaper
Drywall is an ideal base for wallpapering. In the kitchen interior, moisture-resistant types of wallpaper coverings are used - glass wallpaper, liquid wallpaper (analogous to decorative plaster - the dry composition is soaked before applying to the wall and after drying it is protected with acrylic varnish).
The term “washable wallpaper” does not indicate the moisture resistance of the surface. This type of finish can be wiped with a well-wrung out damp cloth, but should not be wetted with water or washed with a brush.
Wallpaper on a lined kitchen wall
Drywall in the kitchen, options for its use
Today, plasterboard is used in the renovation of any room, as it allows for any design solutions. A do-it-yourself plasterboard kitchen means perfectly smooth walls, interesting surface shapes and a wide variety of furniture, making the interior of the room unique.
Padding
When priming plasterboard walls for painting, you need acrylic-based compounds with increased permeability, and best of all, antiseptic properties.
It must be applied on a dry and rubbed plastered surface. The working tool is a roller with a width of 200-300 mm; in inner corners and other hard-to-reach places it is easier to manipulate with a brush of a suitable width.
During the priming process, the movements of the tool must be smooth, and gaps in the layers are unacceptable.
The minimum number of times of treatment is 2, and preferably 3, with breaks for absorption and drying (usually about 4-5 hours).
What can be made from drywall
There are a lot of options for what can be made from plasterboard sheets, but they can all be divided into small groups:
- leveling and finishing of walls;
- ceiling finishing;
- furniture manufacturing;
- creation of arches and partitions.
All these groups have many solutions for creating an original and functional kitchen design. Let's look at some of them:
- Arches and partitions perform the function of delimiting the room, and by turning on your imagination, you can create a real masterpiece.
- Cabinets and shelves are, one might say, an integral part of the kitchen, which is created based on the requests of the owner of the room. The peculiarity of plasterboard structures is that they can be given any shape and size corresponding to a specific room. As for the quality of the material, we can say with confidence: it is quite durable and can withstand heavy loads.
- Various niches relate, rather, to wall decoration. When forming the correct frame for covering walls with plasterboard sheets, immediately think about niches, for example, for radiators. Making them from other materials is much more expensive, and they don’t look as stylish in appearance.
- Other furniture attributes are also made based on the characteristics of the kitchen: you can make a table, bedside tables or pencil cases. It all depends on the needs of the kitchen owner.
Greatest assortment
Do-it-yourself plasterboard ceiling with finishing examples
In the modern construction market, the profile for plasterboard can be very diverse. Here the choice must be made based on the requirements of the structure being installed. Since a partition, ceiling or arch requires completely different profiles. Drywall profiles differ in the following parameters:
- purpose;
- appearance;
- dimensions (thickness).
Selecting the right profile requires taking all these parameters into account. Only then will you do everything correctly and buy only the necessary frame elements. Also, profiles for forming a frame for a plasterboard structure are of the following types:
- guide for use on the ceiling PNP/UD;
- ceiling profile PP/CD;
- PS/CW rack profile;
- guide profile PN/UW.
- corner profile. Used to create an arch or figured partition.
- beacon profile. It is used for leveling the surface to create a flat wall.
Different profiles The first four types are main, and the rest are auxiliary. As you can see, the choice is quite large. Therefore, before you go to the store to purchase one, you need to clearly know which profile you will need in each specific situation. You need to choose only those types of frame elements that you definitely need. This way you will save money and greatly simplify your task of installing a partition, arch or any other structure.
Profile for drywall: how to choose and not overpay
In this video I provide an overview and reasons for choosing a profile for drywall with an optimal price/total ratio...
For a person who has decided to make just partitions or other structures from plasterboard, the profile abbreviations do not mean anything, unlike construction specialists. Correctly choosing the right profile without the help of sellers is only possible if you understand the meanings of these symbols. Let's look at the most common of them:
CB-50
- PP60 or CD-60 is a profile for the ceiling. The most popular type of frame element. It is the basis of any ceiling lathing. It is also used in the construction of various built-in structures and partitions. It can be used to form curves and shapes, so it is considered an excellent replacement for an arched profile, which is much more expensive. Considered universal;
- PN27 or UD-27 – ceiling guide profile. Also widely used in construction. Has excellent bending properties;
- CW-50 is a rack-mounted main element. Used for installation of lightweight structures. You can also use it to assemble partitions. In practice it is rarely used, as it requires frequent steps when fastening;
- CW-75 and CW-100 are essentially similar to the CW-50. Better quality CW-100. Used much more often than the previous option. As a rule, partitions are built from it;
- UW-50 – is a guide element used for CW-75 and CW-100. Used to align rack profiles in one plane. It is the basis for the frame when covering walls with plasterboard sheets.
Profile
Knowing the meaning of these abbreviations, you will know exactly what type of profile is needed in each specific situation when working with drywall.
Advantages of finishing a kitchen with plasterboard
Finishing a kitchen with plasterboard has the following advantages:
- The material has an affordable price.
- The ability to do the installation yourself, as the technology is quite simple.
- During installation work, a minimum of dust and dirt is generated.
- High speed of installation work and quick delivery of the finished result.
- Obtaining perfectly smooth surfaces.
- Environmentally friendly material.
- Possibility of implementing numerous design solutions.
- The structures are lightweight.
- Good maintainability.
- Compatible with many finishing materials.
Stages of installation of plasterboard structures
Installation of plasterboard structures consists of several stages, the basis of which is planning and drawing.
Everything else is a matter of technique. According to the drawn up drawing, the furniture frame or wall sheathing is mounted and everything is covered with plasterboard. Having basic skills and following the advice of professionals, you can make any design masterpiece.
Finishing the walls in the kitchen with plasterboard
Installation of plasterboard sheets can be done in two ways - framed and frameless. Both methods are good, but the frame method is used more often due to the fact that the resulting gap allows you to mask any unevenness of wall surfaces and hide all kinds of communications.
However, in small kitchens it is better to use frameless fastening of sheets, which will level the walls and take up a minimum of free space.
Stages of finishing walls using a frame method:
- The guide profile is being installed.
- The hangers are attached and checked for evenness.
- The material is prepared and, if necessary, cut.
- The plasterboard sheet is attached to the frame.
- The surface is being finished.
Stages of frameless wall cladding:
- The surface of the walls is cleaned and degreased.
- Primed.
- The canvas is being prepared.
- The sheets are glued with special glue.
- The seams are sealed and final finishing is carried out.
How to putty drywall under wallpaper and is it worth doing?
Often the choice of drywall is determined by the perfectly flat surface of the sheet, which, as it may seem, does not require additional processing before wallpapering. And almost any adhesive composition with a cardboard surface of the material adheres very firmly and reliably.
But, even taking into account the many advantages of drywall, craftsmen do not recommend gluing wallpaper onto plasterboard sheets without prior putty. Why? If you glue wallpaper onto drywall without first puttingtying it, the wallpaper will stick tightly to its surface, and during the next renovation, when you want to renew the walls, you will either have to glue new wallpaper onto the old ones. or dismantle the drywall along with the old wallpaper. In addition, when gluing light or thin wallpaper, you need to be prepared for the fact that the joints of the drywall sheets will be visible through them.
Is it possible to glue wallpaper onto drywall? You can paste wallpaper directly onto untreated plasterboard sheets if you are only going to glue non-woven wallpaper.
The non-woven wallpaper fabric can be peeled off when the time comes to replace the wallpaper, and its paper can be removed, i.e. upper part. The thin non-woven layer that will remain on the walls will not interfere with gluing new wallpaper or applying a putty layer.
Preparing drywall - putty
Preparing drywall for wallpapering is a simple but important step. You have to putty the surface of the walls without leveling.
The process of putting drywall under wallpaper consists of several steps. The first is preparing the wall surface for primer:
- The surface of the sheets must first be primed. Professionals advise using any acrylic primer for this, which will protect the material from mold and fungus development and securely fasten the drywall sheets.
- Then comes the turn of processing the joints of drywall sheets. It is better to do this with reinforcing tape: it will secure the sheets and prevent cracking of the walls. Seams and joints, in addition to using tape, should also be treated with putty.
- When the putty has dried, you can apply the mesh to the joints and seams (no additional papering is required).
Find out how to screed a floor with expanded clay with your own hands; detailed and step-by-step instructions for repairing the floor yourself.
Which is better: metapol or polypropylene? Read in this article. Professional advice and recommendations on choosing pipes for heating an apartment.
Having finished processing the seams, you can proceed to priming the drywall under the wallpaper. There are two most acceptable primer options:
- The first method involves applying just one layer of putty. subsequent grouting and application of the finishing coat;
- the second method involves treating the drywall before gluing the wallpaper with three layers of putty. moreover, grouting must be done after applying each layer; at the end of the work, you need to cover the putty with fiberglass: it will protect the material from shedding and additionally hold it together.
You should choose the right method of wall treatment based on your intentions for changing the wallpaper. If you tend to change your interior every 2-4 years, one coat of putty is sufficient.
Do not overdo it when rubbing the putty: your task is to eliminate possible defects from the surface of the material and even it out a little
If, through carelessness, you accidentally rub the material down to the drywall, you will have to reapply the putty
Tip: For grouting the primer, it is best to use fine-grit sandpaper. Do not forget to wear a protective mask while grouting so that small particles of primer do not enter the respiratory system - this is unsafe for health.
If you plan to glue wallpaper to a plasterboard ceiling. the preparatory stage of work is almost identical to that described above, however, processing the ceiling is a more complex process than processing walls. In addition, you will need to apply putty to the surface of the drywall, fix the corners of the sheets with sickle and lightly grout the material with a mesh on the holder.
Tip: To make work easier when processing drywall sheets, choose a penetrating primer.
After applying the putty and its complete drying, it is necessary to check with a spatula whether the putty layer is ready for gluing wallpaper. If the material pulls behind the staple, you need to wait a little longer until the putty is completely dry.
Kitchen partitions made of plasterboard
If the kitchen area is large, as a rule, they are zoned, dividing them into cooking and eating areas. The boundary between these zones can be an arch or a partition. For its manufacture, materials of minimal thickness are mainly used. The design of partitions depends on the imagination and preferences of the owner.
- The product design is developed and a drawing is drawn up.
- According to the drawn up diagram, a frame of metal profiles is mounted.
- The sheets are cut into specific segments.
- The canvas is fastened to the profile frame.
- The final stage is finishing and cladding for the interior of the room.
Fastening plasterboard sheets
Having received the finished metal frame, you can begin attaching plasterboard sheets to it. If you have drawn up a detailed diagram and taken into account the costs of drywall, then you already know how many sheets and how you need to cut them. They cut very easily. A jigsaw is usually used for this, but even an ordinary stationery knife will do. It is precisely because plasterboard sheets are so easy to cut that they have become so popular. After all, you always want to do something unusual in the interior of your kitchen. If you are also interested in this, then you can cut various shapes from plasterboard sheets and use them in the future to create an original interior.
Since the kitchen is a unique room that differs from all others in certain specific parameters, you can choose an unusual type of plasterboard sheets for it. What types of plasterboard sheets are there? In addition to the usual gray sheets, there are also green moisture-resistant plasterboard sheets. There is often a high level of air humidity in the kitchen. Maintaining this moisture level is the job of green plasterboard sheets. So this would be a good solution if you want to extend the life of your plasterboard sheathing. The second unusual type of plasterboard sheets are pink fireproof sheets. Such plasterboard sheets are fire resistant, so this will be an excellent solution in terms of fire safety. This is especially true if the wall next to which the gas stove will be located is being sheathed. But for all other kitchen walls, pink plasterboard sheets remain a good option.
When the plasterboard sheets are cut, the process of installing them on the frame begins. The sheets are placed vertically on the frame and secured to the rack profiles with metal screws. Under no circumstances should the self-tapping screw stick out from the sheet. He must delve into it. To check whether the self-tapping screw is set deep enough, take a spatula and run it across the sheet at a slight angle. It should not crash into the cap. Remember that two adjacent sheets of drywall must be placed on the same stud. When all the plasterboard sheets and their pieces are secured, we proceed to the finishing. First, the wall needs to be primed. We wait until the primer dries and proceed to putty. We take a spatula and begin to cover the wall with putty. First of all, you need to tightly fill the seams between the plasterboard sheets with putty, close the holes from the screw heads and eliminate all the cracks formed during the installation process. Then, using putty, we again create a perfectly flat wall surface.
After this, you can begin decorative finishing. Since in the kitchen it is most often tile, it is worth saying a few words about it. In any case, you will need to cut the tiles in order to cover the entire surface of the wall. Unlike plasterboard sheets, which can be easily cut with a simple utility knife, tiles are quite difficult to cut. You will need a grinder and special skills to make the cut even.
Finishing the ceiling with plasterboard
Drywall is used everywhere in the kitchen, and the ceiling is no exception. Hanging structures are made from it, which not only externally decorate the room, but also hide possible communications.
Main stages of work:
- Marking lines for attaching the frame.
- Installation of the profile frame.
- Preparation of material, which involves cutting and making holes for lamps.
- Fastening them to the profile frame.
- External cladding material.
Painting drywall
To paint drywall, first of all, pay attention to the type of paint.
For drywall, oil-based, water-based and enamel paints are considered suitable. For residential premises, as a rule, water-based paint is used. The only limitation is that for wet rooms it is necessary to choose other types of paints that are not only more resistant to a humid atmosphere, but also protect the drywall from moisture. In addition, the structure of gypsum plaster easily absorbs dye, so the consumption of water-based paint will be greater than that of other types of paint.
Oil paint does not have this drawback - it is easy to apply in a small layer. Oil paint is glossy; this structure protects drywall from moisture, which is great for a kitchen or hallway. In addition, the surface painted with this paint is easy to clean. The disadvantage is the chemicals in the composition, which is why oil paint is not desirable for residential premises. And during work it is necessary to ventilate.
The enamel has properties similar to oil paints: it does not absorb moisture at all.
Bright colors, shine, low consumption - which is important given the fairly high cost of paint. Enamel dries faster, but toxicity does not allow its use in all rooms
In addition, drywall must be cleaned from the slightest irregularities: the glossy surface of the enamel will highlight any defects.
Wallpapering on drywall
Kitchen set
A kitchen set made of plasterboard is an exclusive solution in the interior. In most cases, furniture is installed and attached directly to the wall.
You can create the following furniture from plasterboard:
- lockers;
- racks;
- bedside tables;
- hanging shelves;
- small table;
- various decorative elements.
Plasterboard furniture has the following advantages:
- it visually expands the space;
- has an original design;
- costs much less than buying standard furniture.
The technology for making furniture is practically no different from finishing walls or ceilings; it involves creating a drawing, a frame and covering it with plasterboard.
But there are small features:
- For furniture, it is enough to use sheets with a thickness of 12 mm.
- If you plan to store something heavy in a cabinet or on a shelf, you need to use more profiles, thereby strengthening the structure.
Types of finishing options
The problem of choice becomes especially important when renovating a kitchen. How to finish the walls and ceiling, what material to cover the floor with - these are complex tasks, but thanks to the huge number of proposals, they can be successfully solved.
Wallpaper
The kitchen is a room with special conditions due to high humidity, temperature changes, the presence of fumes and dirt. Ordinary paper wallpaper does not meet the increased requirements, but there are more modern types of this material.
The list is topped by vinyl wallpaper. They are moisture resistant, do not absorb odors, and can be washed with soap and water. The designs applied to the surface provide an attractive appearance that suits a variety of styles.
Non-woven wallpaper is less resistant to high moisture, so it is better to choose a type that has a vinyl base.
A modern option is liquid wallpaper. Their advantage is the absence of seams. The disadvantage is the absorption of moisture and odors. Other types are also used to decorate the kitchen space - cork, metallized and glass wallpaper.
Tile
If you are wondering what is the best way to replace wallpaper in the kitchen, then the most suitable material is ceramic tiles. Its advantages include practicality, wear resistance, moisture resistance, and a large selection of shades and patterns.
Easy installation allows you to do the job yourself. Caring for tiles is not difficult and involves wiping the surfaces with a soft cloth and soapy water. The problem is the presence of seams, which are more difficult to clean. Therefore, it is recommended to choose dark-colored grout: traces of dirt are not so noticeable on it.
Dye
Kitchen finishing options include a popular type - water-based paint. This material is non-toxic, dries quickly, and has good moisture resistance. Unlike oil paint, water-based paint does not peel off.
The ability to pass air allows painted surfaces to “breathe”. An important advantage is fire resistance, which allows you to paint the part of the wall located behind the stove.
First you need to level the surface, because all flaws and irregularities will be visible under a layer of paint. But the application process itself is simple. For a better effect, the walls can be covered with several layers of paint. This will ensure good appearance and long service life.
Decorative plaster
A popular material for kitchen finishing is decorative plaster. Its application to walls requires preliminary priming and leveling. Decorative plaster is not prone to fading under the influence of ultraviolet radiation, which allows it to maintain its appearance. The advantage is that there are no seams. The plastered surface is fire-resistant, wear-resistant and durable.
Lining
Wooden lining is a natural finishing material. It preserves all the advantages of wood, adding to them other useful qualities acquired during processing. The cladding material can withstand environmental influences: temperature changes, high humidity, sunlight.
Wooden lining has a decent appearance. It should be taken into account that its use reduces the internal volume of the kitchen. Various tree species are used.
Stone
Decorative stone used for finishing is divided into natural and artificial. Natural stone is much more expensive. The main types used for finishing are granite and marble.
Their main advantages are strength, durability, and rich appearance. Designers advise decorating the dining area with natural stone.
A cheaper option is artificial stone. Moisture resistance and fire safety allow the use of this finishing material not only in the dining area, but also in the work area. Stone, as a rule, has a cold tint, so combining it with warm-colored materials gives good results.
Features of using drywall in the kitchen
Before you start working with drywall in the kitchen, you need to study all the features of the material:
- Drywall comes in different types. When choosing a material for the kitchen, it is better to choose a moisture-resistant or gypsum-fiber type.
- Before drawing up a furniture design, it is necessary to take measurements of the equipment so that they fit well together and do not interfere with each other.
- If you plan to hang cabinets on plasterboard walls, it is necessary to strengthen the wall frame. The easiest way is to hammer a wooden beam with the appropriate cross-section into the profile - to the entire height of the rack.
- When making a cabinet table, it is recommended to make the tabletop not from plasterboard, but from bakelized plywood.
- If tiles are used for finishing structures, it is necessary to seal the seams using sealant or epoxy grout.
To summarize, we can say that a plasterboard kitchen is a chance to turn any design ideas into reality. The main advantages of this material are its availability and the ability to perform all installation work with your own hands, without the involvement of specialists. Plasterboard can be used to decorate any kitchen surface, delimit the room and create furniture masterpieces from it.
Mistakes when handling drywall
Even such a simple material as drywall can behave unpredictably if you do not know a few basic rules for handling it. In this chapter we will talk about the main mistakes that both beginners and experienced professionals make and tell you how to avoid them. There are several disadvantages when working with drywall:
- incorrect placement of screws;
- non-compliance with the screw tightening depth;
- ignoring the putty stage;
- improper cutting of drywall;
- non-compliance with indentations;
- use of low-quality or inappropriate profiles;
- incorrect connection of profiles.
Read more about how to hang a cabinet on a plasterboard wall.
Driving the screws too close to the edge
When installing drywall, profiles, sheets of material and self-tapping screws are used to hold these two elements together. If you tighten the screws in the wrong place, the drywall, due to its fragility, runs the risk of starting to crumble, which puts an end to the entire further structure. Correct installation involves placing the screws at a distance of 10-15 millimeters from the edge of the sheet.
An incorrectly screwed self-tapping screw destroys the gypsum board
Incorrect screw depth
If the screw is placed too deep, the cardboard layer may tear, which will further affect the quality of the structure, since the frame will not be rigid enough. The surface location of the screws will primarily affect the time of puttying, since the spatula will cling to the protruding screws.
Deep as well as superficial placement of self-tapping screws harms the structure
The suitable depth for screwing the screws is one millimeter (we are talking about the distance from the sheet to the head of the screw). To make it easier to determine the distance, it is recommended to use special attachments with a limiter, forcing the screwdriver to stop at the right moment, preventing damage to the plasterboard. This attachment can be easily purchased at any building materials store.
Ignoring the putty stage
For many inexperienced craftsmen, the puttying stage raises questions - what is the point of leveling a material that is smooth from the start? However, this meaning is still present. There are three good reasons why masters do not neglect this stage:
- The smoothness of drywall is deceptive. With suitable lighting, it is easy to see that the surface of such a leaf is strewn with microscopic grooves. If you want to paint the drywall right away, the paint will fall on these grooves sloppily, which will be noticeable after it dries;
In the absence of putty, grooves may be visible on drywall
- putty allows you to balance the joints between the screw heads and the material, as well as between adjacent gypsum board sheets. You also need to remember that most sheets of drywall are painted green-blue, which will certainly show through when light, thin wallpaper is placed on it. White putty makes it easy to avoid this misunderstanding;
If you skip the putty, the screw heads may be visible.
- the absence of putty increases the likelihood of damage to the front layer of drywall when changing wallpaper. This oversight usually manifests itself during repairs. And if the surface layer of plasterboard is really torn off, then the apartment owners will have to change not only the wallpaper itself, but also the plasterboard sheets.
You can skip the puttying step if the material is subsequently hidden by wallpaper (preferably embossed), which will allow you to “retouch” all the imperfections of the raw material.
Incorrect cutting of drywall
Despite the fact that drywall is a very flexible material that can be cut with any saw, there are a number of nuances in cutting it that you need to be aware of. There are special files designed for working with drywall, but after using them, the edges of gypsum boards often remain uneven, which makes them untidy. When making straight cuts, craftsmen periodically turn to an ordinary stationery knife and ruler.
Cutting drywall with a utility knife
Failure to indent
One of the common mistakes when handling plasterboard is mounting it close to the floor. During installation, it is important to leave gaps, which perform two important functions:
- prevent drywall from absorbing moisture. Of course, moisture absorption will occur in any case, but the presence of a gap will reduce it to a minimum;
- After installation, the drywall sheet gradually expands under the influence of the microclimate. If it does not have this opportunity due to its tight fit to the floor, then bumps may begin to form on the material.
An example of bumps on drywall when finishing a ceiling
Full compliance with the rules requires not only leaving a gap, but also gluing a damper tape, which will compensate for the expansion of the gypsum board and, moreover, reduce vibrations of the mechanical profile, which will help improve sound insulation.
Using low-quality profiles
The main drawback when choosing profiles is the purchase of too thin (0.3 millimeters thick) copies. The strength of these elements is much like foil - they can be easily bent by hand if desired.
Such profiles are completely unsuitable for creating walls or installing wardrobes. The optimal strength of profiles that can fix plasterboard sheets starts from 0.6 millimeters. Thinner options are used only for the formation of small boxes that do not involve loads.
The thickness of the profile is of great importance for subsequent installation and determines its success or failure
In addition to the thickness of the profile, it is also necessary to take into account its texture. Basically, there are two types of profiles in stores - smooth and embossed. Embossed profiles are great for beginners who tighten screws using a screwdriver (by fixing the screw in the recess). When working with a smooth profile, the self-tapping screw may slide, which sometimes leads to incorrect tightening, the danger of which we have already discussed earlier.
Incorrect profile connection
This point includes several errors that are observed periodically even by experienced craftsmen. One of these mistakes is connecting two profiles together using a press washer. It is believed that the use of such self-tapping screws allows you to reliably connect the profiles.
Connecting profiles using a cutter
The main problem is the protrusion of the caps of such washers, which does not allow subsequently to correctly apply a sheet of drywall - it simply does not adhere to the profile. Accordingly, despite the strength of the frame, we do not end up with a reliable structure due to the wobbly sheets of drywall. In order to carry out installation correctly, the best solution is to use a cutter.
Where can drywall be used?
Drywall in the kitchen can be mounted on any interior surface - walls, ceilings, arched vaults. When remodeling, internal partitions are erected from gypsum plasterboards. Plasterboard walls in the kitchen isolate the living space from neighboring rooms and absorb noise and vibrations from the street.
Ceilings and plasterboard partition between kitchen and living room
When replacing a door with an arch, the drywall creates a smooth, curved arch. To arrange arches, special types of gypsum board sheets of small thickness are used - arched ones. If there is no arched plasterboard, the vault is made from thicker slabs (first cuts are made on the back side).
Drywall in the kitchen is indispensable for leveling crooked walls. With the advent of gypsum boards, this work lost its colossal complexity.
With the help of plasterboard, they make chic multi-level ceilings with various lighting - hidden, spot, decorative. Gypsum material provides unlimited design and the embodiment of any interior fantasies.
Multi-level ceiling and plasterboard partition
How to do it yourself?
To assemble such a structure with your own hands, of course, you need at least minimal skills in working with construction tools. You can turn to the help of a master who will help you do the most difficult part of the work - installing the frame and sheathing it with sheets. Finishing and decor are a matter of taste and style, and here you are limited only by your own imagination.
Before you begin work, you need to develop a detailed design.
- Measure the room and make a drawing taking these parameters into account.
- Buy the necessary materials: metal profile 60x27 mm, sheets of plasterboard, self-tapping screws, dowel-nails, timber 50x50 mm, sheets of moisture-resistant plasterboard. Calculate the quantity from the planned size of the kitchen, take it with a reserve. To work, you will need tools such as a screwdriver, a hammer drill, metal scissors, a level, a tape measure, and a hammer.
- A frame is assembled from a metal profile, which is subsequently covered with sheets.
- If the countertop is made of the same material, then the design will be uniform. You can order the tabletop separately; it will be installed on an already sheathed frame.
- You can use plasterboard to install an independent cabinet with shelves or a niche into which laminated chipboard modules will be installed, as, for example, the master did in the first video for this article.
- Depending on the idea and concept, the finished structure can be painted with acrylic paint or tiled.
Any such structure will be stationary. If you get tired of it over time or want to install a regular kitchen with modular cabinets, you will have to dismantle it, which, of course, is more difficult than removing a simple set from the modules. But for those who are looking for fresh and unconventional design ideas, this is an excellent opportunity to create an unusual and unlike any other interior.
Selection of drywall and tiles
The kitchen is a room with high humidity. However, material with a moisture-proof layer is not always required. Why:
- Modern kitchen units are equipped with hoods, which prevents steam or condensation from reaching the material.
- Drywall is never left without finishing - paint, tiles, film, waterproof wallpaper. Through them, moisture will not reach the cardboard - the volume is too small.
As for thickness, the function of the shelf is taken into account. If it is intended for storing crystal sets, cast iron frying pans or pots, then a significant thickness is natural - from 10 mm + metal frame. For pencil cases, plasma TVs and designer inserts, even less will do.
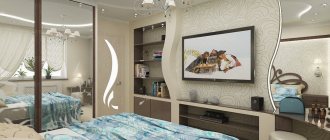
Furniture in a light-dark tone looks ideal with lighting