Which plaster to choose? Deciding
Depending on the quality and complexity of the work, plaster comes in three types:
- High quality.
- Improved.
- Simple.
Now, let's find out - what is the best way to plaster brick walls inside a house?
When constructing individual, complex projects, high-quality plaster is used, the thickness of which is 20-25 mm. As a rule, these are “elite” class buildings - museums, theaters, hotels, restaurants.
The most common option is simple plaster, which is not at all suitable for residential premises. Typically, basement, temporary or warehouse premises fit this type. The layer thickness is about 15 mm.
Improved plaster on brickwork is often used in public places or in social institutions - hospitals, schools, as well as in residential buildings. Layer thickness is approximately 15 mm.
How to make imitation brick with decorative plaster
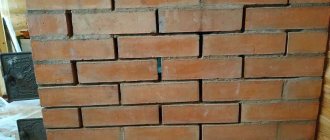
Plastering brick walls from the outside
Let's consider the technology of constructing a wall using masking tape. The process can be divided into several stages, the sequence of which must be strictly followed. Before you make decorative plaster for brick, you need to carefully study the sequence:
- The wall is cleaned from foreign inclusions to bare cement or masonry. For cleaning you can use a spatula, chisel, or hammer. Then, if necessary, the wall is treated with an antiseptic and deep penetration primer based on quartz sand.
- If the wall is uneven or unplastered, then a base leveling layer is applied. Classic cement-sand plaster or modern plaster with additives is used. The wall can be aligned using beacons or by eye. The main thing is that the difference does not exceed 3-4 mm per length of the two-meter rule. If the walls are very curved, then you can use galvanized mesh to reinforce the base. The color of the base layer will match the color of the joints between the bricks. If you are planning a bright wall pattern, then the seams can be decorated with a special colored putty.
- Marking in progress. To transfer dimension lines to the surface, you can use either a classic building level or a more modern laser level. Using these measuring tools and a ruler, a diagram of the future imitation of brickwork is applied to the wall. The first to be beaten is the lower horizontal and outer vertical lines. The rest of the markings “dance” from them.
- Mounting tape is glued along the drawn lines. Its width is the size of the future seams between the bricks.
- Decorative brick plaster is applied with a spatula. This is done with small grips to ensure uniform laying of the layer. The ends of the tape are not covered with solution.
- After a few hours the tape is removed. Uneven edges of decorative masonry are treated with a spatula soaked in water.
- At the final stage, the wall is treated with protective varnish for decorative plaster.
Do-it-yourself decorative plaster to look like a brick is a simple and reliable way to decorate a wall with a simple but original ornament. It can be used to decorate walls in residential and public spaces. Recently, many catering enterprises have been using decorative brick patterns to decorate their dining rooms.
Brick wall made of plaster
The imitation made with the help of plaster is carried out in several stages, the main of which are: marking, preparing the solution, finalizing the resulting form and further painting. This is one of the most budget options. Such work does not require special financial investments, is very environmentally friendly and extremely easy. To make a high-quality imitation you do not need special skills or tools.
Stages of work:
First of all, work must begin with preparing the workplace. You should completely prepare the wall by removing the old finish from it. If the walls are uneven, they must be leveled using special plaster and coated with a primer base.
Important!
If the apartment in which the work will be carried out is located in a new building, you cannot decorate the room in the first year after the house is commissioned. During this time, the walls shrink, which will affect the decorative wall. Cracks or creases may simply appear on it, which will negatively affect the entire appearance of your work.
After the working surface is fully ready for work and thoroughly plastered, it is necessary to start marking the future brickwork.
Markup can be done in two ways:
- using an already manufactured mesh mold, which is sold in construction supply stores;
- apply independent markings made with your own hands. To do this, it is necessary to take into account the standard size of the brick, in which the seam is 15 mm, and the edges are 250 by 65 mm.
These indicators are not important, and otherwise you can use your own dimensions, which are most relevant in the future design of the entire room. Some experts advise using a blank the size of a brick, cut out of cardboard, and using it to draw a template for the future imitation. In another case, it is possible to use special masking tape 12 mm wide. Painting tape is applied at the seams between the bricks. In this case, the jumpers should be applied overlapping, so that after applying the plaster, it is easy to remove the tape. If at the time of surface preparation there was no primer treatment, it can be applied over the glued tape.
To prepare the solution you need the following tools:
- container for preparing putty;
- two types of spatulas (100 and 250 mm long);
- gloves;
- oilcloth.
The most acceptable type of solution contains gypsum plaster and tile adhesive. You can stir the solution manually with a spatula or an electric tool with a mixer attachment. In this case, you should pay attention to the amount of the finished mixture. You should not prepare the entire mixture at once, as you may not have time to apply everything to the wall, and the solution will simply dry out. The plaster should be applied with a spatula. The masking tape must be removed immediately after completing the application of the solution to the surface. Otherwise, it will harden and it will no longer be possible to work with it.
How to draw a brick wall
Plastering walls made of aerated concrete, interior and exterior decoration of the facade of a house made of aerated concrete blocks, how and how to plaster an aerated concrete block with your own hands, photo-video and price
Before you start painting the wall, you need to make sure that the wall is smooth and dry. It will be most convenient to paint on white putty or plaster. If the wall is crooked or there are remnants of the previous wallpaper on it, they should be completely removed and the unevenness should be covered with putty. Only after these actions can you begin work.
Below are three ways to imitate a brick wall using painting, each of which will require slightly different tools and materials. Just in case, prepare:
- Roller
- Wide brush
- Narrow brush (for detailed drawing of the contours of bricks and masonry joints)
- Toothbrush (to create fine splashes and texture)
- Masking tape
- Foam rubber
Method 1: drawing each brick
Before starting work, it is recommended to cover the floors with a tarp or newspaper over the area where you are going to paint to avoid unwanted paint splashes and streaks on the floor.
- If the wall is not initially white, apply a layer of white acrylic paint, and on top of it the background of the future bricks, the color of your choice. It will be visible between the “bricks”.
- When the background coating has dried, markings are made on the wall with chalk, from floor to ceiling. If you want a more natural “brick”, it is better to mark without using a ruler, but noticeably mark the horizontal lines so that in the end it does not turn out that the bricks suddenly “slid” up or down.
- Draw each planned brick separately with a thin and thick brush. To obtain a rich brick color, you can mix natural sienna with red, light ocher and white.
- To make each brick more prominent, add shadows to them. It is better to do this with a thin brush for painting and a mixture of umber, white, and black color.
Method 2: tape stencil
This method significantly reduces painting time, unlike the first method, although it will not look as natural, but more neat. However, by decorating and adding texture to the design, the effect of realism can be brought closer to the maximum.
- On the prepared and dried background, you need to make a stencil with narrow masking tape - these will be masonry joints. The size of the bricks may vary depending on your preferences. If at this stage you are not lazy and glue the masking tape evenly, then in the worst case it will take 3 hours, depending on the size of the wall.
- Next, paint the entire wall brick color with a roller, but you can use a spray gun. Let the paint dry thoroughly, after which you can remove the tape.
- In order not to get confused during marking, you can divide each brick in half - this is already a vertical masonry joint for bricks at a higher level, and mark the brick itself with a cross using a simple pencil.
- As a result, you will get a neat imitation of brickwork.
Method 3: using foam rubber
It is advisable to take several pieces of foam rubber, in case the first one becomes very hardened by the paint. The shape and size should be like a real brick, that is, rectangular in shape, approximately 25 cm wide and 6.5 cm high.
- Dip the foam rubber stamp into a pre-prepared tray of paint. Do not forget to remove excess paint from the stamp, it can ruin the entire composition.
- Then apply the foam to the wall, thereby leaving an imprint.
- Thus, leave stamps in the form of a brick along the entire desired section of the wall. Try to leave equal space between bricks.
Highlighting volume and texture
This is perhaps the most important part of finishing - without this stage, the work done will not look as natural and natural as possible. In addition, the given methods for decorating bricks are suitable for all three methods of simulating masonry.
- To make the painted brickwork more realistic, it is necessary to add additional shades. To give the appearance of volume, the upper edge can be lightened, and the lower edge, on the contrary, can be darkened.
- To give the wall a little “carelessness”, you can add various strokes and strokes with a sponge, thereby creating the effect of antiquity.
- In order for the pattern of masonry joints to look “deeper”, it should be outlined with a thin brush, a shade slightly darker than the main one.
- When you apply a drawing, mistakes in the form of random lines and extra spots are quite possible. They will need to be removed immediately, using ordinary water, because acrylic paint dries very quickly.
Even without any artistic skills, you will be able to paint a wall like a brick, the main thing is to avoid making gross mistakes.
Previous DecorGypsum tiles in imitation brickwork Next DecorDecorative plasterboard bricks
Where is it appropriate to use a brick wall?
Painted brick used in the interior is suitable for delicate and sensitive people.
Previously, a brick wall was used as an organic design for lofts - apartments that were located in abandoned buildings of former factories; many unique photographs have been preserved in history, reflecting the style of those times. The authorities gave them to the tenants on the condition that they would repair them themselves; the tenants, as a rule, were poor families or students who decided that brick walls could exist anyway, they didn’t really need plaster, wallpaper, or any finishing, just a little sand the surface and paint the walls.
A brick wall in the interior clearly emphasizes the objects hung on it - wall shelves, paintings, portraits, lamps, etc.
A brick wall in the interior of a living room looks fashionable, relevant and modern. This solution gives the room a special style and character.
Students organized parties where representatives of the wealthy classes also came, they noticed the interesting walls of the living room, took photos, showed it to friends, even thought that it was a unique design and began to copy it in their homes. This is how a specific style appeared, combining incompatible things - bohemianism and poverty, as a result, this design was loved by many city residents for many years. Today it fits into many modern trends.
A living room with a brick wall as the main decorative accent can be very cozy and stylish.
Brickwork ornament
Brick walls
decorative brick ornament
The ornament has long been considered a talisman. People willingly believed in the miraculous power of ornament and used it in every possible way in clothing, applied designs to dishes and, of course, added elements of ornament to the walls of houses.
Today, the ornament on the wall of a building is often created not through drawing, but using brickwork. The pattern of brickwork is very popular, it looks catchy, but in a combination of colors it looks pleasing to the eye.
Before giving preference to one or another ornamental sign, study the meaning of the drawings. Take a closer look at which picture you like. It will not be difficult for a master to lay out an ornament of any complexity. The main thing for you is the harmony and aesthetics of the drawing. When choosing fragments of an ornament, remember that brickwork is not just a design; it is very difficult to remake.
Decorative gypsum bricks
Homemade gypsum bricks look no worse than factory-made finishing elements. Carrying out such cladding does not require the performer to have special skills or large financial costs.
The first step is making the mold
Make a mold to make bricks. The thickness of an individual element can be 5-20 mm. At a lower height, the bricks will quickly break, and the use of large-sized elements will lead to a significant increase in the consumption of plaster for grouting joints. In addition, too large bricks will visually reduce the area of the room.
The second step is preparing the solution
Prepare a solution for making cladding elements. To do this, dilute the dry plaster with water until it resembles thick sour cream. Lubricate the mold prepared at the previous stage with a soap solution or simple petroleum jelly and pour the prepared mass into it.
Level the fill using a regular ruler
Leave the mold for 20-30 minutes, then turn it over and carefully remove the finished cladding element. Paint the brick the color you want
Sometimes, to obtain the required shade, the product must be painted in at least three layers. If desired, you can varnish the brick.
Third step - cladding
Start imitating brickwork. To do this, apply markings to the area of the wall allocated for finishing. At the bottom of the wall, set aside a starting line from which you will begin laying the plaster stones.
To fix the bricks, use an adhesive specially designed for such work, for example, tile adhesive. Buy it from the appropriate store.
Lay out the first row of bricks in compliance with the selected joint width. Attach further rows in a checkerboard pattern. Use a notched trowel to apply the adhesive to the wall. For greater effect, you can carefully break the outermost bricks in each row so that their edges look torn and uneven.
Leave the finish to dry for 1-3 days. You can check the exact drying time for the glue on the packaging.
Option 4 – brickwork made of putty.
To recreate it you will need:
- directly putty (any except finishing);
- level;
- pencil;
- putty knife;
- window seal with a thickness equal to the desired joint of the false brick wall.
A furniture stapler may also come in handy (if the glue you choose cannot securely hold the seal), but it is not necessary.
So, the standard brick dimensions are 250x65x120 mm. In accordance with them, basic surface markings should be carried out.
- Step back 65 mm from the floor, use a level and a pencil to mark a straight line and glue the window seal onto it.
- Step back 65 mm from it again and do the same thing again. And so on until the entire surface of the future “brick” wall is filled with these horizontal stripes.
- Make vertical markings. To do this, step back from the lowest point (from which one, it doesn’t matter, unless there is a corner in your false wall, otherwise you need to start from there) 250 mm and draw a vertical line, then another 250 mm... and so on throughout the first row. The second row and each subsequent even row should be done in the same way, only in order to get a checkerboard order, the first “brick” must be halved. Afterwards, glue all the drawn lines with a sealant.
- Dilute the putty, fill the resulting “honeycomb” to the entire thickness of the seal (there is no need to cover it) and leave until completely dry (about 24 hours).
- Peel off the seal (this is not difficult to do, since it does not “resist”), paint the imitation brick wall with your own hands in a more natural color, and after it dries, cover the seams with tile grout or cement.
How and what to paint
Recently, a white brick wall has become fashionable. If you are going to do just this, there are no problems: apply the seams with a brush, use a roller to apply the surface. If you want something that is not too monochromatic, add a little tint to the base color composition - gray, brown, yellow... or even pink or blue. Paint with this paint. Add more white to the remainder and add highlights with this lighter composition using a semi-dry roller, sponge, or brush. If desired, you can apply the top “shadows” with silver, bronze, adding a little gold. Here's how you like it best.
Imitation brick in the bedroom - looks very stylish
If the seams in the imitation brickwork should be darker, go over them first with a brush. Then, using a roller with short or medium pile, we paint the very surface of the bricks. If you take a roller with even shorter pile, dip it in paint of a different shade (lighter or darker - it depends), in bronze, silver, gold, etc. and with this roller, quickly, lightly touching, paint over the most protruding parts, you will get an even more interesting effect. In general, you can experiment. With this approach, imitation brick becomes a design object and the main interior decoration.
In this tutorial we will draw an old brick wall with a door. To convey its texture and shadows, we will use several layers of acrylic paint. Just three colors – and the picture will be ready.
Acrylic paints are now very popular, perhaps even no less popular than oil paints. It's all about their convenience - with the help of acrylic paints you can paint a transparent background and thick spots of color. It is especially interesting to use acrylic paints to convey a complex and uneven texture, which will require a variety of strokes.
Acrylic paints dry very quickly, which allows you to then apply new layers. In addition, when the acrylic dries, it will no longer flow. Using different layers allows you to create the illusion of depth. However, unlike oil paints, you need to paint quickly with acrylic paints. Brushes should be stored in a jar of water, otherwise the paint will dry on the bristles of the brushes and they will have to be washed.
In this case, we will draw a picture like this.
Its composition is based on a photograph. Many artists use photographs as a model, because creating an exact image is not at all necessary. A true artist can shape the image of a painting by choosing truly interesting and remarkable details. Of course, his imagination also helps him in this, thanks to which the artist creates a coherent and expressive composition.
It is advisable to create such a picture in parts, from one fragment to another. You can move on to the next fragment by waiting until the paint has dried. At the same time, keep in mind that the paint should not accumulate and create thick spots on the textured paper, since it will not be easy to correct such a mistake. In addition, the lower layers of paint should be visible directly through the upper layers.
What we need for the picture:
- easel or tablet;
- sheet of textured paper;
- pencil 2c;
- palette;
- a jar of water;
- paper napkins or towel;
- brushes No. 8, No. 4, No. 1;
- acrylic paints: burnt umber, cobalt blue, raw sienna.
A paper towel is a very convenient tool for removing paint stains and emphasizing texture. If you blot fragments of the painted wall with a roller towel, some of the paint will be removed and the texture will become more interesting.
Let's get to work.
Imitation brick for interior decoration using plaster mortar
The general idea is simple: a layer of plaster or tile adhesive is applied to the wall, and a seam is cut/pressed into it. After processing the edges of the “bricks” and seams, and painting, the result is a semblance of brickwork of varying degrees of plausibility. Everything is simple, but there are significant differences and nuances.
What and how to make a solution from
The first question that arises is: what kind of solution is needed and from what? There are many recipes. Here are some options:
Regardless of what you make the solution from, it should be semi-dry and should not leak under any circumstances. It will not need to be leveled, so its plasticity is not important to you, and the adhesive ability will be provided by additives - tile adhesive and PVA. To adjust the consistency, add water in small portions.
Surface preparation
The wall on which we will make imitation brickwork does not have to be even. It should be free of dust and dirt, crumbling fragments and particles. This is where the requirements end.
The process of preparing the wall is a careful approach: first they make markings
Before starting work, it is better to prime the wall. The type of primer depends on the substrate. If the wall is concrete or loose, walk with “concrete contact”. It will bind crumbling particles and create an adhesive surface on which any composition fits perfectly. If we are decorating plywood, gypsum board or other similar material, we can do without a primer, or we can coat it with diluted PVA.
Technology No. 1. We use thin tape to draw seams
First, we paint the wall to match the color of the seams between the bricks. Some are planning gray-brown, others white-gray. We cover the wall with paint of a suitable shade. Using narrow masking tape (1 cm or slightly less/more), apply markings to the prepared base. The tape will mark the seams between the bricks, so stick it horizontally, at a distance of about 6-6.5 cm from each other. When the horizontal lines are pasted, glue the short vertical ones. They are 23-25 cm apart from each other - this is the length of a standard building brick, but decorative ones can be shorter.
Now we take the solution and apply it to the wall. The layers are unequal, the thickness is 0.3-0.5 cm. We apply it “as it turns out”, without achieving a flat surface, smooth transitions... As it turns out, so be it. We only avoid obvious bald spots through which the wall shines. We filled the area, took a flat trowel (grater), and slightly smoothed out what we got. Leave until slightly dry: so that when you press with your finger, the composition is slightly pressed through.
We pry up the ends of the horizontally pasted strips of adhesive tape in any place (when gluing, leave the “tails”), pull, removing along with the solution adhering to the tape. We remove the entire mesh. The edges of the “bricks” turn out to be torn and uneven. This is fine. Even good.
Take a toothbrush or paint brush with fairly stiff bristles. Use a toothbrush to go along the seams, removing any remaining mortar. At the same time, the edges of the bricks are rounded. Then we take a wider brush and use it to go over the surface, adding naturalness and removing too sharp edges. Leave to dry at room temperature for about 48-72 hours. Do not force dry it - it will crack. Although, if you want to have cracks... If the composition was not painted in bulk, it's a matter of painting.
Technology No. 2: cutting the “seams”
This method of simulating brick for interior decoration takes less time: no tape is required. Apply the solution to the surface of the wall. Everything is exactly the same as described above, only the layer can be thicker - up to 0.8-1 cm. After waiting until the solution “sets” a little, we mark the seams. Here again there are options:
The second option is more accurate. But you have to be careful not to make it too smooth. Although, due to the fact that the hand trembles, the seam “walks” slightly, which gives a more believable look.
Having made the horizontal seams, we proceed to cutting the vertical ones - also by hand. The width of the bricks is about 6 cm, the length is around 23-25 cm. Having finished, we wait for 12-14 hours. Until the composition has set enough to be picked out. When the concrete begins to crumble under strong pressure, take a wide screwdriver (the usual one with a “spatula”) and use it to pick out the solution between the cut strips.
In progress…
When the seams are cleaned, take a stiff brush or brush and remove the remaining mortar and crumbs. The bristles on the brush should be fairly stiff. If the solution is dry, you can try more drastic measures - a wire brush.
Technology No. 3: saw seams
This method of making imitation brickwork for interior decoration differs only in that instead of a knife we take an old hacksaw blade.
After waiting until the solution sets and does not slide, we use a saw to mark the boundaries of the seams. Here you choose one of the methods described above. But you don’t have to wait any longer: use a hacksaw to paint out the seams little by little. Long horizontal seams are quick to make, but vertical ones are not very convenient, since the fabric is not very suitable for short distances.
This method is good because there is no danger of “over-drying” the solution. You can do the “jointing” as soon as the solution hardens a little. In this state, it is easier to round the edges of the bricks, giving them a natural “old age”. The downside is that you have to get used to it, otherwise you might end up doing something bad.
Plastering walls on beacons
For plastering, beacons are used only if the walls have real flaws, for example, unevenness or bulges. To ensure that the surface is smooth in the vertical and horizontal planes, you need to control the layer of plaster around the entire perimeter. This is exactly what beacons are needed for.
Plastering brick walls on beacons
Plastering brick walls is a troublesome task; the work is quite dirty, dusty and requires extreme caution and dexterity. Therefore, people often turn to construction companies
The price depends on the shape of the walls and whether it needs to be done along beacons. Although prices can vary greatly among different companies. But there is no need to panic; plastering a brick wall with your own hands is a low-cost and effective way out of this situation. Performers will only need patience and strict adherence to our recommendations.
This technology is quite complex. For brick walls, beacons made of gypsum or mortar are used.
Step by Step Actions
- First comes the marking. At a distance of 15-20 cm from the perpendicular wall, we screw in a self-tapping screw or drive in a nail. We hang a weight on it on a string - this will be our plumb line. At the bottom of the wall we also screw in a self-tapping screw at the required level.
- Between two self-tapping screws: upper and lower, we throw piles of mortar, three pieces are enough.
- You and I are installing an aluminum beacon on our screws and piles of mortar. You need to press it into the solution, and it should rest against the screws. Be sure to check the evenness of its location.
- And we install the 2nd beacon near the opposite edge of the wall. Well, the third one is between them. If you have long walls, you will need more beacons, the distance between which should be approximately 1 m. The installation technology is identical, only in this case we look at the evenness of the arrangement both in planes and relative to each other.
- We cover our beacons with solution on both sides along the edges and wait a little until it becomes hard.
- Using the above technology, we apply plaster mortar. Before leveling, the finishing layer must protrude 1.5-3 mm beyond the edges of our beacons.
- We add the solution if we notice voids. When the wall turns out to be smooth, we stop working and wait for it to dry (this will take approximately 10-12 days).
In conclusion, I would like to answer more briefly the question of how to properly plaster a brick wall? This is a responsible and complex undertaking. In order for the surface to become flawless, it is worth buying all the necessary tools and purchasing the appropriate equipment - wall primers and plaster mixture. There is no need to save money on this. It is better to be patient, and the skill will be developed in the process. Good luck!
Brick drawing technology
The entire work process is simple in terms of execution and takes little time, money and effort. Let's break it down into sequential steps:
Step 1. Preparing materials
To paint a wall whose length is 50 m, we take the following materials:
Choose the right color for your brick wall
10 tubes of acrylic paint in the following shades: carbon black, red and light ocher, umber, natural and burnt sienna, mars brown and titanium white, more of the latter;
Water container;
Sponges of different sizes;
Used toothbrush;
Disposable dishes for mixing acrylic paints;
Chalk for drawing;
We cover the floor and baseboards with newspapers, so they will remain clean after our creative work. We mark the boundaries of the future brick wall with chalk, along which we then stick adhesive tape.
Painted brickwork option
We paint the entire area with white paint, after which we apply a background to it with a large sponge - the shade of cement mortar. This gray color will imitate the gaps between the bricks.
Step 3. Draw and paint the bricks
After the background has dried, we begin drawing out the bricks with chalk. We start drawing from the bottom, moving upward, trying to keep the horizontal row straight, but don’t use a ruler - it will turn out more natural.
First we will paint it brick color: mix sienna, light and red ocher, with a small addition of white. We take a wide brush and randomly paint some bricks, immediately soaking the paint with a sponge.
Let's paint the next part of the bricks with a different shade: add brown mars and a little water to the previous mixture of colors. And we get the last color by mixing the main palette with burnt sienna and white.
Step 4. Giving the drawing texture
Having painted all the bricks, dilute the white with water, then add a little ocher, and use a tampon to shade the surface. Next we do this: dip the toothbrush in sienna and spray it on the wall, creating a texture.
But that is not all. An artificial brick wall should look natural and maintain maximum resemblance to the natural one. To do this, you need to give it relief and volume. Take a small brush and paint the right and bottom side of each brick, shading slightly. The color we use is white with black umber. Don't forget that the relief should be in one direction, based on the incident light rays.
Step 5. Finishing touch
At the top of the wall we place a wooden panel or depict a stone border.
That's it, the brick wall is built! We put away the newspapers, arrange the furniture and invite friends to appreciate our work. Even if you do not have the skills of an artist, you can decorate a wall in the form of brickwork if you decide to refresh the renovation yourself.
https://remontick.ru
Despite the abundance of modern materials, brick walls do not go out of fashion. But what to do if it is not possible, for example, in the living room or hall, to build a real one? The solution is simple: draw!
In the interior, such walls are usually made in the living room behind the TV or around the fireplace, on the balcony or in a spacious hall. Well, such a wall would look great in a country house, in a billiard room or in a winter garden. If you want to make such a wall in the kitchen, then near the work surfaces it is covered with tempered glass. It will protect the “bricks” from splashes and soot and at the same time display this interesting interior detail in all its glory.
Materials
To draw a brick wall 50 meters long you will need:
- About ten tubes of polymer acrylic emulsion in the following colors: carbon black, red and light ocher, umber, natural and burnt sienna, brown mars and titanium white (it is advisable to buy them with a reserve).
- Water bucket,
- Two paint brushes (4 and 20),
- Two sponges (large and small),
- Old toothbrush
- Plastic plates for mixing paints,
- Chalk for drawing,
- Work gloves,
- Clean rag
- Adhesive tape.
Work process
- We cover the floor and baseboards with paper or film so as not to stain them with paint during the process. Then we outline the place of the future drawing with chalk and also attach adhesive protective tape along this line.
- We apply a layer of white acrylic paint, on it with a large sponge - a background layer - the color of cement mortar, which will be visible in the spaces between the future “bricks”.
- When the background is dry, draw the outlines of the “bricks” with chalk, starting from the floor. We make sure that the spaces between them do not coincide vertically, and that the horizontal rows are even. We work without a ruler - this way the wall will look much more natural.
- We get a brick shade by mixing natural sienna with red ocher, light ocher and adding a little white. Use this color to paint some of the “bricks” in random order using a wide brush and immediately blot it with a sponge.
- To obtain a different shade, add a little brown mars and water to this mixture of colors. The third color will be obtained when we add burnt sienna and white to that mixture.
- Having painted all the “bricks” onto the wall surface with a swab, we apply a mixture of whitewash diluted with water with a small addition of ocher.
- Now we dip an old toothbrush in burnt bone sienna and spray it to replicate the texture of a brick wall.
- How to paint a brick wall so that it looks natural? Of course, make the masonry visually embossed. To do this, with a thin brush on the right and bottom, we outline each “brick” with paint (a mixture of black umber and whitewash) and shade it a little. In any case, the relief on each wall should be directed in one direction, depending on the light from the window.
- We nail a wooden plank above the brick wall or again draw a border under the stone or brickwork.
Our wall is all ready, now we can remove the film from the floor, arrange the furniture and invite guests!
October 28, 2021 Sergey Somov
In this article we will look at painting a wall step by step. We will make a window with stucco and patterned bars. Well, let's transgress.
How to make imitation brick with your own hands
There are several ways to finish the brickwork. We will analyze each of them in a separate article with a detailed master class:
- Brick plaster;
- Imitation foam;
- Decorative bricks made from tiles, as well as from plasterboard;
- Painting walls in the form of brickwork;
- Photo wallpaper and roll wallpaper.
Wallpapering
The simplest option for decorating walls would be wallpapering. Smooth, inexpensive wallpaper with matching bricks was a popular option for hallways and kitchens. Modern production offers many types of brick-look roll wallpaper made of strong and durable materials, for example, vinyl, non-woven fabric, fiberglass. Their drawing surprises with its realism; it is quite difficult to find identical bricks the first time. The price for one roll can be up to 5 thousand rubles.
Photo wallpapers differ from roll wallpapers in that their pattern is not repeated. Besides the brick wall, they usually have something else painted on them: old crumbling plaster, paint, graffiti. Photo wallpaper with imitation brick can be ordered from any design studio. They will print them according to your design and desired size. The price starts from 400 RUR/m2.
Painting the walls
The cheapest option to imitate a brick wall is painting. As in the case of wallpapering, we get a smooth wall, but to create the effect of relief masonry, you will need to try, because each brick will have to be drawn separately. For a beautiful finish, you will need several colors of paint: one for the masonry joint and two or three shades for the brick pattern.
False brick made of foam plastic
When decorating brick walls, polystyrene foam is used for interior decoration. Advantages of this method:
- the brickwork is voluminous;
- the work does not require the skills of a professional finisher;
- polystyrene foam is not expensive, 1 m3 for 2000 rubles is enough for 33 m2 (with a thickness of 3 cm);
- lightweight material adheres well to the wall without the use of strong adhesives.
To imitate a brick wall, bricks are cut directly onto a sheet of foam plastic with a knife or the material is melted along the drawn lines using a soldering iron. You can also cut individual bricks and glue them one by one.
For cladding building facades, brick-like panels made of expanded polystyrene are available for sale. They not only protect the walls from precipitation, but also insulate the house.
Plaster for brickwork
Decorative plaster can be used for both interior and exterior decoration. This is a great way to create the desired texture, protect and decorate your walls.
Different compositions are suitable for work. For example, for interior decoration you can use cheap gypsum putty or plaster. It is applied in an even layer of 3-5 mm and, until the solution has set, false bricks are formed. You can do this step by step:
- press out with a stamp;
- cut masonry joints in plaster;
- create a stencil on the wall from masking tape, plaster it and remove the tape.
Cement-sand plaster is suitable for decorating external walls and plinths. It is easy to prepare with your own hands, it is moisture resistant and strong.
Wall cladding with decorative tiles
This is the most expensive, but also the most realistic way to make a wall under brickwork. Sometimes it’s even difficult to tell whether it’s a real brick or a decorative tile. Such a good imitation is helped by the fact that the same material is used to make tiles as for bricks - baked clay. Such ceramic tiles are called clinker tiles. It is often used for cladding facades.
In addition to ceramic, you can imitate a brick wall with gypsum or flexible tiles made of acrylic polymers.
The installation process involves gluing the decorative material onto a flat, prepared wall. The glue used is: tile adhesive or liquid nails of the “Moment Installation” type. After the cladding is completed, the seams are cleaned of excess glue and filled with grout. The result is a very realistic finish for a brick wall.
You can read more about each simulation method by following the links above.
Previous Decorative plasterWhat is “microcement”, “microconcrete” and how to work with them Next Decorative plasterArtificial foam brick: a DIY finishing lesson
sawing brick
The idea of replacing expensive “brick-like” finishing tiles with bricks loosened into plates seems reasonable. But you need good quality brick, without voids, inhomogeneities, underburning or burnt areas. In general, you need an expensive brick. Or old.
An example of sawn bricks... but these are two “beautiful” parts
It is better to cut it with a water-cooled circular saw. The result will be decorative brick-like tiles in a natural color. The thickness of the tiles is at least 8-10 mm. The advantages are clear: low price, no need to paint - there is a natural color. These homemade brick tiles are then glued to the walls using regular tile adhesive.
We lay out any texture from sawn bricks. And this is for decorating external corners
But there are also disadvantages: you need a good quality brick, but you still have to find it. When cutting, the plates may break. Only two of them are obtained with a beautiful surface - the extreme ones. The rest will have to be modified manually, creating relief. It’s tedious, dusty, time-consuming, difficult, and it’s not a fact that brick imitation will actually be learned “at the level.”
Despite all the shortcomings, this method is used. And this is, perhaps, the only option for homemade imitation brickwork that can be used for exterior decoration
. For these purposes (finishing the facade of a building), by the way, you can cut the brick into two halves. Everything is cheaper than buying tiles.
Application of imitation coating
There are many methods, so the author will limit himself to only the most common ones, based on the fact that the work is done independently.
"Drawing"
This does not mean highly artistic work with the goal of creating a masterpiece. This is nothing more than a banal drawing of rectangles on a pre-designed grid, which are then filled with paint.
The color combination is chosen depending on your own preferences. For example, red - brick and white - seams (sometimes the lines are drawn in black). Yes, and the shade of artificial stone is chosen differently. For example, orange, gray, dark red, but these are already details.
Using adhesive tape
Before starting work, the wall must be painted in the color that should be at the seams. Typically gray or white (or something in between). The fact is that depending on the components and their ratio in the mixture, the dried solution takes on a different shade.
Next, horizontal seams are marked (using tape). After this, it is easy to highlight individual bricks, simulating masonry with shifting products in adjacent rows (pieces of tape are attached vertically). The peculiarity is that since the tape will then have to be removed, there must be free ends left, sufficient to grab them with your fingers.
https://youtube.com/watch?v=nmjkbAXTpPk
After this, the prepared mixture is applied to the wall. Which?
Option No. 1 - based on gypsum. But this material hardens quickly. Therefore, it is necessary to introduce a so-called “moderator” into the mixture. Its use leads to the fact that the layer of gypsum mortar does not harden for 20 to 40 minutes. Otherwise, it will simply not be possible to remove the tape to mark the masonry seams.
Option No. 2 – a mixture of plaster + tile adhesive (1 to 1). In this case, only the smallest fractions of sand are used in the preparation process. This means that you will have to purchase it specially, since the usual one (from a river or from a quarry), even well sifted, will not work.
Stenciled
The method is more complicated, since you will have to prepare the grate. It is made from a sheet of plastic or rubber, knocking out rectangles in it. After applying the mixture to the wall, it is pressed into this layer.
Disadvantages - the stencil still needs to be made. It is unlikely that this can be done manually; at least, the dimensions of each “brick” can be accurately verified. Moreover, he is not easy to work with. For example, how to ensure uniform indentation of the stencil ribs along the entire length of the seam? Moreover, if it is assumed that the finishing is carried out without assistants, on your own.
Using tiles
Various samples are available for sale (ceramic, clinker or plastic). Working with them is quite simple, but the costs of arranging the premises will increase significantly.
Finishing
- After removing the tape, it is necessary to clean the seams (align the edges of the bricks). This is easy to do with a knife, spatula or chisel.
- The top of the “masonry” is varnished or treated with a wax-based product.
One should not lose sight of such a point as the compatibility of materials.
Conclusion
Much depends on your own imagination and design options. Some will prefer the wall to look like new, while others will want to artificially age it, even imitate cracks and chips. In everything that does not concern the linear dimensions of a brick, you should not be afraid of impromptu.
This is where any master’s imagination is appropriate. Even “bricks” can be made with your own hands - from wood, polystyrene foam, plastic. All that remains is to stick them on. Therefore, the instructions given are only a general description of the process. And the specifics are up to you, dear reader. Good luck!
Making a mold for casting brick tiles from plaster
An imitation of brick for interior decoration in an apartment or house can also be cast: you can make gypsum tiles in the form of bricks yourself. To do this, an impression is taken from interesting specimens of bricks (a mold is made to form an artificial finishing stone), and then a gypsum solution is poured into it. The resulting tiles are used for wall decoration. This technology is good because it allows you to prepare several molds in which you can make bricks of different colors for different rooms.
We find bricks of interesting shape and several almost ordinary ones, but with various minor defects. We will use them to cast the mold. It is desirable that there be at least a dozen of them, or better yet, more. “Artificial brickwork” will be more varied.
On the side that we will “multiply”, apply grease or heated wax mixed with kerosene. This is necessary so that the silicone does not stick to the surface. When everything is dry, apply a layer of silicone sealant to the treated side. The layer thickness is 1-1.5 cm. Leave until the silicone is completely polymerized (the time depends on the type, it is written on the package).
When the silicone has hardened, take the foam and coat the mold without removing it from the brick. After the foam has hardened, remove the brick and level the bottom of the mold so that it stands level. Can be used by filling with gypsum mortar. It sets quickly; if you have a dozen molds, in 2-3 days you can make tiles for a couple of squares simulating a brick wall. By the way, gypsum mortar can be painted in bulk. Then new cracks and chips are not a problem - just like a brick.
How to draw brickwork on a wall
If “wet” or “dusty” work is not your thing, but you know how to draw at least a little, you can paint a brick wall. You will need acrylic paints, brushes, a pair of natural sponges, masking tape, and thick paper plates for mixing paints. When thinning paints, remember that acrylic paints darken as they dry. And one more thing: they dry quickly, but freshly applied ones can be removed with a clean cloth soaked in water.
The whole process in step-by-step photos
First, we prepare the workplace: cover the baseboard and adjacent floor with polyethylene or old wallpaper (it’s better to fix it with tape). Use masking tape to outline the boundaries - at the top, on the sides. At the bottom there is a limiter - a plinth, although in order not to get dirty, it can be removed.
Drawing bricks on the wall
Below are the step-by-step actions:
- Paint the wall with white semi-matte acrylic paint. Leave to dry.
- Preparing the background paint. In one of the paper plates, mix 1/6 part umber, 1/6 black paint and 4/6 titanium white. Immediately prepare a little paint, apply it to the wall using a sponge, simply applying the surface soaked in paint to the wall. You should not try to make a solid background - it should be torn and textured. In some places we apply the paint more densely, passing twice, in some places we apply a more transparent layer.
Preparing the background: it should not be uniform
- On a dry background, draw several rows of bricks by hand, not using a ruler. We focus on the standard for masonry: 25 * 6.5 cm, seam thickness - 0.8-1.2 cm. When marking, keep in mind that using this technology it is easier to make the seam a little narrower by painting it, than to try to widen it later.
- To paint “bricks” you need to mix ocher and sienna in different proportions, getting different shades of “brick” colors - from yellowish-orange to brownish. We got some shade, painted several “bricks” in random places. We mixed a new batch and painted over the other bricks. We apply the paint with a brush, without trying to get a uniform surface or a dense layer of paint - the background layer is visible. The edges of the “bricks” also should not be smooth.
- For a traditional red-brown color, to sienna and red ocher, add a little light ocher and a little white. You can paint several bricks in a row with this color.
We gradually paint the bricks with different shades
- One more shade - to the above composition we will add brown mars and a little water. Apply with a brush or sponge - as desired.
- If you add white and burnt sienna to ocher and sienna, you get another color.
- We paint all the bricks in random order with these shades.
- We dilute white and a little ocher, add water. Apply the composition with a sponge, acting as a tampon.
- Take an old toothbrush and burnt bone paint. We dip the bristles in paint and spray them on the wall, imitating the heterogeneity and texture of clay bricks.
Final stages
- We add volume to the bricks: dip a thin brush in a mixture of umber and white. We bring all the bricks from below and to the right or left. Everything is on one side, depending on where the window is located (on the side opposite the window). The thickness of the liner varies, since the masonry and the bricks themselves cannot be ideal.
It takes much longer to describe than to do it all. A beginner can draw about 30 squares of imitation brickwork in a day. For maximum verisimilitude, there are several secrets, which we will discuss below.
Final touches
To ensure that the brickwork painted on the wall is as close to natural as possible, there are several little secrets:
- If the shadows near the bricks turn out to be too harsh, they can be shaded with a toothbrush (another one) dipped in a mixture of white and natural sienna, heavily diluted with water.
Tricks without which there will be no believability
- After applying paint to brick, do not wait for it to dry. Take white, add a little umber, dip the sponge and use it to “break” the uniformity of the paint, imitating a rough surface. To do this, lightly touch the “brick” with a sponge.
- On a plate, next to the main batch, squeeze out a little of the other colors. They change color as they paint. The brick will not be monochromatic. It has a smooth and not very gradient color.
Imitation brick for interior decoration: the result of artistic efforts
- The dimensions of the bricks, their edges, seams - all this does not have to be perfect.
With some skill and effort, you can ensure that the painted brickwork looks like the natural one. The main rule: imperfection and heterogeneity.
Construction of the stencil
Accessories will speed up the drawing of brickwork. There is a sufficient variety of materials from which a stencil is made. To paint brickwork on a wall with paints like the masters, you need to choose the following options:
Chipboard sheets. Strips are cut from the slab to the height of the brick, but 1-2 cm more, since there must be a seam between the stones. Pieces of pressed slabs are laid at the joints and the parts are fastened with a stapler and staples. The shapes of red or sand-lime bricks are marked on the stripes. Unnecessary areas are cut out with a stationery knife, applying a ruler or building level to the lines.
Expanded polystyrene. Similarly, strips of the required size are cut from foam boards. The elements are glued together. Inside, the shapes of stones are cut out with a knife. If the owner wants to paint the wall rough, this option is better.
Scotch. Adhesive tape is applied to the wall horizontally over the entire area. You can cut long pieces 1-2 cm wide, which will cover the seams. These strips are glued horizontally and vertically to create the shapes of stones. This material is replaced with an adhesive plaster, which is sold in different widths.
It’s easier to use a metal profile and create markings with a marker or chalk. In this work, you cannot cope with drawing without an assistant.
Basic design techniques
Since design using bricks does not apply to traditional finishing methods, you should listen to the advice of designers.
To make the design of the room stylish and not gloomy, only one wall or even individual fragments should be finished with brick. A brick imitation for interior decoration of a bathroom or even a bedroom can be quite original. Cladding a niche, corners or fireplace can look very organic.
The use of combined finishing - fragmentary brick cladding and smooth plain walls - creates a unique style and allows you to focus on the most interesting design elements. In order to avoid excessive gloom in the interior, you should choose the right color for the finishing and think through the lighting system. You don't have to stick to traditional red or brown brick colors.
You can play with shades, combining light or dark elements, and also use extraordinary color solutions in accordance with the overall design concept of the finish. For example, a brick wall made in white or pastel colors will organically fit into any interior.
As you can see, there are many ways to imitate brickwork in the interior. The most common and realistic option for this imitation is clinker tiles, but there are also more budget options. A skillful and thoughtful combination of different textures and colors can turn an ordinary renovation into a work of design art.
