How to choose a primer?
There is a huge variety of primer mixtures on sale, which allows you to purchase the most suitable composition for each individual case.
Base priming is carried out in order to:
- level surfaces, fill chips and cracks;
- improve adhesion;
- reduce concrete porosity;
- strengthen the foundation;
- provide waterproofing.
When preparing the floor for installation of linoleum, the following types of primers are used:
- Polyurethane. Used in areas with heavy operational load. It increases the wear resistance of the surface and is perfect for laying industrial linoleum material. Disadvantages: considerable price, there is a possibility of chips and cracks appearing in the future.
- Water soluble. The most popular, used for floors, walls, ceilings, and other surfaces. It is relatively inexpensive, effective, has no pungent odor, and dries quickly. The main disadvantage: it does not penetrate deeply into the base.
- Organic. It differs significantly in depth of penetration and increases the strength of the rough base. It will perfectly strengthen loose material and eliminate the need to re-fill. Cons: high cost, limited range, requires special conditions for use.
Important! All soils are divided into compositions with deep or surface action. The former increase the adhesion of contacting materials, the latter make the base stronger.
Water-soluble primer is in great demand due to its high efficiency and affordable cost Source parketcapital.com
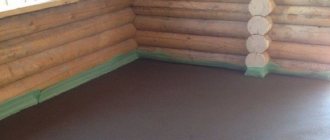
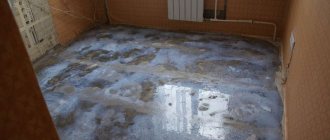
Treatment of concrete joints
Sealing butt joints on floor slabs
Preparing a surface made of concrete or concrete floor slabs begins with cleaning the surface from the remnants of old finishing material. All concrete slabs have shrinkage joints that must be thoroughly cleaned, then coated with a concrete primer and sealed with foam, putty or sealant. If there are small holes or cracks on the surface of the slabs, they must be sealed with moisture-resistant putty using a sickle mesh, which will prevent their further expansion and ensure the integrity of the putty. A similar sealing operation should be carried out at the joints between the floor and the wall using putty and sickle mesh.
Features of choice
When buying a primer for linoleum covering, you definitely need to take into account the base material. Studying the composition of the mixture and the manufacturer’s recommendations will help you make the right choice. Depending on the constituent components, primers can be intended for treating the following surfaces:
- Concrete. When applying a protective suspension, the absorbent characteristics of the material are reduced. This happens by filling all the cracks and crevices. Deeply penetrating polyurethane and latex compounds cope well with this task.
- Plywood. The use of primer mixtures reduces the intensity of internal moisture penetration, serves to prevent the appearance of mold and mildew, and extends the service life. To process this material, it is necessary to use alkyd, acrylic, and polystyrene mixtures.
- Polymer ties. Applying primer allows you to make the base perfectly level, which in the future greatly simplifies the installation of linoleum covering. For high-quality treatment of such surfaces, it is recommended to use Betonkontakt, as well as polyurethane and epoxy products.
- Cement-sand bases. They are characterized by significant porosity and absorb a lot of moisture. To avoid the appearance of fungal formations, after installing the linoleum it is important to treat it with an acrylic composition. It penetrates deeply into the material and strengthens it well.
It is possible to qualitatively prepare the base for laying linoleum only with the correct selection of the primer mixture in each specific case.
As a result of applying a primer to a concrete base, its absorbency is significantly reduced Source beton-house.com
What is required for priming?
In order to apply a primer to the subfloor, you will need, in addition to the primer composition, the following tools:
- brushes - large and small - for applying the composition to the floor. The large one is convenient for processing large areas, the small one - corners and other hard-to-reach places. It is also recommended to purchase a large brush with a long handle - this will make the work easier. Some find it more convenient to work with a roller - this tool will increase the speed and quality of applying the mixture.
- containers of 2-8 liters in volume - for the primer itself.
- sandpaper - to remove small irregularities on the base.
- cleaning equipment or a rag, dustpan, broom - for thoroughly cleaning the surface of debris.
Types of primers
Today, there are universal soils and special ones designed for rooms with high levels of moisture that can withstand temperature changes. As a result of using a suitable composition, any base under linoleum will be strengthened.
Acrylic
A universal-use mixture suitable for treating most types of surfaces (including concrete). It quickly absorbs into the structure of the material and ensures good adhesion. The drying time for this composition is up to five hours. Acrylic primer has no odor.
Acrylic primer is the most popular, used for treating almost any type of floor Source dekoriko.ru
Alkyd
The suspension is used to protect concrete bases. It increases the strength and moisture resistance of the material. The latter is achieved through the formation of a protective film. This mixture is characterized by versatility of use. The main disadvantage is a sharp, unpleasant odor that disappears after drying.
Alkyd primers are prohibited for use on cement screeds, concrete bases, and other mineral surfaces Source remontik.org
Polystyrene
Designed for high-quality processing of plastered and wooden surfaces. It contains toxic solvents and is therefore not recommended for use in closed, insufficiently ventilated areas.
Epoxy
The mixture is used to treat concrete bases, often in rooms with excessive moisture levels. It has significant chemical resistance and can be applied to a damp surface. This primer can only be diluted with solvents.
Epoxy primers are specially designed for use in rooms with high humidity Source remontik.org
Shellac
Initially developed for thorough processing of coniferous wood, it contains methyl alcohol and milky sap. This unique product protects wood from the harmful effects of moisture, increases its strength, and reduces absorbency.
Multigrunt
It is difficult to find in construction stores, since a similar mixture is produced by only a few manufacturers. It contains polymers and resins. For this reason, the primer is suitable for treating almost all types of substrates.
Important! Multiprimers require practical application skills, which is why they are most often used by professionals.
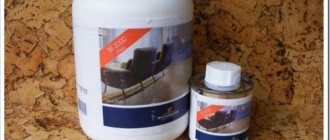
Additionally, there is the option of preparing the soil yourself using long-tested recipes. Among the latter, the most popular is considered to be a primer for linoleum floors made from PVA glue and an acrylic mixture. Its main drawback is the rapid loss of properties. Therefore, it is prepared immediately before use, only in the required quantities.
Using PVA glue, you can prepare the primer yourself, which means saving on the purchase of materials Source gidpokraske.ru
How to lay linoleum
Step 1. The linoleum sheet is cut in accordance with the geometry of the room. It is more convenient to do this if you spread the material on the floor in the room and immediately trim all the edges with a sharp knife.
Step 2. After cutting, the linoleum sheet is rolled up so that it is rolled into a roll located on the wall farthest from the exit from the room.
Step 3. Using a small spatula, apply adhesive to the subfloor. It is applied in an even layer, thoroughly coating the entire base.
Applying glue with a spatula
Step 4. The rolled linoleum sheet is rolled out onto the previously applied glue.
Step 5. The surface of the linoleum placed on glue is carefully and forcefully ironed. This procedure will help expel any air trapped in the glue.
Removing air from under linoleum
Step 6. Corners and places near the walls are additionally ironed by hand.
The area near the wall is ironed by hand
Step 7. The entire linoleum sheet is glued in the same way. You can walk on the floor only after the glue has completely dried.
Linoleum after installation
Important! Before the linoleum is laid, it must be rolled out on the floor and allowed to rest for several days. This will allow him to straighten out, and the result of all the work will be as good as possible. Also, when laying between the wall and linoleum, it is recommended to leave a small gap - about 0.5 cm. Then the material will not bend after final installation.
Video - Laying linoleum
Do I need to prime the floor before laying linoleum?
Sometimes when carrying out repair work, craftsmen skip the stage of applying primer to the base, although this is completely wrong. A correctly applied protective layer will eliminate many problems later.
What are the advantages of priming the floor before laying linoleum:
- Minor defects are eliminated, which simplifies installation work in the future.
- In conditions of excessive humidity, the subfloor may become damp over time. As a result, mold and mildew will appear under the coating. Preliminary application of primer forms a protective film on the surface that prevents moisture absorption.
- If glue is used when laying linoleum covering, the priming process increases the level of adhesion of the materials.
- When using linoleum, dust accumulates underneath it. After a while, it begins to penetrate into the room through the joints. Applying a primer to the base completely eliminates this problem.
The listed advantages indicate considerable benefits and the need for priming work before laying linoleum.
Application of primer prevents the accumulation of dust under the linoleum during its operation Source remontik.org
Pros and cons of using a primer layer for linoleum
The need to use a primer under linoleum is explained by the peculiarity of the coating. Linoleum is a soft and plastic covering material. Over time, all the unevenness of the floor will be visible. The reason is that an unprepared concrete base partially loses its strength under the influence of friction, pressure, and temperature changes. Cracks, chips, potholes, and bumps appear and are pressed into the linoleum.
The primer creates a durable and even layer on the concrete, preventing its destruction, the penetration of dust into the room and moisture under the linoleum.
Another positive property of the primer layer is the insulation of the concrete coating from the linoleum. There are micropores in concrete through which condensation can penetrate from the lower layers of concrete to the upper. This creates a favorable environment for the development of mold, since an air gap remains between the concrete base and linoleum.
The primed surface does not absorb moisture, so when laying linoleum with glue, the consumption of adhesive will be reduced. Applying adhesive to a subfloor without a primer will eventually cause the coating to peel off due to the adhesive being absorbed into the concrete base.
Priming the subfloor has negative consequences if there are gaps in the linoleum through which water can penetrate. If it gets between non-wettable surfaces, it will be a source of fungal infection.
How to prime a linoleum floor?
The base is primed shortly before laying the linoleum covering. First, all construction debris and dust contamination should be carefully removed from the rough foundation.
When a linoleum floor primer is purchased in powder form, it must first be dissolved and brought to the required consistency. The required volume of drying oil, water, and solvent is usually indicated on the packaging box. Manufacturers' instructions must not be ignored; this may adversely affect the quality of the work performed. If the primer composition is purchased in liquid form, it must be mixed until a homogeneous mass is obtained.
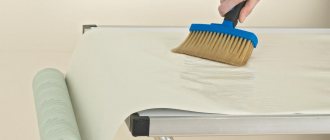
After proper preparation, the primer should be applied evenly to the clean surface. In this case, as a rule, a roller is used.
Primer work should begin from the side opposite to the door Source remontik.org
Tools for removing debris before applying primer
If you purchase a dry mixture, it must be prepared according to the attached instructions.
The most important thing is to distribute the primer on the surface in such a way that there are no untreated areas and at the same time no puddles form.
Particular care should be taken to treat corners and areas around the perimeter of the room. If glue is used, these places must be securely secured. For this purpose, before laying, we increase the bonding with a primer.
Concrete base priming technology
The priming procedure requires preliminary preparation. First you need to purchase a high-quality mixture suitable for the base material, as well as the necessary tools. In addition, you should definitely familiarize yourself with the basic rules for performing such work in order to avoid mistakes.
Surface preparation
First of all, the room should be cleared of furniture and the baseboards should be removed. When renewing the floor, the old coating is removed manually or with a grinding device.
If oil stains are found, they should be removed with a solvent. Deep cracks need to be slightly widened, thoroughly treated with soil, and sealed with cement.
At the final stage of the preparatory work, a vacuum cleaner will come in handy. They should go over the entire surface.
The use of a sanding machine allows you to efficiently remove the old coating from the floor Source polof.ru
Required Tools
To properly apply primer to a cleaned subfloor, you will need the following tools:
- brushes (of different sizes) – provide treatment of hard-to-reach areas and corners;
- rollers - allow you to apply the mixture evenly;
- tray;
- spray bottle – speeds up the priming procedure.
Before you start priming the base, you should prepare the necessary tools Source res.cloudinary.com
Sequence of work
Before you begin installing linoleum, it is important to carefully inspect the concrete base. If it is ordinary (consists of multiple slabs with seams), then the following steps should be performed:
- Remove all debris and dust.
- Fill defects (gaps, cracks), make a cement screed.
- Lay a layer of waterproofing or insulation.
- Install linoleum.
The easiest way to install linoleum material is with 2-sided adhesive tape.
Leveling a concrete floor
To make the surface as smooth as possible, it is necessary to make a cement-sand screed. This procedure allows you to remove the difference in thickness up to 7 cm.
Sequencing:
- Clean the base and install waterproofing if necessary.
- Place beacons.
- Secure a damper tape around the perimeter of the room.
- Using cement and sand (ratio 1:3), prepare a solution.
- Pour the latter onto the floor and carefully level it.
- After 24 hours, remove the beacons and carefully wipe out the resulting depressions.
- Cover the surface with polyethylene or wet it regularly for two weeks.
- Remove the coating and allow the base to dry for 15 days.
Primer should be applied to the finished screed, then linoleum can be laid.
The thickness of the cement-sand screed must be at least 3 cm, otherwise the coating will not be strong enough Source pol-spec.ru
Applying primer to concrete
Before use, the primer should be thoroughly mixed. With high-quality surface treatment, the risk of any problems is minimized.
Sequencing:
- Using a brush, carefully process the seams and edges.
- Apply the solution to the base (with a roller). You should start from the farthest corner.
- Allow the base to dry for the time specified in the instructions.
- If necessary, repeat the procedure after two days.
Attention! The primer mixture is applied only to a well-dried base.
How long should the primer dry?
Linoleum material can only be laid after the soil has completely dried. The optimal period of time is indicated by the manufacturer in the instructions. Typically, drying time is approximately 4-12 hours.
Self-leveling screed device
To quickly create a high-quality, durable, monolithic base for linoleum, self-leveling mixtures are often used. They are easy to use and after drying do not require any additional processing.
The self-leveling mixture will help you quickly and easily form a strong and reliable base for laying linoleum - even a beginner can work with such a solution
When choosing this method, proceed as follows:
- Fill large holes and depressions in the concrete surface with a fast-hardening filling compound to roughly level the substrate.
- Prime the surface with a roller in two or three layers (mutually perpendicular).
- Prepare the self-leveling mixture according to the manufacturer's instructions. Mixing the mixture should be thorough, but not for long. As a result, you will get a homogeneous mass with the consistency of liquid dough. Pause for 2-3 minutes, necessary for a series of chemical reactions to occur in the solution, and stir it again.
- Pour the composition onto the primed surface and distribute it evenly using a squeegee - a notched spatula.
- Go over the formed layer with a needle roller - this will help to completely remove air bubbles from it.
- Wait until the mixture has completely crystallized (usually a day is enough) and you can safely proceed to further work on laying linoleum.
Preparing Wood Floors
Installation of linoleum on an old wood covering is carried out only after its restoration. To do this, you need to remove the paint using a trowel and a hair dryer, and level the entire surface with a sanding machine. The latter will allow you to remove large irregularities and small differences.
The next preparatory stage can be carried out using the following methods:
- Puttying the joints of the boards. Used for new floors when there is no need to seal cracks. This method is also suitable if there is confidence that the old wooden base will not deform or creak during further use.
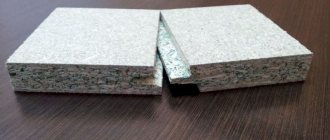
- Use of plywood or chipboard sheets. It is considered the best; after its implementation, a smooth, homogeneous base is obtained. Then there is no need to install waterproofing: the wood should not be damp. It is necessary to create such conditions so that it is ventilated and transfers moisture to the underlying layer. Otherwise, mold will appear on chipboard and plywood sheets, and over time the material will begin to rot.
Foamed polyethylene can be used as a soundproofing layer. But it is advisable to prepare the wooden floor so that it does not contain squeaky panels. That’s why the boards are attached to the joists. When laying chipboard and plywood around the room, it is recommended to use shock-absorbing tape. This will prevent the negative effects of thermal expansion. To avoid squeaking, a small gap (1-2 mm) should be left between the laid sheets.
Installing linoleum on a wooden floor requires thorough cleaning of the surface Source pol-exp.com
The best primer for self-leveling floors
A rough-type self-leveling floor is a convenient means for leveling the base. The material is quite capricious, so before application, according to the instructions for use, wooden and mineral surfaces require priming.
What is soil used for?
Self-leveling floors are complex mixtures based on cement or gypsum binder. Simply put, it is a highly flexible screeding (leveling) material that works in thicknesses from 1 to 100 mm. Before using it, manufacturers require that the base be carefully prepared:
- Remove old coatings, including bitumen and paint;
- Clean from dirt, oil stains, soot and soot;
- Carefully remove dust using a vacuum cleaner or damp cloth;
- Prime the surface.
Let's focus on the last point. The primer for self-leveling floor provides:
Strengthening the base and binding residual dust.
Roughly speaking, the soil glues the particles of the base together, increases its strength, and reduces the level of sand spalling from concrete. This is especially true when applied to loose mineral screeds.
Loose, fragile screed.
Improving adhesion of materials.
When the solution dries quickly, there is a high risk of the self-leveling layer detaching from the base floor, resulting in the formation of bubbles, cracks and cavities. Properly selected soil significantly reduces the likelihood of these defects occurring.
Uniform spreadability (mobility) of the solution;
Ideally, the solution, after application to the base surface, should spread out into the most even, neat spot possible. Two factors help achieve this effect - preliminary leveling of local areas and priming.
Reduced absorbency of the base.
If a mineral or wooden surface “pulls” water out of the solution, it quickly thickens and the production time decreases. In addition, this negatively affects the strength of the new layer. Saturating or moisture-proofing primer compositions help to neutralize this effect, as well as increase the density of concrete or gypsum screed.
Thus, soil treatment makes it possible to increase the workability of the bulk mortar, as well as reduce the likelihood of various defects (cracks, bumps, cavities, weak areas).
Absolutely all manufacturers produce appropriate primers as part of their bulk mixtures. Therefore, it is recommended to use products of the same brand - the compositions are designed in such a way as to complement each other.
Set of self-leveling floor and soil.
Preparing the floor using plywood sheets
In practice, leveling a wooden floor with plywood is most often used. If this procedure is carried out in accordance with all requirements, it is possible to obtain a flat surface. It is permissible to lay any type of coating on the latter, including linoleum.
Procedure:
- Using a screwdriver and level, install the beacons. They often use self-tapping screws set to the desired height.
- Attach the logs (strips of plywood about 3 cm wide) to the floor with glue. Install bars in the gaps between the last and the boards.
- Prepare sheets. It is best if they are in the form of squares with a side of 0.6 m. It is important to ensure that there are no signs of delamination at the ends.
- Laying should be carried out so that the joints of the plywood parts are on the joists.
- The installation of sheets should be done with an offset, similar to the laying of bricks. If necessary, elements are trimmed along the contours.
- Connect the squares and logs with self-tapping screws with countersunk heads, marking the attachment points in advance.
- Sand the plywood thoroughly.
- Apply varnish to a smooth surface.
- Fix fiberboard sheets on top of the plywood parts.
You need to apply glue to the prepared floor and glue the linoleum covering.
The use of plywood sheets allows you to properly level the surface Source pol-spec.ru
Preparing linoleum for laying on a concrete floor
Linoleum delivered to the installation site in rolls should be spread out and left to rest for at least two days at a temperature above 18°C. This is due to the ability of the floor covering to crumple, and if this measure is excluded from the installation technology, waves and unevenness may appear.
If the room is large and there are several rolls of linoleum, they need to be rolled out, pressed to the floor with a soft brush, then carefully align the pattern along the edges of adjacent sheets.
Plain or marble-colored linoleum Patterned linoleum, on the contrary, is more advantageous to lay across the room in order to more effectively hide the joints and emphasize the beauty of the coating.
Types of linoleum
Based on their constituent components, the following types of material are distinguished:
- Natural. Eco-friendly, abrasion resistant. High-quality fabric of this type is made from resin, linseed oil, cork flour, limestone, dyes, and jute fabric. In addition, it is fire-resistant and inhibits the spread of fire in the event of a fire. The main disadvantage is the high cost.
- Polyvinyl chloride. It is quality controlled, so it can be laid in sleeping areas. This coating can be multi- or single-layer, with or without a base. Pros: durability, low price, variety of colors.
- Alkyd. It has excellent sound and heat insulation properties and is most often made on a fabric basis. Main disadvantages: easily deformed, loses quality when exposed to low temperatures.
- Relin. Strong, elastic, tolerates high humidity. This coating is made from bitumen, synthetic rubber. It cannot be used indoors.
Nitrocellulose linoleum is made without a base. It tolerates moisture well, is quite attractive, but at the same time it is prone to shrinkage and does not withstand temperature changes well.
What are the benefits of linoleum flooring?
Linoleum is one of the most popular flooring materials. This is an affordable and comfortable floor covering, and given the huge number of different color options, linoleum allows you to create a unique interior in any room.
Linoleums are made to resemble wood, tiles, with various ornaments and patterns. Now in stores you can find materials with diagonal patterns, horizontal and vertical stripes. Different shades will help make the room warm, visually expand it, and emphasize the advantages of the chosen style.
Features of transforming rooms when laying linoleum:
- To visually make the room larger, choose linoleum in light colors;
- Light colors and small tile or diagonal patterns will help expand the room;
- Linoleum with abstract patterns will fit into an interior designed in a modern style, for example, modern, fusion, minimalism;
- Bright linoleums with different designs and patterns were invented for children;
- Warm shades of linoleum will make the room warmer and more comfortable;
- In the bedroom, noble tones will look best, for example, burgundy, light beige, ivory, to further add coziness.
Linoleum on the floor will fit into absolutely any interior
A monotonous pattern is calming, so pay attention to linoleum with the same pattern. Be sure to pay attention to the base from which the linoleum is made. It comes in two types - felt and foam. The most durable linoleum is thick, it can resist various impacts longer and is similar in structure to a pie. This material weighs much more, and the layer feels very thick to the touch. You can even press on the lower part of the material; the linoleum will not bend, but will work like a spring. Also, such linoleum has high-quality sound insulation and thermal insulation.
A well-foamed base will make the floor in the apartment as warm as possible and comfortable for walking on it.
It will also help hide various irregularities and cracks in the base. A thick layer of linoleum does not bend or deform under the weight of furniture and retains its original appearance longer. Anyone can lay linoleum, the main thing is to take your time and do all the work correctly. In this case, laying the material will not be difficult if the surface is smooth and clean.
Related article: How to make a vanity unit for a sink?
Laying technology
Installation of the coating should be carried out taking into account the characteristics of the materials used. The installation technology requires compliance with the following rules:
- When pouring the base with cement-sand mortar, you need to wait four weeks. During this time, the floor will dry out and gain strength;
- If you use a self-leveling mortar, you must begin laying the finishing materials after the time indicated on the packaging has elapsed;
- The humidity level in the room should not be higher than 60%. Recommended temperature - not lower than +18C;
- When using an adhesive, possible drafts should be eliminated during installation.
Floor marking
The material is cut in various ways:
- The covering is adjusted at the installation site, the edges are pressed at the junction of the floor and walls. When cutting, you need to leave a reserve in case of thermal expansion of the flooring;
- The markings are made on the material laid out in the room, after which the excess is cut off. No gaps are left;
- First, the protruding elements are marked if the room has a complex configuration. Next comes cutting;
- Cutting occurs using cardboard templates. This is required for flawless installation around plumbing pipes and any monolithically installed fixtures.
The flooring can be cut in different ways
On concrete floor without glue
Installation without fixing with glue is suitable for small spaces. The rolled material must be allowed to rest. Next comes cutting the canvas around the perimeter of the room. The correctness of cutting is checked with a meter ruler. The instrument is placed on top of the linoleum and pressed against the wall. After laying the covering, the skirting boards should be attached.
The material should be immediately pressed with a plinth
Installation using glue
The covering is fixed to the floor using special linoleum glue. The water-dispersion or other mixture is applied with a notched trowel. Then you need to wait a while for the chemical properties of the mixture to activate. The glue is applied in stages, in separate sections under the pre-cut material. For laying linoleum, bitumen mastic is also used, which is applied in the same way and requires preliminary priming.
You can use bitumen mastic
Using adhesive tape
Laying linoleum on adhesive tape is a good way to secure it for a low-traffic area. This fastening method is used in spacious and small rooms. Special tape is rolled out around the perimeter of the room, where the edges meet. The protective film remains until installation. The covering is rolled out and cut to fit the size of the room. The protective film is gradually removed, the canvas is fixed on a clean concrete base.
Scotch tape is suitable for low-traffic areas
Joining linoleum sheets
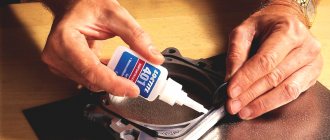
When laying linoleum in a spacious room, it is difficult to avoid joints. In such a situation, careful alignment of the pattern is required. The fit of the edges of the canvas should be tight, without gaps. If water gets into the joint, mold can form under the linoleum on the concrete floor. To create a strong, invisible seam, you should use a special glue - cold welding. The joining area is pre-cleaned and taped with masking tape. The edges of the canvas can also be glued by hot welding. This method requires special equipment and professional skills.
Application of hot welding
Preparing the base for linoleum parquet base
If you need to cover an old parquet floor with linoleum, you must do the following:
Nail and secure the boards well. The gaps between the boards need to be puttied, then treated and cleaned.
It is advisable to cover such floors with fiberboard sheets. Medium-hard wood fiber sheets can also be used. Before laying the sheets, the skirting boards should be raised (removed).
Fiberboard sheets are adjusted to size. The sheets are nailed along the edges every 10 cm; along the perimeter of the sheet, punching is done every 25-30 cm. It is better to use screws instead of nails. They need to be recessed by 2-3 mm. Try to keep the sheets firmly attached to the floor. The heads of the screws and the joints between the sheets are puttied and sanded. Before laying linoleum, the surface is dust-free.