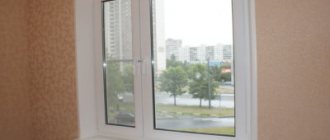
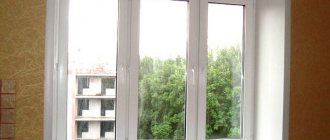
Drywall slopes
The best option for finishing a slope is plasterboard. This option, however, has both pros and cons, but now we have a different goal, namely, to figure out how to paint the slopes on plasterboard windows.
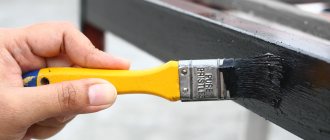
In this case, it would be optimal to opt for water-based paint, which not only applies well, but can also be wiped off during use.
So, however, before you figure out what paint to paint plasterboard window slopes, you need to do some preparatory work.
Slope preparation
If you have recently installed drywall with your own hands, then you cannot immediately start painting. Have you puttyed the slope? If yes, then skip the next few paragraphs, as the information will be offered to those who have not yet done this work.
So, you need to take putty and carefully putty the joints between the slopes and the perforated corner, as well as those holes that remain after fastening with self-tapping screws.
Important! Before you putty the holes for the screws, you need to embroider them. To do this, crosswise cross the hole, protruding 3 mm in different directions. Now you can putty.
After you have putty, give the mixture time to set. Then, take the abrasive mesh in your hands and carefully walk over the putty areas, removing any unevenness. You can use a carrier; it will make it easier to see irregularities.
Very often, after painting, cracks appear at the junction of the slope and the frame, to avoid them you need to do the following:
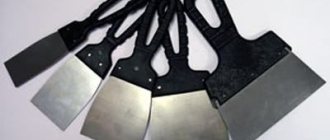
- Using a painting knife, in which it is better to replace the blade so that it is sharp, make a small chamfer along the entire perimeter of the joint, which goes to a depth of about 1-3 millimeters, at an angle of 45 degrees in the frame.
- Prime the slot area immediately, but apply masking tape along the frame and slope, first retreating 1 mm from the slope and frame.
- Next, insert the tube with acrylic into the construction gun and fill the chamfer. After filling, you need to “embroider” - run your finger along the seam to remove excess acrylic, as well as align the joint.
Important! You need to use acrylic, not silicone! Silicone is not painted, but acrylic is quite easy, moreover, it is initially white.
After you apply the acrylic, you can start painting only after 12 hours.
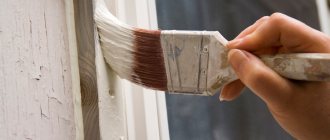
We answer further the question of how and with what to paint the slopes. You will need to prime the surface using a convenient brush.
But while the surface dries, you can use tape and cover the entire frame so as not to stain it with paint.
Painting
So, let’s figure out what paint to paint the slopes of plasterboard windows. It is better to use, as already mentioned, water-based paint, you can use acrylic, less often, oil or enamel.
Moreover, it is advisable to choose non-cheap analogues, since more expensive options will require fewer layers for coating, and their operating time will be a level higher.
So, the painting process will look like:
- Use a small brush to paint corners and other places that are difficult to reach with a large brush and roller;
- Next, use a velor roller or brush to apply paint to the main surface.
It is preferable, of course, to use a roller - there is less consumption (since excess paint is removed right there in the ditch with the material), and the layer goes on smoother and more accurately.
Important! In order for the paint to lay evenly, the pile on the roller must be very small; such rollers are usually called “velor”.
However, if you are used to and know how to work with a brush, then no one argues.
The painting process is simple - move carefully over the entire surface, but you don’t need to paint the same place often, for this you can apply the paint after drying with a second layer along the plasterboard slope. And if you paint it like this right away, then sloppy “scars” may be created.
So, here’s how and with what you can paint plasterboard slopes on windows, now let’s look at the plastered counterparts.
Coloring gypsum board sheets
Depending on the raw materials of the main surface, the principle of preparation and painting of existing window slopes may differ.
Slope preparation
After installing the plasterboard slopes, the joints, corners, and imperfections are smoothed out with putty. A tight fit on the attachment points is possible if the space for them is expanded.
When the putty is completely dry, sand it on top with abrasive paper and apply a primer.
Applying paint
Immediately after opening the container, the contents must be thoroughly mixed. Experts advise not to save money at the purchasing stage: more expensive types of paint cover better and do not require multi-layer application.
Removing masking tape
First, use a brush to paint corners, joints, and hard-to-reach areas near the window frame. The main area is painted with a roller. You can replace it with a wide brush.
In order for the paint to lay down in an even layer, it is better to use rollers with fine pile; at the same time, the liquid consumption will be reduced.
Plastered surface
Plastering slopes is a finishing method that is now not as common as, say, plasterboard, but let's look at how to paint such slopes.
Preparatory work
As with every job, the plastered surface needs preparation.
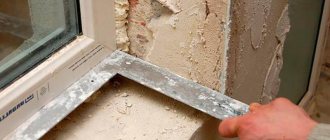
To do this, use a painting knife to cut off the excess paint foam, remove significant protruding irregularities, and apply putty in several layers. After puttying, you will need to go through an additional fine abrasive to remove minor defects.
Important! Plastering of external slopes should be done only with cement mortar, and the use of putty can only be done in the same way, on a cement base.
Otherwise, painting external plastered slopes will be no different from similarly finished internal analogues.
Taking masking tape in hand, carefully close the frame, and you can attach either plastic film or wet newspaper to the windows themselves for protection.
And now, feel free to prime the surface of the slope with a primer. Having waited the time allotted for the mixture to dry, we proceed directly to figuring out how and with what to paint the plastered slopes on the windows.
Painting the slope
For interior work, the same paints are used as those mentioned above for drywall (water-based, acrylic, oil, etc.), but for external surfaces you need to use only façade versions of water-based or acrylic mixtures.
The principle of operation is the same: the corners are painted with a small brush, and the main surface is painted with a roller or a large brush.
Window slopes need to be painted over at least two layers, and care must be taken to ensure that the room has a constant temperature and there are no drafts. Do not use any heating devices to dry the first layer - this method will only cause the paint to peel off much faster later.
Paint the next layer only when the previous one has completely dried!
But for street work you will have to choose the weather to be dry and windless. However, if there are still small defects on the surface in the form of lumps, specks, blades of grass, and even brush or roller hair, then when the layer dries, you can easily remove them with fine abrasive paper. And then apply the next layer.
As soon as you finish the work, carefully remove the tape protecting the frame. If this is not done immediately, but after the finishing layer has dried, then the tape may remove pieces of paint from the slope, but why would you do that?
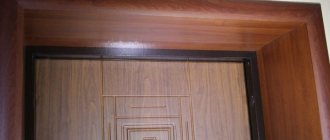
The finished type of finishing - however, the doorway
So, how and with what to paint plasterboard and plastered slopes on windows, you now know what we are extremely happy about!
SovetRemont.com
Dear visitor to my blog! I think you yourself know how important the appearance of window openings is, why painting the slopes on the windows Therefore, I will not engage in demagoguery on the importance of this work and will immediately get to the point.
Preparing to paint slopes
To begin with, the slopes should have a white, clean, dust-free appearance.
You need to achieve this using finishing putty and sanding it with abrasive sandpaper. Perforated aluminum corners should be installed on the outer corners of the slopes; read how to do this here. After cleaning the putty, the slopes should be treated with a deep penetration primer. Attention: if during the process the primer gets on the plastic window frame or glass, then immediately remove it with a damp rag. The window sill should also be protected from contact with primer (for example, polyethylene secured with masking tape).
As soon as the primer has completely dried, we proceed to the next stage - we cover the window frame with masking tape. It is important to do this work carefully and correctly. Use wide masking tape. It should be glued along the entire perimeter, including the junction of the slope and the window sill. The strip of tape should run smoothly without bends, and be pressed as tightly as possible against the supporting frame of the window. Glue the tape along the entire length of the junction of the slopes to the frame with your hands, and then press it as hard as possible with a plastic spatula, this is necessary so that during the main work the paint does not flow under it, this is especially important in the corners of the window opening.
Painting slopes
As for the quality of the paint, it's up to you to choose. Everyone has different financial capabilities, but I still recommend not to buy cheap paint. When choosing, rely on the following three criteria:
- Over time, as it becomes dirty, the paint should be easily washed off with a foam sponge.
- Use acrylic, its service life is longer than that of a regular water-based one. When purchasing paint, pay attention to the manufacturer's instructions on the can. Some types of paints have a purely individual composition.
- If you order online, it will be much cheaper, and if you buy it using cashback, it will be 2 times cheaper! The same goes for buying household appliances or new furniture!
Open the can of paint and mix it thoroughly. Pour a small amount of paint into the tray. Painting should begin from the top slope, moving to the sides. In hard-to-reach junction areas we use a flute brush.
List of tools needed for painting:
- Paint roller
- Flute brush
- Paint tray
- Pliers or screwdriver (for opening paint cans)
Try to roll out the paint evenly with a roller without putting too much pressure on the tool, otherwise greasy streaks and streaks will appear. Before applying paint to the slope, first roll it out with a roller in a paint bath. Attention: the work is done in one go; under no circumstances should you take a break, leaving one side of the window slopes partially painted. If you do this, the paint will dry out and, continuing to work, you will put an extra layer on top of the already painted one. Thus, in this place, at a certain angle and lighting, a non-uniform spot will stand out. If you don’t want to paint the slopes in two approaches, then apply the paint as thick as possible. But again, I remind you, make sure to apply the paint evenly with a roller.
Tips for painting slopes from personal experience
Once you've painted, peel off the masking tape immediately! Do this carefully without haste, being careful not to touch the fresh paint with your hands. Why do you need to remove the tape right away? I answer: the fact is that as soon as the paint dries, it forms a single film, including the paint that got on the masking tape. And when you remove the tape from the window frame, you will pull the dried paint behind it. This results in an uneven painting border; the appearance of such work, to put it mildly, is not very good! If, for some reason, you did not remove the tape from the window frame and the paint has dried, then do the following; Using a standard paint knife with replaceable blades, cut the paint along the entire paint border. After this, you can safely tear off the tape.
Do not under any circumstances try to dry paint with any electrical appliances (heater, hair dryer). The paint must dry naturally, otherwise it will become covered with small cracks, or even completely move away from the base in large “scales”.
Puttying slopes for painting
The slopes are white, clean, and dust-free thanks to the application of finishing putty. After drying, it is rubbed with abrasive sandpaper, after which it is primed with deep penetration mixtures.
Attention! It is necessary to protect the glass and window sills from getting primer on them, and if this happens, use a rag to remove it immediately! Our workers carry out such work with the utmost care; experience allows us to putty, prime and paint with maximum speed and excellent quality.
Next comes the crucial moment when it is necessary to cover the window frame with masking tape around the entire perimeter before painting, including the junctions with the window sill. Here you need to ensure that the strip attaches tightly and without bending.
How to properly prepare plastered slopes
Preparation is not difficult. You need to carefully check the surfaces around the windows for unevenness and cracks. If loose pieces are found, they must be pulled out. Eliminate identified defects using putty or cement mortar. Check the level of deviation in the horizontal and vertical planes. Cover the frames with masking tape, and cover the glass surfaces of the windows with paper or polyethylene.
The plaster needs to be primed twice. The second layer is applied after the first has dried. There is no need to paint until the primer is completely dry.
Painting
Nuances when painting slopes
After puttying, the slopes are painted using a hand roller with a fur coat. Apply the first layer of paint along its length, and the second coating is applied across it so that the direction coincides with the spread of light. The corners for radiators are coated with a brush. The choice of material depends on several points. The desire to save money by purchasing cheap paints leads to a reduction in the service life of windows. Our consultants recommend the best options for each consumer individually, which helps to maximize their performance characteristics. When selecting paints, you must be guided by the following criteria:
- dirt should be easily washed off with a soft sponge;
- Acrylic paints are used for coating; they last longer than water-based mixtures;
- When purchasing, pay attention to the manufacturer, since some of them make paints with a specific composition that is not suitable for slopes.
After the work is completed, the pasted tape is immediately removed. Do this carefully, making sure not to touch the fresh layer. And if the protective tape is removed after the paint has dried, it will pull the adjacent layer, which will create unevenness. The appearance will deteriorate, and such work cannot be called high-quality. Our service is to ensure that the painting of slopes and the price for the work meet all the wishes of our clients.
The information presented on the site is posted as a reference and is not related to the public offer.
Data on services, materials and prices ( the cost of the work performed depends on the materials used, the complexity of the repair, its volume, related operations, etc.
), are given as reference information and are not the subject of a public offer agreement, which is determined by Art. No. 437 clause 2 of the Civil Code.
To get detailed information, contact our manager using the contact form or call the number.
To find out the exact cost of your repair, you need to invite our specialist to calculate a detailed estimate.
Each object is discussed with the customer individually. Calling a specialist is FREE and does not oblige you to anything!
Order a specialist visit at any time convenient for you from 9:00 to 21:00.
Reminder for proper painting of window slopes
When installing or replacing a window, the issue of finishing the slopes and putting them in perfect order becomes relevant. Plaster or drywall alone is not enough here, since the surface needs additional coating. Below we will tell you how to paint the slopes on the windows and get a decent result.
Choosing paint for slopes
In theory, paint for window slopes can be used in any desired color, but the classic white version is mostly used. The most suitable type is acrylic water-based paint or an oil analogue containing drying oil in the composition .
Most often, white acrylic paint is used to paint slopes.
When choosing what to paint the slopes on the windows with, keep in mind the recommendations of craftsmen who do not recommend using:
- bitumen enamel;
- bitumen-vinyl;
- bitumen-epoxy.
If you purchased an oil version without drying oil, you can correct the defect by diluting the paint with this substance yourself. The approach is not forbidden, but take into account the advice of professionals who advocate purchasing already prepared material where all proportions are met. Painting the slopes will consist of two stages, one of which involves applying a primer layer, and at the next stage you need to apply paint mixtures.
Before painting the slopes, a primer mixture is applied to them.
Do not forget that acrylic materials dry much faster than oil materials and do not emit strong odors. Another important difference is the matte surface of acrylic as opposed to glossy oil paint. Oil compositions form a film when applied to a surface, while acrylic paints are considered “breathable”. Both types of paint mixtures can be used with equal success for both internal and external painting of slopes. Having considered the options and decided what to paint the slopes with, you can safely move on to preparing the tools.
Required set of tools
Before you begin processing slopes, make sure you have the necessary tools.
These tools are required for painting slopes
In our work we will need:
- large and small brushes;
- paint container;
- cruvette and roller;
- masking tape;
- ladder;
- construction knife;
- primer and a clean rag;
- fine abrasive mesh;
- liquid acrylic;
- construction pistol.
Painting drywall trim
Painting plasterboard slopes will require preparatory work that will help achieve the best result. The best option for paint would be water-based paint, since it adheres well to the surface, and after drying, it allows you to wash the internal slopes without damaging the coating .
Preparing the slopes
Once you have finished the slopes with plasterboard, the next step is to putty all the empty holes, joints and corners. Before sealing, the areas for fastening with self-tapping screws need to be slightly widened so that the putty lays more evenly. This can be done with a Phillips screwdriver, running along the hole and expanding it by approximately 3-5 mm over the entire diameter. Allow the applied mixture to dry for several hours, then sand the surface using an abrasive mesh, carefully going over the areas of the window. The mesh will help get rid of all the unevenness and clean the prepared surface well.
An abrasive mesh is used to clean out uneven surfaces.
A few words about how to properly paint slopes so that there are no small cracks left. Follow simple rules:
- Take a painting knife with a sharp blade and make a small chamfer along the joint area, going inward by 2-3 mm. Make sure that the work is carried out at an angle of 45°C in relation to the window frame.
- Cover the frame and slopes with masking tape, leaving 1-2 mm from the base of their surface. Immediately cover the cut areas with primer.
Painting tape is used to protect the frame from paint
- Using a gun with an acrylic tube, fill the bevel, then run a clean rag or finger along all seams to remove excess acrylic and make the joint even.
- First, with a small brush you need to carefully paint the corners and other places that are inaccessible to a large brush.
- Once you've finished with the corners, you can apply paint over the entire work surface using a large brush or roller.
Do not replace acrylic with silicone materials, as they do not paint as well as acrylic . Allow the window to dry thoroughly for 12 hours, then prime the entire area. It dries quickly enough and there is just enough time to cover the window frame with masking tape. Try to apply the tape evenly and without errors so that the painted areas can look attractive.
Let's start painting
Pour the paint into a convenient container and stir thoroughly. It is advisable not to save on the cost of painting material, since expensive paint will require fewer layers. Similar water-based options with low cost will lead to high financial costs.
If you decide to use a roller for painting, give preference to velor products with fine pile, then the paint will apply in even layers and with less consumption.
Using a velor roller the paint will go on smoother.
Try not to go over the same place many times, painting the entire surface evenly. Poorly painted areas can be covered with a second coat, but only after the first one has completely dried . Otherwise, roughness and unevenness may appear on the surface.
Painting the plaster finish
Before painting slopes on windows with a plastered surface, it is necessary to carry out preliminary preparation, which will contribute to high-quality painting.
Preparing the slopes
First you need to remove the remaining foam using a painting knife, level all protruding areas and cover with two layers of putty. After complete drying, we pass over the surface with an abrasive mesh, smoothing out minor defects and irregularities. The subsequent stages of preparation are similar to the previous option:
- We cover sections of the frame with masking tape and cover the glass with polyethylene or paper so as not to splatter paint.
Painting of plastered slopes is carried out in 2 layers
Let's start painting
First, we go through all the corners and hard-to-reach areas with a small brush, after which we work with a large brush or roller. The slopes must be painted in a double layer, waiting for the first to dry. Do not try to dry the paint with a hair dryer or other devices, as the material is more likely to deteriorate in the future. Strictly monitor the room temperature, avoiding drafts and high humidity.
Upon completion of work, immediately remove the masking tape from the windows. If you do this after the paint has dried, pieces of material from the slopes may come off along with the strips of tape.
How and with what to paint window slopes?
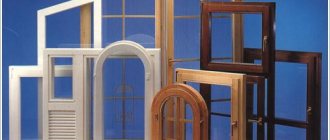
Probably, everyone who has installed plastic windows is familiar with the situation when a beautiful, freshly installed double-glazed window is framed by uneven slopes intended for the old frame. Of course, you can complete window decoration along with double-glazed windows, for an additional fee, and you can also save a little. To do this, you just need to purchase material for leveling the surface and paint for the slopes.
Paint application process
Regardless of the design and material of the slopes, painting technologies differ slightly. The main differences relate to the preparation of surfaces for painting.
When all the irregularities have been smoothed out with putty, the surfaces have been sanded and primed, and wearing rubber gloves, you can begin to work:
- First, the plastic section of the window frame adjacent to the wall is sealed. You can run a silicone spray over the corners, removing excess with your finger or a soft rubber scraper. This will prevent paint from cracking at the junction of dissimilar surfaces.
- Hard to reach areas are being painted. A hair brush will help you get around the loops. The corners are processed with the same tool.
- For the main parts of the slopes, a roller is used. The technique, when the instrument is passed over one place several times, leads to the formation of streaks and uneven coloring. One pass is enough. Then the freshly applied layer should dry. For acrylic paints this is 10 – 25 minutes.
- Then the second layer is applied. Again using a brush for hard to reach areas and a roller for the main area. Finally, carefully remove the masking tape.
The final drying of the paint takes no more than 4 hours. During this period, it is especially recommended not to create drafts in the room. Since sudden changes in humidity and temperature negatively affect the polymerization process. During the day, you should also not touch the painted areas or expose them to other mechanical stress.
Which paint to choose
The dye is selected taking into account where it will be used. The main requirements for the coloring agent are:
- Aesthetic appearance, because the main purpose of the chosen paint is to create a worthy frame for a plastic window.
- Strength and abrasion resistance (the film formed after drying should not be damaged when washing the surface).
- Compliance with operating conditions (for example, for a bathroom this will be increased moisture resistance, and for outdoor work - the ability to withstand atmospheric conditions and temperature changes).
- Environmental friendliness (this requirement is mandatory for residential premises).
For interior decoration
Based on these requirements, experienced craftsmen recommend using the following compositions for interior work:
- Acrylic water-based. Easy to use, after drying they form a durable, beautiful film. They dry quickly, are easy to apply, have water-repellent properties and are suitable for painting slopes on bathroom or kitchen windows. Due to the fact that the solvent for such enamels is water, the compositions are non-toxic and almost odorless.
- Acrylic latex. They have the same properties as water-based ones, but the presence of latex additives in the composition increases their strength and moisture resistance. In addition, the addition of latex gives the dyes a beautiful gloss. If desired, you can purchase a coloring solution from glossy, which beautifully reflects light, to matte, emphasizing the beauty of the window opening.
For exterior finishing
For the street it is recommended to select the following paints:
- Acrylic latex with high protective and decorative properties. But it is worth considering an important rule: latex without additional additives is not sufficiently resistant to temperature changes and quickly breaks down. If you purchase latex paint for slopes, then the packaging should indicate: “For external use.”
- Alkyd, based on organic solvents, are suitable for any substrate and can withstand temperature changes. The downside is that they are highly toxic; you can only work with them wearing gloves or a respirator.
- Epoxy. Durable, beautiful, but expensive, and it can be difficult for novice craftsmen to work with them. They are rarely used for finishing windows due to the fact that there are more affordable coloring compounds with excellent protective and decorative qualities.
It is not enough to choose only the composition of the dye. To make the window look impressive, you need to choose the color.
Requirements for paints
Paint for slopes must be selected taking into account where it will be used - on the outside or inside of the window. Here is a list of the basic requirements that must be met for paint:
- aesthetics and attractive appearance, since one of the main purposes of the coloring agent is to create a beautiful frame for a new window;
- sufficient strength and abrasion resistance. After the paint for window slopes has dried, it should withstand washing with chemical detergents without damage;
- The paint and varnish composition must correspond to the conditions in which it will be used. For example, if a window opening in a bathroom is to be painted, the paint should have an increased moisture resistance rating. And if the window will be treated from the street side, then the paint must be able to withstand temperature changes, heat, frost, ultraviolet rays, and precipitation;
- environmental cleanliness and safety. This requirement applies to situations where paint for slopes is used indoors, especially in living rooms and children's rooms.
Choice of colors
Manufacturers of paints and varnishes offer a wide color palette.
You can paint it in any color, but it is worth considering that plastic double-glazed windows have a traditional white color, and too bright a color window design can introduce dissonance into a carefully thought-out interior.
Designers recommend using the following color schemes for interior decoration:
- A shade of white, which will differ by 1-2 tones from the glass unit.
- Painted to match light wood species. This option will be an excellent solution for rooms with wooden panels.
For exterior painting, it is recommended to select the color so that it harmonizes with the façade finish.
Paint selection
Slopes are divided into several types:
Therefore, the choice of material for painting depends on what type of paint will be painted. It is better to paint the exterior with façade vapor-proof paint. It will protect the surface from mold and the accumulation of large amounts of moisture.
For the internal parts, you can use water-based emulsion. Regular enamel and acrylic are also suitable. It is advisable to choose white shades. This color will not greatly attract the attention of passersby.
In addition, white color visually expands the room. The room becomes much brighter, as the light from the lamps will be reflected from the painted surface.
Before you start painting, you need to wait until the primer is completely dry. Otherwise, the coating will begin to form lumps, and the work will have to be done again.
Water-based compositions create a matte finish. The enamel always shines. The acrylic composition does not react to sunlight and other light, its properties do not change under the influence of ultraviolet radiation.
The choice is always individual, it depends on the design and interior of the room. The selection of the desired dye is made taking into account the place of its use.
Design of slopes and adjacent walls
Required Tools
Finally, the composition and color of the dye have been determined, now you need to select the necessary tools, and you can begin finishing the window. To make a quality finish, you will need:
- tools for leveling the surface (if necessary);
- masking tape;
- dye tray;
- gloves;
- painting tool.
The recommended painting tool is to use a brush or roller. When selecting a tool, experts recommend:
- Give preference to small and medium-sized rollers.
- Choose a “coat” for the roller from a sponge or natural fur with short pile. This is justified by the fact that rollers with long piles can splash paint compositions, and the splashes can get on glass or plastic.
- It is better to use brushes only for painting joints, and paint the remaining areas with a roller. This will allow you to achieve even coloring and save material.
Required set of tools
Before you begin processing slopes, make sure you have the necessary tools.
These tools are required for painting slopes
In our work we will need:
- large and small brushes;
- paint container;
- cruvette and roller;
- masking tape;
- ladder;
- construction knife;
- primer and a clean rag;
- fine abrasive mesh;
- liquid acrylic;
- construction pistol.
Preparing for painting
Preparing a window opening for painting plays a huge role, because in sunlight all surface imperfections will be visible. Therefore, before painting, it is necessary to carefully prepare the base. To do this you need:
- Carefully inspect the surface using a portable lamp and level out any uneven areas or dents. Drywall does not need leveling, but unevenness may appear on chipboard or plaster. After eliminating all the deficiencies, it is advisable to re-inspect the lamp.
- Pour the primer into a container for dipping the roller, prime the surface thoroughly and allow to dry. Inspect again with a lamp. If there is a possibility of uneven application of the soil, then repeat the procedure.
After the primer mixture has dried, you can begin to paint, evenly distributing the selected dye using a roller. It is recommended to paint in two layers, the first one should be applied evenly from the wall to the window, and the second one should be applied up and down.
If the paint is selected in accordance with all requirements, and the finishing work is carried out in compliance with all the necessary stages, then the result will be a beautiful window opening.
How to prepare plasterboard slopes
After the installation of window slopes is completed, preparation for painting begins.
- It is necessary to putty the joints, cracks, and holes formed by the screw heads.
- The putty must dry. After drying, the puttyed areas are sanded with an abrasive mesh.
- Masking tape is applied to the window frames, and the glass is covered with plastic film or paper to protect the structure from accidental splashes.
- Some people forget to prime the surface before painting. The coloring result turns out to be far from what was intended. Stores sell various primers for drywall products. If it is difficult to choose on your own, you should consult with a sales consultant. He will tell you the optimal brand of primer, taking into account the circumstances.
The seams at the joints are treated with a brush
How to paint the slopes on the windows in an apartment with your own hands?
When replacing old windows in apartments, slopes made of PVC panels are not always installed; some owners prefer not to destroy the walls and install only one double-glazed window. In this case, the question is always logical: how to paint the slopes, what is the best way to do it and is it necessary to carry out preparatory work?
Installation of slopes for plastic windows.
Preparatory work
When doors are installed, cracks often appear on the walls and large chips are visible. They need to be sealed. Before painting, preparation is carried out. The following technological work must be performed:
- filling cracks;
- sealing cracks;
- removing old coating remaining on the wall;
- surface leveling;
- sealing the resulting cracks with sealant or a special solution;
- priming the leveled surface.
Coloring
Stages of finishing slopes
When installing double-glazed windows, chips and cracks inevitably appear on the outside and inside, which need to be repaired. Before painting the slopes on the windows, you need to carry out preparatory work, which consists of:
Scheme of the structure and insulation of the slope.
- There are cracks and crevices in the putty.
- Removing old paint, if any.
- Leveling surfaces.
- Sealing all cracks that appeared during the installation of double-glazed windows with special solutions.
- Primers for leveled surfaces.
- Painting slopes with your own hands.
Since slopes can be external and internal, you need to choose the appropriate paint for their repair. For external slopes, façade paint is suitable, and it is best to choose a vapor-permeable one: this will not allow moisture to settle and prevent the formation of mold. You can paint the slopes on the windows on the inside of the apartment with water-based paint, acrylic or enamel. Based on the shade, it is best to choose white, as it does not attract attention, visually expands the room, reflects sunlight and makes the room brighter.
Painting of the slopes is done after the primer layer has completely dried, otherwise the applied paint will collect in lumps and the work will have to be done again.
Painting with water-based compositions gives a matte effect, the enamel on the surfaces will shine, and acrylic paint does not change its external characteristics under the influence of ultraviolet radiation and sunlight. Each owner decides which paint to choose depending on his financial capabilities, the general style of the room and how many years its renovation is expected to last.
Features of painting door slopes: equipment for work
When doors in old apartments are replaced and new wooden or metal structures are installed, the owners of the premises, in order not to dismantle the walls, decide not to install plastic or laminate slopes. They stop at installing one door.
The question immediately arises: is it necessary to paint the slopes? What is the best paint, and is any preparation necessary?
Preparatory work
When doors are installed, cracks often appear on the walls and large chips are visible. They need to be sealed. Before painting, preparation is carried out. The following technological work must be performed:
- filling cracks;
- sealing cracks;
- removing old coating remaining on the wall;
- surface leveling;
- sealing the resulting cracks with sealant or a special solution;
- priming the leveled surface.
Coloring
Paint selection
Slopes are divided into several types:
- external;
- internal.
Therefore, the choice of material for painting depends on what type of paint will be painted. It is better to paint the exterior with façade vapor-proof paint. It will protect the surface from mold and the accumulation of large amounts of moisture.
For the internal parts, you can use water-based emulsion. Regular enamel and acrylic are also suitable. It is advisable to choose white shades. This color will not greatly attract the attention of passersby.
In addition, white color visually expands the room. The room becomes much brighter, as the light from the lamps will be reflected from the painted surface.
Before you start painting, you need to wait until the primer is completely dry. Otherwise, the coating will begin to form lumps, and the work will have to be done again.
Water-based compositions create a matte finish. The enamel always shines. The acrylic composition does not react to sunlight and other light, its properties do not change under the influence of ultraviolet radiation.
The choice is always individual, it depends on the design and interior of the room. The selection of the desired dye is made taking into account the place of its use.
Design of slopes and adjacent walls
Coverage Requirements
It should create a beautiful appearance so that the door does not get lost and looks attractive.
The resulting film should be very strong. When washing the surface, scratches and cracks should not appear.
The paint must be suitable for the operating conditions. If this is a bathroom, it should have increased resistance to moisture.
Painting of the external sides should be carried out with a special composition that will not react to temperature fluctuations and atmospheric influences.
Any composition must necessarily comply with all modern environmental requirements.
Slope installation
Painting drywall
If the slopes are made of plasterboard, when choosing a coloring composition, several important criteria must be taken into account:
- it should be easily washed off even after ten years;
- compound;
- manufacturer.
From practical experience, the best options for decorating drywall are:
- Tikkurila, Finland;
- "Condor", Germany.
Finnish belongs to the group of elite paints, so it is very expensive. The German one has similar quality, but costs a little less. But in any case, everyone chooses for themselves what paint to buy for a plasterboard slope. It all depends on financial capabilities and personal preferences.
Interior decoration
Professionals advise interior painting to be done with only a few compounds.
- Water-based acrylic. Easy to apply to the surface, dries quickly. After painting, a very durable film with water-repellent properties is formed. Suitable for bathroom or kitchen. Since this paint is diluted with water, it has no odor and does not emit toxic substances.
- Acrylic latex. Properties are similar to water-based paint. Latex additives increase the strength of the film and make it more moisture resistant. This paint sparkles with a beautiful gloss.
Plastering slopes
Finishing of external slopes
When slopes are painted from the outside, higher demands are placed on the dyes. Latex acrylic compounds with special additives have these properties. When purchasing, pay attention to the packaging. It must be written “For outdoor use.”
Alkyd compositions, which are based on organic solvents, are used to paint any surface. They can withstand large temperature changes. The disadvantage of this paint is its toxicity. Work should be carried out only with a respirator and gloves.
Epoxy paints are highly durable. They look beautiful, but are very expensive. Only specialists can work with such compositions; beginners have many problems. They are rarely used for painting. They can be replaced with other inexpensive coloring compounds that have excellent protective characteristics.
Selection of shades
Today on the market you can see a huge range of colorful products of various colors and shades. You can, of course, paint the slopes any color. However, usually door slopes are painted predominantly in white or light shades. Therefore, if you make the door design too bright, it can disrupt the harmony of the entire interior. According to designers, it is better to do interior decoration in certain color combinations:
- white, differing from the color of the partition by several tones;
- painting that imitates expensive types of wood - this looks especially beautiful on doors when wooden panels are installed in the room.
When exterior painting is carried out, it is advisable to select a color so that it harmonizes with the color of the facade.
Plastered and painted doorway
Painting technology
Before starting work, you need to prepare all the tools in advance. To work you will need:
- roller;
- to paint joints, you need to prepare a narrow brush;
- masking tape.
- container for paint.
- rags.
Painters recommend using a roller or a special brush. It is desirable that the dimensions of the roller are not very large. The sponge should be made of natural fur and have short pile. If the pile is very long, the coloring composition may splash. Splashes will fall on the door frame and leaf.
To paint the joints well, it is best to use brushes. Other areas are painted only with a roller. This technology allows you to get even coloring and save coloring agent.
Before painting, dust is removed from the surface. The entire perimeter of the door is covered with masking tape. It will protect the canvas from paint. In addition, the door must be additionally closed with plastic film. This protection will help keep the canvas completely clean.
First the joints are painted. The work is done with a thin brush. There should be no breaks in the paint layer. The top is painted with a roller. When the painting of the horizontal surface at the top is completely finished, the side bases are painted. Craftsmen advise painting slopes in one layer. But if you decide to apply several layers, then the next one can be applied only after the previous one has dried.
When painting is finished, you need to immediately remove the masking tape. If this is not done, it will dry out, stick to the door, and it will be very difficult to remove it.
Decorative painting of slopes
Interior decoration
Professionals advise interior painting to be done with only a few compounds.
- Water-based acrylic. Easy to apply to the surface, dries quickly. After painting, a very durable film with water-repellent properties is formed. Suitable for bathroom or kitchen. Since this paint is diluted with water, it has no odor and does not emit toxic substances.
- Acrylic latex. Properties are similar to water-based paint. Latex additives increase the strength of the film and make it more moisture resistant. This paint sparkles with a beautiful gloss.
Plastering slopes
Painting drywall
If the slopes are made of plasterboard, when choosing a coloring composition, several important criteria must be taken into account:
- it should be easily washed off even after ten years;
- compound;
- manufacturer.
From practical experience, the best options for decorating drywall are:
Finnish belongs to the group of elite paints, so it is very expensive. The German one has similar quality, but costs a little less. But in any case, everyone chooses for themselves what paint to buy for a plasterboard slope. It all depends on financial capabilities and personal preferences.
Paint for window slopes - choose, paint, be satisfied
Water-based acrylic and oil paints themselves are very different from each other. The first is odorless, but the second has a pungent odor. Thanks to it, you will get beautiful windows, but remember that you will still have to monitor the current state of the slopes - because sooner or later the color saturation will change for the worse, and the slopes will begin to fade . Paint for slopes must be “fresh” - look carefully at the expiration date and production date. If you don’t want to correct your mistakes later, read on, delving into it, about working with slopes now!
If you completely change the color of the slope, then first you will have to dilute the paint to the desired shade. However, do not forget that as acrylic dries, it becomes much lighter. Expert advice - it’s better to test the pre-diluted paint on plywood or a board. Please note that you need to look both in daylight and in room lighting - sometimes shades in different light can sparkle completely unexpectedly.
The process of finishing slopes with different materials is described in detail in other articles on our website - be sure to read them. So, one of the most difficult tasks when painting like this is to keep the glass clean. So it is important to know not only how to paint the slopes on the windows, but also how to do it correctly in order to keep everything in order. To prevent the window from getting dirty during painting, use paper strips - stick them with a regular soap solution along the edge of the glass.
The paper must be at least 3 cm wide. When choosing paint, experts recommend that you take into account the condition of the slopes in the cold season. Dampness and moisture, which most often affect the lower parts of surfaces adjacent to windows, lead to the appearance of mold.
Some of the best options for such cases are acrylate and latex paints, which provide a stable, durable, washable finish. Offhand you can name Tikkurila LUJA or Caparol Fungitex - W, which are very popular among professional painters.
List of tools and materials
Having chosen the paint composition, prepare tools and additional materials. Having the necessary equipment on hand speeds up the coloring process and leads to positive results.
- a narrow brush and a short-haired foam roller;
- small tray for painting;
- masking tape;
- primer;
- latex gloves;
- solvent;
- sponges, rags.
Pigment is applied only on a flat surface. If there are defects on the wall, fix them using putty, plaster and/or drywall. Choose a small paint roller, as a large tool is inconvenient to use. A short-haired roller will help prevent splashing and smudges on the surface being treated.
If the inside of the frame is made of wood, use a light-colored paint or clear varnish.
Choosing paint for slopes
In theory, paint for window slopes can be used in any desired color, but the classic white version is mostly used. The most suitable type is acrylic water-based paint or an oil analogue containing drying oil in the composition .
Most often, white acrylic paint is used to paint slopes.
When choosing what to paint the slopes on the windows with, keep in mind the recommendations of craftsmen who do not recommend using:
- bitumen enamel;
- bitumen-vinyl;
- bitumen-epoxy.
If you purchased an oil version without drying oil, you can correct the defect by diluting the paint with this substance yourself. The approach is not forbidden, but take into account the advice of professionals who advocate purchasing already prepared material where all proportions are met. Painting the slopes will consist of two stages, one of which involves applying a primer layer, and at the next stage you need to apply paint mixtures.
Before painting the slopes, a primer mixture is applied to them.
Do not forget that acrylic materials dry much faster than oil materials and do not emit strong odors. Another important difference is the matte surface of acrylic as opposed to glossy oil paint. Oil compositions form a film when applied to a surface, while acrylic paints are considered “breathable”. Both types of paint mixtures can be used with equal success for both internal and external painting of slopes. Having considered the options and decided what to paint the slopes with, you can safely move on to preparing the tools.
Finishing of external slopes
When slopes are painted from the outside, higher demands are placed on the dyes. Latex acrylic compounds with special additives have these properties. When purchasing, pay attention to the packaging. It must be written “For outdoor use.”
Alkyd compositions, which are based on organic solvents, are used to paint any surface. They can withstand large temperature changes. The disadvantage of this paint is its toxicity. Work should be carried out only with a respirator and gloves.
Epoxy paints are highly durable. They look beautiful, but are very expensive. Only specialists can work with such compositions; beginners have many problems. They are rarely used for painting. They can be replaced with other inexpensive coloring compounds that have excellent protective characteristics.
Additional recommendations
If you don’t have construction experience, then don’t despair; the desire to do everything efficiently and correctly will overcome any doubts. As a rule, professionals do everything quickly because they are confident in their actions. Beginners weigh all the pros and cons, thereby treating the task at hand more carefully.
List of tips for the average person:
- To avoid cleaning the floors, it is recommended to lay down old newspapers or covering film. If paint gets on the window glass, it is better to immediately wipe it off with a damp cloth.
- If paint smudges remain on the surface, then after complete drying it is recommended to scrape them off with a staple and reapply the paint.
- When painting slopes in the kitchen, it is better to use oil-based paint, and in other rooms - water-based paint.
- In order for painted slopes to be admired for a long time, what is important is not the choice of colors, nor what exactly the surface was painted with, but the quality of the preparatory operations.