When buying a used car, a person knows in advance that he will have to carry out various checks regarding the painting of the car. This will indicate whether the vehicle was involved in an accident or not, or was repaired.
You can check the layer of paint applied to the body using a thickness gauge. It is usually rented rather than purchased. This is why many people do not know how to use a thickness gauge correctly. There is nothing complicated about this, but you need to take into account some subtleties in the work.
What is a thickness gauge?
A thickness gauge is a miniature device used to measure the paint finish on a car. Devices are different. For example, some models do not function at temperatures below zero, others are only capable of measuring aluminum parts.
Experts advise using professional options like Etari or Autotest. The cost of the product varies and can reach 7,000 rubles. If a person rarely changes his car, then it makes no sense to purchase a thickness gauge. It is best to rent it for 200-300 rubles.
Why do you need to check paint thickness?
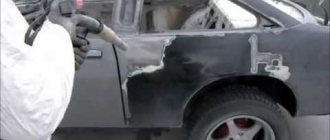
Drivers should know not only how to use a paint thickness gauge, but also why it should be done in the first place. The thickness of the paintwork will clearly show the buyer whether the vehicle has been painted or restored after an accident.
Cars are most often repainted in two cases:
for masking small defects;
after an accident that resulted in serious damage.
Unfortunately, only an expert in these matters can determine “by eye” whether the body has been repainted. The average car enthusiast will not see the difference. But a new car can also be tinted, so it is important to use a thickness gauge when inspecting the vehicle.
There is nothing wrong with buying a car after a little cosmetic “adjustment”. However, painting is a serious reason to ask the seller for a discount.
If the car has been in a serious accident, then it is not even worth checking. By buying a used car, the driver risks his life and the lives of his family. He doesn't know which damage has been repaired and which has not. Internal problems can lead to another accident at any time. You can only buy a damaged car for spare parts.
How to examine a car with a thickness gauge?
The thickness of paintwork on new cars varies from 80 to 150 microns (see the article “Paint thickness on cars”). The difference can be up to 40% among different cars. A repaired and repainted body part can have a thickness of 200–250 (up to 400) microns. If the car was declared as not damaged, then determining the repaired area will cause a price reduction or refusal to purchase it.
Measurements can start from the roof. You also need to repeat the process on other parts of the body (the more measurements, the better). If in doubt, you can check the paintwork on the same panel on the other side of the car. If this does not help, then you can compare it with the same part on another similar machine.
Cars parked outside in the sun's rays experience temperature fluctuations. Polymers and other paint ingredients expand when heated. Thus, depending on the paintwork temperature, different thickness gauge readings can be obtained. If you measure paint on horizontal surfaces at a temperature below 10 degrees and then the same place in the middle of a hot day at a temperature of 30 degrees, you will get different readings. At high temperatures the paint will be several microns thicker, and at low temperatures it will be thinner. Data varies by 2 microns or more.
Types of device
It’s not difficult to figure out how to use a car paint thickness gauge. However, you need to understand that there are different devices and the principles of their operation are also different.
The simplest option is the magnetic model. There is a magnet in its body. It is able to change its force of attraction to the metal in places with different coating thicknesses. The readings can be seen by the arrow. The angle of its deflection clearly demonstrates how much paint is in different places of the body.
Electromagnetic models are more accurate than magnetic ones. However, they can be used to measure coating thickness on iron, rather than on plastic or non-ferrous metal.
Eddy current ones are even more accurate in measurements than the model with a magnet. They transmit the most accurate data only on parts made of aluminum or copper. As for simple metal, the device sometimes produces errors.
Ultrasonic devices have the highest accuracy. They can be used on a variety of materials including metal, plastic, etc. The only drawback of the product is its high cost. Most often, such devices can be seen in professional service stations.
Useful tips
- Sometimes sellers resort to such a trick: they deliberately do not wash a dirty car in order to make it difficult to examine it with the device.
- You should know that some premium models (Mercedes and some others) have a factory paintwork thickness that is higher than usual and reaches 150-250 microns. In this case, you need to look at the documentation for the car.
- Keep in mind that for older cars, even if for some reason they still have the factory paintwork, body elements located horizontally may have a significantly low thickness, because when washing these places rub more strongly and the paint on them It becomes thinner over time, especially among those who like to keep their cars clean, which in itself is commendable, of course.
What does the thickness gauge show?
Many people are interested not only in how to use a thickness gauge, but also in how to decipher the data obtained. The thickness of the coating is measured in micrometers. 1 micron is 1 thousandth of a millimeter. Accordingly, the higher the value on the screen, the thicker the paint on the body.
The factory paint layer never exceeds 200 microns. If the device shows a higher value, then this 100% indicates that the body has been repainted.
Let's take a closer look at each value:
200 - 300 microns - indicates that light cosmetic repairs have been carried out.
Up to 1000 microns - indicates that there is putty under the paint. This means carrying out body repairs in which elements with severe deformation were puttied.
Up to 2000 microns - the car was involved in a serious accident. It is not recommended to buy such a car.
2000 µm is the maximum value of the thickness gauge. In any case, this parameter indicates that there is too much putty on the body.
The device may show errors, but they should not be more than 60 microns. Before agreeing on a purchase with the seller, it is necessary to study in advance the factory thickness of the paintwork on a particular car model.
How to use a paint thickness gauge
In some cases, before directly measuring the thickness of the paintwork, it is necessary to correctly calibrate the device. To do this, you should use special calibration plates, one of which plays the role of a metal base, and the others imitate layers of paint of various thicknesses. They are used to determine the accuracy of the device change. However, not all models require such adjustment - self-calibrating models can also be found on sale.
Next, you need to decide what thickness of paint for your car should be considered normal? After all, each manufacturer can use different color intensity for each model. You can find such information in the technical documentation for your car. On average, a layer of factory paint has a thickness of 70 to 150 microns.
However, a number of nuances need to be taken into account:
- In different areas of the body, the thickness of the paint layer may be different, which is due to technological features. In particular, a thicker layer is usually applied along the edges of the body.
- On the front and rear wings, the basic thickness of the paintwork may be different, but on symmetrically located elements it is always the same by default.
- The range of factory values for the thickness of the paint layer on different parts should not differ by more than 50 microns.
- The internal surfaces of body parts are covered with thinner layers of paint, the difference here is about 40-60 microns.
In order to change the thickness of the paintwork, press the working plate of the device evenly and firmly against the surface of the part being examined and, if necessary, press the start button (many modern models automatically turn on when in contact with the element being examined). Literally immediately, the thickness gauge will display data on the thickness of the paint coating at a given point.
For greater accuracy and reliability of measurements, divide the part of the body under study into 5 parts - 4 corners and a center. For each such point, take 3-5 measurements, recording the results in writing - this will minimize the error. Moreover, measurements need to be repeated not exactly at the selected location, but at some distance from it. For example, take measurements within a radius of 15-20 cm, so the objectivity of the results obtained will be much higher.
If strong deviations from the norms or a large range of measurements are identified in some area, then such an element can be examined more carefully. Take measurements not at 5, but at 8-10 different points, this will allow you to accurately determine the relief of the metal and the change in the thickness of the paintwork.
When all the necessary measurements have been completed, you need to determine the arithmetic average values for each part. Then, if necessary, you can calculate the average value for the entire machine.
Step-by-step instructions for using the device
To use the device correctly, you need to calibrate it. Sometimes sellers say that the device is already calibrated. In any case, you should definitely double-check this.
Special plates are used for double-checking. They contain different layers of paint. If the device shows a different value that does not coincide with the correct data, then it should be reconfigured. As soon as the changes are made, we proceed to the instructions for use.
A thickness gauge can be used to determine the thickness of the paint on the body. Experts recommend starting the procedure from the front wing, gradually moving around the perimeter of the car.
Factory paintwork produces values on average of 90-160 microns (it all depends on the model). The table of values will be given below. If the device shows that in some place the thickness of the paint is greater than in another, then the vehicle was most likely in an accident. You can buy cars after an accident, but with great caution. Using a thickness gauge, it is worth determining the extent of damage.
If the test results differ by no more than 50 microns, then there is no need to worry. This suggests that the driver painted over minor scratches.
If the device produces different values in different areas, and the value exceeds the norm by 300-500 microns, then you should be wary. The car was involved in an accident, and the body parts were puttied.
If the thickness gauge value exceeds 1000 microns, it means that the vehicle was damaged in a serious accident. The items may have needed complete replacement, but the seller put a lot of putty on them and repainted them.
Thus, checking a car with a thickness gauge is a long process that requires care. If the driver is worried that he will not be able to check the car correctly, then he should consult with an experienced specialist.
We figured out how to use a car paint coating thickness gauge; the table will show the approximate values of modern cars.
| Model | The thickness of the paint |
| Toyota Camry | 110-130 |
| Citroën C3 | 90-120 |
| Audi A5 | 100 |
| Renault Logan | 55-120 |
| Lada Kalina | 60-100 |
| Daewoo Nexia | 95-115 |
| Nissan X-Trail | 75-120 |
Before going to the seller to inspect the car, you should study this table. This will help avoid misunderstandings.
Criterias of choice
The first step is to evaluate which vehicles will be measured especially frequently. If the metal contains an admixture of iron, then there is little point in purchasing an expensive professional scanner. For these purposes, it is enough to purchase an electromagnetic paint coating thickness gauge. If the composition of the surface is unknown in advance, then experts recommend using an ultrasonic meter. Magnetic instruments for checking thickness are only needed if the cost of the proposed car is low, as are the verification criteria.
Depending on what set of functions is needed, the appropriate measuring device is selected. If the purpose of the inspection is only to determine various external damage and replaced or painted elements, then you should not purchase an expensive device. When selecting luxury cars, you will have to choose a more precise model - every micron is important here.
Most devices for measuring the thickness of paint on a car depend on the battery capacity. This must also be taken into account when choosing a suitable device.
Restrictions and rules
Before you start working with a thickness gauge, you need to understand that the device has limitations. Let's take a closer look at them.
Unfortunately, not all models work with aluminum. There are quite a lot of body panels made of this material. This must be taken into account when choosing a device.
No thickness gauge can determine the thickness of the coating on a plastic surface. The front fenders of some cars and the bumpers of almost all cars are made of plastic.
Even the most expensive car, recently released from the factory, will show different values when tested with a thickness gauge. That is why you need to know that the thickest paint layer is at the bottom of the doors. The thinnest one is on the roof.
Before the procedure, it is worth studying the factory paint thickness indicators. Japanese and Russian cars are painted thinly (up to 120 microns), while for SUVs the norm is 240 microns.
During the “measurements” process, you need to install the device in different places of one part. The fact is that the door can only be repainted in the corner.
If the hood of the car is covered with a protective film, then the device’s indicators will show high numbers.
It's not just the body parts that need to be checked. It is recommended to pay attention to the struts and spars.
There is no need to be afraid that the car is painted. The fact is that many drivers buy cars on credit. Accordingly, they are asked to apply for CASCO insurance. According to CASCO insurance, any minor scratch is subject to painting.
Instructions for using the thickness gauge
A paintwork thickness meter is a small device, powered by batteries or an accumulator, made in the form of a pistol, but there are other types. It refers to non-destructive testing devices, that is, diagnostics are carried out without damaging the car and its components.
Electromagnetic, ultrasonic, eddy current, laser and other meters are produced.
The method of obtaining data allows you to work with two or more types of materials.
Stages of working with the device
The entire cycle of working with a thickness gauge can be divided into several actions:
- Calibration;
- Measurement;
- Correlation of the results obtained with the basic indicators.
Before starting work, make sure that the thickness gauge is turned on. This can be understood by the display being turned on and the presence of indicators on it. After 20–30 seconds of inactivity, the device turns off to save battery.
After switching on, you need to adjust the thickness gauge. The setup procedure is described in the instructions.
New models of meters make it possible to work with two or more body materials.
Preparation
Before taking measurements, it is necessary to prepare the device itself and the coating being measured. The thickness gauge must be charged and calibrated. Before diagnostics, the surface of the part must be cleaned of dust, dirt and protective materials, such as film. When determining the thickness of the paint through the film, the devices will show a deviation by the value of the thickness of the protection. This value can be ignored if all elements of the car are also covered with film.
Examination
The kit comes with a set of plates that are used to adjust the thickness gauge. They look like small strips of metal painted with paint. The material of the plates corresponds to the metal or plastic that the thickness gauge is intended to work with.
Checking the operation looks like this:
- Release the calibration plates from the film;
- Turn on the device and lean the sensor against the plate;
- Press the “K” or “CAL” key;
- Using additional buttons, compare the indicator with the standard one, for example, 102 microns for plastic;
- Press the calibration button again.
If the adjustment is carried out correctly, the device will be ready to measure the material on which it was calibrated
Depending on the model, it can also be configured to interact with other materials.
Thickness gauge is not a guarantee
If the car has been in an accident, the driver does not always repaint the body. For example, he can install other used parts. If, when restoring a vehicle, the technician selects parts of the same color, the thickness gauge will not recognize the deception.
Another way is to cover the body with armored film. It increases the thickness of the layer. That is why it is important to check it in all areas of the car, and not just around the perimeter.
There is no need to check the car only with the device. At the same time, it is worth paying attention to the gaps between panels, bolts, glass, etc. If you want to be sure of the correct choice, then contact a specialist.