Requirements, rules and regulations that must be followed
Before starting this or that type of work, it is necessary to consult with specialists and analyze what the work procedure should be. All requirements must be studied in SanPin. This applies not only to the choice of building materials, but also to the quality and order of finishing work.
Repair work in a house and apartment should definitely be carried out in accordance with GOSTs Source strs68.ru
The most important thing in choosing a repair stage is compliance with standards and GOSTs. As a result, the owner will be able to achieve some results:
- The amount of time spent on repairs is reduced.
- Financial costs are reduced (if planning is incorrect, more money may be required).
- The budget is planned (all this is done in advance at the project preparation stage).
- Achieving maximum quality.
When repairs are carried out strictly according to the correct stages, the owner of the house can be sure that such a room will be used for as long as possible.
Where to begin?
The order in which repairs should be made should be determined at the very beginning. It can be conditionally called theoretical. It is characterized by a number of preparatory activities:
- Development of a design project. To draw up a design project, you can contact a special organization where experienced professionals will handle this matter. But this is not at all necessary; you can experiment with your own design solutions in your apartment. The project should reflect in detail such aspects as the redevelopment of rooms, the arrangement of furniture, equipment, the location of lighting devices, switches, sockets, and decorative elements. An important role in this project is given to color solutions; right now you should think about what color the ceiling, walls, doors and floor will be.
- Selecting materials and drawing up cost estimates. Based on the finished design project, you can already begin selecting the necessary materials, approximate calculation of their consumption and drawing up an estimate. This document will help track and control financial costs during the renovation process.
Advice: when creating an estimate, do not forget to calculate the amount of materials and the costs for them with a reserve, since there is always a risk of defects, damage during the work, or changes in their cost.
- Drawing up a plan defining the sequence and types of repair work.
- Purchase of materials and missing tools.
Simple rules will help you correctly identify the repair procedure:
- Repairs should begin with the rooms furthest from the front door.
- Dismantling and installation work is carried out in the direction from the ceiling to the floor.
- Finishing work begins only after the communications have been completely completed.
Under no circumstances should you neglect this stage. It is the preparatory measures that will help avoid disappointment in the final result of the entire repair.
USEFUL INFORMATION: How to plaster a wall with cement mortar with your own hands
Stages of repair work
Let's go through the main stages that must be implemented when performing various types of repairs and design.
It is important to plan the stages of home renovation correctly Source remontnik.ru
Project preparation
A renovation project is a diagram that describes all the details and nuances of the repair. It provides for the future design, quantity of building materials, their quality, size, and company. In general, the preparation of the project will be based on several significant stages.
- Precise layout of the room, taking into account every free centimeter after the finishing work has been completed.
- Location of communications (sewage drains, water risers, as well as other plumbing equipment).
- Placement of electrical equipment (for example, if it is a bathroom - boiler or washing machine, kitchen - microwave, refrigerator, multicooker and others).
It should be noted that the presence of every part, any equipment and even accessories will allow you to avoid mistakes in calculating the amount of materials and costs.
So where to start first?
Experts recommend starting with dismantling. First, the walls and partitions are freed from old building materials, then it comes to the floor. There is another opinion on this matter: sometimes they start by preparing the floor (tearing off the old coverings). But, this is only in cases where the materials on the partitions are too old and it is not possible to remove them immediately (you have to wet the walls and let them soak in moisture to make dismantling easier). In order not to waste time, at this moment they begin to work on the floors.
Floor repairs should begin with the dismantling of old finishing materials Source company-megapolis.rf
As for the start of repairs, the situation here is a little different. For example, if the floors are not very level and there is no horizontal plane, then a concrete screed is made to level the surface. This is done immediately after dismantling work and only after complete hardening do they begin to level the walls. In case the horizontal is still respected, then the initial work is carried out on the walls.
Preparing formwork for flooring Source pol-exp.com
Dismantling
Dismantling work should also be carried out in a certain sequence, observing the rules of your own safety. The entire dismantling process is based on the following steps:
- turning off the electricity and removing all kinds of electrical equipment (sockets, switches, lamps);
- removal of furniture and household appliances (if installed in the room), but if there are built-in items, they will have to be protected from dust and dirt, damage;
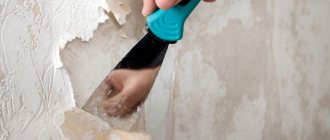
- removing old finishes. To do this, you will first need to remove the ceilings, then clean the walls, and only then start tearing off the floor covering;
- performing redevelopment, which also includes gating walls for laying new wiring;
- dismantling of doors, partitions, windows if a complete redevelopment of the premises is planned, as well as replacement of windows;
- periodic garbage removal. This procedure needs to be done more often, as waste from old building materials accumulates.
Remember that dismantling partitions in a room should be done carefully, after first making sure that they are not load-bearing structures. Otherwise, not only the room in which the renovation is being carried out will be at risk, but also the entire structure.
Dismantling of a house can begin with the elimination of walls Source rezka-prof.ru
Padding
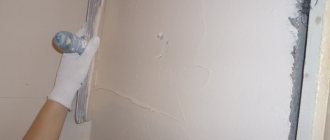
After all the dismantling work is completed, the question again arises, whether to do the floor or the walls first. Here it is recommended not to start leveling the walls right away. It is advisable to use a primer and treat its ceilings, slopes, and walls for better adhesion of starting finishing materials.
It is convenient to prime the floor before rough finishing with a large brush Source kraski-net.ru
If the floors are in critical condition (there are potholes, unevenness, or chipped concrete), then the floors are also treated with a primer at this stage.
Plaster and screed
Everything here is strictly definite. If the walls are fairly smooth and do not require special treatment, then proceed immediately to the concrete screed. If the partitions leave much to be desired, then the first step is to plaster them.
It is more convenient to plaster walls using a spatula and a trowel at the same time, which will serve as an auxiliary Source alprom74.ru
After installing windows, there are often holes left on the slopes that need to be properly repaired. For this purpose, you can use not only cement mortar, but also sheets of drywall. Therefore, before you begin preparing the partitions, you will first need to work on the window opening.
After this, you need to start plastering the walls. The first layer (rough) can be made using a cement-sand mixture. Next, puttying is carried out and checking that the plane meets the building level.
Leveling the plaster can be done using a provil Source materik-m.ru
Installation of window sills
The installation of window sills must be approached only after making sure that the plaster in the window area has already completely dried. This is especially true in cases where the window sills are wooden, because they tend to strongly absorb moisture.
Installing a plastic window sill after performing rough work in the room Source Yandex.Zen
Pastel colors
The absolute compatibility of everything with everything is the main advantage of pastel colors. This is a rare case where you can harmoniously combine 3-5 different colors at once. Due to the fact that they are muted, the decoration does not seem flashy and overloaded.
Pastel interiors are the atmosphere of French Provence and the eternal celebration of spring. They make the room visually lighter, lighter, airier, without pompous seriousness. This is a good choice for a bedroom, kitchen or girl's children's room.
Choose bleached wood laminate flooring or warm sand and walnut shades. It is advisable to make the ceiling a little lighter than the other surfaces - this will make the room seem larger and more spacious.
On the walls you can combine several colors at once: pink with lilac, blue with beige or lavender with turquoise. Use paint or companion wallpaper, alternate stripes, divide the surface in half or create accent walls. But then it is better to take neutral and monochromatic furniture, without unnecessary decor.
In the kitchen, the floor, laid with a mosaic of multi-colored small tiles, looks interesting. It can be mirrored onto an apron above the work surface. Make the remaining walls one neutral beige or milky shade.
In fairy-tale children's rooms, multi-level ceilings that combine several colors look interesting. Combine fancy shapes from glossy canvases or make a blue ceiling “under the sky.”
How to choose wallpaper for furniture: useful tips (90 photos)
Carrying out cosmetic repairs in an apartment: what comes first - the floor or the walls?
Cosmetic renovations in an apartment do not require large expenses. Of course, if all the points, without exception, are performed correctly. Below is a table of the step-by-step implementation of cosmetic repairs in the apartment. It should be noted right away that in such a room they try to do everything from top to bottom. The actions are carried out as follows.
| Stage | Description of work |
| Ceiling finishing | As usual, it begins with dismantling if the repair is performed a second time. Then priming and puttying are carried out to level and remove defects, and then puttying with a finishing composition. After this, you can begin finishing. |
| Wall treatment | This process includes all work on the walls: from removing the old finish, if it is secondary, to updating the cladding. This process necessarily includes priming, which improves the adhesion properties of the material to the base. |
| Electrical installation | This applies to sockets and switches, since replacing wiring is a major type of repair. The process requires strict consistency. |
| Working with windows and doors | They must be put in order, their work adjusted, and, if necessary, polished. The latter case is only possible if wooden window frames are installed. PVC double-glazed windows are not touched. |
| Flooring installation | If the old facing material has been torn off, a new one is laid on the base without preparing a concrete screed. Cosmetic repairs only involve reworking the cladding. |
It is important to follow this sequence when renovation work is carried out in the apartment. This minimizes time and financial costs.
Important! The finishing stages may vary depending on the type of room that needs restoration.
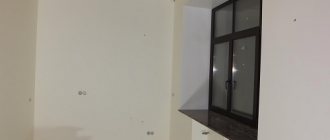
Cosmetic renovation in a small apartment Source spetsstroy37.rf
Dismantling
Once you have everything planned, it's time to dismantle. If you started cosmetic finishing, then everything is simpler. They tore off the old wallpaper and put up new ones. But we are not here to discuss wallpaper. Our plans are more global, which means:
—
We dismantle old floors;
— remove the tiles that have lost their luster;
— we demolish unnecessary partitions;
— moving doorways to new places;
— dismantling old window frames;
— we remove the painted baseboards to the side.
Now that you have gotten rid of everything unnecessary, you can move on to the next step of our plan “sequence in apartment renovation: floor, walls, ceiling.”
Is the sequence of work the same for each case: we analyze possible deviations from the norms
Sometimes situations arise when you have to deviate from generally accepted algorithms. Why is this happening.
- If you plan to use a suspended PVC ceiling for a room, you can first finish the walls and only then start decorating the ceiling surface.
- If you need to treat the walls with wallpaper in order to update them, you just need to change the canvases to new ones. Accordingly, priming, puttying and many other preparatory works can be avoided. But this outcome is only appropriate if the plaster on the walls does not burst or fall off.
- It happens that you have to break the sequence of processing the walls and ceiling. If there is a significant violation of the integrity of the foundation in the apartment, or an undesirable slope is observed, it is necessary to begin repair work by eliminating this error.
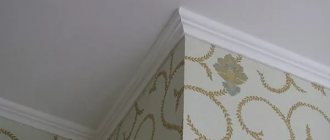
The very last step is to install moldings, platbands, baseboards, baguettes and other fittings. This is the only type of work that cannot change the sequence.
Communications
The purpose of repairing communications is to perform such work as:
replacement of heating radiators;
- installation of fresh electrical wiring;
— installation of air conditioning;
— installation of water supply pipes.
Note! If your goal is to build new partitions, they must be built before laying communications. This way you won't have to break anything.
Regarding email. wiring, then it is stretched in the cavities of the profile, if we are talking about a plasterboard structure. In the case where the wall is brick, grooves are made for laying the wiring. The same recommendations apply to the piping and heating system.
Let's move on to the next step.
Overhaul and its sequence
Major renovations are one of the large-scale processes that are carried out in a house. Therefore, we can safely say that after dismantling is completed, it is necessary to first begin building the walls, and then work on the floor. But, nevertheless, we suggest that you understand in detail what is being produced and in what sequence. All data is in the table below.
| Stage | Description of work |
| Planning and drafting | This process cannot be avoided, since with its help you can accurately determine which materials will go where and how many of them will be needed to carry out a major overhaul. This stage necessarily includes a consultation with a designer. He must evaluate the room with his own eyes and suggest which layout is best to implement. All this is prescribed in the project. You shouldn’t skimp on calling a professional if you don’t have the skills to create the right interior yourself. |
| Preparation | This includes dismantling old partitions, removing debris, and removing old building material. Please note that new walls are planned first or, conversely, they are removed. This issue is being coordinated with the BTI. |
| Selection and purchase of building materials | Again, they should be recommended by a professional. For example, if this is floor tile, then it is advisable to lay it out first, and then adjust the walls. This often happens when decorating a bathroom or kitchen. Before purchasing, be sure to determine the type, shade and texture. If there is a preference for the manufacturer, then attention is also paid to this. |
| Installation of windows and doorways | The main thing is to install the windows first, and the door panels can be postponed until later. Of course, if they are replaced with a frame, then the installation is carried out even before the process of leveling the slopes and plastering the walls. Why is it important to install windows in the first place: firstly, deformation of the walls and slopes occurs, and secondly, all repairs should be carried out only indoors. |
| Real redevelopment | This involves the installation of new walls and partitions made using solid building materials: brick, aerated concrete, white stone. Please note that you can start installing partitions immediately after the dismantling process, and then start working on the windows. |
| Engineering work | At this stage, communications are installed, laid in the floor screed and wall grooves. Everything is done strictly before the leveling of all coatings begins. |
| Working with the floor | In a major renovation, after installing all the walls and communications, the floor is screeded using a cement-concrete mixture. We told you above which brand to choose. It is considered more reliable and has good operating properties. |
| Rough finish | Rough finishing is carried out in the direction from bottom to top. This includes leveling the flooring and walls to the ideal level. For the floor, use a self-leveling concrete screed (poured in a thin layer so as to eliminate the slope error). The walls are plastered with sand added to the solution, and then puttied. |
| Entrance door installation | This task is performed second to last, after first removing the old door. There is no need to worry about broken slopes; they will still have to be repaired. After installing and fixing the panel using polyurethane foam, it is necessary to wrap the door in film to avoid damage and dust accumulation in the cracks and niches of the canopies. |
| Finishing | The final finishing begins with the finishing of the floor covering, and the whole thing is completed with the ceiling. When finishing the walls, they try to decorate them in the second stage, but deviations are possible for each individual case. |
All that remains is to install plumbing fixtures, hang door panels in each room, and install heating radiators. Everything ends with designer decoration and addition of furniture.
Major renovations in an apartment with the demolition of partitions Source 1nsk.ru
Natural colors
Nowadays, naturalness in all its manifestations is in fashion: in materials, shapes and colors. Eco-style interiors combine all shades of wood and green. Other natural colors are used less frequently: yellow, red, blue, sea wave. Complete the range with black if you need contrasts, or white if you need to add light.
A dark wooden floor with beige walls and a white ceiling looks good. They are combined with gray furniture and bright green textiles. And a corner with your favorite geranium or succulent seedlings in colorful clay pots will add freshness and life.
Wooden wall panels to match the laminate will help create the atmosphere of a country cottage. Mediterranean style with rattan, woven floor rugs and turquoise walls also fits into the natural palette.
Hallway design 2021: fresh ideas and trends (photos)
How to protect walls
Installing a frame for a suspended ceiling is a fairly dusty process that can lead to contamination of the wall covering. To avoid this, the walls can be covered with a protective film, and cement dust can be collected with a vacuum cleaner during drilling.
The high temperatures required to install PVC ceilings can cause the wallpaper to peel away from the walls. Therefore, installation of ceiling structures should begin after the wallpaper paste has completely dried. This occurs approximately on the fourth day after pasting, subject to normal temperature conditions.
If you install ceilings yourself, the negative effects on the wall covering can be minimized by alternating the process of installing the ceiling and finishing the walls. It looks like this:
- Preparing walls for wallpapering or painting.
- Fastening the frame for a stretch ceiling.
- Direct pasting or painting of wall surfaces.
- Installation of ceiling sheet.
USEFUL INFORMATION: How to paint a ceiling with water-based paint correctly and without streaks
This sequence of work helps ensure that the molding fits tightly to the wall, eliminating contact between wallpaper or painted walls with cement dust, and the ceiling sheet with paint and glue.
A special case - suspended ceilings
Today, stretch ceilings have become extremely popular and widespread. Their installation is possible in any room, they reduce renovation time and look simply excellent. However, the installation of tensile structures makes some adjustments to the usual apartment renovation at the stage of finishing work. The rule about the direction of repairs from top to bottom, or from ceiling to floor, does not work in this case.
Most experts strongly recommend installing the canvas after finishing the walls. There is a completely reasonable explanation for this advice. Installing the ceiling after finishing the walls will protect it from the negative effects of various primers, glues and paints, which can leave indelible stains on the ceiling canvas. The ceiling material is quite expensive, so replacing it will cost much more than replacing or repairing wall coverings.
Psychological approach to apartment renovation
To implement this TOP 7 stages of preparation for repairs (which are listed above), you need to prepare psychologically and have:
- Determination. Stop being afraid and take the first step! Then the second and third. And then everything will go like clockwork.
- Interest. Even if you don't have enough money, there are things you can save on. For example, cleaning the apartment before renovation on your own. Or create some decorative elements yourself. Sometimes, if you have a little experience, you can do the rough work yourself. Although this requires specialized knowledge and skills.
- Logic. You'll have to evaluate what needs replacing now and what parts could last just fine for another year or two.
- Tendency to delegate and abstract. This will be very useful. There will be many advisers among relatives, friends and acquaintances. You will have to learn to “move away” from their opinions and trust yourself. That's the minimum. Or leave everything in the hands of professionals. In this case, you save several vital resources: money, time, nerves.
We act according to the scheme
The movement of finishing the apartment should be carried out from top to bottom: ceiling → walls → floor. This way you won’t have to worry that the part of the repair that has already been completed will be spoiled or damaged. However, there are some amendments to this course of events.
Floors. If you intend to make a new floor screed, then your path will begin from the floor, and not from the ceiling. There are two ways:
Leveling the floor using cement mixture
Fill a self-leveling self-leveling floor
The first option is cheap and labor-intensive, the second is more expensive and simpler. If possible, use the second one. You will not regret. The self-leveling floor will dry in a couple of weeks.
If the screed will not be made, follow the above scheme.
Walls. For leveling you will need plaster. The number of layers applied depends on how smooth the walls are. In turn, the time spent on leveling depends on the number of layers of plaster.
The second method is drywall. Installs easily and quickly. It is usually puttied in two layers. The first is the starting one, the second is the finishing one. It is easy to install communications and cut holes in plasterboard structures. For example, under sockets. In addition, such walls will be perfectly smooth. The only disadvantage of a plasterboard block is that it takes up part of the area.
Ceiling. The principle is the same here. Either you putty or use drywall for leveling. Pros of gypsum:
it is very easy to install lighting (spotlights, LEDs);
- the ability to make figured ceilings.
Another point that stands out from the basic scheme of “sequence in repairing floor, walls, ceiling” is a suspended ceiling. This part is best left for last. You can design boxes for suspended ceilings initially, during rough work. But you will mount it at the end.
Is the dirty work done? Start cleaning.
After installing the door frames, proceed to painting and pasting. When the cosmetics are ready, we finish by assembling the baseboards, sockets and other decor.
Floor finishing
Finishing the floor, despite the fact that its initial stage is similar to finishing the ceiling and walls (that is, leveling and heat and waterproofing are implied), is nevertheless somewhat different. After all, the floor is that very part of the living space that is subject to constant loads, which means that the requirements for floor finishing are more stringent, although these requirements are still based on the same practicality and beauty. The variety of floor coverings, oddly enough, does not make the choice easier, but rather complicates the choice. In fact, what is better - laminate or piece parquet, linoleum or tiles, parquet boards or carpet, or maybe self-leveling floors?
Block parquet is the king of flooring. Beautiful, natural, expensive, requiring installation by a professional - parquet is good, but not everywhere. They can decorate, for example, a living room or hall, if, of course, the chosen interior style allows it. But its care must be appropriate to its status, and its practicality is not at such a high level (it is not friendly with water, it warps, chemically active substances insult its dignity).
Another thing is laminate. The Swedes who invented it know a lot about practicality and beauty. Laminate, stylized as wood and similar in appearance to parquet, is covered with such a wonderful film that it does not care about most mechanical damage that can destroy parquet. Laying laminate flooring is easy, simple, quick, and virtually cost-free. The service life is decent, especially if you lay industrial laminate series. And in general the material looks very, very decent.
Ceramic tiles have been no less popular lately. It has safely left the plumbing area in our homes and turned into a wonderful floor covering that brings its share of aesthetics and practicality to the interior. Corridors, dining areas, kitchens and other high-traffic areas readily accept tiles as flooring.
Less expensive floor coverings include linoleum and carpet, but they also have their fans. The time-tested practicality of linoleum is not in doubt, and the softness of carpet and excellent performance, a variety of colors and inexpensive cost allow linoleum and carpet to still be popular.
Types of ceiling surfaces
The entire process of finishing a room, as a rule, starts from the ceiling. Not so long ago, owners of houses or apartments did not have a large choice of materials with which to decorate this part of the room. Most often, whitewashing, painting (mainly in light colors) or wallpapering were used for these purposes. But today the situation has changed dramatically. Modern designers are not afraid to experiment with ceiling design and offer quite bold and original ideas.
Currently, the following types of ceiling surfaces are especially popular:
- suspended plasterboard ceilings;
- stretch ceiling;
- all kinds of paint colors;
- original decorative plaster;
- wallpaper;
- various ceiling panels;
- a combination of several previous options in one room.
Let's talk about each of the materials described above in more detail. It’s worth starting with drywall, which appeared not so long ago, but quickly managed to gain popularity among designers and their clients. Regarding the components of such a ceiling, everything is simple here - the suspended surfaces are made from high-quality gypsum, which in turn has a double-sided lining with cardboard. With this solution you can realize even the most complex design idea. In addition, plasterboard ceilings have several quite important advantages:
- Possibility of installation even on untreated and unplastered surfaces. Thus, it is not necessary to prepare the ceiling for installation of drywall.
- The ability to hide all kinds of cords and pipes that are located on the ceiling.
- The formation of a perfectly flat and smooth surface without the slightest flaws, which can be difficult to achieve with ordinary whitewash.
- Compliance with all fire safety requirements. Drywall is a non-flammable material, so it does not ignite and can be placed in any room.
- Modern technologies use special auxiliary substances to ensure absolute waterproofness of the coating.
- Environmentally friendly. The finished product is absolutely safe for both the environment and human health. Therefore, you can safely install it even in a children's room.
- Providing a field for experiments. The thing is that with the help of gypsum boards you can create multi-level ceilings, decorate niches and arches, thereby adding exclusivity to your room.
- This option is suitable for those who plan to install built-in lighting in the room. You can install light bulbs inside the panels, and hide all the wiring under the panels themselves.
- In some cases, installing drywall is so simple and convenient that you can handle it yourself without the help of professionals.
- The possibility of combining this type of coating with other types of materials for ceiling surfaces.
- Affordable price and a fairly wide range of shades.
However, it should be noted that such panels have several disadvantages. For example, despite the use of water-repellent materials, drywall is still not recommended for installation in rooms with high humidity. Therefore, it is not suitable for finishing a bathroom or laundry room in which the drying area is open. Another disadvantage of the coating is its fragility. Such material is not able to withstand heavy loads and can easily deform from mechanical damage.
Another common type of ceiling design is suspended ceilings. They are divided into two main classes - fabric and made from a special film. Using this method of finishing a room, you can achieve a perfectly flat surface.
In addition, stretch ceilings have several advantages:
- hide all wiring and pipes located on the ceiling;
- can be placed even on an imperfectly flat surface. On the contrary, most often it is thanks to stretch ceilings that it is possible to achieve smoothness and symmetry when facing the space;
- like the previous type, this product is waterproof;
- however, if we again compare it with a plasterboard panel, this material can withstand stronger loads, which can be useful if the apartment is flooded by neighbors above;
- The environmental friendliness of the material allows it to be safely placed in residential premises. It does not harm nature or humans and does not cause allergies;
- Installation of the product is completed quite quickly. In addition, after installing such a ceiling, there is no excess dust or dirt in the room, compared to many other materials;
- a wide range, which includes not only a variety of shades, but also the ability to apply any pattern or pattern at your discretion;
- very affordable price.
But do not forget that, like any other room decoration option, suspended ceilings have disadvantages, which in a given situation can become significant. For example, it is almost impossible to install them yourself. Since laying such a film requires special equipment, which is quite difficult to obtain. In addition, due to the components of the product, after installation, a specific odor may be present in the room for several days.
Wallpaper has been considered one of the most famous methods of ceiling cladding for many years. However, if once upon a time the priority was exclusively light (most often just white) colors, now on store shelves you can find a large number of high-quality wallpapers, varied in both color and texture. You can choose both light pastel colors and bolder bright colors for your room.
Among other advantages, we highlight the following:
- Wide range of colors and patterns.
- Possibility of combining two different options.
- Some models can be repainted, thereby changing the atmosphere in the room.
- Easy to install. Wallpapering requires some skill, but once you get the hang of it, you can easily do the installation yourself.
- Affordable price, which does not affect the quality in any way.
- Water resistance, which is inherent in some collections.
However, this option is not suitable for all rooms. Owners of houses whose windows face the sunny side should take into account the fact that over time, wallpaper may lose color from sunlight. In addition, not all brands produce water-repellent series, which is also important to consider at the selection stage.
Along with wallpapering comes painting the ceiling. This finishing method is also quite traditional. As in the cases described above, stores today offer many shades of paint with which you can create a unique design for your home. But painting can be problematic, especially if there are even minimal irregularities on your ceiling.
This option requires a perfectly leveled surface. Otherwise, the result will be sloppy and even slightly “dirty.” Therefore, before purchasing cans of paint, you need to make sure that the surface is smooth by correcting all defects with plaster.
Other methods of decorating the ceiling include special wooden panels, which have been popular in recent years. They are fairly easy to install, so you can do it yourself. There are many materials from which such panels are made - natural wood, fiberboard, chipboard, plastic or even glass.
All of them are made from natural ingredients, so they are absolutely environmentally friendly. Their only drawback can be considered the high price of the products. Compared to previous options, this ceiling decoration (depending on the chosen material) can significantly hit the budget.
Drywall (GKL)
It is rightfully considered one of the most popular materials for leveling walls, ceilings and floors, installing interior partitions and even decorative elements such as arches, columns, spheroids, multi-level ceiling coverings, etc. The main component of plasterboard sheets is gypsum filler and this determines many of the positive qualities of the building material. Thus, drywall is chemically inert, its acidity is approximately equal to the acidity of human skin, it does not contain and does not release chemical compounds harmful to humans into the external environment. A standard board consists of 93% gypsum dihydrate, 6% cardboard and another 1% surfactants, starch and moisture.
Thus, the fragility of the panels complicates their transportation and loading and unloading operations. For the same reason, gypsum board cannot withstand significant physical stress and is not recommended for leveling floors. Suspended plasterboard ceilings can withstand a weight of no more than 4 kg per square meter, while suspended ceilings can bear a load of more than 100 kg per square meter.
Drywall
A variation or more modern modification of a simple sheet of plasterboard is painted or laminated plasterboard, gypsum vinyl or gypsolam - colored plasterboard with a vinyl coating. A fundamentally new material that has an initially exclusive appearance with a wide selection of decor. It is used for interior wall cladding, for covering window slopes, creating partitions, showcases and exhibition shelving, without additional finishing.
Laminated plasterboard, gypsum vinyl or gypsolam - colored plasterboard covered with vinyl coating
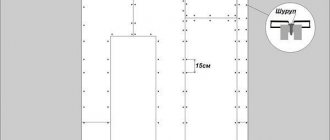
These environmentally friendly non-flammable panels are a gypsum board covered on both sides with special cardboard. They have ideal geometry and are used for constructing internal partitions and lining ceilings. Supplied in sheets 2700 (3000) x 1200 x 12 mm. Special grades of plasterboard are produced for wet (bathroom) and fire hazardous (wall near the fireplace) rooms. They are painted in “signal” colors - red and green. There is also plasterboard of increased plasticity (thickness 6 mm, width 900 mm) for covering rounded walls. Sandwich panels are made from plasterboard with a heat-insulating layer of polyurethane foam (up to 50 mm). They are already used for internal cladding of external walls without subsequent insulation and vapor barrier. This significantly reduces construction time.
Advantages of drywall:
- environmental and sanitary safety;
- easy to process: cut, drill;
- does not burn, but is destroyed when heated significantly;
Disadvantages of drywall:
- low strength, fragility;
- greater vulnerability to moisture, even of a moisture-resistant variety;
- does not tolerate low temperatures and significant temperature changes;
- Suitable for interior decoration only.
MDF
Medium density wood board or dry pressed fibreboard. MDF from English (Medium Density Fiberboard). It is made from wood chips, ground into flour by dry pressing, at high temperature and pressure with the addition of lignin, which is found in natural wood. Lignin makes this material environmentally friendly and resistant to fungi and microorganisms. MDF boards come in thicknesses from 3 to 30 mm and are laminated with plastics, varnished or veneered. In terms of moisture resistance and mechanical characteristics, MDF is superior to natural wood and chipboard. MDF is also 2 times stronger and holds screws better. MDF is used for finishing premises, for example, in the form of wall panels or laminated flooring - laminate, in the production of furniture, speaker cabinets. MDF has a homogeneous structure, is easy to process, and very durable.
MDF Medium Density Wood Board or Dry Pressed Fiberboard
Advantages of MDF:
- fire resistance;
- biostability;
- high strength;
- holds screws better than chipboard;
- moisture resistance is higher than that of chipboard;
- wide choice of colors and patterns thanks to film and veneer coating.
Disadvantages of MDF:
- burns with the release of toxic smoke;
- Dust-like sawdust generated during processing and sawing of slabs is harmful to health.