With the passage of time, things often become unusable. This also applies to interior doors, which also deteriorate or have an unpresentable appearance. You can restore an old door leaf yourself in several ways. It is worth considering the type of material, degree of wear and financial capabilities. A door made of veneer can be easily confused with products made of natural wood, but the former are much lighter. Considering the manufacturing technology, restoration will not cause problems.
Painted doors
Stages of work
Painting is divided into two main stages: preparation and painting itself.
Preparation
It will be more convenient to work with the door leaf removed. Horizontal surfaces are less susceptible to the formation of paint smudges and sagging.
Initially, the canvas is removed from its hinges and placed on placed stands (stools are possible). After that, all available fittings are removed from the doors: hinges, handles and locks.
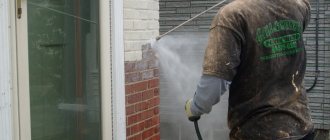
All previous layers of paint and primer must be removed from wooden doors. To do this, it is best to use an industrial hair dryer, or an angle grinder with a grinding attachment. All surfaces of the canvas are cleaned to bare wood.
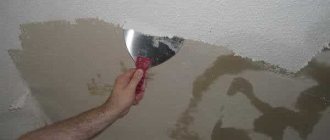
In this case, you need to examine the door for dents, chips and other effects. If there are minor damages, they can be sanded; larger ones can be repaired with wood putty, which, after drying, is leveled with the main surface.
Before painting an MDF interior door, it should also be prepared.
Layers of the previous coating from such material are removed either by heating with a hairdryer or with a solvent. Sanding the MDF surface can be done using fine-grained sandpaper and only by hand.
After preliminary preparation, they proceed directly to staining.
Further care
It is worth using interior doors carefully, keeping them clean, and avoiding mechanical damage. There is a list of products that do not need to be applied to this door leaf:
- hard abrasives;
- liquid cleaners containing active chemical components;
- iron scrapers.
With proper care, the door leaf will look beautiful for a long time.
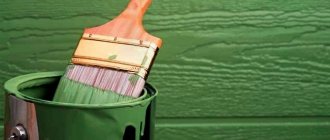
How to choose the right paint
After determining the type of door, you should proceed to choosing a coloring composition. Here it should be immediately noted that high-quality paint does not come cheap. Of course, some stores offer discounts on products from certain manufacturers, but even in this case the cost is higher than the market average. Painting products can be transparent or opaque. The first category includes varnishes, glazes and enamels.
The composition of the varnish emphasizes the natural beauty of wood, while protecting the product from a humid environment and other external factors. Note that varnishes can be tinted or tinted - they give the surface a certain shade.
Opaque compositions intended for painting interior doors include various types of paints.
Nitro paints are stable compositions available on the market in a wide range of colors and shades. However, do not forget that these are toxic dyes that can release harmful substances into the surrounding space during the evaporation process.
Acrylic paints are made on a water-dispersion basis, are quick-drying and do not emit a characteristic odor. Disadvantages include low wear resistance and overpriced.
Alkyd enamels are the best option, which after drying forms a durable coating that is neutral to almost any external influences. However, after painting, the smell of paint can be felt in the premises for 1-2 days, so children and people suffering from bronchial asthma or allergies should be removed from the apartment during the drying period.
Knowing these features, you can choose the best option for painting an interior door.
What composition should I use?
The choice of varnishes is huge. The compositions are classified into several groups according to the type of base. To choose a paint coating, use the following tips:
- A good option is varnish for interior work. If there is high humidity in the room, then it is better to choose paints and varnishes for outdoor use.
- Pay attention to resistance to sudden temperature fluctuations.
- Consider the interior style. For example, matte varnish is suitable for Provence style rooms.
- Surface quality. When varnishing interior doors, gloss will make defects and unevenness more visible, while matte will disguise it.
Attention
It is necessary to check the selected composition for compatibility with the primer. Otherwise, the combination of inharmonious materials will lead to cracking or final damage to the canvas.
Next, popular paints and varnishes, their advantages, features and disadvantages will be considered. Which varnish to choose is decided by the person himself, based on personal wishes and financial capabilities.
Alkyd
The varnishes are made with solvents; interior doors will have an off-white, rather yellowish tint.
Advantages:
- strength;
- moisture resistance;
- quick drying;
- acceptable price.
Minuses:
- unpleasant pungent odor;
- rapid fading in the sun;
- contains harmful substances.
Nitrovarnishes
Acetone and nitrogen compounds act as a base. The substance is transparent and can preserve the natural shade of wood. However, nitro varnish cannot be used in living rooms.
Pros:
- low price;
- strength;
- durability;
- short drying time - up to 1 hour.
Flaws:
- toxicity;
- flammability.
Important
It is prohibited to use this composition in homes where children and pets live.
Polyurethane
The basis is polymers with long molecules. When coated, this varnish changes the shade of interior doors to a darker one.
Advantages:
- nice smell;
- no toxicity.
But polyurethane varnish is applied only to a previously prepared primer layer.
Acrylic
Manufactured on a water basis. Eco-friendly, suitable for use in living rooms.
Pros:
- quick drying due to water evaporation;
- resistance to sunlight;
- mechanical damage.
Disadvantages - fragility.
What will you need for work?
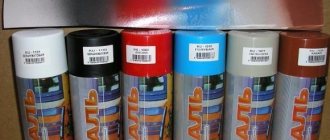
Has the glossy surface lost its distinctive shine, dulled and lost its original appearance? Then you need to take care of painting the aged piece of furniture. To do this, you just need to apply a new coating. Let's start with what materials and tools you will need:
- acrylic based paint;
- glossy or matte varnish;
- roller and brush for applying paint;
- scraper and metal brush to remove the old layer of varnish;
- sandpaper (or sanding machine);
- primer solution (for repainting wood surfaces);
- solvent and detergent;
- protective composition for wood (antiseptic).
Furniture decoration
Decor using decoupage method
Painting using an interesting decoupage technique can radically change the appearance of furniture elements. The price of materials for implementing this method is low, but the visual effect is simply amazing.
To implement such coverage you will need:
- PVA or specialized decoupage glue;
- Scissors;
- Three-layer napkins with a pattern printed on their surface. You can replace napkins with fabric, photographs, postcards, specialized cards or other images.
How to treat a wooden door?
Wood has a big disadvantage - it absorbs moisture. An expanded sash cannot be closed or opened normally. To prevent a wooden door from swelling from dampness, before painting it must be treated with a protective impregnation and preparatory measures must be carried out.
- The process begins with removing the sash from its hinges and dismantling the protruding fittings. The canvas is laid on a horizontal surface, sanded and thoroughly cleaned from dust.
- When using paint, the clean surface of the wooden door is impregnated with a primer. The first layer is allowed to dry and the second treatment is performed.
- The panel door is painted with a roller, and the panel door with a brush. Depending on the structure of the material, 2 to 4 layers of enamel are applied.
- If stain is used instead of paint, the surface of the wooden door is not primed. The door leaf is simply sanded and cleaned of dust. The stain itself is a protective impregnation that penetrates deeply into the wood.
A wooden entrance door needs to be treated especially well, since outdoors the door is constantly exposed to moisture and temperature changes.
Work order:
At first I wanted to paint it like this without removing the door, then I realized that it would be inconvenient. So I took a risk. and took it off. It turned out not to be difficult. True, worries about how to put them back on were present until the last moment. In the end, I also screwed it myself; I didn’t have the patience to wait for my husband))).
I pulled out the built-in lights and wrapped them in a suspended state with masking tape. The same tape was used to protect the walls on the sides of the cabinet, the floor, and the mirrors on the doors. Prepared the workplace. I decided to paint it. on the bed)))! I covered it carefully with polyethylene. And I have never regretted this choice. The bed was large and high, everything fit, there was no need to bend over and crawl on all fours. I prepared approximately equal stacks of books and wrapped them in cling film. They are needed as substrates so that the doors can be lifted and painted as if suspended; the painted edges will not come into contact with a flat surface.
Stage 2.
I sanded all surfaces that needed to be painted. It is necessary to sand lightly, without fanaticism, with the finest sandpaper. Light circular movements. Purpose: to create roughness without removing the laminated layer. If there are dents and scratches, they should be filled with putty at this stage. After sanding, thoroughly wipe all surfaces with degreaser. It will remove dirt, grease marks, and everything that can disrupt the adhesion of the primer and paint.
Stage 3.
Primer. I went through hard-to-reach places with a brush, the rest with a roller. A thick layer is absolutely not necessary; it must be covered with primer without drips and in a thin layer. Uneven coloring is not a problem, but there should be no gaps. I didn’t prime the rattan inserts; the paint applied well to them anyway.
They are easy to paint - just roll them with a roller; with a brush it is more difficult not to go beyond the edges. Wipe off any blemishes immediately with a cloth. Each layer was dried, as recommended, acrylic dries in an hour and, in principle, you can carefully turn it over and paint the door on the other side.
Stage 5.
I assembled the closet. I screwed the doors and handles. I removed the masking tape and cleaned everything up. At first I planned to keep the doors open for two days, I was afraid that they would stick. Nothing like that - you can close it right away.
Mirror.
Important! Acrylic paints dry quite quickly “touch-free”, but polymerize for at least a month; with a primer the process can take even longer. The painted product can be used almost immediately (or it’s better to wait 2 days) and even wiped with a damp cloth
But within a month, the coating remains very vulnerable; it must be handled carefully, not scratched or rubbed with force. If shelves or horizontal surfaces are painted, then it is better not to immediately place things on them that may “stick”, wait until the paint “sets”
Although I immediately put everything I needed on the chest of drawers, nothing stuck).
Here you go. The work is labor-intensive, but I was pleased with the result. The paint job ends up looking no worse than the factory paint, no brush marks are visible. It holds up well too. I haven’t tried scratching, I use the furniture as usual. But usually I don’t scratch it))). Although I will conduct an experiment in a month. The room has been pretty updated)
Alas, the photos after compression leave much to be desired, in fact the colors are brighter and cleaner, but this is not so important
If you also want to redo furniture and have questions, write and I will answer. And if such a rework seems complicated to someone, I assure you that it is not, labor-intensive - yes, but quite doable without any experience. You can just start with internal, unnoticeable parts, or with small furniture, a chair, for example. The rework took three days. At the same time, I managed to cook and... suffer from bronchitis + my leg is still slightly lame after the cast. The “disabled painter” was able to paint, which means you can too))).
Color selection
Choosing the color of the door will help it become a bright accent of the room or, on the contrary, merge with the interior
It is important to achieve harmony with the overall appearance of the apartment. The shade of the canvas should be consistent with the furniture and wall decoration:
- For an interior in warm colors with wooden furniture and parquet, doors made of solid wood or imitation natural wood are suitable.
- For rooms in cool colors - plain, plain-colored options.
- A white door will fit perfectly into any room, as this color goes well with any others. This statement is true if the color of the door matches the shade of the ceiling trim and the color of the window frames.
- If the room has linoleum or carpet, the door leaf should be combined with the floor covering.
- You can create a successful ensemble by painting the door block in colors that match the textiles on the windows or furniture upholstery.
- A dark door leaf will become a contrasting element of an interior decorated in light colors.
- For bedrooms and children's rooms, pastel shades are recommended when painting. The color of the doors should be different from the wallpaper, darker or lighter.
- If there are antiques in the house, the ideal solution would be a door painted “antique” with a patina effect.
Patina can be applied with the following compositions:
- acrylic - the richest range of colors;
- bituminous, giving a dark brown tint;
- wax, made in natural colors - brown or bluish-green;
- shellac - a palette ranging from gold to red.
Methods for painting a veneer door
First of all, the question of the advisability of changing the color of solid wood is decided. To choose a method for finishing a door leaf, it is necessary to evaluate the main aspect - the degree of its deformation.
The presence of small defects in the form of depressions (scratches, cracks) can be eliminated using varnishing. At the end of the process, the canvas is rubbed with a restoring polish. If there are one or several small scratches, you can get rid of them locally by choosing a varnish of the appropriate color.
It is not always possible to choose a model of interior doors in the color you are interested in, or the selected shade stands out too much in the interior combination. What to do in this case? Few people know that a new door leaf is quite suitable for varnishing in a different tone, and there is no need to remove the previous layer of varnish. The only caveat is the correct choice of sustainable coating. For these purposes, only compositions intended for floors are suitable, but not for furniture.
How to paint MDF doors?
To paint such doors, you can safely use compositions containing varnish and tone in one (Lakobeits, for example). This will help maintain the structure of the door, and at the same time it will have a pleasant appearance.
The consistency of Lakobeits is liquid, so it penetrates deeply into the pores of MDF, filling them and forming a uniform, thin and moisture-repellent layer.
Conveniently, the tone and varnish are mixed together, so the door does not need to be tinted first and then varnished.
Since this door has a specific panel pattern, and when painting with a roller or spray gun it is very difficult to achieve uniform varnish coverage, painting should only be done by a professional.
No special skills are required for painting with a brush. You just need to be careful and immediately remove small smudges.
It is quite easy to prepare MDV doors for painting. You just need to thoroughly wipe the doors with a damp sponge or cloth so that there are no unnecessary particles on the surface.
A beautiful option for decorating doorways with decorative stone is written here.
If you have sliding doors, find out how to choose fittings for them.
Preparing furniture for painting
The next step is to remove the old paint from the furniture. Take a small glass jar and pour out some car wash. Take a construction brush and carefully apply the remover to the surface of the furniture; do not forget to apply the remover liberally to the side and corner parts of the furniture. Give some time for the wash to dry, it will take a couple of minutes. Apply another layer of remover and immediately begin removing the paint using a spatula. This technology will make it easy to get rid of the paint layer down to the wood. You'll see, it's easier and faster than if you removed the paint using sandpaper.
You can remove old paint with a spatula, having treated the surface with a remover in advance.
Now we need a prepared metal brush, with its help you can easily remove the paint from the sides and corners. So, the base is removed, and this is already half the battle, but you still can’t do without sandpaper. Take a small piece of sanding sponge and sand the surface, corners and sides of the furniture. Ideally, if you have sanding equipment, this will speed up the process and make the surface smoother and more uniform. Take a damp cloth and wipe the wood, give the surface time to dry thoroughly before you can start painting.
Inspect the furniture in detail for chips and dents. For example, if there are such defects, putty, then grout, and level the surfaces using a primer. But, if there are no such problems, then we move on.
How to paint MDF doors?
To paint such doors, you can safely use compositions containing varnish and tone in one (Lakobeits, for example). This will help maintain the structure of the door, and at the same time it will have a pleasant appearance.
The consistency of Lakobeits is liquid, so it penetrates deeply into the pores of MDF, filling them and forming a uniform, thin and moisture-repellent layer.
Conveniently, the tone and varnish are mixed together, so the door does not need to be tinted first and then varnished.
Since this door has a specific panel pattern, and when painting with a roller or spray gun it is very difficult to achieve uniform varnish coverage, painting should only be done by a professional.
No special skills are required for painting with a brush. You just need to be careful and immediately remove small smudges.
It is quite easy to prepare MDV doors for painting. You just need to thoroughly wipe the doors with a damp sponge or cloth so that there are no unnecessary particles on the surface.
Painting laminated doors
The paint adheres perfectly to a smooth laminated surface, but it will not last long. Therefore, the first step is to remove the top layer of impregnated varnish using a sanding machine and, if necessary, zero sandpaper.
We should not forget that directly under the protective layer there is a particle board, which will easily begin to crumble if the treatment is carried out at a sufficiently deep distance. The prepared surface is thoroughly wiped with a solvent and a layer of primer-antiseptic mixture is applied. Wait some time for the protective layer to dry and apply paint.
Impregnation of the door surface.
You can purchase any paint, since particle board is unpretentious in terms of coatings applied to it.
The paint is distributed over the surface using a spray gun or a roller with velor pile. After the 1st layer has dried, apply the second. A day later, the painted door is varnished with a transparent composition, which will act as protection during operation.
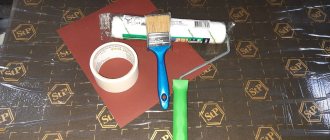
Instructions: how to carry out the procedure yourself?
Tools and materials for painting the door leaf:
- A couple of stools, a small table or sawhorses to lay the door leaf horizontally, slightly “hanging” it.
- Brushes of different sizes for processing surfaces with complex configurations, paneled doors.
- Roller coated with faux fur, polyamide or polyacrylic. These materials are not afraid of caustic chemical solvents contained in paints.
- Pallet or other container for paint.
- Screwdrivers and a screwdriver for dismantling and reinstalling the door.
- Hammer.
- Medium grit sandpaper.
- Spray gun to apply the coating in an even, thin layer and speed up painting.
- Craquelure - if the surface is artificially “aged”.
In order for the paint to lay as evenly as possible on the door leaf, especially on an old one that already had a coating on it, it must first be prepared for further work.
Preparation includes:
- Removing the door leaf from the hinges. To do this, the fasteners are unscrewed with a screwdriver or screwdriver.
- Dismantling of fittings - handles, glass, locks and other elements that cannot be painted.
- The holes are covered with cotton wool or rags to prevent paint from penetrating inside.
- To remove the old layer of paint, a special solution is applied on top of it, which reacts chemically with the coating.
- After the time specified on the package has expired, the old coating is removed with water, and the remains are smoothed off with a small spatula and medium-grain sandpaper.
- After processing, the canvas should be wiped with a damp cloth to get rid of fine dust.
- Then it is treated with a solvent, which will degrease the surface.
- If defects, cracks and gouges are found, they must be repaired with wood putty.
- The dried putty must also be sanded and degreased again, then treated with a primer.
- If there are areas on the surface that cannot be painted, they are covered with construction tape or sealed with masking tape. The protection can be removed only after the paint has completely dried.
The choice of painting scheme will depend on the design features of the door leaf:
- Panel doors are usually painted in three approaches.
It is convenient to use a roller, since it will not leave any untidy marks or fragments of pile. The coverage will be more uniform. The process starts from the top corner from left to right in the transverse direction. The next layer is applied in the longitudinal direction, and the final layer in the transverse direction. Tip Each next layer can be applied after the previous one has completely dried. - It is customary to first process paneled canvases with a brush, carefully painting over the existing recesses. The surface can then be painted with a roller. The sequence of further actions is similar to painting the panel fabric.
Painting is often done using either a spray gun or a combination of brushes and a roller. The first option will provide a result close to professional in quality. The sprayer will paint the surface quickly, the layer will be uniform, without streaks or drips. The only caveat is the cost of equipment.
To save money, rollers are used. It also creates an even, thin layer, but subject to the selection of the fur coat material. The fur option is the most practical: it does not leave lint or air bubbles.
Having chosen a painting technology, proceed to the next work. How to paint:
- The prepared door leaf is laid horizontally, having previously covered the working surface with plastic film. The glass is sealed with masking tape.
- Open a can of paint and pour the composition into a tray prepared for this purpose or another wide but low container.
- If the paint is too thick, it is diluted with solvent or water to achieve the consistency of liquid sour cream.
- During operation, the composition will need to be mixed several times, since heavy fractions of the paint will settle to the bottom.
- Use a brush to paint small elements, protrusions, and depressions.
- The initial layer of paint is applied with a roller.
- Wait for the door leaf to dry completely, then re-paint it in a perpendicular direction.
- To obtain a more saturated color and dense coverage, painting is done in three layers of paint.
- The other side of the canvas is updated in the same way.
- The surface needs to be polished, then a layer of decorative varnish is applied to make it more smooth and durable.
We recommend watching a video on how to paint interior doors:
Veneer coloring
It should be noted that the technology is not very different from the technology for painting laminated chipboard or other surfaces.
Approaches to surface painting are similar:
Preparing the veneer surface for painting
– it is necessary to sand the surface to be painted with fine sandpaper or chemically sandblast
– clean the surface from dust and possible grease
– apply several layers of primer to prime the sanded surface and create a smooth and well-adhered preparatory layer for the paint applied in subsequent stages.
The surface of the veneer plywood layer is initially ideally smooth and glossy (shiny or glossed) and as a result of sanding it can lose its shine, so before starting work you need to clearly understand what should be obtained after painting the veneer surface: matte, semi-matte or shiny color. Subsequently, it will be possible to add shine to the treated surface using finishing layers of varnish, but the veneered texture will not look as attractive as if it were left unsanded.
To clean surfaces from dust and grease, it is better to use alcohol-based solvents, but you can use standard dishwashing liquids slightly diluted with water. It should be noted that the surfaces should not be heavily wetted to avoid damage to the veneer and underlying layers of particle board. It is enough to wet the cloth and wipe the surface to be treated several times. This will reduce drying time and avoid possible surface deformation from moisture. Before washing the surface, you can vacuum it or blow it with a compressor.
To prepare surfaces using a primer, it is advisable to use a non-water-based primer of better medium or high quality, since this stage determines the subsequent aesthetic and strength characteristics of the painted product, it is better not to skimp. After applying the first coat of primer, it should be allowed to dry for 24 hours or more, according to the manufacturer's instructions. Increase adhesion by lightly moving sandpaper over the surface, remove dust, apply a second coat of primer and let dry again.
Painting veneered surfaces of particle boards or wood
To paint veneer, you can use water-based or solvent-based paints. You need to apply one or two layers. Before applying the first coat of primer, it is necessary that 24 to 48 hours have passed since the completion of work on preparing the surface for painting. There are no special recommendations for this stage. A second coat is usually necessary when using a primer that is very different in color from the paint color. So, if a white primer is used, and the surface is painted in dark and rich colors, a second coat of paint will be required.
Finishing of the painted surface
To add strength to the painted surface and protect it from damage and fading, as well as increase the durability of the product, it is necessary to apply a couple of layers of polyurethane varnish (matte, semi-matte or glossy), popular nowadays, with technological breaks between layers of at least 24 hours or according to the instructions varnish manufacturer.
Having completed all the above procedures, you can obtain a high-quality and durable coating on the veneered chipboard surface .
Preliminary repair of damaged veneer
Unfortunately, if the veneer chips or peels off the surface of the chipboard, it will have to be removed. Reuse of removed veneer is also excluded. It is necessary to select pieces of new veneer that are suitable in texture and glue them into the area to be restored, carefully working with the sizes and shapes of the glued and restored areas in order to achieve an invisible transition between the new and old surface.
Small nuances of the process of painting a veneer door
* please note that it is better to use less concentrated paint for coating veneer doors. Otherwise you will hide the grain of the wood;
- the use of colored varnishes is an opportunity to leave the door untouched with its own pattern and texture. And to add richness and brightness to the veneer structure, you can use the desired stain;
- The door surface is treated in a horizontal position. Only in this case can you guarantee the even distribution of paint and varnish over the canvas;
- it is permissible and even recommended to paint the surface of a veneer structure in different shades;
- and even taking into account the fact that the range of paints and varnishes today is extensive, if desired, you can give a special look to the surface of a veneered door. And in this case, stain will come to the rescue. From the point of view of professionals, a spray gun is considered a suitable option for applying stain. Although you can use a standard brush or sponge.
How to paint yourself
The work is being carried out in stages. The first stage is preparing the surface for painting. The preliminary stage consists of cleaning the surface from a variety of contaminants, and also removing old varnish. There are often cases when the color of a completely new door is not very suitable and does not fit into the overall scheme of the interior. If the panel is new and has no noticeable damage, then it is possible not to remove the base layer, but simply varnish it in the required color.
Old varnish or paint is removed using special removers or fine-grained sandpaper.
Attention! Some people make the huge mistake of using a grinding turbine - this is unacceptable. Such processing leads to the formation of dents due to the cause of high speed revolutions.
Deep chips or visible scratches are primed or smoothed using wood putty; after drying, the finished areas are protected with sandpaper.
It is a little more difficult if the smoothness of the surface during manufacturing is ensured by polishing. In such a situation, preparation is carried out using a zoned blow-dryer for construction work.
After the preparatory stage is completed, we proceed to the actual painting. Painting is considered the last stage and is quite easy to carry out if the panel is well prepared.
Tips and Tricks:
- It must be taken into account that paints with good coverage can hide a unique pattern on the surface, so it is best to use the least concentrated options.
- The use of colored varnishes will help to better preserve the natural beauty of the structure, and in order to make the color more rich, the use of stain is recommended.
- It is recommended to treat the surface horizontally; such painting will make the surface even and smoother.
- It is allowed and even best to use unequal shades of the sides of the canvas, which is especially successful for interior design in a wide variety of shades.
- Despite the very large selection of paints for coating, sometimes it is necessary to give a special tone or decorate a veneer door
. In these cases, stains will come to the rescue. The optimal and more professional option for applying stain would be a spray bottle, but if you don’t have one, a primitive brush or sponge will do.
Artificial veneered door and its painting
Today there is a very large selection of veneer models. However, it is not always possible to distinguish (especially for non-specialists) fake products from natural ones. The difference between eco-veneer
the fact that artificial variations use specialized film-based coatings created using 3D effect technologies. Non-real options are almost as good as products made from real wood, since a natural pattern is fully created.
Video
Furniture is gradually losing its original appearance, and to fix this, many resort to painting. This method allows you to quickly and inexpensively transform any piece of furniture beyond recognition. You can age a worn lacquered chest of drawers or give a bookcase a classic look. In this article we will try to figure out how to paint lacquered furniture. This process does not require special skills or expensive equipment; the main thing is to choose the right paint composition and follow the technology.
The first thing you need to start with is determining the appropriate coloring composition. Not only the quality of the finishing work performed, but also the durability of the coating and its technological properties depend on the correct choice of paint. Experts find it difficult to choose the best paint and varnish material for processing lacquered or polished furniture. During the purchasing process, you need to take into account your personal preferences, the condition of the piece of furniture and the desired end result.
The main thing to consider when choosing paint is the type of furniture coating.
If you are going to repaint a wooden chest of drawers, then you need a wood coloring compound, but if you have a metal lampshade, you can’t do without metal paint. This rule also applies to painting lacquered furniture.
In this case, very strict requirements are imposed on the coloring mixture:
- water resistance;
- abrasion resistance;
- resistance to mechanical stress;
- frost resistance and strength.
The choice of paint for lacquered furniture largely depends on the desired end result. Experts distinguish three main types of coating:
- glossy;
- matte;
- semi-matte;
- transparent (the surface is varnished).
Depending on the condition of the furniture, you should give preference to a denser paint composition or apply the mixture with a roller rather than a brush.
Depending on the type of coating on wooden furniture, paint with a suitable composition is selected:
Water-based acrylic. This is an almost universal option, but it is better to use this paint if it is necessary to paint veneered furniture.
Enamel or clear varnish. Such materials will be optimal for painting polished furniture if the old coating needs to be updated.
Metallic paint. This option is suitable if you want to give the fittings and some furniture elements a silver color.
On video: how to make an old wardrobe fashionable.
Furniture painting
As a rule, the following types of furniture are found in our houses and apartments:
- Veneered;
- Laminated;
- Lacquered;
- Polished;
- Rattan.
Now let’s take a closer look at the technology of painting each of these types of furniture.
Veneered furniture
Typically, veneered furniture is made from chipboard panels covered with a layer of veneer, which usually has a beautiful natural texture. Therefore, before painting veneer furniture, you should decide whether you want to leave the solid wood in sight or want to hide it with a layer of paint.
Regardless of the type of coating, the work is performed as follows:
- First of all, you need to disassemble the furniture and remove all the fittings from it (this procedure applies to any furniture, so we will not mention it further).
- Then you need to remove the old varnish using fine-grained sandpaper. Moreover, it is advisable to do the work yourself, since using a machine can damage a thin layer of veneer.
- Then you should carefully inspect the structure for scratches and chips. If they are found, all defects must be repaired with wood putty. After it dries, the treated areas should be sanded with fine-grained sandpaper.
- Next, the base is thoroughly cleaned of dust.
- After this, the surface to be treated must be coated with a primer, which acts as a primer.
- The final stage is to coat the product with colored varnish or paint. As a rule, polyurethane, water-based or glypthal coatings are used for veneered furniture.
Advice! There is another, more radical way to update the veneer surface - tear off the old veneer and glue a new one. This option is suitable in cases where the old coating is severely damaged.
Removing old varnish
Varnished
The technology for painting varnished products is not much different from repainting veneered ones, however, there are still some differences.
The process of painting lacquered furniture
Painting a varnished surface is easy. This process does not require any special material costs and will take you very little time. However, you should strictly adhere to the instructions and tips for finishing work outlined below. Let's look at how to paint polished furniture (let's take a cabinet as an example):
- A polished cabinet requires careful preparation (elimination of all drawers, components, various stands and doors). Next, the interior shelves, various recesses, as well as joints and corners are painted.
- Shelves, drawers and doors are painted separately from the main surface of the furniture (which must first be covered with a special film). If you are going to paint furniture yourself for the first time, then paint with a roller rather than a brush, so you can cover the desired area more evenly.
- After painting all the internal elements, we move on to painting the main surface. Apply the paint with slow, careful movements, avoiding smudges and omissions. After the first layer has dried, apply the coloring composition again - this will create the most uniform and durable coating.
- After the paint has completely dried, we begin assembling the structure. At this stage, you can decorate or sand the surface to give it a custom design.
How to paint furniture: video instructions for painting with your own hands
If the furniture has lost its attractiveness or is tired of its appearance, then this is not a reason to get rid of it, because everything can be easily fixed by repainting. With the right approach, you can change its appearance beyond recognition. For example, you can either paint furniture in Provence style or give it a vintage or classic look.
There is nothing overly complicated in this operation, the main thing is to know the technology and apply a little diligence and imagination. To help in this matter, next we will look at the basic principles of painting furniture at home.
Surface preparation and paintwork
Before painting and varnish work, it is important to prepare the interior doors and choose the color of the finish. Features of the process include disassembling the frame, removing the door from its hinges, and installing the door leaf on supports
You need to remove the fasteners and handles. Fixed parts (lock, hinges) are covered with tape. Work is carried out in a ventilated room or in the open air.
Then the old paint and primer layer are removed. The work is carried out using a construction hair dryer, spatula, and remover. After complete removal of paint, the door is cleaned of dust and degreased. Defects must be puttied. Sand the primed door for painting again.
The color scheme of the canvas depends on the type of product design. Application of paint to the array is possible in one or several layers, depending on the design project.
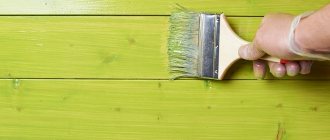
If the product is panel, a roller and brush are used in the painting process. The brush is used for small details and painting crevices. Apply paint to a large surface with a roller. Painting is done from the top corner and from left to right in the direction of the wood grain.
In a paneled product, first, use a brush to paint over the recesses of the structure. After this, the old canvas is painted with a roller. If you are decorating blocks with a hidden box, you will need to prime and decorate not only the canvas, but also the wall panels.
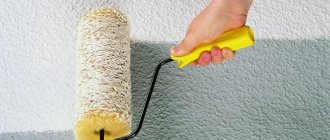
Painting with brush and roller
If you don't have a sprayer, a roller and brush can help give your doors a new look. In this case, as when working with a sprayer, the paint must be diluted and mixed thoroughly, avoiding the formation of air bubbles.
A roller for water-dispersion paint is convenient to work on a flat surface, and a brush is useful for painting the ends and recesses of a wooden door leaf. It is better to apply paint with a brush with synthetic bristles. Do not skimp on tools so that the fluff does not fall off during work and stick to the doors. Apply paint along the wood grain, trying to cover the canvas in an even layer. The final coating is applied in two layers, allowing for intermediate drying time.
How to do it yourself?
Having determined the type of coloring composition, we begin work, which conventionally consists of three stages:
- Selection of all necessary materials.
- Basic surface preparation.
- Coloring.
Let's talk about each of them in more detail.
Materials and tools
To work you will need:
- putty or primer to remove deep scratches;
- sandpaper or wire brush to prepare the canvas for painting;
- container with water, detergent, cotton rags;
- masking tape, protective film or newspapers to protect surfaces;
- dye;
- acrylic varnish for finishing coat.
To save time, use an aerosol, then brushes and rollers may not be needed. Do not forget about means of protection against paint getting on your skin and mucous membranes - rubber gloves, a respirator.
What is needed to prepare a metal (iron) or wooden surface?
The essence of the preparation is to achieve good adhesion of the metal to the paint and give the coating durability.
- First, remove all decorative elements, removable fittings - handles, number, peephole. Seal parts that cannot be removed with masking tape. It is better to remove the canvas itself from its hinges and paint it in a horizontal position.
- To remove the old layer of paint, use a special remover or remove the remains with sandpaper, a sanding machine or a wire brush. The surface is degreased and covered with a primer.
Attention: To seal cracks and irregularities, it is better to use automotive putty.
Instructions on how to paint inside and outside
After completing the preparatory work, we move on to painting. Instructions:
- We cover the surface around the door leaf with a protective film, and also make a flooring on the floor.
- First, paint hard-to-reach areas with a thin brush.
- To paint a large area, use a roller. Apply layers of paint from top to bottom.
- We apply the selected composition in two layers, with the second layer applied after the previous one has completely dried.
- At the end of the work, after the surface has dried, remove the protective film.
Using these tips, the door leaf will get a decent appearance.
Do not forget to also paint over the hinges, which have previously been sanded with sandpaper. If smudges have formed, then also rub them with sandpaper, and then re-coat the surface.
Do not paint exterior doors when temperatures are below freezing or when it is damp outside.
Painting your front door is easy. The main thing is to carefully select materials and tools, and carry out preliminary surface preparation. If you strictly follow the dyeing technique, you can get a result that is no different from the industrial one.
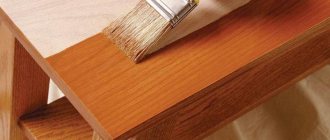
Painting wooden furniture
The photo shows an example of transforming old furniture
Like any painting process, painting furniture parts is divided into several stages.
Tools and materials
First, you need to collect everything that may be required for your work, so that in the future you will not be distracted by searching for the necessary tool or purchasing any material.
The list of everything that may be useful to you is as follows:
- Screwdriver;
- Fine to medium grit sandpaper;
- Rollers and brushes of various sizes and (or) a spray gun for painting furniture;
- Masking tape;
- Paint tray;
- Primer;
- Wood putty;
- Putty knife;
- Paint for painting furniture;
- Varnish.
Advice. When buying a primer, you should choose compositions based on the type of material being painted.
Preparatory work
Before you start working directly with acrylic paint or any other paint and varnish material, the following preparatory measures must be taken:
- Furniture is disassembled into parts;
- Each element is processed with coarse sandpaper to remove the old coating from the surface;
- Use a brush to sweep away all the dust;
- Cleaning is done with fine-grain sandpaper;
- Sweep away dust with a brush;
- Furniture elements are wiped with a damp cloth, after which they are allowed to dry;
- If necessary, wood putty can be applied to the parts using a spatula;
- Cleaned, puttied, dried furniture for painting is subjected to a priming process. (See also the article Primer on wood for painting: features.)
Painting instructions in pictures:
Note! Work must be carried out in a clean room. In order to avoid dust getting on the surface during the painting process, before starting work with paints, you should wet clean the room.
We paint old furniture
There are a huge number of dyeing technologies, including decoupage, two-color or multi-color dyeing, antique dyeing, etc. Only you can decide which specific method will be used to paint your furniture.
Antique painting technique
Painting furniture in a single color, for example, white, does not present any difficulties.
The main thing in the process of work is to follow the following set of rules:
- The paint is applied in one direction of brush movement;
- You should not apply a second coat of paint until the first one has completely dried;
- If the furniture is made of veneer, then the paint is distributed in the direction of the wood grain;
- The room in which work is carried out must be dry and clean.
- During long breaks during painting work, brushes should be immersed in a container of clean water so that the tool does not dry out, otherwise they will become unsuitable for further use;
- If you ultimately want to get a result similar in quality to factory coloring, then you should apply the coloring composition in several layers;
- Finally, once you have achieved the desired color, after the paint has dried, apply a final coat of varnish using a sponge;
- After finishing the work, assemble all the furniture parts into a single whole.
The photo shows the paint application process.
If you want to create a two-color or multi-color design on the surface, then first apply a light-colored material to the surface. Wait until it dries and use masking tape to cover the borders of the subsequent color to create a clearer picture and to avoid mistakes, uneven strokes, etc.
Note! To treat metal parts, fittings or, for example, the outside of a kitchen sink, when it comes to painting kitchen furniture, electrically conductive paint Zinga or fire-retardant paints for metal Polistil can be used, which can protect metal surfaces from rust and corrosion.
Painting paneled doors
Today, paneled doors can be painted in one of two ways.
Method one. First, paint is applied to the ends. Then carefully clean the damaged areas of the panel. A new layer of primer is applied to the cleaned surface. And paint is already applied to the primer, twice. This method is suitable for painting door surfaces with smooth surfaces.
Such doors are coated with varnish or stain in strict accordance with the stated requirements from the manufacturer.
https://youtube.com/watch?v=gy4kJp0JOMI
Method two. Tinting the door panel and frame is used when the surface has a wood texture. To hide wood imperfections, you can use a white shellac primer. Stain will help achieve the desired shade. When painting any surface, you should use only high-quality brushes and materials.
Choosing the composition in order to paint correctly
The choice of paint is a serious matter and the necessary composition must be purchased before the work is completed in the required quantity.
- polyurethane paints,
- water compositions - they are more practical,
- glypthal,
- compositions for painting at high humidity levels,
- other varieties suitable for painting veneer.
Attention! It is not recommended to use nitro paints. The reason is that such compositions react very poorly to excess moisture, which leads to the formation of dull spots on the treated surface. In addition, nitro paint is toxic and can cause poisoning.
Instructions: how to carry out the procedure yourself?
Tools and materials for painting the door leaf:
- A couple of stools, a small table or sawhorses to lay the door leaf horizontally, slightly “hanging” it.
- Brushes of different sizes for processing surfaces with complex configurations, paneled doors.
- Roller coated with faux fur, polyamide or polyacrylic. These materials are not afraid of caustic chemical solvents contained in paints.
- Pallet or other container for paint.
- Screwdrivers and a screwdriver for dismantling and reinstalling the door.
- Hammer.
- Medium grit sandpaper.
- Spray gun to apply the coating in an even, thin layer and speed up painting.
- Craquelure - if the surface is artificially “aged”.
In order for the paint to lay as evenly as possible on the door leaf, especially on an old one that already had a coating on it, it must first be prepared for further work.
Preparation includes:
- Removing the door leaf from the hinges. To do this, the fasteners are unscrewed with a screwdriver or screwdriver.
- Dismantling of fittings - handles, glass, locks and other elements that cannot be painted.
- The holes are covered with cotton wool or rags to prevent paint from penetrating inside.
- To remove the old layer of paint, a special solution is applied on top of it, which reacts chemically with the coating.
- After the time specified on the package has expired, the old coating is removed with water, and the remains are smoothed off with a small spatula and medium-grain sandpaper.
- After processing, the canvas should be wiped with a damp cloth to get rid of fine dust.
- Then it is treated with a solvent, which will degrease the surface.
- If defects, cracks and gouges are found, they must be repaired with wood putty.
- The dried putty must also be sanded and degreased again, then treated with a primer.
- If there are areas on the surface that cannot be painted, they are covered with construction tape or sealed with masking tape. The protection can be removed only after the paint has completely dried.
The choice of painting scheme will depend on the design features of the door leaf:
- Panel doors are usually painted in three approaches. It is convenient to use a roller, since it will not leave any untidy marks or fragments of pile. The coverage will be more uniform. The process starts from the top corner from left to right in the transverse direction. The next layer is applied in the longitudinal direction, and the final layer in the transverse direction. Tip Each next layer can be applied after the previous one has completely dried.
- It is customary to first process paneled canvases with a brush, carefully painting over the existing recesses. The surface can then be painted with a roller. The sequence of further actions is similar to painting the panel fabric.
Painting is often done using either a spray gun or a combination of brushes and a roller. The first option will provide a result close to professional in quality. The sprayer will paint the surface quickly, the layer will be uniform, without streaks or drips. The only caveat is the cost of equipment.
To save money, rollers are used. It also creates an even, thin layer, but subject to the selection of the fur coat material. The fur option is the most practical: it does not leave lint or air bubbles.
Having chosen a painting technology, proceed to the next work. How to paint:
- The prepared door leaf is laid horizontally, having previously covered the working surface with plastic film. The glass is sealed with masking tape.
- Open a can of paint and pour the composition into a tray prepared for this purpose or another wide but low container.
- If the paint is too thick, it is diluted with solvent or water to achieve the consistency of liquid sour cream.
- During operation, the composition will need to be mixed several times, since heavy fractions of the paint will settle to the bottom.
- Use a brush to paint small elements, protrusions, and depressions.
- The initial layer of paint is applied with a roller.
- Wait for the door leaf to dry completely, then re-paint it in a perpendicular direction.
- To obtain a more saturated color and dense coverage, painting is done in three layers of paint.
- The other side of the canvas is updated in the same way.
- The surface needs to be polished, then a layer of decorative varnish is applied to make it more smooth and durable.
We recommend watching a video on how to paint interior doors:
The very first
So, let's get down to the most important thing - preparing the furniture for painting. It is necessary to stock up on materials and tools for work.
- As a means of removing old paint, we recommend using paint remover from wood. You can buy it at a car store. It perfectly removes old coating in just a few minutes. The wash has a gel-like consistency, adheres well and does not spread over the surface. When working with the remover, it is recommended to use a respirator. Another way to remove the old coating is to traditionally sand the surface using an emery sponge or a sander. The smooth texture of veneer is initially even and smooth, and as a result of processing, the surface may lose its glossy shine, so when painting veneer, you should clearly consider what kind of surface you need: matte or glossy. To give a glossy shine, the veneer should be finished with a finishing layer of varnish.
- Prepare a small spatula and a medium-hard metal brush. A spatula will be needed to remove the old coating from a wide surface, and a small metal brush will be needed to remove paint from the sides and corners.
- Velor roller, synthetic brush. You can easily find these tools at any hardware store. When applying acrylic paint, craftsmen advise using a synthetic brush, which is sold in an art store. Unlike a traditional construction brush, it “fits” better and leaves no marks.
- You will need aids such as an emery sponge, gloves, and sanding equipment if available.
- Now you need to remove all the fittings, remove the locks, handles, if it is a chest of drawers or a sideboard, remove the drawers, shelves, remove the doors from the hinges (find out more information on how to paint a chest of drawers).
It is important to thoroughly clean the surface of the furniture to be painted.
Stages of painting a veneer door yourself
The surface of a veneered door is painted with your own hands in several stages. So:
Preparation. Involves preparing the door surface for painting. To begin with, it is recommended to clean the fabric of the product from contaminants, including old varnish and paint.
This is important if the color of the future paint is not similar to the old one. When you have purchased a new veneer door, you don’t have to remove the remnants of the old varnish, but apply new paint of the desired color on top
Preparatory work
It is recommended to remove old paint or varnish from an interior veneer door using special removers or fine-grained sandpaper.
It is recommended to smooth out deep chips and obvious scratches using wood putty.
After the veneer sheet has completely dried, it is important to clean it with fine-grained sandpaper.
If polishing is planned in the future, the preparation becomes more complicated. Indeed, in this case it is necessary to perform zonal treatment with a construction hairdryer.
And only after completing the preparatory stage do they begin to paint the veneer interior door panel. And this stage will be final only if the first stage of surface treatment is completed flawlessly.
Veneer door painting
Veneered doors
To clarify the picture, let’s clarify what veneered doors are. Veneered interior doors can be externally confused with products made from natural solid wood, although the former are much lighter and more functional. Why? For an answer, you can turn to the specifics of the technology for manufacturing veneer doors.
Veneer is a rather capricious material and is nothing more than the thinnest cut of valuable tree species, intended for decorative finishing of the surfaces of the door frame and door leaf. A veneered door conveys the texture and natural shade of natural wood.
The most commonly used technique is to connect veneer to a panel structure. An MDF (modified wood) panel is glued to a blank of wood blocks (mostly coniferous). This frame is responsible for the necessary geometry of the door, making it more resistant to the negative effects of humidity and temperature fluctuations. Following a special technology, a veneer covering is glued onto the MDF board. That is, the hot pressing method is used.
Sequence of painting the door leaf.
The gluing of the finish to the base surface is carried out thanks to the resins released from the wood when heated. Synthetic products are not used. To ensure a glossy shine, the structure is coated with the desired shade of varnish in several layers. He is responsible for the final color of the product. It is important to note that veneered models, like those made from solid wood, within the same delivery from the manufacturer have significant differences in color from each other.
The reason here lies in the uniqueness of the pattern of the wood cut, as well as in its ability to refract light. Among other things, the panel is finished with more than one sheet of veneer, which complicates the task of harmonizing the pattern of stripes. Each model is unique and original. You can choose several products that are similar in color, but they will still be different in texture and design.
Sometimes the internal space of the structure is filled with cardboard honeycombs, which makes it even lighter. This factor is important for an interior door: you won’t have to make any effort when opening and closing it.
There are models that are covered not with a cut from wood, but with films made using a special technology with a 2D effect (artificial veneer), imitating the texture and pattern of wood. Such doors are difficult to distinguish externally from veneered interior doors. Their advantage, compared to the latter, lies in their higher moisture resistance.
The door is old
But what to do in a situation where the door already has old paint or its remnants. In this case, the product should be painted according to the following rules.
To ensure maximum comfort, it is better to carefully remove the veneer interior door from its hinges and place it on a flat surface as stable as possible. The most effective way to remove old layers of paint is with a simple metal spatula.
After complete removal of paint residues, the veneer surface must be thoroughly sanded.
During this work, special attention should be paid to all kinds of recesses. You can effectively level the surface using a special putty designed for wood.
It fills the holes, eliminating their detrimental effect on aesthetics. After the putty has dried, the veneer surface must be sanded a second time.
These processes are accompanied by the appearance of a huge number of small particles of paint, dust and other debris on the door. You can easily remove it with a simple vacuum cleaner or dry brush.
Paint selection
At the stage of preparation for painting veneer, special attention should be paid to the selection of a suitable paint and varnish material. Most often, quick-drying water-based acrylic paints are used to change the color of veneer surfaces. Experts include environmental friendliness, simplicity and ease of use among the advantages of paints of this type. The paints do not have a sharp or unpleasant odor, which allows them to be used indoors.
You can easily repaint old veneered furniture, interior doors, shelves and other interior items made of wood.
When painting entrance doors with veneer trim, experts recommend giving preference to alkyd enamel. It will provide a durable and strong coating that is resistant to moisture and ultraviolet radiation. If you intend to use enamel to paint veneered entrance doors, you should take into account that it will completely hide the unique texture and natural roughness of the wood.
It is also possible to paint veneer with polyurethane paints. A coating made with such paints will protect the wood from moisture, mechanical damage, and exposure to ultraviolet radiation.
It is strictly not recommended to use moisture-vulnerable nitro paints for painting veneer structures. After drying, paints of this type can form unsightly matte spots on veneered surfaces.
In addition, nitro paints contain toxic components that can cause allergies. For this reason, they should not be used for painting furniture, doors and other interior items.
How to decorate a metal entrance door
After you have restored the door leaf, the front door can be further refined. This can be done by installing new fittings, platbands, as well as high-quality finishing of the slopes.
Depending on the method and material used to restore the doors, select the appropriate fittings:
- Lock. This is one of the main elements of the front door, which is responsible for the security of the house, so it must be durable, reliable and of high quality. For such doors, internal models are installed that are invisible from the outside.
- Door knob. This element, unlike the lock, is visible, so it must be in harmony with the design of the canvas, have high strength, wear resistance and reliability. For the front door, an excellent choice would be a handle equipped with a backlight directed towards the keyhole. This solution will allow you to easily open the doors at night.
- Peephole. This is also a necessary element for the front door, as it allows you to see who is trying to enter without opening the door. It can be almost invisible, but there are models that are the main decoration of the door leaf. Even with a minimal budget, you can implement an original solution; all you need to do is choose the appropriate sticker.
- Door knocker. This accessory is practically not used on modern doors, but if you like non-standard and original solutions, you can install such a door knocker. On metal entrance doors it will not only perform a decorative function, but will also allow you to abandon the usual bell.
- Stickers. There is a large selection of stickers with which you can transform and decorate your front door.
- Mirror. To improve the front door, you can install a mirror on it. This solution will not only decorate and transform the appearance of the canvas, but is also a convenient element, since you will always know what you look like before leaving the house. This is always convenient, and especially in a small hallway, when it is not possible to install a mirror in another place.
Slope finishing
In order to give the doorway a complete appearance, it is necessary to make high-quality slopes. You can make them using the following materials:
- drywall;
- wooden, plastic or MDF panels;
- laminate;
- plaster.
When creating slopes yourself, the sequence of work will be as follows:
- The surface is cleared of debris and all cracks are sealed.
- If the wall is smooth, then the sheets of drywall are cut to size and attached to the wall using putty. To install the panels, you will need to create a wooden or metal frame.
- After laying the drywall, the joints are glued with sickle tape and covered with putty.
- The surface is primed, and after it dries, it is painted or covered with wallpaper.
Video: finishing slopes
Installation of platbands
Without the appropriate frame, the front door will not have an attractive appearance, no matter what material you used during its restoration. Usually platbands come complete with entrance doors. You can select such elements separately; this is usually done to match the door leaf, but you can also choose a contrasting solution. Fastening of platbands can be done with foam or liquid nails. The best option is the so-called telescopic platbands, which are attached to the door frame using a tongue-and-groove system. Their only drawback is their high cost.
Platbands allow you to hide the gap between the wall and the door frame
It is not always possible and the means to replace a metal entrance door with a new one. But if it has retained its characteristics, and only the appearance has deteriorated, then you can simply carry out restoration. It’s easier to turn to specialists, but you’ll have to spend additional money. If you have the desire and basic skills, then you can restore or change the appearance of a metal door yourself. It is enough to choose a restoration method, purchase the necessary materials and carry out all work in accordance with the developed technologies. Do-it-yourself restoration of a metal entrance door will cost much less than installing a new one. Thus, you can make an original and unique entrance door that will not only reliably protect the house, but also be its decoration.
How to paint furniture yourself at home?
Restoring wooden furniture is a task accessible not only to professionals and specialized workshops.
Painting furniture with your own hands is real and simple. Updating old furniture is a great idea that will not only save money, but also create original furniture for a modern interior and enjoy your own work. Every craftsman knows the subtleties of working with wooden surfaces, and we will introduce you to some of them. This technology is suitable for various wood-based surfaces, chipboards and veneers.