Applying wood textures to various surfaces using paints and varnishes has been practiced for a long time by professional artists and designers.
But, as it turns out, there is a special paint on the market that imitates wood. We will talk about the characteristics of these coatings and methods of application in this article.
Applying the texture of a wood cut with a rubber matrix
Why imitate wood?
Imitation allows you to create a variety of wood textures, cuts in longitudinal and transverse sections, the structure of old petrified rock or eaten away by insects, as well as make spectacular stylistic variations. After all, the use of natural wood varieties is in many cases impractical and unjustified.
Patterning tools
You can apply the selected material to the wall using a spatula or trowel. To develop a drawing, the following tools are required:
- palette knife;
- textured roller;
- video with the image of a wood cut;
- rubber spatula with a pattern;
- various models of spatulas;
- stencil.
How to make a wood-look spatula with your own hands
There is no need to buy an expensive spatula. It can be cut from ordinary plastic packaging from construction or other materials. First they draw a shape, and then cut it out with well-sharpened scissors and form notches. The following types of spatulas will be needed:
- wide with large teeth;
- medium with sparse serrations;
- small smooth.
How to brush, stain, wax and patina wood (texturing)
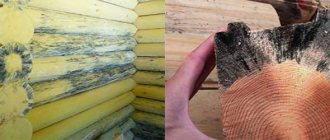
Natural wood attracts the eye with its beautiful texture. The alternation of soft and hard growth rings creates an interesting pattern with bends, waves, fancy knots, cracks and wormholes.
This truly creative texture was created by nature itself, and our task is only to emphasize it, reveal it, and make it tangible. all technical processes associated with this are called wood texturing.
Brushing, staining, patination and waxing techniques are used to texture wood.
Brushing , from English. Brush is a technique aimed at enhancing wood grain by combing out soft fibers. Wood has its own specific texture pattern due to the peculiarities of the growth of fibrous layers.
EVERYTHING YOU NEED FOR THIS ARTICLE IS HERE >>>
Soft fibers perfectly absorb water and coloring compounds and are easily amenable to mechanical action, in particular, combing, while hard fibers, on the contrary, protrude after combing with hard combs. Comb out soft fibers using special metal brushes.
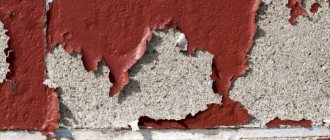
Imitation of wood texture with plaster
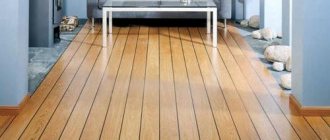
One of the inexpensive and proven ways to obtain an effective wood-look finish is decorative plaster. Types that imitate the texture of trees such as oak, ash, cherry, and walnut are sold. Plaster has significant advantages over other materials:
- suitable for most surfaces;
- you can cover both small pieces and the entire area;
- withstands adverse conditions, temperature changes and is therefore suitable for outdoor use;
- non-flammable;
- You can easily and quickly restore the damaged area.
The main disadvantage is that the imitation only looks good from a long distance. In addition, unlike real wood, the strength and wear resistance are several times less.
Which plaster is suitable
The choice of material depends on the further conditions of use of the surface. For example, the façade of a building is made of putty. Cement plaster works well on concrete. Indoors, you can give preference to materials based on gypsum, acrylic or silicone. The bark or wormholes made by beetles are well conveyed by relief structural plaster with coarse granules. Ready-made mixtures of acrylic and silicone are practical to use. They do not harden instantly and allow you to adjust the process.
Required Tools
The range of devices is determined after choosing the breed that needs to be created. You may need:
- squeegee spatulas with different notches;
- various spatulas (metal, rubber, flexible and others);
- rollers with relief patterns;
- brushes with hard bristles;
- trowel.
It is advisable to purchase expensive equipment only for large volumes of work or when they are carried out to order. In most cases, you can get by with improvised means. So, it’s easy to add texture to a regular paint roller by wrapping it with tape, thread or film.
The procedure for creating wood texture
At first glance, the work may seem quite painstaking, but understanding the technology will not be difficult. Before you start working, you should practice on a piece of cardboard. Follow the following sequence of actions:
- Treat a small area with putty and level it to a thickness of 6 mm. Carefully smooth the surface with a spatula.
- Next, apply wavy grooves in a vertical, horizontal direction or at an angle. After each pass, the instrument is cleaned.
- Then we form a glossy base on the wall with a hard spatula.
- The plaster should dry for 30 minutes.
- Using a brush, distribute the primer over the surface. It is important that it gets into all the cracks.
- Then the surface is coated with paint, dried and, if necessary, smoothed.
Brushing tool
The use of aged wooden parts in the decoration of furniture and premises is a well-known technique, but no less relevant today. One of the ways to create such a visual effect is brushing, performed with special brushes on machines or manually.
Professional woodworkers have been familiar with the term “brushing” for a long time.
The technique is used along with grinding and sharpening. In this way, small defects in the form of protruding fibers are removed from the surface, giving a roughness that is unpleasant to the eye, but at the same time a large ordered relief (fiber pattern) appears.
On parts that have aged naturally, it appears due to uneven drying and abrasion of the summer (soft) and winter (hard) layers of wood. In the case of brushing, the erosion process is accelerated by mechanical processing.
The brushes used for this are not the same and can have different purposes depending on the bristle material (metal or polymer-abrasive), its rigidity and shape (straight or in flagella).
Since the decorating process is a creative one, there are no general recommendations for choosing equipment: each master has his own secret, the only important things are the ability to choose a tool and the affordability of its price.
In the case of occasional use and/or small volumes (up to 10 m2 of surface), it is advisable to purchase hand-held power tools; they are produced under several professional brands. It must be remembered that more intensive use of such equipment is not economically feasible: labor costs are high, and the equipment often requires replacement. It is also important in whose hands the instrument falls - no matter who you trust with such work.
If there are stable volumes, it is much more profitable to operate the machines: they eliminate the “human factor”, have high productivity and are equipped with durable brushes (resource – from 1,000 m2). Until recently, a significant obstacle was their high cost, because there were simply no professional-class models; only industrial equipment for large workshops was offered.
Changeover
The optional brushing kit consists of a shaft and replacement brushes. The shaft is installed instead of the drum, which takes about half an hour. Further installation and replacement of brushes is carried out in a matter of minutes.
1-2.Unscrew the fastenings of the support with the shaft bearing. Remove the protective cover and loosen the drive coupling screws.
3.Remove the support along with the drum. Unscrew the bearing race fasteners, remove the bearing along with the race from the shaft, use a puller for this.
Imitation of wood using polymer clay
The texture of the clay resembles plasticine in appearance. Thanks to the variety of shades and reasonable price, it is gaining popularity as a universal finishing material. Sold in small rectangular pieces. The advantage of the method is the ability to obtain the desired structure without the use of coloring compounds.
Sequencing
The order of working with clay is as follows:
- First you need to take several types of material and cut the same piece from each.
- Each piece is kneaded and a sausage is formed from it.
- Next, the sausages are divided into several slices and mixed together.
- Several different pieces (4-5 pieces) are connected together and balls of a uniform shade are obtained.
- The balls are rolled into thin slices and placed in a pack.
- The edges of the resulting stack are cut off and cut into two parts.
- The two halves are placed on top of each other and rolled. This procedure must be done several times.
- The resulting layer is cut into strips 3 mm thick and connected to each other.
- The strips are laid out with the cuts facing up and rolled out until the required imitation is obtained.
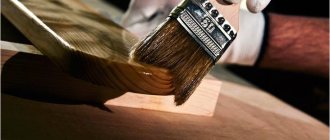
Wood imitation paints
Many designers and artists practice the use of paints and varnishes. The most popular method is to sequentially overlay contrasting shades on top of each other and then process them with special brushes . This method is more realistic.
Tools for work
To work you will need:
- tools for applying the first layer - brush, sponge or paint roller.
- brush with artificial bristles for glazing;
- rocker to create a pattern;
- soft brush made of natural fibers;
- pencil, ruler, tape;
- piece of fabric;
- thickener for acrylic;
- finishing coating.
Shades for the first layer
For the base, regular white acrylic paint is suitable. In stores you can find special tinting compounds and by mixing to achieve the desired shade. The easiest way is to use gouache paints. It is better to conduct color experiments on sheets of plywood or MDF. It is important that the initial layer is a couple of shades lighter than the glaze. Manufacturers offer a wide range of shades for the base layer:
- iron oxide is red;
- burnt umber or sienna;
- natural sienna;
- milky beige.
Shades as glaze
The final color will depend on the compatibility of the first layer with the color of the glaze. The composition should include two parts acrylic or latex paint and one part thickener. The following shades can be used as glaze:
- burnt umber and sienna;
- black;
- red iron oxide.
Work order
Many people note that the method of simulating texture using paint is the most familiar and understandable. To properly make the coating, follow these steps:
- First you need to apply a light color using a brush or sponge.
- Wait for the paint to dry.
- Next, mix the glaze to apply a decorative coating.
- An even layer of glaze is applied on top of the first layer. It is better to work with a small area of the area.
- Then slowly run a rocker over the wet icing, creating rows.
- To achieve the best effect, periodically remove dirt from the instrument.
- Occasionally, you can move along the surface not with the tool itself, but with a comb or grooves.
- Before drying, the layer is treated with a soft brush along the direction of the wood fibers.
- Wait until the surface is completely dry and use it for its intended purpose.
It is advisable to try the technique on a cardboard sheet of medium configuration. Only after achieving the desired effect can you begin to work on the real surface. It’s also worth trying the topcoat so that unexpected nuances do not arise in the future.
Thus, there are proven ways to create realistic wood imitations. Using the recommendations proposed in this article, you can make a unique wood-look material with your own hands and without the help of specialists. The main thing is to prepare the necessary tools in advance and choose a more understandable method.
Applying wood textures to various surfaces using paints and varnishes has been practiced for a long time by professional artists and designers.
But, as it turns out, there is a special paint on the market that imitates wood. We will talk about the characteristics of these coatings and methods of application in this article.
Applying the texture of a wood cut with a rubber matrix
How to make wood texture with your own hands
Currently, compositions with artificial wood are quite popular, which are easy to create at home. To create artificial wood, you will need the following materials: paper of the desired size, hard brushes of different sizes, gouache or watercolor paints, and a foam sponge.
To get started, firmly attach a sheet of paper to a stationary surface. Next, apply a layer of paint that matches the tone of the tree whose species you want to imitate. To ensure that the texture of the wood does not seem unnatural, you should apply a moderate layer of paint, then apply light and dark strokes in a chaotic manner.
Turning metal or plastic into wood is easy
On the Internet you will find many videos in which professional artists, using special brushes, foam swabs and other means, recreate the texture of wood on various objects. After varnishing, objects finished in this way are practically indistinguishable from their wooden counterparts.
Stock up on the necessary tools, patience and try to do something like this. Unfortunately, you most likely will not be able to draw the texture of wood by hand. But don’t despair, there is a way out - this is a special paint that imitates the structure of wood.
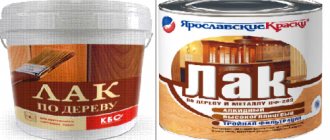
For example, in some specialized stores you will find paints and varnishes presented by the KAOWA SEMENTOL brand. On cans of these products you will see such designations as “mahogany paint” or oak, ash, teak, etc.
That is, these paints and varnishes make it possible not only to imitate the arrangement of wood fibers on certain surfaces, but also to reproduce the texture of valuable or exotic wood species. This advantage is especially important when decorating furniture and other elements of the surroundings.
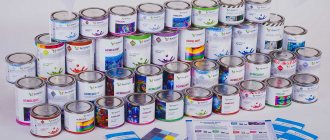
Scope of application
The photo shows a variety of paint colors that imitate wood texture
Quartblog Digest
How to correctly combine different textures in the interior - Combining different textures in the interior is an art. An interior designer told Kvartblog a little about how to know it and what to focus on when choosing materials.
Forest in the house - Furniture and decor made of wood in its original form: growth rings, rough logs and eco-style.
Wood production: linseed oil, chainsaw and loyalty to tradition - We visited the production site of the FUGA brand and learned how a traditional workshop turned into a production facility serving the European market.
25 decor ideas from pieces of wood – Wonderful decor from wooden planks, saw cuts, logs, chips and other pieces.
Photo: Daria Myshlennikova, except for No. 4: Helgi Home.
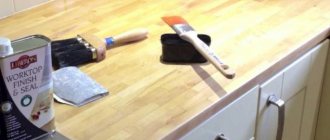
How to do without special paints
In the photo - hand-drawn texture
What to do if there are no special compounds to imitate the texture of wood in the nearest hardware stores, and most likely they will not appear, but it is necessary to decorate this or that surface?
In this case, you will have to awaken your creative potential and get to work.
- In order to paint a wooden surface, we will need acrylic paints and varnish on a similar base . We select paints of two colors: one is dark brown, the other is several tones lighter, closer to beige. We also use two types of flat brushes with stiff bristles. One brush with longer bristles and the other with shorter bristles.
- We prepare the surface . We clean it from dirt and dust and prime it if necessary.
- Apply dark paint as the first layer . The layer should be uniform and should be applied with a long-bristled brush. When the first layer is completely dry, you can begin applying the texture.
- Apply light paint as a second layer, also using a long-bristled brush..
In the photo - a tool for simulating wood using simple paints
- Then we wait until the second layer begins to dry, take a short-bristled brush and draw one line across the coating from side to side . Veins resembling wood fibers will appear on the surface of the painted coating.
Tip: If the brush is not hard enough, you can use a clothes brush to apply texture.
- After the second coat of paint has completely dried, you can apply varnish..
Decor of an old table using the fluttering technique - imitation of wood pattern
There was a post-war table in the barn, old and ugly. The legs are made of wood, but the tabletop, as it turned out, is made of plywood covered with veneer. Over time, the veneer had warped in places and was stained. But, despite its long life, the table was very strong. I felt sorry to throw it away, so I decided to try to give it a chance for a second life. There were several ideas for remodeling the table, including painting and painting. But first we had to remove the old veneer.
The key to successful work is the good mood in which you do your work, and good music contributes to this. So, turn on the music, pick up the instrument and get to work.
And then an unpleasant surprise awaited me. The veneer was glued to the tabletop using some substance unknown to me, similar to var. I removed the veneer with a hair dryer and a chisel; by the way, it turned out very quickly (or maybe good music contributed to this?). When the veneer was removed, she looked at the table with sad eyes, as if at a dead person.
The look of the tabletop, covered with black varnish, was simply terrible; I wanted to throw everything into the fire. But I thought about it and decided to continue - the excitement took over! In the end, if it doesn’t work out, I’ll throw it away and won’t look where I went.
After removing the veneer, the painstaking work of cleaning the tabletop from the adhesive layer began; this was done, again, with the help of a hairdryer and a metal spatula.
It's scary, it's creepy!
After removing the adhesive layer, the tabletop was thoroughly sanded with a grinder. The diagonal stripes on the tabletop are the structure of the plywood, and not the result of working with a sander.
I worked with the table mainly on rainy days, when there was nothing to do in the garden. Every time I started work, I told myself: “Another 10,000 buckets and our key!”
And now, finally, I’ve decided how I’m going to decorate the table next. I decided to make a wooden tabletop from a plywood tabletop, or rather, to make an imitation of a wood pattern. This technique flatlining technique .
I'll tell you about this briefly. For painting, take two shades of paint and a special rubber spatula to imitate wood patterns - eraser.
Eraser
On the bottom layer of paint, which should dry well, apply paint of a different color, which is immediately wiped off with a rubber spatula. Paints are mainly used with water-based paints; I haven’t worked with oil paints, so I don’t know if they are suitable for this technique. Those who are into decorating may know this technique. It’s also written about on the Internet, although they mostly write about working with acrylic, but I’ve worked with other materials.
To imitate wood in this work, I did not use acrylic paints, but acrylic primer (for the bottom layer) and bitumen varnish for aging (for the top layer), since I had both in stock. This is not my invention; there are craftsmen who use bitumen varnish in a similar technique.
So, the table was cleaned, polished and ready for decoration. Next, to save time, I will try to briefly outline the sequence of work. After careful sanding, the tabletop was primed with acrylic primer.
I added light shades of wood to the primer and, to make the bottom layer less uniform and more interesting in color, I applied beige acrylic paint in large strokes.
The primed surface was dried and sanded again, but this time carefully, with fine sandpaper and by hand.
The next stage of work is the drawing itself. And you only need to draw while listening to beautiful music. So, let's turn on very beautiful music and draw!
Next, as a second layer, I applied bitumen varnish to the primer with a wide synthetic brush for aging and immediately wiped it off. Thus drawing a picture of a tree. I did not apply the bitumen varnish to the entire tabletop at once, but to two or three “boards,” after which I made a pattern with an eraser. Then I applied bitumen again for the next “boards” and again made a drawing, and so on, board after board, until I had painted the entire table.
When applying a design, it is important to move the spatula from one edge of the “board” to the other without stopping! After the design was applied, I left the table to dry for a day. Then, so that work could continue, the bitumen was secured with shellac; this is a mandatory process. It was possible, of course, to cover it with any alcohol varnish, but more often the bitumen varnish is coated with shellac. And again I dried everything.
Conclusion
As you can see, instructions for simulating wood using various paints and varnishes are not complicated. Anyone can surely cope with this creative work. You will find more useful information by watching the video in this article.
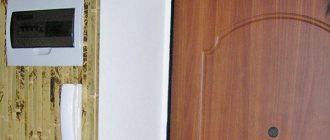
Wood paint is a stylish decoration option that allows you to give doors, car interiors and other products an expensive look. You can paint objects made from any materials: metal, plastic, fiberboard and particle boards.
Artificial wood decor elements
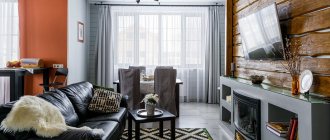
The use of artificial wood for room decoration is quite common and popular. This is due to the minimal cost of finishing materials and methods of creating a unique interior. The texture of wood will harmoniously fit into the style of any room and will help to correctly place accents without overloading the interior.
The variety of building materials allows you not only to create an artificial tree at home, but also to purchase cheap blanks. It is fashionable to decorate the walls and ceiling in the style of a traditional home using polyurethane beams, which will help emphasize the volume of the room. There are many options for wooden decor, and any room with such elements becomes comfortable, modern and as cozy as possible.
How to choose a dye
You need to choose enamel taking into account the nature of the surface on which it will be applied. It is necessary to choose suitable colors to make the imitation of wood with paints more realistic.
You will have to choose 2 tones:
- light (beige, sand, light shades of yellow are suitable);
- dark (dark shades of brown, burgundy, black).
Color combinations are selected so that the product looks like it is made from a particular type of wood. Both dyes must be made by the same manufacturer. In addition, you should select a thinner dark paint: it is applied on top of the light one.
You should not choose colors that are too different from each other: due to the sharp contrast, the color will turn out unnatural. It is recommended to take into account the colors of existing furniture or decorative elements so that the color of the new item matches the overall solution.
Preparing items for dyeing
Before starting painting work, it is necessary to remove the fixed structures. All additional details are removed. If any elements cannot be removed, but the owner does not plan to paint them, it is better to seal them with masking tape.
The base is thoroughly wiped off from dirt and dust. You will also have to remove the old paint. Then sandpapers are used to level the base. First, take options with larger grains, gradually moving to finer ones. You can replace the sandpaper with a sanding machine when processing some materials.
The plastic should not be leveled: this material is produced smooth. It is recommended to apply a small number of scratches to the plastic object: this will allow the liquid enamel to adhere better. For this you need to use a metal brush.
Before painting a metal product, you need to make sure there are no traces of corrosion or rust. If they are found, they are cleaned and treated with special compounds. Use construction putty to remove any remaining unevenness. Then, using an industrial degreaser (for example, white spirit), treat the item.
Glaze
The glazing technique came into decoration from painting, and consists of applying paint in translucent layers. I didn’t have to look far for an example - a beautiful chest of drawers, painted in this style, stood right in the studio. Those gathered repeated this technique on tablets. The sequence of actions turned out to be simple: apply a base coat of paint to the item, dry it, and then work on top of it with a wet brush with a small amount of paint. Each layer should be allowed to dry so that the paint is applied in gentle layers without mixing.
Advice. Instead of water, use a special thinner - it will allow the paint to maintain its thickness and color saturation, the drawing will be transparent, but more clear.
Painting plastic to look like wood
First you need to make sure that the type of plastic from which the product is made can be painted. If there is no prohibition, a primer is applied after sandpapering.
It is important that the dyes used do not have a corrosive effect on the synthetic material. Solvent-based paints must not be used.
It is recommended not to use a roller; To make the result more similar to natural wood, it is better to use a wide brush with medium-hard bristles.
To imitate wood, it is recommended to use acrylic paints.
Painting wooden surfaces
If the pattern on an old wooden product has faded or there is a need to slightly change the shade of an individual object, the wooden surfaces are painted.
First, the surface is prepared, after which the powder method of applying dye is most often used. This method of finishing paint is used to decorate furniture. Some people who do their own painting prefer to use clear varnish.
Painting methods
There are several painting methods: using a special grater, mixing liquid paints, applying soot. The choice is made taking into account the type of surface.
Using a rubber float
This option is considered the simplest; most beginners choose it. First, a layer of light enamel is applied, which is then left until completely dry. Then a dark dye is applied. There is no need to wait until it dries: it should only dry out a little.
Then they take a grater made of rubber with a carved pattern that imitates a pattern on natural wood. Using a tool, marks are left on the surface. At the same time, light dye will appear through the dark dye, which will create the effect of natural wood.
When the master finishes the decoration work, you should leave the product to dry completely. Only after this can you start applying varnish. It is recommended to apply it in 2-3 layers. When the varnish is completely dry, the item can be placed in its original place and used. Before working with furniture or doors, it is recommended to try using a grater on unnecessary surfaces.
Liquid mixing
This complex technique requires artistic taste and work experience. Suitable for working with large objects with a flat surface; Small, curved things will be difficult to repaint. With its help you can get original color solutions.
First, light enamel is applied; You can use any tool for this. It will have to dry a little; You should not overdry, the surface should remain slightly damp. Then you will need a brush.
With its help, a dark dye is applied on top of the liquid bottom layer. Since the shades will mix during work, streaks will remain on the surface.
Outwardly, they will look like a cut of wood. When the work is completed, the paint is left to dry. After the dye has completely hardened, the base is coated with varnish.
Applying soot
This painting technique is considered simple; it is used for plastic objects (for example, in the interior of a car). Can also be used for other materials: wood, metal. You need to use enamel of only one shade (it is better to take dark ones; on light ones the soot will stand out sharply). In addition, you will need to take a plastic stick (a cocktail straw, fork, spoon or knife from a set of disposable cutlery will do).
First, the product is completely covered with dark dye, after which it must dry completely. The stick is then set on fire. When it starts to smoke, apply a design with the end, bringing it to the surface. Uneven dark spots of soot will help you get an original pattern. When the work is completed, the result should be secured with 2 layers of varnish.
Imitation of metal surface
Metallic paint and “contours” for applying a relief pattern are easy to find in art stores, but this is not enough to create the illusion of a metal surface. Mikhail shared a trick with the participants of the master class: the finishing touch should be the application of patina. To do this, acrylic paint of the required color (blue for gold, greenish for copper) is diluted in water, and the item is simply doused with this solution. The liquid lingers around the circuit and, when dried, leaves traces of “oxidation” on the “metallic” thing.
Tip: to make an imitation of blackened silver, paint the item black, then use a stencil and putty or thickened chalk paint to apply a pattern, paint it in a dark background color and, after everything has dried, go over the surface with a dry brush with silver or pearlescent paint. It will linger only on convex surfaces, creating the effect of old metal.