11068 0 11
Michel November 27, 2016Specialization: plumber with 10 years of experience, computer repair specialist, powerlifting coach. I have extensive experience in construction, interior decoration, and making homemade furniture. Hobbies: sports
In this article we are going to find out what the difference is between plaster and wall putty. We will learn what each type of building mixture is used for and how their composition differs. We will also figure out how to putty and plaster correctly.
Plastering implies a rough basic finish, puttying - pre-finishing.
Classification of putty
To prepare a mixture for wall putty, it is important to consider the advantages and disadvantages of each composition.
- Gypsum is an inexpensive material, effectively used for leveling walls, does not shrink, but reacts poorly to contact with moisture.
- Cement putties are moisture resistant, but have a high degree of shrinkage.
- Polymer - guarantee high quality of processed walls, due to high technical characteristics they are distinguished by the high cost of the material.
According to its intended purpose, the putty can be starting for preliminary leveling of the surface, decorative, or universal. Today the market offers both dry and ready-to-use putties. The former can be stored for a long time, and significantly save on purchases. The dry mixture consumption calculator will help you quickly find out how many packs of mixture you will need.
At the same time, it is much more convenient to use ready-made putty; you will not need to prepare the mixture, thereby you can spend less time on the entire work process. But it is important to remember that such mixtures are much more expensive than dry ones, shrink more, and do not have a long shelf life.
The advantage of the ready-made putty mixture is its very fine fraction and thanks to this, smooth surfaces are created. Technologically, they first putty with coarse-grained Vitonit putty, filling all the unevenness, and then the finishing layer is applied with ready-made Shitrok-type putties.
When everything is ready, we move on to the technology of puttying the walls for painting and preparing the surface.
How long does it take for plaster to dry, how to work with putty and other nuances
The drying rate for most current types of plaster (with the exception of gypsum) can be determined using a simple formula: 1 mm of layer dries in one day. So, a layer of 5 mm will dry in five days. Gypsum plaster is considered the fastest drying plaster. Its thickest layer will dry in a maximum of four days.
An important factor influencing the drying speed will be the maximum thickness of the applied layer. The drying speed of layers thicker than 5 centimeters is noticeably reduced.
One layer of plaster 1 mm dries in 1 day
In conclusion, we will give some nuances regarding the choice of putty and working with it.
- Materials such as gypsum and alabaster are difficult to process and shape. They compensate for this disadvantage with a high drying speed (up to 15 minutes). Satengypsum is a more elastic material, but it takes much longer to dry.
- Dry putties have one significant drawback - when humidity increases, they soften again. To prevent this from happening, it is better to use moisture-resistant compounds when finishing.
- When priming walls in rooms with high humidity, be sure to treat the surfaces with waterproofing primers. It is recommended to apply two layers.
- You can determine the readiness of the putty by its consistency. It should not clump or run off the spatula blade. An elastic composition that slightly adheres to the surface of the spatula will be optimal.
It is better to mix the putty in small batches - It is better to mix the putty in small portions so that dry particles do not have time to form in its mass, which can impair the quality of work. It is best to prepare the mixture using a drill with a screw attachment. But you can do this manually. Under no circumstances violate the kneading technology recommended by the manufacturer. This may negatively affect the consistency of the mixture and, as a result, the finishing result.
- The remaining strips from the spatula can be leveled with the final layer.
Application area
An important difference between plaster and putty lies in the scope of their use. The plaster material is selected to correct significant curvature of surfaces and their deviations from the plane. It is possible to correct differences of about 50 mm. In order for the work to be completed efficiently, the basic requirements must be met.
- If it is necessary to correct a significant difference, several layers of the mixture are applied. Each of them should not be higher than 7 mm.
- For layers with a height of more than 30 mm, reinforcement is required, otherwise peeling is inevitable.
- If there are differences of more than 50 mm, perhaps the best option would be to level with plasterboard or install a suspended ceiling.
Instagram shtukaturkarostov.ru
Putty is used to obtain a perfectly smooth surface. The maximum differences in height that can be leveled with its help are 15 mm. Thicker layers are prone to shrinkage and delamination.
- Decoration Materials
Features of ready-made polymer finishing putties
Proper priming and puttying of walls
Those people who want to make repairs to their apartment or home themselves should know that proper priming and puttying of the walls will make the repair high-quality and durable. This article will help you make the right choice of primer and putty for the surface of the walls, as well as use these materials correctly.
Choosing a primer for walls
Let's first clarify why a primer is needed and why prime the walls before puttingty.
The purpose of the primer is an important point in the pre-finishing of walls. The primer completely removes dust from the walls and ensures reliable adhesion of the putty to the base of the wall. In addition, penetrating deeply into the wall (about 2-3 mm), a high-quality primer strengthens the base, which makes the wall surface more reliable for adhesion of the putty mixture.
There are 3 types of primers used in wall repairs:
- Deep penetration primer
- Dust removal primer
- Primer for walls “Concrete Contact”
Proper priming and puttying of walls will be done efficiently if it is advisable to use the primers listed above.
For example, a deep penetration primer should be used when you are ready to apply putty to the walls. That is, an hour before plastering the walls.
A primer to remove dust is applied immediately before wallpapering or before painting walls. Using this type of primer for walls does not have the ability to penetrate deep into the wall and strengthen it; it is only needed to remove dust.
Primer for walls “Concrete Contact” is used to strengthen the surface of the wall and give a rough surface. Typically, “Concrete Contact” is not used before puttingtying walls. It is used before laying ceramic tiles on walls and floors.
Proper priming and puttying of walls will really work if you use the primer wisely.
Rules for priming walls
Rule one . Priming the walls is mandatory before starting puttying work. Ignoring this rule will result in the gypsum putty peeling off from the base. This is a proven fact. Before the first layer of putty, you need to prime the walls with a deep penetration primer.
Rule two . Before painting the walls or wallpapering, be sure to prime the walls. Remove all dust using a primer. Without doing this, you will not get a good result. The paint will lie unevenly, and the wallpaper may partially not stick.
Third rule . Before gluing the tiles to the walls, prime first with a deep penetration primer, then with the “Concrete Contact” primer.
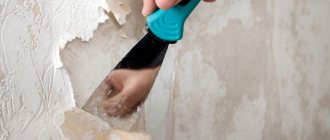
Fourth rule . Before applying primer to the walls, remove anything that has come loose from the wall. Are there any cracks? Then expand them using a narrow spatula or even a punch.
All cracks on the wall need to be deepened and widened, and then coated with a deep penetration primer with a brush.
Proper wall putty
Puttying of the walls is done 1-2 hours after applying the primer. Then, seal the cracks (if any) with putty and glue a strip of mesh (serpyanka) onto them. Serpyanka is glued to the putty mixture.
The putty should be applied to the walls with a wide spatula 30 - 40 cm. Apply it to the spatula, you need a little putty, on the very edge of the spatula. Then it will be easier for you to apply putty.
The correct putty is putty in three layers, and sometimes in four. Typically, puttying walls for wallpaper is done in three layers, and four layers for painting.
After applying the last layer and drying it, the putty deposits are removed by sanding with an emery net. The mesh for sanding should first be taken No. 180, and after removing thick deposits of putty, No. 200 or 220.
“If you really want to, then you can”
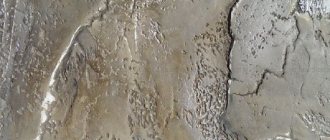
Before applying plaster, treat the surface with a primer.
According to building regulations, applying plaster to a puttied surface is not recommended. In accordance with the rules of SNiP, plaster can only be applied to a prepared load-bearing base. The regulated order of work is as follows:
- The wall is cleared of all previous finishing - old plaster, paint, whitewash down to the “bare” base. There are technologies that allow you to plaster over paint using tile adhesive.
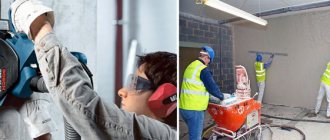
- The surface of the wall is thoroughly cleaned of small debris and dust, grease, etc.
- The entire surface to be plastered is treated with a primer. For best effect, the primer should be applied in two or three layers.
- After the primer has completely dried (12 - 24 hours), you can begin applying the plaster mortar to the wall.
Each type of load-bearing base has its own type of soil composition, which should be used for its treatment. This can be a primer for wood, concrete, brick, etc.
As you can see, building regulations do not provide for any plastering of putty surfaces: plaster is intended for finishing load-bearing bases - brick, wood, concrete, clay walls, etc.
That is, it is impossible to level a putty wall without dismantling the previous coating? But this is a bunch of construction waste that needs to be disposed of, and a lot of wasted effort and time.
But, as experienced finishing specialists say, every rule can be broken. The main thing is to do it wisely. According to professionals, only 10% of all walls damaged by “crooked” plasterers cannot be corrected without “surgical intervention” - complete dismantling of the old finish. In the remaining 90% of cases, limited intervention can be done.
First of all, in order to plaster a putty wall, conditions must be created for strong adhesion of the two materials. Without this, it will be simply impossible to achieve high-quality results.