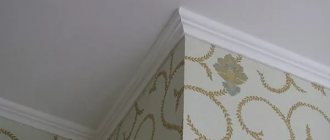
- before plaster
- after plastering
- combined method
A priori, electricians consider the following option to be the most correct. Is this really so and are there any exceptions? Let's consider in detail all of the arguments for and against.
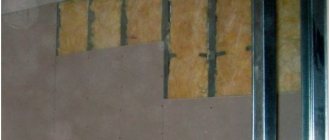
Layer of plaster
Among professionals, it is believed that electrical installation before plastering work was invented by lazy and greedy electricians. They are lazy, because it is much easier for them to haphazardly throw cable routes along the surface of the walls before plastering and not waste time on grooves.
Some even self-confidently convince you that you will save a lot by doing this, you should under no circumstances trench this wall, and they will bring up a lot of other arguments. However, modern installation involves the consumption of a very large amount of cable, and if you don’t cut it, then in the end it will all result in a thick layer of solution.
Which ultimately will result in more significant financial costs than passing one or two grooves to the socket block.
At the same time, take into account the costs not only of additional material (cement, mortar), but also take into account the increase in labor costs, and, accordingly, the payment of labor to plasterers. Therefore, it is much cheaper to pay for grooves and their subsequent sealing than to increase the thickness of the walls by several centimeters.
At the moment, only a greedy electrician cannot afford to buy a wall chaser and an industrial vacuum cleaner and work as a professional electrician.
If you are just a beginning builder and you really don’t have money for expensive and high-quality models from Hilti, Bosch or DeWalt, or you only need to make furrows in your own apartment and nowhere else, then you can get by with one universal attachment for the Mechanic Air Duster grinder.
If you want to completely get rid of dust 100%, use a household vacuum cleaner wisely and you will be happy.
The nozzle almost completely replaces a professional tool and performs dust removal functions even without a vacuum cleaner. You can check the current price and order it for home delivery here.
Cable laying in the groove
The wires are laid in a special groove - groove. Its width and depth correspond to a cable or wire. Laying sequence:
- Chasing is carried out with a special tool - a wall chaser or a hammer drill.
- To remove the resulting dust, use a construction vacuum cleaner.
- Attach wires every 30-40 cm.
- Drill holes for dowels.
- The wires are inserted into a special clip with a clamp.
- Secure them with clamps.
- The final stage is sealing the grooves with plaster.
It is very important to check the cables and wires for their integrity before installing the electrical wiring. This must also be done after installation.
If you follow these simple rules, safety will be guaranteed .
Cable damage
After electricians, drywall workers most often enter the site. And if the walls are plastered between these two teams, then the plasterboard workers simply cannot see where the routes are, and they simply interrupt them.
There is no so-called trace readability in this case.
In addition, the wire loops turn out to be very wide and it is difficult for both gypsum plasterboard and suspended ceiling craftsmen to find a place to attach the profiles, so as not to damage the wiring hidden under the mortar.
In this case, your machine may start working only after all repairs have been completed, including finishing. Since initially it was only the insulation that was damaged, and not the current-carrying core itself.
The problem, of course, can always be solved by using executive circuits or additional photographic recording of finished routes on the same smartphone. If this was not done in due time, then you will have to look for hidden wiring yourself, using various options.
Chasing walls for hidden wiring
Before starting work, a diagram of the location of all switches, power appliances, sockets for them and distribution boxes is drawn up, and the location of the lines along which the gating will be carried out is determined. Such a diagram must be stored in paper or electronic form, so that in case of redevelopment, moving switches and sockets, installing hanging structures (shelves, sconces, hangers), etc., the wiring will not be damaged.
Expert opinion
Evgeniy Popov
Electrician, repairman
Important! Please note that, according to the rules, it is not allowed to ditch load-bearing walls and make through holes in them. Therefore, all wiring should pass only under a layer of plaster.
Marking begins with the locations of panels, sockets, switches and lamps, and then a route for the wires is outlined. All shtoby must pass strictly horizontally and vertically . Marking for them is done with chalk, pencil or marker using a plumb line, laser or regular building level.
Inclined lines are allowed only in attics and stairs, provided that they run parallel to the inclined surface. In this case, searching for damage on straight lines will take a minimum of time, and the likelihood of accidental damage to the cable, for example, when driving nails for shelves or pictures, will be minimized.
A wall chaser is a fairly expensive tool, so the grooves for wiring are usually made with a grinder and a hammer drill. First, two grooves are prepared using a grinder with a diamond wheel, and then the excess plaster is chipped between them with a hammer drill. The size of the groove is determined according to the dimensions of the wiring; usually a depth of 20-25 mm is sufficient .
The use of junction boxes in typical wiring of private houses and apartments is not mandatory. They are installed for convenience when dividing lines into separate groups. The distribution boxes are attached to the gypsum mortar so that they slightly protrude beyond the thickness of the future plaster layer.
For the socket boxes, recesses are made, which are partially filled with gypsum mixture to fix the wires. Their ends are tucked in, and the excess is trimmed so that 10-15 cm remains.
It is more convenient to install socket boxes in blocks at once. It looks more aesthetically pleasing, and they are more convenient to use. For their installation, latches (cable channels) are used. The holes are drilled in one row with a distance of 1-2 mm, the partitions between them are then removed. Socket box covers are installed last, only after finishing is completed - wallpapering or painting. In rooms with high humidity, moisture-proof sockets with grounding are used.
Oxidation of wire connections
When plastering, a huge amount of water is used. And if the electrician is done before, then moisture may well reach the junctions of the copper cable cores in the socket boxes. Subsequently, this will lead to oxidation and destruction of contacts, and may result in their burnout.
There are many ways to seal the junction box to prevent moisture and wet solution from getting there, but not all of them help.
The cheapest and most accessible is sealing with ordinary masking tape.
Another simple method is to make end caps from cardboard boxes. Take a crown to match the diameter of the socket box and cut yourself as many covers as necessary.
In this case, it is better to insert 2 pieces at once into the socket box itself. You can also make such plugs from sandwich panels.
Instructions for restoring or extending the cable
In order to restore the integrity of a broken or cut electrical cable, you must strictly follow the instructions below:
- In all panel houses, the electrical wiring is laid inside the pipes, so additional gating is not required. The damaged cable should be pulled out of the channel and replaced with a new one from the socket to the junction box.
- Sometimes, in order to reliably place an insulated cable connection, you should break a section of the wall along the cable 15 centimeters in both directions. In this case, the depth of the split should be taken with reserve. This procedure must be performed carefully. Otherwise, the cable may be damaged again.
- The cable needs to be cut and its ends cleaned. This must be done at different distances so that the places where the bare connections of zero and phase are not located opposite each other.
- We take wires of the same metal and the same cross-section as in the damaged area. We put cambrics or heat-shrinkable tubes on them. The wires should be connected to each other by welding, sleeves followed by soldering or self-clamping terminal blocks.
- It is necessary to stretch the heat-shrink tube over the exposed areas of the connections and heat it.
- If heat-shrinkable tubing is not used, the wires should be individually rewound with high-quality electrical tape. Although the electrical insulating properties of self-clamping terminal blocks are quite high, it still doesn’t hurt to wrap them with additional electrical tape. This rule applies to places where solution can get inside the clamps.
- The section of the wall where the electrical connections are located must be covered with plaster solution and leveled.
When connecting electrical cables, preference should be given to soldering. This method is simple, reliable and inexpensive. High-quality insulation will be ensured by the use of heat-shrinkable tubes.
Installation of socket boxes and accessories
It is almost impossible to correctly install the socket boxes before plastering, if you yourself, in addition to electrical work, will not also be involved in finishing work in the future. You simply won’t have a flat plane on which to place the socket box and cover it flush with it.
When you do it by eye with an approximate calculation of the plaster layer, errors and inaccuracies are bound to arise due to a “littered” wall or incorrectly chosen installation depth.
If you end up with recessed socket boxes even by 3-5mm, there seems to be nothing critical here. Everything is solved with the help of longer self-tapping screws 25-30mm and spacer rings or extensions for junction boxes.
But it’s a completely different matter when the edge sticks out the same 5mm.
Triggering of RCD protection
It is very inconvenient for the plasterers themselves to work on walls that are literally strewn with wires. If the sections of wires for switches and sockets can somehow be hidden by twisting them into a spiral, then the leads for sconces or half a meter of solid television or Internet cable, which are left specifically for direct connection, cannot be hidden anywhere.
Moreover, some of them may be live! Plastering with wet mortar can end very badly. It’s good if you have a differential circuit breaker or an RCD on this line and it will work.
This will save you from electric shock, but you will need to look for this damage and the reason for the protection to operate, or wait until everything is dry to continue working.
How to extend or connect an electrical cable
Breaking an electrical wire can create quite a significant household problem.
Therefore, the question of its possible restoration becomes incredibly relevant. In some cases, there may be an urgent need to extend an existing wire.
Most often, the need to extend or connect cables arises in the following cases:
- While working with an angle grinder, you “managed” to stumble upon a wire embedded in a wall or floor and accidentally cut it. As a rule, such a situation is accompanied by a mass of sparks that occur at the site of damage. The machine installed in the electric meter will immediately turn off or knock out the plugs. In addition, all sockets connected to this section of electrical wiring will immediately be de-energized, and the lighting in the apartment will disappear.
- A wire carelessly laid by craftsmen in a wiring box or under a switch can also break off. In this case, the remaining length for connection is not enough.
- With the purchase of a new or rearrangement of an old electrical appliance, there is a need to move the existing outlet.
The optimal way out of this situation should be considered a complete replacement of the damaged area. In this case, you will have to replace the entire wire connecting the junction box and the outlet (switch). Carrying out such a procedure very often involves gating, which means inevitable damage to a large adjacent section of the wall. In addition to the wire itself, you will most likely have to replace part of the tiles, plaster or wallpaper, which is not always acceptable.
Electrician before plastering - advantages
Are there any arguments for doing all the wiring before plastering? Of course there are, but there are not many of them. Some craftsmen make a not entirely correct comparison with laying electrical wires along the floor and then pouring screed.
This is justified by the fact that when installing a cable in the floor, you do not cut a screed to lay the corrugated wires there. Accordingly, there should be a similar approach to the walls.
We will consider slightly different arguments.
- wall reinforcement with mesh
In some situations, during plastering work, to prevent the formation of cracks, reinforcement with a special mesh is used.
So, when gating, you will simply cut this entire mesh into pieces. And all the work done before, roughly speaking, will go down the drain.
- SNiP standards
Not a single edition of the PUE today provides clear instructions on how it should be done correctly, and whether wiring can be done after plastering or, better yet, before. However, not so long ago, an updated set of rules was released that directly affects plastering work.
It states that when finishing work begins, electrical and plumbing must already be completed, tested, inspected and working properly. It turns out that from the point of view of building regulations, it is most correct to do the electrical work before plastering.
Here is this set of rules SP 71.13330.2017 () and clause 7.1.5 from it:
However, firstly, we should not forget that all such joint ventures are more of a recommendation nature and even here there is no clear prohibition on doing exactly this and not otherwise.
Secondly, one can find fault in the wording of clause 7.1.5 with such a concept as “finishing work”. It is not entirely clear whether this includes the plaster itself or whether all the work afterwards is meant – puttying, painting.
Therefore, if you ultimately do not violate the final quality, then here too you can deviate from these recommendations.
- wall alignment
Another argument in favor of DO work is the unevenness of the walls. Plaster has a certain fraction, i.e. minimum thickness and when laying ready-made grooves, you will almost never get an ideal surface. This is where “trace readability” comes from.
If you need a result close to the original wall (before gating), this will lead to additional putty, primer, and sanding. And this work of bringing the surface to an ideal state can be very labor-intensive and financially expensive.
And when cutting grooves for cables, these same grooves have to be cleaned with a hammer drill or a chisel. As a result of unnecessary vibration in nearby places, the finishing layer begins to peel off or crack.
And this imposes even more responsibility for electricians on this type of work.
Please advise how to splice a broken wire in the wall?
Valiant gas workers were installing a pipe in the kitchen and managed to hit an electrical wire embedded in the wall with a hammer drill. Well, they cut off one socket. How can we splice this wire now - reliably, but with minimal chiseling of the walls? Copper wire, three cores, 2.5 square.
Related article: Thickness of a brick wall of an individual house
This has already been chewed over here many times from all sides. It is better to smear the box into the wall in this place and crimp the wires together.
Grandal wrote: How now to splice this wire - reliably, but with minimal chiselling of the walls?
The only thing that comes to my mind is copper sleeves with crimping and heat-shrinkable tubes with an adhesive base, after which you can plaster the joint.
Alex_Penza wrote: This has already been chewed on from all sides many times. It is better to smear the box into the wall in this place and crimp the wires together.
I searched and didn't find any specific recipes. If you remember threads on the topic, please provide links (or at least keywords - I’ll try to find them myself). It is undesirable to sculpt a box, and it is also inconvenient - a gas pipe passes over it.
avmal wrote: The only thing that comes to mind is copper sleeves with crimping and heat-shrinkable adhesive-based tubes, after which you can plaster the joint.
As far as I understand, this requires special tools? I would really like to do it on my own. If the alternative is a box and terminal blocks, then I can do this myself. But I’m not sure about crimping.
I would really like to hear advice from someone who has solved a similar problem.
Is there no way to change the entire segment?
Grandal wrote: It is undesirable to sculpt a box, and it is also inconvenient - a gas pipe passes over it.
Grandal wrote: box and terminal blocks, then I can do this myself.
It’s not entirely possible to understand you - sometimes it’s inconvenient and undesirable for you, otherwise you can do it yourself.
Grandal wrote: As far as I understand, this requires special tools?
Are pliers a very elusive tool for you?
Grandal wrote: I would really like to hear advice from someone who has solved a similar problem.
Do you think I got my advice from the Internet?
twist it, solder it, wrap it very tightly with electrical tape (or heat shrink), cover it up and forget it...
What are you going to twist?
avmal wrote: copper sleeves with crimping
Have you tried soldering in a copper sleeve? It turns out quite well, especially when you can’t reach it with a press.
» > » > When I removed the tie “from the builders” I had a couple of pieces of heat shrink + sleeves on hand for crimping - I tore the neighbor’s wires a couple of times - restoration took about 5 minutes at most. Hermetically sealed. If not the end is broken (only insulation) or only 1 core, you can put a tape instead of a cambric" >
Yura T wrote: Is there no way to change the entire segment?
Nothing at all - the wire is plastered in the wall.
avmal wrote: It’s not entirely possible to understand you - something is inconvenient and undesirable for you, otherwise you can do it yourself.
How to gouge a wall, put a box and connect the wires in it with a terminal block - I can imagine. But I have never encountered pressure testing. Moreover, there is a gas pipe on top of the hole.
r155, thanks for the advice. If you don’t mind, could you give me step-by-step instructions for a “five-minute recovery”?
Grandal wrote: If you don't mind, could you give me step-by-step instructions for a “five-minute recovery”?
- They cut off the power and checked the lack of power with a probe (one life).
- We gained access to the damaged area, assessed the scale of the disaster (then, per copper wire, 1.5 - 2.5 square meters, completely torn).
- We will need insulated bushings with an adhesive layer, pliers and a cambric to restore the external insulation, and a hair dryer (the cambric shrinks at 150 degrees) » > » > » > We remove the insulation from the cable (total) on both sides by 3 centimeters, the insulation from the cores - by centimeter, put bushings on the cores, crimp them. We put a 9-10 centimeter piece of cambric on a piece of cable with bushings, move it to the side, insert the cores of another piece into the bushings, and crimp it. We take a hairdryer, heat the bushings - they shrink, slide a piece of cambric onto the repair piece, heat it - it shrinks and seals the connections. If cambric cannot be used, we use tape "> All Well, and so on - you can also restore the corrugation with the same cambric, etc. and so on. The most important thing is that crimping will give reliable contact, heat shrinking will provide insulation and tightness. If you don’t get close with pliers, you can drive it into the terminal block, although I would, as I advised, solder it through copper bushings, put thin cambrics on top (core insulation), and general insulation on top of a thick one.
These sleeves » > only for stranded wire (class 3 and higher)
Grandal wrote: How to gouge a wall, put a box and connect the wires in it with a terminal block - I can imagine.
Do just that, connect with repair terminal blocks. » >
Or press pliers, a hair dryer, sleeves, adhesive heat shrink.
2Smily - where did you find about multi-wire? I didn’t search for a long time, the connection methods are described here (if anyone is interested, sorry for being offtopic) » >
r155 wrote: 2Smily - where did you find about multi-wire?
Any manufacturer of these sleeves has them in their catalogue.
For example, KVT, they call these connectors GSI.
2Smily Something klauke is silent about this Yes, and knippex too - either they hide it or I didn’t find it.
Thank you all for your help, I will try the sleeves. By the way, in one of the threads I found some visual photos of the process - maybe someone will find it useful. » >
2Grandal - if in doubt about crimping - soldering in a sleeve, cambric, etc. I wouldn’t use screws or clamps if it’s monolithic in the wall.
Grandal wrote: in one of the threads I found some visual photos of the process - maybe someone will find it useful.
There is a slightly different purpose of the connection. In your case, you will need to connect end-to-end and therefore be more careful in choosing the inner diameter of the sleeve. And it will be possible to compress the “biters” with part of the pliers, making several transverse “bite-bite”.
avmal wrote: And it will be possible to crimp with “biters” using part of the pliers
Now they'll eat you Offtopic, but to the point - I once stopped at an audiophile store, connectors (buy bananas) - I'm tired of wires, the choice is soldering or crimping, well, of course, I'll take it for crimping (less fuss), the seller is interested, Will I buy a crimp - I say - bring it, we'll see. They bring it. Gold, in a velvet case, looks like an astronomical instrument from the Middle Ages. How much money? - 1500 euros. What can it do - press with a 4x4 mm square! I - screw it! Consultant - well, bring your wires, we’ll crimp them. I - what for, I’ll go to Mitino - I’ll find something to squeeze out rubles for 300 Horror consultant - Aaaah - THERE WILL BE NO SOUND
Related article: Which primer is best for walls under putty
This happens quite often. With great difficulty we hang the carpet on the wall, but we are not happy with the result for long: for some reason the lamp in the room stops burning. Or we drill a hole in the wall to hang a shelf, but sparks fly out from under the drill, a crash is heard, and the apartment plunges into ominous darkness and silence.
The reason for the misfortune is simple to the point of disgrace - we were unlucky and damaged the hidden electrical wiring cable . In the case of a carpet, most likely the phase or neutral conductor was broken. And when they were preparing the holes for the shelf, they damaged the insulation of both cores and caused a short circuit (the drill, of course, can be immediately thrown away).
To resolve the situation, the line damage must, of course, be found. In the case of a shelf, this will not be any difficulty - where they fought at the time of the short circuit, there is a damaged area.
It will be more difficult with the carpet, which we successfully hung after punching a dozen holes. Two questions arise. First: “Which wire is damaged - phase or neutral?” And the second: “Which hole exactly did we damage the cable line?”
If, when installing a dowel and a self-tapping screw in a hole, we break the phase wire , then there is a danger of electric shock. Self-tapping screws, metal profiles, metal decorative and interior elements - all of this can be energized if installation is unsuccessful. You can verify the absence/presence of danger using a working and reliable indicator. In addition, we must remember that there can be not one damage, but two or more. The identified danger should be eliminated by first disconnecting the voltage: unscrew the screw, dismantle the metal parts.
Next, we need to decide which part of our apartment electrical wiring has failed as a result of damage. It is extremely rare that after a line is damaged, the light in the entire apartment goes out; usually one lamp or one or more sockets simply stops working.
If the socket does not work, then you can check the presence of a “phase” in it using an indicator. There is a “phase” - the neutral conductor is damaged. There is no “phase” - we look for the place where it breaks using devices that respond to changes in the electromagnetic field, for example, an indicator screwdriver with a phase detector.
Just remember that extraneous cable lines running parallel to the test subject can cause interference and distort the instrument readings. Therefore, group circuit breakers that are not related to our tests must be turned off.
If the lamp refuses to work, the input cable of the box, the switch cable, or the lamp cable itself may be damaged. Usually, by the location of the box, you can understand which cable we are dealing with. Damage to the phase conductors of the luminaire wiring is detected when the switch is on.
In any case, the points where the phase conductors are broken are usually quite easy to find.
With a damaged neutral conductor the situation is a little more complicated. It will be necessary to do some preparatory work: turn off the circuit breaker of the affected group, disconnect the damaged neutral wire from the bus and apply a “phase” to it. Further, the damage can be found in the same way as in the case of damage to the phase wire.
A similar method is used to detect damage to the lamp switch cable if it is located after the switch itself. Since both conductors of this cable are phase conductors, it will not be possible to find out anything under voltage in this situation. It will be necessary to turn off the circuit breaker and the switch, and then apply voltage to the phase conductor from the lamp side - then it will be possible to find the break point.
When searching for faults in neutral conductors, it is often unknown which of the wires on the N bus in the distribution board belongs to the damaged line. Then you can disconnect the input neutral conductor from the common bus, open the nearest branch box of the affected group and, having determined the neutral wire, apply a phase to it from the load side. Then everything continues as before.
But finding the damage is only half the battle. As a matter of fact, you don’t have to do this at all, but immediately replace the damaged cable section. A lot depends on the situation. Let's say a damaged wire runs from a junction box to a light fixture, outlet, or switch. Then it makes sense to change the cable completely.
But if the group cable coming from the apartment panel is damaged, replacing the entire cable may seem impractical. After all, the cable can run along the walls of several rooms and have a large length. And in order to replace part of the cable, you will need to install at least one additional branch box, and this already involves clearing part of the groove. The groove will need to be cleared to free the ends of the cable running in the wall and to prepare the hole for the box.
Clearing a groove is a responsible matter and requires caution. This is best done with a hammer and chisel, breaking off small pieces of plaster and being careful not to damage the cable. Of course, the voltage must first be turned off. You should refrain from using power tools, because all it takes is one careless movement and the damage will become even more serious.
It is necessary to clear the groove approximately 15 centimeters from the damage in both directions. Then you need to move the ends to the side and use a hammer drill with a crown to punch a hole for the branch box. We install the box using alabaster, and insert the cable from the groove into it. If the damage has not significantly shortened the length of the cores, or there is some reserve, then you can insert the cable into the box on both sides and connect the cores with standard terminal blocks. That is, it is possible to do without replacing the cable by simply connecting the old cores by color. This is especially useful if the cable is damaged in only one place.
Related article: How to cover the wall behind a gas stove
The new part of the cable wiring, if any, is usually mounted in a plastic box (cable duct). The most important thing here is not to overdo it and damage other cables while drilling holes for the dowels. Well, don’t forget to disconnect and plug the old and no longer needed part of the wiring.
We close the newly mounted branch box with a lid, plaster it, level the wall and glue the wallpaper - the work is completed, you can apply voltage.
Conclusion.
Although it is absolutely clear that damage to a hidden wiring cable is not a “tragedy,” when performing repair work, it is still better to first use devices to search for live conductors so as not to create unnecessary problems. Better yet, have a detailed plan for the location of electrical wiring lines with an exact indication of the height of the cables. Still, repairing damage is quite a troublesome and dirty task. And such repairs will not benefit the interior decoration of the premises in any way.
Combined method
After looking at the whole thing and comparing the results, some began to use a combined method.
This is when routes are laid before plastering work, and socket boxes and distribution boxes are installed after. There is also a method when socket boxes are placed together with beacons according to their level.
First, the beacons were placed, all the boxes were mounted on them, and then everything was primed in one plane. However, even here at intermediate stages you can encounter problems.
Due to the fact that the socket box will not be completely recessed into the wall, it may begin to be turned inside out by the rigid VVGnG cables passing through it. At the same time, they get out of the situation as best they can. Screw on screws or dowels.
Some craftsmen even cut off the back wall of the junction box and place it on the front side, passing a bundle of wires through the inlet.
It's not worth doing this. Thus, you violate the rigidity of the entire structure, not to mention the IP protection levels.
The combined method is a kind of average option. What is called neither ours nor yours.
Highly specialized electrical specialists categorically reject it, as well as the DO options.
But builders involved in complex renovations often use it. A larger number of site visits and additional coordination of work hours do not frighten them. Do everything to them anyway.
Coordination of teams of electricians and plasterers
It is good if the home owner undertakes the repairs himself, including electrical and plastering work. However, more often this work is performed by invited craftsmen or teams of specialists. Therefore, their coordination is required.
Depending on whether the plastering or electrical work will be done first, the order of work will vary.
If the wiring installation method is a priority, the order is as follows:
- Electricians are invited to run cables along the ceiling (or along the subfloor), then install distribution boxes, install socket boxes for (sockets and switches) on the walls, and connect wires to them.
- Plasterers are called in to plaster the walls.
- Electricians align the socket boxes to the level of the plaster and install the shield.
- Finishers perform finishing work (gluing wallpaper, painting, etc.).
- An electrician is invited to install switches, sockets and power the electrical wiring.
If plaster first and not electrics, the order is different:
- A team of plasterers is invited to prepare the walls. They do rough leveling with mortar.
- Electricians come in, carry out design markings, trench the walls, and cut out recesses for the socket boxes. They install socket boxes, lay wires, mount sockets, switches, connect the network to the panel, test and turn off the power to seal the grooves. Here, an option is possible in which electricians do not install the “stuffing” in the socket boxes, but carry out this work, as well as testing and commissioning at the final stage (after the object is handed over to the finishers).
- Finishers complete the finishing touches.
With a combined method, electricians are invited first, then return again after the finishers.