Before you paint a door to look like wood, you need to study the process and become familiar with the features of the procedure. Do-it-yourself painting of wooden doors is often done on new structures. And many are renewing the life of old doors. In any case, this mission is carried out using similar methods, regardless of whether the application is carried out on a new surface or on one that previously occupied pride of place in the doorway.
The process of painting an old door to look like wood
For the correct dyeing process, you should familiarize yourself in detail with all the nuances and features.
Paint selection
Based on what exactly will be done with the door, you need to choose the right way to paint the door. In this case, there may be two methods of doing the work:
| Door design method: | Materials used: |
| Highlighting wood texture: | In this case, it is better to paint the surface with clear varnish, oil impregnations or stain, and also use tinting mixtures. |
| Complete removal of the old door surface pattern and application of a new one: | If you need to create a new design that will imitate wood, then the paint should be wood-like, based on an acrylic, polyurethane or oil composition. |
Important! When choosing paint for painting doors, it is better to give preference to a water-based acrylic composition. The mixture can be used for application with a brush, and in terms of consistency this mixture will be the most optimal. If the wood is in a bathhouse, then it is better to use an alkyd composition that can repel water.
How to paint a door with your own hands (video)
Painting
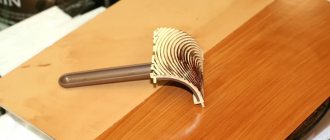
Before starting decorative work, a primer is applied to the base using any painting tool and left until dry. You can create wood-like decor on dried soil with your own hands in three ways:
- when using a special grater;
- by mixing liquid paints;
- method of applying soot.
When deciding how to paint a door to look like wood or decorate any other piece of furniture with your own hands, everyone chooses the most convenient method for themselves.
If you have doubts about your decorating abilities, then you can practice using a grater on unnecessary grounds.
Liquid mixing
This technique is a little more difficult for beginners. Here you need an artistic flair and a sense of color, and this method can only be used on relatively large, flat areas. But do not neglect this technique, because with its help you can create an amazing wood pattern. The sequence of actions is as follows:
- Light-colored enamel is applied and slightly dried. There is no need to wait long, because for the next stage the base dye needs to be wet.
- Take a brush. If the first layer can be applied with any painting tool, then a brush is required for the second. Using a brush, apply a dark layer on top of the first, still liquid, layer. Mixing paints while working with a brush produces stains that resemble a wooden cut.
- After drying, the resulting pattern is varnished.
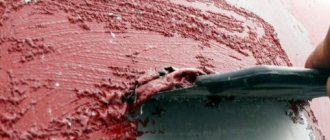
Applying soot
This method is very simple and is most often used to decorate plastic in car interiors, but other materials can also be painted in this way. This technique requires enamel of only one color, preferably dark, and a plastic stick; many take a fork or spoon from a set of disposable tableware for this purpose. The work is carried out in the following way:
- Automotive plastic parts or other objects intended for decoration are painted in the selected color and left to dry completely.
- A stick or any other thin unnecessary plastic object is set on fire. As soon as the plastic product begins to smoke, you can draw with it by simply bringing it to certain areas of the surface. The random arrangement of dark, uneven soot spots allows you to get an original decor.
- The resulting result is varnished in 2-3 layers, and after complete drying the item can be used for its intended purpose.
You can create the illusion of a wooden structure on any basis; thanks to the proposed methods, you can get a stylish and expensive-looking front door or an original car interior, or simply inexpensively update a boring interior and give new life to your old favorite things.
Related article: How to make sliding doors with your own hands
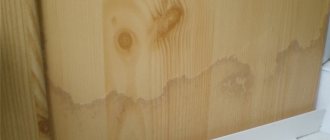
Surface preparation
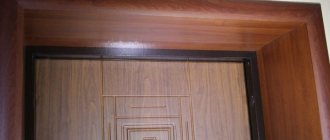
Having selected the necessary materials for painting wood-look doors with enamel, you will need to prepare the surface, and then apply a drawing of the structure of the wooden fibers. It is always necessary to prepare the surface by removing old paint or varnish, using a grinder or sandpaper.
Sanding the door before painting
To paint interior doors Canadian wood, as well as other types, you need to bring the surface to perfect condition. To do this, use a sander or sandpaper with small or medium grain. If there are cracks, holes or other flaws, it is necessary to additionally putty the surface using a wood compound. This condition is mandatory, but when using transparent varnish, the color of the putty should match the color of the wood itself. When the mixture dries and hardens, it must be sanded. After which the preparation is completed and you can proceed to coloring.
It should be immediately noted that an imitated wood pattern can be applied to almost any material. This could be a metal entrance, plastic or plastic, on a steel sheet, etc. the main difference lies in surface preparation.
Preparing items for dyeing
Of course, the preparatory steps for metal, chipboard or plastic vary slightly depending on the base, but there are general requirements:
- Remove the fixed structure and remove all additional parts from it. If permanent parts or some areas of the item are planned to be left unpainted, then it is better to seal them with masking tape.
- Remove all dirt and remnants of old finishing.
- Leveling the surface using “sandpapers”, changing the grain size from coarser to finer, can be done using a grinding machine, it all depends on the structure of the material being prepared. This step is not necessary only for smooth plastic - on the contrary, it is recommended to scratch it a little to improve adhesion with a soft metal brush.
- For metal, if there are traces of corrosion, clean it and treat it with anti-rust preparations.
- Remove all unevenness using construction putty.
- Degrease the bases. For this purpose, white spirit or other degreasers that are suitable in composition for enamel and primer are often used.
After the degreaser has dried, the base is ready for decoration.
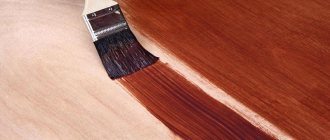
Painting the door
Painting a wooden door
Door painting is carried out using the following technology:
- White fabric dye is used and the surface is completely painted.
- After this, you need to cover the material with liquid soap. Before you paint a white wood-look door with your own hands, you will need to leave the canvas for the base layer to dry. As a rule, the drying time is indicated in the instructions.
- Next, you need to use dark enamel and cover the surface with it to create curls like wood fibers, while the liquid soap is washed off. After the work, the dissolved enamel dries and makes the necessary pattern.
An interior passage made from real wood is expensive, so you need to consider the option of creating an imitation on plywood. In this case, you will need an additional brush. With its help, the fabric is “combed” along the soft fibers. After which you can paint the surface in any color from white to dark. Next, the applied dye will spread and create the desired texture, which will resemble real fiber.
Rules for painting a wooden door
For plywood, it is better to use several shades at once, as this will allow you to create the desired pattern. When the enamel is dry, the plywood is sanded. You can see how to paint a steel door to look like wood in the video, although airbrushing can also be used.
In conclusion, based on the information described, it should be noted that creating an imitation of wood fiber allows you to emphasize home comfort. Despite the different materials, there are still general requirements; the main rule is the choice of suitable materials for the job. For example, if you just need to emphasize the fibers of real wood, then it will be enough to use impregnations. When using varnish as a finishing material, use stain, but not drying oil.
You also need to remember that many materials perfectly absorb paints and varnishes, so it may be necessary to treat the surface in 2-3 layers. It is recommended to use the color “Alder” for interior doors; a Canadian door is perfect for it. If the interior is dark, then it is better to use the color “Venga”.
Technology of painting metal doors to look like wood and stone
To create powder coatings that imitate natural materials, NAYADA uses sublimation technology - an advanced thermal vacuum decoration method. After standard monochromatic painting, the surface is decorated with the desired pattern, which is transferred from the film. The result is doors with a noble facade: aesthetic and durable.
Sublimation from NAYADA involves two-color metal painting. Both primary processing (creating a background base) and subsequent decoration are carried out strictly according to technology. This, coupled with the advanced GEMA painting line (Switzerland) and extensive experience (we have been working since 2002), provides coatings with a long service life - up to 30 years. The high quality of the decor is confirmed by a 5-year guarantee. If peeling occurs during this period, we will repaint the door completely free of charge.
Photo gallery of finished works
Preparing the necessary material and tools
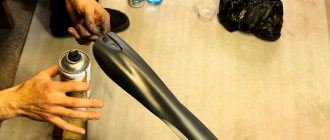
Aerosol paint
When choosing the type of dye and method of painting an iron door, it is most convenient to use a standard aerosol can, which can be charged with a coloring composition for almost any taste. Using this method of applying dye will provide you with a wide choice of colors and shades, including the possibility of obtaining a protective layer with special effects (metallic or mother-of-pearl). In addition, to paint a metal door, you can use such familiar tools as a brush, roller or spray gun.
The top can be varnished
To fix the applied dye, you can use a special acrylic-based aerosol varnish. Thus, for high-quality painting of your metal door, you will need the following materials and tools:
- acrylic enamel in an amount sufficient to treat the entire surface of the door (2-3 containers are usually enough for these purposes);
- a can of acrylic-based aerosol varnish (glossy or matte);
- a certain amount of sandpaper and a special metal brush necessary for final cleaning of the surface;
- masking tape or film (to cover surfaces that do not need painting);
- a small bowl of water, old rags and any cleaning agent you have at your disposal.
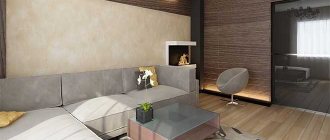
Idea nine. Regular wallpaper
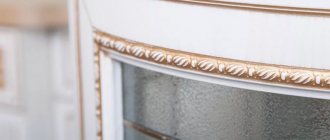
Previously, this decorative option was particularly popular, but now many designers consider it bad manners. This does not prevent ordinary wallpaper, which has “migrated” to the door, from remaining a popular way of decorating the interior. As an option, you can buy cork wallpaper and coat it with varnish on top for reliability. Their unusual texture will make the door more original.
Preparing the door is exactly the same as when using photo wallpaper. The main advantage is low cost, since you can use wallpaper left over from a previous renovation, and ease of decoration. The main disadvantage is rapid wear and tear - the wallpaper can peel off and tear at the joints.
Wallpaper glued not to the entire door, but to parts highlighted by moldings, looks more impressive
A door covered with the same wallpaper as the walls will literally blend into the interior. The reverse side of the door, of course, is covered with other wallpaper so as not to stand out against the background of the wall of another room.
Idea eleven. Posters, cards, paper
An option for creative people and a great idea for a teenager's room. The door can be decorated with a poster and an image of your favorite artist or group, sheets from an old geographical atlas, or sheet music. Pasting such paper sheets and posters is as easy as regular wallpaper.
An old geographical map would be appropriate even on the interior door of an ordinary living room, but it is better to “place” posters in a teenager’s room
Why imitate wood using plaster?
Natural wood is one of the most popular materials for finishing, but the cost of good varieties is quite high, and therefore, if you have a limited budget, you have to look for alternatives. Wood-look plaster is used as a possible solution:
- It is suitable for almost any surface.
- Can be used in various conditions, including outdoors.
- The material covers small areas or entire walls.
- Panels or boards create a noticeable load on the walls and partitions, while the final layer of mortar 2-3 mm thick slightly increases the overall weight of the structure.
- Another argument in favor of such a solution is the possibility of surface restoration. It is enough to remove the damaged area of plaster, reapply the gypsum solution and paint it.
The disadvantages include less durability of the coating than wood. In addition, when viewed from a close distance, you will notice that plaster was used for finishing, not wood.
Wood-like inserts on the facade of the house
Idea four. We paint according to the finished stencil
A very convenient and simple way to turn your door into a work of art, even if you do not have the talent of an artist. Ready-made stencils can be purchased in construction and specialized stores, or ordered on one of the websites, and the choice of designs and patterns is very large. Then we simply apply the stencil to the already prepared door and apply paint. Easy, fast and the result is very beautiful!
Applying a drawing using a ready-made stencil is as easy as shelling pears, and the choice will allow you to choose an original inscription, an exotic pattern, or an unusual picture
Such a deliberately simple design can be easily created without stencils. It was the uneven lines and simplicity that became its main highlight.
The first idea. We paint, we just paint
The easiest way to get your door in order without any frills or extra work. To do this, you will first need to remove the door from its hinges, then go over it with a spatula, removing the old paint, level the surface with sandpaper, fill up cracks and scratches with putty, remove greasy stains, cover the glass with masking tape so as not to stain it, and you can take it to the hands roller or brush! It is better to choose acrylic paint - it dries faster, and paint the door in a horizontal position - this way the paint will not drip and will lie more evenly. However, if it is convenient for you to do all of the above on a vertically standing door, you don’t have to remove it from its hinges. Just remember to put something on the floor while painting so as not to stain the linoleum or laminate.
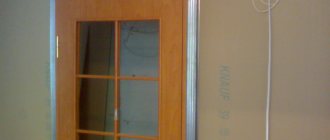
White, simply painted door. Renewing it or repainting it in a different color will not be difficult, although the moldings and carvings need special, careful handling during sanding and removing the old paint layer
Idea six. Children's creativity
Does your little one love to draw? Give him this opportunity - let him decorate the door to the children's room himself. Yes, such a naive, bright pattern would be out of place in a formal living room, but as a decoration for a child’s room it is an excellent option. Just agree with the young artist that the second half of the door is already your field for realizing your fantasies!
Usually children's paints are washed off very easily, so your novice artist will be able to paint the door again at least every day. But you will have to first prepare the canvas by putting the door in order
The procedure for performing painting work
How to independently adjust a plastic balcony door
The technology for painting wooden products assumes that the work will be carried out in several stages:
- Selection and preparation of tools.
- Preparation and processing of the base.
- Painting.
- Additional processing (if necessary).
All processes are carried out carefully. It should be remembered that wood is a capricious material and is easily deformed.
Stages of preparing and painting a wooden product: sanding, dust removal, degreasing, priming and painting
Tool
For painting you may need:
- Spray gun and compressor. This system allows you to process large areas in a short period of time. At home, an alternative can be a mechanical sprayer.
- Brush. Necessary for painting hard-to-reach places, as well as for interior painting.
- Roller. It is better to choose a fur coat with medium-length pile.
- Convenient container. If you plan to paint with hand tools.
- Rags. To quickly correct errors.
Necessary tools for painting
Everything necessary is prepared in advance.
Preparing wooden surfaces for painting
Preparation has a special role to play. If you follow all the procedures correctly, then no problems will arise in the future.
Process diagram:
- If surfaces have previously been treated, they are thoroughly cleaned of the existing coating. For this purpose, a mechanical, chemical or thermal method is used. The main thing is that the base must be completely clean.
- To properly prepare a work site, you need to assess its condition. If the previous coating quickly deteriorated, the reasons for this are first identified and eliminated. Thus, the wooden facade is influenced by water that flows from the roof. In the absence of a drainage system, the impact will be destructive.
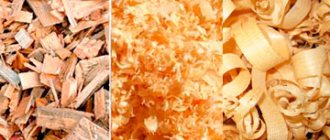
- Grinding in progress. This procedure is necessary for both new and old grounds. The resulting dust is removed.
- Traces of resin are cleaned off, areas are washed with white spirit.
- The surface is treated with protective agents. Fire retardants and antiseptics are applied first. Then, if necessary, the areas most susceptible to destruction are coated with oils. The impregnation is applied in several layers with a roller and brush.
- Further work is carried out after complete drying. Existing cracks and defects are covered with special putty. After it has set, the areas are sanded.
- Primer is applied. If required, it is necessary to treat the surface with drying oil or stain.
The coating is left to dry thoroughly; it is unacceptable to act on a wet base.
Applying paint
Painting wooden surfaces is carried out as follows:
- The process starts from the corner when working with walls, facades, floors and ceilings and from one of the ends when designing objects, furniture, and individual wooden elements.
- Oil and alkyd paints are applied using vertical strokes. Next, the composition is rubbed well, after which the movements become horizontal. Acrylic paints can be immediately laid horizontally (along the grain of the wood).
- The first layer is considered the base layer. To do this, the solution can be diluted slightly to ensure better styling. The second layer (if painting is done in three layers) creates a reliable base. After this, in places of defects, the surface is ground with fine abrasive. The last coating is applied most carefully.
- Spraying tools make it much easier to work over large areas. But when using them, the movements should be uniform and at the same distance from the base.
Rules for applying paint with a spray gun
If required, after drying, a layer of varnish is placed on top. It not only protects the paint, but also adds shine.
Technology of painting wood with varnish
Varnishing is carried out after preparing the surface. If a colorless composition is used, then the base can be treated with stain to give the desired shade.
The varnishing process itself looks like this:
- The first layer is applied evenly. Drips should be avoided.
- To achieve a better effect, grinding is carried out. It allows you to remove invisible imperfections.
- The second layer is laid. The main thing is to distribute the mixture evenly to avoid its accumulation in some places.
- The third layer completes the work.
When applying all coatings, wait until the previous one has completely dried. If necessary, the product is polished after a few days.
DIY old door decor - photo
This is not a complete list of options that you can implement yourself. Don’t be afraid of experiments and imagination, because the old door has nothing to lose in any case. And we offer you even more photo ideas for inspiration!
Idea eight. Photo wallpaper
If all the previous ideas concerned only working with paints and brushes, then this method is suitable for those who do not want to mess with paint. Photo wallpaper will instantly transform the appearance of your interior door, turning it into a striking design element. Of course, it is best to purchase photo wallpaper designed specifically for doors - in this case, your drawing will definitely look complete. Ready-made photo wallpapers usually have a standard size of 86x220 centimeters, so they are suitable only for standard doors, and without moldings and glass inserts. However, now many online stores offer custom-made photo wallpaper for doors, so you can choose the option that is ideal for your door, with any pattern. You can cut doors and regular wall murals to size, but in this case the design may look unfinished.
How do you like this unusual option - a door that has been turned into a telephone booth with the help of photo wallpaper?
Before sticking photo wallpaper, the door must be cleaned of stains, and the surface must be leveled, sanded and degreased with a solvent. You can use regular wallpaper glue, but PVA is much more reliable. The disadvantages of this option for decorating a door include the fact that a bright image will immediately catch your eye, so it can quickly get boring. In addition, photo wallpaper on the door will lose its original attractiveness due to frequent touches. However, no one will stop you from changing the photo wallpaper on your door to something more original in a couple of months.
Photo wallpapers with picturesque landscapes are especially popular
Photo wallpaper on the door will help make a small room visually larger due to the increased panoramic perspective. And it’s very easy to stick them on; you don’t even need to remove the door from its hinges.
Fabric decor
Pasting with fabric resembles wallpaper, but it looks more interesting due to its texture. If you have unnecessary but beautiful scraps left, you can make a real patchwork quilt on the door. This will fit interestingly into ethnic styles, boho, country or Provence.
You can fasten the fabric with glue or using special furniture staples - like upholstery on a sofa. The advantage of mechanical fasteners is that they are easy to remove to replace the boring coating. To decorate, use lace, beads, tassels, fringe, braid and any other decorative little things to your taste.
Metal aging
Many people make products from metal. But a modern product cannot always fit into the overall interior of a building. These are especially doors and gates. Here, too, it is quite possible to give the effect of antiquity. These are either bronze dyes or giving the effect of aging metal.
Imitation of expensive metal
Items made of precious metals make the interior sophisticated, but not everyone can afford them.
Modern stores offer a wide range of paints simulating bronze, silver or gold. They are safe, easy to use, withstand high temperatures and protect the base from rust.
Metal products can be painted in one tone, or you can try to achieve a deeper coating:
- Initially, all contaminants are removed from the metal product and degreased. Then comes the primer treatment. This will improve the quality of adhesion to the base color.
- When painting in a single color, you can immediately coat the product with metallic paint in several dense layers.
- If you want to achieve the effect of antique metal, then after monochromatic painting, all the recesses are tinted with darker paint. After complete drying, you need to give the product a time-worn look. To do this, light paint is applied to all corners and protruding parts with a dry brush. A final coat of clear varnish completes the job.
Antique metal effect
Many decorative styles suggest the presence of interior items with traces of time. Antique items are very expensive and require restoration and special care.
The best way out of this situation is to create the effect of aged metal yourself:
- On a dry and clean prepared surface, preferably with a brush, apply metallic paint with careless movements.
- After drying, the product is evenly coated with a craquelure primer. During the drying process, a transparent polymer film is formed.
- At the final stage, craquelure is applied, which will add cracks and give the item the appearance of an old, corroded material.
No matter what method of aging objects is chosen, the main thing is that the finished product brings joy and fits harmoniously into the interior.
Whether antique paint is applied to brick or antique wood is painted, preparation of the surface is extremely important. Only then will the dye apply evenly and efficiently. The instructions will help you avoid mistakes in this work.
Despite the apparent simplicity of the process, high-quality painting of doors is not an easy task. This procedure contains a whole host of nuances, only if followed it is possible to obtain a beautiful and wear-resistant product. Before you paint a metal door or a wooden interior door, you should familiarize yourself with all the intricacies of the process.
Idea three. Highlighting moldings
Also painting the door, which in general is not too different from the first option. However, in this case we will focus on the moldings, painting them in a contrasting color. White and black are a great combination, but it's a tired one, so think about what colors will look best next to each other. Designers have long recognized white and green, blue and yellow, red and dark blue as excellent options. Such a door will look great both in a bohemian boudoir and in a strict classic living room.
A white door with highlighted black moldings is a true classic. By the way, if your door does not have such decorations, it is easy to make them yourself - special thin wooden strips are sold that are simply nailed onto the door leaf
An unexpectedly bright, pink door that looks especially aristocratic and attractive thanks to the frames highlighted in white
Idea seven. Unusual texture using paint
If you think that simply applying paint is boring, and you are afraid to take on hand painting, you can try to achieve an unusual texture, such as the effect of a wooden surface or an antique door, using very simple tools. So, using a sponge you can get a mottled surface, steel wool can help you achieve the effect of an antique door, and a stiff brush can create an expressive surface on denim. Special ready-made paints are also sold that perfectly imitate jeans, wood, canvas, velvet or slate.
On such a door, painted to resemble a chalkboard, it is convenient to leave messages for household members
Requirements for paints for interior work
Interior paints must meet the following criteria:
- health safety;
- high drying speed;
- no pungent odor.
Wear resistance for such materials is not so important. Exceptions include floor, bathroom or kitchen paints. Acrylic and polyurethane water-dispersed compositions are ideal for treating indoor surfaces.
However, they are relatively expensive, which limits their growth in popularity.
Thus, the choice of paint and varnish materials is influenced by many factors: from the financial capabilities of the buyer to the operating conditions of the painted products. If you encounter any difficulties, you can always turn to salespeople at retail outlets for help.
Idea twelfth. All kinds of stickers
This simple and not too expensive way of decorating a door is becoming more and more popular today. Vinyl stickers can be purchased in online stores, the cost of a model the size of a standard door starts from 2.5 thousand rubles, they are very easy to apply and will last longer than ordinary photo wallpapers.
Stickers with such funny and at the same time useful inscriptions will not only decorate the doors, but also cheer up the guests
If you don’t want to hide the entire door behind stickers, you can purchase small images - a butterfly, a bright flower, and so on. They cost less, and will completely transform the appearance of the door. “Informative” stickers are also popular, for example, on the door of an office, bathroom or toilet, which will tell guests what is hidden behind this door.
The elegant lady on this sticker will immediately inform guests of the house that the bathroom is hidden behind this door
Often, stickers can look like ordinary photo wallpaper, and sometimes they can look like hand-painting on a white door or a child’s drawing