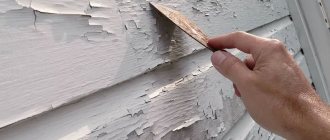
The topic is of interest to many; it is generally accepted that painting a bathtub with enamel at home is the cheapest and most practical way to restore old coatings. The outer surface will not only be restored, but will also exceed the characteristics of enamel in many respects. In order to understand the issue and make the right decision on methods for restoring the external coatings of bathtubs, you need to know what real enamel is, how the surfaces are coated and whether it is possible to obtain an identical layer at home, even using the most expensive materials.
How to paint a bathtub with enamel at home
What is enamel
In terms of physical properties, it resembles a glass-like coating fused onto the metal surface of the bathtub. Its physical properties are similar to glass, but have increased strength. It has a slightly lower coefficient of thermal expansion than metal, which eliminates the risk of delamination during heating of the base; the strength reaches 350 MPa.
On iron, it is first applied to a primer coating, and then enamel - the adhesion coefficient increases. The color changes due to additives: blue color - cobalt oxide, green color - copper oxide, white color - magnesium carbonate. Annealing temperature up to +900°C. At such temperatures, the glass melts, turns into a dense, homogeneous layer and firmly adheres to the surface of the bath. Only such a coating has the right to be called enamel.
People of the older generation remember very well how, during the times of developed socialism and general prosperity, it was impossible to buy natural coffee; it was “obtained through connections.” But all the store shelves were filled with barley coffee. The advertisement claimed that it was much better than natural coffee, contained a large amount of vitamins and other useful substances, tasted no different, was just as invigorating, etc. Although in fact this ersatz product was a little reminiscent of natural coffee only in color.
Conclusion. From a physical point of view, enamels do not exist in cans and jars. These are ordinary paints with the addition of performance-improving fillers. This is exactly how you should consider renovating a bathtub; you will not be working with enamel, but with different types of paints. Their choice is wide, there are many varieties.
Features of enamel bath coating
Why is it necessary to renew enamel?
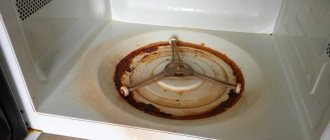
Restoring the bathtub enamel is required not only for its attractiveness; the presence of chips and rust will ultimately lead to the complete destruction of the plumbing fixtures. Enamel is a protective layer from high temperatures, cleaning agents, and sudden changes in temperature. If you do not take care of repairing the coating, the product will not last long.
It is possible to enamel the surface of the bathtub yourself; this option is inexpensive. Therefore, it will be possible to save money, which will not happen when buying a new one.
Restoring the bathtub enamel is required not only for its attractiveness; the presence of chips and rust will ultimately lead to the complete destruction of the plumbing fixtures.
Types of enamel for bath restoration
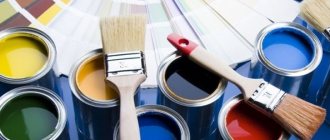
Now you can begin to consider what paints are called enamel, what are the differences, what advantages and disadvantages they have. This information will help you decide on a specific choice of paint (enamel).
| Name | Brief characteristics |
Epoxy enamel | Used to cover bathtubs for over 15 years, it consists of epoxy resin, fillers and hardener. It has high hardness and good adhesion properties. The coating is not afraid of aggressive chemical compounds, the outer surface is glossy. Disadvantages - due to toxicity, safety regulations must be followed, after preparation there is a limited time for use, low-quality epoxy paints become yellow when exposed to ultraviolet rays. |
Aerosol enamel | Drying time is no more than thirty minutes, has good adhesion to natural enamel. Available in cans, which greatly simplifies the application process. The main drawback is that the durability of the coating is poor; the bathtub will have to be repainted until a new one is installed. The frequency of repainting largely depends on the accuracy of the technology. It is not uncommon for detachments to appear within a month or two. |
Acrylic enamel | There are names like “latex enamel” and “liquid acrylic”, but in fact this is a two-component polyurethane paint. Performance indicators are at an average level; proper application and use increases the service life up to ten years. |
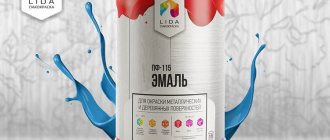
Alkyd enamel | Ordinary water-dispersion waterproof paint with ordinary characteristics. The worst choice for bathtub interior linings of all. But in terms of price and manufacturability, it is the most affordable. |
liquid acrylic
Reaflex 50 - Reaflex 50
Bath enamel "Renaissance"
You need to choose the type of coverage based on your own wishes and financial capabilities. Do not forget that the quality and durability of the coating depends not only on the materials, but also on the professionalism of the contractor.
How to choose enamel
Practical advice. We recommend using this method of restoring bathtubs for temporary residences. The less often you use the bathtub, the longer the coating will last. There is no need to explain why such a dependence exists.
When is enameling necessary?
Restoration with glass acrylic or self-leveling bath
Self-leveling acrylic is also a two-component mixture that will need to be prepared by mixing the components in the proportions recommended by the manufacturer. The mixture does not have a strong odor, which is a plus. After hardening and drying, acrylic has increased abrasion resistance. The glass spreads on its own, and the process of applying it is simple. True, skill is required, although this material does not dry too quickly. If you act slowly, you will avoid possible mistakes.
The step-by-step instructions are as follows:
- Mix the solution by combining the two components. The resulting substance must be homogeneous.
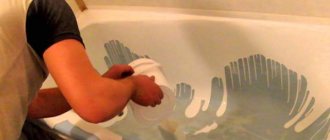
- Fill a small glass and start pouring glass onto the top of the side. As soon as the drip reaches half the depth of the bath, slowly move the container around the perimeter, constantly adding the mixture.
- Repeat everything described in the previous paragraph, only now pour acrylic from the middle of the bathtub depth. It's not worth saving. All excess will be collected at the drain and poured into the prepared bowl.
Step 1
Step 2
Step 3
If bubbles appear, smooth them out with a soft rubber spatula or brush. This surface will take 4 days to dry. Better check what is written in the instructions. Even if it visually appears that the acrylic has hardened, this does not mean that the treated plumbing fixtures can be used. The drying period depends on the temperature.
So, for “Stakryl Ecolor” the standards are as follows:
| Hardening and drying time | Room temperature |
| 36 hours | +25 degrees Celsius |
| 42 hours | +20 degrees Celsius |
| 48 hours | +17 degrees Celsius |
There is no need to artificially raise the temperature using heaters and air heaters. This will likely damage the coating. It is impossible to force natural processes without losing quality. It is also impossible to work at too low temperatures. The manufacturer gives all recommendations in the manual and description of the application.
Video – Restoration of a bathtub using liquid acrylic using the “pouring” method
This is not just a master class from a professional. A video showing how to restore the appearance with poured acrylic will be a good help. Also check out this post about DIY bathtub enamel restoration. Save the link and subscribe to the newsletter. Then, when the time comes to act, you will have a personal teacher. All stages are shown in detail, and you will not make mistakes. This means that the surface will be even, smooth, and shiny.
Prices for bulk acrylic
Before you renovate your bathroom, be sure to create an estimate. It won't be too complicated, and the final amount won't scare you. However, only by comparing the costs can you decide on the choice of restoration method.
Thus, prices for the most popular two-component glass acrylic compositions are given in the table:
| Name of self-leveling acrylic | Weight of material in packaging, kg. | Bathroom volume, cubic meters. m. | Cost of packaging, rub. |
| Plastal Premium 24h. | 3,0 | 1,5 | 2100-2300 |
| Stakryl Ecolor 24h. | 3,4 | 1,5 | 1600-1800 |
| Stakryl Ekolor 16h. | 3,4 | 1,5 | 1700-1900 |
| Plastal Premium 24h. | 3,4 | 1,7 | 2300-2500 |
Surface preparation
The better the surface of the bathtub is prepared, the more reliable the coating will be. Even the most expensive enamel will fall off after several baths if gross deviations from the recommended technology are allowed during coating.
Step 1. Inspect the condition of the bath, select a cleaning algorithm. It is best to use sandpaper; with its help you can not only remove hard deposits of rust, but also level the surface. Enamel paints cover the surface with a thin layer, through which all the tubercles will be visible. You can only tighten up uneven areas at the bottom, and even then manufacturers do not recommend pouring one thick layer of paint, but applying several thin ones. Such features place increased demands on surfaces. The exception is epoxy and acrylic enamels. They are poured in a layer up to 2 mm thick, this is enough for the final leveling of surfaces with paints.
Step 2. Place 80-grit sandpaper on a sanding wheel and begin sanding away any hard deposits and rust. There is no need to press the tool too hard against the surface; it is better to make several passes over one place. The work is dusty, close the door and window to the bathroom, otherwise drafts will carry dust throughout all rooms. Do not rub the enamel down to the metal, do not leave deep marks after the passage of the grinding wheel. It is advisable to work in a respirator.
Preparing the bath for staining
Step 3. Clean the surface from dust; you can use a soft, dry cloth or vacuum cleaner. Inspect the surfaces again and correct problem areas.
Thoroughly dust off the bathtub
Surface cleaning
Step 4. In order for the outer surface of the bath to be perfectly smooth, you need to sand it. Work with sandpapers with a number above 100, select specific values taking into account the depth of the scratches. Don't expect the paint to spread and hide all the imperfections, it won't. Especially if you cover surfaces with a spray can.
Important. Polishing the walls of the bathtub is strictly prohibited. If some areas of the bathtub did not require cleaning and remained perfectly smooth, then they need to be manually wiped with Scotch Brite. The grain size of the material is from P180 to P1000. To make it easier to determine the grain size, it comes in different colors. Green (the roughest), used to treat the surface of the bathtub before applying putty to chipped areas of enamel. Red for primer, gray for finishing coat of paint. To increase adhesion, each dried layer of paint should be wiped with Scotch Brite. This lengthens the process a little, but significantly improves the quality. Don’t be lazy, it’s better to do everything according to technology right away than to repaint the bathtub later.
Scotch Brite
Sanding wheels Scotch-brite + sandpaper
At the end of the work, carefully remove any remaining dust; the bathtub should be perfectly clean before painting. Avoid drafts, as they cause dust to appear on cleaned surfaces and paint.
Step 5. Vacuum the surface very thoroughly; a cloth will not remove fine dust from micro-scratches after sanding or wiping with Scotch Brite.
Step 6. Degrease the surface of the bathtub.
Degreasing the bathtub surface
You can use special solutions or ordinary solvents. Follow safety precautions, these substances are very toxic. Ventilate and, if possible, ventilate the room, work in a respirator and rubber gloves.
Features of liquid acrylic
Among the key features of the new technology, the possibility of independent restoration also stands out. At the same time, it takes not days, but hours to restore the former beauty of a plumbing product. The coating application method is also different. The procedure is carried out without the participation of traditional brushes. The liquid material is poured into the container along the sides. This helps to naturally fill any defects and cracks. Therefore, after a few hours, the restored product looks like completely new.
This amazing coating has good performance properties, among which are the following:
- The uniformly smooth surface is characterized by resistance to external influences;
- Due to the increase in strength characteristics, the shelf life of the product increases;
- Easy care is ensured by a regular sponge and household soap;
- Low thermal conductivity distinguishes acrylic material from an enameled surface. Heat retention can significantly improve the comfort of being in the bathroom;
- Drying of the material takes about 1-2 days.
Attention! While the acrylic is drying, it is advisable not to disturb it. It is necessary to turn off the water.
Liquid acrylic has excellent performance properties
In this case, the liquid material can be applied in a thick layer to any non-standard surface. And this guarantees owners up to 15 years of trouble-free service.
Repairing enamel chips
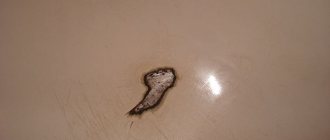
Chip on enamel
This operation must be performed without fail. Why? Firstly, paint will not hide the difference in height, especially on the side surfaces of the bathtub. Secondly, bath paint (enamel) is designed for adhesion to natural enamel; the coefficient of adhesion to metal is low; in these places it will quickly peel off.
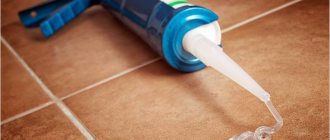
The highest quality automotive materials are used for sealing; use finishing putty.
putty
Mix the components in portions on a metal spatula and apply to the bath with a rubber spatula. The surface must first be cleaned from rust to pure iron using sandpaper or a metal brush. Next, dust is removed from the surface, the enamel around the problem area is treated with green Scotch-Brite. Try to apply the putty evenly, this will make further sanding much easier.
If there are cracks in the enamel, they must first be cleaned with the tip of a thin knife. Don't be discouraged if the enamel chips away at the edges, this is good. It will break off anyway, only after that you will have to repair the bath again. It goes without saying that before applying putty, the surfaces must be degreased.
See how to fill chips on a restored bathtub.
How to prepare a bath
First you need to clean the surface using cleaning powder and fine-grit sandpaper. It is important to remove rust, chips and scratches so that the coating becomes smooth. Severe rust and stains are removed with oxalic acid.
To do this, mix the acid with water to the consistency of a thick paste or slurry. Then dip a cotton pad in the mixture and apply to problem areas. Leave on for half an hour and then rinse off.
After cleaning, degrease the surface with gasoline or acetone. To do this, wipe the coating with a cotton pad or a small cloth soaked in one of the products. Then fill the bath with hot water, leave for 15 minutes and drain the water. After this, the surface is thoroughly dried.
It is important to carry out work only on a dry surface! Moisture must be removed from the walls, bottom and enamel pores. To properly dry the bathtub, first wipe the surface with a soft, dry, lint-free cloth.
Then use a draft, hair dryer or fan. Only then restore the coating using one of the methods described below. When purchasing products, be sure to read the instructions and follow the recommendations!
Surface protection
Protect adjacent surfaces from paint as much as possible. This is much faster and easier to do than later removing dried paint. Cover the perimeter around the bathtub with masking tape, protect the decorative screen, and cover the floor with film or newspapers.
Apply masking tape
Protect areas you don't want to damage while painting the bathtub
It is recommended to remove the plastic elements of the drain and overflow, clean the seats and degrease them. If this is impossible to do for some reason, then seal the external plastic or metal elements of the drain and overflow with tape.
There is another quick and effective method of protecting surfaces from paint. They are carefully lubricated with technical Vaseline or ordinary grease. There is no need to apply a thick layer, tenths of a millimeter are enough. The main thing is that the lubricant does not touch the surface being painted. After finishing the work, Vaseline or grease is removed with a rag, the surfaces remain in their original form.
Solid oil
Check how dry the surface of the bathtub is. Completely dry - start painting with enamel.
Let the bath dry
Use only special brands of bath paint; they are more expensive, but provide better adhesion to the enamel surface.
Acrylic liner insert
This method, according to most craftsmen, is the easiest to install.
How to choose an acrylic liner?
To ensure that the design is truly reliable and lasts as long as possible, pay special attention to the choice of liner. When purchasing, keep three criteria in mind:
- Material color. It should be bright white. The presence of a gray tint indicates the poor quality of the acrylic used for the liner.
- Liner thickness. The optimal parameter is 4–5 mm. You can clarify this parameter by looking under the rim on the edge of the bowl. In other places, the thickness of the acrylic may deviate slightly in one direction or another.
- Flexibility, strength and bowl size. The main condition on which the outcome of the procedure will depend is exactly the right size. The most acceptable option for determining the size would be to take a photo of the mark of an old bathroom or call a professional measurer to your home.
If you choose the right new liner, you can extend the life of your old bathtub by at least 10 to 15 years.
Preparing the bowl
Before you begin pre-processing and installation, try the liner for size. Sometimes a full fit can be prevented by overlaps along the edge, which can be easily removed with a grinder. When trying on, do not press down on the liner to prevent it from bursting.
Before trying on, apply a little toothpaste to the intended drain holes. This way you can accurately mark where exactly you need to cut out the drain and overflow.
Wash the old coating thoroughly, remove traces of rust and limescale from the surface. After this, go over the old enamel with sandpaper. Your task is to make the material rough to ensure stable adhesion to the polyurethane foam.
Installing the liner
After preparing the old bowl, you can begin installing the new one.
Procedure diagram:
- Apply sealant to the drain and overflow area first. Do not save the substance, otherwise there will be voids inside.
- Next, apply polyurethane foam in a thick mesh over the entire surface of the bathroom. You need to perform this action extremely quickly so that the substance does not freeze. Processing should take no more than 5 minutes.
- Insert the liner into the bathtub and press firmly on all sides.
- Remove any excess sealant that appears.
- Install a siphon.
- Fill the tub with water to provide maximum pressure on the surface and eliminate any trapped air between the liner and base.
- The next day, trim off excess foam and mask it if necessary.
Experts recommend using two-component epoxy resin-based mastics or super-strong elastic adhesives, such as SikaBond or AT-Metal, for installation.
Painting with enamel from a can
Wear gloves and safety glasses
Important. If painting is done a few days after preparing the bath, be sure to thoroughly vacuum the surface again. The dust may be invisible to the naked eye, but underneath the paint will have tiny bubbles and will certainly peel off in the future. In addition, dirt accumulates faster on the surface around the bumps and they become noticeable.
Step 1: Buy special bath paint. It is advisable to take one cylinder in reserve, it will always come in handy later.
Step 2. Study the instructions for use and unquestioningly follow all the manufacturer’s recommendations. Shake the container. There is a metal ball inside, it should make the contents uniform in consistency.
Step 3. Put on a respirator and decide on the painting sequence. It is better to start from the bottom surface of the sides, these are the most difficult to reach places. Next, move to the side surfaces and end with the bottom. The distance from the can nozzle to the surface is approximately 10 cm. Movements should be smooth and without stopping. Do not leave gaps, do not allow drips. The paint dries quickly and it is impossible to remove streaks. Even after high-quality sanding and repainting, marks will remain.
Step 4: Apply the first coat of paint and allow it to dry.
Bathtub painting
There are two methods for increasing adhesion between layers of paint.
- The first layer should not be completely dry before applying the second. How to find out? Carefully run your fingertips over the paint; it should “squeak” a little; your fingers will barely noticeably slow down. If you apply a second layer on it, the connection between them will improve significantly. Only experienced painters can do this; if you are doing this for the first time in your life, then it is better not to risk it.
- Give plenty of time to dry. Next, it is recommended to use Scotch Brite. You can buy it in specialized automobile stores or from service station employees. Buy scotch-brite in gray color, it is used for the finishing layer. The material leaves microscopic scratches on the surface, which are invisible to the eye. But due to them, the surface area increases significantly, and the adhesion strength of the next layer increases significantly.
Bathtub staining
Practical advice. Use Scotch Brite to cover the entire surface, leaving no gaps. Monitor treated surfaces carefully. We have already said that it is impossible to visually distinguish cleaned surfaces from unprotected ones. It is better to walk over the surface of the bath three to four times; this will take no more than ten minutes.
Step 5. Apply the following layers of paint using the same algorithm. We recommend painting the bathroom three times, each layer with a minimum thickness. It must be remembered that the thickness of the paint does not have a decisive influence on the adhesion strength. If the first layer is applied to a poorly prepared and poorly degreased surface, the paint will definitely peel off. The thickness of the layer slightly increases protection from water, but the coating will crack at the slightest mechanical force. It is almost impossible for non-professionals to make invisible repairs at home. Such work can be done by high-class craftsmen.
How to remove chips and porosity in a bathtub
A mixture of BF-2 glue and dry whitewash is suitable for eliminating small chips. To do this, apply the composition in several layers to the damaged areas with a brush. Be sure to wait until the previous one has dried before applying each new layer. Apply layers until the area is even with the base enamel coating.
A mixture of Super Cement glue and nitro enamel will help eliminate deep scratches and severe chips. To do this, mix the products in equal proportions and apply the composition to scratches and chips in several layers. It is advisable to apply each layer with an interval of one day.
Instead of glue and nitro enamel, epoxy resin and titanium white or fragments of porcelain tableware ground into powder are also used to eliminate deep chips and scratches. Take two parts resin to one part white or porcelain chips and mix the ingredients.
The resulting composition is applied to the chip and smoothed with a razor blade. The mixture is left to dry for five days, during which you cannot use the bath!
Nitro paint restores porous and rough enamel. To do this, a small amount of paint is poured onto the bottom of the bath and rubbed into the surface. Make sure the paint fills every scratch and every pore.
Repeat the procedure several times, allowing the surface to dry. The last layer can be applied with spray paint, as it gives the most even and smooth coating. Remove excess paint that remains after rubbing in with a swab dipped in solvent.
Painting with two-component enamel with a brush
Color selection
The surface of the bath is prepared as described above. You can use a small roller for painting, but you still can’t do without a brush. With its power, hard-to-reach areas are finished. In addition, you need to use a brush to go where the bathtub adjoins the walls, and carefully handle the drain and overflow holes. And one more problem with the roller. The paint must be poured into a special flat container, and a large surface area speeds up the drying process. You will have to work very quickly, and this will lead to defects. We are specifically considering the most complex option – two-component paints. This can be acrylic or epoxy paints. There is no fundamental difference in application technology, we will not dwell on this. You can pour paints, but you can’t do without a brush or roller. You will have to fill in the gaps, remove excess material from the bottom, and paint the sides on the bottom and sides. These surfaces cannot be flooded. But not only for these reasons we recommend using a brush. With its help, you can obtain a layer of equal thickness, save material, and speed up the hardening process. We will tell you step-by-step instructions for working with a brush.
Step 1. Prepare two-component bath enamel. Follow the instructions, mix the hardener with the base in the required proportion.
Two-component enamel
Mix the paint components according to the instructions
Important. Prepare only the amount of paint that you can use within 40–50 minutes; after an hour, the composition will begin to harden under the influence of chemical reactions.
Mix very thoroughly for at least 5 minutes. It is difficult to work by hand; it is better to use a drill with a special mixer. Reduce the speed of the cartridge; too fast rotation causes the formation of air bubbles, which will then have to be dealt with.
Stirring paint with a drill
Step 2. Place the container with the prepared paint in the bath, prepare a brush, and remove loose hairs from it. The width of the brush is approximately five centimeters. It is quite convenient to work with; all adjacent surfaces can be carefully traced. If the container with paint is in the bath, it will not accidentally tip over, and less paint will fall on the floor. Pour the mixture onto the sides and sides of the bathtub and let it drain. Now you need to paint the bottom and side surfaces of the sides, eliminate gaps and process the bottom. Some areas cannot be filled, and some take a long time. Now it’s better to work with a brush.
Add a coat of paint to the sides
Step 3. Wet the brush with paint no more than 1/3 of the way. Remove excess paint on the side of the container. To completely eliminate paint dripping, keep the brush in a horizontal position and constantly rotate it slowly around its axis. Do this until you begin to paint the surface of the bathtub. The brush handle should be perpendicular to the surface being painted or at a slight angle.
Step 4: When painting vertical surfaces, start at the top and work your way down. In this way, the walls of the bathtub are better covered, the paint flows down itself, the brush only smears it, making it the same thickness. If the marks are very deep, then they need to be slightly leveled by moving the tip of the brush in a horizontal direction.
Painting with a brush
Step 5. Constantly monitor the appearance of sagging and drips, and if found, immediately level them. You need to level it with horizontal movements of the tip of the brush. If the influx is pulled up, then after a certain time it will appear again.
Bathtub enamel
Step 6. You need to treat the bathtub with two-component paints at a time, calculate your strength, control the time. Proceed to the bottom only after the sides and vertical surfaces have been painted.
Step 7. Remove the paint container and place it on the floor. Choose a place in such a way as to eliminate the possibility of it tipping over.
Step 8. When moving the brush from the container on the floor to the bottom of the bath, do not forget to keep it in a horizontal position and constantly rotate. Start painting from a clean surface and move towards the drain hole. Smooth out paint that is too thick. Don't be afraid if there are small brush marks left, they will disappear after a short time.
Dyeing process
The quality of painting largely depends on its thickness. Keep in mind that the technology for painting a bathtub is somewhat different from treating wooden surfaces. The fact is that wood quickly absorbs paint, but the surface of the bathtub does not. Accordingly, you need to take less material onto the brush and more carefully even out the thickness. The number of layers depends on the type of bath enamel. With two-component compositions, the bathtub is covered with one layer 1–2 mm thick. The second is applied only in case of marriage. One-component paints are applied in two to three layers, each thickness no more than 0.5 mm.
Treat the process with great responsibility. Restoring a bathtub with enamel paints is already not very reliable; the service life of such coatings leaves much to be desired. And if you don’t follow the technology, it won’t last even a month. You will have to repair it (traces will remain), completely remove the paint with sandpaper (long and dusty), or buy a new bathtub (the optimal solution). Which option to choose - decide for yourself, we only give advice and step-by-step instructions for the technological process. Using the instructions, you can significantly increase the service life of a restored bath with minimal financial losses.
Renovated bath
Applying enamel
First of all, place a container under the drain hole into which excess paint components will drain. The walls adjacent to the container are covered with masking tape along the corner of contact. The washing machine, sink, furniture and everything in the room should be covered with cellophane or newspapers. You can cover not only the bathroom. This is how sinks, shower trays, and any metal plumbing fixtures are restored. The repair may involve coating the entire vessel or a separate area.
Step 1
Step 2
Step 3
Enameling is a solution to the problem, but you shouldn’t expect such a coating to last very long. An alternative is to restore the bathtub with liquid acrylic, which you can also do with your own hands. But more on that later. Enameling is the most budget-friendly method. Be sure to purchase respiratory protection as enamel paint is toxic until it dries. Then it is absolutely harmless. Unpack the enamel and hardener, mix them in the proportions indicated on the package. Stir until completely homogeneous.
Painting involves layer-by-layer application of a coloring composition. To do this, use a brush, a soft roller or a special spray gun. The last option is preferable. First, horizontal stripes are applied from top to bottom, then, without waiting for setting, vertical stripes are applied. The brush is soaked in water in advance, where it should lie for a day. Then the bristles will not break or fall off. The second layer is applied immediately. It will take at least 24 hours to dry. However, you can mount everything that was disconnected and removed only after 5 days.
Prices for bath enamel
Both Russian and Western manufacturers are represented on the market. In principle, it can be argued that in this segment of building materials the price corresponds to the quality. The main thing is that the description should mention that the enamel can be used to paint bathtubs, sanitary ware, and ceramics. By the way, you can also use regular car paint. The canister is convenient to use. One cylinder costs about 170-300 rubles. You will need from 4 to 6 of them depending on the volume of the bathroom.
How to extend the use of a painted bathtub
If you follow the rules for using a bathroom renovated in this way, the paint can remain intact for several years.
- Do not soak laundry in the bathtub. Moreover, do not add washing powder to the water.
- Wash the surface only with laundry soap, do not use aggressive detergents.
- Do not leave the bathtub filled with water for a long time, and do not fill it with very hot water.
- Do not place too much faith in the manufacturer's advertising about the durability of the enamel coating. In absolutely all performance indicators, they are many times worse than classic enamel.
Bottom line. If you want the paint not to fall off after a few months, treat the coating very carefully.
Use the bathtub carefully
How to restore a bathtub
A new bathtub is not a cheap pleasure.
The cost of acrylic models starts from five thousand rubles, cast iron - from eight, and the upper price bar goes to infinity. Don't forget to add replacement costs: dismantling the old bathtub; paying movers to remove it from the house; delivery and installation of a new bath; repositioning side tiles. Renovating an old bathtub will cost an average of 2,000 to 5,000 rubles, depending on the size of the bathtub, type of restoration and material, so many people choose this method. During the last renovation, I myself did restoration, not replacement. My choice fell on poured acrylic, but we will consider other methods, because they all have their pros and cons.
Decorating the interior surfaces of the bath
If your water does not meet the quality requirements and has a lot of divalent iron ions, then noticeable rusty spots will certainly appear on the surface of the white bathtub. It is impossible to prevent their appearance, you can only delay it a little. In order for the surface of the bathtub not to lose its attractiveness for a long time, it is not necessary to paint it white; add different colors to the paint and make the bathtub blue, green, etc. If you want, create a unique and original external and internal surface. This will take a lot of time, but the result will exceed your wildest expectations. By the way, in such a bath the defect becomes less noticeable.
Colored cast iron bathtub with a pattern
How can you decorate your bath?
Drawings
Can you draw? Great. Buy multi-colored acrylic paints and a set of brushes. Draw sea themes, various fish, algae, etc. The complexity of the drawing is limited only by your talent and desires. Subsequently, the drawings must be coated with a protective varnish. We will tell you how this is done and what varnishes to use below.
Drawing in the bath
Bath painting
Stencils
Stencil with a picture of a turtle
Homemade stencil for painting
The option is simpler and anyone can do it. You can buy a stencil in a store; today the choice is quite wide, both in theme and size. Choose single-color (easier) or multi-color options (more difficult to work with). It is not possible to purchase ready-made stencils - cut them out yourself from thick paper.
The drawing on the outside is made using a stencil
How to apply a design to the surface of a bathtub using a stencil?
Attach the prepared stencil to the wall of the bathtub. There are several methods of fixation.
- First. Masking tape. It's quick and easy to do, but paint may leak into the gap between the stencil and the surface of the bathtub. We recommend using this method only for the bottom of the bathtub.
- Second. Using contact spray adhesive. It is sprayed evenly over the entire outer surface of the stencil and polymerizes after 2 minutes. The composition adheres firmly to the stencil, and the outer surface is sticky for a long time. Do not rush to immediately glue the stencil to the surface; let the composition completely polymerize. Everything is ready - glue the stencil, carefully level it with a dry cloth or sponge. After the paint dries, the stencil peels off, leaving no traces on the paint surface. An excellent method that allows you to glue stencils on the curves of the bathtub and completely eliminates paint leakage.
Paint can get into the cracks for several reasons: it is too thin or too much, using a large brush to apply. To obtain a high-quality drawing, do not put a lot of paint on the brush, gently touch the surface of the bath. Move the brush away from the edge of the stencil.
An example of a pattern applied through a stencil
You can also use a sponge. Gently touch the surface of the sponge soaked in paint to the areas to be painted, making only back-and-forth movements. It is strictly forbidden to move the sponge from left to right. If you apply complex multi-colored designs, then you can start the second one only after the first one has completely dried. When fixing the stencil, carefully ensure that the general lines of the drawings completely coincide. A multi-colored design can be done with one stencil, but this will require extreme caution. If there are small multi-colored elements, then to paint them in different colors you need to use professional artist brushes.
Decoupage
Decoupage bath
It is recommended to do it on the outside of the bathtub, but you can try decorating the inside surface in this way. The decoupage technique is simple - cut out any designs you like and glue them to the surfaces of the bathtub. The only requirement is that the paper on which there are drawings must be as thin as possible. Otherwise, they will rise above the surface; although this is uncritical, it is ugly.
Decoupage napkin
Decoupage card
If the surface plane is flat, then the impression of the integrity of the design is created; individual cut out elements are invisible. You can glue the pictures directly onto the protective varnish. Spread it on the back of the picture and press firmly to the surface of the bath. Smooth out folds and remove air pockets. Or you can use any glue. Just be careful, it should not stain free surfaces. It is difficult to remove traces of glue from the surface with the picture, and it is impossible to varnish the bathtub in this condition.
Which varnish to use to protect drawings
Varnish for decoupage
There are a large number of waterproof varnishes on sale, all of them. But practice shows that they cannot be used for bathtubs; after just a few months of using the bathtub, they first develop microcracks, then these cracks increase, the edges of the varnish bend upward and break off. The result of this process is that the bathtub needs to be completely redone or completely thrown away. Both options cannot be considered satisfactory.
Yacht varnish
To avoid such an unpleasant situation, buy a special yacht varnish on the Internet; it costs approximately twice as much as usual. But this is not a big financial problem, you don’t need to buy a bucket of varnish, half a liter jar is enough. Varnishing is necessary not only to protect the design, it additionally increases the time you can use the bathtub. Thanks to its excellent physical characteristics, the surface does not change its original appearance for a long time.
Waterproof varnish
Types of yacht varnishes
| Names | Composition and brief performance characteristics |
| Akidlak | Made on an alkyd base, one-component, used as additional protection between layers of paint. Does not react to detergents, complete drying time is at least 16 hours. |
| Aurlak | Made on an alkyd-urethane base, withstands average mechanical loads, drying time is 8 hours. Resistant to various chemical compounds, including aggressive ones. Recommended for coating the internal surfaces of bathtubs. |
| Aurlak Express | Made on an alkyd-urethane base, drying time is reduced to two hours. Abrasion resistance is lower than that of Aurlak. |
| Polyurlak | Two-component, with high physical strength, resistant to all chemical compounds. Dries in 45 minutes. |
yacht varnish
Enameling Features
Let's start with a method that has long been familiar to everyone. A special feature of applying enamel is that there is no need for any installation work. It is enough to carry out preliminary preparation of the product for the enameling procedure. The bathtub must be cleaned, degreased, and covered with a primer layer. And only then apply layers of enamel. After this, it is necessary to dry the coating for several days. The cost of this option is extremely low, and the procedure can be repeated as many times as desired. However, achieving an aesthetically pleasing appearance does come with some disadvantages. For example, the following:
- Fragility of the finishing layer of enamel;
- The need for careful care without powder household products;
- The hygroscopicity of the material, which eventually manifests itself in characteristic stains;
- The fragility of the coating (up to 5 years).
The radiant shine of the new enamel will delight the owners for literally a couple of years. In addition, enamel is characterized by poor heat retention. Therefore, the emergence of an alternative option in the form of liquid acrylic has become a pattern. Let's consider this technology further.
Basic scheme for applying enamel to the surface of the bathtub
Properties of cast iron as a bathroom material
Cast iron bathtubs are in demand due to their durability. In production, the casting technique is used. The following advantages of cast iron plumbing can be highlighted:
- Wear resistance, the material can last up to fifty years, the enamel layer is not so durable, but with its timely restoration, the shelf life of the beautiful coating can be extended several times;
- They transmit less noise than other materials, this is due to the thickness of cast iron, which reaches up to 8 mm;
- The enameled surface can be repaired independently; the material lends itself well to restoration work;
- The base cools down slowly, so you can soak in a warm bath longer.
Cast iron bathtubs are in demand due to their durability.
How to repair a bathtub using a liner
This option is suitable for any type of bath: steel, cast iron, etc. But the price will be high and you need to choose the right insert for the size. Then the following is done:
- The base is degreased.
- Check that the hole for the drain in the insert matches the bathroom; if necessary, cut off the area.
- Inside the plumbing, the surface and the outer zone of the insert part are covered with glue.
- The “new thing” is inserted, the butt parts are treated with silicone compound.
Cold water is drawn in, and it should press its weight onto the product for 24 hours.
This option is suitable for any type of bath: steel, cast iron, etc.
What you will need
Before restoring the enamel of the bathtub, it is necessary to prepare in advance the required tools and materials:
- Protective equipment: respirator, gloves, clothing;
- Brush and roller;
- Sandpaper or sander;
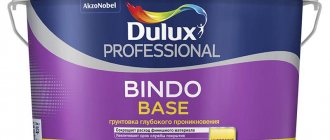
- Primer solution;
- Acetone;
- Rags;
- Enamel.
On the construction market you can find aerosol compositions and standard liquid ones. There are ready-made kits and repair kits for small jobs. For complete coloring, it is advisable to use regular enamel; to seal minor defects, you can use a spray can. Applying enamel from a can over the entire surface will not have an even appearance.
Before restoring the enamel of the bathtub, it is necessary to prepare the required tools and materials in advance.
Repair of cast iron bathtubs with enamel - what is it in simple words?
Repairing cast iron bathtubs with enamel (bathtub enamel) is, in simple terms, the process of restoring the surface of a bathtub by applying a special paint called enamel. Enameling bathtubs is not a complicated process that even non-professionals can do with their own hands at home.
As noted earlier, enameling bathtubs became a salvation for that part of the population that simply could not afford to throw away the old bathtub and buy a new one instead. This happened because people who wanted to change their bathtub were faced with a number of problems of different nature, some of which were simply insoluble.
Besides these, there were other reasons. For example, someone lived in a five-story Khrushchev-era building, and the bathtubs in such houses do not fit through the doorways due to their dimensions, so simply throwing the old bathtub into a landfill in such a house will not work.
Someone rents a home and there is no point in buying, bringing and installing a new bathtub in someone else’s home. Today the tenant lives here, and tomorrow he lives in another place. And someone, on the contrary, rents out their home and believes that there is no point in buying a new bathtub, since the tenants will destroy it anyway.
Someone’s bathtub is completely tiled, and in order to throw out the bathtub, you must first break the tiles, and this will automatically entail renovations in the bathroom. Are you ready for this and do you have enough money to purchase construction materials and pay for repairs?
In all the above and other similar situations, a way out of this situation was found in enameling the bathtub. Moreover, the bathtub did not need to be dismantled, there was no need to drag it anywhere, there was no need to break the tiles along the sides of the bathtub, there was no need to dismantle the Soviet cast-iron drainage system, which was, as a rule, in excellent technical condition.
All work was completed in 2 hours and, at the same time, this service was very cheap. In addition, it should be noted that coating bathtubs with enamel is applied not only to cast iron bathtubs. With the same success, steel bathtubs can be coated with enamel. Therefore, enameling baths is the very first way to restore baths.
And thanks to its low cost, this method of restoring the surface of bathtubs still exists. Enameling bathtubs still remains a budget-friendly way to restore the surface of bathtubs.
Briefly, when enameling a bathtub: • there is no need to dismantle the bathtub; • no need to dismantle the drain and overflow; • no need to break tiles along the sides of the bathtub.
How to restore enamel on a bathtub using ordinary enamel
Before enameling a cast iron or steel bathtub, prepare:
Bathtub enamel kit
- Electric drill (grinding wheel attachment),
- Sandpaper,
- Degreaser (for example, “Nefras”),
- Abrasive powder,
- Lint-free napkin,
- Rust converter (for example, “Tsinkar”),
- Respirator and gloves,
- Sprayer or brushes made of natural bristles,
- And the enamel itself (preferably two-component, i.e. with a hardener).