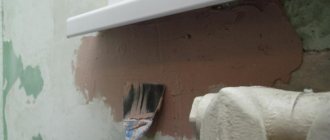
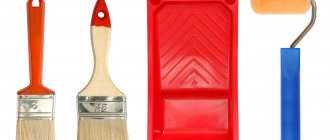
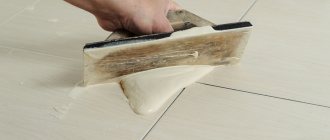
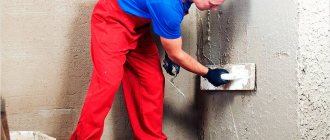
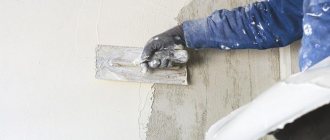
Tools and materials
Decorative bark beetle plaster, in addition to standard ones, requires the use of several specific finishing tools. The list of required materials is quite short.
Texture of bark beetle plaster
- roller;
- brush;
- cuvette;
- drill with mixer;
- Master OK;
- wide and narrow trowel;
- polyurethane grater.
- primer;
- ready-made or dry bark beetle plaster.
Ready-made bark beetle plaster
Preparatory operations and application of the mixture
Decorative bark beetle plaster requires a leveled base. Before applying the texture, the wall must be leveled using traditional methods: continuous leveling, sanding. The smooth surface is carefully primed. Application of decorative bark beetle plaster can be done after the primer has completely dried, which may take from several hours to one day.
In the technology of applying bark beetle plaster, correct mixing of the mixture is important. The instructions for use on the packaging indicate the required proportion of dilution of dry putty with water. It must be followed exactly. Thus, decorative bark beetle plaster Ceresit CT-35 requires 5.5-6 liters of water to mix 1 bag weighing 25 kg. You need to mix the whole bag at once. Determining the ratio for a partial batch is difficult. Bark beetle facade plaster is also offered in finished form. This way it costs more, but is guaranteed to have the correct consistency.
Application technology
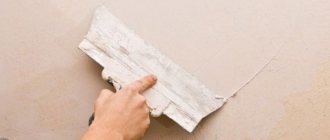
Decorative bark beetle plaster is not applied with a spatula. A wide trowel is used for this. Using a trowel, scoop a good portion of the mixture from the container and place it on the working surface of the trowel. Decorative bark beetle plaster should be applied using vertical movements from bottom to top. The mixture is distributed in strips over the surface of the wall.
The layer is determined by the size of the filler grains. The thickness of the application should approximately correspond to it. You can navigate by the nature of the distribution over the surface. If transverse waves are formed, the layer is insufficient. When the solution begins to drag behind the tool, this indicates excess thickness. You can adjust it by the angle of inclination of the trowel to the wall. A sharper angle allows you to apply more solution. As the angle increases, the layer decreases.
The consumption of plaster directly depends on the thickness of the layer. When choosing a mixture with 3.5 mm grains, keep in mind that you will need more of it than for a composition with 2.5 mm aggregate. Thus, for the Ceresit CT-35 mixture, the plaster consumption will be 4.9 and 3.5 kg/m², respectively.
Advantages and disadvantages of bark beetle plaster
Any finishing material has advantages and disadvantages. It will be useful to learn about the first and, especially, the second.
First, let's list the main advantages:
- Significant service life. As laboratory tests have shown, if the technology for applying bark beetle plaster is followed, it retains its properties for up to 20 years.
- Withstands sudden temperature changes.
- It has a low cost compared to other finishing materials.
- The ease of application allows you to do the job yourself in private homes, further reducing costs.
There are relatively few disadvantages:
- With a strong impact, a crack may appear on the surface, which is quite difficult to get rid of.
- It is not advisable to apply plaster in cold and damp seasons.
- Some cheap materials are made from low-quality components, which reduces the service life to several years.
Every person who has read the article now knows well in theory how to apply bark beetle plaster. It is enough to be careful and accurate to consolidate all this knowledge in practice.
Formation of invoice
Applying decorative bark beetle plaster should take no more than half an hour. Then the solution begins to set. After this time, you need to start creating the texture. Bark beetle facades can have 2 types of patterns:
Take a polyurethane grater, place it flat on the wall and roll the grains into the coating mass using vertical or circular movements. You need to go from the edge where you started applying. Traces remain behind the grains, which are perceived as a drawing. Excess solution is removed from the grater with a narrow trowel. Do not dump it into a container with a fresh portion of the mixture. This speeds up the setting of the new batch.
Vertical pattern of rain
It is advisable to complete the finishing of the entire façade of a house with bark beetle in one go; the transitions on this type of coating are too noticeable.
If you decide that you can do bark beetle plaster with your own hands, do not forget to find yourself an assistant. For a novice master, it is worth choosing the “rain” option. It is made easier and faster.
The main mistakes amateurs make when applying decorative coatings are:
- poor preparation of the base and application on uneven surfaces;
- using the wrong tool;
- errors when mixing the mixture;
- instability or incorrect choice of layer thickness;
- breaks in work within one wall;
- lack of speed and drying out of the mixture (working in the sun or in windy weather speeds up setting).
The list is impressive, but not everything is so scary. The task is quite feasible even with a lack of experience.
Circular plaster bark beetle
Preparing the mixture
If you use Ceresit dry mixture, then preparing the plaster is easy.
You need to remember a few simple rules:
- The optimal water temperature is 15-20° Celsius.
- You need to pour the plaster into the water, stirring continuously, and not vice versa.
- The mixture must be stirred as thoroughly as possible throughout the entire volume - it is best to use a construction mixer for this.
- When the mixture reaches the desired consistency, you need to let it sit for a few minutes, then stir again and get to work.
Obviously, there is nothing complicated about how to make bark beetle plaster with your own hands.
Is it necessary to prime the base before the bark beetle?
Many beginners ask experts whether a primer is really necessary before the bark beetle? After all, priming takes time and increases financial costs.
To answer this question, below I will list what functions the soil performs:
- Improves adhesion . The primer provides good adhesion of the primer to the surface, and accordingly increases the durability of the finish. It must be said that this quality is of particular importance when applying plaster to smooth surfaces such as concrete;
The primer improves the adhesion of decorative plaster to smooth walls and ceilings
- Strengthens the surface . The soil penetrates the pores of the base and glues them together, thereby strengthening the surface. This quality is important for loose/porous surfaces;
- Provides uniform moisture absorption . The primer forms a film on the surface, due to which moisture is absorbed evenly and, accordingly, the decorative plaster dries evenly. It must be said that for the bark beetle, uniform drying is of great importance, since the quality of the grout largely depends on this;
Priming the bark beetle
So, we found out why and how to prime the walls before applying bark beetle. But, this decorative plaster, as you know, needs painting after application. Hence, beginners often have another question: do they need to prime the bark beetle before painting?
In order for the paint to apply evenly, the plaster must be primed
On the one hand, decorative plaster has a rough surface, so the adhesion of the paint and varnish material will be good even without primer. But on the other hand, as a result of the rather porous structure, the paint consumption is high, and the paint is absorbed unevenly, which appears on the surface in the form of spots. Therefore, painting has to be done in several layers.
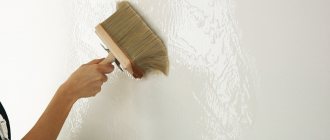
Since the bark beetle has a textured surface, it is advisable to use a roller with medium or even long pile for priming and painting it.
To reduce paint consumption and ensure uniform color, the bark beetle is primed before painting. This process is carried out according to the scheme described above without any nuances.
A universal primer for bark beetles is usually used. You can also coat the surface with a deep penetration compound if, for example, it remains after treating the base.
If you run out of primer, you can dilute the paint with water in a ratio of one to two and use it as a primer.
This, in fact, is all the information about priming the surface before decorative bark beetle plaster, which I wanted to share with you.
What primer to use
Currently, the following types of primers can be found on sale:
What power tool is used to apply plaster?
Andrey, for mechanized plastering, mortar pumps and hoppers with nozzles are used, into which soft and hard mortars are placed. The pouring machine has a steel container for scooping the solution. Four nozzles are used to supply the mixture, 4 for air. For ease of use, the holding tube is covered with a material that prevents your hands from slipping. It has a valve for supplying compressed air. The pneumopath has an average labor productivity of 60 square meters per hour.
Such units can be wall-mounted or ceiling-mounted - they differ in the shape of the bucket and its location relative to the holder. The pneumatic gun has a short nozzle barrel with nozzles through which the mixture is sprayed onto the surface using various methods. The top of the cartouche pistol is equipped with a container in the form of a plastic or metal funnel with a volume of 5 liters. The handle in current equipment has a trigger that allows you to carry out or stop the supply of the solution. It looks like an airbrush. At the bottom of the handle there is a branch for connecting an air hose to the compressor.
Different nozzles make it possible to use compositions of different consistencies. Adjusting the supply of mixture and air allows you to level the surface and apply textured spray (for decorative finishing). The construction equipment market is characterized by an abundance of machines for applying mortar using the mechanized method. Each of the machines has its own technical parameters, dimensions and equipment. German units are compact in size and allow, in addition to supplying the solution, painting.
Technology of applying primer Ceresit before Bark beetle
Everything you wanted to know about primer but were afraid to ask
Primer is one of those materials whose “service is both dangerous and difficult, and at first glance seems invisible.” It performs a lot of functions, but it always remains under a layer of paint, wallpaper or other types of finishing. In this article we will talk about what a primer is, what it is like, how to choose the best one and other interesting and useful things.
A primer is a building material that is applied to various surfaces before finishing work begins. It plays the role of a connecting link between the treated surface and the finishing layer (plaster, wallpaper glue, etc.), promoting their uniform distribution and a longer service life of the finish due to its adhesive properties. In addition, the primer can have anti-corrosion and anti-fungal properties, protect the surface from the negative influence of environmental factors, and pigments can be added to it to control the evenness of the layer application. Thanks to the application of a primer, it is possible to significantly save on finishing materials.
The primer can be sold in different forms. These are mainly: dry mixtures, packaged in bags or boxes, and liquid or paste, packaged in cans or buckets. Dry soils require preliminary preparation for work. It consists of diluting with liquid. Paste and liquid mixtures are immediately ready for use and do not require any additional preparation.
There are mixtures specified for machine or manual application, as well as universal ones.
The range of use of primer compositions is very wide; it can be used on brick, concrete, wood, metal, foam block, aerated concrete, particle board and wood fiber, gypsum fiber and plasterboard, stone (including limestone), gypsum and plastered bases.
In interior decoration, the purpose of using a primer is to bind the surface to the decorative finish. The use of primer in exterior finishing usually aims to protect certain structures from the effects of the external environment.
The primer mixture is divided according to purpose into the following types:
- Universal – suitable for any materials. Its main advantage is good adhesion to most types of surfaces and finishing materials, but on average its characteristics are inferior to each of the special compositions.
- For wood - this mixture is used to protect the tree from pests, fungus, humidity and similar adverse effects. It gives the material smoothness and saves paint.
- For metal - mainly used for ferrous metals such as cast iron, nickel-plated iron-based alloys, steel. Has good anti-corrosion properties.
- For mineral bases - this variety finds its application in the field of strengthening porous surfaces, for example, plaster or concrete. It has high penetrating properties, increases the ability of the material to withstand environmental influences, and saves the consumption of finishing materials. Often this mixture includes an antifungal component that prevents the development of mold.
Another basis for classifying primer compositions is their type:
- Antifungal - this mixture is used in rooms with insufficient ventilation and high humidity, where mold easily grows (for example, in bathrooms).
- Anti-corrosion – used for treating metal surfaces (mainly ferrous metal, since non-ferrous metals themselves are quite resistant to corrosion) in order to avoid the formation of rust. Has a high degree of resistance to environmental influences.
- Deep-penetrating - this type of primer is intended for use before finishing porous and old surfaces such as drywall, plaster, putty. Often fungicidal components are introduced into it, which help combat the development of fungus. In appearance it resembles a cloudy solution.
- Insulating – this primer is designed to combat high humidity, used for interior and exterior work. It is well suited for porous surfaces. The materials processed by it acquire durability. One of its main advantages is vapor permeability.
- Primer-paint is a universal composition that combines the characteristics of a primer and paint, suitable for many types of surfaces, both smooth and porous. Well suited for thermal insulation, waterproofing, finishing and other types of work. It has anti-corrosion properties and prevents excessive water absorption.
- Primer varnish - this composition has a combination of the properties of a primer and varnish. It is well suited for use on wooden surfaces that will then be sanded. Can be used as a finishing finish where there is no strong mechanical impact. It is moisture resistant and not affected by detergents. Used for interior work.
- A special primer is used to save finishing materials and strengthen the finishing layers. It is characterized by strength and resistance to external influences, but it does not have decorative properties and is used only for cladding.
Decorating the house with bark beetle
One of the common options for finishing a house is the use of bark beetle. To ensure that the work is done efficiently, you need to adhere to the following recommendations:
- Styrofoam sheets 5 centimeters thick are glued to the walls of the house. After it has completely dried, you need to pierce the surface with special fasteners, known among builders as “umbrellas.” For work, you should use Ceresit brand glue.
- The next step will be the installation of a reinforcing mesh, with which you can create a flat surface.
- After the glue has dried, apply the plaster.
- Before you start applying the bark beetle, you need to treat the walls with a primer.
- Once the mixture has dried, you can begin applying decorative plaster. After drying, the bark beetle may turn white or gray.
- The final stage of finishing the house is painting the walls in the color you like.
It is worth keeping in mind that you can already purchase. As a rule, this material is chosen by people who place increased demands on the surface being processed. The cost of the finishing material, in this case, is slightly higher, but its qualities are worth the money spent.
How can you highlight the openings of doors, windows, and also emphasize the external corners of the house?
To highlight the corners, you can use the well-known polystyrene foam. For work, a material is used whose thickness is 10 centimeters. This is twice as much as was used to insulate the house using polystyrene foam. The corners should be painted in colors darker than the shade used to paint the walls of the home.
In addition, there is
Another way to highlight corners is to use facade tiles. It can be of a variety of colors and shapes, therefore, the master will have the opportunity to create the most original and unique solutions.
But, nevertheless, this finishing method also has its drawbacks, the most significant of which is the considerable financial costs of their maintenance.
What types of facade plaster are there?
There are several types of decorative bark beetle plaster, each of which has a different service life:
- mineral; - acrylic; - silicone.
The last type of finishing material has the longest service life, but its cost is also appropriate. Be that as it may, acrylic plaster is the most popular among consumers, because it represents the optimal price-quality ratio.
Characteristic features of mineral plaster
The finishing material is created on a mineral basis and is distinguished by its low cost. Among the advantages of plaster, one can note its high strength, which only increases over time. Facades for which this material was used are not subject to any mechanical stress.
Mineral plaster for sale
in the form of a dry mixture, and before use it is diluted with water. Among the disadvantages of the material, one can note its inelasticity, which can cause the formation of cracks. In addition, its color range is significantly limited.
Characteristic features of acrylic plaster
This material contains acrylic. It is presented on the market in finished form, that is, it does not need to be diluted with water. Plaster can withstand significant temperature changes due to its elasticity. It contains antibacterial substances, which prevents the appearance of microorganisms. The surface treated with acrylic plaster is easily cleaned of dirt.
The material is made in a wide range of colors and shades, therefore, with its help you can create a beautiful and original design. The plaster is impenetrable and is recommended for facades insulated with expanded polystyrene. These properties are also characteristic of paint made on an acrylic base.
Characteristic features of silicone plaster
Silicone plaster is used for finishing facades. It is a kind of alloy of acrylic and mineral plaster, which means that it combines the best qualities of both types of materials.
We calculate bark beetle plaster per 1 m2
It is important that bark beetle plaster consumption per m2 is correctly calculated. This will help you buy a certain amount of bark beetle façade plaster without overpaying for too much.
The consumption of finishing material occurs according to the following method:
— you need to determine the thickness of the layer that needs to be applied to the surface. To do this, measure the surface area and determine the deviation in curvature.
It is worth keeping in mind that if the surfaces are finished using beacons, then the thickness of the layer should correspond to their height.
— all mixtures are presented on the market in 30 kg bags. That is, you need to calculate the number of bags that are needed to finish the facade of the building.
The traces left by the wood-boring beetle are intertwined into an incredible pattern that could easily bewitch, if not for the damage caused by this inhabitant of dry trunks and wooden buildings. However, now it is possible to give the walls this attractive and unusual pattern without any harm to them.
This can be done using bark beetle plaster, which will be discussed in this article. It is possible to obtain an interesting texture thanks to small stones (grains) of various sizes specially added to the mixture.
Decorative bark beetle plaster: features of application technology
One of the frequently used types of decorative design of building facades is the so-called “bark beetle” textured plaster. Today it is used almost everywhere, and there are several reasons for this: firstly, buildings finished in this way look attractive; secondly, this is a relatively cheap facade finishing technology; and thirdly, if desired, it is very easy to implement it yourself. It is this technology that we will consider in this article. Now, together with the website stroisovety.org, we will study in detail the question of how to apply decorative bark beetle plaster with your own hands, and we will also pay special attention to all the subtleties of this process, of which there are many.
Decorative plaster bark beetle photo
How to choose bark beetle plaster
Before you begin decorative finishing, you need to choose the material with which you will work.
. Bark beetle plaster, a photo of which can easily be found, is usually sold in two forms - in bags in the form of a dry powder or in buckets in the form of a paste mixture. It is easier to work with the ready-made mixture, but it is more expensive than powder, because it contains synthetic fillers (acrylic or silicone).
When purchasing plaster, special attention should be paid to the composition
. Different manufacturers usually have the same composition. If the manufacturer does not violate the technology for preparing the mixture, then there is no significant difference in the composition. All you have to do is choose a manufacturer you trust - domestic or European. It's a matter of your taste here.
But you shouldn't skimp on quality. Carefully read the composition and finished samples. You can even find a photo of the “Bark Beetle” plaster and carefully examine it. And only after detailed study make a choice.
We must not forget about the diameter of the marble chips, because it is
the grain of the plaster that is responsible for the texture of the finished surface
. When choosing a grain size, you need to take into account this feature - for decorative plaster, the consumption depends on the diameter of the marble grains. Thus, the material consumption with a fraction diameter of 0.1 mm will be greater than with a grain diameter of 4 mm.
How to prepare the base for applying decorative bark beetle plaster
I think it’s no secret to anyone that decorative bark beetle plaster and similar coatings are applied exclusively to dense surfaces. As a rule, the application of such finishing material to the walls is preceded by long and painstaking work to level the base. For the most part, in modern construction, bark beetle is used to finish external walls insulated with foam plastic or basalt slab - this is the technology that allows one to avoid painstaking work on leveling the base.
Polystyrene foam or high-density basalt slabs are attached to the wall like tiles, which allows you to solve two problems in one fell swoop - insulating the house and leveling the outer walls. Subsequently, the foam plastic is reinforced, plastered with a very thin layer, and only then decorative bark beetle plaster is applied.
How to prepare the base before applying bark beetle plaster
This is where we will begin in detail. Even before applying the bark beetle plaster, the surface of the plastered walls must be properly primed (it does not matter whether it is polystyrene foam or cement-sand plaster). An ordinary deep penetration primer is not suitable here - you need a special liquid, which includes quartz sand. If we are talking about the products of the Ceresit company, then it is difficult to find anything better than paint-primer ST-16 - it is the one that is capable of ensuring high-quality adhesion of bark beetle plaster to any surface, and at the same time depriving the base of the ability to absorb moisture.
By the way, this type of primer is used to preserve the plastered surface for the winter. This is in case someone did not have time to complete the finishing of the facade and postpones the application of decorative coating to the next season. Do not underestimate this step - temperature changes and humidity can quickly destroy the thin layer of glue applied to the foam or basalt slab. Such natural phenomena will simply tear both the plaster and the reinforcing mesh.
Primer Ceresit ST-16 before applying bark beetle photo
But let’s return to the technology of applying bark beetle and its subtleties.
Where is the decorative “bark beetle” applied?
Due to its attractive properties, this type of decorative plaster is used almost everywhere. It looks attractive in the interior of the living room, in the children's room, and even in the kitchen.
Since the coating is non-toxic and vapor and moisture resistant, it can also be used in a bathroom or swimming pool, especially if an additional coating is provided with a water-based protective varnish. In the form of a façade covering, “Bark Beetle” is successfully used both for buildings and structures, as well as for fences, finishing gazebos, borders, and the like.
Now let's look at the most popular options.
Façade finishing with bark beetle
“Bark beetle” looks attractive and can be a universal exterior decoration for both private households and office buildings. In this case, this is exactly the material that will satisfy every consumer - depending on the needs, it can be spectacular, bright or classic.
Also captivating is the ideal “price-quality” ratio in this case; “Bark Beetle” is an affordable and easy-to-use, but at the same time, beautiful type of design. For premises, such properties of the bark beetle as moisture resistance and fire resistance are also important.
When used externally, the plaster can be applied to almost any surface; it just needs to be thoroughly cleaned of dirt. There is no need to repair small cracks or irregularities; only significant flaws in the walls need this. For facade work, you should always take “Bark Beetle” in the form of a dry mixture in large volume bags. This will also be more cost effective - since the consumption in this case will be large, and it will also be more convenient for work - it will be easier to mix the prepared solution as needed.
Before applying plaster, provided that the walls themselves are smooth, the necessary preparation consists only of the priming process. It is best to use a deep penetration primer for exterior use.
If possible, it is more reliable to apply the primer in two layers - this way it will ensure strong adhesion to the plaster mixture and protect the walls from the remains of fungus and mold.
Interior decoration with bark beetle
Here, as you already understand, the scope for using the “Bark Beetle” is enormous! Before choosing and buying plaster, you need to draw up an approximate interior design, which will include how exactly this type of design will be applied. Will it be a complete wall covering or partial? This will determine how much of the mixture is needed and in what form it is best to purchase it - ready-made or dry. It is also important to think about the color scheme of the coating - it, naturally, should be harmoniously combined with other materials, if any, or furniture and accessories.
The interior work performed by the Bark Beetle has a huge variety - it all depends on the craftsman performing the work. There are several classic methods of applying and grouting grains, but individual designs invented by yourself look much more interesting.
Additional tinting or mother-of-pearl coating is also possible - these nuances can add zest to any interior.
Before plastering, the walls must be cleaned of dust and old wallpaper or paint. The plaster must be applied to a dry, clean and durable surface. There is no need to achieve perfect alignment, since the “Bark Beetle” is quite voluminous, which allows you to hide minor flaws in the walls. Before applying the mixture, a primer is required - here you can take any primer for interior decoration. If the surfaces are in good condition, one coat will be sufficient.
In rooms with high humidity, for example, a kitchen or bathroom, the finished plastered and painted surface can be additionally coated with a water-based protective varnish. This will give the walls additional moisture resistance.
How to apply decorative bark beetle plaster with your own hands
First, a short excursion into this finishing material. Plaster of this type can be produced either in finished form or in the form of building mixtures. The first of them is made on the basis of acrylic, and it is quite difficult to work with it - if we are talking about applying bark beetle plaster with your own hands, then it should be abandoned in favor of dry construction mixtures. Working with the latter is a little easier, and there are fewer subtleties here.
Application of decorative plaster bark beetle photo
To prepare the dry mixture, you don’t need a lot of intelligence - it is simply poured into water and stirred with a construction mixer. As a rule, the consistency of such a solution should resemble thick sour cream. A thinner or thicker solution is more difficult to apply - in this regard you will have to experiment a little. I want to warn you right away that you should not tint such a solution. Only acrylic mixture is tinted, and this type of decorative plaster is painted after drying.
DIY decorative bark beetle plaster
Facade decorative bark beetle plaster is applied to the walls first with a wide spatula (300-400mm), and then rubbed with a wooden grater or falcon. The most important thing in this process is rubbing; only with the help of a grater can you give a certain structure to the surface of the walls. As a rule, rubbing the bark beetle on the wall is done either in a circular motion or by moving the falcon up and down. It all depends on what kind of structure you want to get. It should be understood that the structure of this plaster is achieved through small smooth balls added to the dry mixture - both the depth and width of the grooves depend on the balls. This nuance must be taken into account when choosing building mixtures.
How to apply bark beetle with your own hands photo
Characteristics of bark beetle plaster
“Bark beetle” from different manufacturers basically has a similar composition
. Usually it includes cement and marble chips of various fractions. Thanks to the small grains, the effect of a tree damaged by a beetle is created.
Marble fractions can be of various sizes from 0.1 mm to 4 mm
. When applied with a spatula, grains of marble “scratch” the base, thereby giving the plaster its shape. The depth and width of the furrow directly depends on the size of the fraction. Plaster with a large diameter of marble grains is popular.
Since the material is used for both interior and exterior decoration of the building
, then it must have characteristics that will ensure not only beauty, but also practicality of the coating. In this regard, “Bark Beetle” plaster copes well with the given conditions.
"Bark beetle" has great heat resistance
, thanks to which it tolerates both low and high temperatures (from -55 to +60 degrees). Plaster is not susceptible to weather conditions - it does not fade in the sun, does not weather, and does not get wet in the rain.
This type of plaster is very difficult to damage or scratch. All this allows you to keep the coating in excellent condition for a long time. In the interior, such plaster will last up to 15 years.
Most often, "Bark Beetle" is produced in white color. But there are many paints compatible with this coating.
, which are added when diluting the mixture. Different shades will add richness to the plaster and make the interior unique. In addition, the paint can be applied to an already finished coating, so “Bark Beetle” allows you to choose a large number of colors. The finished plaster can be washed with a rag, brush or even a vacuum cleaner.
Subtleties and nuances of applying bark beetle
If you think that this work is replete with all sorts of subtleties, you are deeply mistaken - there are few of them, but in order to obtain a high-quality coating, it is necessary to observe these features.
- Firstly, you need to work in planes, not square meters. If you start finishing one wall, then you need to finish it, no matter how big it is. If you see that you can’t cope, make a dividing strip - masking tape is applied from top to bottom along the wall in an even strip, which is removed immediately after applying the plaster (on freshly). After you decide to continue working, the same tape must be glued along the edge of the already dry surface. Why such difficulties? It’s simple - if you don’t use this separation technology, then even after painting the facade, the junction of two different sections will be noticeable.
- Secondly, again, in order to have time to finish the started plane, it is better to work with a partner. Separating responsibilities not only increases finishing rates, but also ensures higher quality. One person should “spread” the prepared bark beetle solution, and the other should “smear” it and give the surface the desired structure.
- Thirdly, it is better to carry out the work of applying bark beetle plaster not in hot weather - rapid drying of the mixture will not lead to anything good. You either will not have time to give the plaster the necessary structure, or cracks will appear on the surface. If you decide to do this work in the middle of summer, then it is better to do it in the evening so that direct sunlight does not fall on the walls.
- Fourthly – painting. It is better to use façade paint from the same manufacturer as the bark beetle dry mixture. If you started working with Ceresit, stop with it. And don’t forget about the primer - after drying, the surface of the decorative plaster must be primed again, only this time with the usual deep penetration mixture.
Bark beetle painting technology
There are various technologies for decorative plaster with a “bark beetle” structure: rain, carpet, lamb, geometry. Painting methods also vary.
Preparatory work and tools
To apply paint or primer, you need to prepare the workplace:
- remove everything unnecessary;
- cover furniture and floors with film;
Before painting, it is necessary to cover the furniture and floors with film.
Prepare auxiliary items and tools:
- primer/paint tray;
- roller, brush and sponge;
- bucket for mixing dry mixture;
- drill with attachment;
- painting spatulas (10 and 30 cm);
- spray bottle and water;
- plastic grout for the bark beetle.
After everything is prepared, you can start working.
To apply paint or primer, you need to prepare the necessary items
Applying paint to the wall
Beginners need to know that coloring is a labor-intensive process. Sometimes painting takes more time and effort than the plaster itself. This is due to the complexity of the relief, due to which the paint is distributed unevenly.
But there is absolutely no need to rush when painting. Before painting, you need to choose a tool. For small volumes take a brush and roller. For a large area, you can use a paint sprayer, but often during operation it distributes the liquid incorrectly, becomes clogged and stops spraying. This can ruin the entire workflow. If you have a compressor, it is better to use it.
If the surface was previously painted with water-based paint and subsequent work will be with the same material, then the old paint does not need to be washed off, but the wall will still have to be primed first.
For small amounts of painting, use a brush and roller
Painting the bark beetle in two colors
If you limit yourself to one color, the result will be ordinary. To make the color interesting, you can use a two-color pigment:
- Use a brush to paint the recesses with one color and let dry.
- Then apply a layer of paint on the outside, which also differs in shade from the original coating.
In the second case, they work with a roller, making movements from top to bottom smoothly without pressure, so that the paint does not flow into the recesses.
Not everyone succeeds in painting the “bark beetle” in two colors; if it doesn’t work out, then it’s better to hire a professional painter.
To make the color interesting, you can use a two-color pigment
Tools and materials
Decorative bark beetle plaster, in addition to standard ones, requires the use of several specific finishing tools. The list of required materials is quite short.
Texture of bark beetle plaster
- roller;
- brush;
- cuvette;
- drill with mixer;
- Master OK;
- wide and narrow trowel;
- polyurethane grater.
- primer;
- ready-made or dry bark beetle plaster.
Ready-made bark beetle plaster
Preparatory operations and application of the mixture
Decorative bark beetle plaster requires a leveled base. Before applying the texture, the wall must be leveled using traditional methods: continuous leveling, sanding. The smooth surface is carefully primed. Application of decorative bark beetle plaster can be done after the primer has completely dried, which may take from several hours to one day.
In the technology of applying bark beetle plaster, correct mixing of the mixture is important. The instructions for use on the packaging indicate the required proportion of dilution of dry putty with water. It must be followed exactly. Thus, decorative bark beetle plaster Ceresit CT-35 requires 5.5-6 liters of water to mix 1 bag weighing 25 kg. You need to mix the whole bag at once. Determining the ratio for a partial batch is difficult. Bark beetle facade plaster is also offered in finished form. This way it costs more, but is guaranteed to have the correct consistency.
Application technology
Decorative bark beetle plaster is not applied with a spatula. A wide trowel is used for this. Using a trowel, scoop a good portion of the mixture from the container and place it on the working surface of the trowel. Decorative bark beetle plaster should be applied using vertical movements from bottom to top. The mixture is distributed in strips over the surface of the wall.
The layer is determined by the size of the filler grains. The thickness of the application should approximately correspond to it. You can navigate by the nature of the distribution over the surface. If transverse waves are formed, the layer is insufficient. When the solution begins to drag behind the tool, this indicates excess thickness. You can adjust it by the angle of inclination of the trowel to the wall. A sharper angle allows you to apply more solution. As the angle increases, the layer decreases.
The consumption of plaster directly depends on the thickness of the layer. When choosing a mixture with 3.5 mm grains, keep in mind that you will need more of it than for a composition with 2.5 mm aggregate. Thus, for the Ceresit CT-35 mixture, the plaster consumption will be 4.9 and 3.5 kg/m², respectively.
Formation of invoice
Applying decorative bark beetle plaster should take no more than half an hour. Then the solution begins to set. After this time, you need to start creating the texture. Bark beetle facades can have 2 types of patterns:
Take a polyurethane grater, place it flat on the wall and roll the grains into the coating mass using vertical or circular movements. You need to go from the edge where you started applying. Traces remain behind the grains, which are perceived as a drawing. Excess solution is removed from the grater with a narrow trowel. Do not dump it into a container with a fresh portion of the mixture. This speeds up the setting of the new batch.
Vertical pattern of rain
It is advisable to complete the finishing of the entire façade of a house with bark beetle in one go; the transitions on this type of coating are too noticeable.
If you decide that you can do bark beetle plaster with your own hands, do not forget to find yourself an assistant. For a novice master, it is worth choosing the “rain” option. It is made easier and faster.
The main mistakes amateurs make when applying decorative coatings are:
- poor preparation of the base and application on uneven surfaces;
- using the wrong tool;
- errors when mixing the mixture;
- instability or incorrect choice of layer thickness;
- breaks in work within one wall;
- lack of speed and drying out of the mixture (working in the sun or in windy weather speeds up setting).
The list is impressive, but not everything is so scary. The task is quite feasible even with a lack of experience.
Circular plaster bark beetle
