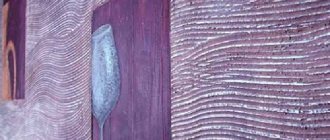
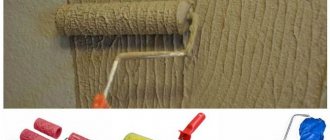
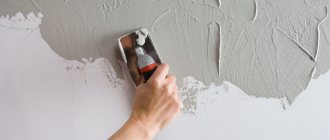
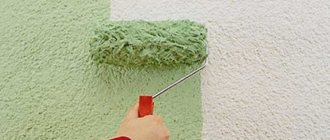
Decorative plaster is a modern way to protect and decorate buildings, however, at the same time it is a very responsible job. If the material is applied with high quality, the appearance of the house will be attractive, moreover, the consumption of the composition will be minimal, and its durability will be maximum. In order for the solution to adhere very firmly and efficiently to the surface, before applying decorative plaster, it is necessary to use a special primer that is treated with the building. Experts in the field of construction and finishing say that a primer for decorative plaster must be used, and it must be applied correctly, in accordance with the technology.
Extension of service life
In order for the plaster layer to have maximum service life, it is necessary:
- qualitatively level the surface vertically and horizontally;
- apply the finishing type of putty to seal all cracks and irregularities;
- apply a special primer to the surface of the walls, thanks to which the decorative finish will adhere well;
- make the base surface strong enough for further finishing work.
To carry out all of the above work, you first need to find out what materials the building is constructed from and assess the technical condition of the walls. For example, if the base is porous, made of brick, concrete or wood, and also if it is an internal surface, then it must be treated with deep penetration soil. This composition allows the surface to be vapor-permeable, and at the same time, the finishing material adheres well to the base coat. To perform external facade finishing work, completely different types of soil are used. It is advisable to purchase primers containing antiseptic additives, thanks to which mold and fungi will not appear on the surface of a building finished with plaster. If the walls are loose, then primer compositions that have a strengthening effect are used. Thanks to them, the density will be significantly increased and the adhesive characteristics will increase significantly. These types of soil can even be used for applying to a lime layer, because if this is not done, then after a few years the finishing material will begin to deteriorate.
Alignment
Before carrying out finishing work, the area must be leveled. This can be done in various ways, but the hanging method is considered the most effective and efficient. First, the area is marked diagonally using dowels, then a measuring thread is pulled between the driven dowels. Then, using this thread, you can see where the surface needs to be leveled and how much. Before plastering, you can smooth out the gaps using putty. When it is completely dry, it needs to be primed. If there are large protrusions and excess mortar, they can be knocked off with a hammer or chisel. Thanks to high-quality and scrupulous leveling, the consumption of expensive decorative plaster will be significantly reduced. In the event that the surface is very uneven, when the gaps are 4-5 centimeters or more, then experts recommend leveling not by plastering, but by other methods:
- creating a smooth metal frame;
- upholstery of walls with wooden shingles.
The metal frame, of course, significantly increases the load-bearing capacity of the wall area, but it is used less often than wooden shingles. Why? Because metal is significantly more expensive, and it also needs to be coated with an anti-corrosion compound to extend its service life.
Primer selection
The primer applied under decorative plaster can be divided into several categories:
- alkaline, acidic or neutral;
- various indicators of adhesive properties;
- different viscosity of the composition;
- suitable for a certain type of plastering.
If there are many external defects on the walls, such as rust stains, salt deposits, and others, then you need to purchase primer with a high alkaline composition, the pH of which is 8 or more, to hide these defects you need to use a deep penetration primer. This mixture neutralizes any salts, even very deep ones. Rust must be removed, as it reduces the adhesion rate, destroys the wall and the primer if the mixture is chosen incorrectly. Low pH soils are suitable for application inside buildings where air humidity is low. In this case, the soil consumption will be much less than outside the house.
What is the best primer to choose for plaster?
The choice of primer composition is determined by three basic criteria. These include operating conditions, nature and condition of the work site. With the first and last, everything is simple: outside or inside the room, is there a need to strengthen the walls or reduce absorbency. Let's take a closer look at the second point.
How does it depend on the wall material?
The nature of the base is an important point that is taken into account before choosing a primer. This is due to differences in the chemical composition, density and vapor permeability of materials. The primer must have high adhesion to the base. After all, this is the primary task solved by the master.
Note ! Gypsum mortar is not resistant to rust. Therefore, it is important to pre-prevent the occurrence of corrosion.
Puttying
When the walls are plastered, they must be puttied, be it external or internal surfaces. You need to select putty depending on the type of plaster or the type of building materials used to construct the building. In order for decorative plaster to be durable and hold firmly, you need to choose the right primer mixture, otherwise the layer of plaster will peel off completely or partially. To prevent this from happening, it is necessary not to use putty consisting of highly viscous substances, as well as those that do not absorb moisture well, for example, you should not use oil putty, glue, or primers based on alabaster.
Primer of walls for plaster, why is it needed?
Each treated surface differs both in structure and in its own set of physical and mechanical characteristics, such as adhesion, adsorption or wettability. In order to ensure the predicted result (quality), they resort to a kind of “intermediary” - an intermediate layer of a special composition, which makes it possible to bring the mentioned physical properties to a certain average level:
- Level out unevenness. Thus, the primer for brick under plaster will differ in composition from that needed for wood;
- Increase the level of adsorption. Glue and paint last longer on a pre-treated surface;
- Ensure the required degree of adhesion, for example, for wallpapering walls;
- Get a protective waterproofing effect. Some materials become saturated with moisture over time and become unusable.
The primer for brick under plaster will differ in composition from that needed for wood.
Correct priming
Before applying a layer of decorative coating, the following conditions must be met:
- prime the area at least twice, the thickness of the layers should be approximately 1 centimeter, more is possible. If you prime with a thin layer, then such protection will be insufficient; it will poorly hold heavy plaster on the wall. Naturally, the thicker the layer, the greater the material consumption;
- The primer can be applied either with a wide brush or with a roller. You should not use narrow brushes, because the layer of soil will lie unevenly, and it will be difficult to maintain the same thickness. Also, experts do not recommend using a spray gun, vacuum cleaner or spray gun, because due to the use of these devices, the quality of the coating will suffer and soil consumption will increase. In addition, deep penetration soils will not be able to penetrate deep enough into the walls if spraying devices are used. The consequence of this will be peeling of the decorative coating some time after application;
- Upon completion of priming, it is necessary to wipe down the treated areas. This operation must be performed for external and internal work. Thanks to grouting, the soil layer is significantly compacted, this will enable the decorative coating to adhere well to the surface;
- The soil should not be allowed to dry out, so before plastering it is periodically moistened. This can be done with plain water, which can be applied with a spray bottle. Decorative types of plaster are of much higher quality and are easier to apply to slightly damp walls. It is very important to do this, especially for interior walls.
Priming walls before plastering - step-by-step technology
When planning a renovation, it is important how long it takes for the primer to dry on the walls. The polymerization period of the impregnation depends on the type of polymer components and drying conditions.
The times indicated by the manufacturer are approximate, since the speed of the polymerization process also depends on:
- type of solvent (acrylic - 3-4 hours, glyphthalic, oil - about a day);
- thickness of the applied layer;
- the condition of the substrate (dry, porous allows the impregnation to set faster, a recently laid coating slows down drying);
- In dry, warm air, polymerization proceeds faster.
The timing depends on the composition:
- glyphthalic impregnations take a day or more to dry;
- alkyds require ~20 hours;
- acrylic – after application from 300 minutes.
To begin with, the primer concentrate is diluted with clean water as specified by the manufacturer. The finished soil is not diluted, but mixed, “churning” in the canister. If you choose a roller for application, it is better to use a plastic tray.
How is the wall primed before plastering? There are two main methods of priming - manual and mechanical application. For the first, brushes and rollers are used. For mechanical application, various sprayers or spray guns are used.
Surface preparation
To perform a primer before plastering the walls, preparatory steps are necessary. The old coating is removed from the walls, cracks and large chips are repaired. Cracks and masonry seams are opened. Remove stains of rust, efflorescence, and various oils. Neutralize and clean areas of rot, fungal and mold colonies. Metal parts are insulated (coated with an anti-corrosion agent). The concrete is covered with notches. The walls are dusted and dried. The wiring is disconnected from the current.
Tools for work
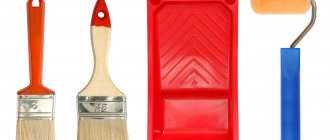
The main tools for manual priming are:
- brushes (for treating small areas or places where access is difficult);
- rollers.
To prime the ceiling, it is convenient to place the roller on a long handle (extension handle) and work from the floor (without scaffolding).
Priming Tools
To wet the roller, use a special plastic bath with a ribbed bottom. You will also need a container for diluting the concentrate and a measuring container for measuring water. Film and masking tape are used to protect windows, door frames, door panels and floors. You will also need clean rags and protective equipment.
If the primer gets on the glass, it must be cleaned immediately, otherwise, after drying, you will need a scraper to clean it.
Applying primer to the wall
The procedure for priming:
- Prepare the necessary primers and tools.
- Clear the room of furniture. Cover or cover windows, doors and floors with film.
- Remove the old coating and properly prepare the surface of the walls for plaster.
- The concentrate is diluted.
- Prime the ceiling. The roller (in the first pass) is carried out parallel to the wall with window openings, and the second time it is applied towards it.
- Prime the walls without leaving any unprimed areas. The resulting drips are smeared so that unevenness does not form (when priming for finishing). The direction of movement of the roller/brush (for two-layer application) is vertical.
- The wall should dry for the time specified in the instructions.
- Reapply a layer of primer. The roller is moved across the previous application movement.
- Dry the primed surfaces.
The information presented will help you decide whether priming of room surfaces is necessary, as well as selecting a primer suitable for your room. Priming the walls before plastering is an easy job. The main difficulty is the right choice, which determines the strength of the new finish.
