There are two ways to level the ceiling: wet and dry. Dry leveling - installation of drywall, installation of a suspended ceiling, etc. The wet method is plastering the ceiling with putty or plaster composition. Plastering is the most common leveling, which will be discussed in the article.
Pros and cons of plaster
Before deciding which is better to choose: plaster or suspended ceiling, it is worth considering the advantages of each option for a specific room. The use of wet leveling is appropriate if the height difference is no more than 50 mm. Since the plaster mixture has a significant specific gravity, falling pieces of heavy plaster finishing can be dangerous. Therefore, if the difference in height of the ceiling surface is large, they resort to dry leveling.
If the construction flaws are minor, the surface is almost flat, there are only small cracks and crevices, the ceiling surface is puttied, applying a layer of 3-4 mm. In intermediate cases, leveling is performed by plastering.
Advantages of plastering:
- strength,
- monolithic coating,
- environmental friendliness,
- washability;
- no frame required
- long-term operation,
- maintainability,
- doing it yourself is cheaper than a stretch ceiling,
- the decrease in room height is insignificant.
Minuses:
- limited coating thickness;
- Some work skills are required;
- can be expensive if you hire specialist plasterers.
The question of what to choose - plaster or suspended ceiling - was resolved in favor of plastering. Let's consider the following question.
Selection of plaster
Before starting work, the eternal dilemma arises - what material is better to use? Doubts arise due to the wealth of choice that buyers now have. Indeed, hardware stores are filled with various mixtures, but you should focus on three main ones:
- Ready-made solutions based on polymers. They meet all the needs that arise when plastering the ceiling with your own hands. There is also a significant drawback - the high price. Considering that large irregularities have to be corrected, the financial costs will be quite large.
- Cement-sand mixtures. These are excellent materials to which lime is additionally added. They require some skill to work with, but they do not shrink (if used correctly).
- Gypsum compositions. It seems that this is the best option for independent use. Of course, they will not lie on the surface themselves, but plastering with such mixtures is much easier. In addition, they have excellent adhesion to concrete bases.
Plaster mixtures for ceilings
On a note! You need to be careful when choosing material. The fact is that many manufacturers indicate on their packaging that the composition is intended exclusively for work with ceiling structures. This is a marketing ploy, because such a product will cost several times more than identical options.
How to properly plaster ceilings, choosing a mixture
The correct choice of plaster composition is especially important for plastering the ceiling.
The main things that must be ensured:
- strong adhesion of the coating to the ceiling surface;
- the solution should not create difficulties during application (be too sticky or fall off the base);
- the quality of the mixture must be maintained until hardening begins (delamination or the start of setting before the guaranteed lifespan is unacceptable).
You also have to choose between a ready-made mixture and a homemade composition. In ready-made mixtures (mineral ones are usually sold in powder form), the composition of the components is carefully selected, which includes all the necessary additives, fillers and binders. Homemade compositions are many times cheaper. They are more of a hassle, but if you follow the basic rules, such formulations are not inferior to store-bought ones.
The size of the fractions can tell you what kind of SS (dry mix) the seller offers - putty (fraction size less than 0.3 mm) or plaster (up to 2.5 mm).
When deciding which mixture to choose, you need to remember the climate of the room being plastered. Simple gypsum compositions are not suitable for wet rooms. For a country house where people live only in the summer, it is more correct to choose compositions for the facades.
Cement based
These mixtures are characterized by their low cost, great strength, versatility, water resistance, and durability. Versatile, frost-resistant. These are the advantages. The disadvantages include instability to vibration loads, a long time to gain strength, and the hardening solution easily becomes covered with cracks if the rules for preparing the mixture and hardening are violated.
The main type of cement used as a binder is Portland cement. Other types are also used. Lime is often added to cement mortar to increase plasticity. There are also cement-polymer mixtures. In decorative compositions, the binder can be white Portland cement.
The specific weight of the solution is higher than that of the gypsum mixture. The maximum thickness of the applied layer is less than that allowed for gypsum. Fits well on concrete base.
Gypsum based
Probably the most favorite type for plasterers. Gypsum sets very quickly and gains strength. The advantages include the low weight of gypsum plaster, plasticity, naturalness, versatility (suitable for most base materials), non-shrinkage, good vapor permeability, low thermal conductivity, and maintainability.
The main disadvantages are fear of water, rapid setting, low frost resistance. As a binder it combines well with lime. There are also gypsum polymer mixtures.
Clay based
The material is cheap, natural (you can scoop it up almost under your feet). Time-tested. Waste-free (dried clay can be easily soaked and used again). Creates a comfortable microclimate in the room. The best choice for finishing a wooden ceiling. Absolutely harmless. Clay plaster can even be applied by hand. Together with sawdust or straw it creates warm walls.
Disadvantages: it takes a long time to dry, which is why there is high humidity in the room, the permissible minimum layer is 10 mm, it gets wet with abundant long-term moisture.
Modern compositions
Although polymer solutions are expensive, they are strong, durable, and elastic. Their adhesion is higher. Sticks to almost all types of substrates. They are easy to install, quickly gain strength, and are not afraid of vibrations and shrinkage of the building. They are not afraid of moisture and are resistant to aggressive substances.
These include:
- acrylic,
- silicone,
- siloxane,
- polymer cement compositions.
They are usually applied in a layer of up to 3 mm, so they are only suitable for smooth surfaces.
Materials
Before starting repairs, you need to decide how best to plaster the ceiling. You can use a standard cement-sand mortar or add lime to it. It is better to apply the plaster in a small layer. This mixture turns out to be inexpensive, despite this, it is used infrequently recently, since it can fall off or become cracked.
Instead of conventional mortar, it is better to use polymer-based plasters, since they have strong adhesion and are less likely to crack. But these compositions have a drawback - high cost. Many home craftsmen prefer modern mixtures, so as not to have to redo the work later when the applied layer falls off.
When choosing plaster for the ceiling, it doesn’t hurt to use the recommendations of experts:
- When plastering smooth surfaces of ceilings and walls, the Knauf Rotband mixture, which has a white or gray color, has worked well. It can be applied in a layer of 5 to 50 millimeters. Polymers are added to this gypsum ceiling plaster.
- To restore old plastered surfaces, including facades, the gray Knauf Sevener plaster-adhesive mixture is suitable. Consists of Portland cement, reinforcing fibers and polymer additives.
- If you plan to use the compositions in rooms with normal humidity levels, you can purchase Bergauf Bau Interier or Volma-Canvas.
If you have insufficient experience in carrying out such work, when deciding which plaster to choose for the ceiling, you should pay attention to the time it takes for the mixed mixture to harden. During this period, it is necessary not only to apply the solution, but also to level it, since then it loses its elasticity.
Of the above-mentioned plaster compositions, Volma-Holst, made from gypsum with biological and mineral additives, has the longest time period for using the mixture. But not all craftsmen like to work with this plaster; they use TM Knauf materials, despite the fact that they harden in 50 - 60 minutes. True, this is quite enough, even if there is no relevant experience.
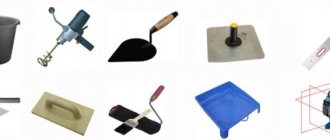
Tools and materials
You will need equipment, scaffolding and tools:
- construction trowel;
- a set of spatulas, preferably with rubberized handles (steel, rubber, plastic of different sizes);
- rule or rod with level;
- trowel;
- grater;
- paint brush;
- cord;
- mixer or mortar mixer;
- roller;
- square or rectangular containers for solution (large volume 15-20 l);
- serpyanka;
- sandpaper;
- gloves, mask or goggles, possibly a respirator, overalls.
Let's move on to the next question, no less important for a beginner.
Necessary tool
First of all, you will need a set of spatulas for work. It is better to have a tool of different hardness and width (from 50 to 120 mm). A comb spatula may even come in handy. These tools will be needed both for cleaning and preparing the surface, and for working with the solution.
Tools for plastering work Source gidpokraske.ru
In addition, finishing the ceiling with plaster will require:
- plaster trowel and spatula;
- rule and building level;
- grater and grater;
- falcon and malka;
- corner leveler and smoother;
- hatchet
To mix the solution, you will need a spacious container of up to 20 liters in volume. With high sides. Otherwise, when kneading, the liquid mixture will splash out of the container. And for ease of mixing, it’s good to have either a construction mixer or a regular drill with a special attachment.
To prime the surface, you need to prepare a ditch, roller and paint brush. The latter will be needed in subsequent stages of work. And for safety, you need to take care of a reliable stepladder. It is best to protect your face when working with a transparent plastic mask. At the preparatory stage you will need a dust mask.
See also: Catalog of companies that specialize in finishing materials and related work
How to remove plaster from a ceiling
Let us immediately note that if the old plaster holds well and has not lost its strength, there is no need to remove it.
Remove completely or partially used coating if it:
- crumbles;
- all covered with cracks;
- “blooming” (covered with mold);
- does not hold well (can be determined by tapping a dull sound) and may fall off.
When partially removing the old finish, you need to remove not only the problem areas themselves, but also the adjacent areas at a distance of about half a meter from them.
First of all, they take out the furniture, cover the floors with film or other materials, and turn off the power to the room. Then tap the entire area with a hammer. As a result, part of the old coating will fall off. Then they carry out the work according to the planned plan.
Standard manual
Use a spatula or chisel, a hatchet, or a hammer. Use a spatula to pry up the edge of the coating, then, using the spatula as a lever, break off a piece of plaster. Sometimes the handle of the tool is tapped with a hammer to drive the spatula deeper under the old coating.
The plaster finish is removed after wetting with warm water (use a brush, cloth, or roller). Allow time to soak, then scrape off with a spatula or scraper.
Finishes made on top of drywall cannot be tapped. Choose a place off to the side and carefully dig out the finishing area down to the drywall. Then, using a scraper, they act similarly to techniques with a spatula, being careful not to damage the cardboard.
They also use a “cunning way” to remove the plaster “casing”: instead of soaking, they use a softening compound. It is prepared like this: 2 tablespoons of starch are diluted in a liter of water. The product is applied with a brush to the plaster coating. After 15 minutes, remove the plaster with a spatula. If not the entire layer is removed, the product is applied again.
The coating, which holds tightly, is removed using a chisel and hammer.
Mechanical approach
How to remove old plaster that is firmly attached to the floor slab? It is removed with a hammer drill, instead of which you can use a drill with a chiselling attachment. A sander is also used (grind down to the base).
Using a grinder, cut the layer of plaster into squares, and then sequentially chip off using a chisel and hammer. The work is hard and dusty. You need stable support and protective equipment.
Removing plaster from the ceiling is a difficult task; you have to work in an awkward position. Therefore, if possible, it is better to leave the old coating.
Application technology
Acrylic putty is suitable for preparing the surface for wallpapering or painting. It is easy to apply and rub over, and is environmentally friendly.
We putty the wooden ceiling in the following sequence:
- To begin, go over the ceiling surface with a roller dipped in the primer solution.
- Prepare the starting putty according to the instructions. Apply the mixture onto the surface of a wide spatula, apply it to the ceiling and level it well. We hold the spatula at an acute angle to the surface.
- If necessary, apply a second coat of starting putty mixture.
- Then go over the ceiling with a wide spatula or scraper to smooth out any unevenness.
- Apply one layer of finishing putty under the wallpaper. Two layers are applied before painting.
After drying, the surface is carefully sanded with sandpaper, cleaned of dust and coated with deep penetration impregnation. After it has dried, the ceiling is ready for finishing.
How to plaster a ceiling correctly
To prevent cracks from appearing on the plastered surface, stains of various origins, and areas falling off, plastering must be done correctly.
So it's correct:
- prepare the surface to be plastered,
- select the composition and mix the solution,
- plaster,
- dry.
The thickness of the plaster layer is selected in accordance with the type of composition, base material, and degree of curvature of the ceiling surface.
So the minimum and maximum layer thickness for various mixtures is:
- for cement mixture – 10-50 mm;
- for gypsum – 15-25 mm;
- for gypsum-sand mortar – 10-25 (with reinforcing mesh up to 35 mm);
- for clay-sand – 10-35 mm;
- for clay-cement-sand – 15-35 mm;
- for decorative mortar - 10 (less is not recommended in order to last longer).
Depending on the base material:
- smooth concrete - 2 mm (with differences - 20 mm, greater thickness is made only with reinforcement);
- brick - 5 mm (for leveling - 20-25, with reinforcement up to 50 mm);
- aerated concrete – 2 mm (uneven – 8-15 mm);
- insulation using serpyanka - two layers in the amount of 25-35 mm (under serpyanka 15 mm, on top 10-20 mm);
- wood (two layers), top layer – 15-20 mm;
- drywall – 1.5-10 mm.
If the thickness of the plaster layer is less than 6 mm, then plastering is carried out without beacons. If, after plastering, you plan to stick wallpaper on the ceiling, the surface of the plaster layer is rubbed and sanded.
Surface preparation
Old wallpaper, paint, screws, nails and other metal parts are removed. You also need to remove the whitewash and old plaster coating. The surface is cleaned of dust.
A beginner will need to know how to repair cracks in the ceiling, seams and other defects. Cracks and seams are opened, sand and dust are cleaned with a metal brush. After removing the dirt, apply a deep penetration primer with a brush. After waiting 24 hours, apply a layer of cement mortar into which the reinforcing mesh is embedded. Apply the solution again on top of the mesh with a notched trowel, allow it to dry completely, and apply a second layer.
Removing whitewash and sealing cracks
Traces of rust, mold, and fungus are removed by wetting a sponge. Then they are treated with special compounds. cement mortar
Primer
The ceiling is primed before plastering with compounds that are suitable for both base and mortar materials. For example, a smooth concrete ceiling is coated with a concrete contact primer to increase adhesion. To prime porous materials that can draw water from the plaster mixture, use a deep penetration agent. The composition is applied with a roller in two passes. Each layer is dried for 24 hours.
Preparation of plaster mixture
The composition is prepared immediately before plastering. The prepared mixtures are mixed before use, if necessary, water is added, not exceeding the volumes indicated on the package. Dry mixtures are poured into a container filled with water (the volume is specified by the manufacturer). Mixing is done with a mixer until a homogeneous mass is obtained.
The solution is covered, allowed to stand for 20 minutes, and stirred again. For mechanized ceiling plaster, the mixture is poured into a special compartment. The mixture is prepared automatically.
Installation of beacons
Before installing the beacons, their installation lines are drawn and the ceiling is hung to check the accuracy of its plane. Nails are driven into the corners, the heads of which are spaced from the surface by the thickness of the plaster coating (approximately taken to begin with).
A wire cord is pulled tightly over the caps, along which the presence of bulges is checked. Any bulges found are cut down. If this cannot be done, pull out the nails to the height of the convex + the minimum permissible thickness of the plaster layer.
Pulling the wire cord
A nail is driven in at a convex place, according to which, using a rule with a level on the line for beacons, a nail is driven in, beginning to form a horizontal plane of the future ceiling surface. Having installed the first nail on the beacon line, hammer the second nail on the same line, making sure that the heads of the second and first nails lie on the same horizontal line.
After filling the number of nails required for installing the beacons, they begin to install metal, wooden or plastic beacons, or to make beacons from mortar. To install beacon strips, mortar marks are applied along the marking line. Under the cord stretched between the outer nails, a beacon bar is installed, recessed into the marks, so that its top is in the same plane with the stretched cord.
Installation of a metal beacon
The plank is either secured with gypsum mortar or nailed down. The cord is removed.
When making beacons from mortar, a rule or wooden strip is installed on the nail heads. As a rule, the solution is applied along the entire length. Place a square spatula perpendicular to the ceiling surface and use it to cut off the mortar protruding from under the lath (on one side and the other). As soon as the solution has set a little, the rule is carefully removed. A mortar beacon of rectangular cross-section remains on the ceiling surface.
Making a lighthouse from a solution
To prevent the rule from pulling the solution along with it when removed, it is lightly tapped in the longitudinal direction.
The distance between the beacons is approximately a meter to one and a half meters. For beginners, it is better to place beacons more often. Beacons (except mortar ones) are removed after plastering.
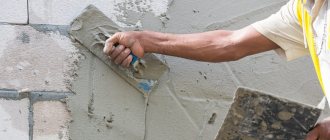
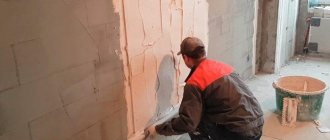
Plastering the surface
There are several technologies used to plaster the ceiling. The mixture is applied by throwing or spreading. Apply the solution with a trowel. If plastering is carried out without beacons, then the composition is applied with a spatula, spreading the mass over the surface. Having applied the first layer in this way, it is dried. Then a second layer is applied. When the applied solution has set, the ceiling surface is washed. Do this with a wet sponge, making circular movements without pressing.
Ceiling plaster technologies
Finishing layer
The ceiling to be painted should not just be flat, but smooth. Visible pores that will appear after staining are not allowed. If you are plastering the ceiling with your own hands before painting, then the plastered surface is covered with a thin (up to 3 mm) layer of coating or finishing mixture. It is more plastic, and its consistency is thinner.
Applying the final layer of plaster and grouting the ceiling
Apply it with a trowel or spatula, holding the tool at an angle. Wait until the covering hardens a little, level it by running a grater over it, removing excess from the tool. This operation is called ceiling grouting. On convex places, the tool is lightly pressed. First, the movements are performed in a circular manner, and at the next stage - in a straight line, without pressing. After grouting, the ceiling plaster for painting is dried and sanded with sandpaper.
Preparatory work
Before starting all other work, you need to prepare the base surface. Used plaster is completely removed using a chisel, hammer and other available tools. If the wooden dies have retained a light shade and there are no signs of rot or mold on them, then all that remains is to remove dust from the surface and you can continue working. If the black slats are visible and there is mold, more work will be required.
All parts affected by mold and rot must be removed. In their place, new dies are nailed, which can be purchased at hardware stores. The condition of the nails in the remaining slats also needs to be checked - over time they could have rusted or come out, and in this case, you need to knock out the nails that have come out with a hammer, and drive new ones in place of the rusty ones.
There are two types of crap: farewell and weekend. The first is intended to create a base and is laid as the first layer. The second is laid on top of the first, creating an outer layer of sheathing. The layers are packed at an angle of 45 degrees in relation to the wall and at 90 degrees in relation to each other.
Once the shingles have been inspected and replaced if necessary, the ceiling is primed to help the plaster adhere better. This treatment should under no circumstances be neglected - in addition to better adhesion of the plaster mixture, this will ensure greater safety of the wooden base and protect you from harmful mold or mildew.
If there is another residential floor or any used room above the room in which the work will be carried out, it is imperative to reinforce the surface with a painting stack. Depending on the condition of the floor, more than one layer of such mesh may be required. Each of them is laid after the solution on the first one has dried.
Step-by-step instructions for plastering the ceiling with illustrations
- First stage: prepare the room, remove the layer of old plaster, clean the surface, repair
- We remove furniture from the room and cover the floor with film.
- We de-energize the room.
- We remove old finishing (wallpaper, paint, whitewash).
- We remove metal objects (screws, nails). We insulate the remaining ones with oil paint so that they do not rust as a result of contact with the solution.
- Use a wet sponge to wash off mold, efflorescence, and rust.
- We treat stains with special products.
- If there is an old plaster coating, we remove it, not forgetting to wear goggles and a respirator to protect the eyes and respiratory organs. There are several ways to remove the coating (see above).
- Clean the surface from dust.
- We repair cracks, seal seams and holes in floor slabs with cement mortar. We embroider wide seams and cracks, clean them from dust, prime them with a brush, and fill them with foam or rags with a solution. We plaster with a solution with a reinforcing mesh (serpyanka will not work).
- We dry it and wait for the cement mortar to dry.
Removing old finish from the ceiling surface
The quality of the preparatory work determines how firmly the plaster coating will hold, as well as the appearance of the entire room (whether cracks will appear and stains will appear on the surface.
- Second stage: before plastering the ceiling, prime the surface
- We prepare the primer according to the manufacturer's instructions.
- Scooping the primer onto a roller, transfer it to the surface to be primed, distributing it evenly with straight-line movements in one direction, leaving no gaps. Where it is difficult to handle with a roller, we use a brush. We wait for the applied primer to dry completely.
- Apply the second layer, moving the roller in a direction perpendicular to the previous application. Give the primer time to dry.
To increase adhesion, be sure to prime the prepared surface.
Priming the surface not only increases the adhesion strength of the plaster finish to the ceiling, but also strengthens the base itself. Affects the duration of trouble-free operation, solidity, and durability of the finish.
- Third stage: installing beacons
This operation determines how smooth the ceiling surface and the appearance of the entire room will be. In addition, it determines the consumption of plaster materials.
- In order to evenly plaster the ceiling part of the room, we determine the “plane of the ceiling horizon” and create landmarks for the surface of the coating - beacons (see above). We purchase metal or wooden profiles.
- We attach a laser level gauge to the wall at the lowest ceiling corner. We will use it to orient the top of the lighthouse strips.
- Using a tape measure and a plane illuminated by a laser, we find the lowest point of the ceiling. You can also determine this point using a cord. Mark the point with a pencil. It will be decisive for the placement of beacons in height. The minimum height of the beacon profile is 3 mm, the total thickness of the coating is 6 mm. This means that the top of the planks should be 6 mm below the point.
- Apply with a pencil to the surface of the beacon attachment line. We select the distance between them so that it does not exceed the length of the rule minus 20 cm.
- To fix the plank along the line, we make marks - patches of gypsum solution. We apply the profile to the stamps, recessing it so that the top exactly coincides with the “horizon plane”. Remove excess mortar protruding above the profile with a spatula. We give the solution time to get stronger and begin installing the beacon on the next line.
- If the thickness of the future coating exceeds 2 cm, install a reinforcing mesh.
Laser level mount
Determining the lowest point of the ceiling
Drawing a pencil line for attaching beacons
Beacon installation
- Stage four: preparing the SS mortar for plastering
- Pour water into a square container intended for the solution in an amount slightly less than indicated on the package.
- Add all the mixture that is in the package.
- Dip the end of the mixing attachment into the mixture and turn on the mixer. Mix the contents of the container until the mass becomes homogeneous. If the dough turns out to be thick, dilute it with water to the desired consistency. At the same stage we add color if a colored solution is needed.
- Cover the mixed solution with film or a lid. Let it “infuse” for 20 minutes. Then mix again.
We produce the prepared solution until the end of its life - 40 minutes
- Fifth stage: plaster the surface.
- We begin to apply the plaster solution between the two beacons (the first and second from the edge, and not between the corner and the first beacon). Fill with solution
- As professionals recommend to beginners, when applying plaster to the ceiling, first apply a thin contact layer and immediately on top of it - the main amount of the solution, which is already coming out on top of the beacon strip. The use of a contact layer reduces the amount of waste (falling off the surface of the solution).
- Using the rule, pressed against the beacons, moving towards you, we stretch the solution. The excess mass, which is removed according to the rule, is collected from it with a spatula and sent to where there is not enough solution. We usually do this several times until the entire surface is level.
- We continue plastering the ceiling along the beacons in a similar way until we can plaster the entire surface. To level the solution between the outermost beacon and the wall, we usually rest it on two nearby beacons.
- We wet the sponge with water, moisten the surface of the set solution (we use the sponge without pressing).
- Gloss the surface with a wide spatula.
- Use a spatula to pry up the beacons and remove the planks from the solution.
- Fill the grooves with mortar, leveling with a wide spatula. We also wet and gloss it. Plastering on e is completed.
Application of contact layer
Applying the main amount of solution
Stretching rule solution
Leveling the solution using the rule
Removing planks from the solution
Filling grooves with solution
Plaster
To prepare plaster mortars, binders, aggregates and water are used. All these components are mixed well until a homogeneous mass is obtained. A solution that adheres in a thin layer to the paddle with which it is mixed is considered suitable for use. binding materials. These include: building air lime, podzol, okshara, carbide sludge, clay, building gypsum, Portland cement and Portland slag cement.
Construction air lime is produced by burning limestone. It hardens only in air. This lime is used in the form of lime paste and requires slaking. Before slaking, the lime is ground into a very fine powder. In this form, it is slaked in the solution itself.
Sometimes it is necessary to slak lime into fluff, that is, into a fine powder in cases where there is not enough water. If there is excess water, a lime dough is obtained.
In order to extinguish lime in a powder, you need to take about 1 cubic meter. m of water per 1 cubic meter m lime. Lime should be poured in an even layer on a horizontal surface and watered until a powder forms. If you need to slak the lime before getting the dough, then for 1 cubic meter. m take 3 cubic meters. m of water.
For extinguishing, it is recommended to use dishes with a height of at least 20 cm. Lime is poured into the dish (it is better if it is a box) to 1/4 of the height. Then gradually pour in water in small portions so as not to cool the lime, and mix. As a result, the lime should become liquid and resemble milk. After extinguishing, it must be poured into a special container and kept for at least three weeks. When pouring slaked lime into a storage container, do it through a sieve.
Lime can be replaced with other materials
For example, industrial waste - podzol, okshara or carbide sludge, as well as construction gypsum and Portland cement.
Podzol is a waste product from the leather industry. Consists of third grade lime mixed with hair. Podzol must be rubbed through a sieve before use.
Okshara is waste from the textile industry. It consists of third grade lime and fine wool hair. Before use, okshara should be kept for at least five weeks in an open box in the fresh air to ventilate the chlorine. Carbide sludge is a waste of calcium carbide from the production of acetylene.
It consists of second grade lime, which has a bluish tint, which contains 40% water and undecomposed carbide, and the carbide sludge must be kept in fresh air to remove the odor.
Building gypsum is obtained from gypsum stone by firing. It can be white or grayish in color, representing a finely ground powder. There are 12 brands of building gypsum. It can be used in its pure form, because when it sets, it does not decrease, but increases in volume.
Portland cement and Portland slag cement are among the most durable binders. They harden both in air and in water. Portland cement and Portland slag cement are gray-green powders with various shades.
It should be noted that all binders must be stored in a dry place and must be tightly packed or tightly tied. During long-term storage they lose strength. fillers. River, mountain, ravine or sea sands are usually used as fillers to reduce the shrinkage of the solution and to save binder.
If the sand is dirty, it must be washed. The best aggregate is mountain sand, since it combines best with the binder due to the acute angular shape of the grains.
Pumice and charcoal can also be used as aggregates. Before use, they need to be crushed and sifted. Warm light mortars are made from pumice and charcoal, the plaster layer of which must have a thickness of at least 30 mm. other materials. There are a number of materials used to insulate ceilings and to reduce sound transmission.
Such materials include felt, matting and plaster shingles. felt is a felted cloth made of wool, which comes in different densities and thicknesses. matting is a fabric woven from sponge. Only whole and clean cloth is suitable for use; dirty matting must be washed and dried.
Plaster shingles are splinters of different lengths, but always thin. They are packaged in bundles of 50-100 pieces. Instead of shingles, you can use sanded willow twigs. If the rods are too large, they should be split.
Preparation of plaster solutions
Lime mortar is made from lime paste and sand. These components are thoroughly mixed and water is added. The consistency of the solution should resemble thick dough. To give the mortar additional strength, add one liter jar of cement per 10 liters of mortar.
Lime mortar with gypsum is more durable than just lime mortar. Lime hardens very slowly, and gypsum speeds up this process. This solution sets in 6 minutes and hardens in 30 minutes. The preparation of lime mortar with gypsum must be done in parts.
The preparation process begins with mixing a simple lime mortar. It is prepared in a box, then a small part of the solution (about 3 liters) is removed from the box. Plaster is poured onto the free space and water is poured. After mixing the gypsum and water well, return the previously removed lime mortar. The mixture is thoroughly mixed again, adding water if necessary.
The resulting lime-gypsum solution should not be stirred for more than three minutes. The solution must be applied within six minutes, otherwise it will begin to harden. If you have a liquid mortar, keep in mind that it will set more slowly, it will be easier to apply, but the strength of the plaster will be lower. The thick solution is difficult to apply, but the plaster will be very durable.
Clay mortar is prepared by analogy with lime mortar.
Due to the low strength of this mortar, it is recommended to add one liter jar of cement per 10 liters of mortar.
Clay-lime mortar is prepared from clay and lime dough, which are taken in equal proportions. Approximately 4-5 parts of sand are added to the dough. The strength of the resulting solution is much higher than that of clay.
Clay mortar with gypsum is made in the same way as lime mortar with gypsum.
Cement-lime mortar is prepared from cement, lime paste and sand. First, cement and sand are mixed. Then the lime dough is diluted with water until a creamy mass is obtained, into which a dry mixture of cement and sand is poured. The resulting solution is mixed well, adding water if necessary.
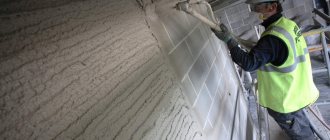
Plaster application process
The plaster is applied in three layers. The first layer is a spray, the second is a primer and the third is a topcoat. With a smooth concrete or brick ceiling, you can apply a thin layer of mortar to it, rubbing it into all surface irregularities. On a concrete ceiling, the layer of plaster can reach 5 mm in thickness, and on a brick ceiling at least 10 mm, otherwise the masonry seams will be visible. On wooden ceilings, the layer of plaster must be at least 25 mm. Otherwise, the warping chips may damage it.
Applying a thick layer of mortar at one time is unacceptable, as it will crack when drying. spray The thickness of this layer should be no less than 5 mm and no more than 9 mm. The solution used for spraying should have a consistency similar to sour cream. The spray is applied by spreading the solution in a continuous layer without gaps.
The spray is applied to fill uneven surfaces or penetrate the exit shingle. priming. It is applied to the spray after it has hardened or set. Primer is a solution of dough-like consistency, which is the main layer of plaster. The primer is applied in one, and sometimes in two or more layers. It depends on how thick the plaster should be.
Before applying each subsequent layer, the previous layer must be leveled. Particular care must be taken to level the last layer of soil. cover. This layer should be applied with a thickness of 2-4 mm. The covering is a creamy solution that is applied to the ground and then leveled well. If the soil is dry, then before applying the covering it should be moistened with water using a brush. It is best to apply the coating to soil that has already set, but has not yet dried.
In this case, the adhesion of the soil to the cover will be especially strong. The covering solution is prepared in the same way as the primer solution, but it is better to use sifted sand, then the surface will be more even and you can do without puttying.
After the cover has set, the surface should be grouted. If the covering is dry, it must be moistened with water using a brush.
Applying the solution using a trowel and a falcon
When plastering the ceiling, transfer the mortar onto the falcon with a trowel, and throw the mortar onto the surface towards yourself over your shoulder.
When throwing the solution away from you, the trowel should be directed slightly to the side.
Throws can be wide, narrow, thick or thin.
In order for the throws to be wide and thin, it is necessary to swing the trowel very sharply.
For narrow and thick throws, the trowel is swung smoothly. The technique of applying the solution requires certain preparation. It will be very difficult for an inexperienced person to apply the solution efficiently, but over time you can achieve excellent results.
How to spread and level the solution
Only the soil and coating solutions are spread and leveled. These operations are usually performed using a falcon or a grater. In order to update only some areas of the ceiling, it is recommended to use a plaster trowel.
When applying mortar using a falcon and trowel, the falcon is held in one hand with the trowel in the other. A portion of the solution is applied to the falcon, brought to the ceiling and pressed with one end so that an angle of approximately 45 degrees is formed between the falcon and the ceiling.
The falcon is then moved along the surface by pressing on it with the end of the trowel. As the falcon moves along the ceiling, the solution is distributed over the surface, and the edge of the falcon that was at an angle is gradually pressed against the layer of applied solution. If you have the appropriate experience, the solution can be applied very evenly.
Applying the solution using a trowel
If you decide to apply plaster to the ceiling using a trowel, you need to put a portion of the solution on it, bring the trowel to the ceiling and, pressing it, move it along the surface in any direction convenient for you. The solution should be applied to the trowel in the form of a bed. The width of the grater blade should not be less than 120-200mm, so that as much solution as possible can be collected at one time.
In order to level the solution using a falcon or a trowel, you just need to repeat the operations without the solution on the tool.
How to grout plaster
Grouting is done after applying the covering. It should be noted that grouting can be done only after the solution has set, but has not completely dried. To do this operation, you will need a wooden grater. If you have correctly calculated the time required for the cover to set, then grouting can be done without first wetting the surface, otherwise the cover must be lightly moistened with water using a brush.
Grouting is done by pressing the float tightly to the surface and performing circular movements with it. When mashed, the solution becomes denser.
After you have grouted, marks in the form of circles may remain on the surface. To smooth them, it is necessary to make a smooth grout.
It is performed immediately after grouting in a circular manner. It is better to perform these operations in stages. First, rub a small area of the surface in a circular manner, then “disperse”, continuing to alternate these stages until the entire ceiling has been processed. If there are bumps or missing spots on the surface after grouting, they will be very noticeable after painting or whitewashing, so grouting must be done very carefully.
Plastering ceilings made of prefabricated reinforced concrete slabs
Precast concrete slab ceilings are found in many apartments. On such ceilings, between the slabs there are rustics, which are rectilinear recesses of the same width. Sometimes floors shrink and the plaster between the slabs falls off. In this case, the plaster must be corrected and new rustications made.
To repair a ceiling made of prefabricated reinforced concrete slabs, you will need the following tools: an even rule, which should coincide with the length of the rust, two or three unplaned slats or thin, narrow boards that will support the rules and plaster mortar. If you use boards, keep in mind that their length should be 5-10 cm greater than the height of the room.
Rules can be continuous or composite. As a rule, they are made according to the length of the rustics. A composite rule is made from two or three pieces and rustication.
Rustication is made from a small grater with a cutout in the canvas and a piece of iron, which is the cutting part. One side of the iron should be sharpened, after which the iron is bent in the form of a semicircle in the shape of a rustic. The diameter of the semicircle should be from 5 to 10 cm.
To secure the rules to the ceiling, you need to press them with slats. This uses the flexibility of the slats, which are installed between the rule and the floor. If the slats do not bend, then wedges must be inserted between them and the rule.
After the rules, slats and rustication have already been made and installed, you need to clear the edges between the slabs and prepare a cement mortar with a small portion of gypsum. The ceiling is coated with this solution, leveled well and rubbed. The edges should be rubbed in especially carefully.
Only after completing all the above operations can the rule be attached to the ceiling.
In this case, you should pay attention to the fact that when rustication is applied to it, the rustication is between the slabs. Then the rustication is applied to the rule and, pressing, it is carried along the surface of the ceiling, cutting off the solution to its full depth. After the rust is cut, it is moistened with water and rubbed with a small trowel, eliminating irregularities.
How to level a ceiling with plaster
If the surface is too far from ideal, leveling is done by plastering the ceiling along the beacons. To install beacons, a laser level gauge is used, usually with a level. If the surface is almost flat, leveling is done without beacons.
Relatively flat ceilings
Relatively smooth ceilings are plastered in several layers (two, sometimes three). In this case, one of the layers can be partial (selected areas are plastered), the second must be complete. If the layer thickness is more than 1 cm, reinforcement is used. The mesh is fixed to the surface under tension before plastering begins. It should be inside the plaster layer.
Ceilings with large unevenness
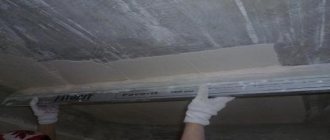
If the ceiling surface has large irregularities (more than 2 cm), plaster the ceiling along the beacons. The composition is applied with a spatula (a medium-width tool is used) so that the mixture protrudes above the beacons. Moving the rule in a zigzag manner, level the applied mixture. The excess is removed from the rule and thrown onto areas that need to be replenished. The rule is moved towards itself.
Briefly about the main thing
To plaster the ceiling, it is better to purchase a ready-made dry mixture and follow the instructions to dilute it correctly with water. But before this, it is important to prepare the ceiling surface. Treat joints between floor slabs, as well as gaps and cracks. It is important to prime the surface thoroughly and preferably do it in at least two layers.
The easiest way to achieve a perfectly flat plane is to use beacons. And the best results can be obtained when working with a long rule. At the final stage, you must remember to wet the grater with water to achieve an optimally smooth surface.
Ratings 0
Some features of plastering other ceilings
There is no single answer to the question, “how to plaster a ceiling?” it can not be. Everywhere has its own nuances.
Wooden ceilings
You need to prepare in advance for plastering a wooden ceiling. Two layers of shingles are stuffed onto the ceiling or a metal mesh with 10x10 cm cells is attached. Without this, the plaster layer will crack and weakly adhere to the wood.
Each of the two applied layers is dried. The first one is applied so that it rises slightly above the shingles. The layers are leveled with a spatula.
How to plaster a plasterboard ceiling with your own hands
Drywall itself is a finishing finishing material. However, joints and nail heads may appear after painting or wallpapering. The plasterboard ceiling is leveled using sickle coating on the seams. The layer thickness should be no more than 15 mm.
Plaster on ceiling insulation
Sometimes sheets of insulation (usually polystyrene foam) are attached to the ceiling surface for insulation. Then plastering over the insulation is carried out in two stages. First, the surface of the insulation is primed. Then a layer of a more liquid mixture is applied over the dried primer, onto which a painting mesh is applied, lightly pressing it into the layer. The mesh panels are overlapped. After the first layer has dried, the surface is primed again and, after the primer has dried, a second layer of a more viscous solution is applied. Work with this layer as usual.
Plastering a wooden ceiling
If the homeowner does not intend to preserve the natural structure of the wood when finishing his ceiling, the surface should be plastered before applying putty and painting. As a rule, this work is performed using the following materials:
- The most popular type of finishing in rooms with a dry microclimate is gypsum plaster. This substance is easy to apply, dries quickly, gains strength and creates a smooth, uniform surface. If you need to perform work on a terrace or porch, you should purchase a special gypsum mixture with moisture-repellent additives.
- A more exotic technology for plastering the ceiling is applying a clay composition. Clay is a natural material and has increased plasticity, but working with it requires certain skills.
Rice. 12. Plastering a wooden ceiling.
If the wood base of the ceiling is susceptible to the formation of fungus due to unfavorable operating conditions, it must be treated with an antiseptic before installing plaster. Borax or copper sulfate should be used to kill bacteria and other microorganisms.
Application of decorative plaster
Finishing the ceiling with decorative plaster is difficult due to the inconvenience of the position, but not the technique. The techniques used are the same as for decorative plastering of walls. For beginners, it is better to practice on the walls. But if you have successful experience, why not try to do the same with the ceiling?
Start from any corner of the room, plastering a strip along the wall. To prevent the solution from flying off, immediately spread it on the ceiling. Apply the pattern using the chosen method. After plastering is completed, the finish is dried. If the decorative composition is not tinted, then the next stage of work will be sanding, then painting the ceiling (you can also do waxing).
Primer, why it is needed and which one is better
You won't be able to properly plaster the ceiling without a thorough primer. It improves the adhesion (adhesion) of the plaster mixture to the base. Basically, all problems with falling and peeling finish on the ceiling are due to the fact that the base was not primed. That’s why we don’t skip this stage. Moreover, if there are several layers of plaster, it is advisable to treat each of them with a primer (with complete drying).
First, we prepare the base - we clean it of old coatings, and then treat it with a primer. To do this, pour the composition into a paint bath, take a roller on a long handle (telescopic rod) and distribute the composition over the ceiling. If there are any depressions - recesses, defects on the surface of the ceiling, into which the roller simply does not fit, we pre-treat them with a brush dipped in primer.
Ceiling primer before plastering
Now about which primer for the ceiling is better. According to the masters, this is “Betonokontakt”. After drying (24 hours), a rough, sticky film remains on the surface. The putty “clings” to it perfectly. Just one thing: you need to make sure that while the primer is drying, no dust gets on it. Otherwise, there will be no effect from such processing. It can only get worse.
Manufacturers and consumption
As a rule, it is difficult for a beginner to correctly navigate what to plaster and which plaster is better. Therefore, it is easier to rely on the advice of professional plasterers, as well as the reputation earned by popular brands. For example, mixtures from the companies Ceresit, Knauf, Volma, Bolars, Prospectors, and Plitonit are worthy of attention.
To ensure that plastering work does not have to be interrupted due to a lack of building materials, the approximate volume of required leveling plaster and putty for the ceiling is calculated in advance. Plaster consumption is calculated using a simple formula, multiplying the area of your ceiling by the average thickness of the coating. The average thickness value is obtained by summing measurements at several points along the beacons and dividing the sum by the number of measured points.
The resulting number is increased (in reserve) by 20%. This is for beginners. Pros increase by 5%. Divide the volume of the mixture you need by 100, you get the number of conventional squares (layer thickness 10 mm). Next, based on the manufacturers’ data, calculate the number of packages of the mixture that you need to purchase to level the ceiling with plaster yourself. For mechanized ceiling plaster, the consumption is slightly less. Our online leveling plaster calculator will help you with the calculations.
Installation of beacons
The installation of beacons should begin with determining the elevation differences. In order to do this quickly and accurately, it is better to use a device for constructing planes (laser). Do this:
- The device is installed above the ceiling.
- Turn on horizontal scanning.
- Measurements are taken in several places. Measure the distance from the ceiling to the horizontal beam.
- All readings are recorded on the ceiling.
- It becomes immediately clear where the minimum and maximum differences are.
Measuring the height difference of the ceiling surface
Why is this required? Having determined these indicators, you can calculate the required layer. This is done according to the principle: up to 5 mm is added to the most significant deviation.
On a note! If you don’t have a laser device, you can get by with a simple level. To do this, horizontal lines are cut along the perimeter of the walls. The indentation point is taken as the total distance from the floor. The level is applied with one end to the line, and holding the other end, they walk around the room. Thus, it is possible to calculate the necessary indicators.
Beacons can be installed. They are perforated strips. They have a protruding back, with the help of which the solution is leveled. The dimensions of these devices may vary, but it is better to select those that are slightly larger than the largest deviation.
Installation of beacons
Installation is performed as follows:
- The length of the rule is taken as a basis. It is better to use a tool that will be no more than 150 cm. The distance between the beacons is made smaller (120-130 cm).
- Lighthouses are placed at a distance of 30 cm from the walls.
- The profiles are fastened using gypsum mixture. It is kneaded until thick.
- Lines are marked on the ceiling. This is done for convenience. You can immediately apply the solution without being distracted by measurements. They do it pointwise.
- The beacons are pressed in and the accuracy of the installation is immediately checked. To do this, you must have a level at hand. With its help, the required indicator is transferred to two opposite walls. Screw in the screws and tighten the cord. It is used for alignment.
- Having exposed all the beacons, they wait for the solution to dry.
If possible, purchasing a laser level would be a great help. It makes it possible to quickly align beacons.
The accuracy of beacon installation is determined using a level
Mistakes made at work
A particularly common mistake is failure to adhere to ceiling plastering technology. The result may be the appearance of shrinkage cracks, swelling, falling off of pieces of coating, and low strength. If the plaster has fallen off, the reason may lie in poor adhesion or poorly sealed seams and cracks.
Stains on colored plaster may appear as a result of breaks or purchasing compositions from different batches. Shrinkage cracks can occur due to drafts during drying or excessively hot weather.
The rules of plastering cannot be neglected.
With or without beacons
There are two technologies for ceiling plaster - with and without beacons. The right thing to do is to do it with beacons. Then the ceiling surface is in one plane. However, there are ceilings with very large height differences. Throwing a 5 cm thick layer of plaster on the ceiling is dangerous: it may fall. Even if you make several layers with a primer after each, there is still no guarantee that such a large layer will stick.
Incorrectly applied plaster can cause everything to collapse.
In general, if the ceilings have a large curvature, it is recommended to level them with suspended ceilings made of plasterboard, but not all rooms allow you to “steal” about 10 cm of height. In this case, you can do it wrong - plaster the ceiling without beacons.
The whole idea is to make the ceiling smooth in some area. It will not have noticeable differences and will visually look smooth. And the fact that in different corners the distance to the floor will differ by several centimeters cannot be determined by eye. With this technology, the main task is to make the junction of the ceiling and walls even. This line is very clearly traced and should be straight. If you choose this technology for plastering the ceiling, you need to start plastering from the walls, towards the center.
Coating repair and care
Caring for the plaster coating is simple. The surface of many modern compounds can be washed with a damp cloth, sponge or soft brush. If the plaster is damaged somewhere locally, it can be repaired using the appropriate composition. Before repairs, the area is dusted and primed. After which the mixture is applied with a spatula and leveled.
This article answers a number of questions that a beginner has when starting repair work. To answer the main one - “how to plaster a ceiling?” is impossible without answering more specific questions, for example, “which ceiling is better, suspended ceiling, plasterboard or plaster?”, “Which is better from plaster mixtures – gypsum or cement?” etc. We hope that after reading the article, you learned all the most important things about how to plaster a ceiling. Missing information, for example, on coloring, can be found on other pages of the site.
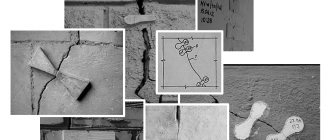
How to seal slab joints and rustications
When plastering a concrete ceiling made of reinforced concrete slabs, the main problem is sealing joints and rustications - recesses at the joints. They are sealed a few days before the general plastering of the ceiling begins - it is necessary for all the materials to “set”.
First, everything that comes out is removed from the joints. Then, with a brush, everything is cleaned of dust and sand. The prepared joints are coated with a primer. Most often they recommend “Betonokontakt”. This treatment significantly reduces the possibility of peeling off the applied plaster layer. If this option is not suitable for some reason, you can use any deep penetration impregnation, but the effect will not be the same.
Such seams on the ceiling are not uncommon.
After the impregnation has dried (24 hours from the date of application), the solution is applied. If a layer of more than 30-35 mm is required, it is better to apply it in two layers. Having laid the first one, a relief is formed on it with a notched trowel. A day later, when the solution dries, apply a second layer. It is already leveled with the ceiling.
With a large layer of plaster, the joints of the slabs are sometimes reinforced with a layer of painting compound. It is needed so that during seasonal movements of the slabs, cracks do not appear at the seam. It is unlikely that anyone will nail the mesh to the ceiling; it is usually simply attached to the composition. In this case, after applying the first layer of plaster, a strip of polymer plaster mesh is laid, a notched trowel is passed along it, deepening it into the solution and, at the same time, forming a relief for applying the second layer.
When applying plaster in two layers, a relief is formed on the first
Sometimes the rust (crack in the seam) is very deep and it is not possible to repair it with mortar. It is also pre-cleaned of crumbling parts and sand and treated with “Betonokontakt”. Afterwards there are two options:
- Seal with polyurethane foam. We put it a little, about 1/3 of the volume of the gap, having previously moistened the walls generously with water (needed for normal polymerization of the foam). We leave it for a day, after which we cut off the foam so that at least 1 cm of plaster fits into the seam. Afterwards, we prime and apply the plaster in two (or three) layers. Holding a can of foam near the ceiling is inconvenient; you can put a piece of hose on the “spout”
- Take a rag, moisten it with Betonokontak, and hammer it into the crack. Leave to sit, then plaster.
The question may also arise about how to seal the joints of the slabs on the ceiling. Usually one of the compositions with polymer additives is used, and you can also use a good tile adhesive. It also contains a considerable amount of polymers. They say that after such sealing the joints do not crack.
This is what a sealed seam on the ceiling looks like
Applying plaster
For further work, you need stable construction sawhorses, and the tools you need are a spatula and a platform with a handle (falcon). The selected plaster composition is diluted in accordance with the instructions. It is necessary that the solution is homogeneous, without lumps.
The putty is spread on the falcon and placed on the ceiling in small portions using a spatula. The solution is used to fill the distance between the beacons. First, the width of the strip is made from 50 to 60 centimeters, and there is no need to achieve a uniform surface.
Then they take the rule, rest it on the beacons and move it towards themselves, swinging it from one side to the other. As a result, a little solution remains on it. It is removed with a spatula and applied to the ceiling - to its unfilled part or where there are holes. Then the rule is moved again.
These steps are repeated until the surface area becomes level. Then they fill in the second lane and so on. The ceiling is allowed to dry for 5 – 8 hours. When the solution has set, but has not yet completely dried, you need to remove the beacons, otherwise they will rust and rusty stains may appear on the surface.
The rustics after the planks are filled with mortar and leveled with a wide spatula to the same level as the ceiling plane. It takes about 5 – 7 days for the plaster to dry completely.
Lighthouses under ceiling plaster
Plastering on beacons is done in cases where it is necessary to obtain a perfectly flat horizontal surface of the ceiling. If you use beacons, you can determine with the naked eye where the solution has been applied in excess and where it is not enough.
Metal “T”-shaped profiles are mainly used as beacons. Less common options are beacons made of wooden slats and plaster mortar. In the future, we will consider the procedure for applying plaster using metal beacons.
Beacon profile
Principles of installing beacons
Beacons are installed immediately before applying plaster. Beacons are attached to the ceiling using plaster mortar. Typically, beacons are designed for installation of plaster up to 1 cm thick. If you plan to plaster with a thicker layer, it is enough to place an additional amount of mortar under the beacons.
The beacons are fixed on the ceiling in such a way that the lower points of the beacons lie in the same plane. The step between the beacons is taken to be 10-15 cm less than the length of the rule. For example, if the length of the rule is 150 cm, the step between the beacons should be no more than 140 cm.
Checking the plane of the beacons using a level
You need to start installing the beacons from the wall in such a way that when leveling the mixture, the end of the rule rests against the wall, while the rule should lie on two beacons at the same time. For ease of work, we recommend placing the outer beacons at a distance of at least 25-30 cm from the walls.
The following illustration shows, as an example, the layout of beacons in a room measuring 3x4 m, for a rule with a length of 2 and 2.5 m.
Schemes for placing beacons: rule 2 m long (left), rule 2.5 m long (right). Dimensions are given in millimeters
The distance between the beacons should not be too large so that the master has time to plaster the entire section. For beginning craftsmen, the recommended width between beacons is 1-1.2 m.
The procedure for installing beacons
The following provides detailed instructions on how to place beacons under the plaster on the ceiling:
1. The lowest point on the ceiling is determined. To do this, horizontal marks are made on the walls using a laser or long bubble level. If in some place the mark rests on the ceiling, you should step back 5 mm down and repeat the procedure, marking horizontal lines at the lower mark. The place where the mark is closest to the ceiling is the lowest point of the ceiling.
2. 5-10 mm is set aside from the lowest point obtained, after which a horizontal mark is placed on the wall using a laser or water level. The resulting mark is called the zero ceiling level; it corresponds to the lowest point of future lighthouses.
3. Using a laser or long bubble level, create a closed zero level line on the remaining walls. Thus, a plane is formed for placing beacons.
Formation of a horizontal plane with a laser level
4. Markings are applied with a pencil for future beacons. The spacing of the beacons and the distance from the walls are assigned according to the above principles for installing beacons.
5. Ropes are stretched between the walls at the zero level of the ceiling. Having created a horizontal plane, the ropes will serve as a guide when adjusting the height position of the beacons. The ropes are stretched across the future beacons, at the beginning and end of the room, as well as diagonally from corner to corner. The ropes are attached to the ceiling between the lighthouse and the wall, using dowel nails or self-tapping screws.
Pulling ropes between walls
6. A solution for beacons is prepared. The material of the future plaster is used as a solution. The finished solution is applied in “cakes” along the lines of the beacons in increments of 25-30 cm.
7. The beacon profiles are pressed into the “cakes” of the solution, focusing on the plane formed by the stretched ropes. Immediately after installation of the beacons, the correctness of their installation is checked using a bubble level. If necessary, corrective changes are made to the position of the beacons until the solution has hardened: if the beacon pulls the thread down, it should be pressed harder into the solution; if the beacon is too deeply recessed in the solution, you need to add more solution underneath it.
8. After we have made sure that the tops of the beacons lie in the same plane, we need to wait until the solution has completely set. This process lasts about 12 hours; to be safe, it is better to wait a day, after which you can proceed directly to applying the plaster.
Installed beacons under plaster
Preparing the ceiling for plastering
An important stage in plastering ceilings is preparing the ceiling for applying plaster. The work must be carried out carefully; the quality of the future plaster depends on this.
Before carrying out work, we recommend that you remove as much furniture as possible and cover windows and doors with polymer films (protection from flying fragments).
It is preferable to use special trestles (scaffolding) that allow free movement at elevated levels. If a stepladder is used, ensure that someone is holding it at all times. Make safety your top priority.
Construction goat
General preparation measures
Check for the presence of peeling old plaster; if found, such peelings must be removed. If you apply the solution to such an unstable surface, the plaster will not last long. Such low-quality coating can be identified by a dull sound when tapped.
Removing old ceiling plaster
- If there are uneven areas on the ceiling, you need to sand them first. A grinder with a circle on concrete and stone is suitable.
- If the ceiling is made of smooth concrete, it is recommended to make notches using an ax, thereby increasing the surface roughness.
- If the old ceiling is painted with paint, it is better to remove it, thereby increasing adhesion. Water-based paint can be easily removed with a solution of iodine and water. After wetting with water, lime can be easily removed with a spatula.
- If there is fungus on the ceiling, it must be removed, for example, using a mixture of copper sulfate and water.
- If the ceiling has been exposed to oil vapors (for example, in the kitchen), it is necessary to clean the base using a degreaser.
After general preparation measures have been completed, it is necessary to remove dust from the surface by wiping with a soapy sponge, and then rinse the ceiling with clean water.
Washing the ceiling with a sponge
Sealing holes in the ceiling
If holes are found in the ceiling, it is necessary to fill them with plaster mortar, and then cover the hole with a piece of plastic mesh for reinforcement. You can use dowels to attach the mesh to the ceiling. Then you need to add another layer of plaster on top of the mesh.
When the plaster is completely dry, you need to cut off any exposed wire, then sand the edges of the sealed hole so that they are smooth and even. With proper sanding, the area where the hole is closed will become completely invisible.
Holes in the ceiling that need to be sealed
Sealing rust on the ceiling
Often in Soviet-built houses you can find worn-out or unusable joints of floor slabs - rusty joints. Over time, the seam seal wears out and some of it falls off (or may fall off in the future). Obviously, before applying plaster, such poor-quality areas of joints must be put in order, otherwise it can cause serious trouble in the future.
First you need to completely remove the old seam seal. For these purposes, you can use a hammer drill, hammer and chisel. Then they pass with a metal brush to remove traces of the solution. After traces of the seal have been removed, it is necessary to prime the space inside the seam and the external adjacent areas.
Next, the rustics are filled from the inside with foam or sealing cord (if the seam is narrow). The outer part of the seam is sealed with new cement mortar on top of the serpyanka laid on the seam.
Sealing rust on the ceilingAttaching the cable to the ceiling
The electrical cable is attached to the ceiling using dowel clamps, brackets and other devices. In the future, it is planned to apply the plaster mixture over the mounted cable. It is necessary to ensure that the edge of the cable insulation deviates from the surface of the future plaster by at least 5 mm.
Fixed cable on the ceiling
Calculator for calculating the amount of dry building mixture for plastering the ceiling
The initial values for the calculation will be:
Ceiling area. For a rectangular room, calculating it is not difficult.
- The planned minimum thickness of the plaster layer depends only on the specific conditions of the room being finished and the wishes of the owners. As a rule, a layer less than 5 mm is not applied when plastering.
- The amount of difference in ceiling height that needs to be eliminated by plastering.
- Master's qualification level. A professional will waste no more than 5% of the solution, but for a beginner, at first, even 15% of the solution may not be enough.
The resulting value will initially be expressed in kilograms. But dry plaster mixtures are sold in paper bags of 25 or 30 kilograms, and purchasing an open bag is great stupidity, since no one can guarantee the quality of the solution. This means that one way or another you will have to round up the amount of purchased composition up to the whole number of bags. This supply will still not be superfluous - all the repairs are still ahead! This is also taken into account by the calculation program.
Advantages and disadvantages of plastering ceilings
Firstly, suspended ceilings always take up several centimeters of space, and if repairs are being made in a small area, then this nuance will be decisive. Secondly, the cost of suspended ceilings and mixtures for plastering surfaces cannot even be compared - the difference is very noticeable, and not in favor of modern structures. Thirdly, plaster is an absolutely environmentally friendly material that absorbs moisture and maintains a normal level of air humidity in the room.
If we talk about plasterboard ceilings, then we need to consider the following points:
- You will need skills or experience in construction;
- all work is carried out on the ceiling, so you will definitely need an assistant;
- Under no circumstances should you make mistakes when marking - it will be impossible to correct.
You may get the impression that ceiling plaster has no disadvantages at all - this is not the case. What are the negative aspects of such finishing of the ceiling surface that need to be taken into account:
- Working with plaster mixtures is necessary for those who have at least a minimal understanding of the process.
- The ceiling after plastering must be perfectly smooth, because any flaw will literally be “conspicuous”.
- If there is a gap of 2 cm or more between the floor slabs on the ceiling, then it is better to give preference not to plaster, but to some other finishing method.
- The work of hired craftsmen will be expensive. Although, on the other hand, it is a team of professional workers who will do the work quickly and efficiently, and the low cost of materials will remain just as attractive.