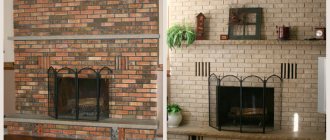
It is human nature to come up with various devices to make work easier and increase the speed of work. Application of the plaster mortar can also be made faster and easier. For this purpose, such “helpers” as the hopper bucket were invented. The device has more than one modification. After all, savvy DIYers “invent” and make a mechanical “tool” based on their capabilities. Often home-made devices are more convenient and much cheaper than industrial designs.
What is a hopper bucket
When plastering, it is important to apply the mixture evenly, to minimize the number of working operations, as well as to reduce the physical stress experienced by the plasterer. A pneumatic bucket (another name for a hopper bucket) is designed to spray a plaster composition onto a wall, driven by a stream of air. The operating principle is similar to a liquid spray.
Compressed air is passed through the semi-liquid solution under high pressure, entraining the particles of the solution and transporting them to the wall to be plastered, just as a conveyor moves people in the subway. Moved by air, droplets of the solution hit the base with force and, sticking, form a sprayed coating - a kind of dense fur coat. The plasterers can only smooth out this “fur coat” and rub it down.
Technology of using plaster ladles
The method of using the tool resembles the technology of working with a spray gun. First, a compressor is connected to the bucket using a rubber hose. After this, plastering begins, provided that the surface has already been thoroughly prepared.
Preliminary stage
Debris, dirt, dust and grease stains are removed from the base in advance. Beacons are installed 20 cm from the corners of the walls, which are placed at equal distances. The profiles are aligned vertically and their correct position is checked with a level. On large bases, intermediate beacons are additionally installed.
Plastering
Prepare a solution from cement and sand (for example, in a ratio of 1:3) or dilute the ready-made building mixture. Mix it with a mixer until smooth and free of lumps. The finished mass should not be too liquid; it is better if the consistency resembles porridge.
The solution is placed into the container, the device is connected and the mixture begins to be applied. It is necessary to work until the entire portion of the composition is finished. It may happen that one hand gets very tired from the movements, then you need to rest a little or start using the other hand.
When the solution begins to extend beyond the profiles, its excess is removed and the beacons are moved higher. If there are holes left on the wall, they are filled with a trowel (by hand). After the mass has dried, it begins to be rubbed and finished.
Cleaning the pneumatic bucket from plaster
After completing work with the plaster mixture, you must immediately clean the ladle of its residue. Dried lumps are quite difficult to remove. If the solution has frozen, you should spray the tool with water or immerse the container in warm water
It is also important to clean the nozzle immediately, because if it is clogged, the bucket may break immediately after turning it on again
Pneumatic bucket device
The main element of the hopper is a container (hopper) equipped with nozzle holes. Compressed air enters the container from the side opposite to the nozzles through a hole with a fitting connected by a coupling with a tubular handle. An air supply hose is connected to the handle. A locking device is installed on the handle to shut off the air supply.
To prevent the hopper, whose center of gravity is located above the handle, from tipping over during operation, a second handle is attached to the top of the container. When applying the mortar, the plasterer holds this plaster shovel (the third name for the unit) with both hands, directing the plaster stream to the area to be plastered. A compressor is used to pump air.
The number of nozzles and their diameter depend on the supply air pressure. The nozzles can be directed perpendicular to the vertical axis of the hopper or installed at an angle to its horizon. Sometimes craftsmen who have a low-capacity compressor install two nozzles on the hopper to ensure the required pressure of the solution-air mixture at the outlet; less often they use one nozzle.
Structurally, buckets come in two categories:
- intended for applying the mixture to reverse horizontal surfaces, as well as inclined planes;
- for plastering vertical bases.
These categories differ in the angle and location of the output nozzles, as well as the presence of an additional element (lid or damper) that prevents the solution from spilling from the hopper during operation. For units of the second category, the outlet nozzles are located opposite the air inlets. A lid covering the tank is not required. Devices of the first category are equipped with nozzles directed at an upward angle. This is done so that there is no need to tilt the tool.
The main elements of a plaster shovel:
- nozzles (nozzles) dispersing the plaster mixture;
- hopper for working solution;
- dispersing nozzles;
- handle with shut-off valve.
Walls
0 votes
+
Vote for!
—
Vote against!
The use of a mechanized method of plastering the surface allows you to obtain a perfectly flat base for further finishing in just one day. At the same time, the quality of plastering walls is much higher than when using a mechanized method. We’ll talk about how to plaster walls using a machine later.
Content:
- Machine plastering by hand: features of a machine for making plaster
- Mixture for mechanized plaster - preparation features
- Plastering walls using a mechanized method - technology
- Technology of applying plaster using a mechanized method
- Mechanized facade plastering
Machine plastering by hand: features of a machine for making plaster
In the process of making machine plaster, a special device is used. Its main function is to mix the solution and ensure its high-quality mixing. As a result, it is possible to obtain a composition that is ideal in consistency for plastering.
The manual part of the work only involves pouring the necessary components into the inside of the device in the required quantity. In the mixing part of the mechanism, the composition is mixed, and from the storage hopper the plaster is supplied to the surface. Using a special nozzle, the composition is evenly sprayed on the wall.
This device has a rather complex structure, so it is quite difficult to make a device for machine plastering with your own hands.
The person performing the plastering must only direct the hose away from the device, ensuring uniform coverage of the wall in relation to the beacons. Excessive application of the solution reduces the strength of the plaster, and insufficient application leads to the appearance of gaps on the walls. The optimal spray thickness is from 10 to 35 cm.
The plastering device must include a reservoir into which water and cement flow. Thanks to a specific program, the device independently controls the proportions of ingredients. Inside a special tank, the ingredients are combined with each other.
Special attachments significantly speed up the speed of plastering. Leveling the composition on the wall is done with large spatulas. The speed of mechanical plastering is 5 times higher than manual plastering. In addition, two people are enough to complete the work. One of them applies the composition to the wall, and the second levels it.
You should start working by measuring the curvature of the wall. A level is used for these purposes. Guides made of aluminum must be installed on the outer corners. Next, the work is automated and involves applying the composition to the surface.
Initially, the device is connected to water and electricity. Next, the dry composition is poured into the bunker. Some machines for making plaster are equipped with a special pump that pumps water if there is no centralized water supply in the area.
Using a feed auger, the plaster composition is delivered to a special chamber in which it is combined with water. The machine continuously mixes the finished composition throughout the entire working process. Therefore, the quality of the solution has very high technological characteristics, the composition has good adhesion to the base.
Next, the solution is transported through a hose to the surface. A spatula, a trowel, or a rule helps to level the mortar on the wall. The type of tool used is determined by the nature and location of the work. After leveling the surface, the solution is left until it dries. To control the evenness of applying plaster by machine, a level is used. In order to eliminate minor scratches, the wall is sanded using a special sponge.
Comparing the manual and mechanized methods of plastering walls, the first has the following advantages:
- The solution is mixed and brought to the desired consistency using an automated method. At the same time, the physical costs of plastering are reduced.
- The consistency of the solution is the same at all stages of work. Because the machine constantly mixes it. Therefore, the surface is not covered with cracks or irregularities.
- The mechanized plastering method reduces the amount of mortar to be applied to the wall.
- The time required to complete the work is several times less than when using the manual method.
- High quality plastered surface, smooth texture, no defects.
Mixture for mechanized plaster - preparation features
There are two options for compositions for performing mechanized machine plastering: liquid and dry. With their help, it is possible to process surfaces of various compositions, which are based on plasterboard, concrete, reinforced concrete, brick, and aerated concrete. The temperature range for using the solution is limited to 5-30 degrees Celsius.
Initially, you should treat the surface with a primer that improves adhesion between the wall and the plaster. After it dries, further work is carried out. The corner profile is fixed on a particularly strong plaster mortar. Facade plastering involves the use of special cement-sand based mixtures. Water is used to dilute it. Special additives in the composition of such plaster are ways to regulate the level of its plasticity and hardening time. The same compositions are used for finishing swimming pools and rooms with high levels of humidity.
For internal plastering, compositions with a gypsum base are suitable. They are able to set quickly, however, they are not suitable for rooms with high humidity levels. The material allows air to pass through well, so it allows the walls to breathe. As a result, it is possible to obtain a perfectly smooth coating for further finishing.
When working with cement-sand compositions, you must wait until they dry completely so that they gain strength. The composition that is applied by machine is more liquid than that applied by hand. Since it should be splashed over the surface.
Plastering walls using a mechanized method - technology
The relevance of using a mechanized method of applying plaster is primarily justified in large areas. The process of plastering them lasts one or two days, while doing it manually would not be enough even a week.
To perform mechanized application of plaster, you must have a plaster station and a gun, which has a compressor that supplies the composition under pressure. As a result, it is possible to obtain perfectly smooth walls, the plaster on which is durable and has a long service life.
A plastering station is an independent system within which the solution is prepared. Then it gets to the gun and is fed onto the wall. The dry composition is poured into a bunker container, which is filled with water. It is necessary to hold the gun firmly, as the solution is supplied under high pressure. The gun should be at right angles to the surface that will be plastered.
Another option for performing mechanized machine plastering is to use a cartouche gun. This device does not prepare the solution on its own, but involves pouring the ready-made mixture into the upper part of the device. Next, the compressor is turned on, which sprays the solution over the surface. The gun is constantly held in the hands and creates a high mechanical load on the person working with it. It is less convenient than a plastering station.
Another option for applying plaster using a mechanized method is the use of a pneumatic shovel. Throwing the composition onto the wall is carried out using a special steel container that scoops up the composition.
There are shovels for walls or for ceilings; in addition, they differ in relation to the shape, size and location of the buckets. The productivity of working with such a device is an order of magnitude lower than with a special station.
In any case, before applying mechanized plaster, it is necessary to prepare the surface. The walls or ceiling are cleaned of dust and dirt, and beacons are installed. Next, the primer composition is applied, and then the corner guides are installed. Since they are made of metal, they must be treated with an anti-corrosion compound.
After this, plastering of the surface begins. Dry mixtures are placed in the machine’s hopper; most models of devices for performing mechanized plastering determine the amount of water independently, using a pumping station. The plaster is applied in a direction perpendicular to the walls. If there is excess, it is directed to a part of the wall that has not yet been filled with plaster or to hard-to-reach places.
Grouting of the plaster is carried out after 3-4 hours from the moment it is applied to the wall. With its help, it is possible to get rid of significant defects on the walls and make them smooth. Next, you need to wait until the composition dries completely, which takes three days. After this, they begin to finish plastering the surface. If there is high humidity in the room, the drying time of the composition increases to seven days.
The hose from the machine must be led along a line, the next line must half overlap the previous one. Thus, it is possible to achieve a uniform distribution of the composition on the wall and increases the smoothness of the coating. The lighthouses should be under the plaster.
If beacons made of metal were used, they are removed immediately after the work is completed. Thus, the walls will not be covered with corrosion. To plaster the grooves under the beacons, use hand tools.
The final stage is grinding the surface using a rubber float. The surface is moistened with water and rubbed down. Thus, using a device for machine plastering greatly simplifies the process of preparing the solution and applying it to the surface.
Technology of applying plaster using a mechanized method
The process of applying plaster to walls using a mechanized method consists of the following stages:
- Transportation of equipment to the construction site. Installation and configuration of the station.
- Work on work areas: removing old finishes, grouting and priming walls.
- Checking walls for evenness using a level. Marking areas for applying plaster.
- Leveling the mortar on the wall, if necessary, re-applying and leveling the plaster.
- Finishing using the rules. Performing puttying of walls.
During the process of performing mechanized screeding of plaster indoors, the air temperature for the work must be at least +12 degrees. At the same time, the humidity level should not exceed 60%.
In addition, the room must have glazed window openings, a heating system, and a leveled screed. Internal and external plastered surfaces must be protected from exposure to excessive moisture.
Mechanized facade plastering
The process of mechanized plastering of facades is quite complex, and it is almost impossible to cope with it without experience. Therefore, if you have not previously plastered walls using a mechanized method, then it is better to entrust this issue to professionals.
The initial stage of work involves a visual inspection of the work site. Determining the curvature of walls, taking measurements on walls and setting angles. Next, the amount of material used in the work is determined and purchased.
At the next stage, scaffolding is installed, cracks, if any, are cleaned and opened. The surface is cleaned of dirt and dust, the facade is washed and dried. To protect the facade from moisture, mildew and mold, as well as to ensure tight adhesion of the plaster to the wall, a primer is applied to the surface in two layers. Next, if necessary, a reinforcing mesh is mounted and beacons with corners are installed.
The corners also need to be installed on the windows. Plastering is done from bottom to top. Followed by leveling the newly applied solution. After the solution has set, it is necessary to get rid of the beacons.
Next, small notches are made using a special brush. Wait for the solution to dry, sand it using a grater. If further application of decorative coating is planned,
DIY hopper bucket
Making a hopper bucket with your own hands is quite feasible even for a novice designer. You can familiarize yourself with the drawings and watch videos in our article. But the main thing is to understand the operation of the mechanism, so that during the manufacture of the device, changes can be made to the design according to what is at hand without damage. Below are drawings for the manufacture of a hopper with a galvanized tank (other sheet metal).
Drawings and dimensions
There are drawings of already developed and tested products. A beginner can use them. You just need to decide what performance of the pneumatic bucket is required and what sizes are more suitable for your case. If it is necessary to deviate from the drawing dimensions, try to comply with the recommended proportions, slopes, and parameter standards for the spray unit of the device.
- the maximum distance between the front and rear walls in the narrow part is 20 mm, sometimes reaching 50 mm (this requires a higher power compressor);
- the inlet hole is made with a maximum diameter of 5 mm;
- the maximum diameter of 1 nozzle outlet is 10-20 mm.
See examples of drawings found on the Internet in our gallery.
The given dimensions allow the use of a household compressor for plastering, consuming 200-250 liters of air per minute with a pressure of 8 atm. If the dimensions are larger than those specified, then the power of the created air flow will be insufficient to push out the plaster composition and bring it to the base.
Instead of a manually operated valve, it is permissible to use a ball valve mounted on a hose, although it is less convenient to use. Some products use a fire extinguisher valve.
When designing a bunker, remember that during plastering you will hold the ladle with the solution in your hands for a long time - up to several hours. The plaster solution is quite heavy on its own. Therefore, you should not make a large container (a volume of 3-4 liters is sufficient). It is more rational to plaster, scooping up a new portion of mortar more often.
Materials and tools
We prepare in advance:
- Galvanized sheet with a sheet thickness ranging from 0.4 to 1.2 mm (or strong sheet metal/aluminium). The ease of processing and the number of required stiffeners will directly depend on the thickness of the metal. The thinner the metal, the easier it is to process, but it will also require more stiffeners.
- Purchased or self-made nozzle;
- A pneumatic gun with a steel tube (you can take a gun from a sink, a fire extinguisher or a ball valve);
- Metal washers 8-12 mm in diameter for nozzles.
Tools you will need:
- metal scissors;
- metal ruler;
- drill, as well as a standard set of drills;
- marker or pencil;
- Bulgarian.
To assemble the container you will need welding or riveting. Therefore, a welder, riveting equipment, electrodes or rivets may be needed.
Metal bucket
We make a plaster ladle in the following sequence:
- We transfer the contours and fold lines of the container parts from the drawing to the metal using any suitable method. We make the drawn lines more distinct by tracing them with a marker.
- We cut with a grinder or scissors. In the case of riveted connections, leave an allowance of at least 15 mm for the joining lines.
- Having cut out the parts, bend them along the fold lines. We connect the parts by welding or riveting.
- We attach a handle to the completed workpiece, taking into account which hand is working (left or right).
- We drill holes for the nozzles on the front wall of the container. We strengthen the edges of the holes on both sides with overhead washers.
- Mark the centers of the holes for the spray bottle on the back side of the container (opposite the nozzle holes). We drill holes.
- If we use an air gun, then we install and secure the original nozzle of the gun on the inside of the tank.
- To protect the thin walls of the hopper from mechanical loads transmitted in the contact zone from the nozzle, we attach reinforcement plates to the bucket handle and its walls on both sides.
- We make a removable lid.
- We collect the solution and perform a test spray on a small area.
From a canister
Plastic is an inert material. It is quite possible to quickly make a plaster shovel from a plastic canister by attaching an air gun to it. Making this design will take a little time, since the plastic bunker is almost ready.
You will need:
- primer canister 10 l;
- ball valve 1/2;
- sleeve for handle;
- two fittings (male, female) with 6 mm internal diameter;
- PVC plug d 10 cm;
- winding, glue, tape.
We make a hopper bucket with our own hands in the following sequence:
- For the hopper, we take a used canister with a capacity of 10 liters from under the primer. The front side will be the sidewall in which there is a recess on the side at the bottom.
- We draw a line with a marker that smoothly outlines the top of the canister with a handle and neck and extends slightly onto the front wall (this will be the top of the hopper).
- With the second line we outline on the front side, stepping back a couple of centimeters from the first line, a horizontally elongated hole with rounded corners for a handle.
- Using a retractable utility knife, cut out the neck and hole for the handle. We clean the cut from burrs.
- The last step in making the bunker is to create and design a cylindrical hole-coupler. It needs to be squeezed out by heating the bottom of the canister (watch the video). You need to heat it without overdoing it so that the factory weld seam connecting the halves of the canister does not come apart. For extrusion, a PVC plumbing pipe of the same diameter as the plug is suitable.
- We cut off the bottom at the protrusion formed in this way.
- We take the plug and drill a 20 mm conical drill hole for the fitting. We drill the hole not in the center of the sidewall, but offset towards the bottom.
- We mount the fitting on the inside of the plug, attach the bushing and tap to the outside, installing it so that it is convenient to use it during operation. Screw the adapter (second fitting) to the tap.
- Inside the plug, we draw a line to the axis of the fitting for precise placement of the outlet hole. We drill a second hole, moving it as far as possible to the bottom of the plug so that the air blows out the plaster solution from the very bottom. Clean the edges of the hole until smooth. 20 mm is the maximum permissible diameter for a construction bucket with one nozzle. If the nozzle is made larger, the plaster mixture will spit out in pieces.
- The nozzle hole should be located from the nozzle at a distance of one third of the diameter of the plug. Therefore, we attach a tube cut from the plastic body of the dowel-nail to the fitting. We additionally fix the attachment point with glue.
- We install the resulting structure on the bunker. To do this, we make two slots for the sleeve and for the nozzle. We make the second recess slightly wider than the nozzle so that the departing train does not linger here. We wrap the junction of the plug and the hopper with tape.
The entire process is shown in detail in the video.
How to make a plastering machine with your own hands?
So, the sequence of actions for making your own device for plastering surfaces is as follows.
- First of all, you need to cut off the bottom of the fire extinguisher. In the future, the homemade unit will be positioned with the nozzle down (bottom up). A container with a cut bottom is a kind of hopper for the solution.
- A homemade sprayer is complemented by a tube through which compressed air will be supplied. It cuts into the side wall of the cylinder, located opposite the valve outlet. The mixture will be sprayed through this outlet. Compressed air is transmitted through a pipe from the compressor, and for high-quality spraying of the solution, the nozzle must have a diameter of no more than 4-5 mm.
- The power of a homemade machine directly depends on the diameter of the nozzle, the pressure of the supplied compressed air, and a certain gap between the compressor nozzle and the nozzle. Therefore, to increase power, the air supply tube should be placed as close as possible to the outlet valve and properly secured. It is secured with nuts and gaskets. This makes it easier to adjust the distance from the tube to the valve. The connection should be welded.
- The final stage is the installation of the air compressor. It should be connected to the nozzle hole using a hose. For the homemade unit to operate, it is necessary to create a pressure of 2 atmospheres. If there is little pressure, the finish will be rough. If you want a smooth finish that fills all the pores on the wall, you need to apply high pressure.
Requirements for a homemade bucket
The main requirement for technical devices is safety.
A self-made hopper bucket should also include:
- protection against accidental splashing of the solution when tilting the bucket during plastering (permanent or removable cover, raised sides);
- the ability of the hopper body to maintain its shape (soft sheet metal or plastic five-liter bottles are not suitable for the container);
- The diameter of the inlet nozzles must be at least 1.5 mm.
Safety precautions when plastering walls using a mechanized method
- First of all, you need to understand that with this type of work, drops of the solution begin to fly in all directions. In this regard, it is necessary to wear clothing that covers the skin, gloves and, most importantly, protect your eyes;
- When preparing the machine, it is necessary to check all hoses and containers for leaks, and the device itself must be tested at idle;
- Remember that the compound flies out of the gun at high speed, so standing in front of the hose while working is strictly prohibited;
- The gun must be kept at least 25 centimeters from the wall. Otherwise, the composition will fly off the surface and splash around the room;
- Do not bend the hose during operation, as this may cause a rupture.
Mix for work
Construction shovels are designed to work with various construction mixtures: from paints to plaster compositions. Solutions for mechanical application are prepared according to the instructions. It is permissible to add fiber additives to the composition. The consistency of the compositions should not be liquid. Some manufacturers equip buckets with replaceable nozzles for plasters of different consistencies.
Most commonly used mixtures:
- Gypsum plaster.
- Cement-sand mixture.
- Lime compositions for plastering.
Principle and technique of work
The plastering machine contains a container for receiving water and dry mixture.
The proportions are programmed, so the output is a mixture of ideal consistency. Inside, the solution is mixed, loosened and saturated with air. After mixing, the mixture is applied to the surface using a hose. Special attachments allow you to cover large areas in a short time, and with wide spatulas and rules, leveling takes only a few minutes. Thus, mechanized plastering can be performed by 1-2 employees, and the speed of work increases by 4-5 times compared to manual labor.
Connection kit
To operate the plastering ladle, you need a compressor, to connect to which a set of adapters is used. For industrially manufactured pneumatic buckets, suppliers offer standard “rapid” and “bayonet” quick releases. However, it is more rational to use a fireman, a more convenient type of connection for connecting a hopper bucket, since it provides the maximum possible air supply due to the increased diameter of the hole. The through hole of this conductor is three times larger than those indicated earlier.
The Hopper Bucket Huck Kit includes:
- ball air valve;
- nipple adapter;
- Huck adapters ½ and fittings;
- wire clamp (which secures the hose).
Devices for mechanized plastering
Let's look at the most important component of the job - the apparatus for spraying plaster onto the wall. This device is powered by an electric motor with a power of 0.5-1 kilowatt. There are also gasoline engines, but they are used mainly in industrial applications, while we will select a household plaster sprayer for ourselves.
In general, there are two types of such devices:
- Augers. The solution is supplied using mechanical force. A mechanical auger exerts pressure on the nozzle, and it, in turn, knocks the mass out of the mixer into a reinforced hose, and then into a spray gun;
- Pneumatic compressors. Here the plaster is fed into the gun under the influence of air pressure of 2-3 atmospheres.
Today, the market offers a huge number of similar devices of various price categories, including economy options. If you are taking the device not for your professional activities, but for one-time use, then it is better to take a cheaper option. However, you cannot skimp on quality and performance characteristics under any circumstances.
Hopper bucket operating technology
Now about how to do plastering with a hopper ladle with your own hands.
- Prepare the ceiling and walls for plastering in the same way as preparations are made before manual plastering.
- Beacons are installed and, if necessary, reinforcing mesh is installed.
- The pneumatic bucket is assembled and connected to the compressor.
- The composition is closed taking into account rapid consumption. 50 kg of mixture passes through the nozzles in 3-4 minutes. Therefore, the volume of solution preparation is larger. When plastering with a hopper, it is rational to use a mortar mixer to prepare the composition.
- Take the device with your right hand by the working handle. Left hand - for auxiliary. Scoop up the plaster composition with a tank or put it into the hopper with a ladle. After scooping, excess solution from the outer surface is shaken back. Bring the unit to the surface to be treated.
- Having opened the valve, direct the mortar stream onto the surface to be plastered. Smoothly driving the hopper from lighthouse to lighthouse and back, they spray the plaster composition strip by strip. Try to apply the mixture evenly.
- When the solution in the tank runs out, the sprayed solution is leveled manually or with a spatula, following the rule along the beacons (zigzag from bottom to top).
- Scoop up a new portion of the composition and transfer it, “spraying” it with a hopper in the same order.
- After completing the plastering, the device is disassembled and washed. To wash the nozzles, you can lower the hopper and the bucket filled with water and open the air supply valve for a few seconds.
Before starting plastering, it is recommended to wet the inside surface of the bunker so that the mixture sticks less to the walls.
For an example of how a hopper bucket greatly improves work productivity, see the video.
Main points of machine operation
How it works
The unit requires an electrical network and preferably running water. If there is no source of water supply at the construction site, it’s also not a problem; serial units are equipped with a pump that will supply water from any available container. Any machine has a hopper for loading dry mixture; ready-made, factory-made mixtures for plastering are loaded into it. From the bunker, the finished mixture is fed by a screw into a special chamber for mixing with water. The mixing process occurs continuously and the finished mixture is immediately pumped into the distribution system.
Plastering unit based on a semi-trailer.
Important: if the machine is turned off, there will be a minimum of excess prepared solution - only what remains in the chamber and hose. All of them are easily produced when plastering problem areas.
A device, usually in the form of a gun, is attached to the end of the mortar hose, with the help of which the mixture is applied in an even layer to the wall. The plaster gun, in turn, has several application modes, which are set depending on the type of surface and consistency of the solution. The units can be based on diaphragm, screw or piston pumps. There are 2 main types of devices. ASH is a more autonomous system (stands for plaster mixing unit). The design is equipped with a cyclic block for continuous mixing of the solution. A more simplified system is represented by the AS system, which stands for plastering unit. It requires a ready-made solution of appropriate quality. This device is an earlier analogue of the AShS and is cost-effective only for large construction sites.
Facade finishing.
Application technology
Initially, before applying the composition, you should carefully prepare the surface. The preparation process is carried out in the same way as with the manual application method. You should start by inspecting the surface and removing the old layer of plaster. There should be no paint or oil stains on the wall. The base must be dry, strong and clean. If fungus or mold is found, they must be removed. Next, in accordance with the type of solution, the surface must be primed. The primer is applied with a regular roller or brush. Before application, beacons and corner profiles are installed on the wall. They can be attached with mortar or mounting adhesive. Now the wall plastering machine comes into play. Each unit has its own instructions in accordance with which it must be operated. After assembly and connection, all hoses must be checked for kinks.
Installation of beacons.
After this, the operator stands at an angle to the surface being treated and begins work. The gun is held in the leading hand, the second hand fixes the hose, it should not be stretched and experience tension in the docking unit. Initially, deep depressions and cracks are filled, then the composition is evenly applied to the surface. Plastering is done from the left, upper corner of the room and gradually moves down and to the right. When working with ceiling coverings, you need to start from the corner farthest from the window. The composition is laid in even strips about 70 cm long. The laying step is selected depending on the thickness of the application.
We recommend: Interior design in minimalist style
Application between beacons.
Important: when applying a thick layer of plaster, as well as with the manual method, the plaster must be laid in layers. The interval between applying layers should be at least half an hour.
The video in this article shows the principle of machine plastering.
The plastering machine is not the only technological miracle that currently makes the work of builders easier. For large volumes and large, flat areas, a trowel for plaster has proven itself well. It is installed along the beacons and secured. After which the machine lays the solution in an even layer. The surface after such installation does not require additional leveling and grouting. But this unit can only work on a ready-made mixture. The solution can be prepared independently or used in combination with both devices, which will automate the plastering process by at least 70%.
Unit with grouting function.
The video in this article shows how a trowel for plaster works.
Important: currently, all units presented on the construction market operate on ready-made mortar or dry plaster mixtures, combining them with water.
Work in pairs.
Handmade car
Serial models of plastering units are of course powerful, practical and of high quality. But the main disadvantage here is the price. They are quite expensive. Naturally, to perform a one-time job, a person will not buy a device that costs more than the entire work together with the material. But renting is not always possible. But there is a way out here too, our land has not yet become depleted of talents. Next, a homemade machine for applying plaster will be presented to your consideration. Of course, in power and performance it is inferior to serial models, but its cost is acceptable, plus it is quite easy to operate. We will take as a basis an ordinary fire extinguisher with a capacity of 4 liters; it has most of the parts we need, these are a handle, a solution bottle and a lever for opening the outlet valve. A larger fire extinguisher will be too bulky, and a small container will need to be refilled frequently. First you need to cut off the bottom of the fire extinguisher. A homemade machine will work on the principle of a spray gun, so the fire extinguisher container will serve as a hopper for the solution and be in an upside-down position. A hole is drilled opposite the outlet valve and a metal tube is inserted into it, at the end of which a nozzle with a diameter of 4 - 5 mm is mounted. Air from the compressor will be supplied through it. The power of the device depends not only on the diameter of the outlet and air pressure; the size of the gap between the nozzle and the outlet nozzle plays an important role. The closer the nozzle is located to the outlet nozzle, the stronger the mixture will be released.
Applying the solution with a homemade unit.
Advice: for fur coat plastering, 15–20 mm from the nozzle to the nozzle is sufficient; for fine mixtures, the nozzle should be located closer and the compressor pressure should be higher.
You can, of course, sweat, cut a thread of the appropriate diameter on a metal air duct tube and secure the tube to the nuts through sealing gaskets. In this case, the gap will be adjustable or simply weld the connection. But the easiest way would be to fix and at the same time seal the tube with resin. To do this, the fire extinguisher hopper, with a tube inserted into it, is installed so that the angle between the axis of the outlet and the horizon is 45º. Liquid resin is poured in such a way that its level does not reach the nozzle slightly, after which the fire extinguisher is left alone until the resin hardens.
Resin pouring diagram.
The option of filling with resin is also good because during operation the solution flows down an inclined surface directly to the nozzle. Next, you need to get a compressor that creates a pressure of 2 atmospheres, connect the connecting hoses, fill in the solution and you can work.
The video in this article shows how a homemade machine for plastering walls works.
1
Will one machine replace a team of construction workers?
The main advantage of using technology is freedom from routine manual labor. True, a machine cannot completely replace a person, but it greatly facilitates and speeds up the process. There are a number of advantages that speak in favor of using specialized equipment:
We recommend: Plastering walls made of aerated concrete indoors: technology for plastering walls with installation instructions
1. Preparation of plaster mortar requires an exact ratio between dry mixtures and water. If a person can make a mistake, then the machine, observing the exact dosage, prepares high-quality mixtures automatically.2. Mixing of mixtures is carried out mechanically. It is difficult for a person to mix the solution; it takes a long time. The machine kneads quickly. Thanks to the accelerated supply, the solution contains a large amount of air, which makes it possible to save money, since at the same cost, more solution is obtained.3. One plastering unit can replace an entire construction team. In this case, the process proceeds much faster, and an evenly applied thin layer of solution dries better.
Process of robot plastering machine
This means time is saved and less material is consumed. A high-quality and durable coating is created that does not require puttying or further finishing work to level the surface. The equipment is easy to operate. The operating rules are described in the instructions included. Therefore, a person of any training can work with the device. The dimensions of the machine are small, special handles and wheels make it easier to transport the equipment to the work site.
The unit consists of separate modules, which makes it possible to assemble and disassemble it for transportation over long distances and storage. Serial machines have the ability to adjust work processes, so they can be used both on large construction sites and for small volumes of work.
We recommend
How to install beacons for plasterInternal plaster of aerated concreteDo-it-yourself wind generators for the home
Advantages and disadvantages
A pneumatic bucket is an effective, simple device for plastering surfaces.
Even beginners will appreciate its advantages:
- application of the mixture can be carried out by people who do not have plastering experience;
- the speed of plastering increases;
- thanks to the spray force, a coating with increased adhesion is formed;
- the device is capable of applying mixtures of various compositions;
- low cost of homemade products.
Minuses:
- the high cost of products offered by the market;
- the work is accompanied by splashing of the surrounding areas (less carefully than manual plastering on beacons).
Carrying out work
- If the work is carried out in the fresh air at temperatures above 22 degrees Celsius, then the wall is moistened before application. In general, the air temperature should be at least 12 degrees Celsius, with a humidity of no more than 60 percent;
- The plaster is applied in several layers, and the first of them is called spray. In this layer, we need to fill all the unevenness as much as possible, since it is this layer that is responsible for the adhesion of the plaster to subsequent layers of material. In this case, there is no need to level the layer, since its roughness will serve for better adhesion to subsequent layers;
- The second layer, called primer, is applied to level the surface;
- The third layer is applied when the second has not yet dried in order to ensure better adhesion. As a rule, a solution with a smaller fraction is used for this, which after drying can create a smooth surface;
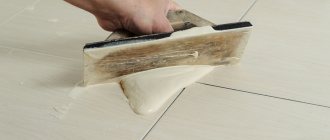
- At the final stage, the trimming operation takes place using a trapezoidal rule cutter. The operation is performed a certain time after the solution is supplied, until it has completely dried. The task of trimming is to give the surface the most even shape with a discrepancy in the thickness of the applied layer of no more than 2 millimeters.
Machine application technology on walls
The technological process can be divided into several main stages:
- Delivery and preparation of equipment, including installation of a station for mechanized plastering.
- Preparation of work areas: cleaning of residues of assembly adhesive, formwork release agent, metal and concrete protrusions, priming and grouting.
- Checking vertical and horizontal surfaces, joints and corners with their subsequent marking.
- Formation: leveling of the applied solution, if necessary, repeated local supply and formation.
- Cutting the set mortar with a special trapezoidal cutter is the rule.
- Puttying plastered areas.
The requirements for such work as machine plastering of walls must comply with SNiP 3.04.01-87 : air temperature not less than + 10 C, air humidity not more than 60%.
Necessary conditions are also:
- protection of internal premises and external surfaces from exposure to atmospheric moisture;
- glazing of window openings;
- checking heating systems;
- leveling floor screeds and sealing seams;
- carrying out isolation operations.
Video - machine alignment operation:
Preparing the area
The garbage has been removed, the walls have been cleaned, and the beacons are displayed. Time to get to work!
First of all, it is necessary to clean the areas being prepared for plastering from the remains of construction waste (construction adhesive, formwork lubricants, etc.).
Next, check the joints and corners for the presence of concrete sagging, metal protrusions, remnants of formwork elements, and remove all unnecessary elements. Places where metal structures are removed must be protected from possible corrosion.
The second stage of preparation will be priming the cleaned areas using rollers or brushes. The purpose of this stage is to ensure the maximum possible adhesion of the treated surface to subsequent layers.
The primer is applied to any area without exception. Monolithic, panel and plasterboard walls and ceilings are primed with “Betonokontakt”, concrete (ceramic concrete, foam concrete, etc.) and brick – with soil mixtures of the “Grendermittel” type.
The need for this stage also lies in saving finishing materials. The use of primers also makes it possible to increase the adhesive properties of the base, so the application of subsequent layers is greatly facilitated.
Another necessary preparatory step is the installation of beacons (gypsum or metal) to level the plaster layer. Only machine plastering of building facades allows you to bypass this stage.
Applying material to the wall - machine method
The main advantage of special stations for supplying plaster is the automation of the work process and, as a result, the rapid production of a uniform, high-quality plastered base.
The device automatically mixes a homogeneous plaster solution, and then supplies the mixture under high pressure to any horizontal and vertical surfaces.
machine applied plaster
The technology for applying the plaster mixture is as follows: a gun operating under pressure is held perpendicular to the surface, and the plaster is applied to the wall or ceiling with uniform movements of outstretched arms from a distance of about 30 cm .
Before applying the base layer, it is recommended to first go through the joints and corners with a gun. The order of work is to sequentially apply each subsequent layer, overlapping the previous one by about half. The layer thickness is adjusted by changing the speed of movement of the gun.
After all layers have been applied, leveling is carried out using a special rule, after which the treated area is given some time to harden.
Video - instructions for operating the machine and step-by-step plastering: