Cement, which appeared as a binding building substance in the 19th century, replaced lime and gypsum in strength and ease of use. It is produced from a burnt mixture of limestone and clay, crushed after cooling. As a building material, cement plaster is universal, therefore it is familiar to many in construction and repair.
Peculiarities
- Cement mortars for plastering walls are not self-painting, so a finishing coat is required.
- The second feature of cement plaster is its high frost resistance, which gives it an advantage over other types of coatings.
- Another feature is the dry mixing of the cement component and sand, after which the mass is mixed.
- It is used in rooms without heating, with high humidity.
Cement plaster is used for:
- monolithic joints;
- work on rough leveling of the surfaces of building structures to level out height differences;
- for sealing cracks;
- protection of building structures from impact damage and destructive environmental influences;
- pre-finish preparation of structures for finishing with wallpaper, tiles, decorative plaster solutions;
- increasing the sound and heat insulation of walls.
Advantages:
- champion in strength among plasters;
- high adhesiveness;
- moisture resistance due to the dense structure of the solution;
- common, accessible components, causing low cost.
Flaws:
- high specific gravity (severe load on structures);
- multi-layer application increases labor costs;
- it takes 3-4 weeks to gain full strength;
- failure to comply with the technology leads to cracking;
- without special preparation, it is incompatible with previously painted, plastic, other smooth, and wooden walls;
- not suitable for finishing plaster coating.
Advantages and disadvantages of plaster
This material has become widespread due to its positive properties:
- The gypsum plaster mixture is 95-97% made from materials of natural origin that do not emit toxic substances when heated or wet.
- After drying, the result is a perfectly even coating of a pleasant shade, so further finishing with wallpaper, tiles or paint is not necessary.
- High adhesion to almost all surfaces, thanks to which the material does not lag behind the wall.
- The relatively small weight makes working with the material convenient, and also allows you to finish ceilings.
- The plasticity of the solution allows it to be easily stretched over the surface, which significantly speeds up and facilitates the work.
- Gypsum-based plaster does not shrink, so it does not crack.
- Vapor permeability ensures high-quality ventilation of the wall, thanks to which water will not accumulate under the layer of material.
- Gypsum does not support combustion and does not burn, therefore it is an absolutely fireproof substance.
Gypsum plaster allows you to create a perfectly smooth coating.
There are also some disadvantages:
- Low moisture resistance, which is why the scope of use of the material is limited to dry rooms.
- You cannot cover surfaces with metal parts with gypsum plaster, as the material will constantly absorb moisture, which will lead to corrosion.
- High price compared to other types of plaster.
- Low mechanical strength.
Kinds
Cement plaster comes in different varieties and differs according to several criteria. To choose the right proportions, you need to know the strengths and weaknesses of each type of cement composition.
By composition
There are two basic groups of finishing compositions, depending on the type of components:
- cement-sand (pure mixtures with additives, or CPS for short);
- cement-lime (complex mixtures containing lime, which gives plasticity, or CIS for short).
A cement-clay composition is also sometimes used. Ratio (c-g-p) 1:4:6-12.
Lime
The following is used as a component of lime plaster:
- dry hydrated lime (fluff);
- lime dough (usually its volume is indicated in the mixture formulas);
- Lime milk is often used.
Lime dough - it is prepared from quicklime lump lime and water in the ratio of 2 kg of lime + 1 liter of water. The lime is poured with cold water (a little), after the reaction begins, more water is added, the components of the solution are mixed. The lumps should sizzle, foam and dissolve. The container, covered with a lid, is left for a day. 1 kg of lime, turning into a dough state, increases in volume to 2 liters. This is taken into account when choosing containers.
The temperature of slaking lime can reach 150°C. You need to work in protective clothing, gloves and goggles.
Lime milk (suspension) - obtained from dough, diluted with water, or from 2 kg of quicklime + 2 liters of water (quenched in the same way as dough).
Before introducing it into the CPS, dilute the required amount of dough (indicated in CIS proportions) with the water you will use to mix the CPS. If the CIS is 1:1:3, then for a bucket of cement powder take a bucket of lime paste and 3 buckets of sand.
The batch is prepared in two ways.
- Mix the dry ingredients and then pour in the suspension in small portions. Bring the kneaded mass to the desired consistency. Add water if necessary.
- Sand is poured into the milk of lime, cement powder is added to the resulting lime mortar, and everything is stirred.
Lime milk can be prepared immediately. The best lime dough is aged for 2-3 months (without freezing).
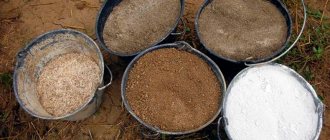
Sand
Serves as a filler. It also determines the strength of the coating. River or quarry sand of medium fractions is suitable. Large sand fractions manifest themselves as lumpy surfaces of the coating. Too small - they reduce the strength of the plaster and cracks may appear when drying. The optimal grain size is 0.5-2 mm. Sand comes with rounded or angular grains. Sand for plaster should not contain clay, soil particles, or silt. It is sifted, washed and dried.
There are two ways to wash sand. You will need to supply clean water and provide drainage.
For small quantities:
- sifted sand is poured into a container,
- fill with water,
- stir with a shovel,
- muddy water is drained
- place the container at an angle under a small stream of water so that it flows without dragging grains of sand with it, stir with a wooden oar,
- washing is stopped when the water becomes clear.
For large quantities of sand, make a box from a bed net with 1x1 cm cells, place it on bricks, put burlap on top of the net and fill it with sand (up to 8 cm high). Water it with a hose until the water flowing from the burlap becomes clear.
Other types of sand can also be used as filler. What kind of sand is needed for the wall (barite, perlite, quartz) can be determined by the desired properties of the coating.
Water
For the chemical reactions of the binder to occur with the formation of a strong crystalline structure that binds the filler particles to each other, water is required. Use clean tap water or collected sediment at room temperature.
Main technical characteristics
Cement plaster is characterized by the following technical parameters:
- density (affects thermal conductivity and strength), there are light 1500 kg/cm3 and heavy ones - 1600-1800 kg/m3, optimal - 1700 kg/m3;
- adhesion strength – from 0.4 MPa;
- compressive strength – 2.5-12 MPa;
- viability – 30-180 min;
- frost resistance – 30-100 cycles:
- Thickness h (layer max) – 4 cm (with reinforcement up to 7 cm);
- thermal conductivity coefficient of plaster is 0.93 W/m°C (regular CPS), 0.35 W/m°C (cement-expanded polystyrene);
- drying time – 12-14 hours at t +15-25°C, layer thickness 2 cm;
- vapor permeability – 0.09 mg/mchPa.
Other selection criteria
When choosing a suitable product, not only thermal conductivity and the price of the product should be taken into account.
You need to pay attention to other criteria:
- volumetric weight of insulation;
- dimensional stability of this material;
- vapor permeability;
- flammability of thermal insulation;
- soundproofing properties of the product.
Let's take a closer look at these characteristics. Let's start in order.
Volumetric weight of insulation
Volumetric weight is the mass of 1 m² of a product. Moreover, depending on the density of the material, this value can be different - from 11 kg to 350 kg.
Such thermal insulation will have a significant volumetric weight
The weight of thermal insulation must definitely be taken into account, especially when insulating a loggia. After all, the structure on which the insulation is attached must be designed for this weight. Depending on the mass, the method of installing heat-insulating products will also differ.
For example, when insulating a roof, lightweight insulation materials are installed in a frame of rafters and sheathing. Heavy specimens are mounted on top of the rafters, as required by the installation instructions.
Form stability
This parameter means nothing more than the creaseability of the product used. In other words, it should not change its size during its entire service life.
Any deformation will result in heat loss
Otherwise, deformation of the insulation may occur. And this will already lead to a deterioration in its thermal insulation properties. Research has proven that heat loss can be up to 40%.
Vapor permeability
According to this criterion, all insulation materials can be divided into two types:
- “cotton wool” – heat-insulating materials consisting of organic or mineral fibers. They are vapor permeable because they easily allow moisture to pass through them.
- “foams” are heat-insulating products made by hardening a special foam-like mass. They do not allow moisture to pass through.
Depending on the design features of the room, materials of the first or second type can be used. In addition, vapor-permeable products are often installed with your own hands along with a special vapor barrier film.
Flammability
It is highly, highly desirable that the thermal insulation used is non-flammable. An option is allowed when it is self-extinguishing.
But, unfortunately, in a real fire, even this will not help. At the epicenter of the fire, even things that do not light up under normal conditions will burn.
Soundproofing properties
We have already mentioned two types of insulating materials: “cotton wool” and “foam”. The first of them is an excellent sound insulator.
The second, on the contrary, does not have such properties. But this can be completely corrected. To do this, when insulating, “foam” must be installed together with “cotton wool”.
Functional additives
With the help of various additives, the properties of the composition of cement-sand plaster, as well as the coating that is obtained from it, are regulated. What to add and why?
liquid soap and clay
- To increase adhesion, polyacetate adhesive or carbocellulose compositions (water-soluble powders) are used. These additives displace air from the surface layer of the cement mixture for plaster, resulting in a coating with an even, smooth structure.
- To increase the plasticity of the solution for plastering walls (cement M400), add 70 g of liquid detergent or washing powder per 50 liters of the composition.
- Increased plasticity is achieved by adding 0.1 kg of fatty clay to 15 liters of water. The clay is ground in water, then the mixture is mixed with this solution. A dose greater than that indicated is not recommended, as cracks may form during shrinkage. This additive extends the drying time of the solution.
- Cement plaster for basements often contains lime paste.
- An increase in adhesion is also achieved by adding KMS solution to the solution or coating the walls.
- Additional strengthening of the coating, which undergoes temperature changes, is provided by the addition of chopped polymer (fiberglass) fibers to the solution.
- Diabase flour or quartz sand imparts acid resistance.
- PVA (100 ml per 10 liters of plaster mixture) is introduced for plasticity.
- In winter, for outside work, potash or other antifreeze additives are added to the solution.
A few recommendations
Before moving on to the preparation technology and instructions for use, you should highlight several important factors that need to be used in the plastering process:
- To prepare the mixture, you need to use plasticizers, then the solution will not shrink quickly, will remain pliable for a long time, will allow you to create a smooth surface without significant defects, and thanks to the penetration of the mixture into the deep recesses of the wall, the layer will be more durable. The store sells special plasticizers, but at home a common product - PVA glue - is quite suitable. It must be added at the rate of 1 liter of mixture to 8 ml of glue.
- To ensure sufficient density of the plaster and increase adhesion to the surface, tile adhesive can be added to the solution in small quantities. This method is suitable for spraying plaster.
- The instructions on the packaging are a necessary component of the correct use of the sand composition, since the consistency, proportion and other parameters largely depend on the specific situation.
To prepare high-quality cement-sand coatings, it is necessary to take a closer look at the composition of the solution, because the quality of the components largely determines its properties. In this case, we are talking not only about cement, but also sand.
Cement-sand mixtures (CSM)
Cement plaster - standard mixture composition:
- binder (cement of various brands),
- filler (sand),
- liquid substance (water).
When indicating the proportions of cement and sand for plastering walls, the number of parts of cement is indicated first, the number of parts of sand is indicated second, for example, 1:3.
Advantages:
- high wear resistance, strength;
- high water-repellent ability;
- in terms of adhesion it is second only to gypsum plasters;
- resistant to temperature fluctuations;
- versatility.
Disadvantage: the period of setting and strength gain is too long.
According to the method of application and area of application, they are distinguished:
- conventional (two-layer - spray, subsequent primer) for basements, attics, utility rooms;
- universal finishing (three-layer - spray, primer, coating) internal walls, facades;
- high-quality (five-layer - spray, three layers of primer, covering) the highest quality plastering using beacons.
Plaster - what is it
Gypsum plaster is a dry mixture (rarely ready-made) intended for interior finishing work. With its help, you can quickly correct various types of defects and surface unevenness.
Gypsum plaster contains natural gypsum. Increased absorption and hydrophobicity promote the penetration of moisture into the layers of the material, due to which favorable microclimatic conditions are formed in the room.
As can be seen in the photo of gypsum plaster, dry mixtures have a dark gray color and a granular fraction. The higher their viscosity, the more convenient it will be to finish them.
Cement-lime mixtures (CIS)
Advantages compared to DSP:
- adheres well to calcareous surfaces;
- lifespan is longer;
- has its own bactericidal properties;
- creates a good microclimate in the room;
- more flexible solution.
The ratio of the parts of the composition (by volume) is indicated in the sequence c:i:p, for example, the entry 1:1:2.5 means that 1 part of cement is taken, 1 part of lime and 2.5 parts of sand. The proportions of the components of the ISIS are shown in the table.
| Brand of solution | Proportions of components | ||
| Cement | Lime | Sand | |
| M-50 | 1 | 0.5 | 4-4.5 |
| M-75 | 1 | 0.32 | 4 |
| M-100 | 1 | 0-0.25 | 3-3.5 |
Usage: M-50 – for grouting uneven surfaces; M-75 – for leveling plaster; M-100 – for plastering (with the addition of plasticizers it can be used for facade work).
CIS remain plastic for a long time, so lime can be added not only to increase plasticity during installation, but also to slow down the setting time. Compositions containing lime adhere better to wooden surfaces. Clay is rarely used in CIS. Its addition is permissible if the composition is applied to a clay base
Which one is better to choose?
So that after finishing the room with plaster the quality of the coating does not raise doubts, you need to opt for materials that comply with GOST. The parameters of gypsum plasters for interior work are detailed in GOST 31377-2008.
Dry:
the moisture content of the material should be no more than 0.3% of the total mass; weight of 1 m3 in loose form is 800-1100 kg, in pressed form - 1250-1450 kg.
In solution:
- the use of water per 1 kg of mixture should be in the range of 600-650 ml;
- Setting time for manual application is 45 minutes, for machine application – 90 minutes;
- consumption per 1 m2 with a layer of 1 cm for manual application - 8.5-10 kg, for machine application - 7.5-9 kg;
- moisture retention without dripping – 90%.
Finished surface:
- compressive strength – 2.5 MPa;
- adhesion force to other surfaces – 0.3 MPa;
- density per 1 m3 – 950 kg;
- vapor permeability – 0.11-0.14 mg/ (mh Pa);
- thermal conductivity – 0.25-0.3 W/ (m°C);
- shrinkage is not allowed.
For surface treatment there is a special SNiP 3.04.01-87. These are requirements for the evenness of the plaster application and its moisture content. Deviation from the horizontal and vertical by 1 meter is allowed within 1-3 mm, and for the entire height of the room - 5-15 mm. There should be no more than 2-3 irregularities per 4 m2, and their depth is limited to 2-5 mm.
The maximum humidity of the base is 8%.
For wet rooms, you need to choose a plaster that is recommended by the manufacturer for these purposes. The usual composition is not suitable for working in such premises. To give the coating additional resistance to moisture, a deep penetration primer or acrylic-based concrete contact is applied to it. For the same purpose, you can use waterproofing mastic. Such mixtures must be applied in several layers to a completely dry surface.
Before you finally decide on the choice of plaster mixture, you first need to read reviews about various manufacturers and compositions. You can only purchase materials in specialized stores, and when purchasing, it is recommended to consult with a specialist.
Gypsum plaster is usually used in rooms with low humidity. The mixture is perfect for the bedroom, nursery and living room, since it does not contain substances that can be harmful to health. Initially, gypsum solutions are intended for leveling walls for wallpaper and painting. They are convenient for sealing drywall seams.
To obtain an even, high-quality coating, the plaster is spread over the surface in thick layers. It is better to do leveling as a rule, but if it is not available, you can use a spatula. The walls are leveled from bottom to top, making parallel movements to the left and right. When working on the ceiling, the rule is to pull towards yourself.
The plaster layer can float, so it needs to be periodically pulled up and leveled.
20-30 minutes after application, you need to cut off the excess mixture with a rule and smooth out the unevenness with a spatula. After about 1 hour, if the layer does not deform when pressed with a finger, it should be moistened with water or primer. When the surface becomes matte, rub it in a circular motion with a spongy metal or plastic grater. Excess mortar must be removed from the trowel during grouting. Then you need to level the entire layer of plaster with a spatula.
After another 5-6 hours, it is recommended to repeat the grouting. After this, the surface is polished with a spatula or a special trowel. These actions are aimed at making the coating perfectly smooth and closing large pores. Such a surface does not need to be puttied, and before painting and applying other decorative coatings it will be enough to treat it with a primer.
For the machine method, special expensive equipment is used, which can be rented if necessary. Gypsum plaster is mixed in a container designed for this purpose and supplied through a hose. In this case, the layers are applied overlapping, and leveling is done in the same way as with the manual method. This treatment creates a more uniform layer, which has a positive effect on the quality of the coating.
Special types of cement mixtures
Special formulations are designed to provide:
- waterproofness (waterproofing);
- thermal insulation;
- X-ray protection;
- acid resistance;
- sound absorption, etc.
There is also adhesive plaster used for installing insulation. But due to its high cost, it is rarely used.
polymer cement plaster and perlite additive
Polymer-cement
A newcomer among building materials, polymer cement plaster is a finishing mortar used for exterior and interior work. It differs from conventional ones by the presence of reinforcing and plasticizing polymer additives. This is a light-colored dry mixture that is diluted following the instructions. Typically the ratio of mixture to water is 5:1. After a few minutes of soaking, the mixed solution is mixed again, and application is immediately started with a spatula and a rule. Life time ~ 40-60 minutes. After drying it can be painted. The thickness of the applied layer is from 2 to 30 mm. Unlike other cement compositions, it has a short drying time and quickly gains strength; for this it takes a day or two (depending on the air temperature). The advantage of this composition is high adhesion and crack resistance provided by reinforcing additives.
Perlite
Another relatively recent composition, the filler of which is expanded perlite sand. This is finishing and thermal insulation in one bottle. Universal purpose, however, is more often used to cover facades. The ratio of cement to perlite can be different (depending on the task) from 1:1 to 1:15.
Additional advantages of perlite compositions are:
- lightness of the material, which is ideal for application to gas silicate and foam concrete blocks (suitable for wooden bases);
- high sound absorption and heat retention (5 times superior to brick);
- the surface turns out smooth, for which it is glossed - moistened and smoothed with a wide spatula or a porous grater.
A layer thickness of no more than 25 mm is allowed. If it is necessary to obtain greater thickness, increase the number of applied layers. The last of the applied layers is immediately leveled.
Ceresite
Cement plaster with sand can be sealed with cerizite, a special milky emulsion that ensures complete waterproofness of the coating. Cement-sand ratio 1:2 or 1:3. Ceresite (emulsion) is sold in finished form. This additive is protected from freezing and drying out. You can make ceresite milk with your own hands. To do this, ceresite (powder) is diluted with water by volume in a ratio of 1:10.
To prepare a cement mortar, mix the dry components, after which they are sealed with a diluted emulsion, adding it in small portions to the desired consistency. Mixing is completed when, when smoothing pressure with a shovel, no cement or sand strips appear on the surface, and the surface has a uniform color. The lifetime of the solution is half an hour. It is impossible to dilute a solution that has dried in a bucket. The solution is stirred several times during operation. The thickness of the layer depends on the pressure of water filtering from the ground. It can be from 2 to 4 cm. The re-applied layer will no longer stick (it slips and does not harden for a long time). During work and hardening (4 days), drainage is required. After hardening, the plaster is protected from drying out, frost, and shocks.
Thermal conductivity of gypsum plaster
The vapor permeability of gypsum plaster applied to the surface depends on mixing. But if we compare it with conventional plaster, the permeability of gypsum plaster is 0.23 W/m×°C, and that of cement plaster reaches 0.6÷0.9 W/m×°C. Such calculations allow us to say that the vapor permeability of gypsum plaster is much lower.
Due to low permeability, the thermal conductivity coefficient of gypsum plaster is reduced, which allows increasing heat in the room. Gypsum plaster retains heat well, unlike:
- limestone-sand;
- concrete plaster.
Due to the low thermal conductivity of gypsum plaster, the walls remain warm even in severe frost outside the room.
How to make a mortar from cement and sand
Since one of the purposes of plaster is to protect structures from mechanical damaging factors, its ability to resist external influences (measured in kg/cm2) is of considerable importance - the grade of the composition depends on the grade of cement.
Application area by brand:
- grades M150-M200 – for interior work;
- grades M300 and higher (including M500) are used in cement plasters for external use.
Within the same grade of mortar, as the grade of cement increases, the proportion of filler (sand) increases. With M400 the composition is 1:4, with M500 – 1:5. Sometimes it is taken into account that the composition of M400 and M500 differs. M500 cement contains additives that increase resistance to frost, increase ductility, and reduce internal stresses.
| Cement (grade) | Solution (brand), kg/cm2 | ||||
| 200 | 150 | 100 | 75 | ||
| Component ratio | |||||
| 500 | 1:3 | 1:4 | 1:5.5 | 1:7 | |
| 400 | 1:2 | 1:3 | 1:4.5 | 1:5.5 | |
| 300 | 1:1 | 1:2.5 | 1:3.5 | 1:4 | |
| Application area | Basement, facades, joints, screeds | Facades and basement | Interior decoration | Grout | |
If it is necessary to determine the brand of the composition during work, the brand of cement is divided by the number of buckets of sand taken for the composition. For example, if M300 cement and 3 buckets of sand were used for the mortar, then the grade of composition is 100. The same grade of composition can be obtained using cement materials of different grades. In this case, the grade is regulated by the ratio of cement and sand.
Cement plasters for external walls
Obviously, cement plasters for the exterior walls of a building must withstand weathering and temperature fluctuations. Therefore, the frost resistance indicator is important for them, and the higher it is, the better. Simple guidelines when choosing a material are the name “Facade” on the packaging and the indication (in the “Areas of Application” section) for use for external walls.
Photo: “Osnovit”
Scheme of wall cladding in a wet room: 1 - mosaic; 2 - tile adhesive; 3 - soil; 4 - cement plaster; 5 - plaster spray; 6 - masonry mortar; 7 - ordinary brick
If we are talking about finishing the basement, it is worth considering that this part of the building is in a more aggressive environment than the walls. The base is moistened by slanting rains and drops bouncing off the blind area, as well as melting and freezing snowdrifts. It is subject to various mechanical stress, therefore, in addition to frost resistance, cement plaster for the plinth must have high density and compressive strength. For example, ordinary wall plaster has a compressive strength of 2.5–3 MPa, and basement plaster has a compressive strength of at least 7–8 MPa.
Photo: “Osnovit”
Mixtures for pre-treatment of bases: plaster spray “Prowell PC20 M” (“Osno-Vit”) (1 pack 25 kg - 180 rub.)
Photo: KNAUF
“Adhesive” (KNAUF) (1 pack 25 kg - 270 rub.)
Photo: Volma
“Obryzg” (“Volma”) (1 pack 30 kg - 215 rub.)
The walls of the house, built from highly porous foam-gas concrete and gas silicate blocks, are finished only with vapor-permeable cement plasters. The fact is that the blocks are capable of condensing moisture inside themselves, and the plaster layer should allow it to come out. Otherwise, moisture will begin to escape into the room, causing the walls in the house to constantly be damp, and colonies of fungi and mold will appear on them. At the same time, it is necessary that the plaster be light and optimally strong, since a layer of plaster that is too dense can tear the porous surface. Keep in mind: during wet finishing work in a new aerated concrete house, excess moisture actively escapes through the walls (and accumulates in them during the cold season). As a result, the outer plaster layer, especially with low vapor permeability, can gradually peel off, crack and fall off. To avoid this unpleasant situation, it is better to plaster the facade after finishing the interior decoration of the house.
When applying and hardening a layer of cement plaster, it is necessary that the temperature of the air and the base be in the range of 5–30 ° C, and the air humidity is no more than 75%
Photo: Legion-Media
In the process of applying a cement plaster solution to the base, you cannot add water or dry mixture to it.
What and how to mix the correct solution for plastering walls
Experienced specialists say that particularly important factors affecting the quality of the result are:
- sifting the ingredients before mixing;
- uniform mixing of components;
- compliance with mixing technology;
- quality of raw materials;
- moisture content of raw materials;
- correct addition of additives.
manual and automated mixing
The sequence of preparing cement-sand mortar depends on manual or machine mixing. When using a concrete mixer (simultaneous addition of cement and sand is allowed):
- part of the water is poured in (or prepared lime milk, if CIS is mixed),
- additives are introduced (liquid soap, etc.),
- after stirring, let stand for 5 minutes,
- pour in half the volume of sand,
- the entire volume of cement is poured,
- After thorough kneading, add the remaining sand, add water (milk) little by little until the desired consistency is obtained.
For manual kneading:
- prepare a large container;
- pour sand and cement into the container and mix;
- if the components have not been sifted in advance, the mixture is sifted;
- prepare water in the required volume (part of the water is poured out), plasticizers are added to the water, which can be introduced at the beginning of mixing;
- gradually, in small portions, pour in water and mix the composition;
- add the additives, which according to the instructions are introduced at the end of mixing, into the remaining water and add them to the stirred mixture.
Mixing time of components is no more than 15 minutes.
Preparation of the solution
To finish small surfaces, it is much easier to buy a ready-made dry cement-sand mixture. For larger amounts of work, it is more profitable to prepare it yourself. The most important thing is to accurately observe the proportions.
First, sand and cement are thoroughly mixed without adding water. The mixing proportions will depend on the brand of cement. The resulting cement plaster according to GOST is divided into several grades:
Even the cleanest sand must be sifted through a sieve to remove small inclusions. It is undesirable to use cement that has been stored and caked for too long. If necessary, it can be sifted, removing hardened lumps, and the amount of sand in the solution can be reduced by 1/4.
The liquid is added after mixing the dry ingredients. It is added in small portions, thoroughly mixing the solution each time.
To increase its plasticity and mobility, plasticizers are introduced into it. We have already mentioned this above. The finished solution should be collected in a slide and not spread, while being well distributed over the surface.
Read more about preparing sand-cement mortar for plaster here.
How is the strength of cement mortars regulated?
Cement plaster is characterized by a high strength index of the future coating. The determining factor here is the brand of the solution. This is the degree of compression that the coating can withstand 28 days after application. The value is regulated by changing the ratio of sand and cement, additives.
Cement consumption within one brand may vary. There are several factors that increase or decrease strength. They also affect the amount of cement consumption for plastering walls:
- The size of the filler particles determines the area of contact with the cement laitance. The finer the fraction, the more is required to ensure cement contact.
- The strength of the filler material can significantly influence the strength of the coating. If sand is replaced with ground rock, the strength increases up to 1.5 times. Then for a specific brand of mortar, less cement will be required.
- The water-cement (W/C) ratio also affects strength. Hard (thick) mixtures give a more durable coating, watery ones - less durable. The amount of water required for the reactions to occur is small. However, such a composition is difficult to fit. Therefore, the W/C is selected taking into account ease of use. Can be in the range from 0.15 to 20.
- Curing conditions can significantly affect the strength of a coating. The longer the composition dries, the stronger the coating. (Therefore, it is covered with film, moistened, and protected from the sun).
Which plaster to choose: cement or gypsum?
FORMAN GYPSUM PLASTER
In a number of characteristics, these materials are similar to each other, so it is necessary to consider those qualities and properties that differ from each other.
These include:
- price - gypsum plasters are about 1.5 times more expensive than cement plasters, but gypsum material is consumed 45% less. In addition, if the gypsum is applied with high quality, the surface will not need to be puttied, and the cement coating always needs to be treated. As a result, gypsum plaster will cost less than a cement mixture, especially if a large surface is being processed;
- adhesion and drying time - cement has a faster hardening rate, so gypsum mortar is applied within 45 minutes, and cement mortar can be applied within 2 hours. The gypsum mixture is formed several times in small portions, otherwise it will quickly become unsuitable for further use;
- scope of use of mixtures - cement plaster is more versatile, since it can be used for internal and external facade work. The gypsum composition cannot be used outdoors - it has lower performance qualities because it is deformed from excess moisture. By the way, this is why gypsum is not recommended for treating the walls of rooms with high humidity levels. Even the use of high-quality waterproofing will not improve the situation.
How to properly plaster a wall with cement mortar
The quality of the finished coating - its durability, strength, appearance - depends on the correct execution of plastering work. Therefore, you should follow the technology of plastering walls with cement-sand mortar.
installation of beacons
splash
base layer
cover
grout
Preparing the base
This is a very important part of plastering work, since the cement coating is heavy. The surface of the base must be cleaned of dust, grease stains, old coating, areas of biological damage, etc. Depending on the type of wall materials, preparatory work may have specific features.
- Before plastering new brick walls with cement-sand mortar, no special preparation is required. You just need to clean the seams a little from the mortar. Indentations of ~1 cm are made in the seams and cleaned with a metal brush. Then remove the dust and moisten it generously.
- Walls made of stone or concrete that have stood for a long time without covering are covered with notches and washed. Cracks and gouges are repaired.
- Walls made of aerated concrete or cellular concrete are treated with a deeply penetrating primer. This prevents the base from absorbing water from the wall plaster mixture.
- Smooth surfaces (for example, concrete slabs) are first coated with tile adhesive, leaving grooves on it.
Cleaning from dust and dirt is carried out with a metal brush using multidirectional movements and pressing. The resulting scratches increase adhesion.
Oily, resin-coated areas are removed until a clean surface is achieved (cement plaster does not adhere to oily surfaces, and resinous, oily substances may bleed through the finish over time).
Applying a primer strengthens the base and increases its adhesion to the plaster composition.
There are additional ways to increase traction:
- Tile adhesive is applied to the base, a mesh is laid on top (mesh joints overlap 10 cm), and it is embedded in the adhesive. Grooves are drawn on the surface of the glue with a notched trowel. Dried glue provides a strong base for the cement coating.
- Applying notches over the entire surface of the concrete wall with a hatchet or hammer drill. After this, an adhesive primer is needed, for example, Betonokontakt.
- A reinforcing mesh is attached to fragile surfaces using self-tapping screws (suitable for clay and wooden walls).
- Homemade wire mesh is cheap but labor intensive. Nails are driven into the wall, between which the wire is twisted and stretched.
Installation of beacons is a preparatory work. Wooden slats or a metal profile can be used as beacons. They are guides along which the wall is aligned. They are set using a plumb line and level. Attached with self-tapping screws or putty. The distance between the beacons is taken to be 10-20 cm less than the length of the rule.
Tools
Plastering work is carried out using the following tools and devices:
- metal profile for beacons (5 cm);
- metal hacksaw (for cutting the profile);
- construction mixer (concrete mixer);
- plumb line and level for installing beacons;
- large container for preparing the mixture manually;
- containers for bringing the solution to the workplace;
- spatulas;
- rule;
- grater;
- Master OK;
- For large volumes of work, a hopper, compressor, mortar pump, plastering machine and other mechanical devices can be used.
Plastering
Plastering walls with cement-sand mortar is carried out in 4 stages:
- The liquid composition is sprayed onto the surface (ground layer). The thickness depends on the type of structure being plastered. For concrete partitions, the thickness is no more than 0.5 cm, for brickwork - 0.7 cm, for a wooden surface - 1 cm. The mass is applied with a trowel (without grouting) and leveled with a spatula or rule.
- The main layer or primer (levelling, of which there can be 3) is applied with a trowel, as soon as the lumps of spray stop sticking to the fingers when rubbed (after about 2 hours), leveled with a spatula or rule. The thickness of the soil depends on the profile of the beacons. It also doesn't rub off. The composition is placed from bottom to top. They work in small areas up to 1.5 square meters. After applying layers of soil along the beacons, they are removed, and the resulting grooves are sealed.
- The surface (grouting or covering) layer, ~3-5 mm thick, is made with a liquid consistency composition on wet soil (if left too long, the grouting layer will roll off). If it is necessary to obtain a mirror effect, the batch is made with fine sand.
- The slightly dried, but not dry surface is rubbed with a trowel in a circular motion, pressing the tool with the entire surface until a protrusion of sand appears. The surface layer is wetted using a spray bottle. When rubbing with a trowel, small grooves are smoothed out, protrusions and irregularities are removed.
It is inconvenient to level the mixture under the ceiling rule. Leave 10-15 cm unplastered, apply the solution the next day and level with a vertical rule.
to thoroughly moisten the area with water before plastering .
High quality is obtained if the entire plaster coating works as a single monolithic layer. Therefore, plastering is carried out without interruption; the layers are not allowed to dry out before rubbing. Then allow for slow drying.
Thermal calculation of walls made of various materials
Among the variety of materials for the construction of load-bearing walls, sometimes it is a difficult choice.
When comparing different options, one of the important criteria that you need to pay attention to is the “warmth” of the material. The ability of a material to keep heat out will affect indoor comfort and heating costs. The second becomes especially relevant in the absence of gas supplied to the house.
The second becomes especially relevant in the absence of gas supplied to the house.
The ability of a material to keep heat out will affect indoor comfort and heating costs. The second becomes especially relevant in the absence of gas supplied to the house.
The thermal protection properties of building structures are characterized by such a parameter as heat transfer resistance (Ro, m² °C/W).
According to existing standards (SP 50.13330.2012 Thermal protection of buildings.
Updated edition of SNiP 23-02-2003), during construction in the Samara region, the normalized value of heat transfer resistance for external walls is Ro.norm = 3.19 m² °C/W. However, provided that the design specific heat energy consumption for heating the building is lower than the standard value, a decrease in the value of heat transfer resistance is allowed, but not less than the permissible value Ro.tr = 0.63·Ro.norm = 2.01 m²·°C/W.
Depending on the material used, in order to achieve standard values, it is necessary to select a certain thickness of a single-layer or multi-layer wall design. Below are calculations of the heat transfer resistance of the most popular external wall design options.
Calculation of the required thickness of a single-layer wall
The table below determines the thickness of a single-layer outer wall of a house that meets the requirements of thermal protection standards.
The required wall thickness is determined at a heat transfer resistance value equal to the base one (3.19 m² °C/W).
Permissible - the minimum permissible wall thickness, with a heat transfer resistance value equal to the permissible value (2.01 m² °C/W).
| No. | Wall material | Thermal conductivity, W/m °C | Wall thickness, mm | |
| Required | Acceptable | |||
| 1 | Aerated concrete block | 0,14 | 444 | 270 |
| 2 | Expanded clay concrete block | 0,55 | 1745 | 1062 |
| 3 | Ceramic block | 0,16 | 508 | 309 |
| 4 | Ceramic block (warm) | 0,12 | 381 | 232 |
| 5 | Brick (silicate) | 0,70 | 2221 | 1352 |
Conclusion: of the most popular building materials, a homogeneous wall construction is possible only from aerated concrete and ceramic blocks. A wall more than a meter thick, made of expanded clay concrete or brick, does not seem realistic.
Calculation of wall heat transfer resistance
Below are the heat transfer resistance values of the most popular options for external wall structures made of aerated concrete, expanded clay concrete, ceramic blocks, brick, with or without finishing with plaster and facing bricks, insulation. These options can be compared with each other based on the color stripe. A green stripe means that the wall meets regulatory requirements for thermal insulation, a yellow stripe means the wall meets acceptable requirements, a red stripe means the wall does not meet the requirements
Aerated concrete block wall
| 1 | Aerated concrete block D600 (400 mm) | 2.89 W/m°C |
| 2 | Aerated concrete block D600 (300 mm) + insulation (100 mm) | 4.59 W/m°C |
| 3 | Aerated concrete block D600 (400 mm) + insulation (100 mm) | 5.26 W/m°C |
| 4 | Aerated concrete block D600 (300 mm) + ventilated air gap (30 mm) + facing brick (120 mm) | 2.20 W/m°C |
| 5 | Aerated concrete block D600 (400 mm) + ventilated air gap (30 mm) + facing brick (120 mm) | 2.88 W/m°C |
Wall made of expanded clay concrete block
| 1 | Expanded clay concrete block (400 mm) + insulation (100 mm) | 3.24 W/m°C |
| 2 | Expanded clay concrete block (400 mm) + closed air gap (30 mm) + facing brick (120 mm) | 1.38 W/m°C |
| 3 | Expanded clay concrete block (400 mm) + insulation (100 mm) + ventilated air gap (30 mm) + facing brick (120 mm) | 3.21 W/m°C |
Ceramic block wall
| 1 | Ceramic block (510 mm) | 3.20 W/m°C |
| 2 | Warm ceramic block (380 mm) | 3.18 W/m°C |
| 3 | Ceramic block (510 mm) + insulation (100 mm) | 4.81 W/m°C |
| 4 | Ceramic block (380 mm) + closed air gap (30 mm) + facing brick (120 mm) | 2.62 W/m°C |
Sand-lime brick wall
| 1 | Brick (380 mm) + insulation (100 mm) | 3.07 W/m°C |
| 2 | Brick (510 mm) + closed air gap (30 mm) + facing brick (120 mm) | 1.38 W/m°C |
| 3 | Brick (380 mm) + insulation (100 mm) + ventilated air gap (30 mm) + facing brick (120 mm) | 3.05 W/m°C |
Consumption rate of cement-sand mortar for plastering walls
The consumption of plaster per 1 m2 depends on the base material, surface condition and layer thickness. To determine how much cement needs to be prepared for plastering walls, a calculation is usually made.
Layer thickness depending on the base:
- Concrete. Good adhesion of concrete allows you to apply a layer of a minimum thickness of 2 mm. Without mesh, 2 cm is allowed, with reinforcement - up to 7 cm.
- Brick. The minimum layer is 0.5 cm. Without reinforcement, a layer of 2.5 cm is recommended, with reinforcement - a mesh of up to 5 cm.
- Foam concrete and aerated concrete. A layer of 2-15 mm is sufficient.
- Insulation. Plastered according to reinforcement. A layer of 1-2 cm (no more) is recommended.
- Tree. You need to plaster the walls using a grid. Layer thickness up to 2 cm.
If the wall is uneven, the thickness of the cement plaster is determined after installing the beacons. It depends on the curvature of the wall and the type of mixture. To determine the average thickness of the wall covering along the installed beacons, measurements are taken at several points (3-4 for 1 beacon) from the wall to the top of the plank. When calculating, all measurements are summed up, the resulting number is divided by the number of measurement points. This will be the average thickness of the plaster layer. Let's say it turns out to be 25 mm. Since the rate of cement consumption per 1 m2 of plaster is usually indicated for a 10 mm layer, you need to multiply the rate by 2.5. To determine the required quantity per wall, the resulting number is multiplied by the footage.
If you make a cement-sand mixture for plaster yourself, then calculate the required amount of cement based on the average cement consumption per 1 m2 - 8.5 kg. The average consumption of the mixture is 17 kg/m2. This does not apply to light cement plaster. The consumption of cement-sand mixture in kilograms per square meter with a layer thickness of 10 mm is indicated by the manufacturer on the packaging:
- Knauf mixture – 8.5 kg;
- Bergauf – 17 kg;
- Hercules – 16.7 kg
Construction waste weight 1 m3
You need to understand that different types of waste have their own density. For example, the density of wooden debris will be much lower than that of concrete. Let's say, if you take two garbage containers and fill them, the container with concrete will be heavier. Knowing the density of construction waste is very important, because it will let you know how many trucks you need to order for removal, as well as the cost of the work done.
Below are the averaged values of waste density in m3:
- concrete - 2.4 t/m3;
- reinforced concrete - 2.5 t/m3;
- fragments of brick and stone, tiles, external tiles, waste from removing plaster—1.8 t/m3;
- wood, frame structures with backfill - 600 kg/m3;
- other construction waste (except for engineering, technological and metal structures) - 1200 kg/m3.
The above data refers to buildings “in a dense body,” that is, not disassembled. The actual density of disassembled structures will differ (t/m3):
- mixed waste (dismantling) - 1.6;
- mixed waste (repairs) - 0.16;
- pieces of asbestos - 0.7;
- broken brick - 1.9;
- ceramic products - 1.7;
- sand - 1.65;
- asphalt road surface - 1.1;
- insulation (mineral wool) - 0.2;
- steel products - 0.8;
- cast iron products - 0.9;
- plaster - 1.8;
- crushed stone - 2;
- fibreboard, chipboard - 0.65;
- wood (window and door frames, baseboards, panels) - 0.6;
- linoleum (trimmings) - 1.8;
- roofing material - 0.6.
Weight of construction waste in 1 m3 table
Below are data on the volume and specific gravity of construction waste.
| Garbage type | Package | Volumetric weight, tons/m3 | Specific gravity, m3/ton | ||
| Oscillation limits | Average calculated value | Oscillation limits | Average calculated value | ||
| Construction waste | in bulk | 1,10 – 1,40 | 1,20 | 0,91 – 0,71 | 0,83 |
| Household and street garbage | in bulk | 0,30 – 0,65 | 0,55 | 3,33 – 1,54 | 1,82 |
| Wooden scraps | in bulk | 0,35 – 0,55 | 0,40 | 2,86 – 1,82 | 2,86 – 1,82 |
| Fabric scraps | in bulk | 0,30 – 0,37 | 0,35 | 3,33 – 2,70 | 2,86 |
| Wood sawdust | in bulk | 0,20 – 0,30 | 0,25 | 5,00 – 3,33 | 4,00 |
| Snow wet | in bulk | 0,70 – 0,92 | 0,80 | 1,43 – 1,09 | 1,25 |
| Snow wet | in bulk | 0,40 – 0,55 | 0,45 | 2,50 – 1,82 | 2,22 |
| Snow is dry | in bulk | 0,10 – 0,16 | 0,12 | 10,00 – 6,25 | 8,33 |
| Boiler slag | in bulk | 0,70 – 1,00 | 0,75 | 1,43 – 1,00 | 1,33 |
| Crushed brick | in bulk | 1,20 – 1,35 | 1,27 | 0,83 – 0,74 | 0,79 |
| Wood chips | in bulk | 0,15 – 0,30 | 0,25 | 6,68 – 3,33 | 4,00 |
| Electrical fittings | in bulk | 0,37 – 0,63 | 0,50 | 2,70 – 1,59 | 2,00 |
| Asphalt, bitumen, crushed tar | in bulk | 1,15 – 1,50 | 1,30 | 0,87 – 0,67 | 0,77 |
| Various fights, glass, faience | in bulk | 2,00 – 2,80 | 2,50 | 0,50 – 0,36 | 0,40 |
| Paper | rolls | 0,40 – 0,55 | 0,50 | 2,50 – 1,82 | 2,00 |
| Paper | bales | 0,65 – 0,77 | 0,70 | 1,54 – 1,30 | 1,43 |
| Paper | ligaments | 0,50 – 0,65 | 0,55 | 2,00 – 1,54 | 1,82 |
| Old pressed paper - waste paper | bales | 0,35 – 0,60 | 0,53 | 2,86 – 1,67 | 1,89 |
| Bottles are empty | in bulk | 0,35 – 0,42 | 0,40 | 2,86 – 2,38 | 2,50 |
| Rags | bales | 0,15 – 0,20 | 0,18 | 6,68 – 5,00 | 5,56 |
| Large metal products, pipe parts | 0,40 – 0,70 | 0,60 | 2,50 – 1,43 | 1,67 | |
| Plastic products | without packaging | 0,40 – 0,65 | 0,50 | 2,50 – 1,54 | 2,00 |
| Glass products other than sheet glass | 0,26 – 0,50 | 0,40 | 3,85 – 2,00 | 3,85 – 2,00 | |
| Cardboard | bales | 0,59 – 1,00 | 0,70 | 1,70 – 1,00 | 1,43 |
| Cardboard | ligaments | 0,42 – 0,45 | 0,43 | 2,38 – 2,22 | 2,33 |
| Scrap steel, cast iron, copper and brass | in bulk | 2,00 – 2,50 | 2,10 | 0,50 – 0,40 | 0,48 |
| Aluminum scrap | in bulk | 0,60 – 0,75 | 0,70 | 1,67 – 1,33 | 1,43 |
| Oversized household scrap | in bulk | 0,30 – 0,45 | 0,40 | 3,33 – 2,22 | 2,50 |
| Various small machine parts | in bulk | 0,42 – 0,70 | 0,50 | 2,38 — 1,43 | 2,00 |
| Various furniture | 0,25 – 0,40 | 0,30 | 4,00 – 2,50 | 3,33 |
Having the above garbage weight table at hand, you can easily convert cubes (m3) into tons. In this way, you can save a significant portion of the money that you would end up paying for work that you yourself are able to do.
Aligning walls inside and outside a room is a complex and time-consuming process. Moreover, the final result directly depends on the material the master uses. The construction products market offers a wide range of plaster mixtures. The most common are:
Plaster. Calcareous. Cement. Combined (arrangement of 2 or more types).
When choosing the right material, it is necessary to take into account the functional characteristics of each type.
At the very beginning of plastering work, a professional and an amateur need to decide on the amount of material required for successful work. A prerequisite for achieving the quality of the final result is to adhere to all the features of the technological process. You can give calculations using the example of such a parameter as the weight of dry plaster:
The average weight of one square meter of plaster is on average 15 kg. In order to find out more specifically, you need to multiply this weight by the thickness index. You can see an approximate calculation in the table below.
Weight of 1 m2 of plaster depending on thickness Thickness of plaster Weight of 1 m2 (kg) Specific gravity (kg/m3) 1 cm1515002 cm303 cm454 cm605 cm75 Comparative characteristics of plaster solutions: Criterion / Plaster solution Gypsum Lime Cement Vapor permeability 0.11-0.14 mg/ mchPa0.10-0.12 mg/mhPa0.09 mg/mhPaConsumption per 1 m², with a thickness of 1 cm8.5-10 kg12-20 kgWorking hardening time1.5 hours2 hoursWorking conditions must be maintained optimal conditionsresistant to water and airThe need for puttying is not requiredMoisture resistance is not presentBactericidal properties does not have Strengthhigh not high versatility (external and external facades) not universal
Based on the data presented, we can say that all types of solutions have a number of advantages. They perfectly allow moisture to pass through without creating a “steam room” effect. The work process also has its own nuances, for example, the gypsum will have to be mixed more often in small portions, because it dries faster. Cement plaster can add heat capacity to a room, which is a significant advantage. When working in damp areas, it is necessary to use a moisture-resistant solution.
As for the cost, it varies depending on the material consumption. Thus, the specific gravity of cement-based plaster is 2 times greater than gypsum, and accordingly the weight of 1 m2 of plaster will be different. The price of gypsum mortar is higher, which means there will not be much difference in cost compared to a cement-sand mixture.
Tips and tricks for selecting a mixture
Cement-sand mortar can be made by selecting and measuring the components yourself. It will cost much less. Or you can buy a ready-made dry mixture. When choosing, they are guided by the type of coating, operating conditions, base material, labor costs, and cost.
Some selection rules:
- To decorate the external surfaces of buildings, CPS and CIS compositions for facade work, or universal ones, are used.
- All types of DSP and CIS are suitable for ordinary premises, but the optimal ones are those that are intended specifically for the interior.
- For rooms with high humidity, compositions without lime are used. For dry rooms, CIS may be preferable, as they create the most favorable conditions.
- When working in winter, cement plaster with anti-frost additives is used.
- According to special requirements (reduce noise levels, insulate walls, etc.), special compositions are used.
- For wooden surfaces it is better to take CIS.
- The specified maximum permissible layer thickness is taken into account if a thick leveling coating is required. This indicator is related to the duration of work.
- Gypsum-containing walls as a base are not suitable for all ready-made mixtures.
- It is better to purchase mixtures from those manufacturers who have proven themselves to be of high quality products.
The “correct” mixtures are packaged in three-layer bags made of paper and film. They do not have the same release time (they must differ by at least a second). It is better to purchase mixtures that have been produced recently.
Since there is a possibility of purchasing a fake, it is better to play it safe, buy a couple of bags of the mixture, and try it out. If the setting times stated on the packaging are met experimentally, the plaster mixture has a normal consistency, and the coating has the required surface quality, you can purchase the remaining quantity.
What is this article about?
Plaster refers to two groups of fundamentally different building materials. Firstly, plaster is a leveling, strengthening mixture intended for rough work. Secondly, finishing solutions for decorative finishing.
Basic alignment of the geometry of the room is carried out using mineral plasters with a base of cement or gypsum. Decorative decoration of walls - with expensive acrylic, silicate, silicone solutions, as well as more budget thin-layer cement mixtures such as “Bark Beetle”, “Shuba”, etc.
Naturally, materials with such different tasks should not be combined into one category, since this can only confuse, and our goal is to help you understand. Therefore, today we will talk exclusively about “rough” plaster.
Manufacturers (Ceresit, Knauf, Prospectors, Bergauf, Bolars)
At different times, a mixture of the following manufacturers was recognized as the best cement plaster:
- Plitonit T1+ from the German company MC-Bauchemie (universal, with reinforcing fibers, layer thickness 3 cm),
- Knauf grunband of a German company (universal, thermal insulation with polystyrene foam granules),
- Veber vetonit TT40 is produced at Russian enterprises (universal, layer up to 4 cm),
- Ceresit ST29 from the German concern Henkel (universal, layer thickness up to 2 cm),
- KM pro from a Russian company (universal CIS with reinforcing fibers).
The Russian company Starateli is one of the main producers of cement plasters in Russia, competing in quality with well-known brands.
The Russian company Bergauf has been on the market for about 15 years. It has proven itself with high-quality products. In addition to universal cement plaster, it produces Bau block mixture for repairing and leveling cellular concrete.
Bolars is a Russian company known outside the country. Produces dry mixes of excellent quality. An interesting mixture is Uniplast, universally applicable, suitable for all types of blocks.
How to prepare gypsum solution?
Self-production of a solution from ready-made dry mixtures must be done strictly according to the manufacturer’s instructions.
There are also general recommendations that are suitable for almost all formulations:
- In a container with 1 liter of water, the temperature of which should be within 20-25°C, you need to pour 2 kg of dry mixture.
- Mix thoroughly with a construction mixer or drill with a special attachment. As a last resort, mixing small volumes of the mixture can be done with a spatula or trowel;
- Leave the solution for 3-4 minutes so that it gains strength and ductility. Stir it again. The resulting mixture should not flow from the instrument or have any lumps.
All manipulations for making the mixture must be done in a clean container and with clean tools. The amount of ingredients for each new portion must be carefully measured, since differences in the composition of the mixture can lead to poor-quality coating.
There are recipes for making your own gypsum-based plaster:
- To 4 parts gypsum add 1 part sawdust and 1 part tile adhesive.
- To 1 part of gypsum add 3 parts of chalk in the form of powder with small fractions and wood glue in an amount of 5% of the total mass of the mixture.
- One part of gypsum is pre-soaked in water and mixed with 1 part of lime paste.
In the first two recipes, the dry ingredients are first mixed, and only then they are diluted with water to the desired consistency. Stirring is carried out in two stages with a break of 3-4 minutes. Various plasticizers can be added to such mixtures. PVA glue is added in an amount of 1% of the total mass; the use of tartaric or citric acid and special plasticizers is allowed.
Lime also gives the mortar plasticity and increases its setting and drying time.
We don’t repeat common mistakes
Defects such as cracks, peeling, and plane breaks are avoided by eliminating the causes of their occurrence.
- Inhomogeneous cement plaster of different batches leads to the appearance of cracks at the joints. Therefore, the batches are made with the same proportions.
- A large difference in the thickness of adjacent layers often causes cracks to appear between them. It is advisable to make the soil layers equal.
- Ignoring spray, pre-wetting the wall surface, weak adhesion of the base are the reasons for weak adhesion of the plaster to the base, leading to peeling. Therefore, the base is moistened abundantly. To increase adhesion, the walls are primed or covered with notches (shingles are stuffed onto wooden walls).
- Direct sunlight and wind accelerate, making the drying of cement plaster for exterior work uneven. As a result, cracks appear. Fresh plaster coatings protect from the sun and wind, otherwise the material dries quickly without having time to gain strength. It is recommended to spray the surface of the drying plaster with water from a spray bottle or cover it with film.
- Be sure to maintain the recommended proportions of the components of the composition.
- The beacons used are set so that kinks do not occur. A control cord is pulled between the outer beacons (in several places along the height) to check the alignment.
- Thick layers are reinforced.
- The coating is applied to fresh plaster. When applied to a dried surface, moisten it. Then the grinding will be done correctly.
A sand castle is not for us! Knowing and following the rules will ensure the strength of the cement coating on the wall surface, and the quality of work will ensure its beauty and reliability.
Important nuances
Gypsum plaster is suitable for many surfaces. It can be applied to cement and lime plaster, drywall, wood and paint. It is also allowed to use gypsum mixtures on gas silicate blocks, logs, chipboard and expanded clay concrete. Such surfaces always need to be primed. For most of these materials, a regular universal primer of two or three coats will do, but for concrete floor slabs and paint it would be better to apply concrete contact.
Before you begin applying gypsum plaster, you need to carefully prepare the surface. All old decorative coatings are completely removed, grease stains, glue and dust are removed. If the wall or ceiling was previously painted, it is recommended to remove the paint layer completely. To do this, you can use a scraper or grinder with a grinding attachment. Loose layers of old plaster also need to be removed.
It is necessary to remove all metal elements from the surface being treated, since the gypsum layer increases the impact of corrosion on them. Metal parts that cannot be removed are generously coated with an anti-corrosion compound.
Large cracks, chips and other significant defects must be covered with cement mortar.
The minimum layer for some plaster mixtures is 5 mm. But the optimal thickness for a layer of plaster is within 1-2 cm. In cases where there are large defects on the surface, it may be necessary to increase the thickness of the coating to 8 cm. Under these circumstances, it will be necessary to reinforce the surface with galvanized or plastic mesh. Also, reinforcement of walls must be done in new buildings to prevent deformation during shrinkage of the building.
To install the reinforcing mesh on the entire surface of the wall, you need to apply markings every 35-45 cm with a marker. Holes are drilled along these marks using a hammer drill, and plastic rods from dowels are inserted into them. The mesh is cut into small rectangular pieces and overlapped with self-tapping screws. The distance from the wall to the reinforcing material should not be more than half the plaster layer.
No deflections are allowed on the reinforcing frame , and vibration should not occur when touching it. To correct such defects, to strengthen the structure, a wire in the shape of the letter Z is threaded between the cells of the mesh. A plaster mixture of a thinner consistency is placed on the inside of the mesh. This layer is left for 10-20 minutes to dry and only after that a thicker outer layer is applied.
You may also need to install guide beacons. As such, you can use an aluminum profile for drywall, which must be removed after the plaster layer has dried. You can make your own beacons from a gypsum mixture. To do this, construct a vertical strip from the solution and level it using a level. You can work on gypsum beacons in 3-4 hours.
After the plaster has completely dried, it is necessary to check the uniformity of color and evenness of the surface. You can only check the color in the correct bright lighting. The finished coating must not have cracks or chips, and it should not be perfectly smooth or very porous. Only small pores are required on the surface. If there are any shortcomings, then a second thin layer of plaster should be applied on top of the finished coating.
When working with gypsum materials, you need to take into account many nuances. For example, you can add cement to gypsum, mix it with alabaster or sawdust. Various additives impart new properties and textures to the solution. You need to work very quickly with any gypsum solution. If it hardens, then it will no longer be possible to soak the frozen mixture for further work with it.
Application Features
How to plaster with gypsum plaster? First of all, prepare the solution:
- mix the dry mixture with water in proportions 2 to 1;
- For better mixing, use an electric drill with a mixer attachment.
Applying plaster yourself is carried out in several steps:
- It is necessary to clean the surface from dirt and old finishing elements.
- It is necessary to treat the wall with a deep penetration primer.
- Install the beacons in increments of 30-50 cm using a building level.
- Throw the mortar onto the wall and level it using the rule.
- After a couple of hours, apply a layer of putty.
- Level the surface using a wide spatula.
In conclusion, we note that when choosing plaster, you should not try to save money. This may affect the quality of the finished result. Therefore, it is necessary to choose only products from trusted manufacturers and carefully read the attached instructions.
How to dry?
The surface should dry under natural conditions. There should be no drafts or operating heating devices in the room; the required air temperature should not be lower than +5 and not higher than +25°C. Direct sunlight on the coating is not allowed. Do not speed up drying with a heat gun or any other heating equipment.
After 3-7 days, the room must be thoroughly ventilated to remove moisture from the plaster layer. The plaster will dry completely and gain strength only after 1-2 weeks. The finished surface should be smooth and light. Then you can glue tiles or wallpaper onto it. And the moisture content of the coating for painting should not exceed 1%.
Application area of plaster
Plaster can be used to level walls and ceilings indoors. It allows you to smooth out defects between slabs, joints of horizontal and vertical planes, eliminate gaps and cracks, chips and depressions. Thanks to plaster, you can prepare any surface for subsequent decorative finishing.
With the help of "Rotband" you can solve the following problems:
- seal grooves for various purposes;
- smooth out the joints between gypsum board sheets using reinforcing tape;
- make slopes of window blocks (provided they are insulated from moisture);
- increase the sound and heat insulation of housing;
- treat thin brickwork and partitions during redevelopment.
Also, plaster of this brand is suitable for creating smooth and textured decorative coatings, for making imitation stucco molding, and various volumetric elements on walls and ceilings. The building mixture can be tinted with dry pigments and made into various designs and relief images.
Which company is better to choose plaster?
Many companies are engaged in the production of plaster mixtures. Both imported and domestically produced material is available for sale. The most popular products are from the following companies:
- Knauf is an international concern founded in 1932. Then the Knauf brothers began to develop a Schengen gypsum mine and produce building mixtures.
- Volma is a Russian company that mines natural gypsum stone and creates construction and finishing materials from gypsum and cement.
- Prospectors - the domestic company offers a large selection of plaster, putty, primer and other materials for repairs.
- Unis - Russian-made building mixtures are supplied to 140 different cities. The gypsum deposit is located near Perm.
- Rusean - the brand offers inexpensive but high-quality mixtures for finishing and construction. Modified formulations are made from our own raw materials.
- Etalon Stroy - in 1968, a concrete unit was opened and the production of blocks for foundations began. During this time, the company expanded its range and gained fame.
- Glims - a brand that has been producing high-quality dry materials for construction since 1994. The products are widely appreciated and in demand.
- Ceresit - building mixtures under this brand are produced by the Henkel company. It is a leading manufacturer of repair materials.
- Weber is a company that cares about the well-being of people, therefore it produces materials with the safest possible composition. There are three factories in Russia.
- Litokol is an Italian company founded more than 50 years ago. Today, repair compounds, primers, grout mixtures and glue are supplied to more than 100 countries around the world.
- Perel - dry building mixtures from a domestic manufacturer successfully compete with foreign analogues.
- Perfekta is the first company in Russia to develop and launch the production of dust-free mixtures based on natural materials.
Farbe "Bark beetle"
After application and complete hardening, Farbe plaster forms a specific pattern on the surface called “bark beetle.” It consists of grooves arranged in a chaotic manner. This facade is easily cleaned of dust and dirt during rain.
Farbe “Bark Beetle” plaster is sold in 25 kg buckets. Approximate material consumption during application is 2.7-3.1 kg/m2. Available in 15 colors, among which brown and gray shades predominate. But if necessary, tinting is possible.
It is recommended to apply plaster at temperatures from +5 to +30 degrees. The decorative texture begins to form 15 minutes after the start of work, but it will take at least 15 hours for the surface to completely harden.
Advantages of Farbe "Bark Beetle":
- service life up to 25 years;
- does not fade in the sun;
- adhesion to the facade 0.3 MPa;
- Can be tinted up to 25,000 shades.
Among the disadvantages is the high cost of the material compared to mineral plaster compositions. Moreover, it is cheaper than many silicone compounds.
Features of plaster
Rotband plaster from Knauf is a dry gypsum multifunctional plaster mixture “originally” from Germany, which has rightfully been the market leader in its segment for several decades. Translated from German, “rotband” means “red ribbon”. This concept was proposed for commercial use by the company's founder, Karl Knauf, for marketing purposes in order to distinguish different product lines. The “Rothband” line also includes thin-layer putty and materials for decorative finishing “Rothband Profi” (paste-like mass) and “Rothband Finish” (dry mixture).
Gypsum plaster "Rotband" is used for interior work. It is ideal for finishing walls and ceilings, for leveling them and preparing them for painting, wallpapering, tiles and other finishing materials. The difference between “Rotband” and standard gypsum mixtures, which are often prepared directly at a construction site, is the presence of a special retarder additive “Alenal”. This additive reduces the rate of setting of gypsum, which, as is known, hardens very quickly. Thanks to this composition, the solution can be added in larger quantities and used for a longer time.
Gypsum plaster of this brand has other features that are its advantages:
- Versatility. The material is suitable for many purposes - it can be used for roughing, finishing and even decorating surfaces. “Rotband” will repair cracks and chips, eliminate small and large defects, and increase adhesion between the decorative finish and the wall. Even in the absence of a primer, the plaster will fulfill its purpose.
- High quality. Plaster is valued by craftsmen, as it invariably has efficiency, a perfectly smooth texture, the absence of foreign impurities, and excellent adhesion to most building materials (gypsum plasterboard, concrete, OSB, cement, etc.).
- Adaptability for different situations. "Rotband" can be used in various climatic conditions. The plaster is suitable for rooms with low to moderate humidity, but with additional protection it will be suitable for rooms with high humidity. Rotband is also suitable for both professional and private use.
Universal gypsum plaster Rotband