Home / Installation, repair, maintenance / Leveling / How to level a ceiling with your own hands using beacons?
When performing leveling, an important parameter of the work will be not only the quality of workmanship, but also how difficult it will be to achieve a good result. When large surfaces have to be processed, many difficulties arise, primarily associated with obtaining an evenly and evenly applied layer of the composition.
This task can be made easier by using a simple device – a plaster beacon. They are used by everyone - from home craftsmen to professionals, since they are the ones who will allow you to obtain an even distribution of the composition over the surface.
We will tell you further about how to use such devices and how to level the ceiling or any other plane using beacons.
With or without beacons
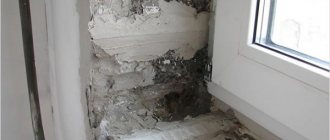
There are two technologies for ceiling plaster - with and without beacons. The right thing to do is to do it with beacons. Then the ceiling surface is in one plane. However, there are ceilings with very large height differences. Throwing a 5 cm thick layer of plaster on the ceiling is dangerous: it may fall. Even if you make several layers with a primer after each, there is still no guarantee that such a large layer will stick.
Incorrectly applied plaster may fall off
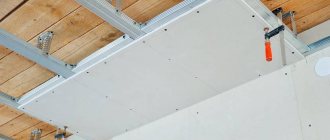
In general, if the ceilings have a large curvature, it is recommended to level them with suspended ceilings made of plasterboard, but not all rooms allow you to “steal” about 10 cm of height. In this case, you can do it wrong - plaster the ceiling without beacons.
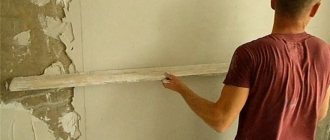
The whole idea is to make the ceiling smooth in some area. It will not have noticeable differences and will visually look smooth. And the fact that in different corners the distance to the floor will differ by several centimeters cannot be determined by eye. With this technology, the main task is to make the junction of the ceiling and walls even. This line is very clearly traced and should be straight. If you choose this technology for plastering the ceiling, you need to start plastering from the walls, towards the center.
Mixture consumption
The deeper the unevenness in the ceiling, the more plaster is required for a high-quality finish. It is possible to calculate the need only after accurately determining the layer thickness, so an approximate method is used at the procurement stage.
Typically, the manufacturer indicates on the packaging the consumption of dry mixture per 1 square meter for a plaster thickness of up to 1 cm. Knowing approximately what the thickness of the solution will be in a particular case, the total consumption can be easily calculated by multiplying it by the area of the room.
For example, in a room of 16 sq.m. the plaster will be applied in a layer of 20 mm. According to the manufacturer, the consumption for every 10 mm is 10 kg per 1 sq.m. Accordingly, you will need 16x10x2=320 kg. If there is 25 kg of mixture in a bag, you need to buy 13 bags plus 10-15% of the reserve, that is, 15 pieces.
The better to plaster
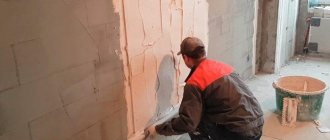
To plaster the ceiling, you can use a regular cement-sand mortar, or the same one, but with the addition of lime. But it is advisable to apply a small layer. Although this mixture turns out to be the cheapest, recently it has been used infrequently - it may fall or crack.
The place of conventional mortar has been taken by plasters based on polymers, which have better adhesion and are less likely to crack. Their disadvantage is their high price. But redoing the ceiling after the applied layer falls will not be cheaper. Therefore, they prefer to immediately make flow plaster from modern mixtures. Some types of similar materials recommended for ceilings are shown in the table.
| Name | Purpose | Color | Layer thickness | Binder type |
| Knauf Rotband plaster mixture | For plastering smooth surfaces of walls and ceilings | White gray | 5-50 mm | Gypsum with polymer additives |
| Plaster-Adhesive Mixture Knauf Sevener | For restoration of old plaster surfaces, including facades | Grey | Portland cement with polymer additives and reinforcing fibers | |
| Plaster Bergauf Bau Interier | For plastering in rooms with normal humidity | Grey/White | 5-40 mm | Cement with polymer additives and perlite filler |
| Plaster Volma-Canvas | For indoor spaces with normal humidity | 5-50 mm | Based on gypsum with chemical and mineral additives |
If you have little experience in plastering work, when choosing a composition, pay attention to the time before the mixed solution hardens. During this period, it is necessary to apply and level the entire solution, because then it begins to harden and loses its elasticity. Of the plasters listed in the table, Volma has the longest “life” period. But not everyone likes to work with it, many say that with Knauf it is easier, although they have a shorter drying time - 50-60 minutes, but it is more than enough even with no experience.
Primer, why it is needed and which one is better
You won't be able to properly plaster the ceiling without a thorough primer. It improves the adhesion (adhesion) of the plaster mixture to the base. Basically, all problems with falling and peeling finish on the ceiling are due to the fact that the base was not primed. That’s why we don’t skip this stage. Moreover, if there are several layers of plaster, it is advisable to treat each of them with a primer (with complete drying).
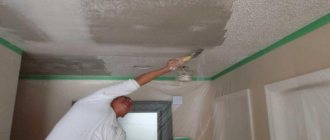
First, we prepare the base - we clean it of old coatings, and then treat it with a primer. To do this, pour the composition into a paint bath, take a roller on a long handle (telescopic rod) and distribute the composition over the ceiling. If there are any depressions - recesses, defects on the surface of the ceiling, into which the roller simply does not fit, we pre-treat them with a brush dipped in primer.
Ceiling primer before plastering
Now about which primer for the ceiling is better. According to the masters, this is “Betonokontakt”. After drying (24 hours), a rough, sticky film remains on the surface. The putty “clings” to it perfectly. Just one thing: you need to make sure that while the primer is drying, no dust gets on it. Otherwise, there will be no effect from such processing. It can only get worse.
How to seal slab joints and rustications
When plastering a concrete ceiling made of reinforced concrete slabs, the main problem is sealing joints and rustications - recesses at the joints. They are sealed a few days before the general plastering of the ceiling begins - it is necessary for all the materials to “set”.
First, everything that comes out is removed from the joints. Then, with a brush, everything is cleaned of dust and sand. The prepared joints are coated with a primer. Most often they recommend “Betonokontakt”. This treatment significantly reduces the possibility of peeling off the applied plaster layer. If this option is not suitable for some reason, you can use any deep penetration impregnation, but the effect will not be the same.
Such seams on the ceiling are not uncommon.
After the impregnation has dried (24 hours from the date of application), the solution is applied. If a layer of more than 30-35 mm is required, it is better to apply it in two layers. Having laid the first one, a relief is formed on it with a notched trowel. A day later, when the solution dries, apply a second layer. It is already leveled with the ceiling.
With a large layer of plaster, the joints of the slabs are sometimes reinforced with a layer of painting compound. It is needed so that during seasonal movements of the slabs, cracks do not appear at the seam. It is unlikely that anyone will nail the mesh to the ceiling; it is usually simply attached to the composition. In this case, after applying the first layer of plaster, a strip of polymer plaster mesh is laid, a notched trowel is passed along it, deepening it into the solution and, at the same time, forming a relief for applying the second layer.
When applying plaster in two layers, a relief is formed on the first
Sometimes the rust (crack in the seam) is very deep and it is not possible to repair it with mortar. It is also pre-cleaned of crumbling parts and sand and treated with “Betonokontakt”. Afterwards there are two options:
- Seal with polyurethane foam. We put it a little, about 1/3 of the volume of the gap, having previously moistened the walls generously with water (needed for normal polymerization of the foam). We leave it for a day, after which we cut off the foam so that at least 1 cm of plaster fits into the seam. Afterwards, we prime and apply the plaster in two (or three) layers.
It is inconvenient to hold a can of foam near the ceiling; you can put a piece of hose on the “spout”. It's much easier to work this way - Take a rag, moisten it with Betonokontak, and hammer it into the crack. Leave to sit, then plaster.
The question may also arise about how to seal the joints of the slabs on the ceiling. Usually one of the compositions with polymer additives is used, and you can also use a good tile adhesive. It also contains a considerable amount of polymers. They say that after such sealing the joints do not crack.
This is what a sealed seam on the ceiling looks like
How long does it take for interior plaster to dry?
After installing the plaster, it is necessary to leave it to dry, preferably until it reaches full strength. In conditions of tight deadlines, finishing is not recommended earlier than 5-7 days after applying the plaster.
The time it takes to gain full strength depends on the type of plaster used: for cement plasters - up to 30 days, for cement-lime and gypsum plasters - up to 7 days. The use of heaters and fans is not recommended; drying should occur smoothly under natural conditions.
When the plaster is completely dry, you can begin finishing - gluing wallpaper, painting walls, installing decorative plaster, etc.
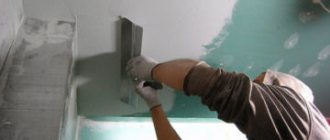
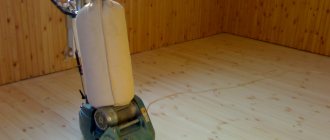
Grouting plaster with a float
Do-it-yourself ceiling plaster on beacons
If you've ever plastered walls, this will be easier for you. The ceiling plaster, although slightly different, is not radically different. The biggest difficulty is that you have to keep your arms raised up - they get tired, and your neck also gets tired - you have to throw your head back.
Preparation
First, the ceiling is cleared of all existing finishing materials, down to bare concrete. Afterwards, dust is removed from the surface. If you have a construction vacuum cleaner (not a household one, it will get clogged), it is convenient to use it; if not, just remove all the dust and sand with a large brush.
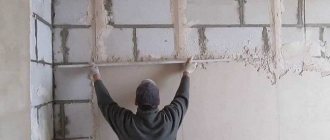
First we clean everything down to clean material.
If the ceiling is made of reinforced concrete slabs with large rustications, they are repaired. After the solution has dried on the rust, a primer is applied to the clean surface. After 24 hours you can continue working.
Installation of beacons
The first stage of ceiling plastering is the installation of beacons, but first you need to determine the maximum and minimum height difference. It is more convenient to do this using a laser plane builder. It is installed under the ceiling and turned on the horizontal plane. They measure at a certain number of points and measure the distance from the ceiling to the luminous beam. In this way, the maximum and minimum deviations are found. The thickness of the plaster layer should be slightly greater than the most significant deviation.
The same operation can be done with a water level, but it will be much more difficult. First, you need to apply a horizontal line along the perimeter of the walls at some arbitrary distance from the floor. We fix one end of the level at this mark. With the second one, we go around the room, measuring the distance from the water column in the level to the ceiling. So calculate the same maximum and minimum points.
Having decided on the thickness of the layer, we select the beacons. These are galvanized perforated strips with a protruding back. These backs will be the supports when leveling the solution. The height of the back of the lighthouse can be 6 mm and 10 mm. We choose the one that is slightly larger than the found maximum deviation.
Installation of beacons on the ceiling
Beacons are placed in increments slightly less than the length of the rule - the tool used to level and cut the mortar. With a rule length of 1.5 meters, the beacons are placed at a distance of 1.1-1.3 m. Longer ones are difficult to work with if you are not used to them; shorter ones are not worth it - there are too many seams. First, the outer beacons are placed, retreating 20-30 cm from the walls. The remaining distance is divided so that the distance between the beacons is within the specified limits.
Attach the beacons to the gypsum mortar and mix it thickly. Islands of this solution are applied along the beacon installation line (can be drawn on the ceiling). The beacon strips are pressed into it, exposing their backs in one given plane. If you have a plane builder (level), everything is simple - set it according to it - the beam should slide along the back.
If we work with a water level, we transfer the required “finishing” level of the ceiling to the walls, stretch several cords so that they are directed along the lighthouse. Using these cords we insert the backs of the slats. Having set all the beacons, check the plane using a rule with a bubble level installed on it.
The distance between the beacons on the ceiling is 1.1-1.3 meters
After the plaster has set (this should take several hours), you can begin plastering the ceiling.
Applying and leveling plaster on the ceiling
At this stage, the work will require stable construction trestles with a large platform between them. The tools include a small spatula and a construction falcon - a platform with a handle.
The selected plaster mixture is diluted strictly according to the instructions. The solution should be homogeneous, without lumps. The solution is applied to the falcon from the container, then it is placed on the ceiling in portions using a small spatula. It is probably more convenient to apply the solution with a sharp movement of the brush, but you can simply “smear” the solution onto the ceiling. Here everyone chooses their own way.
Filling the space between the beacons with solution
The distance from one lighthouse to another is filled with plaster. The width of this strip to begin with is 50-60 cm. When laying, you should not achieve a uniform surface. It is filled with chaotic strokes.
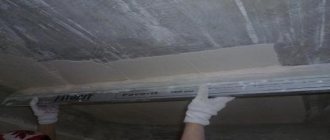
We take the rule, rest it on the beacons, move it towards us, swaying from side to side. With this movement, a certain amount of solution remains on the bar.
We take a rule and begin to equalize
We remove it with a small spatula and send it to the ceiling - to the unfilled part or where holes are found. Having filled the holes, we pull the rule again. These are the basic techniques for plastering a ceiling; we repeat them until the area becomes level.
We stretch it several times, filling the holes
So, gradually, one strip is filled, then the second, and so on - the entire ceiling. We leave it to dry for 5-8 hours.
Removing beacons and sealing rusts
When the solution has set, but has not yet dried, remove the beacons. If you leave them, the metal will begin to rust, and rusty stains may appear on the ceiling.
After removing the beacons, rust remains; they are sealed with mortar.
The rusts remaining after the beacons are filled with the same solution and leveled to the same level as the ceiling plane using a wide spatula. There is no point in using a melting pot - it is too long. After this, you can consider that plastering the ceiling with your own hands is finished. All you have to do is wait for it to dry completely. This will take from 5 to 7 days, depending on the composition.
Required Tools
To prevent the process of leveling the ceiling from becoming a pain, prepare your equipment in advance. You will need a building level to determine the difference in the working surface. If it is 2-3 cm, then buy a reinforcing mesh for the job; if it is 4-5 cm and you need to level concrete slabs with joints, then you cannot do without plaster beacons. The main tool is a long rule, without which even a professional cannot make a smooth surface. When working with plaster, use three metal spatulas 10, 45 and 80 cm wide, a construction falcon, a deep container with straight sides (15-20 liters), a paint brush, a paint brush and a roller to evenly distribute the primer. We do not recommend diluting the mixture in a bucket or basin with round sides, since you will not be able to scoop it out evenly with a spatula.