Decorative plaster is gradually and more and more confidently replacing other methods of wall decoration. This belief is especially true with wallpaper, which is not as durable, attractive or modern. Using plaster on the surface you can create not only a perfectly smooth layer, but also textured patterns and images. Rollers are excellent for this, and you can even make them yourself. They are based on different materials - wood, plastic, and, of course, traditional pile. Rollers for decorative plaster help realize bold design ideas, making the result unique.
Rollers for decorative plaster and forming a relief surface
Something as simple as a roller can be used to create unique effects on wall surfaces. This tool is attractive because it can be used not only by professionals, but is also suitable for construction beginners. Such products for applying decorative plaster can be classified according to two criteria. The former differ from each other in material, while the latter differ in the type of design.
The purpose of the tool may be somewhat different. We are talking about a roller for decorative painting of walls. It can have a certain width:
- mini;
- midi;
- maxi.
The latter is suitable for large areas, for example, painting facades. But when working indoors, it is better to choose the first two options - they do not increase paint consumption and its splashing. When choosing a roller, you should also pay attention to the length of the pile. If you need to paint a smooth surface, this value should not exceed 5 mm. But for puttying surfaces and painting ceilings, rollers with a pile of up to 10 mm are suitable. If paint will be applied to concrete, you should purchase a tool with a pile of up to 20 mm. The structural roller can have a pile of up to 30 mm. It is suitable for concrete or brick, as well as bases finished with relief plaster.
Varieties of figured rollers according to the resulting final texture
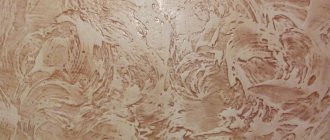
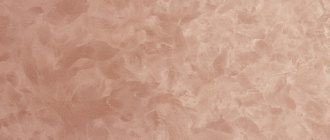
Rollers can have a completely different texture, imitating textiles, wood, fur, marble, brickwork and even more complex patterns, for example, waves, oriental-style ornaments, braids and others. Thanks to each of them, you can create a specific surface. The deeper the pattern is cut on the roller, the richer and more pronounced the final texture is.
It should be noted that it is necessary to select for each room its own texture of the pattern on the wall, and therefore its own type of textured roller. So, for example, in the kitchen work area or in the hallway, imitation brickwork will look good, but it will be completely inappropriate for the bedroom. Therefore, it is better to immediately purchase a roller that comes with replaceable attachments.
Types of rollers for decorative plaster
Textured rollers for decorative plaster are made from:
- rubber;
- plastic;
- faux fur;
- foam rubber;
- skin.
Based on the type of pattern applied, these devices are classified into textured and structural.
Rollers for applying plaster
Tools for decorative plaster, as mentioned above, can be rubber. They are made of hard types of material with indentations, ornaments and protrusions. Using a plaster roller you can obtain a decorative surface that imitates natural materials:
- bricks;
- stone;
- wood.
For a pronounced relief, you should choose a tool with a rubber working surface.
The decorative layer of plaster may not have a very pronounced relief. Adherents of restraint and minimalism should choose foam rollers, with which they can form unusual roundness and indentations on the wall.
A decorative roller can also be considered from the point of view of the type of pattern applied. Thus, textured work surfaces allow you to get the look:
- bamboo fiber;
- textiles;
- stone chips;
- fur.
To form a surface from a repeating pattern on the wall with your own hands, you should use a structural tool. For example, for a brickwork effect, the plaster is left for 15 minutes until it dries a little, and then applied with a roller.
Wooden structures
Wooden rollers for wall decoration allow you to create clearly structured patterns. They are easy to use, the composition does not stick to their surface, and the working part is easy to clean. These devices are good because they do not react with any decoration compounds. In order for the roller to last a long time, after use it should be rinsed and dried thoroughly, as otherwise the wood may swell.
Plastic tool
Rollers with patterns for wall decoration can also be made of plastic. They allow you to save money, because they are cheaper than other options, and they show only the best qualities in their work. When choosing such a tool, you need to pay attention to its weight. If it is minor, the technician may have to apply excessive pressure, which will lead to tension in the hands.
Leather work products
Before making repairs, you should select materials and tools. If plastering work involves the use of Venetian mixture, a leather roller will do just fine. With its help you can also create a marble effect. Such a structural roller will be ready to last a little longer than other material options.
Pile tool
A decorative roller with a pile working surface can be made of natural or artificial material. Both the first and second options may have a tendency for individual hairs to fall out, which will negatively affect the result. Therefore, you need to be careful when using such tools.
Application area
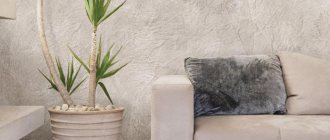
Without a special protective coating, Venetian plaster can only be applied inside buildings and outside places with high humidity. If you coat the material with a special composition, it will be perfect for the kitchen and even the bathroom. In large rooms it is better to use relief, textured types of plaster, and in small rooms give preference to smooth options. Too bright shades do not look good in small rooms - pastel, light colors are more appropriate here.
Venetian plaster is suitable not only for residential premises, but also for offices, shopping centers, and concert halls. It can be used to cover walls, ceilings, individual areas, niches, columns and other interior elements. The material combines perfectly with brickwork, stone, wood, and thick wallpaper.
Using textured plaster to decorate an office
How to choose a roller for textured plaster
When choosing a roller for decorative plaster (if you plan to apply it yourself), you should think about what effect you want to see in the final result. If the pattern should be blurry, you should choose a tool with a soft working surface. But for a clear relief, perhaps with geometric shapes, hard rollers are suitable. They even allow you to recreate something like frescoes.
Attention! To paint walls with your own hands, it is better not to choose a design with a telescopic handle, since the intensity of pressure will be uneven.
The price will depend on the material of the working surface. The most budget options are made of plastic and foam rubber. But if the consumer is not limited by budget, it is better for him to choose a silicone analogue - it is more functional and will be ready to serve for a long time.
Pattern application technique
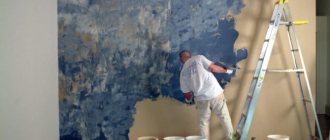
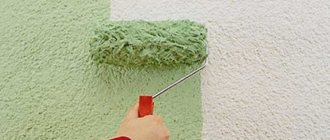
If you want to get a surface with a pattern, you need to use a roller. Once the plastering work has been completed, you can begin to form the pattern. The layer should harden a little; you cannot use the tool on a completely liquid mixture, as it will not leave any mark. But you can’t wait for the material to completely harden. You need to start printing the design by placing the roller under the ceiling. Then it should be slowly driven down, the relief should be as uniform as possible. There is no need to remove the instrument from the base. The force of impact should be the same.
When the first strip is completed, you can move on to forming the second. It should go close to the previous one. It is important to align the drawing on top so that it starts from the same fragment. Once the relief has been formed, you can proceed to painting the walls.
Additional tools
To perform structural finishing, not only special rollers are used, but also the following tools:
- rigid brushes of large width, thanks to which the base coat is glazed, resulting in the surface acquiring a rich texture;
- elastic brushes that allow you to make the structural surface look like natural wood;
- stencils that allow you to apply any ornaments and designs.
You can use a crumpled paper sheet, plastic film, a skein of thread or fabric of various textures for structural finishing.
How to carefully apply a drawing
You can make a pattern using stamps with ornaments. Proper work involves periodically cleaning the working surface of the tool and wetting it with water. Rubber sheets are produced together with such stamps; they allow you to apply a design in a hard-to-reach place.
Surface preparation
To decorate the walls, they need to be prepared. Surfaces must be clean and dry. Only then will the plaster lie in an even layer. Old finishing materials are removed. Grease stains are removed. If there are small cracks, it is not necessary to get rid of them, because the decorative coating will have a relief structure, masking the unevenness. The application of decorative plaster begins only after the surface has been treated with a primer. Then you can begin applying the first layer.
The principle of accurate drawing
Decorating walls with your own hands involves applying a starting layer of plaster, which is formed with a mixture of medium thickness. The layer thickness should be about 3 mm. The drawing will be neat if the roller is moistened in water. Then you can form a drawing, pattern or ornament. You can achieve more expressive relief by painting the wall, sanding it and covering it with varnish, patina or mother-of-pearl.
Subtleties of working with a textured roller
- You can obtain a given structure by moving the tool along the surface at different speeds. The force of influence will also affect the result.
- Plaster is sensitive to external conditions, or more precisely, to temperature. If the thermometer mark drops below + 5 ˚С or turns out to be above + 25 ˚С, this may cause uneven hardening of the mixture.
- When forming a pattern within one line, you must not tear the tool off the wall, moving the roller from the ceiling to the floor or horizontally.
- A fairly common effect is orange peel. To obtain it, you need to use a relief roller, with which you create transverse and then longitudinal lines. The direction of movement must be the same.
- To get the effect of a fur coat, you need to move along and across alternately.
Roller in combination with masking tape
To make the effect on the wall even more interesting, when painting textured plaster, you can use a structure roller, which will be used in conjunction with masking tape. With the help of the latter, geometric shapes are indicated on the wall, under which there will be no paint. Once the tape is on the wall, you can start painting it by dipping the structure roller into the paint. When it dries, the tape is removed from the wall, and an interesting effect can be observed.
Even more interestingly, you can decorate the wall using the same textured roller and stencil. The latter should be fixed on the surface of the textured plaster, and then paint over the base. If the stencil does not have an adhesive layer, you need to attach it with aerosol glue.
Attention! You can get the matting effect using a mesh; it is attached to a roller that is used to process the plaster. When dyeing, it will be possible to use a composition of different shades to achieve a complete imitation of rough fabric.
Most common mistakes
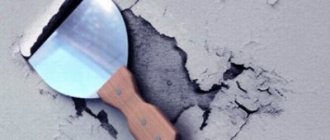
- Even if the plaster was applied perfectly, and with the help of a textured roller it was possible to create a beautiful pattern, after the mixture has hardened, you can see that the layer is cracked. The reason may lie in an excessively thick layer of material. In order not to get rid of the entire decorative layer, you should open up the cracks and fill them with a working composition.
- If a novice master is faced with the fact that his drawing does not work out, most likely the surface was not prepared according to the rules. The solution to the problem is only to remove the applied layer. The wall will need to be leveled, coated with a primer and plaster applied again.
- If the decorative plaster is crumbling, it is possible that the mixture does not like the temperature conditions. When the room is too hot, work should be postponed. Another reason may be that no primer was applied during surface preparation. In this case, the layer of plaster will also need to be removed, a deep penetration compound will be applied, and then the plaster will need to be reapplied.
Subtleties of working with a hard roller
If decorative plaster was applied with defects, the imprints of the roller structure will be uneven. You can avoid overuse of plaster if you level the wall well. The composition sets slightly, which should happen within at least 10 minutes. If you start working on a wall with a still liquid solution, it will begin to clog into the structure of the roller, and the pattern will turn out unclear. But you also can’t hesitate, so that the solution does not fully gain strength.
To achieve a satisfactory result, it is better to work with help. One master will apply the composition, and the other will work on creating the texture. The direction of movement can be from one wall to another, but also from the ceiling to the floor. But you cannot tear the tool off the surface. If the pattern is excessively pronounced, it is smoothed with a pre-moistened sanding mesh. You can begin texture painting only after the plaster has dried.
The surface can turn out to be two-color; for this you should stock up on a tool with a soft base. A mixture of one shade is applied to the base. This will form the background. It is left until dry. Then you can seal the composition of a different color. The consistency should not be too thick. The material is tinted with paste. The roller is dipped into the mixture, which is applied to the surface, while trying to distribute the solution as evenly as possible. There should be no rush, movements should be slow. It is important to maintain an even load.
Chaotic waves
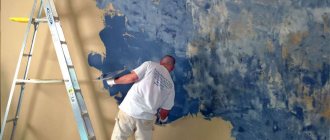
There are a large number of textured mixtures on the market. Their quality can only be compared in practice, but there are also manufacturers and products that have long proven themselves, for example, Decorazza relief decorative coating from Italy. This is what the masters will use in our example.
The material has a fibrous structure, which is achieved by including small fibers in it. Thanks to this, the finished surface is very strong and durable - the material can be applied to surfaces with small cracks. The viscosity of the mixture is already optimally selected, and you can work with it straight from the package. If the composition seems a little thick to you, then simply add a little water and mix everything thoroughly by machine.
In our work we will need two main tools - a small spatula for part-time work and scooping up plaster from a bucket, as well as a trowel in the form of a trowel - we will use it to apply the composition to the walls. We take our textured mixture from the bucket and distribute it along the edge of the tool, as shown in the photo above.
Table 1. Creation of chaotic waves.
It is recommended to carefully fill the corners with a spatula rather than a trowel, since due to the dimensions it is inconvenient to do this, and the result will be of less quality. We do not leave voids or gaps.
Mix both components together. The varnish is initially white, but after drying it will become transparent.
The sponge must be clean and damp. Otherwise, you risk ruining the entire finish.
To complete the process, all you have to do is remove the masking tape from the trim. If it is stuck to the plaster, then it must first be cut with a stationery knife so as not to damage the edges of the coating.
Video - Textured plaster
Prices for various types of decorative plaster
DIY roller for decorative plaster
By making a roller with your own hands, you can get a unique decorative effect on the wall surface. To carry out the work, you can use a store-bought rubber roller and thick rubber. Its thickness should be about a centimeter. To make a roller for painting or applying a pattern, you need to cut out elements from a piece of rubber with your own hands that will be imprinted on the surface. They are glued using rubber glue. The easiest way would be to cut out something like plant leaves.
Attention! The decorative surface will be more realistic if the elements made of rubber are slightly rounded at the ends. This work is delicate and you may need to first practice several times on samples that will not work.
You can also make a decorative roller for painting walls or applying a design on plaster using a regular rope. It is wound in a chaotic manner on the working part of the roller and is well secured. You can use hot glue for this. The cord can be wound so that there is an equal distance between the strands. To obtain a texture with multiple levels, you can wrap a rope around a fur coat. You can also combine ropes of different thicknesses. But such a tool will most likely only be used once.
You can paint the wall with the same decorative roller, which is made using cotton fabric. The working part of the tool is wrapped with it, forming folds. It is most convenient to use a clothing sleeve. It is fastened along the edges in such a way that the fabric does not interfere with scrolling. In order for the fabric to initially lie easily on the surface, it can be wetted, secured well, and then wound and left until dry.
Budget options for rollers made from scrap materials
When you have an old tool, its surface can be supplemented with a variety of materials and devices for texture. You can use:
- scotch;
- vegetable mesh;
- plastic bag.
You can use almost anything that can be fixed to the roller part of the tool. The main thing is that it all holds up well. Otherwise, it is unlikely that it will be possible to process the wall while maintaining the repeating pattern.
Using fabric, you can form wrinkles and folds on the wall, which will look very attractive. And if you use textured, for example, upholstery fabric, the effect will be even more expressive.
Attention! If desired, the fabric can be replaced with cellophane.
You can find foam rubber in the arsenal of almost any housewife. It is fixed to the working part of the roller in any order. You can additionally wrap the cylinder with rope or secure it with tape. You can first cut out designs in a sheet of foam rubber. This device can be used not only for textured plaster, but also for painting it after drying. If a single piece of foam rubber is not enough to wrap around the roller, you should cut it into small elements that sit on the glue in a chaotic manner.
Care
After painting the decorative textured plaster, you need to think about how to care for the surface. If the decorative composition had a quartz filler, the wall will turn out rough. You can care for it using a cotton cloth, which is slightly moistened in warm water. If the contamination is significant, you can dissolve soap or dishwashing detergent in water. If the wall has been protected with varnish, it can be washed using a soft bristle brush. Some housewives use a vacuum cleaner to remove dust.
Preparatory stage
Plaster finishing requires a perfectly prepared surface. To do this, you need to carry out the following manipulations:
Preparing the wall before decorative finishing
- Completely remove the old coating or clean it of traces of paint, wallpaper, and so on.
- Level the walls using starting plaster and reinforcing mesh or plasterboard sheets.
- Fill possible surface defects, such as potholes and cracks, with putty.
- Remove protruding parts.
- Check the evenness of the walls with a level or plumb line.
- Apply a coat of primer twice to enhance adhesion.
Using a Japanese spatula to apply plaster
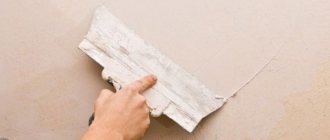
In order to achieve a positive result, it is important to know not only how to work with a decorative roller. In many ways, the result also depends on how professionally the plaster is applied. It is convenient to use a Japanese spatula for such work. This is a tool, one side of which is made of stainless steel, and the other is made of plastic.
This tool does not have a handle, but it does have a holder. If the wall has a small area, using such a spatula will be convenient. Specialists usually have several spatulas in their arsenal, each of which has a certain width, so that the master can conveniently work in different areas, including hard-to-reach ones.