Work performed with plasterboard gives an excellent effect. Literally “before our eyes” a perfectly flat surface appears. This requires a minimum of effort. There is practically no need to carry out a large number of finishing works. Although, situations arise that require applying a leveling layer to the gypsum board. In particular, for better results, use plaster on drywall.
Is it possible to plaster gypsum boards?
Professional opinions about whether plaster can be applied to drywall are contradictory. Some believe that the material benefits if it is plastered. Others say it's useless. In addition, excessively liquid mixtures harm the gypsum board and deform it.
Both are right. Drywall is not always covered with plaster. However, in some cases it is necessary to plaster it. At the same time, unpreparedness and non-compliance with the rules are the reasons that worsen the condition of the foundation. A competent approach will ensure a high-quality result. It is especially important when plastering drywall is done with your own hands and not by a professional.
Is it necessary to plaster drywall under wallpaper?
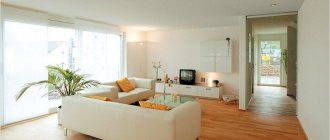
Preparing the body of the future structure is just the beginning of the work. Next comes the selection of finishing materials. The most popular type is wallpaper.
But before you start gluing them, there is a need for additional surface treatment. Since the base, made of plasterboard, absorbs moisture well, the question arises: is it necessary to plaster it before wallpapering? The process of applying plaster to plasterboard under wallpaper is usually divided into stages. Compliance with them will make it possible to ultimately obtain a positive result.
The final step in preparing drywall before applying plaster under the wallpaper is priming. The best option to obtain a good effect is to choose an acrylic type of finishing material. The main advantage of such a primer is the ability not to isolate water vapor. When the base needs to be leveled a little before wallpapering, you can’t do without plaster. You can also eliminate existing defects at the corners, hide the joints of drywall sheets, and also prepare the walls for wallpaper.
If the surface is planned to be covered with wallpaper in light shades, then the base should be the same color. That is, separately plastered areas will stand out under the pasted wallpaper. This will ultimately affect the appearance of the walls.
They will become unattractive. Having attached the sheet, it is necessary to seal all the seams, joints, and also eliminate any irregularities. Putty will help in this matter. The mixture is useful for work both in dry and ready-made form.
In the process of sealing connections, questions often arise about the amount of work.
Why do this?
A less common name for gypsum board is dry plaster. Its main task is to level the plane or create a surface without sudden changes in curvature. Ordinary plaster solutions are intended for the same purpose. Therefore, plastering drywall, most often, does not make sense. However, this cannot be avoided if:
- The installation of plasterboard sheets was carried out with shortcomings. The mortar will only emphasize obvious distortions and unevenness. But if small potholes or dents appear on the surface of the finished walls, it will hide the defects.
- In the future it is planned to apply a decorative coating.
- Fastening elements, screws, and edge connections are noticeable.
Significant deformation and sharp bends are not processed. Such structures must be completely replaced.
GCR coated with a plaster mixture acquires additional properties. It increases strength and resistance to mechanical damage. Modern components provide moisture protection and prevent mold.
In addition, some compositions (containing expanded clay, pumice) increase sound insulation. Additives of polystyrene and foam glass insulate the house.
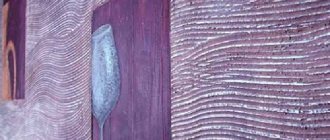
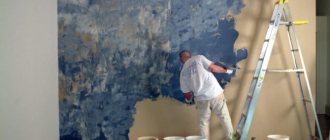
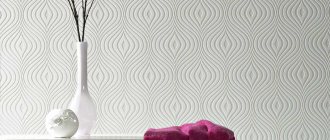
Decorative plaster on drywall is an increasingly popular means of finishing walls. With its help, you can create unique patterns that imitate the texture of minerals.
Wall made of gypsum plasterboard with decorative finishing
Features of the work
Installation of drywall is an intermediate stage of room renovation. Its surface is imperfect and requires additional processing. In this case, a number of features of the building material are taken into account:
- It is made of several layers of paper glued to a gypsum base, therefore it is weakly resistant to mechanical damage. Ordinary sheets are destroyed under prolonged exposure to moisture.
- Plastering plasterboard sheets with a thick layer is not allowed. Otherwise, it will not be possible to avoid deformation, and the coating will crack and chip as it dries.
Fact! Drywall is a leveling building material. It is also suitable for creating niches, ledges, partitions of angular or rounded shapes. After the installation of the structure is completed, it is finished with more decorative coatings.
Walls made of gypsum plasterboard without finishing look very unpresentable
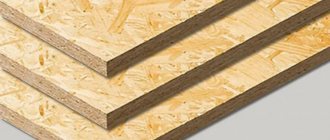
Peculiarities
GKL is a slab consisting of two layers of thick paper, inside of which a gypsum-based mixture is pressed. Standard sheet sizes are 120x250 and 120x300 cm with a thickness of 8 to 12 mm. The purpose of the material is to level ceilings and walls, create suspended structures, niches, partitions and partitions.
To understand how to plaster drywall correctly, you need to familiarize yourself with its features, these are:
- Smooth surface;
- possibility of gluing and screwing to the base;
- environmental cleanliness;
- Fire safety;
- ease of processing;
- heavy weight;
- fragility;
- affordable price.
Installation of the slabs does not take much time, but the created structure cannot serve as the final version of the finishing coating. It needs to be protected from environmental influences and given a look that matches the interior of the room. Plastering drywall yourself is a great way to save on professional services.
Types of drywall
The composition of the plasterboard core affects the choice of plaster mixture. A total of 5 varieties are produced, suitable for various conditions:
- GCR is a common option for leveling in apartments where excess moisture does not form.
- GKLV – reinforced with moisture-repellent impregnations. This makes it possible to use GKLV in rooms with high humidity.
- GKLO - gypsum base reinforced with reinforcing substances (fiberglass and clay). This gives it fire resistance - fire does not affect it for up to 55 minutes.
- GKLVO – combines resistance to fire and water.
- GKLF - can be used for installation outside buildings, because not subject to deformation due to adverse weather factors.
The most popular types of plasterboard sheets
Drywall varies in thickness and size. These parameters depend on where it will be used:
- Wall ones are the largest possible types. Their thickness is 12.5 mm, their length varies from 1500 to 3600 mm, and their width is 1200-2500 mm.
- For the ceiling - product thickness - 9 mm. Standard height and width parameters are 1200x2000 mm, 1200x5000 mm.
- Arched - have a minimum thickness of 6.5 mm. Because of this, they are used to create wavy, rounded niches and partitions. Standard size – 1200x2500 mm.
Note! Craftsmen often attach sheets intended for walls to the ceiling. Advantage is given to wall plasterboard due to the fact that it has increased strength.
Material selection
In addition to the type of base, other factors also influence the choice of suitable plaster:
- Humidity level in the apartment.
- Frequency of use of the room, possibility of mechanical damage.
- The need for subsequent treatment with wallpaper, tiles or paint.
It is recommended to opt for moisture-resistant compounds that do not weigh down the drywall. In this case, it is permissible to use both diluted with water and already prepared products - in the form of a paste.
The less water the plaster solution contains, the more suitable it is for drywall.
Gypsum plaster
Suitable for rooms with normal or low humidity. Rapid hardening prevents deformation of drywall. But for a non-professional, this will significantly complicate the process of accurate application.
The product is not suitable for work in bathrooms and kitchens, as it takes a long time to dry. Stagnation of water over a long period of time can lead to the destruction of the base and the emergence of fungal colonies on it.
Used as a base for painting and wallpapering. Without treatment, it is susceptible to moisture, chips, and cracks may occur upon impact.
Applying gypsum plaster to a gypsum board wall
Cement plaster
The mixture is used only for waterproof types, since when it hardens it releases moisture to the surface. Long drying time makes it impossible to use in rooms where the air is oversaturated with moisture. Due to its heavy weight, the composition is not suitable for thin ceiling and arched sheets.
Therefore, there is no clear answer to the question whether it is possible to plaster drywall with dry cement plaster. The use of the mixture is not prohibited, but there are more suitable varieties.
The advantages of the product include accessibility, moisture resistance and strength comparable to stone. Cement plaster is easily applied to drywall, so it can be used even by beginners.
Modern polymer compositions
Modern pastes are made from synthetic agents that improve the quality of plaster. Their main advantage is the absence of water. In addition, they are plastic, durable, do not dry for long, do not let in moisture and resist the appearance of mold spores.
The disadvantage of polymer mixtures is their high cost (compared to mineral ones). They are also unable to eliminate severe irregularities.
Beginners are advised to purchase ready-made pastes - they are easier to use. Dry ones are diluted with water, and failure to comply with the proportions deforms the plasterboard.
Plastering drywall for wallpaper: materials and tools, progress of work
The main purpose of plastering drywall is clear - all the joints and fastening points, but wallpaper poses new tasks and increases the scope of work
- firstly , there are always joints between the sheets that need to be closed so that they do not appear as holes in the wallpaper;
Helpful advice! If the corners for finishing are straight, then straight metal corners are quite suitable. But if the angles are not right, then we advise you to take care of plastic corners, which are much more convenient to bend and achieve the desired angle in accordance with the place of contact.
- the lime-gypsum mixture inside is covered with cardboard on both sides;
- and what will happen if you glue two sheets of paper, and the second in our case is a sheet of wallpaper, there is no need to explain much - the strength will be incredible;
- but this strength will not leave any chance in the future for any change in the wallpaper - it will not be possible to tear it off, everything will go along with the drywall itself;
After sanding the plastered seams, I really want to leave the work in this form and start wallpapering, but it’s better not to do this, the price of such a solution is big problems in the future
Tools
To carry out plastering work on plasterboard walls or ceilings, you will need the following tools and consumables:
- Deep penetration soil liquid
- Plaster mixture
- Reinforcing mesh
- Containers for mixing mortars
- Construction mixer (can be replaced with a drill with a mixing attachment)
- Metal spatulas with blades of various widths, rubber spatula
- Brush or roller - for impregnation with primer
- Rule, trowel, grater - for leveling
- Fine sandpaper
- Construction knife
- Masking tape
Advice! To protect your respiratory system from dust, you will need a respirator. Wear gloves when using sharp instruments.
Tools and some materials that may be needed when plastering gypsum boards
Plastering drywall - “yes” or “no”
Drywall is called dry plaster. The sheets perform the same function as the plaster mixture - they level the surface of the walls. GLA is a gypsum base enclosed in a paper shell. With proper installation, you get smooth walls and joints. The coating does not require complete plastering. To get rid of fastener recesses and smooth joints, it is enough to putty.
The exception is the application of decorative plaster. The use of such mixtures can only be carried out on waterproof plasterboard and using deep penetration primers.
Plastering a plasterboard ceiling with your own hands can cause particular problems. Difficulties arise precisely because it is inconvenient to process gypsum board on the ceiling, because you need to constantly stand on a stepladder with your arms raised above your head.
How to properly plaster a plasterboard wall - 5 steps
The plastering process is carried out in several stages. Before you plaster the ceiling or plasterboard walls with your own hands, they are primed, fasteners and potholes are puttied. After this, finishing begins.
Work begins from the ceiling. It is prepared for application of the composition in the same way as wall panels. Further actions have a little specificity. You need to apply the plaster with a large spatula to create an even plane. Allow the layer to dry, and spread the second layer perpendicular to the first.
Plastering gypsum boards begins from the ceiling
Surface preparation
The preparatory stage includes cleaning the plane from gypsum dust and eliminating curvature and protruding parts. The screws must be screwed in carefully. You cannot press them deep into the base or, conversely, leave the caps too high. It is enough to immerse the fasteners 2-3 mm deep.
Places where the cardboard has peeled off need to be repaired. To do this, the torn paper is cut off with scissors or a construction knife. Then they try to smooth out the damaged pieces using fine-grain sandpaper.
If there are inscriptions on the drywall, they are removed. Otherwise, there is a chance that they will appear on the top finishing coatings. The pencil is wiped off with an eraser, and paints and markers are wiped off with alcohol or technical acetone.
The edges of the gypsum board must be processed, if this was not done during installation. Each edge is cut at an angle of 45 degrees. Ideally, there should be a gap between the sheets that forms an angle of 90 degrees.
Padding
Initially, the liquid is applied selectively to the spaces that will be plastered. These are joints, visible fasteners, corners. The liquid is applied with a brush or roller.
Deep penetration primers are suitable for processing. They will saturate the entire thickness on their own - there is no need to moisten it abundantly. After applying the primer, leave it on for a while to allow it to work.
Usually, a couple of hours are enough for the liquid to penetrate the porous structure, but it is better to check the manufacturer’s instructions printed on the packaging.
Applying primer to gypsum board
Putty of fasteners
The screw caps are plastered with a small spatula with a narrow blade - each separately. A criss-cross motion will allow you to apply a thin layer and still hide imperfections.
If one application is not enough, you can re-treat the area. The initial coating must dry before doing this.
Sealing joints
The treated areas of contact with the drywall sheets are filled with a solution. It is convenient to distribute it with a narrow spatula, moving from bottom to top.
A reinforcing mesh strip is placed on top to strengthen the installation area. The joint is re-plastered, but with a device with a wide blade. This will allow you to make a smooth transition from the plastered surface to the clean one.
Important! The reinforcing tape should be located exactly in the middle of the seam.
Sealing joints between gypsum board sheets
Forming corners
To create a solid base at the corners, you will need additional devices: mesh or perforated corners. Using an angle spatula simplifies the work, but you can do without it.
Apply mortar to the corner and press a mesh or corner into it. The metal structure must be completely immersed in the mixture. The resulting excess composition is removed with a spatula. After drying, the sealed corners are rubbed with sandpaper.
Gypsum compounds are polished to the required smoothness.
The treated wall is left to dry overnight. If in the morning you are not satisfied with the result, the product has “settled”, you can repeat the plastering process again. Once completed, the base is completely coated with primer.
Preparatory work
First you need to check whether all the screws are sufficiently recessed into the plasterboard base. Check with a spatula. They are passed over the surface and if it does not cling, it means the installation was carried out efficiently and you can begin painting work. If necessary, tighten the protruding screws with a screwdriver.
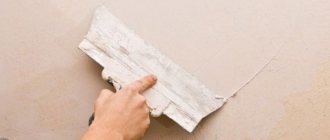
- Each hole from the screw head is covered with a layer of putty. Using a small spatula at an acute angle, with pressure, rub the building mixture flush with the main surface. This technology will not allow rust to appear on the finishing layer in the future, when the screws oxidize.
- A thin layer of putty is applied to the joints between the sheets. Next, by pressing, they glue the sickle tape, and it, in turn, is covered with another layer of solution flush with the main surface.
- For multi-level ceilings, during transitions, a perforated or arched corner is mounted on the edge. The first can be attached to putty, the second using self-tapping screws.
- The technical gap is sealed using a building mixture.
After carrying out the preparatory work, you need to let the layer dry for a day. The next step is to clean and sand the rough finish. Now you can apply primer to the putty seams.
1 - Cut out damaged areas, 2 - Embroidered seam, 3 - Factory hem
How to prepare the base for different types of finishes
Wall preparation is different for different types of finishing. Somewhere it is necessary to make the surface impeccably smooth, without the slightest flaws. In other cases, you may not need to spend much time on alignment.
Dense products and tiles can cover any roughness. Wallpaper partially copes with this task. However, particularly large particles will be visible on the surface. When ironing the canvas with a spatula at the gluing stage, such places will tear.
For painting
The most difficult method is to plaster plasterboard sheets for subsequent painting. We'll have to get rid of all the bumps and dents. For this purpose, a special application method is used - on peel:
- The recesses are filled with plaster.
- The mixture is leveled from top to bottom. This increases the pressure on the device so that it is pressed as tightly as possible to the base.
For your information! The method allows you to eliminate small depressions without leaving large plaster fractions on its edges. The surface is as smooth as possible.
Then the plane is polished to perfect condition. If this is not done, the paint will highlight the remaining plaster particles. The final stage before painting is impregnation with a small amount of primer.
Painted plasterboard wall
Under the wallpaper
Some people doubt whether it is necessary to plaster drywall if it is prepared for wallpaper. In practice, this is necessary. Finishing plastering of the walls under the wallpaper will allow you to change them in the future without any special costs. If you skip this step, the wallpaper will be firmly glued to the panels. Plastering the surface of plasterboard walls under wallpaper is carried out in 2 stages:
- Starter – for leveling and eliminating noticeable potholes. Thin wallpaper will not hide strong unevenness. In addition, the voids under the canvas make it vulnerable to mechanical damage. It can tear even with light pressure on it.
- Finish – 1.5-2 mm thick. It will ensure safe removal of wallpaper if necessary.
After drying, the surface is sanded. There is no point in bringing it to perfect smoothness. Small grains of plaster mortar will be hidden under the coating. When the base is prepared and well dried, you can glue the wallpaper.
Under tiles
In most cases, tiles can be laid on a prepared surface. Additionally, it is not plastered. However, this cannot be avoided if it was planned to make drywall under tiles that are massive. Then the entire base area is strengthened.
The next step, which will make laying the tiles easier, is priming. The liquid is thinly distributed and allowed to dry.
Laying tiles on a gypsum board wall
For plastering with “Rotband”
Rotband is a gypsum plaster from a German manufacturer. It is used for leveling and finishing. At the same time, the lightness of the mixture allows it to be used for ceiling and arched plasterboard.
Before applying the composition as a finishing coating, all metal elements are tightly plastered. The water contained in the finished mineral composition can damage them and cause corrosion.
There is no need to pre-plaster the entire surface. It is only allowed to soak with soil. It will improve the adhesion of building materials and prevent the base from becoming saturated with water.
How to plaster drywall - technology
Let's turn to how to properly plaster plasterboard walls. If the unevenness on the surface of the gypsum board is small, it is better to plaster by stripping:
- apply the solution into the recesses with a spatula;
- The mixture is leveled using the rule, resting the tool on the surface of the sheets.
Stripping plaster technology
In case of unevenness with differences of up to 10-15 mm, plaster with a wide spatula. It is possible to apply two layers sequentially with the obligatory drying of each.
How to plaster drywall under wallpaper with large curvature of the walls? If the curvature or unevenness of the surface is too great, plaster along the beacons, applying two layers in succession. Each layer is dried and only then the next one is applied. After the solution has dried, the unevenness is rubbed down with fine sandpaper or an abrasive mesh.
For painting
Since a layer of paint can make even small flaws visible and emphasize, the surface of the plaster coating of drywall before painting is treated especially carefully. The plaster layer applied and leveled with a wide spatula (except for the gypsum layer, which is sanded to the desired smoothness) is rubbed using a trowel.
They begin this from the moment when the solution stops sticking and does not press through with a slight finger pressure. The surface of the solution is moistened. The grater is applied flat and rubbed in a circle with slight pressure. On convex places the pressure is increased, on depressions it is reduced. The dried drywall plaster, intended for painting, is sanded. After this, a primer is applied.
How to plaster drywall under wallpaper with your own hands
If you are not confident enough about the need to plaster drywall under wallpaper, the following information is for you.
If drywall is being prepared for wallpaper, a layer of primer and putty/plaster is also necessary to ensure that the wallpaper does not stick tightly to the gypsum board cardboard. Otherwise, it will not be possible to remove outdated wallpaper without damaging the plasterboard base.
Wallpaper, unlike painting, can hide small, minor flaws and errors - small pores, microcracks. Therefore, it is quite possible to apply only the starting putty under the wallpaper, ensuring the absence of protrusions, dents, and large pores. The same applies to plaster. When applying leveling plaster on beacons, the top layer - the covering - is made with a fine-grained composition. The surface is rubbed and, after drying, sanded.
You can also learn from the video how to properly plaster drywall under wallpaper.
Is it possible to apply decorative plaster to drywall?
Of course you can. Decorative plasterboard plaster is one of the types of finishing. The application of decorative plaster to drywall must be preceded by preparatory work, culminating in the application of a primer. For thin-layer coatings, for example, Venetian, the surface is additionally puttied to achieve smoothness. A smooth base is not necessary for structural plasters.
Decorative plaster is applied to drywall with a spatula, roller or trowel in the manner prescribed for the selected effect. Layers of textured plaster are applied sequentially, and each one is dried. The decorative layer should not be thick.
After drying, the decorative plaster is coated with paint or varnish.
Is it possible to plaster drywall with rotband?
Among the best plasters for gypsum boards is the gypsum composition - Rotband (Knauf). This is not only a leveling plaster for drywall. It can be used to form a decorative coating. It contains gypsum, polymer additives and light aggregate. The use of rotband for plastering allows you to create a smooth surface that does not require any other additional processing.
Rotband is used not only for plastering dry rooms. It is also suitable for bathrooms and kitchens (except for very wet rooms). The lightness of the composition allows the use of rotband for plastering ceilings. The plaster mixture dries quickly. The disadvantages include the ability of the solution to corrode metal objects. Therefore, they are isolated before plastering.
Finishing drywall with decorative plasters
One of the options for completing a room renovation is applying decorative plaster. Provided that the base is prepared well, any type of coating is suitable as a finishing coating.
Volumetric, structural plasters do not require additional manipulations. Walls for compounds applied in a thin layer (like Venetian) are pre-puttyed.
Applying decorative plaster to a prepared gypsum board wall
It should be remembered that the color is mixed for the entire mass of decorative plaster. Otherwise, you won’t be able to get into the desired shade again. The difference between the tones will be noticeable only after the topcoat has dried.
Technique for applying decorative plaster
Decorative plaster should be distributed in three approaches. This will enhance the strength of the final layer and improve the appearance.
| Stage | How to apply | Tools | How long does it take to dry? |
| 1 | Movements from bottom to top, subtly | Trowel or wide spatula | About 5 o'clock |
| 2 | Chaotic or wave-like movements. The thickness of the layer depends on the type of plaster | Trowel | At least 24 hours |
| 3 | Small strokes creating the necessary relief | Trowel, spatula, other devices for creating texture | The drying time of the finishing layer is indicated on the packaging |
“Drying times are indicated for rooms with normal humidity levels. Mixtures take longer to dry in bathrooms and kitchens.”
Finishing with different types of plaster mixture
The final, but optional step is to give the surface a glossy shine with wax or varnish. It will strengthen the front side, provide moisture resistance and greater attractiveness.
Trowel and spatula
With the help of these devices it will be possible to imitate the texture of stone. To do this, perform chaotic “overlapping” movements.
The trowel allows you to create the popular “fur coat” effect. First, the plaster is spread over the surface of the wall in an even layer; there is no need to achieve perfect smoothness. Then the tool is applied and peeled off. To create invisible transitions, the trowel must be applied in different directions.
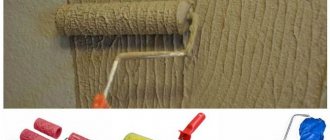
Roller
Fur rollers are suitable to imitate a “fur coat”. It is important to choose a high-quality tool that does not cause hairs to fall out. Otherwise, the pile will remain on the wall surface.
Finishing with textured plaster like Shuba using a roller
Silicone rollers can create a unique interior. It all depends on what kind of relief is cut out on the silicone tube. They are decorated with geometric patterns, plant motifs, and animal prints.
There are several ways to plaster a wall with a roller. You can distribute the solution over the surface directly with the tool. Another method is to walk it over a ready-made base. The second method is more convenient to use to create a textured pattern.
Brush
To create a light design, brushes with stiff bristles are suitable. The tool does not require any professional skills and is easy to use. However, it is not able to cover a more or less large area. Because of this, the plastering process may be delayed.
Sponge
Another available tool is a foam sponge. She performs “smearing” movements on the plastered wall. The result is a texture reminiscent of stone.
Drywall putty
Now begin the finishing putty of the drywall. For work, it is advisable to use 2 spatulas: small and large (up to 50 cm):
- Using a smaller tool, scoop up the mixture and spread it evenly over the wider one.
- Using a large spatula, apply the solution to the wall and spread it in a thin layer.
It's better to start from the corner. It is recommended to level the second wall in the same corner only after the mortar on the already treated wall has set. This will reduce the risk of damage to the leveled coating on the finished side.
After all the walls have been puttied, you need to let the solution dry. It will take at least a day to dry.
Consumption and ideal quality of plaster
The consumption of the plaster composition depends on:
- Area of processed surface, number of defects
- Type of mixture (mineral, polymer, etc.)
- Manufacturer
The easiest way to calculate how much plaster will be used is by the number of sheets of drywall. They indicate the width and height. On the packaging of the leveling solution is the maximum number of square meters for which it is designed.
A well-prepared mass does not spread and has sufficient density. When preparing it yourself, it is recommended to follow the manufacturer’s instructions regarding the proportions of dry and liquid substances.
Important! You cannot mix a composition designed for the entire wall. It will dry out around the edges of the container and may get into the main mass. Then after application, the surface may crack and dried pieces will fall off.
If the technology for preparing and finishing gypsum boards is not followed, consequences may occur.
Plastering drywall: is it necessary for wallpaper and how to do it correctly
Plaster on drywall is often used in combination with putty. Let us immediately differentiate the area of application of the two compositions used: Work performed with plasterboard gives an excellent effect. Literally, “a perfectly smooth surface appears before our eyes. This requires a minimum of effort. There is practically no need to carry out a large number of finishing works.
Although, situations arise that require applying a leveling layer to the gypsum board. In particular, for better results, use plaster on drywall. Finishing (it is better to use putty for this purpose) - the method is to use a roller. Its use significantly speeds up the process, but it requires some skill.
It all happens like this: Note! Sanding is a mandatory process that is carried out at different stages of finishing work. The final stage, when the work is done after the finishing layer, is the most thorough. But there is always a lot of suspended matter and dust left, so it is better to use a respirator and goggles. Don’t think that this is where all the manipulations end.
The question of how to plaster drywall is not completely closed. After the joints and corners are processed, work begins on the entire surface. But “simpler” does not mean “simple” at all, and the work should be approached with maximum diligence.
Plastering drywall under wallpaper is just as important as under any other type of finish. And if you ignore this stage, or treat it, so to speak, “carelessly,” there is nothing to expect high quality of the final result. Now, having familiarized yourself with all the nuances of puttingty work on plasterboard walls under wallpaper, you can try your hand at it in practice. You shouldn’t despair if you don’t get a perfect surface the first time - everyone has been through this.
The process seems simple only at first glance. Therefore, before you start decorating the walls, it’s still worth doing some training, so to speak, to get your teeth into it. Its properties and structure make it possible to produce structures of almost any shape.
In addition, using drywall to level the walls, you can significantly save on materials. If there are an abundance of irregularities on the wall, then you will need to use just a huge amount of plaster, after which you will have to work hard with putty. It is very important to know the exact area of the drywall surface being treated. This allows you not only to save on materials, but to prevent the mixture from drying out.
The easiest way to calculate the area is using sheets of drywall. Each one has a meaning on it, usually on a label. Simple addition allows you to find out the desired number. Before plastering begins, the plasterboard ceiling must be allowed to settle.
The period is from a week to two. The sheets should take their final position. After filling, the surface should be given a day to dry . Before the next step, you should wear personal protective equipment.
Closed-type glasses and a respirator will protect you from dusty work. It is better to wear respiratory protection with an exhalation valve. Next, take a paint float and a portable lamp and begin sanding the surface.
Drywall plaster or putty - what's the difference?
You may notice that plaster and putty are used as synonyms - this is incorrect. Although sometimes the functions of two substances may coincide. For example, plaster is also used for sealing seams and iron fastenings. However, it is applied in a thicker layer. The putty is distributed over the surface thinly, but several times.
Putty is preferable for eliminating small defects in drywall sheets. It is lighter than heavy plaster coating and has a smaller fraction. The latter fact simplifies the leveling of the walls, because they are practically not required to be sanded.
Another advantage of putty is lower cost and less consumption. Most often, there is no need to putty the seams again; the material has low shrinkage. Therefore, if there are no obvious distortions of the gypsum board, plastering is abandoned. It will be enough to putty the surface.
Tips and tricks
There are several features when plastering drywall that simplify the process:
- At the purchasing stage, it is better to choose gypsum boards. This will speed up the processing process and prevent unpleasant “surprises” from occurring.
- If walls and ceilings are being repaired in a room, start with the latter.
- Before plastering the panels, window frames, switches and sockets are sealed with masking tape.
- To prepare a gypsum solution, pour the mixture into a container with cold water, stirring constantly. If you pour liquid into a dry substance, lumps form that are difficult to stir. During the process, you should not dilute the drying agent with water - this will only speed up its hardening.
- You should not prepare a large volume of plaster at once. It is better to dilute the minimum amount, based on the proportions. Usually the ratio is as follows: kilogram of substance per square meter.
- Broad strokes allow you to spend less time processing the wall. However, they look less advantageous compared to short strokes.
- It is convenient to apply the plaster using several spatulas: wide (600 mm) and narrow (about 40 mm). Using a small tool, take the solution from the container and distribute it over the larger one. They also clean the main tool from excess building material.
Before starting work, stock up on several spatulas of different sizes.
When carrying out plastering work, turn off electrical appliances. Heaters should not be used to speed up drying. Windows should also be closed to prevent drafts.
Compliance with the rules for plastering drywall prevents its deformation. The treated surface is suitable for further finishing with paint, wallpaper or tiles. Or it serves as the final decor option for the room.
Did you manage to learn something new? Share in the comments!