So, you have completed the installation of a plasterboard ceiling with your own hands, the last sheet of plasterboard is secured. How to prepare it for painting or wallpapering? After all, the surface is still far from ideal; both self-tapping screws and joints of individual sheets are visible on the ceiling. The topic of our article is how to properly plaster a plasterboard ceiling.
Our goal is a perfectly smooth ceiling. It's just a matter of the means to achieve it.
As the Dodo bird said to Alice: first, away with confusion.
Plastering a ceiling usually means applying mortar to floor slabs to eliminate differences in height and shape corners into the desired shape.
However, the plasterboard ceiling itself serves the same purpose. After attaching the sheets of drywall to the guides, we should have a perfectly horizontal surface above our heads. Yes, with small flaws where the sheets meet each other. The screw heads are also, of course, still visible.
Please note: a plasterboard ceiling may deteriorate over time if it is attached to a wooden lath in a damp room. However, applying a layer of plaster on it is, to put it mildly, a strange solution to the problem. Once bent, the frame will continue to deform.
It is easier to attach drywall to wooden sheathing.
But it can become deformed when humidity changes. Thus, the upcoming plasterboard ceiling plaster magically turns into putty - eliminating minor surface defects.
Putty or plaster
Formally, both materials are used to level surfaces. However, there are some nuances. Significant differences in composition make their scope different. Their main difference is the grain size of the binder. In plaster it is larger, even in the finest-grained varieties. It is good for rough leveling the base. Easily covers even large defects and irregularities.
The putty is applied in a thin layer because it has minimal grain size. With its help, final leveling is performed when all significant flaws have already been closed. Solutions can be distinguished even by appearance.
Finishing putty Knauf Rotband Pasta Profi, 5 kg
506
Buy
Plaster necessarily contains large or small particles, while putty is a homogeneous paste. These differences should always be taken into account when deciding on the finishing treatment of gypsum plasterboard.
Instagram stasyan.r
Both putty and plaster level the base, but do it in different ways
- Decoration Materials
How to paint drywall: detailed instructions
Required tools and materials
Let's first consider the main material - the plaster itself. It can be made on the basis of:
- Gypsum is lighter and less dusty, more often used for interior decoration;
- Cement - takes longer to dry, but costs less, and is more used for external finishing work.
It is necessary to distinguish between concepts such as “plaster” and “putty,” although these words are often used as synonyms. Putty is a finely dispersed mixture, usually made of gypsum, which is used before the very last stage of work mainly in order to make small corrections. Leveling the ceiling with plaster is carried out in order to fill and eliminate all unevenness, and then putty.
As for the tools for plastering the ceiling, you will need approximately the following set:
- large capacity for solution;
- drill with mixer for building materials;
- spatulas of different sizes;
- building code;
- grater with sandpaper;
- brush;
- roller
Additionally, some mixtures or tools may be needed to clean the surface during preparation for finishing.
Back to contents↑
Is it possible to plaster drywall?
Now that the difference between leveling mixtures is obvious, let’s look at what exactly gypsum sheets need to be treated with. Let's start with the fact that after installation, the base finished with such plates is flat. If the installation was carried out correctly, only marks from the fasteners and seams at the joint areas will remain on it. Dents are possible, but very small. All these flaws must be smoothed out.
Putty is enough to remove them. A special composition is used for fasteners and corners, finishing for final finishing. And it's all. No need to plaster. If mistakes were made during installation, the base will be uneven. In this case, many try to plaster it and level it at the same time. You need to understand that this is only possible for small differences. To seal significant defects, it will be necessary to apply a thick layer of material, and this is extremely undesirable for gypsum boards.
Firstly, the leveler will have a significant mass, which can even destroy the structure. Secondly, over time, the thick layer will begin to crack and collapse. Therefore, if the differences are large, it is better to dismantle the sheets and redo the frame. Plastering drywall without any doubt is necessary only in one case: if a decorative mortar is applied, which will become the final finishing of the base.
Gypsum plaster Volma Layer, 30 kg
401
Buy
- Walls
2 methods for leveling walls with plasterboard: useful instructions for finishers
How to perform finishing plastering?
Finally, finishing plastering is done. It is done after intermediate cleaning has been carried out. It involves cleaning the room and disposing of debris to prevent damage to other surfaces, as well as to facilitate final cleaning.
The first thing to do is prepare the solution. It is prepared in the same way as the starting mixture. The powder is poured into a wide bucket of water in appropriate proportions. Instructions are provided on the packaging. Usually it details the ratio of ingredients. The solution is mixed using a construction drill, onto which a mixer attachment is attached.
The finishing solution is applied to the ceiling using narrow and wide spatulas. The material is collected with a narrow tool and applied to the edges on a wide one. The ceiling is covered last, gradually spreading the mixture onto it. The result should be a smooth ceiling, without unevenness. The layer should be very thin.
After this, another layer is applied. This should be done only after the previous one has dried. If you do this earlier, cracks may form. This may result in having to do the work again.
The final stage is surface grinding. It is performed using a fine mesh. This will allow you to achieve a perfectly flat ceiling without flaws. After this, finishing work begins, if necessary. If necessary, you can watch a video that introduces this work in detail.
Finished plasterboard ceiling surface
Now you know how to plaster a plasterboard ceiling with your own hands. This work is simple and accessible to every person. The main thing is to act carefully and follow the instructions. This will ensure that no difficulties arise. If you still have questions, you should watch the video, which shows how plastering is done step by step.
What materials can be used
For subsequent plastering, it is advisable to choose moisture-resistant sheets. During the production process, such drywall is treated with hydrophobic impregnation, as a result of which it becomes resistant to moisture. The plates can be distinguished by their markings, green color and higher price. The usual material consists of cardboard and dry plaster, which are destroyed by exposure to water. It is not advisable to treat them with a wet mixture.
To work, you will definitely need a primer. Choose the option that is appropriate for a particular case. A deep penetration solution is optimal.
Deep penetration primer Bergauf TiefGrunt, 5 l
350
Buy
Its use protects the base from getting wet, improves the adhesion of finishing materials to it: glue, paint, etc., and also reduces their consumption.
Instagram sokolowpro
Moisture-resistant drywall is always green
Decorative mixtures used for plastering gypsum boards differ from conventional ones in the presence of some inclusions. Depending on their type, compositions are divided into:
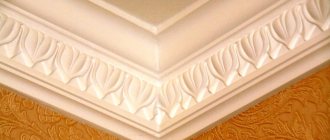
- Embossed or textured. Solutions with a highly viscous coarse structure. Pieces of mica, fiber, wood, mineral chips or small pebbles are used as filler for them. As a result of application, a surface with a pronounced relief is obtained.
- Structural. They have a finely dispersed structure, which is obtained by adding quartz or marble chips. There are fine and medium-grained coatings. The first ones are almost flat, the second ones have slight relief.
- Venetian. They are made with the addition of slaked lime and fine marble chips. They have an almost uniform structure. When finished, they imitate a marble or onyx surface. Painting with special pigments gives them the appearance of a precious metal. Multi-layered and difficult to apply.
Instagram mastercom27
Decorative plasters can be very different, with a clear or blurred relief
Start of finishing work
Before you begin finishing, you need to prepare cutouts for lighting fixtures in pre-designated places, and you also need to plaster the plasterboard.
Ceiling putty tools
Source materials
In fact, this procedure is more reminiscent of putty, because in the understanding of most people, plastering involves the use of heavy solutions. In the case of using gypsum plasterboard, special gypsum-based mixtures are used for this purpose, but with different grinding fineness of their constituent parts. The coarser ones are called starting ones, the thinner and softer ones are called finishing ones. Such compositions are produced industrially in the form of powders, which are mixed with water immediately before use and thoroughly mixed until homogeneous. And also in the form of a paste-like substance, ready for use without additional preparation.
Mixtures from individual manufacturers differ in qualitative and quantitative composition, additives and additives, and are recommended when working in different temperature and seasonal conditions. Therefore, the decision about what and at what time to plaster or putty drywall should be made in each specific case individually, based on the manufacturer’s advice. When choosing mixtures, it’s a good idea to remember that materials from well-known manufacturers are more reliable than those from random ones.
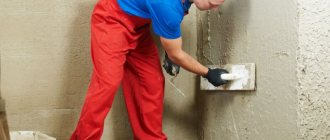
Problem areas are treated first
Surface preparation
Almost any material must adapt to the conditions in which it will be used. Therefore, before the start of rough finishing work, the ceiling lined with plasterboard panels must “settle.” This means that you should not immediately begin finishing work after completing the installation work. It is necessary to wait for about 8-10 days, otherwise shrinkage cracks cannot be avoided later. Afterwards, the ceiling must be thoroughly impregnated with primer. This will help better adhesion of one material to another and protect the base from all kinds of harmful influences.
Features of preparatory work
Leveling walls or ceilings, as well as arranging more complex structures, involves assembling a frame, which is sheathed with gypsum sheets. Then work must be carried out to seal the seams, corners and recesses of fasteners with putty. Let's figure out how to do it right. Let's start with the joints.
- Using a sharp knife, carefully cut the edge of each sheet at an angle of 45°. If everything is done correctly, the plates will join at right angles. It will be easier to fill it with putty.
- Remove plaster dust using a brush or brush.
- We prime the prepared joint and wait until it dries.
- We fill the seam with a previously prepared putty solution. We level it along the entire length with a narrow spatula.
- Place reinforcing tape over the joint and gently press it.
- Cover the mesh with a second layer of solution. Use a wide spatula to level the surface.
Instagram vashdom92
The joints of drywall sheets must be opened at an angle of 45 degrees.
Now you need to close the dents from the fasteners. We check that the screws are recessed into the sheet. Their caps should be below surface level. If this is not the case, tighten them more tightly. Then we apply putty to each element and level it with a cross-shaped movement of the spatula. Corners, both internal and external, are processed in the following sequence:
- We chamfer the edges of the plates. Similar to how they did it for the joints.
- We clean from dust and prime.
- Apply the first layer of mortar and level it.
- We lay a reinforcing mesh or a special corner. According to reviews, the latter option holds its shape better.
- Apply the finishing layer of the mixture and level the resulting angle well.
After the composition has completely hardened, we rub it with a special grater to remove all irregularities.
Instagram shtukaturimvse
Reinforcing mesh is always used to decorate corners
The process of finishing a plasterboard ceiling
Before determining how to properly plaster a plasterboard ceiling, you need to understand its design. What is drywall?
These are sheets of thick cardboard, between which a gypsum core is placed. The finishing material itself is strong and durable, but it still needs to be handled very carefully, since hardened gypsum is quite fragile.
The colored shell indicates the type of sheet: gray - standard gypsum plasterboard, green - moisture-resistant gypsum plasterboard, pink fire-resistant
Characteristics and advantages of drywall:
- Drywall is very easy to work with.
- It is quite easy to cut it straight; an ordinary stationery knife will do for this.
- Drywall is available in sheets that come in a variety of sizes.
- This material is attached using self-tapping screws either to a metal profile frame or to a sheathing made of timber.
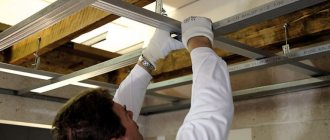
The sheets are mounted on a metal frame: sheathing the attic ceiling
How are ceiling structures constructed, which can be single-level or multi-level:
- It is first attached to the surface of the ceiling, and sheets of plasterboard are already mounted on it.
- As a rule, in the manufacture of plasterboard ceiling structures, a special type of this finishing material is used - ceiling. It differs from all existing types (wall and arched) in its thickness. But all types are almost similar in their technical characteristics.
- There are 3 main types of drywall: standard, moisture-resistant, fire-resistant. There is also GKLVO - an option that has all the qualities of the mentioned types. But it is not used for home interiors. Basically, standard gypsum board with a thickness of 9.5 mm is used.
Manufacturing of radius elements from arched plasterboard
Note: When making three-dimensional and curved figures, arched (designer) plasterboard can be used. It is thinner and more flexible, so it does not need to be cut when making radius elements.
Preparatory work for plastering a plasterboard ceiling
Plastering a plasterboard ceiling requires high-quality and proper preparation of the surface. The entire scope of work is assessed in advance. If the ceiling is simply flat, then there will be no problems with the preparatory work.
If it is a rather complex ceiling structure, then some difficulties may arise. In any case, an ordinary spatula cannot be used here. In addition to the usual set of tools, you also need to have a spatula for internal corners, as in the photo below.
Attention! To make the joints less noticeable during the process of plastering a plasterboard ceiling, it is worth gluing them with a special tape. It is worth paying special attention to the caps of the screws - they should also be closed during the process of sealing the seams between the sheets.
Apply the putty to the joints using cross-shaped movements. Only in this way can you completely fill the space that has formed between the sheets.
How to plaster drywall correctly
After the preparatory work is completed, you can plaster the gypsum board. As we have already found out, this method cannot be used to remove significant defects. It is suitable for walls or ceilings with minor dents and cracks, or with differences of no more than 10-15 mm.
- Prime the base with a suitable product. We strictly follow the manufacturer's instructions.
- We take the prepared plaster mixture, starting or universal. Using a wide spatula, apply it to the base and carefully level it. Apply the mixture to fairly large surface imperfections in two steps.
- We wait until the solution dries. We rub in all the imperfections.
- We putty the surface using a finishing compound. Let it dry thoroughly, which will take up to two days. Then rub it again with fine sandpaper.
Further finishing of the drywall is possible only after the joints, corners and dents from fasteners have been puttied.
This is a general instruction on how to plaster drywall with your own hands for wallpaper, painting or cladding. But these are not all options. It is also possible to apply decorative plaster. In this case, much will depend on the type of material. Different compositions are stacked differently. Venetian requires a perfectly even base and is applied in several thin layers.
Textured ones are laid in a thicker layer. The mixture is leveled in wide strips from ceiling to floor. To obtain a pronounced relief, the slightly dried solution is processed with special stamps or rollers. You can use a regular hard brush, sponge, spatula or brush for these purposes.
Instagram decor.stavropol
A relief pattern on decorative plaster can be applied with special stamps, a roller, etc.
- Walls
How to properly plaster walls with gypsum plaster
Plastering drywall: risk assessment
This division of opinion regarding plasterboard plaster is largely due to the fact that the material itself is somewhat unpredictable. As the practice of its use shows, there are contradictory cases: in some cases, plasterboard sheets actually become deformed, in others they serve for many years without the slightest hint of cracks in the plaster. Therefore, it is recommended to decide on such a risky event only after assessing its feasibility, i.e. determine whether there is a need to cover the ceiling with plasterboard.
Experts advise using plaster only when the curvature of the surface is slight or there are dents in the material. If the surface is strongly curved, especially if there are displacements of the sheets relative to each other, plaster is strictly not recommended. In this situation, plaster not only will not correct the surface, but, on the contrary, will deform it even more, because it's quite heavy. If the drywall is severely deformed, only reinstallation will help. In this case, it is recommended to pay attention to the reason for such a serious curvature; Perhaps it's due to high humidity. If this is the case, then it is definitely better to replace the sheets with more moisture-resistant ones.
How to prepare gypsum boards for different types of finishes
Novice finishers doubt whether it is necessary to plaster drywall for wallpaper, painting and other types of decor. Let's consider each option.
Wallpaper
They can only be glued to a leveled base without noticeable defects or flaws. Especially if the panel is thin. Therefore, all the preparatory measures described above are mandatory. Then priming. You may have to prime the surface twice, depending on the type of product. For thick, loose fabrics this may be sufficient.
They will hide minor irregularities. It will be enough to seal the joints, dents and decorate the corners. If the wallpaper is thin, you will have to carry out a continuous treatment. If there are minor differences, they start with plastering with a universal or starting composition. Then the finishing putty is applied. For even surfaces, the first stage can be omitted.
Instagram v_remonte_krasnodar
If the wallpaper is thick, plastering the wall is not necessary
- Walls
Which putty to choose for walls under wallpaper: detailed instructions for the home craftsman
Dye
Before painting, the surface must be leveled, otherwise a good result will not be obtained. The preparation process is similar to that for thin wallpaper. However, there are slight differences. If necessary, it is possible to apply more than one layer of the starting mixture.
Finishing putty is mandatory, and it can also be repeated. After the base has completely dried, it is carefully sanded to remove even minor flaws and irregularities. For work, only gypsum compounds are used, for example, rotband. They have less mass, and after hardening they acquire a pure white color, which is important for painting.
How is starting plastering done?
Before starting the starting plastering, the joints should be prepared. For this purpose, they are specially reinforced with meshes. In some cases, the gaps between the slabs remain noticeable. They can be sealed with mesh with large mesh or fine mesh, if the inconsistencies are not too visible.
The resulting plasterboard ceiling in the interior of the room
The mesh is fixed to the layer of putty that was previously applied. It is not recommended to use construction adhesive, as it is not suitable for these purposes. After this, use a wide brush to begin priming the ceiling. The primer is allowed to dry a little and a layer of plaster is applied. It is mixed in water using a construction mixer or drill. Adding ingredients should be gradual to avoid the formation of lumps.
The resulting mixture should have a consistency similar to thick sour cream. It is allowed to brew for 5 minutes and then used. The tool is filled with plaster to the brim and the ceiling is lubricated with it. The residue is removed using a narrow spatula, taking care to prevent the appearance of lumps. If there are any unevenness on the ceiling, re-apply a layer of plaster after the first one has dried. If you are wondering how many layers there should be, the answer is 3 thin ones.
Finally, the surface is thoroughly sanded. To do this, you can use a tungsten mesh. Sanding of the first layers should be done with a coarse mesh. The resulting sanding is done with a fine mesh. If you wish, you can watch a video illustrating all stages of the work.
Plasterboard ceiling in interior design
Calculating the consumption of putty for a plasterboard ceiling
On average, the cost of putty material is 1.5 kg or liter per square of primed drywall. Accordingly, for a double layer of putty you will need at least 2 liters.
If we take into account the sealing of the seams, this is at least another 0.5-0.6 liters per square. The amount of putty consumed per 1 m2 depends on the number of joints. Installation with small drywall panels is easier to do, but at the same time the material consumption increases sharply, and it takes 2-3 times more time to properly putty the joints.
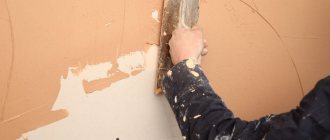
High-quality priming allows you to see ceiling defects
The working process
Grouting holes and seams
This will help avoid the formation of cracks at the joints. Before you begin, you need to check the strength of the installation of the screws. They should be deepened by 0.7-1 mm. If the screw heads protrude beyond the permissible limits, they must be tightened.
Stages of grouting seams and holes:
- Treat all existing joints, holes, recesses, edges of sheets with a primer;
- Fill the cavities with putty and level them so that they are flush with the surface;
- Fill the gaps between the walls and plasterboard sheets with sealant;
- Re-prime the treated areas;
- Glue the reinforcing tape over the seams, overlapping at the joints;
- Rub the surface and treat with a primer.
Applying the starting layer
After grouting the holes, it is necessary to prepare a working solution from gypsum starting plaster. The strength of the material is not inferior to cement and reliably protects the ceiling from mechanical stress. Step-by-step instructions for preparing the working solution:
- Pour 3.3 liters of water at a temperature of +18-25 degrees into a container with a volume of 10 liters;
- Pour 1 kg of dry plaster;
- Stir the contents until completely dissolved, add another 500 g of dry powder;
- The mixed solution should taste like mashed potatoes;
- Allow time (5-7 minutes) for the solution to sit until all lumps soften;
- Stir the mixture again until smooth and ready to use.
For information! The gypsum solution can be used for only 15-20 minutes.
Rules for applying starting plaster:
- You need to scoop up the working solution in small portions using a narrow spatula and distribute it evenly on a wide blade.
- Apply a layer of plaster no more than 1.5-2 mm to the prepared surface.
- Upon completion of the distribution of the gypsum composition, remove the resulting irregularities with a wide tool, and remove the excess with a small spatula.
- Leave the treated surface to dry for one day.
Applying the finishing layer
Working with finishing putty consists of:
- Preparation of the working solution according to the instructions indicated on the package;
- After applying a small layer to the surface to be treated, the mixture is taken out with a narrow spatula and transferred to a wide tool;
- Using a large spatula, distribute the prepared mixture along the entire perimeter of the ceiling.
In what cases is ceiling plastering required?
If puttying a plasterboard ceiling with ready-made putty is always required, then the plaster is applied only if there are significant surface defects that a layer of putty simply cannot hide. The fact is that layers of putty more than 5 mm thick can crack and crumble during use, but the plaster uses a coarser-grained substance, which means it is possible to make layers up to 20 mm thick. Thus, the plaster hides the most significant differences in height, chips, cracks and other defects.
It is also important to carry out the treatment when subsequently decorating the ceiling with textured plaster - this increases the adhesion of the compositions, increases the strength and service life of the finished surface.
Source
Preparing and plastering a plasterboard ceiling for painting
A suspended plasterboard ceiling is the best finishing option, affordable and do-it-yourself. Preparation for cladding does not require careful leveling of the base base, since the structure will hide all unevenness. Another advantage is the ability to decorate the finished surface using any available means. Owners of private houses benefit from the finishing due to the additional insulation of the floors, and to protect them from external influences, the sheets are coated with a moisture-resistant compound. Let's look at how to putty plasterboard on a ceiling for painting step by step with your own hands.