Features of painting walls on plaster
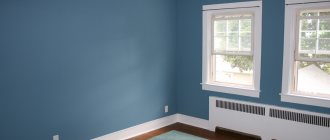
Most property owners prefer this type of finishing such as painting. The work does not require effort or special skills. The cost is cheaper than using some finishing materials.
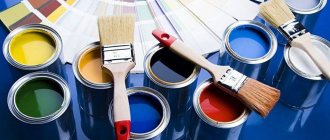
The modern construction market contains a wide range of paint and varnish products, which allows buyers in each specific case to choose the appropriate option for painting the walls. It is important to consider that only perfectly leveled walls are suitable for such finishing, and the plaster layer should not contain flaws. Otherwise, all defects will appear fully.
When selecting paint, it is important to take into account the relevant requirements for paints and varnishes:
- To ensure the durability of the coating, you need to choose wear-resistant paint.
- For rooms where there is a constant high level of humidity, a moisture-resistant coating is necessary.
- The quality of pigments largely determines long-term color retention.
- Whatever paint is chosen, it should not emit harmful substances, but be completely safe. This especially applies to compositions for interior work.
- It is also important for paints to have a quality such as vapor permeability. Thanks to this, air passes freely through the coating, which prevents the development of fungus and mold.
Attention!
By choosing a paint coating for external and internal walls, property owners thereby solve several problems at the same time. A decorative surface is created that receives additional protection from various types of external influences.
Painting plaster is the most common finishing method
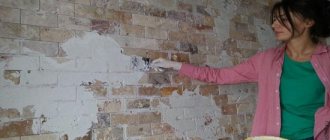
Is it possible to plaster over old paint?
Most instructions for finishing materials say that before applying them, it is necessary to remove the old surface coating, since the new one may fall off soon after the repair. Especially when it is already poorly held or can be easily removed with a spatula. This rule applies to old paint. But there are cases when it holds up well for now, but removing it will be quite labor-intensive. As a result, even the most experienced specialists find themselves at a dead end in finding a way out of this situation. Under these circumstances it is quite possible to apply plaster over paint.
Old paint, especially oil paint, has already lost its adhesive properties. Thus, when putty or plaster is applied to it, these finishing materials will fall off and crumble after some time. But there is one way in which it is quite possible to solve this problem. And this secret is that a special primer is applied to the old paint under the plaster:
- Betonokontakt primer is very suitable;
- you can use a special composition from Neomid.
When using this method, the surface becomes rough. Strength is achieved thanks to the liquid component of the primer, which is absorbed into the old coating, in our case, into the paint. And adhesion is improved by containing small particles, for example, quartz sand.
Selection of paint for plaster
If we compare paint with wallpaper, then the second option helps create a luxurious interior with an emphasis on various details. The paint and varnish coating acts as a budget cladding, which is suitable for offices and industrial premises. However, this is the best choice in cases where the owners of houses or apartments have limited funds.
The construction market offers a wide range of paints and varnishes, but not all paints are universal. Some compositions are suitable for external use, while others can only be painted on internal surfaces. This specific application is due to different conditions - there are more factors outside than from the inside and they have a stronger impact. Hence the different requirements for paints and varnishes.
For interior work
In order for the walls inside the room to gain additional protection and retain their appearance for a long time, it is necessary to select the appropriate option. Plaster paints for interior work are not subject to the most stringent requirements. The main ones are:
- vapor permeability;
- resistance to moisture;
- resistance to minor mechanical damage.
Depending on the specific room for which paint is purchased, the composition may include a number of additional characteristics. It is also desirable that the finishing inside the house be convenient for work and subsequent cleaning.
The most important thing in choosing paints for interior decoration is their safety.
For exterior decoration
Many beginners are wondering whether this or that paint is suitable for finishing surfaces after plastering on the street side? As professional finishers note, there are no special prohibitions in this regard, but for external use the appropriate composition should be selected. Operating conditions inside and outside buildings vary greatly. The requirements for these paints are more stringent. In particular, the material must have a number of necessary qualities:
- efficiency;
- moisture resistance;
- durability;
- wear resistance;
- resistance to the harmful effects of precipitation;
- color preservation;
- the coating should not fade.
It is worth noting that the paint that is intended for outdoor use is not recommended for indoor use. These compounds are created specifically for difficult conditions, and they are not always environmentally friendly.
Not every paint is suitable for exterior use.
Drying conditions for plaster
The first thing to do after plastering the walls is to give it the opportunity to dry naturally. Part of the solution water is used to create artificial stone (gypsum, lime or cement), depending on the plaster used. Another part is needed as a medium in which reactions, for example, polymerization, take place. Excess moisture gradually evaporates from the surface of the layer, which cannot be prevented. According to the standards, the surface before wallpapering or painting should have a humidity of no more than 8%.
The drying time of the plaster coating depends on:
- type of solution;
- consistency of the solution;
- weather;
- base material;
- How thick is the layer of plaster?
Most often, walls are leveled with cement-based mortars, followed (in popularity) by gypsum and lime mortars. From construction experience, a pattern of drying progress was identified. So, regardless of the composition (with the exception of gypsum), it takes a day for 1 mm of outdoor plaster coating to dry; a 2 mm layer dries indoors in a day.
Stretch film is used to retain moisture in DSP plaster
Cement coatings require at least 4 weeks to gain strength. Less time is allocated for drying, since the main share of free water evaporates earlier. Indoors, mortars with a cement binder, as well as cement and lime, often take 6-7 days to dry, however, during this time only the surface layer dries. During this time, the room is not ventilated, since higher humidity creates better conditions for hardening of cement coatings.
It’s better to take your time and let the solution gain good strength.
Solutions based on lime or lime and gypsum spend less time on drying. For normal strength gain, these compounds require 10-15 days, and the room must be ventilated frequently - 2-3 times per hour (especially the first few days). According to KNAUF recommendations, a layer of 15-20 mm of gypsum plaster will dry for 7 days (at a temperature of +20 degrees, 60% humidity); layer 5 cm – 14-16 days. For puttying work, 10 days may be enough.
These are the times for drying inside buildings, where conditions can be created and controlled. This is impossible to do on the street. Therefore, choose the time for plastering facades according to the normal weather conditions of your climate. For work, it is better to use dry periods, when precipitation occurs less frequently and the temperature does not fall below 8 degrees and does not rise above +30. Ideally, if the temperature is 18-20°C.
Types of paint for plastered walls
Despite the rich variety of materials on the construction market, you should not buy the first paint you come across. It is necessary to take into account the characteristics of the premises of an apartment or house, as well as your own preferences regarding external design.
Water-based
Water-based paints are environmentally friendly and therefore can be safely used to paint interior walls. A matte surface is created, but the choice of colors is poor. The problem is solved by using the color of the desired shade. It is permissible to create any color that best suits the interior of the room.
Any type of base is processed with water-based compositions. At the same time, such paint is not able to withstand moisture (especially direct contact). For this reason, it is recommended to paint walls only in dry rooms. In order to increase adhesion, it is better to coat the surface with a primer before painting.
Water-based paints form a matte surface and are easy to apply
Acrylic
The inclusion of polymer additives in paints allows you to create an elastic film on the walls that can withstand mechanical stress and also resist the influence of ultraviolet radiation. With slight deformation of the walls, cracks do not form.
On the one hand, acrylic paint is hydrophobic, but on the other, it is vapor permeable. The latter quality is especially valuable for wooden walls “hidden” under plaster. This means that if water gets on the walls, then this composition is contraindicated for use. It is also not recommended to paint lime plaster coatings.
Manufacturers make acrylic paint on an organic or water-dispersed basis. This is an economical solution for finishing the facades of buildings. It is effectively fixed to almost any plaster coating, wears only slightly, and the finished surface is easy to clean. Service life reaches 7 years.
Due to the high acrylic content, such paints provide a more durable and durable coating.
Silicate
The silicate material is based on liquid glass, which ensures increased water resistance. Contaminated coating can be washed quickly and easily. Among other advantages it is worth highlighting:
- preservation of shade even under the influence of solar ultraviolet radiation;
- service life is considerable - more than 20 years;
- the coating is resistant to temperature fluctuations;
- the material is resistant to fire, which prevents the spread of fire;
- does not develop fungus or mold on the walls.
At the same time, some disadvantages of silicate-based paints do not allow them to gain market demand:
- Firstly, the material does not adhere well to organic plaster.
- Secondly, the paint is not elastic, and therefore is not recommended for use if the buildings shrink (the coating cracks).
- Thirdly, due to thermal effects, the coating runs the risk of deformation.
- Fourthly, the tinting process is extremely difficult.
- Fifthly, due to the fear of moisture and frost, silicate paint is not the best solution for finishing garages, basements, bathrooms, and balconies.
Before purchasing this particular type of paint, you need to weigh all the pros and cons, since it is not suitable in all cases.
Surfaces painted with silicate paint tolerate temperature changes well
Silicone
Silicone paint and varnish material is a good solution for those buildings that are still in the process of shrinkage. The use of paint is advisable in cases where housing is located in seismic areas or near railway tracks. The material is produced on the basis of polymer compounds. The result is a structure impenetrable to moisture, but at the same time permeable to steam.
A moisture-resistant coating is created that is easy to clean if necessary. Silicone paint is compatible with lime plaster and is durable - it does not cause any complaints throughout the entire period of operation. The term can be up to 25 years. The paint contains no toxic substances, static does not accumulate on the surface, and therefore dust is not attracted.
Treated surfaces effectively resist the harmful effects of chemical elements from the atmosphere. Plus, it is possible to hide minor defects (no more than 2 mm). Another advantage lies in high adhesion, however, the advantages are counterbalanced by high cost.
The silicone composition has good hydrophobicity, due to which moisture does not penetrate into the painted wall
Alkyd and oil
After treating the surface with alkyd or oil paints, a durable, wear-resistant layer that is resistant to mechanical stress is created. The coating can be washed. The surface turns out bright, but the palette itself contains few shades. The paint is suitable for treating walls of rooms with high levels of humidity.
However, such paints have an unpleasant odor when applied, which will remain until the layer dries. Another disadvantage is considerable consumption, and the composition is highly flammable. The finished coating lasts a long time and does not require special care. In addition, a glossy effect is created on the walls.
Walls coated with this composition do not require special care and are easy to clean.
Latex
Latex paint is waterproof, does not contain harmful substances, and therefore is environmentally friendly. But at the same time, such material has a high price, which can scare off buyers. The paint is difficult to apply due to its thick consistency. Consumption is usually indicated in g/m2 and among different manufacturers the value varies over a wide range - from 90 to 200 g/m2. If necessary, it is permissible to dilute with water, but not more than 5% of the original volume. Drying time ranges from 1 to 5 hours.
After treatment with the composition, a glossy or matte waterproof film is formed on the walls. Therefore it is suitable for rooms with high humidity. You can paint both walls and ceilings, regardless of the base materials, including gypsum, cement, and lime coatings.
The paint has a number of special effects:
- sand;
- velvet;
- silk;
- cotton fabric;
- stone;
- Venetian;
- metal or metallic;
- "chameleon".
Note!
It is better to cover decorative plaster with latex paint material, since in this case the relief of the coating is ideally emphasized.
Latex paints are often used as a finishing coat for decorative plaster.
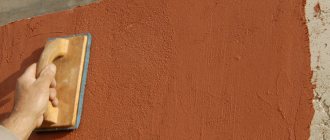
Choosing putty for walls after plastering
The consistency of the putty is a pasty mass. The purpose of which is to level the walls after plastering before finishing, which requires a particularly even surface.
According to their structure, putty compositions are divided into:
- Starter grades, characterized by a larger grain size, are used for the initial processing of plaster coatings. Filler – quartz sand. Used to seal cracks, holes and large recesses.
- Finishing ones are distinguished by fine grinding of the filler, greater plasticity and ease of installation. They are used on top of the starting putty with a layer of 0.5-2 mm to create almost glossy surfaces. Easy to sand.
- Universal ones are used as finishing and starting paints, applied in a single layer. The cost is more expensive than other putties.
When choosing a putty, pay attention to the basis of the composition, which may be significant for the application.
Acrylic putties are applied only in a thin layer, which is not permissible for leveling. They also have a narrowed range of application temperature conditions (not lower than +10°C), and are not used in rooms where coatings are supposed to breathe.
Popular putties:
- on polymer binders;
- gypsum;
- with cement.
Cement putty
Like cement plaster, it is most popular for finishing interior and facade surfaces. The popularity is deserved by the durability of the created coating, accessibility for the mass consumer and other advantages. It is suitable for damp rooms and unheated buildings. Putty is used to level surfaces and “heal” cracks and potholes.
Manufacturers divide putty compositions with cement into:
- façade;
- used for interiors;
- thermal insulation (used for thermal insulation coatings in combination with other means).
Cement of various types serves as a binder. For example, there are white cement putties (expensive). In addition to cement, the composition includes: polymer additives and mineral fillers. The coatings are smooth and durable. Starting and finishing pastes are produced according to their intended purpose.
Starting putty with quartz sand is used for single-layer leveling of walls with differences of up to 20 mm. The finishing mixture contains finer sand, which gives a smooth surface. There are two types on sale: ready-made (in buckets) and dry mixtures.
Gypsum putty
Even high-quality finishing cement paste does not provide such a smooth surface as gypsum putty. In addition to gypsum, the composition contains modifiers and additives (polymer and mineral).
The filler fraction, for example, sand or marble flour, determines the purpose of the gypsum composition:
- Finishing (used for smoothing), a perfectly smooth wall after puttying has a snow-white color;
- starting (can be used to level surfaces with minor unevenness and without plastering);
- universal.
The material for dry rooms is easy to sand and install, has less weight, forms a breathable coating, and does not form shrinkage cracks. A significant disadvantage is that it is not resistant to water. There are ready-made and dry mixtures.
Polymer putty
These are latex, polycement and acrylic compounds. There are many differences with cement and gypsum “classics”. They form elastic coatings, therefore they are in demand in earthquake-prone regions and in areas located near railway tracks. Such putties and shrinkage of buildings are not afraid.
High adhesiveness is inherent in all polymer compositions. They form breathable, durable finishes. What is attractive for beginners is that polymer compounds have a long lifespan - up to 12 hours. The main disadvantage is the high price.
A new product in the range of polymer compounds is polymer cement (polycement). This is a universal finish that can be applied in layers up to 30 cm, that is, in one pass it can be used to level curved surfaces.
Mandatory work rules
In order for the surface of the walls to acquire a bright and rich shade, it is necessary to apply paint in 2, or preferably 3, layers. Each subsequent coating is laid only after the previous coating has completely dried. In addition, painting walls with plaster requires compliance with other rules:
- Before purchasing paint, you need to find out the material consumption per 1 m2 of surface. This parameter is indicated on the packaging container.
- During operation, avoid direct exposure to sunlight and moisture. Otherwise, stains will appear on the walls and the paint will not apply evenly.
- It is advisable to change the shade of white paint by adding a suitable color.
- The optimal temperature for painting work is in the range of 5-28 °C, most importantly not lower than +5°.
- Adding drying oil, water or solvent makes the paint more liquid (if necessary). Only the liquid should be poured in small quantities and gradually, while stirring the paint.
- To protect unpainted areas from paint, cover them with masking tape.
- When the decorative composition is applied to the walls in stripes, it is better to shade them until the layer dries completely. This avoids unnecessary joints.
All the necessary information, including temperature and other conditions, is on the container of any paint and varnish material. For some types of paint, it is important to exclude any drafts.
Each manufacturer indicates on the packaging its material consumption per 1 m2
Process technology
The technology for painting plaster is not complicated, but it is important to follow a certain sequence in order to obtain a strong, aesthetic and durable finish. Let's look at the main stages of the workflow in detail.
Surface preparation
Work always begins with high-quality preparation of plastered surfaces for painting. The base must be cleaned regardless of where the work is carried out - inside or outside the building. If you skip the cleaning step, the finishing coating may lie unevenly and subsequently become covered with cracks.
Cleaning wall and ceiling surfaces is carried out with a special tool or using brushes, brushes and rollers.
Preparing surfaces for painting plaster will include work on priming or puttying surfaces, which is necessary both to level the topography of the base and to reduce the consumption of the paint composition.
Application of coloring composition
The method of painting plaster is always chosen taking into account the characteristics of the base and the type of coloring composition. If you decide to use alkyd paint in the process of painting plaster, then you will need a spray bottle to apply it to the surface. Various types of rollers and paint brushes are used to paint walls and ceilings inside a building.
The paint must be properly prepared before applying to the base. Oil or alkyd compositions are usually further diluted with a solvent to the desired degree of thickness.
The composition is always applied to the walls from top to bottom. This method of painting will allow you to get the most even finish. If the walls are painted in several layers, each new layer is applied to the surface after the previous one has completely dried.
Preparatory work
Painting work begins with preparatory work, which in turn is divided into several stages. The first step is to prepare the workplace itself, the necessary tools, and also purchase materials. An important factor is weather conditions - it is advisable to carry out the main work in dry and windless weather.
You should be prepared in advance for the fact that the entire preparatory process may take much more time than the coloring itself. Sometimes you have to wait for suitable conditions.
Tools for work
The actual preparatory stage can begin with the preparation of the necessary tools for work. In particular you will need:
- Brushes are wide for the main area, and with the help of a narrow brush it is good to treat hard-to-reach places. Instead of a wide brush, a (foam or pile brush) will do.
- Color tint - will be needed if you buy white paint and need to change the color.
- Grater – for removing small irregularities.
The main thing is not to forget about safety precautions! Therefore, it is recommended to use personal protective equipment - a respirator, a hat, gloves, and safety glasses. You will also need a stepladder and a container of a suitable size for paint. If a large amount of work is planned, then it is worth preparing a spray gun with a compressor in order to save time and increase labor productivity.
Attention!
It is important to prepare several types of rollers - use foam rollers only for treating surfaces with a primer (mandatory procedure). Painting should be done with tools with a velor or fur coat.
Various tools are used to perform high-quality wall painting.
Preparing the premises
Painting work is classified as “dirty”, since paint splashes cannot be avoided. Therefore, it is necessary to protect everything that cannot be painted - the floor, furniture, window and door openings. This stage should be taken very seriously. The work is carried out as follows:
- First you need to remove lamps, paintings, fasteners, and hangers from the walls.
- The furniture, along with household appliances and belongings, is moved to another room.
- Door trims, as well as floor and ceiling plinths are being dismantled.
- The room where the painting will be done is de-energized, after which the sockets and switches are removed.
- If painting is carried out in a room on the sunny side, the windows must be covered with film to avoid direct sunlight, which is unacceptable.
- Apply masking tape along the ceiling or construction tape closer to the wall. The same is done locally with baseboards and platbands.
- The floor is covered with plastic film.
Furniture, as well as other large objects that cannot be taken out of the room, must be covered with polyethylene.
Surface preparation
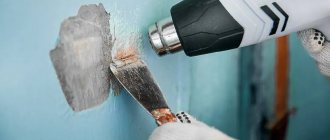
Before choosing what to paint and how, the surface is inspected to assess the condition of the outer cover. If you find areas with paint that is firmly in place, there are no cracks and “conflicts” are not expected with the new paint material, they can be left. This does not apply to the oil film - it is completely removed in any case.
If defects are found during the inspection, they must also be eliminated. Detected cracks and potholes are repaired. Finally, all that remains is to remove the dust, after which the walls are primed in two passes (minimum) with intermediate drying of the layers. The primer mixture is selected depending on the type of plaster and paint.
Many construction and renovation processes begin with the preparation stage.
Calculation and preparation of paint
To determine how much paint you need, you should use simple arithmetic:
- The area of each wall of the room is determined (height times length).
- The obtained values are summed up.
- The area of window and door openings is determined using a familiar formula, if any.
- From the total area of the walls, subtract the calculated indicator of the areas of windows and doors (Stotal).
Any packaging of a paint composition contains information about the average consumption of material. This value must be multiplied by the calculated total area (Stotal). The result is a figure that reflects the amount of paint in kg. It matters how many layers you need to apply. Each new coating usually requires less paint.
Regardless of the type, the paint must be stirred so that the heavy filler particles sink to the bottom. You also often have to change the consistency, as it is thicker than necessary. While stirring, add water in small portions until the thickness of the paint resembles sour cream. It is convenient to use a screwdriver or electric drill with a special attachment. If they are not available, a stick will do, however, the process will take a lot of time.
As you stir, grains may appear, which usually happens with water-based paints. Then the composition must be filtered through three layers of gauze.
Not all dyeing materials are sold ready-made.
Tools for work
Required tools include:
- paint brushes of different sizes;
- foam and pile rollers;
- a grater or fine-grained sandpaper for grouting individual areas;
- paint tray;
- personal protective equipment when working with coloring material (gloves, respirator, safety glasses);
- ladder.
In addition, after plastering, you may need a spray gun to apply the dye to a large area of the walls. When repainting and creating a structural coating, you can use rollers with special attachments.
Nuances of tinting
If you wish, preparing the desired shade for the walls is easy:
- Gold - white paint is diluted with color until an orange tone is formed. Next, add 1-2 drops of red or brown color.
- Golden-brown range - add yellow or orange pigment, and then red and blue dye (1-2 drops).
- Bronze - first, add orange or yellow dye to the white paint until a rich yellow color appears, and then a drop of red and the same amount of green.
Attention!
To obtain the chameleon effect, you need to add the same dye to the colorful material.
Tinting a water-based emulsion is not so easy. To begin with, white paint is poured into a bucket in enough quantity to cover all the walls of the room (10-12 liters or more). It is no longer possible to get the same shade again, and therefore you need to do it at once. If you have prepared less dye than you should, the walls with windows are painted a lighter shade.
Subsequently, water is poured in in small portions, the paint is brought to condition. Next, coloring pigments are added - one or several, based on what exactly the owners want to receive. After each addition, the composition is stirred well.
After stirring the composition, you need to treat a small area on the wall (about 1 m2) and let it dry (2 hours). This time is enough for the real shade and tone of the paint to appear, since the color scheme in the container and on the surfaces has differences.
Water-based paint requires coloring
Is it possible to paint without puttying?
Many novice painters are interested in whether it is possible to paint without first applying putty or is this a mandatory procedure? If there is no desire to putty the plastered surface, this step is skipped. However, there must be a preparatory layer between the paint and the plaster - that is, it is strictly necessary to apply a primer. Plaster itself requires a large amount of paint due to its high permeability. For this reason, it is recommended to always coat plastered surfaces with a primer. Otherwise, stains will appear on the walls and the paint will not be absorbed evenly.
Features of the wall painting process
In most cases, owners prefer to plaster walls with one of two types of mortar - gypsum or cement. In the first case, the walls are usually covered with sheets of plasterboard, which are mounted on the frame, while in the second, a cement-sand mixture is mixed. Each finishing option has its own technique, and the selected paint and varnish material for a specific surface differs in properties.
Made from cement plaster
Experienced finishers, when asked how and with what to paint plastered walls with cement mortar, prefer water-based paints because they are easy to apply. The work uses not only hand tools (rollers, brushes), but also mechanized painting (electric sprayers) when the volume of work is large.
Water-based mixtures include organic components to make the shade richer. The color palette is poor in color, however, it is suitable for rooms without pretentiousness.
Note!
The material is applied evenly over the entire surface of the plaster. Since the water-based emulsion contains water, it penetrates into all the pores of the wall. The remaining liquid evaporates as the coating dries.
After treating the surfaces with a water-based mixture, the walls become breathable, which is not achieved when using oil paint. The surface allows air to pass through, which has a positive effect on the formation of the microclimate in the room.
Cement plaster is characterized by vapor permeability and a high level of moisture absorption
Made from plaster finish
Before you start painting the gypsum coating, it must be puttied. Neglecting this step risks losing the adhesion of the paint to the gypsum-based plaster. After applying the putty, it is better to choose water-dispersed and acrylic paints and only water-based ones.
All work on painting walls with gypsum plaster is carried out in the following sequence:
- The sheets are cleaned, the edge seams are trimmed;
- The joints are sealed with serpyanka using starting putty for rough finishing.
- The putty is applied to the entire surface of the wall, and the cavities and screw heads must be hidden.
- The 2nd layer is laid with finishing putty.
- The mill is rubbed with a grater and sandpaper.
- Contaminants and dust are removed from the surface, after which it is covered with a primer mixture.
- When the primer dries, the wall is puttied.
After finishing the work and drying the wall, painting work should begin. The paint is applied with a roller or brush. It is convenient to handle the corners of drywall with a thin brush.
Gypsum plaster is highly absorbent, which must be taken into account when choosing a coloring composition.
Painting decorative plaster
Painting a decorative coating should be carried out taking into account a number of points:
- The plaster layer must dry well, otherwise the material will deform, causing it to lose its presentable appearance. You need to allocate 24 hours for such a process, but two days is better.
- If the laid plaster crumbles, it is necessary to cover the wall with a colorless primer. After the coating has dried, you need to check the surface for crumbling plaster.
There are several methods for painting walls with decorative coating:
- in one layer;
- two shades.
Painting one layer is done in one pass. That is, the wall is evenly covered with paint, excluding gaps. The roller moves up and down and each new layer is applied while capturing the previous one. If the work is done with a large brush, first vertical movements are made, then horizontal ones. This promotes uniform coloring. The method is used regardless of the type of decorative plaster.
The two-shade method is performed in two passes. Initially, a layer of the first color scheme is applied using a long-nap roller. For the second tone, take a foam roller or sponge, with which only the protruding parts of the relief are painted. The recesses remain in the original color.
Decorative plaster can be painted in several ways
Painting techniques for different types of plaster surfaces
Before you start painting plastered walls, you need to carefully prepare the base. The process looks like this step by step:
- The walls are cleaned of old coating. The whitewash is washed away with water, the wallpaper and paint are soaked and then removed with a spatula, the tiles and glue are torn off.
- Then the base is sanded with special coarse sandpaper, removing all irregularities.
- Small cracks are filled with putty, large cracks are filled with foam.
- After drying, excess foam and mixture is removed and the surface is sanded again.
- The smooth base is dusted with a damp cloth and covered with a deep penetration primer mixture. It will bind all small particles of dust and dirt and improve adhesion to the next layer of finish.
Note! Acrylic primer is optimal for interior work. It is advisable to apply two layers, allowing each to dry completely.
Next, painting of the plaster begins. To ensure quality work, it is important to consider what composition the walls were plastered with.
The cement base, as well as textured plaster such as bark beetle or fur coat (the surface resembles fur in texture) inside the house can be painted in different ways.
- The simplest one is to apply a thick layer of paint to the texture, which fills all the recesses. Excess and smudges are removed with a sponge. After complete drying, apply a second layer of paint: basically go over the bulges with a short-haired roller.
- If you want to show imagination and originality, then in order to get a three-dimensional effect on the walls, paint them in two colors. The first color is added to the plaster itself, and the second to the paint. You can take dark and light shades, or you can have completely different colors. As a result, the recesses will be more contrasting, which gives visual volume to the surface.
- Not the most spectacular, but a quick option. Colorless plaster is covered with colored primer, and the second layer is painted.
Note! If the repair is fresh, then at least 2 months must pass from the moment of applying the cement mortar, since the material shrinks and cracks may form.
For gypsum plasters, water-based paints are used. Before you properly paint a smoothly plastered wall with water-based paint or water-based acrylic paint, you need to prepare your tools. You will need: a paint tray, a medium roller and a brush 5 cm wide. First, they pass the brush along the joints, slopes and corners, then they begin to work with a roller, moving from the upper right corner of the wall. Movements with the roller are made in zigzags up and down, several times in one place, processing one area after another.
Note! You should not apply a lot of paint to the roller: smudges may appear on the walls and splashes around. Wipe off excess on the ribs of the inclined part of the tray.
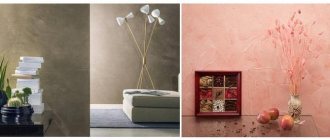
Decorative painting methods
Some experienced painters use non-standard painting methods that allow them to achieve unusual effects. The surfaces look not only original, but also beautiful. Among the common design solutions it is worth highlighting:
- On top of the painted surface, another layer of paint is applied with a roller with a pattern.
- Cut out a pattern or schematic design on thick and thin material. This stencil is easy to use with a sponge.
- The first layer is applied with any of the painting tools, and the second with a brush, but in a chaotic manner.
Not all options are listed; if you use your own imagination, it’s easy to come up with other painting techniques.
Decorative painting of walls is one of the popular types of finishing
Tips for choosing colors
Only the correct selection of colors and shades creates the desired effect. While this is not critical for interior walls, it has a direct bearing on the façade. It is advisable to take into account a number of criteria:
- The shade of the roof should match the color of the external walls. When the color scheme for the top of the house has not yet been chosen, it is better to paint the walls in pastel colors.
- With a dark roof, light shades are suitable for external surfaces.
- The double color scheme will add dynamism to the appearance of the house. The walls are painted in the main color, and light colors are selected for the openings.
- Individual facade parts should be distinguished by the structure of the coating or color - the use of both options is highly undesirable.
It is necessary to take into account the style, as well as the design of the local area, including lighting.
Paint selection
In order to paint plastered surfaces efficiently, it is extremely important to choose high-quality paint for the work. Let's consider the types of materials that can be used in the process of painting plaster.
Different types of paints are suitable for painting plaster. Traditionally, the following types of coloring compositions are used: acrylic, water-based, latex-based, silicate, alkyd, oil. Let's take a closer look at these types of paints, their features and advantages:
Acrylic
Acrylic-based paint compositions are a universal option, suitable for working with plastered substrates. Acrylic material can be used for both internal and external decoration of wall surfaces. The advantages of this option include the following qualities:
- A huge palette of colors and shades, allowing you to choose a color scheme to suit any stylistic interior design;
- Durability;
- Painted surfaces acquire a beautiful matte finish;
- Affordable price.
Acrylic paints are not suitable for painting surfaces in rooms where there is a high risk of large amounts of moisture getting on walls or ceilings. When painting plaster in such rooms, it is better to choose more water-resistant compounds.
Latex compounds
The main advantages of latex-based paints are their rapid drying, as well as the thin film layer they form that can withstand constant contact with moisture.
Thanks to this quality of latex paints, painted surfaces can be washed without fear of damaging the aesthetics and integrity of the coating. Also, increased moisture resistance makes latex paints an excellent option for painting external surfaces.
Using latex paint, you can create both a glossy and matte surface; the material is also suitable for painting decorative plaster, since it will ideally highlight its texture and volume.
Water-based
PVA-based water-based paints are a budget option, using which you can get a beautiful and durable coating on wall surfaces. But it is important to know that this type of paint cannot be used for substrates that are constantly in contact with moisture.
To get a rich color when painting plaster with water-based emulsion, the paint will need to be applied in several layers. Preliminary priming of the surface will help reduce paint consumption and ensure its strongest adhesion to the plaster.
Oily
Oil paints are valued for their choice of colors and shades, allowing you to obtain a rich color of the painted base, but they are not easy to work with due to the sharp, unpleasant odor, as well as the complexity of application.
Alkyd
Alkyd coloring compositions will allow you to obtain a durable finish coating, which, moreover, will not require complex maintenance, but the material is not cheap and has a high consumption during the work process.
It is worth knowing that the smell of alkyd paints is pungent and toxic, which requires compliance with certain safety measures when carrying out work.
Silicate
Silicate paint is suitable for painting plastered facades. The composition is created on the basis of silicate glue, which ensures the strength and durability of the finish coating. The base coated with silicate paint will withstand the effects of aggressive factors: ultraviolet radiation, moisture, temperature changes.
Silicate paints have poor adhesion to substrates made of organic materials, and when exposed to high temperatures, the silicate coating may crack.
Whatever type of coloring material you choose for painting a plastered surface, buy products from trusted manufacturers and be sure to study both the certificate and the instructions for using the specific coloring composition.
Caring for Painted Walls
Once the walls are painted, they subsequently need proper care to maintain the properties of the paint. It takes several hours for the surface to dry completely. However, it takes at least 2 weeks for the coating to gain strength and wear resistance. When using a water-based composition, wet cleaning is contraindicated. In this case, the dust is brushed away dry.
Painted surfaces may require maintenance over time
Even novice painters can paint the plaster layer, as the work is not difficult. However, you need to adhere to technology in order to subsequently avoid unwanted nuances. This applies to both external and internal work.
Was this information useful to you? Share in the comments!