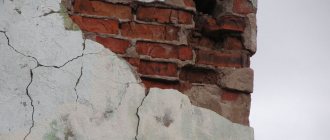
Restoration of the plaster layer on the walls is required when it becomes cracked and begins to peel off. Chip areas and cracks form near window openings and doors, and defects appear in other places. If a crack is clearly visible on the surface of the plaster layer, then places with delaminations remain visually invisible. In some places the finishing layer swells, when tapped, it finally collapses and falls off. The reasons are different, but more often the problem is associated with violations of preparatory measures before plastering the walls. Therefore, there is a need to organize plaster repairs, the features and rules of which will be discussed today.
Possible defects and reasons for their occurrence
Problems with walls arise when the proportions for preparing the mortar mixture are not observed or violations are made in the technology of carrying out work on the installation of the plaster layer.
Defects include:
- tubercles and swellings;
- cracks formed after shrinkage;
- peeling of fresh plaster mortar;
- cracks that form to the depth of the plaster layer;
- spots and stripes that appear after drying.
What contributes to such problems? Swollen spots and bumps appear when the solution contains unslaked lime. What to do? The plaster solution should be kept until the lime particles are completely extinguished. Problem areas are opened, moistened and filled with solution, followed by rubbing the surface.
Sedimentary cracks appear when the solution is poorly prepared and contains an excessive amount of binder. The problem is solved by precise adherence to proportions, thorough mixing of the mixture and re-leveling.
Delaminations are observed on a wall that is poorly prepared for work. It is necessary to stop the entire repair process, re-prepare the surface, apply notches, clean dirty and dusty areas, and moisten with water.
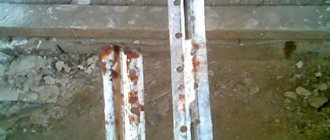
A crack across the entire layer indicates one violation - the reinforcing mesh has not been laid.
Stains and streaks mostly appear on exterior walls. The main reason for this defect is waterlogging of the surface.
Removing old coating
First, you will need to identify problem areas of the surface, which are not only clearly visible cracks. To find places where the plaster will soon begin to crumble, tap them with a hammer. If the sound in the tapping zone is dull, the plaster layer has begun to peel off. It is removed from the walls using a spatula.
When checking the integrity of the coating and identifying areas of peeling, always check the cause that caused the destructive process. Depending on the reason, certain work is performed to help make the renewed coating as strong and durable as possible.
Let us describe the process of removing old coating in problem areas step by step:
- Using a spatula, you carefully remove not only the plaster in places where it is peeling, but also traces of paint, whitewash, and greasy stains (if they are found in problem areas). Carrying out the cleaning stage poorly is fraught with the risk of rapid destruction of the repaired plaster.
- If the cause of the destruction of the plaster layer is a fungus, then the coating is removed not only in areas of its noticeable manifestation - the plaster will also need to be removed outside the area. Usually another 5-6 centimeters of the surface around the fungus-affected area is cleaned.
Before removing the plaster, to simplify the work process, it is recommended to moisten the surface with warm water. The old coating will come off easier and there will be much less dust when removing it from the wall.
- After the surface area freed from plaster has completely dried, it is recommended to treat it with an antiseptic to prevent the appearance of fungus and mold in the future.
- A separate stage of work is preparation for sealing cracks. The cracks need to be moistened with water and, using a narrow spatula, all peeling fragments must be removed. Afterwards, a depression is created along the crack, which is subsequently filled with solution.
Having completed all work on removing the old coating, the surface and cavities that formed as a result of treating cracks are carefully primed. This will ensure high-quality adhesion of the base to the new plaster.
Preparing the walls
To save time and money, most homeowners prefer to repair only obvious uneven places and damage, without caring at all that in other places the plaster layer is also kept on its word of honor. Everything looks presentable, but, as practice proves, the need for restoration returns again.
If a muffled sound is heard, the plaster layer has come away from the wall.
To avoid such results, the following measures are performed before starting repair work:
- The entire surface of the wall is carefully tapped with a hammer.
- plaster that has lost its properties is removed. You should not rush to work roughly - try to remove the frozen solution with special means or a brush with metal bristles;
- make sure that there are no salt deposits, mold or mildew on the wall surface. If such changes are detected, such areas are treated with a fungicidal solution that has antimicrobial properties;
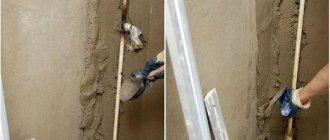
- we continue preparatory activities, using a spatula to widen the existing cracks;
- We moisten the defective areas with water, remove the remaining old mortar, and place reinforcement tape in deep cracks;
- putty the surface.
Recovery technology
The technology for restoring old plaster will also be a step-by-step process, which we will consider in detail and in detail:
- Large areas with damaged coating, as well as large cracks, require preliminary reinforcement. Reinforcing tape should be placed in deep surface defects, and areas under new plaster should be covered with mesh. Reinforcement is required at the junctions with window and door openings.
- The first layer of a new plaster coating is applied by spraying a pre-prepared solution. Please note that in places where there are deep cracks, as well as in large areas with damage, plaster will need to be applied in several layers.
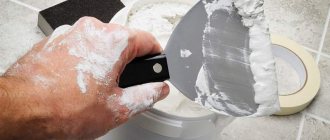
If there are small cracks on the surface, they can be properly sealed using gypsum test, to which crushed chalk is added in small quantities. After filling the cracks with dough, be sure to prime them in two layers and grout.
- After the first layer has dried, the solution is applied again. Before applying each new layer, the previous one must dry completely. The last layer of the renewed coating is leveled using a rule or a trowel, but if the area to be treated is large, it is advisable to first place beacons on it.
When placing beacons, it is important to correctly determine the distance between them. Usually it is done in such a way that the solution can be easily applied between the beacons using the rule.
Please note that it is recommended to repair all damage to the walls with the same type of compound, preferably the same one that was used to create the old coating.
If, after plastering, the walls are planned to be covered with panels, the work on restoring the plaster can be completed at this point, but if the finishing is planned to be done with wallpaper material, it is advisable to putty the surfaces and, before this procedure, treat the layer of finishing plaster with a sanding bar or a special grinder. Features of restoration of different types of coatings
The procedure for restoring old plaster has some features associated with different types of coatings. Let's look in detail at the specifics of restoring gypsum and cement-sand plaster.
Required Tools
If you decide to repair plastered surfaces, prepare the necessary tools for the job:
- mallet or hammer;
- spatulas with different blades;
- electric drill or screwdriver;
- mixing attachment for mixing the solution;
- reinforcing mesh;
- sandpaper for polishing the surface, pumice, grinding machine;
- container for preparing the solution;
- plaster mixture.
Operating at the wrong temperature
It is recommended to plaster walls at a room temperature of +5 - +25 degrees Celsius. If, for example, the temperature is too high, then the water from the solution will dry out too quickly, and the gypsum will not be able to harden correctly, according to technology.
Low temperatures are also dangerous as the material will crystallize too slowly.
Repairing cracks
At this working stage, certain difficulties arise. To do everything correctly and efficiently, you will have to try.
To begin with, purchase a similar plaster mixture that was used to finish the facade. The dry composition should not be mixed in large quantities. Prepare as much solution as you plan to produce to eliminate one large or several medium-sized defects.
Carefully inspect the entire wall to fully assess the upcoming workload and identify any problem areas. To do this, tap the wall with a hammer, mallet or the handle of a spatula.
Prepare the workplace, clean out the cracks, treat them with a primer and soda solution. While the area is drying, mix the optimal amount of solution.
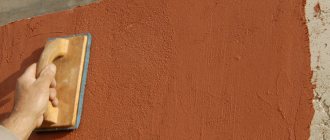
Now proceed to repair the plaster layer of the facade. On a smooth surface there will be no particular difficulties in working - the crack is simply sealed with a mortar mixture, the excess is removed, and the surface is rubbed down. Once the solution has completely dried, the repaired area is sanded. If you worked with a gray mixture, it is recommended to putty the repaired area so as not to apply several layers of paint.
The final stage of plaster restoration is painting. Experienced experts advise doing this work over the entire surface to refresh the decorative layer and create an overall tone.
Local defect repair
Grouting a crack with a repair compound
Repair of old plaster is carried out in several stages:
- Checking the surrounding layer, removing the lagging part;
- Cleaning and widening of cracks;
- Primer;
- An intermediate layer of repair composition is applied to the crack 2-3 mm below the general surface of the wall;
- While the mixture has not hardened, a mesh is applied to its surface with a spatula to improve the adhesion of the decorative layer;
- After the repair mixture has dried, a decorative finishing layer is applied, which is given the appropriate texture.
This sequence of actions is suitable for repairing decorative plaster with a uniform pattern.
Important: restoration or repair of Venetian plaster is much more difficult, since it has a multi-colored surface with a chaotic pattern. In case of noticeable, albeit local, cracks, it is recommended to finish the entire wall.
Restoration of gypsum plaster
First, preparatory activities are carried out:
- using a spatula, the cracks expand and deepen;
- the edges of the defective areas are leveled so that they do not have sharp changes;
- The old coating is removed from the wall surface. If necessary, problem areas are degreased and treated with antiseptic compounds;
- As soon as the surface dries, a primer is applied. This measure ensures improved adhesion of the base and the new plaster mortar;
- A gypsum plaster mixture is prepared and applied to the wall with strong movements with elements of indentation. It is necessary to ensure that the gypsum solution completely squeezes out the air, otherwise you will get a new coating with a low quality level.
- The reinforcing mesh is fixed. This measure helps minimize the formation of cracks. The mesh is applied shallowly, but in such a way that it is completely covered with the gypsum mixture;
- Use a wide spatula to level the repaired surface;
- Once the gypsum mixture has completely dried, it should be sanded with sandpaper.
Repairing an old plaster coating made from a gypsum mixture is carried out using a similar technology, but still has its own distinctive features.
Cracks appear when drying
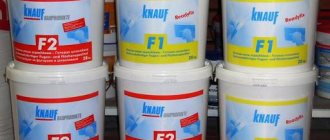
There is another possible reason why gypsum plaster cracks when it dries. The point is non-compliance with temperature and humidity conditions. According to SNiP 3.04.01-87, as well as the German standard DIN V 18550:2005-04 for insulating and finishing coatings, the most popular Knauf gypsum plasters must dry at a temperature not exceeding 18-20 ° C, and humidity: walls up to 8 % and air 40-55%. It is very important not to provide intensive ventilation in the room.
Surface cracked due to drying out from overheating
For cement compositions, the drying rate under optimal environmental conditions is different, and also strongly depends on the type of base. There may be many more options for why the plaster on the walls is cracking.
To avoid cracking, sand-cement and heavy decorative plaster on brick and concrete bases should dry at a temperature of 15-25°C and a relative humidity of no more than 75%. At the same time, the duration of drying depends on the wall humidity of 5-15%, up to a quarter of the entire period. Therefore, a 2 cm layer can dry from 18 to 30 hours.
Important: to avoid cracking of the plaster after finishing work, the temperature and humidity conditions in the room must be strictly observed.
Restoration of cement-sand base
The technology for repairing plaster walls in some places is practically no different from restoring a coating made from a gypsum mixture, but it still has certain nuances.
In order to qualitatively restore the coating from a solution prepared on the basis of cement material and sand, you will have to act according to a certain scheme:
- the base is prepared carefully, with abundant wetting with warm water;
- the walls are not primed before applying the cement-sand mortar;
- The plaster mixture is being prepared. In this case, the proportions in the materials that were used when applying the initial plaster layer should be strictly observed. If the percentage of cement is exceeded, the new solution will have a negative effect on the old layer. If there is less cement, after some time the applied solution will begin to crumble;
- When applying the plaster mixture, a certain force is applied. The work is carried out using a trowel, which is used to seal cracks and other defective areas. Do not be afraid to apply more solution than required - excess mixture can be easily removed with a regular wooden strip;
- before plastering, a reinforcing mesh is attached to problem areas;
- if you have to restore large areas, it is recommended to periodically moisten the masonry so that the water in the mortar mixture is not absorbed too quickly;
- It takes two to three days for the solution to dry completely. Once the mortar mixture has dried, grouting is performed. To do this, use a grater made of plastic or wooden material to make circular movements. Before starting work, the tool should be moistened with water.
In cases where a surface with fallen pieces of plaster is being repaired with your own hands over a large area, experts recommend using beacons. When setting them, it is necessary to accurately maintain the distance in order to facilitate the process of applying the solution and working as a rule.
Necessary tools and selection of materials for plaster repair
To study the surface:
level, plumb lines, hammer.
To delete an old layer:
metal brush, jointer, chisel or hammer drill.
To prepare for plastering:
container for solution, construction mixer.
To apply plaster:
a set of spatulas and usually a plaster float, sandpaper or sander.
It is important to choose the right mixture for repair. For better adhesion, its composition must match the composition of the old plaster.
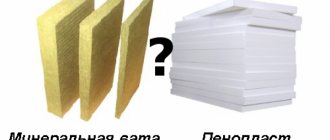
The easiest way to determine the composition of the old solution is by color:
- cement plaster – dark gray,
- cement-lime – light gray,
- lime – beige,
- gypsum - white.
The definition method is quite conventional. Therefore, we look at the strength characteristics. Cement plasters are the most durable, gypsum and lime plasters are less durable.
For modern wall repairs, gypsum plaster is most often used inside dry rooms, cement plaster for wet rooms, and special clay-based mixtures are used for stoves and fireplaces.
For internal repairs of plaster, you can choose a gypsum composition, for facade work - frost-resistant with increased strength.
Reinforcement
Reinforcement is performed with a mesh with small cells attached to the wall in such a way that the subsequently applied solution penetrates under it.
This means there should be a small gap between the reinforcing mesh and the masonry.
If the layer of old plaster does not exceed 1 cm, then for full-fledged high-quality reinforcement you will need a special nylon mesh. Removing the damaged layer:
- the area is given the shape of a rectangle;
- clean the open surface from dirt and dust;
- treated with a deep penetration antiseptic primer.
The next stage is fastening the reinforcing mesh. To repair small areas, there is no need to install beacons and reinforce the surface with a mesh, but it is necessary to prime the base.
Restoration work
Plaster repair also involves removing stains from the wall surface. They appear during operation and can be caused by grease, soot or rust. It also happens that the stains formed before the finishing work. In this case, you will have to solve this problem before you start gluing wallpaper or laying tiles. Restoration work is as follows:
- For greasy stains, use a two percent hydrochloric acid solution. The entire surface with stains is treated with the composition until they disappear.
- As for rust stains, copper sulfate or a two percent solution of hydrochloric acid will help to deal with it.
- If the stains are deeply ingrained into the plaster and cannot be cleaned, then you will need to seal the area with dye or white.
Advice! Whatever surface you're cleaning, it's important to clear it of dirt and dust first. Only after this other manipulations are performed.
The restoration of the surface under the tiles requires special attention. The procedure is as follows:
- using a rubber mallet, tap the surface of the wall. This is the only way to identify a peeled or poorly fixed area;
- When the area is found, you need to knock harder so that the tile falls off. If it is not removed in this way, then you will have to act radically - break it. The process requires accuracy: the tile is broken from the center so that the adjacent one is not damaged;
- If after removal there is a strong layer of plaster left, then it is not necessary to knock it down. The new tile should be glued more securely using a special glue;
- when the plaster falls off, the area is cleaned, primed and plastered again. After drying, a new tile is glued.
How is the need for major façade repairs determined?
Its participants are:
- government contractor;
- authorized employee of the management organization (authority);
- active members from among the owners appointed at the general meeting.
After checking and analyzing all the damage, the commission decides whether major repairs are needed or whether it is permissible to limit ourselves to only superficial restoration. This decision is not based only on one’s own convictions, but must comply with regulatory documents.
Major repairs of an apartment building are carried out with the permission of the commission
So, major repairs are carried out if:
- the insulation is worn out or the seams between the slabs are broken, which affects the penetration of moisture onto the load-bearing wall;
- 35% of the external walls contain destruction of the external cladding;
- The drainage system is broken.
Based on the results of the inspection of the external walls, the commission brings up for discussion what capital work needs to be carried out depending on the nature and extent of the damage.
Features of repair of plastered surfaces
Plaster is an affordable and very versatile building material, which is often used for cladding facades. The advantages of this mixture are its low weight, wide selection of colors and ease of use. When restoring the plaster layer, you need to pay attention to the following points:
- It is prohibited to apply gypsum mortar to a concrete base;
- the layer of plaster should be no thicker than three centimeters;
- Grouting should be done four to five hours after applying the plaster.
If the total area of destruction of the finishing made from the plaster mixture is more than thirty percent of the entire surface, then they turn to a major overhaul of the entire building. It involves removing the old coating and creating a new finish.
Technology for repairing the facade of a building with painting and preparation
Technical recommendations on the technology of painting interiors and facades of residential and public buildings under construction
Date of introduction 2003-10-01
DEVELOPED BY SUE "NIIMosstroy"
APPROVED by the Head of the Department of Scientific and Technical Policy in the Construction Industry A.N. Dmitriev on August 18, 2003.
INSTEAD VSN 45-96
These recommendations have been developed to replace VSN 45-96 “Instructions for the technology of painting interiors and facades of residential and public buildings under construction and reconstruction.” The recommendations outline the technical characteristics of a wide range of currently used paints and varnishes and coating systems, the use of which increases the decorative effect and service life of protective coatings, presents the technology for the production of finishing works when painting and finishing the surfaces of building structures with textured compositions, and provides a map of step-by-step control quality.
State Unitary Enterprise "NIIMosstroy" (OS "Mosstroysertifikatsiya") and State Institution (OS "ENLAKOMsertifikatsiya") have formed a database on the certification of paintwork materials and paintwork systems, as well as a database of expert opinions on the quality of finishing materials produced by domestic and foreign manufacturers for the period 1997-2002 .G. The technical requirements for coating materials are based on the analysis of this information.
Technical recommendations are intended for engineering and technical workers and foremen of construction organizations carrying out interior and exterior finishing work, as well as designers and organizations carrying out quality control of work.
Recommendations were developed by the State Unitary Enterprise "NIIMosstroy" (Ustyugov V.A., Kalinin Yu.A., Voropaeva R.I., Yastrebova Z.A.) with the examination of the State Institution (Usatova T.A.)
Technology of façade plastering over thermal insulation
If the thickness of the load-bearing walls is less than 40 cm, there is a high probability of freezing during the cold season. As a result, damp spots will appear on the inner surface of the walls and within one or two seasons you will be forced to fight mold.
Of course, freezing and subsequent thawing negatively affects the structure of the building materials from which the walls are erected. The most effective solution to the described problem is to insulate the walls using polystyrene foam boards and subsequent plastering.
The stages of plastering over thermal insulation are listed in this diagram.
Stages of plastering over thermal insulation boards
Let's consider the above points in more detail. The surface intended for plastering is a wall covered with foam plastic. Our task is to protect the thermal insulation material from the effects of environmental factors and at the same time cover the gaps between the slabs, which act as cold bridges.
Plastering on polystyrene foam - a step-by-step overview
We lay a polymer reinforcing mesh with a cell size of 5*5 mm on top of the slabs. We fasten the mesh with special dowels, the seal of which ends in a wide plastic cap.
Scheme for applying the plaster layer
Then we prepare the plaster solution. Tile adhesive can be used as a dry mixture for external work. This mixture is characterized by high strength and resistance to cracking. The only drawback of tile adhesive compared to conventional DSP is its high price.
Finishing external walls using foam plastic
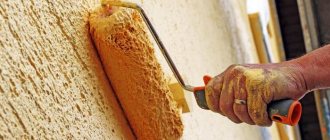
Using a narrow spatula, spread the prepared mixture along the edge of a wide spatula and press it into the mesh, leveling the layer over the surface. After the entire surface is covered with mesh and plastered, we proceed to grouting.
Grouting is done with a foam float, which is carried over the surface in a circular motion with gentle pressure. For greater efficiency, we moisten the plastered surface with water from a spray bottle from time to time.
After finishing the grouting, we wait for the façade finish to dry, after which the surface is primed and painted with special paints intended for exterior work.
Do-it-yourself major wall repairs: when necessary
In most cases, we start working on walls only after major renovations. Cosmetic interventions every few years do not count. If you follow the advice of experienced builders and finishers, the first signs of a major overhaul are:
- Strange sounds when tapping plaster. If, when knocking, the wall begins to sound like an empty drum in at least half of its area, do not tighten it. The plaster can fall off at any moment, and re-glued wallpaper will not only not hold it in place, but will also become an aggravating circumstance.
- Damp external walls. Have you noticed such a problem? The reason is the leakage of the walls and their constant contact with the street environment. A simple replacement of drywall or wallpaper is not enough; you need to work closely with the plaster.
- Worn electrical wiring. To replace communications you will have to make a lot of effort. If the problem is local, then you can get by with local repairs, but in the case of laying new electrical wiring throughout the entire apartment or room, it is better not to save money and do two things at once.