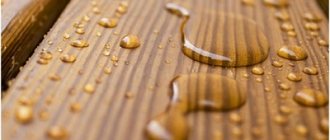
Due to increased air humidity, constant exposure to moisture on the floor, walls and even ceiling, the bathroom is exposed to various harmful effects. These include the appearance of mold and mildew, the growth of bacteria, which causes an unpleasant odor, as well as the destruction of wall, floor and ceiling materials, especially if they are made of wood. The absence or poor waterproofing of a bathroom in an apartment can lead to constant leaks. To avoid unpleasant consequences, you need to carry out waterproofing work in the bathroom correctly and efficiently.
Types of waterproofing
Waterproofing materials are laid between the base of the room surfaces and the decorative trim in all areas where contact with water is possible. To decide which waterproofing is best for a bathroom, you need to consider its types.
Pasting
This type includes roll or film materials made from cardboard or synthetic fiber impregnated with bitumen. The roll is cut into separate strips, laid on the surface and heated with a gas burner, after which the material melts, firmly adhering to the floor.
Disadvantages: roll waterproofing is not suitable for use in a small, unventilated room, since a gas burner cannot be used under such conditions. The joints of the strips must be sealed with silicone or polyurethane sealant, otherwise they will allow moisture to pass through. Inconvenient during installation.
Advantages: in addition to those materials that need to be heated, there are waterproofing materials that themselves adhere to the surface. Such materials are reliable and convenient to use. In addition, roll insulation is cheaper than other types.
Coating
These are thick compositions in the form of powder, paste, mixture based on bitumen, sand or cement with the addition of various polymers.
Coating materials for waterproofing a bathroom come in two types: one-component and two-component. The first type contains water and waterproofing agent, and the second includes polymer binders. Two-component waterproofing, in addition to protecting against moisture, contains substances that protect the surface from the formation of fungus and mold.
Disadvantages: bitumen mastic can crack due to temperature fluctuations, and it also has an unpleasant odor during application. In addition, it is worth noting the long drying time of the waterproofing layer, reaching three days. It is necessary to apply several layers, each of which must dry for at least 6-8 hours.
Advantages: coating waterproofing for the bathroom with various plasticizers and polymers has a composition that penetrates into all cracks and cracks, filling them and protecting them from water penetration. Easy to apply. The adhesion coefficient of the mastic allows it to be applied to hard, flexible surfaces. Coating materials combine well with the “warm floor” system and are able to withstand elevated temperatures.
Liquid formulations
Liquid waterproofing for the bathroom is used to cover walls, floors, and ceilings. It is available in two types: liquid glass and liquid rubber. Liquid glass consists of a solution of potassium and sodium, fills the pores on the surface of concrete or wood without forming a film. Liquid rubber is a bitumen emulsion diluted with water. Absorbing into the surface of the floor or walls, it forms a reliable top protective layer.
Disadvantages: liquid waterproofing of the bathroom floor is done only under the screed.
Advantages: liquid waterproofing of bathroom floors is universal in relation to various types of surfaces. This material has a high coefficient of adhesion to various coatings, is resistant to various aggressive environments, and can be used to insulate walls or floors where there is constant contact with water.
Tools
Among the large number of options for waterproofing, liquid glass stands out with many advantages. We will consider the features, application and characteristics of this material further.
Table of contents:
- General concept and advantages of liquid glass
- Scope of use and types of liquid glass
- Recommendations for working with liquid glass
- Liquid glass - operating instructions and application
- Liquid glass for waterproofing - nuances in application
- Recommendations for choosing and purchasing liquid glass
- Tips for preparing solutions based on liquid glass
General concept and advantages of liquid glass
The term liquid glass refers to a solution based on water and sodium or potassium silicates. It has a viscous structure, and therefore copes well with work related to waterproofing.
If we consider the composition of liquid glass, then small crystals are easily visible in it, which, after being applied to the surface, enlarge, filling small cracks. It is thanks to this structure that liquid glass is characterized by a water-repellent and airtight effect. Liquid glass is used in a variety of fields due to its environmental friendliness and harmlessness.
If we talk about the principle of action of liquid glass, then it has adhesive ability. This manifests itself due to the fact that liquid glass molecules enter the molecules of the solid material, which do not have close bonds with each other, which penetrate into the interior of the solid molecules and thus their adhesion occurs.
Liquid glass resembles rubber, which is in a liquid state. After its application, the surface becomes water- and airtight. The composition of liquid glass includes calcium or sodium silicate, to which soda or quartz sand has been added. During the production of liquid glass, it is crushed, fired and re-crushed into a powder mass.
The liquid glass mixture has the following properties:
- water repellent - that is, water repellent;
- antiseptic - prevents the formation of bacteria;
- antistatic - no electrification;
- hardener - the material on which liquid glass is applied becomes durable;
- acid protectant;
- fireproof material resistant to fire.
Choosing the right waterproofing material
To get high-quality work on applying a moisture-resistant coating to a bathroom in a frame house or apartment, you need to know what kind of waterproofing to choose for the bathroom and how to install it correctly. So, the best waterproofing for the bathroom is selected according to the recommendations:
- To lay tiles on a concrete base, it is recommended to use a coating mastic. They are easy to use, withstand temperature changes, and are suitable as a base for screed. Coating materials are also best used if the surface area to be treated does not exceed 10 sq.m.
- Liquid rubber is suitable for use in the bathroom, regardless of the finishing material.
- Waterproofing bathroom walls is often done using cement-polymer compounds. This material is excellent for tiling.
- Waterproofing the ceiling in the bathroom, as well as the walls, can be done with liquid glass - this plastic composition forms a thin surface that protects against moisture, fungi, mold, without weighing down the wall surface.
- Waterproofing a bathroom in a wooden house is conveniently carried out using roll materials, and protecting the floors under the bathroom floor is done using coating mastic.
- Waterproofing drywall in the bathroom is carried out using coating compounds, on top of which tile adhesive and the tile itself are applied. Coating mastic is also ideal for covering plaster walls in the bathroom.
In this case, it is always possible to combine different types of materials. For example, to cover a large area of the floor surface, roll waterproofing is used, and for the walls of the same bathroom, coating or liquid insulation is used.
How to properly dilute
The quality of the composition and ease of application depend on correct mixing. The volume of additives should not exceed the main substance, so professionals recommend maintaining precise proportions. Let's look at the main methods of diluting materials.
Technology for PVA
The glue breaks down when exposed to sunlight. In order not to lose properties, the connection is carried out indoors. The maximum concentration of additives is 20%. When tiling, the ratio of PVA and cement is maintained in proportions of 1 to 5, for plastering work - 1 to 3. If a mortar is prepared for screed, the proportion of adhesive varies between 5-10%.
Concrete is combined with sand and diluted with cold liquid. The additive is added to the composition in the required concentration. The glue has a very viscous consistency, which makes mixing difficult. PVA is first diluted with water to a milky state (1:2), after which it is poured into the solution.
Mixing technology Source domwine.ru
Waterproofing a bathroom in a wooden house
Waterproofing the floor and walls in the bathroom of a wooden house can combine not only treatment with water-repellent compounds, but also the use of water-resistant wood species for finishing.
Waterproofing drywall in the bathroom is not required if you use moisture-resistant material or aquapanels. They do not allow moisture to pass through; you just need to treat the seams with sealant or glue.
Waterproofing a wooden bathroom in a private house is carried out with special care in those places that are subject to constant interaction with water: the ceiling, walls above the shower stall, near the sink, toilet, around the bathtub and the entire floor surface. To waterproof the ceiling, you can use film material or regular polyethylene film attached with a construction stapler, as well as coating mastic. It is imperative that a vapor barrier material be attached to the beams above the ceiling.
Waterproofing of a wooden floor in a bathroom is carried out at two levels: on the joists under the rough flooring and under the screed before laying the flooring. Many experts agree that it is better to use rolled material, and treat the corners, pipe outlets and sewer holes with a coating compound extending onto the walls by 20-30 cm, covering the edges with sealing tape. Sealing of seams between the joints of strips of rolled mastic should be done using glue.
Thus, high-quality waterproofing in the bathroom with your own hands will allow you to avoid many problems associated with constant exposure to water and high air humidity in the bathroom, and a wide selection of materials will help create a comfortable atmosphere.
The need for waterproofing measures arises during the construction process. It is no less relevant in cases where repair and restoration work is carried out. Thanks to the use of modern technologies and materials, waterproofing can be carried out on vertical, horizontal surfaces, and structures of complex shapes. In order to get the maximum result, you should choose the right insulating material and strictly follow the technology for its application. The choice should be based on the operational and structural features of the building. The most popular nowadays are roll and coating (liquid) waterproofing materials.
Moreover, the last group is considered the most extensive. It is accompanied by a whole range of compositions made in the form of mastics, pastes, paints, impregnations, etc.
The main task performed by liquid waterproofing is to protect the surface from moisture penetration. With its help, you can process the most complex and uneven areas (basement walls and ceilings, foundations, roofing with parapets, seams, ventilation and antenna outlets, abutments and much more).
Based on the type of composition, liquid waterproofing is divided into:
– dry mixes and mastics. The insulating composition is obtained by mixing binding components, additives and fillers. The heat resistance and flexibility of such mixtures make their use quite wide, from injection (spot) and joint insulation to general waterproofing of surfaces; – water repellents. These are special compounds that, after application, form a protective, durable film that does not allow moisture to pass through. Using water repellents, you can treat surfaces without prior preparation; – penetrating liquid waterproofing. It fits perfectly on any type of surface, filling microcracks and pores. When moisture enters, a chemical reaction occurs, resulting in the growth of crystals, which fill cracks and damage.
Advantages and disadvantages
Why is liquid glass so good that it is so often used in the construction industry? Why is it sometimes indispensable? All thanks to the advantages of this material:
- liquid glass has excellent adhesive properties, which allows it to penetrate deep into the structure of the material being processed;
- the composition can be used to coat products made of wood, concrete, metal, stone;
- the composition is moderately fluid, but at the same time quite viscous, due to which the coating from it will be reliable and uniform;
- the consumption of this substance is minimal. If you compare liquid glass with rubber, then you will need half as much of the former as the latter;
- The price of the material is low, liquid glass is the most affordable way to protect the surface from moisture.
Liquid glass has many advantages
On a note! You need to work with liquid glass quickly; it is advisable to apply the composition in one approach, without leaving uncoated areas. Only then will the treated surface be reliably protected.
Liquid glass also has disadvantages. In its pure form, such a coating turns out to be quite fragile, and even a small blow can destroy it. Also, the composition cannot be applied to brickwork, because it will collapse quite quickly. The disadvantages include the need to quickly work with the substance, and the fact that it will be impossible to apply a finishing coating to such a layer - paint and varnishes do not stick to liquid glass.
How to work with liquid glass
Liquid glass - all the pros and cons
The most popular among other compounds used for waterproofing are liquid glass and liquid rubber. Their undeniable advantages over rolled materials include:
– the ability to process foundations and other surfaces of complex shapes; – the ability to form a continuous coating without seams and cracks; – higher moisture resistance compared to bitumen compositions; – non-toxic, – do not “float” in the heat; – do not ignite; - do not require preheating; – provide high adhesion to the surface being treated.
Liquid glass has found wide application for waterproofing various surfaces due to its almost instant crystallization. The working solution is applied very quickly, with complete setting of the material occurring within a maximum of 30 minutes. Its undeniable advantage is the ability to use it in wet conditions. Liquid glass completely fills cracks and damage, forming a waterproof film.
When working with this material, it is very important to follow the dosage. If mixed with concrete or other compounds, it is very important not to exceed the dose. The result of such an error may be a “tear” of seams and joints.
Methods for waterproofing a foundation with liquid glass: – coating. The protective composition is applied to the surface of the foundation using a special roller, brush or brush. If further installation of rolled materials is planned, then liquid glass is diluted according to the instructions and applied using a spray bottle in two layers. The depth of penetration of the composition into the foundation is 2 mm. In this case, cracks and micropores are filled. – processing of seams and adding liquid glass to the cement mortar. If the house has a prefabricated foundation, additional treatment of the seams with a composition that includes cement and liquid glass will be required. – injection. To restore the foundation, injection waterproofing is carried out with the same liquid glass. To do this, holes are created in separate parts of the base (preferably from the inside) using a perforator, into which the mixture is subsequently pumped.
Advantages and disadvantages of use
The operational warranty is 5 years. During this time, there is a gradual decrease in the thickness of the protective layer, up to approximately 1 mm per year. To extend the life, experts recommend applying a layer of paint over the glass.
The composition completely penetrates into the structure of the coated material, filling the cracks and pores.
It is beneficial to add silicate directly to the concrete solution itself. At the same time, it becomes more transparent and stable. But the setting and hardening time is reduced, which is very important if the work is being done for the first time and leveling takes a lot of time. The frozen mixture is not suitable for reuse. Therefore, it is advisable, when pouring screeds over large areas, to prepare the solution in portions.
If more than 10% silicate is added to concrete, it will become weak and easily damaged by mechanical influence.
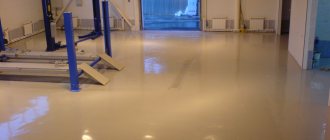
When the floor is filled with liquid glass, the result is a very even, smooth plane, a beautiful appearance, and maximum resistance to mechanical stress is achieved. This surface is easy to clean and prevents the emergence of pathogenic microorganisms. Therefore, such spraying is often used in hospitals.
The coating can be carried out independently, without the involvement of labor. This is an inexpensive material.
In certain options, additional materials are added that extend the service life of the interlayer.
Waterproofing the floor with liquid glass
To obtain a hydrophobic solid coating, it is recommended to apply liquid glass to the floor. Activities are carried out in the following order:
– portions of the solution are poured onto the concrete screed in strips located parallel to the wall; – using a spatula, the solution is evenly distributed over the surface to be treated; – the floor is rolled with a roller to eliminate bubbles and unevenness; – alignment is carried out with a squeegee.
The layer thickness should be 3-5 mm. Remember that the solution should be applied within 30 minutes, so carefully calculate the amount of the mixture. Flooring in one room should be done in one go. After the coating has completely dried, you can apply a layer of polyurethane or epoxy varnish. This will give the floor a special shine and transparency. The surface can be used only by knocking. If there is a “warm floor” system under the floor covering, it is recommended to start using it no earlier than after 7 days.
Use with concrete
Silicate is used with concrete in 3 directions:
- To waterproof it, spray it in a number of layers.
- Additive during the production of concrete mortar.
- Admixture for the purpose of creating several types of marks. When dry, a monolithic state is achieved.
Concrete should especially be supplemented with liquid glass, which is used to fill floors in buildings located in damp lowlands, where groundwater is located directly in the upper layer of the earth. It is also worth making a foundation with such an additive in such buildings. This will help protect the building from moisture, even without treatment with other antiseptics.
With the appropriate knowledge, it is possible to prepare such solutions yourself at home.
When the composition is added to the concrete mixture for pouring the screed, it will make the base stronger and acquire waterproofing and heat-resistant properties. The coating with such concrete is created in swimming pools, furnaces, and wells.
The addition of silicate is permissible in cement grades M300, M 400.
It is unacceptable to add more than 10% glass to the concrete mixture; the best option would be 7%. The higher the percentage, the faster the initial setting occurs.
Silicate is not added to the ready-mix concrete. First, if necessary, dilute the glass with water, then add the dry cement mixture.
When sodium silicate is added to cement, its mass increases by 25%.
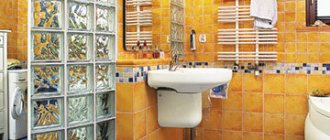
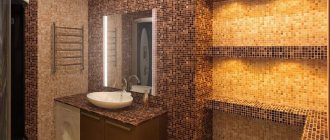
Bathroom waterproofing
The use of this composition allows you to reliably protect the room from moisture and aggressive alkalis. Using liquid glass, waterproofing a bathroom can be carried out in the shortest possible time. In this case, not only the surfaces of walls and floors are treated, but also seams and joints in cast iron pipes are sealed. Using this material you can reliably protect metal fittings from corrosion and get rid of leaks. In addition, the composition is used to isolate communications supplying drinking water, which significantly expands the scope of its application.
Bathroom surfaces can be treated with liquid glass in several ways. But before starting work, the surface should be leveled and degreased. If impregnation of a concrete surface is intended, the solution should be applied in several layers. This will make it possible to provide a penetration depth of up to 20 mm. In addition, liquid glass can be used for waterproofing pipeline joints, as well as as a universal adhesive for laying a wide variety of materials.
One of the important stages of bathroom renovation is waterproofing, and here homeowners are often faced with the question of what is best to use under tiles to build a reliable and durable bathroom water barrier.
Rules for working with material
Carrying out work on covering floors with liquid glass requires compliance with the rules for working with the material used:
- The room temperature is maintained within the range from -5 degrees to 30 degrees.
- For large areas, the mixture is prepared in portions to avoid premature hardening. Since this composition is not reused.
- The composition is not added to the finished mixture; it is first diluted with water and then poured into the dry mixture.
- When pouring, avoid drafts and the use of air conditioning and heating devices. Drying also occurs under the same conditions.
- The concrete surface must be degreased and, if necessary, puttied.
- Liquid glass can penetrate into a concrete floor to a depth of 2 cm, so for maximum surface protection, the treatment is carried out at least 2 layers.
- Upon completion of the process with the material, you should definitely wash off the remaining mixture from the devices and hands.
We recommend watching the video instructions:
Which areas need waterproofing?
Waterproofing must be carried out over the entire floor area with a minimum overlap of 20-30 cm on the walls. Wall-mounted moisture protection is needed in the area of the bathtub, washbasin, shower and other plumbing fixtures that are installed here. In this case, the wall must be covered with waterproofing for at least 50 cm to the sides and upwards from the extreme sides of the plumbing, in general, wherever there is a high probability of moisture getting on the tiles. Along with this, it is advisable to waterproof the inside of the plumbing cabinet, where the common culprits of leaks are located: water supply and sewer risers.
Types of coating waterproofing
Materials for coating waterproofing are sold in the form of dry or granular powders, semi-dry pastes, or in ready-to-use liquid form. Also, coating mixtures can be one-component or two-component, the latter, as a rule, are quick-drying and more elastic.
- Bitumen-polymer mastics are sold in finished form. They are made from bitumen binder and polymer fillers. This is an excellent insulating material that has high elongation and recovery rates, is non-toxic, odorless, resistant to temperature changes and aggressive environments. You can use bitumen-polymer mastic under tiles only on the bathroom floor, subject to subsequent filling with a thin screed.
Advice! Coating waterproofing is most relevant in small bathrooms, up to 7 square meters. m.
- After complete polymerization, the composition is leveled and becomes a seamless surface with excellent moisture-proof properties and high elasticity. It is recommended to apply a thin screed over bitumen-latex waterproofing. And after it dries, you can lay the tiles.
- Budget moisture protection. One of the most inexpensive and short-lived ways to provide waterproofing in the bathroom is acrylic enamel. It is applied to the surface in several thick layers (at least 3-4 layers). Soon the paint will crack. As an alternative, some use liquid glass, but it can provide the necessary water barrier only in combination with a plasticizer, which makes the layer plastic after drying.
Rolled adhesive waterproofing materials
Materials for roll waterproofing are made on the basis of polyester or fiberglass. On the bottom side the canvas is covered with a layer of adhesive that provides adhesion to the base, and on the top with a component that improves adhesion to tile adhesive.
Roll waterproofing is laid on a previously prepared, cleaned and leveled surface. Height differences within 2 mm per 2 linear meters are allowed. The list of their advantages includes an affordable price, strength of attachment to the subfloor and the ability to begin cladding almost immediately, without observing a long technological break.
In addition, roll materials are suitable for waterproofing wooden floors. They are quite elastic, withstand the movement of wood and at the same time maintain solidity. It is advisable to use the roll sealing method over large areas.
The sheets of material must be overlapped by at least 10 cm on each other and overlap the walls. The joints are carefully glued with a roller. It is important to remove all air bubbles; if the slightest gap remains, all the work has been done in vain.
Necessary tools and materials for waterproofing
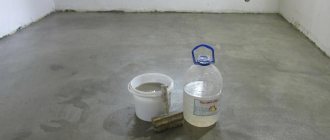
In order to treat floors with liquid glass, you will not need many materials and tools:
- brush and spatula - for applying the composition;
- directly the liquid glass itself;
- water, if you need to dilute the composition;
- rags - to remove drops of the composition that fall where they should not;
- container - for pouring liquid glass in order to achieve ease of use;
- degreaser - will be needed for pre-treatment of the subfloor;
- broom, dustpan, vacuum cleaner and other cleaning equipment - to clean the surface being treated.
Cleaning the subfloor
Advice! When working with liquid glass, it is recommended to wear old clothes that you don’t mind getting dirty, as well as gloves and a mask. So these items should also be prepared in advance.
When and how to start installing moisture protection
One of the key questions at this stage of repair is when to waterproof: before pouring the screed or after. But there is no consensus on this matter yet. And all because each of the options has both its pros and cons.
- Performing a screed on top of the waterproofing will provide a smooth concrete base, which has excellent adhesion and will provide good adhesion to the tile adhesive mixture. Bitumen, bitumen-polymer and bitumen-latex compositions, as well as roll materials, can be used.
- Builders who prefer to seal over the screed justify their decision by the fact that in case of leaks, the concrete mass will be protected from moisture. At this point, everything is correct, but the durability of the cladding glued directly to the waterproofing through a thin layer of tile adhesive cannot be guaranteed. In this case, only cement-polymer mixtures or rolled waterproofing are suitable for arranging moisture protection.
- You can also take the third path, the most expensive in terms of time and money, but also the most reliable - combined waterproofing.
Features of combined floor waterproofing
Prepare the rough base. If necessary, perform partial repairs or completely dismantle the old screed.
- The prepared and cleaned surface is coated with concrete contact primer and left until completely dry.
- Along the beacons, a screed with a height of 3 cm is pulled out, into which a reinforcing mesh is laid.
- After a week, the surface is cleaned of dust and primed in two layers.
- Apply a layer of any coating waterproofing along the perimeter of the room in the wall-floor corners, allow it to dry, and then seal the corners with waterproof tape. The entire surface of the floor is now covered with a coating waterproofing mixture, extending onto the walls at least 20 cm. Three layers are applied, and the drying interval for each is strictly maintained.
- Concrete contact is applied to the last layer of dried waterproofing.
- A day later, a second tie is pulled out with a minimum thickness of 1.5 cm.
- After final drying, the floor is covered with a primer, allowed to dry and the tiles begin to be laid.
Features of wall waterproofing
To waterproof walls under tiles, cement-polymer mixtures are used.
- Before applying waterproofing, the walls are primed in two layers. Particular attention is paid to the angles and entry points of the pipes.
- Special cuffs are put on the pipes, and the corners must be sealed with sealed waterproofing tape.
- Sections of the walls are coated with a waterproofing compound, and after it has completely dried, they are covered with concrete contact to improve adhesion to the tile adhesive. For reliability, a reinforcing mesh is additionally embedded into the waterproofing.
- After the layers have dried, they begin cladding.
In construction work and waterproofing in particular, a trend is clearly visible: the more expensive the material, the more durable and reliable it is, and vice versa. Therefore, it is difficult to unambiguously answer the question: what kind of waterproofing to choose for tiles. It is important to consider the time frame in which you need to invest, evaluate your own strengths if professionals are not involved in the repairs, as well as financial capabilities.