It is advisable that the installation of OSB on walls be carried out by specialists. OSB (oriented strand board) is a material that has gained popularity in the construction and finishing of houses. It is distinguished by a large number of advantages that allow it to be used in the external decoration of a home, in the cladding of internal walls and in the construction of partitions during the redevelopment process. Due to the growing demand for this material, it is worth considering what the advantages of OSB boards are and where they are used, as well as what finishing methods exist for this material.
Advantages and disadvantages of OSB boards
According to builders, finishing walls with OSB boards has a number of advantages:
- Compared to other materials that are sold in sheets, OSB walls are relatively inexpensive.
- The manufacturing method assumes resistance to damage, which ensures a minimum of defects during production, transportation and after installation.
- They are lightweight, so installing the slabs on walls does not place a large load on the supporting structures. Also, due to their lightness, these slabs are easy to move from place to place and install with your own hands.
- These slabs look attractive on their own. There are several options for additional decorative finishing.
- This material is resistant to moisture, rot, fungal infection and is of little interest to insects.
- The strength of the structure of the slabs does not prevent them from being drilled or processed in any other way.
All these properties make the material suitable for external and internal work. However, when choosing, you should pay attention to the reputation of the manufacturer. Some companies do not follow technology in order to save money, so their products turn out to be of poor quality from an environmental point of view. Such stoves can emit harmful substances. Any OSB product does not allow moisture and steam to pass through, so in rooms with such finishing it is worth taking care of adequate ventilation.
Application of OSB
OSB in a frame house is attached to the outside of the building on the frame posts. The construction project is drawn up for this material. The dimensions of the panels must be taken into account so that OSB is attached to the walls of a frame house with joints on the frame posts. Masters of frame construction must take this point into account.
The building is lined with OSB from the inside. Thanks to this technology, the panels are securely connected to the base of the building. The design of any frame house involves the use of materials of different sizes, so the slabs will still have to be cut. The task of the professional drafting the project is to ensure that there are fewer such manipulations with the building material. Openings and other openings are made on the slab using a special tool. Construction tape is fixed to the joints of the slabs. This manipulation is carried out to seal the walls. This has a positive effect on the indoor microclimate. Thanks to sealing, a frame house sheathed with OSB has a long service life. Even if a frame house is being built without OSB, there must be sheathing, and you can use plywood, chipboard, fiberboard, and isoboards.
OSB panels are not always used only for rough work, and their non-standard texture will be attractive in itself, and therefore the slabs are also used as a decorative material indoors, as is shown in most video tutorials.
Areas of use
There are two main ways to work with OSB boards. Firstly, this is the rough cladding of the main wall, inside or outside. This option allows you to reduce the number of joints, level the wall and make it more durable. To achieve such results, it is worth considering a number of points:
- The material is fastened every 30 cm in intermediate areas and twice as often at joints.
- The outer edges are attached to the wall every 10 cm at a distance of at least 10 cm from the end of the sheet.
- For ventilation, gaps are left between them, which are then filled with sealant. This is one of the main ways to provide ventilation for external walls.
- When finishing a wall made of OSB boards, you should take care of protection from wind and excessive humidity. Taking into account the characteristics of the material, it is worth using a superdiffusion membrane for working outside; for finishing the inside, foil polyethylene is useful.
Other nuances in the question of how to cover a wall with OSB boards are discussed in the following video:
OSB partition on a wooden profile
Since the base of the material includes wood in chip fragments, when making OSB boards they are coated with a special composition. It contains resins, wax or paraffin. It not only has a fastening effect, but also gives the surface evenness and smoothness, so additional finishing of OSB walls is associated with additional difficulties. Firstly, the outer layer does not have any adhesive properties. Second, some components contain grease and other substances that can bleed through exterior finishes and ruin the final appearance, so you should consider decorative treatments for the material before finishing OSB walls inside your home.
Details
Type of OSB
The following types of OSB panels can be distinguished:
- OSB-1 - such boards have low mechanical strength, and they are used only for structures that will not bear a load-bearing load. These will include interior items inside a frame house, and the panels are also used for finishing walls in a dry room.
- OSB-2 - this type of material can be used inside a dry room for wall or ceiling decoration.
- OSB-3 – panels are used indoors where there is high humidity.
- OSB-4 - they have increased mechanical strength, and they can be used inside and outside buildings.
In frame houses, OSB-3 and OSB-4 are used.
Comparison with CBPB and plywood
Is it possible to finish a frame house using OSB panels? This will be a pressing question among users who build this type of building. Professionals strongly recommend using such products for finishing buildings, as they have a number of advantages over other similar products. Plywood So, OSB sheets and plywood have similar characteristics, but there are certain differences between the materials. The main difference between the products will be the manufacturing method. For OSJ, wood chips are used, and plywood is made from several layers of veneer. This will make the panels a cheaper material to build. For the same reason, OSB cladding of a frame house is done much more often. In terms of characteristics, such a product will be inferior to plywood. It is not the most durable and resistant to moisture, and therefore will wear out more quickly, especially in harsh climates. Cement-bonded particle boards OSB has common characteristics with cement-bonded particle boards. Such building materials will be in the same price range. But OSB panels are inferior in certain indicators, and CBPBs are environmentally friendly and also an extremely safe material that is resistant to negative environmental influences and has increased mechanical strength. The downside of the product will be its enormous weight. OSB boards are several times lighter than such a material, and cement-bonded particle boards are inferior to OSB also in that when edging and fastening these panels, flaws may appear on them. For such reasons, the installation of OSB on a frame house is completed much more often, since the material is light weight, affordable and has excellent characteristics.
Application of OSB outside
If you are making external cladding of a frame house using OSB boards, then it is important to think about the finishing in advance. As a rule, siding is used for this or plastering is performed with primary reinforcement and insulation. The optimal OSB thickness for finishing a frame house is from 1.1 to 1.3 cm. This is an ideal option, but if the OSB thickness for walls inside a frame building is less than 1 cm, then the frame should have additional types of jibs. Finishing the OSB frame The algorithm for finishing the frame is as follows:
- It is important to attach the panels to the frame so that the slab joint is located exactly in the center, and the gaps between the sheets are from 0.3 to 0.5 cm.
- Sheets of material are attached along the common perimeter and grip the bottom trim, and the trim edge is aligned with the edge of the material.
- For multi-story construction, it is important to place the slabs in such a way that they cover both floors at once, and the middle of the panel should overlap the top view of the frame.
- It is important to cut door and window openings from a single slab.
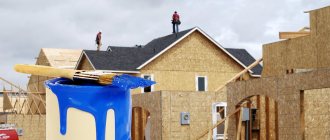
To fix the material, spiral-type nails or even self-tapping screws are used, and both types of fastening are also combined. To ensure the sealing of the building, a sealant is used, which is made on the basis of acrylic resin. It is used to process all joining seams and other gaps or cracks. The pie inside a frame house with OSB is made using windproof and waterproof materials. A superdiffuse membrane is perfect for this. Such wall structures create a comfortable microclimate for living indoors. The pie inside a frame house with OSB on the outside should under no circumstances contain films or glassine. Such materials have low vapor permeability, which will create favorable conditions for the active life of an aggressive biological environment. If you insulate a frame house using OSB panels without the use of additional building materials, then the inside of the building will be very cold even in severe frost, even with ideal insulation. For this reason, we do not recommend ignoring the use of heat-protective products. Sheathing instructions
If we talk about how to properly sheathe frame houses using OSB panels, then the finishing will look like this:
- Panels are attached to the base.
- Next, a layer of vapor insulation is laid.
- Insulation material is attached.
- An additional layer of film is laid for vapor insulation.
- The pie is covered with panels and the external final finishing is done.
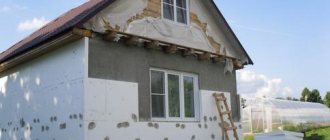
As an alternative to decorative materials, experts suggest using OSB boards for external cladding using a wet facade system, which involves the use of plaster to level the building base. Finishing “wet facade” We looked at the installation of OSB panels on the walls, and they do everything like this:
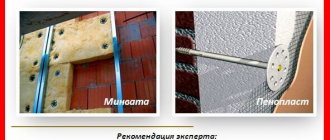
- Material for thermal insulation is fixed to the panels - polystyrene or mineral wool can be used as such products.
- Install a reinforcing mesh - this material will increase the adhesion of the plaster and insulation material. The mesh makes it possible to apply the product even in a very thick layer.
- Afterwards, starting plaster is applied - it makes it possible to hide surface imperfections and level the building base.
- The final finishing is carried out with a finishing composition - for this it is recommended to use decorative plaster, and you can choose materials with different textures that will create unusual textures on the surface (“bark beetle”, “fur coat” and others).
- If white plaster was used for decoration, then it can be painted - for this purpose paint and varnish materials with any shade are used.
The photo shows a wet facade on OSB. When making a wet facade, you need to remember that the materials are applied only after the previous layer has dried. If the exterior of the frame OSB house is finished with high quality, then the period of operation of the building will increase without losing its attractiveness even externally.
OSB inside
These types of slabs are still used inside frame private buildings, and the material will increase the thermal and sound insulation of the building.
Working order:
- Insulation material is fixed to the wall surface - in this case, it is recommended to use mineral wool, and it will be securely fixed vertically and will not start to roll down.
- Vapor insulation of the walls is carried out - for this it is important to fix a film for vapor insulation on top of the insulation. It will protect the building foundation from moisture, thereby extending the service life of the building. A construction stapler is used to fix the material. The film is fixed overlapping each other by 15 cm, and the joints are glued together using masking tape.
- They attach OSB boards - after that they do the decoration, and since the boards have uneven surfaces, it is worth choosing this type of finish to hide such imperfections. If, for example, the panels are painted, then all the disadvantages will be noticeable, which will negatively affect the appearance of the cladding.
OSB panels are not always used only for rough work, and their non-standard texture will be attractive in itself, and therefore the slabs are also used as a decorative material indoors, as is shown in most video tutorials. OSB panels for finishing First, they make lathing, and for this, slats are attached to the sides of the walls, and then to the ceiling/floor. Next, the profiles will be fixed along the common perimeter. They are attached so that the panel joints fit perfectly onto the rail. The profiles are installed using building regulations so that after fixing the slabs the surface is perfectly flat, without depressions or bulges. Panels are attached to the profiles, and self-tapping screws can be used for installation. The plates are fixed with a small gap of 0.3 cm, and in order to increase the attractiveness of the material, it can be coated with a transparent paint composition.
There are two most popular ways to work with OSB boards: covering walls from the outside, inside, and installing partitions for remodeling rooms. When covering a room, you can hide all visible defects and level the walls. To do this, you must follow the recommendations of experts:
OSB is a relatively new building material that is widely used in construction and renovation. The slabs have a large number of advantages, thanks to which it is possible to sheathe both internal and external walls. Inexpensive finishing material is also used for the manufacture of interior partitions. Let's consider what advantages OSB has, where the material is used, and what features can be noted.
Table of contents:
- Features of OSB boards
- Disadvantages and advantages of OSB boards
- Application of materials, features of OSB boards
- How to prepare OSB boards for finishing
- Variety of options for finishing OSB surfaces
- Application of OSB for roofing
- How to fix OSB boards indoors
- How to cover walls with OSB panels with your own hands
Features of OSB boards
The OSB panel is made from compressed wood shavings and special resins. Resin products are water repellent. The layers of material are arranged in a perpendicular sequence, this allows increasing the strength of the slabs. The OSB surface can be painted or varnished. The boards have a variety of characteristics and when choosing a material, these features are taken into account. For interior decoration, experts recommend using OSB-3 and OSB-4. These types of products have maximum moisture-resistant capabilities and are easy to finish. Such slabs can more easily withstand adverse effects and operational errors. When choosing slabs, be sure to check the class of the material:
- the first class of panels is used in dry places;
- the second class of panels is recommended for use as a construction or repair material in dry rooms;
- the third class of slabs is used in rooms with high humidity;
- The fourth type of slabs is suitable for structures with high mechanical loads and rooms with high humidity.
Disadvantages and advantages of OSB boards
The material is recognized as suitable for finishing work and manufacturing structures for various purposes. Builders are unanimous in their opinion that OSB panels have a number of advantages:
- in the end, walls made of slabs will cost an order of magnitude cheaper than after finishing with other materials;
- the resistance of the material to mechanical stress helps prevent the occurrence of defects during transportation, during wall cladding and during operation;
- the sheets are light in weight, which does not create additional load on load-bearing walls, and the products are easy to carry;
- the external attractiveness of the slabs allows you to avoid finishing;
- the composition of the products allows you to prevent damage to the material by fungus, mold or insects;
- Despite the density of the sheets, they are easy to drill, process and install.
The disadvantages of the material are the need for additional ventilation in a room lined with OSB. Also, when purchasing slabs, you need to pay attention to the manufacturer and product reviews: if technology is violated, the material can evaporate toxic substances and be environmentally unsafe.
Application of materials, features of OSB boards
The use of the material in construction and decoration is very extensive. The product allows you to hide unevenness and external unattractive aspects. The panels are manufactured using a method that eliminates internal voids or defects, this prevents deformation and bending of the sheets directly in the structure. The use of panels allows:
- not only to finish the building for protection from dampness or for insulation purposes, but also to abandon additional finishing actions;
- used in the construction of frame-panel houses (certain categories of OSB boards);
- construct formwork for building the foundation;
- sheathe buildings from the outside, finish houses made of timber and logs;
- build sheathing and rafters, since the slabs can withstand the weight of the roof even under heavy loads in the form of precipitation;
- lay floors or level even large uneven areas.
In general, the use of panels can be divided into the following categories:
- for roofing;
- for walls;
- for the floor.
There are two most popular ways to work with OSB boards: covering walls from the outside, inside, and installing partitions for remodeling rooms. When covering a room, you can hide all visible defects and level the walls. To do this, you must follow the recommendations of experts:
- at joints it is necessary to fasten the material more often than in intermediate areas;
- the outer edges should be attached to the wall surface every ten centimeters;
- to ensure the flow of air, gaps are left between the slabs, which are filled with sealants, this will allow the walls to be ventilated;
- When covering external walls, you should think about waterproofing and protection from winds.
How to prepare OSB boards for finishing
There are a lot of materials for wall finishing, but most of them need finishing: siding, foam plastic or sheathing. The large area of the sheets makes it possible to make fewer joints during finishing. Before covering, it is necessary to carry out preparatory work, which consists of the following steps:
- level the surface of the slab - defects and unevenness of the product must be sanded or puttied;
- process the edges - so that the porous edges do not absorb a large amount of paint and varnish material, it is necessary to round the edges;
- processing gaps between OSB panels - putty is used for this.
Preparatory work is necessary to extend the service life of the material.
Variety of options for finishing OSB surfaces
Since processed chips of various types of trees are used to make slabs, for painting you should choose a special helmet, which is intended for finishing wood products. Instructions are attached to each can, you must follow them carefully. Particular attention should be paid to the incompatibility of some materials. To avoid unpleasant moments, before painting the entire surface of the slab, you should try the paint on a test fragment. This will show whether the materials are compatible. The surface of OSB boards can be treated using the following materials:
- Varnish - it helps to preserve the original appearance of the material, while protecting the slab from negative influences from the outside. Experts recommend applying varnish to a sanded surface or after sanding. Craftsmen also advise avoiding water-based varnish, as such a product can deform the surface. Oil or acrylic varnish is recommended to cover the surface of the slabs.
- Paint for interior work - the same tips apply here as for choosing a varnish. Only if there are no strict requirements for the quality of the surface, water-based paint can be used. To prevent the slabs from becoming deformed, painting should be carried out simultaneously on all sides of the slab. Acrylic dyes are considered the best for application to OSB.
- Stain - used to emphasize the structure and appearance of OSB. In some cases, the stain is diluted with a solvent or acetone. The latter substance dries quickly and does not raise the pile of the product. A polyurethane primer is applied on top. Materials for dissolving stain are toxic, so it is necessary to protect the respiratory tract when working with the substance and ventilate the room.
- Patina - used to artificially age the surface, in order to achieve the desired result, patina is applied to the primer layer, not to the stain.
- Wallpaper - before gluing wallpaper, you should remove the paraffin coating of OSB. The layer is removed using sandpaper. Then two layers of primer are applied and putty is applied. To avoid the wallpaper coming off the surface of the slabs, experts recommend adding PVA glue to the wallpaper glue.
Very often, the new owner plans to remodel the home for himself, and to do this, he demolishes the old interior partitions. New ones must be installed in their place. Previously, plasterboard, SML, and boards were actively used for these purposes, but recently they have given way to OSB boards. It is recommended to use sanded panels if you plan to focus on the appearance.
Application of OSB for roofing
OSB of the third and fourth classes is often used for roofing work. To do this, take material with a smooth edge or lock. Experts prefer a lock-type product. There are important points that you should pay attention to before starting work:
- The distance between the load-bearing beams should not exceed seventy centimeters, no matter what kind of roof the material is used for: sloping or flat.
- Since the slabs expand slightly, a small gap should be left between them, no more than two millimeters.
- Gaps are made for each linear meter and along the perimeter of each slab; in this case, a gap of about three millimeters is recommended.
- Attach OSB boards to the supports using nails, the distance between them is about ten centimeters.
When using the material, it is necessary to pay special attention to the quality of the product and fasteners, due to the fact that the material will be subject to heavy loads from adverse weather conditions and precipitation. The roofing structures themselves are also not static, so builders are advised to carefully analyze the following points:
- when attaching slabs to joists, you need to use ring or ruff nails;
- It is not recommended to use self-tapping screws; they are not strong enough for roofing work;
- in order to choose the correct length of nails for fastening the slabs, it is necessary to add forty to fifty millimeters to the width of the material;
- The material is attached at such main points - along the rafters, slab joints, ridge cut, along the edges.
How to fix OSB boards indoors
Indoors, the slabs are also mounted on the floor or ceiling. The choice of fasteners and fastening pattern are determined by the material of the surface on which the slab will be laid. The installation pattern is considered typical, this allows you to calculate the number of screws. According to experts, when laying OSB, thirty pieces per square meter are required. It turns out that a standard size slab will require up to a hundred screws. When buying fasteners, give preference to high-quality products, do not strive to purchase the one that costs less. For the floor, the material has also begun to be used more and more often. It is characterized by moisture resistance, high thermal insulation properties, and environmental friendliness. The panels are superior to recently popular materials such as plywood or planks. The wear resistance of OSB exceeds the listed building materials. One layer of slabs can be laid on a concrete screed. A small gap of two to three millimeters should be left between the edges of the panels for a possible increase in the volume of the product. The material is easy to lay independently even for a person without experience in such work. The panels are easy to cut and install. They can be installed using screws, nails or similar fasteners.
How to cover walls with OSB panels with your own hands
OSB is increasingly being used for interior decoration. But before you start work, you need to prepare the material, let’s look at what exactly is needed. The tools you will need are:
- perforator;
- drill;
- screwdriver;
- hammer;
- plumb line;
- roulette;
- building level;
- marker.
If you still have questions about how to cover walls with OSB boards, do roofing work, or lay them on the floor yourself, watch the video, which will answer all your questions about the rules for working with panels. The main thing is not to violate technology and use the correct class of slabs for a particular case. If you have any questions, watch the video on this topic:
On video: how to choose putty.
Finishing with paint or varnish
Painting or varnishing walls is one of the budget ways to decorate the walls of rooms. But in order for the layers to lie evenly, and there are no unpleasant surprises in the future, it is worth considering a number of points.
First, you need to inspect all the mounting points of the plates for incompletely driven nails or screws that are screwed in. Such minor imperfections can lead to rust stains showing through the paint. In the case of nails, it is worth using a nail hammer, since when working with a hammer, not only will the result not be sufficient, but the wall sheathing will also suffer.
If it is planned that the interior walls will be painted, it is worth using acrylic sealant to treat the joints, since the paint does not adhere well to the silicone type.
An obligatory stage of work is priming the surface. It will provide the material with greater adhesion properties. In addition, the layer will lie more evenly on the prepared surface and give the corresponding effect. After the first coat of primer, you need to pay attention to the condition of the pile. After such treatment, it can rise and the wall will lose its evenness.
Varnish
Since the sheets are 90% made of wood shavings, the plane itself looks very good. All it needs is a little shine and a protective film of paintwork, and several layers of applied varnish can provide this. At the same time, at your request, the surface can be either shiny or matte - depending on the type of coating chosen. In addition, tinted or colorless compositions are also sold, which can be tinted to any shade of your choice.
There are models of panels made from shavings that have already undergone preliminary preparation such as grinding. If the smoothness of the surface is important to you, it is better to choose polished models - the coating fits better on them and creates a polished feeling. The varnish must be of a type that is intended for wooden parts.
When working with particle boards, you can use the technique of applying several layers for different purposes - patina, mother-of-pearl and a tinted layer. As a result, you can get a very beautiful and unusual coating that looks very extraordinary. The order of work and execution technique are reminiscent of working with decorative plaster.
Preparing OSB walls for wallpapering
Wallpaper is considered the most popular option for wall decoration, so it is used in rooms with walls finished with OSB boards. Sometimes such a need arises in the process of redevelopment of space. So, before making a partition, you should make sure that it is in harmony with the rest of the interior.
Before you start wallpapering, the wall must be primed. When working, use regular glue. However, for it to be more effective, it is necessary to add PVA to it.
If necessary, you can plaster OSB boards.
OSB wall putty can be used if there is a need for the finished wall to become universal for applying any type of decorative coating. With this type of wall treatment, you should pay attention to some features:
- The putty is applied to a clean surface. The presence of dust, dirt or traces of other building materials on the wall can adversely affect the quality of the coating, so before applying the putty composition it is worth washing the wall well.
- It is worth paying attention that the heads of nails and screws are recessed as deeply as possible, and it is better to remove the top layer with sandpaper. The surface for putty should be slightly rough.
- It is better to treat the joints between the plates with nitro putty. This will ensure evenness and strength. As an alternative, you can use body putty, since its properties are designed for moving objects. In this regard, the composition has not only lightness, but also great connecting properties, and it does not collapse on the wall for a long time. After completing the preparatory work, a layer of putty is applied.
- After applying the composition, you can begin priming the surface.
This option is convenient because now any decorative material can be used on top of the primer layer without regard to the features of OSB boards.
OSB boards are a universal material for cladding walls of a house or finishing rooms inside it. This raw material is used both to strengthen walls and create partitions. It is quite durable, lightweight and resistant to mechanical stress, humidity, fungus and insects.
In order for this coating to last as long as possible, it is worth considering several factors before attaching OSB. This is especially true for the distance between nails and screws, as well as the location of the joints. The appearance allows the use of OSB boards without any decorative treatment. However, they can be puttied, coated with paint, varnish, or prepared for wallpaper. If the technology is followed, the result will be smooth walls, which will be the basis for any interior and will delight its owner for many years.
OSB boards are a laminated board material made from oriented wood chips bonded with resins and synthetic substances. OSB boards of different thicknesses and sizes are available for sale. Depending on the standard size of OSB, it is used for exterior finishing and for installation and finishing of walls from inside the room. After installation, it is necessary to finish the OSB inside the house.
Rules for finishing OSB boards
So, having dealt with the material itself, we move on to the main issue of the topic of the article - OSB finishing. Available in the form of the slabs themselves. Let's start with the fact that manufacturers today offer two types of them: polished and unpolished. If the walls or ceiling of your house are sheathed with the second type, then it will have to be prepared - sanded. To do this, use either a grinding machine or an angle grinder, on which a grinding wheel is placed.
Now about finishing methods.
See also: Catalog of companies that specialize in finishing materials.
Painting
What can you say about this type of finishing? The simplest in terms of labor intensity, but difficult in that OSB boards have minimal adhesion. The paint applied to it “sticks” with difficulty. And if the building is used in unfavorable conditions, then after a year or two it will peel off. This primarily applies to OSB finishing outside the house.
Of course, if you need to paint an outbuilding from the outside, then there are no problems with this. Because in a couple of years it can be painted again. But when it comes to the main house, more serious problems will have to be solved, which relate not only to decorative design, but also to long-term service.
Painting a building made of OSB boards from the outside Source pt.decorexpro.com
Therefore, a few recommendations:
- Before painting, special primers with a high degree of adhesion are applied. They are produced in cans and are called exactly that: primer-paint for OSB. This material is always white, but it can be tinted.
- After drying, the surface is sanded again , and then paint, patina or varnish is applied.
- Instead of a primer, you can use a special putty , which is again covered with primer-paint on top.
As for painting, different types of paints are used for OSB boards, choosing depending on the purpose of the room, price and quality characteristics. The main task of the work manufacturer is to increase the adhesion (adhesion) of the surfaces of OSB boards with the paint and varnish material.
What is OSB board
OSB board material, along with chipboard, consists of an adhesive composition and crushed wood. Chipboard contains small chips that are placed randomly, so this material does not have impact strength and is destroyed when hardware is repeatedly screwed in and out. Oriented strand board (OSB) does not have these disadvantages due to the use of long chips, a layered structure and perpendicular orientation of adjacent layers. Despite the resin and synthetic wax in the thickness of the material, it has low water resistance and is susceptible to deformation when exposed to moisture. Left unfinished for long periods of time, OSB darkens and delaminates.
Basic information about OSB
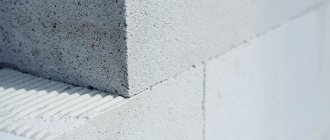
An example of what moisture-resistant OSB boards with factory surface treatment look like
Oriented strand OSB boards are a multilayer construction and finishing material made from chips that are glued together with a mixture of natural resins, wax and a number of syntactic additives. High strength of the material is achieved due to the cross arrangement of chips in adjacent layers.
Oriented strand board is not a universal material, since there are four classes of boards on the market with different technical and operational properties. As a rule, boards with the designation OSB 2 are purchased for interior finishing, while OSB 3, due to its greater moisture resistance, is used for facade cladding.
Among the advantages of the material, I note the following:
- Strength compared to other particle boards;
- Affordable price compared to other categories of lumber;
- Attractive appearance even without additional finishing;
- Low weight compared to other particle board materials.
Are there any disadvantages? Unfortunately, there are, among them:
- High degree of formaldehyde emission and, as a result, harmfulness of OSB boards for interior decoration;
- Low vapor permeability and, as a consequence, impossibility of use when finishing rooms with high moisture content in the air.
How serious are the listed shortcomings? A low degree of vapor permeability is easily compensated by installing a supply and exhaust ventilation system. The situation is much sadder with the release of formaldehyde.
As a result of a long stay in a room decorated with OSB without additional coating, you risk your health. So is it possible to use smallpox for interior decoration of residential premises ? It turns out that it is possible. After all, if oriented strand boards are properly treated, they will become no more dangerous than sheet plywood.
Let's look at several effective and easy-to-implement methods that you can apply yourself.
Is it harmful to use slabs for interior decoration?
According to the technology, the inner and outer layers are glued with various types of resins. The outer layer is glued with a composition based on melamine-formaldehyde resin, and the inner layer is glued with urea-formaldehyde or phenol-formaldehyde resin, the fumes of which are harmful to health. The use of these resins is due to their low cost and high adhesion.
When choosing a material, you should give preference to well-known manufacturers who produce certified products with low emissions of toxic substances. Modern technologies involve the use of polymer MDI for gluing all layers. OSB boards based on polymers have the prefix ECO or Green. Clean finishing will help reduce emissions
Plaster
Naturally, when creative finishing of OSB boards is meant, we are not talking about applying simple types of plaster. We will talk about a decorative plaster mixture. From it you can create various patterns on a plane, give the composition different colors and use various application techniques.
Preliminary preparation of the processed parts consists of their mandatory priming and grinding. After these procedures, you can create a coating of the type as intended. Work with plaster compositions does not differ from the same work, but with plaster applied to ordinary concrete bases.
Decorative plaster mixtures are presented in several versions - some allow you to create a three-dimensional pattern due to their plasticity, others contain special fillers to give the plasters the necessary decorative effect. In addition, the application technique is very important - the more imagination you show, the more unique the coating will be.
Material selection
Before decorating the walls of your house with OSB boards, get acquainted with the largest manufacturers whose products are represented on the domestic market.
- Kronospan OSB boards are produced under license from the Austrian building materials concern in the Belarusian Mogilev. Affordable prices and good quality allow the products to be used in construction and decoration.
- The products of the Finnish manufacturer Kalevala are in demand on the Russian market. The main dimensions of slabs for thicknesses of 8 and 9 mm are 2500x1250 mm, for thickness 12 mm the sheet dimensions are 2800x1250 mm. The slabs with double-sided tongue-and-groove have dimensions of 2500x1250x12 mm.
- The Romanian brand EGGER produces OSB of high density and strength with a low water absorption coefficient. EGGER slabs are environmentally friendly and reasonably priced.
Important! Store OSB sheets in a horizontal position to avoid their deformation.
Types of OSB
OSB varies in composition and production methods. It is necessary to select the material depending on the application:
- OSB-1 has a low density, it cannot be used in high humidity, so it is used for making furniture and as packaging containers;
- OSB-2 sheets are denser, quite durable, but hydrophobic, so they can be used for the manufacture of load-bearing structures and partitions in rooms with low humidity levels;
- OSB-3 is the most widely used type of oriented board. The optimal ratio of strength, moisture resistance and price allows it to be used for external and internal work. Subsequently, it is necessary to finish the walls to protect the OSB from the negative effects of moisture;
- OSB-4 has high strength and moisture resistance, and is used for installation of structures with high load-bearing capacity. Widespread adoption is hampered by high costs.
On sale you can find varnished, laminated and tongue-and-groove OSB boards. Lacquered boards can be used as finishing walls or when laying a finished floor. Laminated ones are used for arranging formwork; the material can withstand up to 10 cycles. The tongue-and-groove material is convenient for installing pre-finished floors; the tongue-and-groove fastening increases the strength of the coating.
Important! Sealing the joints reduces the risk of moisture getting into the joints.
Optimal size
OSB boards produced in Russia are manufactured in accordance with GOST R 56309-2014, which complies with European standards and EU markings. Imported material can be found on sale. The thickness of the sheets varies from 6 to 25 mm. In private housing construction, 9 and 12 mm slabs are most often used. EU standards for OSB dimensions are 1250x2500 mm, and North American material has a size of 1220x2440 mm. To minimize the number of joints, you can purchase three-meter sheets. OSB up to seven meters in length is produced upon individual order. Standard sheets are used for internal and external cladding.
How dangerous are NDEs for health?
The main question troubling those who are planning to buy OSB is whether its close proximity to humans is harmful to health. Most developers have already appreciated the advantages of this material, which is superior in many respects to particle boards and fiberboards, plywood and plasterboard. They are stopped only by doubts about his safety. And they are not in vain, since adhesives based on synthetic resins release dangerous toxins such as formaldehyde, phenol, methanol, and benzene into the environment.
On the one hand, thanks to the polymer binder, it is possible to produce relatively inexpensive building boards with excellent characteristics, affordable for most buyers. On the other hand, volatile toxic substances released into the air have carcinogenic, mutagenic and allergenic effects. They can cause diseases of the skin, visual and respiratory organs, the cardiovascular system, and provoke the appearance of malignant tumors.
Harm of phenol Source infourok.ru
Sanitary and hygienic requirements
It is possible to say for sure whether OSB is harmful for interior decoration only on the basis of tests carried out during a sanitary and hygienic examination. It is mandatory for this type of product, and the seller is required to have a certificate for each batch, presenting it upon request.
It must indicate the maximum permissible concentrations of substances used in the production of OSB and the actual data obtained during tests. By comparing these values, you can independently draw a conclusion about the degree of toxicity of the material.
It should be noted that the health harm of OSB boards decreases over time. Most harmful substances evaporate during drying of hot-pressed slabs. They continue to evaporate during transportation and storage of the material. But as the air temperature rises, the harmful emissions increase.
Advice! If in doubt, you can order an additional examination and measure the content of harmful substances in the room with OSB boards. The maximum permissible concentration of formaldehyde in the air should not exceed 0.003 mg/m3 at a temperature of +20 degrees.
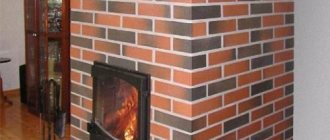
How to decorate a stove from the inside of a room
OSB walls inside the house require a fine finish. It is not recommended to leave the OSB board open. If you want to preserve the structure of the OSB, you should cover it with water-based varnish or paint.
Painting with acrylic paint and varnish
For painting OSB boards, compositions intended for painting wood are suitable. Taking into account the fact that OSB contains resins, paint or varnish from unsanded sheets may peel off, so you must first remove the top layer of OSB. If you want to emphasize the structure of the material, you need to use fine sandpaper. If a smooth surface is required, then sanding should take place in two stages: first with coarse sandpaper, then with fine sandpaper. Before coating, it is necessary to dust the surface with a vacuum cleaner or a special primer.
Is it possible to attach drywall to OSB?
You can attach gypsum board sheets to OSB using guides if the surface is not flat enough. If the walls are smooth and the room is dry, the gypsum board is attached with self-tapping screws directly to the OSB. Try to separate the joints of materials by joining the drywall offset relative to the OSB joints.
Puttying with gypsum putty
Binding resins have low adhesion to gypsum mixtures, therefore, for filling OSB, mixtures with increased stickiness to wooden surfaces have been created. Dry composition Rotband, containing polymer additives, is ideal for puttying OSB. Before you putty the wall, you need to prime it with a composition containing glue, putty and non-woven material. This measure will increase adhesion and prevent surface staining.
How to plaster a surface made of OSB boards
The walls need to be prepared, for which you need to glue the joints with sickle tape, putty them and let them dry. The next step will be the primer. After the primer layer has dried, a layer of plaster is applied, a reinforcing mesh is embedded in it, followed by the application of a covering layer. After the plaster has dried, it is necessary to check the evenness of the wall and, if necessary, apply a finishing layer.
Glass wallpaper sticker
Sticking fiberglass and then painting it allows you to choose the texture and choose the color in accordance with the design of the room. The OSB surface has a heterogeneous structure and poor adhesion due to impregnation. Before gluing wallpaper, you need to sand off the top layer, removing unevenness and impregnation. Apply two coats of primer, drying in between. After preparation, pasting is carried out in accordance with the recommendations of the wallpaper manufacturer. Painting is done in two or three layers with intermediate drying of each.
Important! Buy glue recommended for fiberglass.
How to glue ceramic tiles
In order to firmly fix the tiles on the OSB base, it is necessary to equalize the expansion coefficient of these materials. Select the appropriate option:
- Fix the mesh to the wall and lay out the tiles using regular tile adhesive;
- Lay the tiles directly on the OSB wall using highly elastic adhesive;
- Lay the tiles on an epoxy compound.
Attention! Use epoxy grout, it is more flexible than cement grout.
Liquid wallpaper
Before applying liquid wallpaper, you need to repair large irregularities, glue the seams with sickle tape and putty them. After the putty has dried, prime the base and apply liquid wallpaper according to the manufacturer's instructions. The advantage of liquid wallpaper is its ability to mask small blemishes and uneven walls.
Cladding the walls of a frame house from the inside
Before proceeding with the interior cladding of a frame house, it is necessary to insulate the walls, cover the outside of the frame and the insulation with a vapor barrier.
It is recommended to insulate walls with mineral wool, and it is better to use slab wool, since it is easier to work with than polystyrene foam, it holds better in vertical structures and does not settle down, which happens with fiberglass insulation. Other insulation materials are not excluded and are also suitable for insulating the walls of a frame house. You can learn more about various insulation materials in the article: choosing insulation.
After insulating the walls, they must be covered with a vapor barrier. The vapor barrier membrane protects the wall from moisture penetration, which will keep the house frame and insulation dry. The vapor barrier is fastened with a regular construction stapler, with an overlap of 10-15 cm, and glued together with special double-sided tape.
An example of a frame house wall design. A vapor barrier film is laid on the inside of the frame, and OSB boards are attached on top of it.
The sheathing itself is done as follows: the sheets are screwed one after another to the frame of the house. The gap between the sheets is 3 mm. The sheets are screwed with wood screws 35-40 mm long. All holes (for windows, doors, mounting holes) are cut with a jigsaw.
Is it possible to sheathe a bathhouse and a garage inside with an OSB slab?
Garages and other outbuildings do not belong to the category of residential premises, therefore the requirements for the quality and environmental friendliness of building materials are lower. Finishing the interior walls of the garage with OSB slabs is allowed without further finishing. The requirements for the bathhouse are higher. The influence of high temperatures and humidity contributes to the destruction of OSB. As a result of temperature exposure, harmful compounds are released, so finishing the inside of bathhouses with OSB sheets is impractical. You can use them only as an element of rigidity of the frame, sheathing the building along the racks from the outside, and for interior decoration you should choose lining or imitation timber.
How to make a partition from OSB inside a house and what screws to use?
OSB is a completely suitable material for the construction of internal room partitions. The strength and light weight of the sheets are clear evidence in favor of this product. OSB boards can be mounted on a metal profile (like gypsum plasterboard) or on a wooden frame.
If the second option is used, the wood should be treated with protective materials against mold and mildew, as well as fire retardants.
Now regarding the partition installation diagram , which will be discussed using the example of a wooden frame:
- Markings are made at the installation site of the structure. Lines are drawn along the floor and ceiling, which will serve as guidelines for installing horizontal guides.
- Beams with a cross section of 4x6 cm are attached along the marking lines. If the wall will be subjected to serious loads (for example, you plan to hang furniture on it), it is better to use thicker bars - 5-8 cm. The guides are attached using dowels.
- Vertical posts are installed, which are fixed to horizontal beams using metal corners and self-tapping screws.
- After installing the racks, OSB panels are installed.
The pitch between the racks depends on the width of the slab, which varies. So, if the transverse size of the OSB sheet is 125 cm (the value characteristic of European brands), then the optimal distance between the axes of the vertical beams is 62.5 cm. In this case, it will be possible to screw the edges and the middle of the slab to the frame.
They are attached using self-tapping screws, the length of which depends on the thickness of the sheets and should be 45-50 mm greater than this value. For example, when using material with a thickness of 12 mm, the recommended length of screws will be 60-65 mm.
In the middle of the slab, self-tapping screws are screwed in increments of 30 cm , along the edges - every 15 cm. The distance from the edge is 1 cm. A gap of 1 cm is left between the slabs and the floor. The same gap should remain between the OSB and the ceiling.
Also, the panels should not be installed closely, but at a distance of 3 mm from each other. This will protect the sheets from deformation due to changes in humidity.
Making a partition from bars and OSB - watch the video:
Types of putty for OSB
Despite the content of a large number of synthetic substances in OSB, 85-90% are wood fiber components. For this reason, the material shares many of the properties of wood, including the ability to absorb water. In this regard, certain requirements are imposed on putties for OSB boards. In order for the treated surface to serve for a long time, you need to choose a suitable composition, otherwise unjustified costs cannot be avoided.
It is worth paying attention to trusted manufacturers, especially when you plan to putty the surface for painting. These brands are deservedly in high demand:
- SOPPKA is a universal composition for various types of particle boards
. - NEOMID is a water-based polymer mixture.
- Semin sem – putty is suitable for use both indoors and outdoors.
Most of the unsuccessful results are due to the miscalculations of unskilled craftsmen who performed the putty.
The duration and quality of the repairs depends on the correct choice of putty.
Oil-adhesive
The oil-adhesive composition is most often used for processing OSB boards before further use of finishing materials. However, it is important to take into account that the room must be well heated. Drying oil is used as a binder, and the fillers are:
- glue;
- lime;
- water;
- adhesive plasticizers.
To make oils dry faster, manufacturers add driers. Oil-adhesive putties are intended for indoor use. Recommended coating thickness is up to 1-2 mm. Suitable for cases where you plan to wallpaper or paint walls.
Among the main advantages are the affordable price, high level of adhesion, environmental friendliness, plasticity, and ease of application. At the same time, there are also disadvantages. Firstly, the finished coating is not resistant to mechanical stress. Secondly, this is a poor choice for wet areas. Thirdly, this putty cannot withstand temperature changes. Fourthly, it is not suitable for every finishing material.
Oil-adhesive
Polymer
Polymer compositions are made on the basis of latex or acrylic. This is one of the effective ways to provide protection to structures made from OSB boards. By including modifying additives, putty can be used to treat surfaces of rooms with high levels of humidity, both outside (facade) and inside. Among the advantages:
- a very thin coating is created - no more than 1 mm;
- high adhesion rates;
- snow-white shade;
- good sound insulation;
- vapor permeability;
- no smell;
- moisture resistance;
- antiseptic qualities;
- heat-resistant, plastic and durable mixture.
One of the main disadvantages is the high cost. This can hit the family budget hard, especially when a large amount of work is planned. Also, the mixture dries out quite quickly, which requires immediate action from the master.
Attention!
It is worth considering that you need to work with putty at a positive temperature - in cold weather the mixture loses its elasticity.
Polymer
Epoxy and alkyd
Both alkyd and epoxy mixtures help create a coating that resists mechanical stress. Surfaces after treatment have high rates of adhesion to finishing materials. At the same time, epoxy and alkyd putty are not widely used for treating the surfaces of OSB sheets during large-scale work. This is due to not the most affordable price.
In addition, epoxy putty, although it creates a strong coating, is vapor-tight. This surface has poor adhesion to the finish. Specifically, alkyd compounds are extremely toxic, and therefore are mainly used in vehicle repairs. Such options are suitable for local repairs of small areas.
Epoxy and alkyd
Gypsum and cement compositions - suitable or not
The choice in favor of cement or gypsum mixtures is due to ease of use and low cost. The finished rough coating is really durable. However, professional finishers do not recommend using such mixtures. This is explained by low resistance to deformation against the background of natural processes (the volume of particle boards changes).
During operation, due to exposure to moisture and temperature fluctuations, the coating will begin to expand. As a result, the gypsum or cement putty will begin to move away from the walls. As a result, the protective properties of the coating are reduced, as is the service life of the material.
The wood-based material will begin to absorb moisture from the applied finishing materials. At the same time, the risk of mold developing under the finish increases, causing the structure to lose its strength. For this reason, it is better to choose elastic compounds for processing OSB sheets. Only in this case can you avoid deformation of the finished coating, keep the walls intact and at the same time extend the service life of OSB boards.
Gypsum and cement compositions are not suitable for working on OSB
OSB production technology
Boards for interior decoration are made from small components of industrial trees. To do this, large planed chips are glued with resins of various modifications, adding synthetic wax and other chemicals for strength.
Each subsequent layer of wood chips is laid perpendicular to the previous one, therefore OSB is recognized as a fairly durable construction and repair material.
After laying, the workpiece is pressed under strong pressure and high temperature, which provides the tile blocks with the following properties:
- Ease of processing;
- Resistance to moisture and temperature changes;
- High retention rate of fastening devices;
- Absence of knots, voids, delaminations and other defects;
- Protection from damage by insects and fungi.
- Strength combined with the lightness of the material, making it easy to work with.
OSB puttying technology
When the choice of material has been made and all the necessary tools have been prepared, work can begin. The sequence of actions does not depend on the planned method of finishing OSB for wallpaper or painting. The technology itself looks like this:
- Stage I – priming. It is necessary to apply 2 layers, which allows you to create a protective film on the surface. As a result, the likelihood of stains from resins and tannins in the wood tends to zero. The drying time of the primer is from 4 to 12 hours.
- Stage II – puttying. Work should be performed only at positive temperatures, and the humidity level should not exceed 60%.
- Stage III – grinding. At this stage, all irregularities are removed, making the surface smooth. In addition, dust is removed.
- Stage IV – reinforcement. The reinforcing layer is attached using the overlapping method.
- Stage V – leveling. The reinforcing layer is closed and the entire surface is leveled. Next, finishing work is carried out using the selected finishing option (wallpaper, paint, etc.).
Attention!
The technology is applicable to both vertical and horizontal surfaces.
Wall reinforcement appears as a reliable guarantee of the absence of cracks in OSB. For this it is better to use some elastic material. A good solution is painting non-woven fabric or fiberglass mesh.
After installing OSB sheets on the walls, you can begin preparing them for further finishing.
Surface preparation
Before applying putty to OSB panels, it is necessary to carefully prepare the surfaces to be treated. A mandatory step is applying a primer, without which the putty will not adhere to the OSB boards or it will fall off. That is, the composition provides the necessary adhesion.
It is important to pay attention to the reinforcement of surfaces. The painting interlining is glued onto the slabs with an overlap using a special wood compound. The reinforcing mesh is fastened with a construction stapler and also overlapped (100 mm). In this case, the end of the canvas should in no case be at an angle. There should also be no sagging. Fastening the mounting corners protects the corners from damage and extends the life of the finish. They are also mounted with a stapler.
Puttying on walls
When the preparatory stage is left behind, the most important work begins. Treatment of vertical surfaces with putty is carried out according to the following instructions:
- OSB boards are coated with a primer in two stages, and special attention is paid to the ends of the panels. After applying the first layer, be sure to give it time to dry. Only then proceed to the repeated priming procedure. The mixture is applied with a roller or brush, whichever is more convenient.
- Putty is applied only to the joints of OSB sheets, wait until it dries.
- The treated areas are sanded.
- Reinforcement is carried out (fiberglass mesh or non-woven fabric).
- External corners are reinforced by fastening metal slats.
- When using ready-made acrylic putty, it is advisable to add 2 tbsp. l. PVA glue (for strength gain).
- The entire wall is covered with the prepared mixture in 3 layers with breaks for each of 12 hours.
- When the coating is dry, the surface is sanded and dust is removed with a damp cloth.
At the very last stage, the walls are primed with a mixture that is suitable for further finishing.
The primer coating is applied in two layers
Plastering on the ceiling
Ceiling surfaces are generally processed in almost the same way as walls. However, the procedure is fraught with a number of features:
- The ceiling is primed exclusively with a brush and not with a roller.
- After covering the OSB with a primer, go over the entire surface of the ceiling with a plastic scraper. This allows you to remove drops of the mixture that do not dry, which makes it inconvenient when applying putty.
- After priming, wait 3 to 4 hours.
- Sand the surface with sandpaper to level it.
- Reinforcement is also performed, and the material is fixed over the first layer of putty. Three more layers of putty mixture are placed on top of the mesh or non-woven fabric. This will reliably hide the reinforcing coating from view. As a result, there should be not three layers on the ceiling, as on the walls, but four.
- When choosing an acrylic mixture, do not apply it like cement mortar. A small amount is scooped onto a spatula and smoothed over the surface in the direction of natural light. That is, initially parallel to the window, and then from it to the opposite surface.
All these features must be taken into account, otherwise the desired result will not be achieved.
Applying putty to the ceiling has its own nuances
Puttying on the floor
Often, varnish and paint are used as a finishing material for OSB panels. In other cases, laminate or linoleum is placed on the floor. In the latter case, no special preparation is required, which cannot be said about coloring. The consumption of materials for finishing (paint, varnish) depends on the preparation of OSB for further processing. The main goal is the same as with any other conventional surfaces - to ensure high adhesion, as well as to remove unevenness, making the slabs as smooth as possible. Let's look at how to prepare an OSB floor for painting.
To begin with, the entire floor covering is sanded with sandpaper to remove the factory protective coating from the sheets. It is more convenient to perform this process before installing the panels.
Next, inspect the sheets for chips, cracks and other defects. Problem areas and joints are smoothed with wood putty. It is optimal to choose an acrylic-based mixture. To achieve maximum evenness and smoothness, the entire floor is puttied. When the mixture is dry, go over it with fine-grained sandpaper to finally achieve the desired smoothness.
At the final stage, the surface is covered with two layers of primer. Along with the increase in adhesion, the absorption of the paint coating decreases. After the primer has dried, all that remains is to move on to painting.
If OSB is used as a finishing coating, then puttying is necessary
Why is OSB puttying done?
Before focusing on the choice of material, it is worth finding out whether it is possible to putty OSB boards or whether this is really not necessary. It’s worth starting with what this type of material is. Pressed chips are used as the main raw material and at the end, after all technological processes, multilayer (3 or more layers) slabs up to 150 m long are obtained. According to the technology, thin chips are laid in different directions, which makes it possible to increase the resistance of the material to mechanical stress and deformation.
But since it is a wood material, there are a number of disadvantages. The main disadvantage is low resistance to moisture. Putty for OSB boards can protect panels from the harmful effects of various external factors. In addition, the appearance of the sheets is not attractive, and therefore the material needs decorative finishing.
Properly performed puttying of OSB panels opens up a wide choice for subsequent finishing directions
Processing OSB boards with putty has certain advantages:
- Prevention of exposure to moisture contained in the material for decorative finishing.
- Protection from humid air and solar ultraviolet radiation.
- Reduced risk of resolution due to the gradual appearance of resinous substances on the surface of the slabs.
- Protection against the release of formaldehyde, which is contained in OSB panels.
- Wall unevenness is effectively eliminated, which improves the external quality of the coating during further decorative finishing with different materials.
- OSB boards are effectively disguised to imitate concrete or another type of coating, which allows you to effectively hide layers of wood material.
Attention!
Puttying OSB sheets allows you to increase adhesion to finishing materials. That is, before gluing wallpaper, painting or plastering the walls, it is advisable to cover the surface with putty.
Putty protects the material from direct sunlight and fumes