Decorative plaster is a special heterogeneous mass with which various coatings are created. Due to its durability, strength, and wide choice of application techniques, the material is becoming increasingly popular. Preparing walls for decorative plaster is a fundamental stage of the process. The result of the work will depend on how you approach it. Working with different types of solutions requires different levels of preparation. There are silicate, silicone, mineral, and water-dispersion compositions. The mixture often contains marble or granite dust, glass (liquid, crumbs), ash fractions of blast furnace slag, gypsum, cement, lime, and silicone resins. After hardening, they form a beautiful, durable, moisture-resistant surface that does not lose its ability to “breathe”
The aesthetic properties of the finish will be fully revealed only if defects do not interfere with this. We will tell you how to properly prepare a wall for decorative plaster.
Why is preparation for decorative plaster so important?
Despite the fact that the decorative coating itself often imitates rough walls, for example, concrete-like plaster. Surface preparation is an important stage of repair work even for such coatings.
If neglected, this will affect the durability of the plaster:
- Substrates with a porous structure have high moisture absorption (wood, foam concrete, aerated concrete, etc.). They have the property of “pulling” moisture from the solution. Such substrates require careful priming after preparation.
- Smooth bases are characterized by poor adhesion to the decorative mortar, which will lead to its premature peeling.
- Decorative plaster does not adhere to the remains of wallpaper or whitewash. Such an error can lead to the formation of cracks and premature peeling.
Defects can affect the aesthetic qualities of the coating and its service life.
Decorative plaster: main stages of surface preparation
Finishing with decorative plaster is the final stage of renovation, when doors and windows have already been installed, flooring has been laid, and construction waste has been removed from the premises. The material is universal; it fits equally well on wood, concrete, brick, sometimes even metal. It allows the walls to “breathe”, is frost-resistant, moisture-resistant, has a safety margin, and is not sensitive to mechanical stress.
Surface preparation is much the same as preparation before painting. All work can be divided into five stages:
- Removing old coating. Cleaning paint, tiles or wallpaper.
- Remove sockets and switches and insulate wires
- Fastening the reinforcing mesh and applying the cement-sand mixture. The first helps to mask cracks, and the second helps to seal them.
- Elimination of defects. Prevents the formation of cracks.
- Applying primer. Necessary to increase adhesion.
- Puttying. Helps level the surface before the final stage of repair.
Preparing walls for decorative plaster, especially with your own hands, is a long, labor-intensive process. Depending on the coatings applied, it will differ slightly from the standard algorithm described above.
Useful tips
Before carrying out preparatory work and in the process of preparing walls for decorative plaster with your own hands, you must take into account the following expert advice:
- Use masking tape or plastic film to protect the areas of the floor, walls and ceiling adjacent to the wall. Windows, doors and pipes also need to be covered with polyethylene so as not to get dirty during work.
- Each layer of primer and putty must be completely dried before further work can be carried out.
- To prevent the formation of cracks, you need to use a reinforcing mesh.
- When choosing a putty, you must take into account that it must absorb moisture. Oil and alabaster based mixtures should not be used.
- The primer layer on the walls should be approximately 2 mm thick, because otherwise it will not be possible to improve the adhesion of the treated surface.
The thickness of the primer layer should be 2 mm
Thanks to these tips, you can properly prepare the room for finishing with decorative plaster.
It is not difficult to prepare almost any walls for decorative finishing if you adhere to the rules for removing old facing materials from them, technologies for eliminating defects on the surface, priming and leveling the base. In addition, you need to prepare the required tools and materials, and also follow the recommendations of professionals. This will allow you to complete the work accurately and efficiently.
Have you ever had to prepare walls yourself for applying decorative plaster? What coating had to be removed? Share life hacks for different stages of work in the comments.
Features of preparation before applying Venetian plasters
Venetian decoration is a special type of decor that imitates valuable materials. It consists of a polymer binder, particles of marble, quartz, and granite. It looks luxurious and rich, but is more “scrupulous” in preparation, unlike other types of decorative solutions
The material can be smooth or have a slight relief (only 1 mm deep). It is applied to perfectly smooth substrates, so they need to be prepared according to the same algorithm as for painting:
- Remove dirt, remove unnecessary wallpaper, remove tiles, whitewash.
- Align the base with the beacons until it is in perfect condition.
- Carefully and thoroughly sand the base.
- Level it with putty.
- Sand every square centimeter by hand. Perfect leveling cannot be achieved using a tool.
- Apply primer.
During the sanding process, use good lighting directed at the wall. This way you will notice all the flaws.
The material consists of several layers. Its luxury and beauty cannot be fully revealed if the base is not first leveled.
The master has to perform long, labor-intensive work. In the most difficult cases, each procedure will have to be repeated several times to achieve an ideal result.
Secrets of the masters
If you are preparing walls for decorative plaster, then you must follow several rules. There is no need to purchase putty mixtures based on alabaster and oil-adhesive bases. You can prefer any other compositions. The thickness of the primer layer should be 2 mm or more.
It is recommended to apply the putty on serpyanka, which is a self-adhesive mesh. Distribute it along the wall. In this case, surface treatment should be carried out with a large-width spatula. Preparing walls for decorative plaster is carried out using a primer. It is recommended to purchase acrylic mixtures.
Preparation before applying textured and structural coatings
Structural and textured plaster is not as fancy as Venetian decor. It allows the walls to “breathe” freely, is not afraid of water, and fits well on any base. Thanks to these properties, the material allows excess moisture to pass through the room and does not interfere with its natural release to the street. With its help, you can properly disguise minor defects (for example, this will work great with decorative wood-look plaster).
If you prepare the base correctly, the finish will retain its original appearance for decades: it will not peel off or become cracked. The main advantage of the material is the uniqueness of its texture and texture. Even if the repair is carried out by the same person using the same tools, the result will be two different drawings.
Even a beginner can handle the preparatory work:
- Remove all switches and sockets,
- First, clean the base from the old coating.
- Then remove greasy stains, if any, and wash with a weak soap solution.
- Next, leveling is carried out and cracks are sealed with a cement-sand mixture.
- Now you can apply the primer.
- After the composition has dried, puttying is carried out.
- After the layer of putty has dried, it is covered with another layer of primer, but this time with a special acrylic composition.
- It is carefully sanded using fine-grained sandpaper.
After about a day, you can begin applying the finishing touch. If the textured or structural coating will be applied in a thick layer with a pronounced relief (for example, imitation brickwork), then it is not necessary to use putty
Putty technology
It is important to choose the right putty materials. They should not be based on oil-based adhesives, alabaster, etc., which block absorption. Also, you can’t start putting putty until the soil has dried. On average, this may take from 3 to 6 hours.
You need to apply at least two layers of putty. If the wall has significant unevenness, then you will have to putty in 3 layers. Moreover, before applying the next one, each layer must be allowed to dry for 6 to 10 hours, having previously been primed (a universal primer is used for this).
The surface cannot be forced to dry. Drying should take place at room temperature. Then it is important to sand all surfaces thoroughly using fine-grained sandpaper. And finally apply decorative plaster.
Tools and materials required for preparation
To clean and prepare walls for decorative plaster from outdated coating you will need:
- Scrape. Used to clean the base from old wallpaper and paint. It can be replaced with a regular knife.
- A brush with metal bristles for dry whitewash removal.
- Chisel. Useful for removing wallpaper and paint.
- Putty knife. Used to clean the base and when leveling putty.
- Hammer, chisel, chisel. Useful for removing tiles.
- Needle roller. Required for removing vinyl wallpaper that is resistant to moisture.
- Sandpaper for sanding.
From special equipment you can resort to using:
- Grinding machine to level the surface.
- Electric drills with different attachments for cleaning and grinding surfaces.
- A special steamer for removing wallpaper is already equipment for professionals.
To prime the surface you will need:
- Container for solution.
- Roller
- Tassels.
Before leveling the wall, you need to examine it with a plumb line and level. Auxiliary materials will be required: PPE (masks, gloves, respirators), covering material to protect the floor.
How to prepare a wall: removing old coating
The first stage of preparing walls for decorative plaster with your own hands is to remove the remnants of the old finish. To protect the floor from contamination, it is covered with a polyethylene sheet, which is secured at the edges with heavy objects.
All switches and sockets located in the area of upcoming work must be de-energized. There is a risk of moisture getting on them, which can cause a short circuit. After the preparatory stage is completed, you can begin active actions.
Old plaster, tiles
The technology for removing old plaster depends on its condition. A thin layer can be quickly removed in several ways:
- Wet it thoroughly. The soggy mass can be easily removed with a spatula.
- Use a hand grater.
- Use a drill with a special brush attachment.
- Use a sanding machine, which will remove a thin layer of the old finish and collect all the debris in the compartment of the construction vacuum cleaner (they need to be connected with a special hose).
Each method has its drawbacks. If you use water, the floor in the room will be covered with wet, sticky dirt. Dry removal is accompanied by a large amount of fine dust. It is better to work in a respirator. Special equipment for “clean work” using the latest technology will cost a substantial amount.
If you are dealing with a thick layer of old finish that has already begun to crumble and cracked, just use a chisel and a hammer. With their help it is easy to pry and break off large pieces. If the finish is in excellent condition (no cracks or other defects) and is not crumbling, then it can be left.
To remove tiles, use a regular chisel. Much more heavy construction waste will be collected during this work, so it is advisable to prepare containers for its storage in advance. Ceramic tiles can be carefully chipped and subsequently reused.
Removing old paint
Old paint can be removed using a special chemical composition (removal) or using special equipment (hair dryer, drill with an abrasive attachment). In the first case, the solvent is applied to the painted base. After a certain time, the composition softens it. The layer can be easily removed using a regular spatula. After removing the paint, the room must be thoroughly ventilated.
You need to work in gloves, safety glasses, and a respirator. Solvent vapors are very toxic.
A construction hair dryer thoroughly heats and softens the paint layer. After this it can be easily removed. Cleaning using a drill or sander is very tedious, so the method is not suitable for large surfaces.
After removing the paint, it is advisable to prime the base with a special product - contact concrete. The composition improves the adhesion of concrete, brick substrates, alkyd and oil paints and old tiles. Concrete contact should never be diluted with water. Before use, the solution is thoroughly stirred and applied in several layers.
Removing old wallpaper
If the wallpaper is very old and still remembers the times of the Great October Revolution, then to remove it you just need to tear the canvas in several places and “remove” it in pieces. Resistant areas should be moistened with water and cleaned with a spatula or a regular knife. To make the wallpaper peel off faster, add a couple of drops of liquid soap or dishwashing detergent to the water. If you are dealing with stubborn vinyl wallpaper that can withstand contact with liquid, you will have to buy a special needle roller. It will make enough holes in the canvas for water to soak the wallpaper.
There is another progressive method - a special steamer. It heats up the adhesive and the wallpaper falls off on its own. You can buy a chemical solvent that is used by professional craftsmen.
Whitewash cleaning
Whitewash is removed in three ways:
- Wet method. The whitewash is thoroughly moistened with a sponge or sprayed with water from a spray bottle. After getting wet, the layer is cleaned off. This method is inconvenient if you need to process a large area. Whitewash dries quickly, so you will have to clean small areas one by one.
- Wet method for old whitewash. The multilayer coating is first blotted and then cleaned off with a spatula.
- Dry method. Suitable for a thin layer of whitewash, which is removed with a brush with metal bristles. It is pre-fixed on a grinding machine or drill.
Dry removal is accompanied by the release of a large amount of dust. To protect the respiratory tract from its harmful effects, you need to work either in a respirator or in a gauze bandage.
No matter how excellent the condition of the whitewash, it must be removed when preparing the walls before applying decorative plaster. Lime tends to absorb moisture, which will negatively affect the coating and can cause it to peel off.
Surface repair
The next stage of preparing walls for decorative plaster is eliminating defects that were exposed after removing the old coating. Large and small cracks, irregularities, chips - all these flaws become:
- A consequence of errors made during finishing work.
- “Inheritance” after long use.
If the preparation of the walls before applying the finishing is done without the stage of surface repair, then the defects will sooner or later manifest themselves in the form of new cracks or peeled pieces.
- Before repair, cracks are thoroughly cleaned, sanded if necessary, and even widened so that the primer penetrates deeper.
- After the primer coating has dried, the cut crack is filled with a material that is similar in composition to the base material.
- You can use a special liquid sealant. After it hardens, the excess is removed and the surface of the crack is sanded.
If the crack is very long and deep, use a reinforcing mesh, this will strengthen the surface.
Types and features of material
Decorative plaster must have aesthetic qualities and be sufficiently durable.
Decorative plaster coatings in their composition, technical characteristics and method of application are fundamentally different from conventional plaster solutions.
The main purpose of base or finishing compositions is to level load-bearing surfaces, eliminate various technical defects, and prepare them for further finishing.
In contrast, decorative plaster is designed for use in interiors as a final wall covering. Due to the operational and technical features of this material, preparing walls for decorative plaster has its own nuances.
First of all, we should take a closer look at this coating from the technical side: its characteristics, pros and cons, varieties, application, etc.
Varieties
All decorative plaster mixtures are divided into two main categories:
- Natural ingredients.
- Polymer.
The first group includes mixtures prepared on the basis of natural ingredients. These are the following compositions:
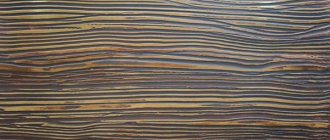
- mineral. Their basis consists of coarse mineral fillers, often painted in different colors. The connecting link in such mixtures is cement. The treated surface has a grainy texture that shimmers in different shades;
- calcareous. This solution is based on slaked lime with the addition of fine sand and cement;
- plaster. Gypsum solutions are easy to use and flexible. They have a number of operational restrictions - they can only be applied to interior walls of rooms with a natural level of humidity.
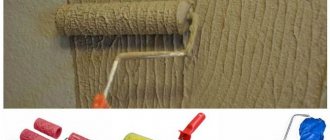
Special texture rollers will help create an original surface.
Polymer compositions can be silicone or acrylic. Based on the technology for creating an aesthetic effect, mixtures are divided into textured and textured.
Texture mixtures have a three-dimensional pattern, applied using a trowel, texture roller, or stencils.
In textured mixtures, the external effect is achieved thanks to a color scheme that imitates expensive coatings - primarily polished marble and granite slabs.
Advantages and disadvantages
The wide popularity of such finishing mixtures is explained by a whole set of positive qualities that distinguish them favorably from most other wall coverings. Among the main advantages are:
- High aesthetic properties. The widest range of colors and textures allows you to give the interiors an exclusive and expensive look that can emphasize the high status of the home owners.
- Durability of use. The high quality of plastering compositions allows them to withstand various external influences - aggressive chemical environments of detergents, mechanical loads, ultraviolet radiation, etc.
- Environmentally friendly. The coating does not interfere with natural gas exchange between the interior and the external environment. As a result, a favorable microclimate is created inside the apartment with a natural level of humidity and oxygen content.
Only a professional can create a particularly complex texture.
Exclusive plaster coatings are not without some disadvantages. Of course, they are not so critical, otherwise these mixtures would not be so in demand among buyers. There are only two main disadvantages that may influence the choice:
- high price. The price of the material is quite comparable to the high aesthetic effect that can be achieved with its help. Usually it is several times higher than the cost of conventional base or finishing compositions;
- difficult application. Applying the mixture to the wall has a number of features, sometimes very difficult from a technical point of view.
Therefore, before choosing this material, you need to soberly assess your skills in the finishing craft. Otherwise, you can waste expensive plaster mixture, or, as an option, spend extra money on the services of professional finishers.
Putty and leveling
Crooked walls are a common problem among apartments in new buildings that were built in haste. Eliminating such curvature is an important step in surface preparation. Severe curvature can be corrected using drywall using the frame method. Unfortunately, the lathing will “eat up” part of the space, which will be an unacceptable sacrifice for small rooms.
In case of slight curvature, you can use the same drywall (without frame) or ordinary plaster cement-sand or gypsum mortar.
If an accurate calculation of thickness is required, then special beacon profiles are used.
Stages of wall leveling:
- Primer of walls;
- Installation of beacons - we install them on the same solution with which we level the wall;
- We fill the space just below the level of the beacons with a solution (if the thickness is large, use a reinforcing mesh);
- We align the wall along the beacons by applying the finishing layer;
- After drying, remove the beacons and fill the remaining grooves.
Start installing beacons from a corner. When installing, be sure to use a level in combination with a square, otherwise the room will turn out diamond-shaped.
Putty is a mandatory stage in preparing walls for decorative plaster if we are talking, for example, about Venetian mixtures.
Putty is sold in two versions:
- A ready-made solution, which is hermetically sealed in buckets of different capacities.
- Dry powder requiring dilution.
The first option is more convenient: the putty is homogeneous, easy to apply to the surface, and easy to work with. The dry powder will have to be diluted in the correct proportions and stirred thoroughly until the desired consistency is obtained.
Many types of decorative plaster can be prepared from putty yourself.
“Ready” putty is more expensive than powder, so it is less often chosen in order to save money. The putty is applied in a thin layer because the surface is already smooth. It must be applied with spatulas of different sizes. When finished, sand the wall using fine-grain sandpaper.
Preparation of material and its consumption
The modern construction market offers customers ready-made mixtures in plastic containers and dry powdery substances that must be diluted with water. In the first case, it is enough to simply open the container and mix the composition with improvised means (a long screwdriver, a wooden plank, and so on). In the second, you must first study the instructions provided by the manufacturer, and then prepare the solution in the required proportions. To do this, you will need a mixing container and an electric drill with a mixer attachment.
Preparing a solution of decorative plaster with a mixer
Consumption of main types of decorative plaster:
- Structural compositions - approximately 3 kg of material per square meter of surface.
- Textured plasters - on average 1.5 kg per square meter.
- Venetian plaster - about 150 g per square meter. meter for one layer, the total consumption must be calculated based on the number of layers.
The above data is approximate. Actual consumption depends on application method and desired result.
Preparatory work is both a simple and important part of finishing. In order for the stage of preparing the surface for plastering to be successful, and for the coating to last for many years, it is necessary to follow the above instructions and the recommendations of the manufacturers.
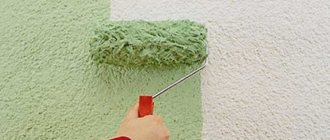
Selection and application of primer solution
Preparing walls for decorative plaster includes the priming stage. Applying the composition will help increase the adhesion of the surface, that is, improve the quality of its adhesion to the coating. The primer penetrates deep into the micropores of the material and provides its protection from destruction and proliferation of fungi or mold. A special primer is selected for each material. For example, acrylic compounds are considered universal, perchlorovinyl compounds are suitable for concrete and brick, and alkyd compounds are suitable for wood.
Padding
The surface needs to be treated with primer before applying any material. The mixture improves adhesion between materials and reduces cladding consumption. Therefore, the operational layer of decorative plaster will be increased significantly.
You can find a large number of different primer compositions in the store. They have their own purpose and scope of use. For example, if the room is quite damp, then there is a risk of mold and mildew. Therefore, it is better to choose a primer containing antiseptic substances. You can also find compositions for decorative plaster on sale. Usually this means Venetian plaster. Once the composition has been purchased, you can begin to work.
Advice! How much primer will be needed? The mixture is applied to the surface of the walls without gaps. It is recommended to apply two layers. First, find out the area of the walls. For example, two walls have a length of 3 m and a height of 2.2 m, and the other two have a length of 4 m and a height of 2.2 m. The total area of the walls is: (3 × 2.2) × 2 + (4 × 2.2) ×2= 30.8 m2. If the primer consumption is 200 ml per 1 m2, then for application in 2 layers you need: (30.8 × 200) × 2 = 12320 ml of composition.
There are three ways to apply the primer:
- roller;
- brush;
- spray gun.
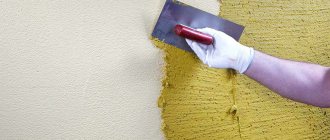
The fastest way to work is with a spray gun. But the equipment is expensive, so not everyone can afford it. The average method in terms of simplicity and speed is to use a roller. On flat surfaces it does an excellent job. But hard-to-reach places are best treated with a paint brush. The primer layer should be uniform. The entire surface of the wall is processed without exception. When the first layer is applied, you need to wait for it to dry. The packaging indicates how long it will take. And only then the second layer is applied. At this point, the preparation of the walls is almost complete. All that's left is the basic putty.
Video about preparing walls for decorative plaster
So we found out how to prepare walls for decorative plaster, so that in the near future you won’t have to undertake repeated wall repairs. Do not skimp on materials when performing work, because stingy people pay twice. Do not waste time and effort, as a high-quality finish is worth the effort. After the composition has completely dried, you can apply a layer of paint to the finish if the resulting color is not to your liking.
To obtain an unusual color texture with sharp or smooth transitions in shade saturation, use two layers of paint and sponges, paint rollers (with special rubber nozzles), and hard-bristled brushes. The original relief can be obtained using an ordinary crumpled plastic bag, which is pressed with force onto the composition that has not yet dried.
Preparing walls for plastering
If, after all, the choice is made in favor of this expensive exclusive coating, you should consider in more detail how to prepare the walls for decorative plaster so that it can last as long as possible.
Preparation stages
Clean the wall from debris and dust and cover it with primer.
The entire procedure for preparing walls for decorative plaster can be divided into several stages.
- Surface cleaning.
- Leveling plastering.
- Primer.
- Putty.
Proper surface preparation implies stage-by-stage and high-quality completion of all the listed works. At the same time, walls can be prepared in a special way for each type of plaster.
Leveling plaster
Application of decorative composition to walls in a new building always requires preliminary leveling with base and (or) finishing plaster. The fact is that new walls, whether they are made of brick, cast concrete or made of wood, always have some flaws.
It could just be small chips and cavities, or seams that are too deep. And there may be more serious defects in the form of crooked walls. Moreover, at first glance, the curvature of the walls may not be noticeable. But finishing in some cases can emphasize this flaw, making it so noticeable that it will cancel out the entire effect of expensive repairs.
It is not possible to correct wall defects using decorative mixtures for the reason that they are designed to be applied in a thin layer. No more than 1.5 - 2 mm. And this is clearly not enough to correct more or less significant defects in the load-bearing foundation.
Therefore, all walls in a new home should be carefully inspected using a builder's or laser level. In case of significant deviation in the vertical or horizontal direction, a leveling plaster layer should be applied.
Alternatively, preparing walls for decorative plaster may involve covering them with plasterboard sheets - the so-called “dry plaster” technology. This method of leveling walls is simpler than “wet technology” and requires less effort and time. To learn how to apply the leveling mixture, watch this video:
However, it should be taken into account that gypsum board sheets together with the frame eat up a significant amount of room space - at least 50 mm for each wall.
Wall cleaning
Thorough cleaning should be done before applying any type of plaster mixture to previously treated walls. During the work, you need to clean the surface from old wallpaper, paint and varnish compounds, putty, right down to the layer of leveling plaster. For cleaning, you can use any suitable tools - spatulas, trowels, picks, grinders.
To remove wallpaper faster, you should moisten it with soapy water or a special wallpaper remover. You can buy it in the same stores that sell wallpaper and wallpaper glue. Ordinary paper wallpaper is simply moistened with the composition using a roller or brush.
Soapy water treatment will help remove old wallpaper
Waterproof vinyl sheets should first be perforated with a needle roller, a “wallpaper tiger” or a regular knife so that the liquid has access to the back of the wallpaper and the surface of the wall.
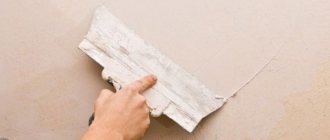
You can try to remove the paint with a spatula, starting from the bubbling and peeling fragments. If it holds too tightly, you should move on to more radical measures - resort to using a grinder or hammer drill. Lime whitewash can simply be washed off with a damp cloth, passing it over the entire surface of the wall several times.
Removing the putty can take quite a long time, since it is applied in a thin layer, but at the same time it has good adhesion to the underlying base. To facilitate its removal, it is recommended to prepare a special composition from a mixture of starch and water in a ratio of 1 to 20 or 1 to 15 in particularly difficult cases. For more information on cleaning the base, watch this video:
The putty walls are moistened with this solution and left to soak for 15 – 20 minutes. After this, simply scrape off the layer of putty using a spatula.
Primer
The primer will improve the adhesion of the wall with the mixture.
The primer allows you to create a strong adhesion between the different finishing layers.
Primer compositions increase adhesion, significantly extending the service life of the coating, therefore the preparation of walls for decorative plaster necessarily includes treating their surface with primer mixtures.
For greater effectiveness, primers are applied in at least two layers. Each subsequent layer should be applied only after the previous one has completely dried.
On the modern market of finishing materials there is a huge number of primer compositions that differ in their purpose and scope. If the walls are located in a room with a high level of humidity, they must be treated with antiseptic primers. These protect surfaces from the formation of mold and fungal infections.
A special primer for decorative plaster is also available for sale. It is used mainly under textured “Venetian plaster”, applied in a thin layer of less than 1 mm. The wall is first treated with a regular primer, after which it dries, a tinted acrylic primer is applied to the wall.
In some cases, instead of a special primer composition, ordinary acrylic paint of the desired shade is used as the underlying layer under the “Venetian”. It allows you to add depth of color to Venetian plaster, which enhances the “marble” effect and gives the wall a more natural shade.
Putty
Keep in mind that textured compositions are applied in a thicker layer than textured ones.
Preliminary puttying of surfaces is carried out before applying textured, colored compositions. If you are going to treat the wall surface with textured plaster, then the puttying process can be omitted.
The fact is that textured compositions - “fur coat”, “rain”, “Leonardo” - are applied in a thicker layer than textured ones. After application, they are further processed with shaped rollers or rubber stamps to give them a textured relief. Therefore, their layer can reach up to 3–5 mm, which is quite enough to mask minor wall imperfections.
If you plan to treat the walls with thin-layer “Venetian” mortars, it is simply necessary to improve their surface with putty. To do this, you need to carefully examine the wall for cracks and crevices, which must be carefully sealed. Over time, any, even minor cracks tend to expand and increase, so defects left unattended can soon transfer to the decorative layer.
To seal cracks, they must be carefully expanded and cleared using a knife or thin spatula. After this, the gap is cleaned of dust and covered with putty along its entire length. Also, before applying the “Venetian”, the entire surface of the walls is puttied to give it a perfectly smooth appearance. After finishing the work and the putty layer has completely dried, the entire surface of the wall is primed again. For more information on how to prepare walls for the bark beetle, watch this video:
If the apartment owner has some experience in finishing work, he can independently prepare the walls for finishing with exclusive and expensive plaster mixtures. But if you have the slightest doubt about your competence, then it is best to entrust the work of preparing the surface and applying an expensive decorative coating to professional finishers.