Types of decorative plaster by material
Decorative plaster is used for design purposes.
The composition affects the technical and functional properties of the solution.
The main connecting component can be:
- silicate;
- mineral;
- silicone;
- acrylic.
Cellulose fibers, metallized threads, colors, pigments, crushed shells, etc. are often used as decorative additives. In addition, now additional substances are often introduced into the mixture to improve performance characteristics.
Mineral
This category includes types of plasters based on cement.
Additionally they may contain:
- clay;
- mineral chips;
- sandstone;
- lime, etc.
The basis of mineral plaster is cement.
Often, additives are added to the composition to give the finished coating a grainy appearance. Decorative plaster is sold in the form of a dry mixture, which can be stored in low humidity conditions for a long time. Ambient temperature is not important. The solution is prepared immediately before use. It can be applied not only with a trowel or spatula, but also with a hardware method. Often this type of material is used to eliminate uneven walls. Moreover, if the expected thickness of the decorative layer is more than 15–18 mm, a reinforcing mesh is used.
Mineral plaster is often used to imitate the surface of marble, granite, jade or other natural stones. There are many application methods to achieve different textures. The material is used for both external and internal work. With its help you can get both a smooth glossy and a rough matte surface.
The finished coating is characterized by moisture and frost resistance. Its main disadvantage is high porosity. It retains dust, lint particles, animal hair and other contaminants.
For cleaning you need to use special products. The finished surface is characterized by fire safety.
Acrylic
This category includes plasters based on acrylic resin. This component is highly elastic, so cracks rarely form on it. The composition can be applied either manually or mechanically. It adheres well to wood, OSB panels, brick, stone, drywall, foam and other porous surfaces.
Acrylic plaster is highly elastic.
To add color, a special pigment paste is added to the mixture. The material is sold in a state ready for application. It is packaged in large plastic buckets.
Acrylic plaster has many advantages:
- It dries quickly and tolerates sudden temperature changes.
- It can be used to decorate rooms with high humidity levels.
- It is allowed to include various additives in the mixture, incl. having antifungal and antiseptic effects.
- The acrylic coating does not absorb dirt and is easy to clean.
The service life of the material reaches 15 years.
At the same time, cracks may form on the plastered surface under the influence of ultraviolet radiation.
In addition, the material is characterized by low vapor permeability.
Silicone
The main binding component of plasters belonging to this category is silicone. The substance is made from resins, so it is characterized by high plasticity.
Silicone plaster is characterized by plasticity.
Plaster is used for interior and exterior work. It is characterized by high resistance to moisture, temperature changes, ultraviolet radiation, etc. An antifungal concentrate, fillers, stabilizers, pigment and other additives are often added to the composition. When applying, no preliminary leveling of the walls is required.
This type of finishing materials is characterized by a high level of vapor permeability, which helps maintain a normal microclimate in the room. Due to good elasticity, defects rarely appear on the finished surface due to mechanical stress. The recommended application tool is a spatula.
Silicate
This decorative material is made on the basis of liquid silicate glass. In addition, it contains additional mineral additives, pigments, etc. This plaster adheres reliably to many surfaces. The finished coating is characterized by high strength and wear resistance. Thanks to its silicate base, it withstands moisture and temperature changes well.
Silicate plaster repels dirt well.
A plastered wall repels many types of dirt. The material is non-flammable and resistant to cracking. It is often used for façade finishing and interior decoration.
Silicate composition is recommended for use when decorating kitchens and bathrooms.
According to the binding basis.
Mineral plaster, with cement, lime or gypsum as a binder. The dry composition is sold in bags of 30 kg, sometimes you can find 50 kg. Diluted with plain water, used with most minerals. It has good vapor permeability and does not burn.
An excellent option for external insulation of a building. These types of plasters are used for interior and exterior work. As described above, it is used for rough work, but you can often see it as a decorative coating with elements of colored marble chips or simply painted.
Interesting fact: During the Soviet era, the types of facade plaster on the market were very limited, so “Armenian” was popular - a mixture of fine sawdust, which was soaked and applied to the wall. After drying, it was covered with plaster.
Acrylic, with acrylic resins in the composition (Polymer). Compared to the previous option, vapor permeability is significantly lower, but there are a number of other significant advantages. It is more climate resistant and moisture resistant. Can be applied to any mineral base, including old ones. Types of plaster for interior decoration of premises with this base are presented in a very wide variety on the market. It covers almost all application effects options.
Silicate, based on “liquid” potassium glass. You can find it immediately diluted, usually in buckets. Applicable to mineral and silicate substrates. Compared to polymer, it has a narrow color line and higher cost. Has increased vapor permeability. Apply only to special silicate primers. In some countries it is prohibited for use due to increased toxicity. Elimination of defects is possible only with silicone or itself. Types of decorative plaster with a silicate base have a wide range of colors, so there are no restrictions on decor.
Silicone with silicone resins in the base. In truth, this material is superior to all other binding components. It has good vapor permeability with a wide range of colors available, is non-staining and breathable. Its service life is the longest. The only thing that confuses many is the price. But many will argue here, arguing that after time, it turns out to be the cheapest. Since it does not require constant attention for a long period of time.
Decorative plaster by type of finish
Plasters are divided into types depending on texture. Their appearance is largely influenced by the additives and fillers included in the composition.
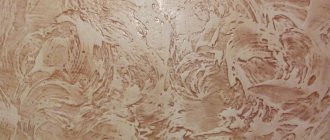
Textured
There are many options for such plaster. They contain additives that ensure the appearance of one or another texture after drying. A striking example is plaster with a craquelure effect. After drying, this coating becomes covered with large cracks. Often several layers of plaster of different colors are applied at once, and only the top one cracks.
When producing mixtures of textured plasters, manufacturers often use the following as a filler:
- small stone chips;
- shell;
- natural wood fibers;
- mica.
Textured plaster contains special additives.
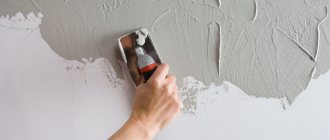
Depending on the relief, the material can have a ready-made pattern, a random pattern, or an even coating with different color effects. Plaster is considered universal. It is applied to the already prepared surface in a layer of 0.2 to 2 mm.
Structural
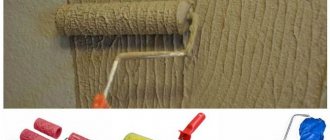
It allows you to create a uniform surface with a particular pattern. To achieve this effect, small quartz grains and other mineral additives are added to the composition. Textured rollers are often used to create complex patterns.
Using this plaster, you can create artistic bas-reliefs of any complexity on the surface of the walls. Such compositions are well suited for the manufacture of three-dimensional panels and imitations of natural stone. Most types of structural plasters can be varnished and painted. This enhances the decorative effect. To add shine to the coating, crushed polyester film is added to the material. Various painting tools are used to apply plaster.
Structural plaster creates a surface with a pattern.
Venetian
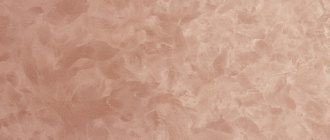
The “Venetian” contains fine-grained marble chips. It is quite difficult to decorate its surfaces. High-quality wall preparation is important. Differences of no more than 3 mm per 1 sq.m are allowed. In this case, the plaster is applied in a thin layer. Because of this, any defects in the base will be clearly visible.
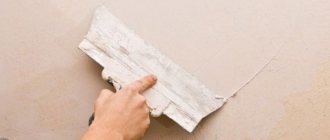
For application, spatulas of different sizes and other tools are used. Thanks to its composition and special installation method, plaster allows you to create a coating that accurately imitates polished marble. To add shine, the “Venetian” is coated with wax or varnish. It cannot be painted, because... this leads to the loss of the original decorative effect.
Venetian plaster contains marble chips.
Flock
The material got its name due to the inclusion of colored acrylic flakes - flocks - in its composition. These fragments can have different sizes and shapes. Flock is more often used to imitate velor, suede, leather, etc., decorating walls, columns and ceilings. The surface is smooth but warm. In terms of tactile sensations, it is comparable to paper wallpaper.
This plaster is characterized by high vapor permeability and is therefore not exposed to mold and other microorganisms. Moisture-resistant mixtures are now on sale. They can even be used to decorate kitchens or other rooms where a short-term increase in air humidity levels is possible. Flock plaster is easy to apply and does not require particularly careful preparation of the base.
Flock plaster is not susceptible to mold.
"Bark beetle"
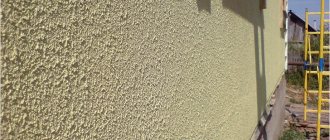
This type of finishing materials is more often used for exterior decoration, less often for interior decoration. It is sold both dry and ready-made. The material contains mineral granules with a diameter of up to 2 mm. When applied, they leave rough, deep marks on the surface of the coating, reminiscent of the passages made by a bark beetle. Thanks to this decorative effect, plaster got its name.
"Bark beetle" adheres well to concrete, stone, brick and plasterboard surfaces. The process of applying it is simple.
Bark beetle is rarely used for interior work.
The composition dries for a long time, so if necessary, the applied mixture can be adjusted.
"Lamb"
The main binding component of such plaster is cement. Additional elements present in the mixture include dolomite, marble, quartz, etc. In addition, additives are often introduced into the material to ensure the coating’s resistance to moisture, temperature changes and ultraviolet radiation.
"Lamb" is sold dry. It is rarely used for interior decoration. It is more suitable for decorating facades: for walls made of brick, plasterboard, cement, natural stone, etc. The application process is simple, but it is important to properly prepare the surface by thoroughly cleaning and priming it to reduce the risk of fungus formation. To form a decorative texture, a special grater is used.
“Lamb” plaster is suitable for decorating facades.
"Fur coat"
This is another type of plaster that is more often used for exterior decoration. It's easy to apply. To create a decorative effect, just use a roller. The basis of the mixture is cement and plasticizers. The material is sold both ready-made and in the form of a dry mixture.
The coating adheres well to any mineral base, incl. brick and natural stone. It can be applied either with a special roller or by machine. At the same time, it is extremely important to properly prepare the base by removing dust from it and strengthening the weakened areas with putty in advance. The “fur coat” can be dyed.
“Shuba” adheres well to brick and natural stone.
Classification of plasters by composition
The properties of the building material depend on the composition. Inexpensive mixtures with large fractions are suitable for rough work. These include:
- Cement-sand. The mixture includes sand and cement. The first fills surface defects, and the second performs a binding function. The proportions vary depending on the task at hand. After applying TsPSh, it is necessary to clean the surface and apply putty to it. Strength is the main property of the CPS layer.
- Plaster. The composition with gypsum is applied in dry rooms. Once saturated with water, such plaster will simply fall off. The main advantage of the material is an even layer that can be obtained quite quickly. You don't need to have any special skills. Gypsum mixtures dry quickly and immediately look beautiful. The material is used if maximum layer strength is not required.
- Calcareous. This type of plaster is used in cases where the plasticity of the material is important. The composition includes a little sand and cement. Most of the volume is occupied by lime. These are light and easy to apply mixtures. They apply quickly and look aesthetically pleasing. Such a layer cannot boast of strength. Tile and stone are not laid on it. This plaster is suitable for painting, applying decorative mixtures and wallpapering.
Rice.
2. Gypsum, cement and lime plasters For surfaces with a minimum of defects, compositions are used that are not leveled, but intended for decoration. Then polymer mixtures are used. This group includes polymer-based compounds. These are acrylic, silicone, silicate and siloxane. All of them have increased elasticity. There are other features:
- acrylic plasters are diluted with water, have soundproofing properties, retain heat, and allow air to pass through;
- silicone compositions can include different fillers, which gives the surface texture and color;
- silicate types of plaster mixture are made on the basis of molten glass, which gives it water-repellent and fire-fighting properties;
- Siloxane plasters are not afraid of mechanical stress, do not accumulate moisture and dry very quickly.
The easiest way to apply clay types of mixture. They can be used in damp rooms, since the clay practically does not absorb moisture after drying. The low thermal conductivity of the layer allows you to maintain the microclimate of the room. The low price has made this type of plaster popular for interior decoration. In addition, the environmentally friendly coating can absorb harmful substances. Therefore, it is often used in medical institutions.
Features of decorative plaster
This plaster is recommended to be used to form the outer layer. Most types of this material are not suitable for leveling walls. They can hide only minor defects. The decorative properties of the mixture are largely due to the additives introduced into its composition.
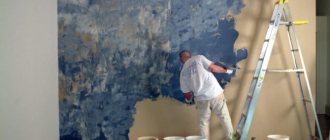
This plaster is often used to imitate different textures, incl. pattern of animal skin, wood, stone surface, etc. There are ready-made mixtures to which color has already been added. They are convenient for those who have not previously had experience in preparing and applying such compositions. Plasters in which you need to add color yourself are more suitable for professionals.
They require proportions to be observed when preparing new portions of the material so that the coating has a uniform color.
Differences in quality of plaster
If we talk about SNiP for plastering walls, it is important to understand what the difference is between the finishing classes. For example, simple finishing is most often used in basements, warehouses, attics and utility rooms. Simply put, in all non-residential premises where there is no need to create a perfectly flat surface. In this case, the finishing layers are as follows:
- spray;
- 2nd layer – primer.
This allows you to hide the main irregularities without additional labor and financial costs. The maximum thickness of simple plaster walls is 12 mm.
Improved wall plaster is used in residential premises that are used by humans. It is important to make the surface smooth and beautiful, since it is constantly in sight. It is applicable for private houses, high-rise apartments, educational institutions, medical and public buildings. In this case, the coating consists of:
- spray;
- 2 layers – primer;
- 3 layers.
This way you can remove the smallest defects and irregularities, making the surface smooth and beautiful. The average total thickness of improved wall plaster is 15 mm.
High-quality surface plaster is the most technologically advanced. It is used for residential buildings, public, educational and medical buildings, as well as office premises where the requirements for plaster are increased. In cross section everything looks like this:
- spray;
- 2 layer;
- 3 layer;
- finishing layer.
The maximum layer thickness is 20 mm.
Note! Leveling the walls by applying high-quality or improved wall plaster in accordance with SNiP occurs through beacons that are installed on the wall and serve as a guide for the work as a rule.
They are fixed in advance, before work begins. Metal profiles or the solution itself can be used as beacons.
Advantages and disadvantages of decorative plaster
Plaster for interior work has many advantages over other types of finishing.
This material:
- provides additional sound insulation;
- durable and has a long service life;
- hides minor wall defects;
- can be used to create various decorative effects;
- not damaged by wet cleaning;
- helps maintain a normal indoor microclimate;
- resistant to temperature changes and moisture;
- characterized by high decorativeness, etc.
Interior plaster provides sound insulation.
At the same time, this decorative coating also has some disadvantages. These include the high cost of the material, the need for fairly thorough preparation of the base and the complexity of application.
It often takes several days for the premises to be decorated. In addition, it is worth considering that removing hardened plaster is quite difficult.
Kinds
Depending on the purpose, plaster for interior wall decoration can be:
Starting
Used for roughing. Its purpose is to fill voids in the wall and level the surface as much as possible. It is characterized by increased density and good adhesion. It takes a relatively long time to dry.
Finish (decorative)
A light-textured mass that is applied in a very thin layer and used as the final coating of the wall.
As for the functional purpose, starting plaster is divided into the following subtypes:
Simple - consists of a surface spray and a primer coating, the total thickness in total is no more than 12 mm. Suitable for non-residential premises.
Improved - applied in 3 layers, including spray, primer and covering. The total thickness must be at least 15 mm.
High-quality - characterized by two layers of primer, which significantly improves the adhesion of surfaces. The thickness of the total layer is at least 20 mm.
Tolerances for plastering work.
In turn, decorative plaster can be of the following types:
Textured
The surface is characterized by the presence of irregularities, which change the perception of the walls, and also allow you to make the interior less strict. To give relief, granite, quartz or marble chips are introduced into the dry mass, which, in addition to decoration, significantly strengthen the plaster.
Mineral
The composition contains natural components, including crushed minerals, which makes it possible to create an imitation of brickwork or form stucco on the surface of the wall.
Venetian
The mixture contains crushed powder and crushed minerals, as well as dyes, with which you can create a unique wall interior without having any special design skills.
Considering the type of base, the plaster can be gypsum, cement, silicone, or polymer. Each of them has its own characteristics, on which their use in a particular case depends.
Cement
It is produced in the form of a dry bulk mixture, which consists of cement and admixtures.
There are two types:
Cement-lime
The composition contains lime, which forms the corresponding white tint.
Cement-sand
The composition contains sand, which in combination with cement increases the strength of the plaster.
Cement-lime plaster is used for finishing walls with high humidity, since it has adhesive properties, does not absorb moisture and promotes its rapid evaporation from the surface. Does not cause the formation of fungus even at high humidity levels. It is best used as finishing walls in the bathroom or kitchen.
As for cement-sand mixtures, they are excellent for leveling surfaces that have significant flaws. The plaster adheres well and does not slide off the wall if it is mixed in the correct proportions.
Advantages
- High strength of the coating, which allows you to put a load on the wall;
- There is no need to necessarily prime the wall surface before application, as the solution adheres well;
- Relatively low price;
- The ability to quickly repair holes in the wall without paying special attention to them;
- The solution can be used in unheated rooms.
Flaws
- Since the mixture has a fairly large mass, it is important to correctly calculate the thickness of the applied layer;
- It hardens for a relatively long time, and to speed up the process it will be necessary to artificially create optimal microclimate conditions;
- Incompatible with plastic bases and painted wooden structures.
You should always consider the feasibility of using this type of plaster in order to obtain only the advantages while minimizing the disadvantages.
The key point in using cement plaster is the correct mixing in the proportions specified by the manufacturer.
Large brands, in addition to the main components, often add stabilizers and plasticizers, which together improve the quality of the plaster, but to fully dissolve them, a much larger volume of water may be required than, for example, from another manufacturer.
Advice! There are always instructions on the packaging and it is recommended to knead strictly in accordance with them. Otherwise, there is a risk of getting not a plastic, tenacious mass, but thick plasticine, which cannot be evenly distributed over the wall, or slurry, which is also difficult to apply.
Plaster
The basis of the dry mixture is gypsum, the main distinguishing feature of which is its relatively rapid hardening. This is both an advantage, since you don’t have to wait a long time for complete drying, about a week, as is the case with cement, and a clear disadvantage, since you need to mix it in small quantities, and if you don’t have time to use it, you have to throw it away.
The hardened mixture loses its properties and is not suitable for application. This fact significantly increases the consumption of material, especially if the painter carries out kneading and plastering on his own without anyone’s help.
The adhesion of gypsum itself leaves much to be desired, so to improve the adhesion of the solution to the wall surface, manufacturers add certain components to the dry composition.
Easy and correct application depends entirely on the density of the solution.
Since it sets and hardens quickly, experts recommend mixing it often, but in small portions.
This will take some time, but will save material.
Advantages
- A perfectly smooth surface even when applying one layer, suitable for decorative painting and wallpapering;
- Maximum environmental friendliness, which is achieved due to the absence of harmful components that can be released into the air and harm health;
- Does not interfere with natural air exchange;
- After drying, the surface will not crack even with room temperature fluctuations;
- Economical consumption of the mixture compared to cement. The layer can be used up to 2 mm, while providing a perfectly flat and smooth surface;
- Easy to apply, does not require preliminary screwing of the reinforcing mesh to the wall;
- Can be applied in several layers, which will not affect the strength of the coating;
- Creates excellent noise and heat insulation.
Flaws
- It is not suitable for rooms with high humidity, since gypsum, even under a coating layer, can absorb moisture, provoking the development of pathogenic flora.
If we compare gypsum plaster with cement plaster, its advantages are as follows:
Thanks to a thin layer of application, consumption is reduced
Dries quickly (maximum 3 days)
No load on the wall
Long service life
As for the price, gypsum plaster is 1.5-2 times more expensive than cement plaster, but if you take into account the material consumption, they are approximately the same.
Expert opinion
Mezentsev Sergey Petrovich
Residential renovation and finishing specialist
Note! Gypsum plaster is not friendly with metal surfaces. This is especially true for nail heads and metal staples, which, upon prolonged contact with plaster, oxidize and cause characteristic yellow spots on the surface that appear through wallpaper or paint. To prevent this from happening, the caps are rubbed down separately before plastering.
Silicone
If the first two types are most often found on sale in the form of a dry mixture for mixing mortar, then this plaster is sold ready-made. The base is silicone resin, into which various fillers are mixed, depending on the effect you want to achieve.
It is a decorative type and is used as a finishing wall covering. You can also add any dyes to the finished mixture.
Advantages
- Suitable for application in contact with wooden and metal surfaces;
- Excellent water resistance and the ability to repel moisture with frequent contact with it, which makes it possible to use it in absolutely any residential premises;
- Excellent adhesion and ease of application;
- Dries quickly and has a long service life;
- Easily painted in any color.
Flaws
- Relatively high cost and the need to use a silicone primer before starting work.
The advantages also include the absence of the need to measure the required amount of mixture and water for mixing the plastic mass. The manufacturer did everything himself; the only thing before starting work is to stir the mixture for several minutes with a mixer to achieve the most uniform consistency.
Polymer
It is a type of decorative plaster, which is based on polymer resin and other synthetic components that form a dense and even coating. This option can hardly be called environmentally friendly, since resins, when the air temperature increases, can form vapors that are unsafe for the human respiratory system.
Advantages
- High moisture resistance;
- Maximum drying speed;
- Does not require additional painting;
- Resistant to temperature changes without causing cracking of the surface layer.
Flaws
- High price.
Material requirement calculation
To calculate the amount of plaster, use the formula C = (Sxd) / V, where:
- S – surface area to be finished;
- d – thickness of the plaster layer;
- V is the output of the finished solution.
The consumption of plaster is affected by its type. When applying “Venetian”, to cover 1 square meter of surface you will need only 150–300 g of the mixture. To finish 1 square meter with a textured composition, approximately 1500–3200 g of ready-made solution will be required. The consumption of smooth plasters is 900–1400 g of mixture.
Types of material by type of work
According to this principle, plasters for interior work are divided into two main types: for starting work (usually leveling walls) and finishing.
The first type of material is used for finishing “bare” walls with many defects, for example, potholes, chips, cracks, sagging, and so on. To remove these defects, coarse mixtures based on sand and cement or slaked lime are used. There are other options for mixtures: acrylic, silicone, silicate and polymer. They differ from the previous ones by the presence of additional components that increase the performance of the coating, as well as by a higher cost.
For initial work, cement-sand plasters are most often used.
At the second stage, the so-called coating plaster is applied; types of plaster of this type are in most cases more expensive than rough plaster. They are usually made from gypsum. They serve as a base for tiles, paint, decorative plasters or wallpaper. Additional substances can also be added to gypsum plasters. They are usually used to reduce the intensity of moisture exposure and increase the drying time of the solution.
Finishing mixtures are the most expensive, but they are used to create decorative coatings. These solutions, in turn, are divided into structural, textured, and Venetian plaster is considered a separate type. When choosing such mixtures, it is recommended to focus on the mid-price category. This way you can avoid the risk of purchasing a counterfeit or low-quality product, but also not overpay.
Gypsum mixtures are very plastic and easy to process, so they are usually used for finishing
On a note! Various types of plaster solutions are usually used for specific purposes, but there are also universal mixtures that make finishing faster and cheaper.
Which decorative plaster to choose
When choosing a material, you should take into account not only its decorative qualities.
When choosing a material, the composition and purpose of the product are taken into account.
First of all, you need to carefully study the information presented on the packaging, incl. compound. It is important to indicate the possibility of using the mixture for interior decoration. This plaster is made from environmentally friendly components that are not capable of releasing toxic substances when heated, exposed to aggressive cleaning agents, moisture, ultraviolet radiation, etc.
In addition, manufacturers often indicate the purpose of their products. Some types of plaster are recommended for use only in bathrooms and kitchens, while others can be used in children’s rooms and bedrooms. For people who do not have experience working with this finishing material, it is better to buy ready-to-apply mixtures.
When choosing plaster, you should also check for additional properties, incl. fire resistance, possibility of wet cleaning of the surface, etc.
Thermal insulating plasters
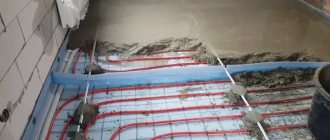
Until recently, heat-protective plaster was not particularly popular due to its high cost. The solution acts as additional thermal insulation, but it is very successful. There are 2 main groups:
- plaster for the preparatory layer - involves covering. Thermal conductivity is close to that of gas or foam concrete;
- solution for the finishing coating - its performance is better: thermal conductivity is 2-3 times lower than that of foam concrete and 1.5 times higher than that of mineral wool.
The composition of this mixture
The binder is the usual white Portland cement, but porous lightweight materials are used as filler:
- vermiculite or foamed perlite . Porous granules easily absorb moisture, so before manufacturing the material is impregnated with a water-repellent agent. It still absorbs moisture, but it also loses it easily. The cost of the solution is from 280 rubles. for 25 kg;
- foam glass – hollow glass granules. Their water resistance is well known. The price of a 25 kg package is from 520 rubles.
Its characteristics and properties
The solution is designed to solve problems of thermal insulation of premises and facades and meets these requirements:
- thermal insulation qualities - 5 cm of composition replaces 3–4 cm of foam plastic or 1.5–2 clay bricks;
- light weight - density after hardening is 240–360 kg/cubic. m;
- adhesion – the material adheres to concrete, brick, plasterboard, and stone surfaces. Certain types of plaster can be applied to metal and glass;
- no special surface treatment is needed, the process is completely standard and does not cause difficulties. The machine application method uses conventional equipment.
Disadvantages of the material:
- compositions including vermiculite and pumice absorb moisture, but dry out over time;
- It is not economically profitable to apply the solution in a layer of more than 5 cm. If there is such a need, a special primer and reinforcement are required;
- the solution is not thrown onto the surface, but rubbed in; a short rule is used.
Plasters serve many functions. And since this material has much less weight than other forms of finishing, and its application is much simpler, it is not surprising that it is so popular for solving special problems.
This video will tell you about the application and features of heat-insulating plasters using a specific example:
Application Tools
When working with plaster, the following tools may be required:
- container for mixing the solution;
- construction mixer;
- graters;
- simple and serrated spatulas;
- textured rollers;
- trowels;
- brushes;
- construction tape, etc.
When working with plaster, you need a container for mixing the solution and a mixer.
How to choose facade plaster for exterior work
Building materials stores offer a wide selection of products to suit every taste and budget, but when choosing façade decorative plaster, you cannot rely only on color preferences. In this case, it is important what the operating conditions and goals of the customer are.
When choosing a mixture, pay attention to the following indicators:
- water absorption rate (the lower, the better);
- protection from ultraviolet rays;
- high degree of adhesion;
- low degree of shrinkage, which will allow it not to crack for a long time;
- high degree of breathability.
It is possible to apply the material yourself, however, absolute lack of professionalism in this matter will be marked by unevenness and visible joints.
The work is not difficult to carry out, but you need to have certain skills
Additionally, pay attention to shelf life, frost resistance, consumption and other technical parameters. Using them, it is easy to determine how possible it is to work in the conditions of your home, and how many kilograms of the mixture you will need to buy.
Instructions for applying plaster
Applying plaster has its own subtleties. Taking them into account will help you avoid mistakes and get the highest quality finished coating without defects.
Preparing the walls
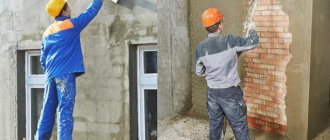
Before you start decorating the walls, you need to carefully prepare the base. The surface is cleaned of the old decorative layer. If there are places where the base plaster has peeled off or large cracks have appeared, they are cleaned and sealed.
Walls with a strong level difference are leveled with a cement-sand mixture. In this case, you need to wait until they dry. Then carefully treat the wall with a special primer. It will promote better adhesion of the plaster to the base and reduce the risk of the formation of fungal colonies on its surface. Often several layers of primer are applied, allowing each layer to dry. This increases the completion time of the work, but reduces the risk of peeling of heavy finishing material.
Application of flock plaster
People often choose flock plaster because... it does not require careful preparation of the base.
The application process includes 3 stages:
- First, the surface is treated with a thick layer of water-based acrylic adhesive.
- After this, flock plaster is applied. To do this, it is better to use a spray gun equipped with a compressor. Dry powder may fall onto the floor during operation. If necessary, it is collected and reused.
- Upon completion of treatment, the surface is allowed to dry for 6 hours.
- Then the flock mixture that has not stuck to the base is brushed off with a soft broom.
Applying plaster requires careful preparation.
The last stage is coating with protective varnish. To do this, you can use a soft roller or brush. The varnish will protect the surface from dust and damage.
Venetian plaster
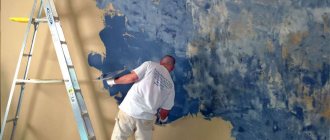
Applying the “Venetian” is a rather complex process. This material fits well only on a previously prepared and leveled surface. It hardly hides defects. The “Venetian” is applied already tinted, in 2 layers. You should not mix a large portion of the solution at once to prevent it from drying out prematurely.
To fix the first layer, use a special spatula. You should put a little solution on it, and then apply it to the surface to be treated at an angle of approximately 30°. Subsequently, the “Venetian” is applied to the wall or ceiling with multidirectional strokes. It is desirable that each new portion lies perpendicular to the previous one. The layer thickness should not exceed 1–1.5 mm. After the material begins to harden, its surface should be polished. This will result in the formation of fine veins that are characteristic of marble.
The first layer should be left to dry for 24 hours. Then use a spatula to remove roughness and unevenness. After this, you can begin applying the second layer. The process is no different from the formation of the first one. If necessary, apply a third one in the future.
To create a more pronounced design, white, brown and black paints are often used.
Special plasters
Special varieties of plaster are offered that have special properties. Strengthening the characteristics will increase the level of protection and create a natural barrier. The development is associated with increased requirements for residential and industrial facilities
Sanitizing
Building structures with salt-containing components require sanitizing mixtures. Constant exposure to moisture leads to the appearance of unsightly salt stains on the surface. The structure of the treatment composition is porous and vapor permeable.
The arrangement helps to retain salt particles that tend to escape along with capillary moisture. Special chemical and grain elements (fractions, grain parameters) are selected. Fillers and binders are not afraid of salt.
Note!
The mixture can level the surface and sanitize. The wall will remain constantly dry, there will be no cracks or efflorescence. Not suitable for plaster bases.
Waterproofing mixtures
Waterproofing solutions can create a waterproof shell. External walls, basement, basement, bathroom, kitchen are subject to treatment. When making a cement-sand mixture you will need:
- Portland cement (grade 400);
- fine fractions of quartz sand (ratio with cement 1:2);
- ferric chloride;
- water repellents (liquid glass, ceresite);
- plasticizers (oleates);
- compactors (stone flour, ground coal, bitumen);
- astringent and adhesive components.
Multilayer coating (3-25 mm) is applied by mechanized or manual method. The second category refers to waterproofing asphalt compounds. They can be cold (fillers, cement, latex, brick chips) and hot (polymers, bitumen).
Acoustic
The characteristic high porosity of acoustic plaster provides sound insulation. The solutions are light in weight due to granular fillers (pumice, expanded clay). For excellent sound absorption, you should not paint the wall with enamel paint or glue wallpaper.
There are four recipes for walls that are often used. Pumice (3mm) is mixed with cement (4:1) or caustic magnesite (0.25mm) and diluted with hydrochloric acid. Combine gypsum or cement with slag. It can be applied without difficulty (layer up to 25 mm); leveling is not necessary.
Sanitizing
Waterproofing mixtures
Acoustic
Thermal insulation
A comfortable microclimate is created by a thermal insulation solution. Sawdust, expanded polystyrene, expanded clay, pumice, and vermiculite help keep the room warm. The cement-lime or cement base includes sand along with additives (plasticizers, clay, paper).
The layer (2-5 cm) is durable and non-flammable. Meets environmental standards. Tolerates heat and low temperatures. Eliminates reinforcement and will last for years.
X-ray protective
Specialized production requires the use of X-ray protective plaster. By adding berite concentrate, it is possible to protect from electromagnetic and x-ray radiation. Layer up to 5 cm, additional plates (berit) can be installed.
Fireproof
Fireproof plaster can withstand temperatures up to 1700° for approximately 2.5 hours. Heat-resistant elements give a gray color. Glass, gypsum, perlite, vermiculite, minerals, and components of volcanic origin are added to special cement. Used for walls, fireplaces, stoves. The surface is primed, after mixing, applied no later than 30 minutes.
Using objects to create a decorative effect
Using different tools, you can quickly create many types of textured surfaces. Now there are stamps, stencils, curly rollers, etc. on sale.
Brush work
To create texture, a brush with rubber bristles is often used. She makes straight or perpendicular strokes. This allows you to get different designs. Use this tool until the top layer of plaster dries. Thus, the pattern remains after the material hardens.
To create texture, use a special brush.
Paint roller
A simple paint roller can be used to create a “fur coat”. This tool is used on only applied plaster. Spikes form on the surface, looking like wet wool. Instead of a roller, to create this effect, use a crumpled plastic bag or other suitable means at hand.
Stencils
Stencils are used to recreate one design on a large surface. They come in both plastic and metal. To obtain the desired pattern, the stencil is applied to the base, a small amount of putty is applied to it, and then removed. The drawing remains on the surface. The stencil is a reusable tool, but it is important to clean it of any remaining plaster every time.
Stencils are needed to create a beautiful design.
Stamps
A stamp is a tool similar to a roller, but it has a pattern on it. It is made of plastic and has a handle. Nowadays they produce rollers with patterns of floral arrangements, imitation of reptile skin, etc. The operating principle of this tool is as simple as possible. The stamp is passed over the surface of the plaster that has not yet hardened. A clear pattern remains on the surface.
Finishing work
2.5. Plastering surfaces with conventional solutions
Applying and leveling plaster layers
Ordinary plaster
. This coating is applied for the sole purpose of hiding defects in the underlying base. The surface of such plasters is even and smooth. As a rule, ordinary plaster is applied in separate layers.
Splash
— 1st layer of plaster coating, the purpose of which is to ensure adhesion of the coating to the surface being finished. In view of this, a more mobile solution is used for spraying (9–14 cm of cone sediment). The thickness of the spray layer does not exceed 6 mm with lime and lime-gypsum mortar, 5 mm with cement mortar. The surface of the spray is not leveled and remains rough.
Priming
— 2nd layer of plaster coating, forming the required thickness of the coating. If the defects of the structure being finished are significant and the quality requirements for the plaster are high, the required thickness of the plaster is increased and the primer is applied in several layers. The thickness of each layer is recommended based on the condition of its stability on the surface without slipping: up to 7 mm for lime and lime-gypsum mortars and up to 5 mm for cement mortars. Each subsequent layer is applied only after the previous one has been leveled and set. The solution for soil is less mobile than for spraying - the mobility of the cone is 7–8 cm.
Covering
— 3rd layer of plaster coating, the purpose of which is to prepare the surface to be painted. A sufficient layer thickness of 2 mm. Since this layer is subject to manual or mechanized grouting, the covering solution must be homogeneous, well mixed and have an aggregate size of more than 1.2 mm.
Conventional plastering is performed both indoors and on building facades. Plaster layers are applied manually (throwing or spreading) and mechanized methods.
Layers of plaster are manually applied to the surface using different techniques - casting and spreading. A solution of spray and the first layer of soil is poured so that it better penetrates into all roughness and thereby adheres more firmly to the surface. The 2nd and subsequent layers of primer can be spread. The cover is thrown on or spread. The solution is also leveled in different ways.
Throwing
. To work you need a mortar box, a plaster trowel and a falcon. The box is installed closer to the surface to be plastered (Fig. 2.4).
Rice. 2.4. Applying plaster mortar to walls and ceiling
The mortar from the box is applied to the falcon with a plaster trowel. If the solution is liquid, then the falcon is held almost horizontally. Plasterer with mortar on falcon
approaches the place of work, takes a portion of the mortar with a trowel and throws it onto the surface to be plastered. Hitting the surface, the solution fills seams, cavities and roughness, forming a dense layer.
When plastering the wall, the falcon is held slightly inclined towards it. This is convenient for work and protects your hand from getting solution on it.
The solution is applied in thin throws, the swing of the trowel should be sharp, the solution seems to dissipate; when thick throws are required, the swing should be light.
During the plastering process, the mortar has to be applied in different positions: from left to right and from right to left, it depends on the place where the mortar is applied.
When plastering walls, apply the mortar at head level or slightly higher; at waist level and near the floor or scaffolding.
When plastering ceilings (Fig. 2.4), you have to throw the mortar over your head, over your shoulder, above you, away from you.
When applying the solution, you should always choose a position in which the splashes would not fly towards the plasterer working nearby.
Using a trowel from a box, apply the solution in the same way as from a falcon. In this case, a lightweight mobile box and an oversized spatula are used. If the surface to be plastered is located below the level of the box, then it is installed at a distance of 1 m from the wall.
Sokol solution is applied as follows. The solution is drawn onto the falcon using a plaster trowel, scoop or ladle. The falcon with a portion of the solution is taken with the right hand and with a strong sharp swing from the bottom up it is dropped onto the wall surface to be plastered. The solution is spread over the surface in a wide strip.
Using a ladle, the solution is applied to vertical and horizontal surfaces, as well as to cornices, platbands, slopes and other parts of buildings. It is more convenient to apply lime, lime-cement and cement mortars with a ladle.
Spreading.
The spreading solution should not be very thick. When using a thick mortar, you should press firmly on the tool, otherwise the plaster layer will be less dense than when thrown, and with a large number of internal cavities. When applying the solution to the walls, the box with the solution is placed at a distance of 1 m from the wall; on the ceiling - under the place of application.
The solution is spread with a falcon, trowel, and trowel (Fig. 2.5).
Rice. 2.5. Spreading plaster mortar
They take a trowel in one hand, and a falcon with a solution in the other. The falcon is placed against the surface to be plastered so that one side of it is 50–100 mm from the surface, which depends on the amount and thickness of the mortar, and the other side is by an amount equal to the thickness of the applied layer of mortar. As the falcon moves, the solution is spread onto the surface, and the raised side of the falcon is gradually pressed against it. You need to press the trowel evenly on the falcon to get a flat surface.
Spreading the solution on the wall, the falcon is moved from bottom to top.
Using a trowel, the solution is spread mainly on mesh surfaces. First, the mesh is sprayed with a solution, it sets, and the mesh stops vibrating. Only after this do they begin to spread. A solution with fibrous additives is collected onto a falcon-ladle or falcon, which is then spread onto the surfaces to be plastered with the back of the trowel. If the solution is spread on the wall (Fig. 2.5, a), then the falcon is placed against the wall, with a quick movement of the back of the trowel, a portion of the solution is moved from the falcon and a thin layer is spread on the surface. Strokes of the solution are made vertical or horizontal. The solution is spread on the ceiling (Fig. 2.5, b) in the same way as on the walls. During spreading, the falcon is moved along with the trowel to pick up the falling solution.
When working with a grater, place one end of it on a box, place a bed of mortar on the trowel with a trowel, then take the grater with both hands, bring it to the surface and spread the solution, pressing one longitudinal side of the grater against the wall and lifting the other. If the solution is spread on a wall, the trowel is moved from the bottom up, if on the ceiling - towards itself, applying strips of the solution of the same thickness to the surface.
Leveling
. Using a falcon, the solution is leveled in the same way as it is spread. Usually, when spreading the solution from the falcon, it is simultaneously leveled.
When working with a trowel, place it against the surface with the applied solution, lift the top edge and, with pressure, move it along the wall from the bottom up, along the ceiling - towards you. Where there is a lot of solution, it is cut off and collected on a grater cloth. Where it is missing, the removed excess solution is spread. In some places it is necessary to apply additional solution.
The thickness of the plaster depends on the force with which you press the trowel or other tool. Where the pressure is stronger, the layer of solution is thinner, and vice versa.
The rule is to simultaneously check whether the surface is flat and additionally level it. The rule is applied to the plaster in all directions and unevenness is immediately corrected. In places where there are recesses, a solution is applied and leveled, and where there are bulges, they are cut off.
Applying and leveling the covering.
Application of the solution.
The covering is carried out with a solution of the same composition as the previously applied layers of plaster.
12–20 minutes before applying the covering, the surface of the soil is moistened with water. The covering adheres more firmly to the moistened soil, due to which the solidity of the plaster layer is achieved.
The solution is applied to the surface of walls and ceilings in thin layers and leveled with trowels. The covering can also be applied from the falcon by spreading.
The cleaner and more thoroughly the solution is leveled, the easier it will be to grout.
The solution is prepared in small portions without setting retarders. A slightly set solution should not be used.
Before applying the covering, the soil is leveled and moistened with water. The solution is applied (Fig. 2.6) in a layer of 2–3 mm, leveled and smoothed with metal trowels. When joining the covering, the edge of the previously applied mortar is cut off at an angle of 30º and a new portion of mortar is applied to the cut part.
Rice. 2.6. Applying and grouting plaster
Grout
. Grouting is done with trowels in a circular and smooth manner (Fig. 2.6). Spreading grout gives a cleaner surface; it is most often done with high-quality plaster.
When grouting in a circle, take a trowel with one hand, press the blade to the surface of the plaster and make circular movements counterclockwise. The solution, moved with a grater over the surface, fills individual depressions and rubs the covering. The grater should be pressed with different force: where the surface is convex, it is stronger, where it is concave, it is weaker.
Over time, the covering dries out and is difficult to rub off. To make it softer, the surface of the plaster to be rubbed is moistened with water using a brush.
When grouting in a circular manner, slightly noticeable circular marks remain. Therefore, for high-quality finishes, the round grout is supplemented with a running grout.
The grater, well cleaned of the solution, is pressed tightly to the surface and begins to make straight-line movements with it - swings. This removes all traces of grout all around.
If the surface of the plaster, rubbed in a circle, has dried, then it is moistened with water and then rubbed smoothly.
The greatest cleanliness of rubbed plaster is achieved when the work is done first with a wooden float, and then with a float, the canvas of which is upholstered with felt.
Smoothing
. Smoothing is performed in two ways. In the first case, the applied coating is first leveled with a wooden trowel, and then smoothed with a trowel in one or two directions.
On the walls, the covering is first smoothed in a vertical direction from the floor to the ceiling, and then in a horizontal direction along the length or width of the floor.
On the ceiling, smoothing is first performed across the rays of light coming from the windows, and then in their direction.
In the second case, the covering solution is simultaneously spread and leveled, and then smoothed.
When smoothing, it is better to do the work together. One applies the solution and levels it, the other smoothes it.
When smoothed with a rubber-lined trowel, the surfaces have the appearance of fine sandy textures. It is better to paint such a surface with adhesive paints. When smoothed with metal trowels, the surface of the plaster becomes as if iron-clad. It is better to paint it with oil paints.
Husks, usenki and chamfers
Luzg
- an internal corner at the junction of two walls or a ceiling and a wall;
usenka
- an outer corner formed at the junction of two walls.
Since sharp corners (shanks) quickly break off, they are blunted by rounding or chamfering
.
Rubbing and cutting husks, usenki and chamfers are labor-intensive operations. Husks, grouts and chamfers are made using husk or grub rules, half-graters, and a template.
To rub husks or usenki, use solutions prepared in fine sifted sand. A husk or stub rule is applied to the applied solution and, moving it up and down with slight pressure, rub until an exact clean line of husk or stub is obtained. These elements must be made strictly vertically or horizontally.
Defects are corrected with small trowels and additional application of the solution to the right places.
The chamfers are rubbed along the previously made grooves. To do this, the finished cuttings are moistened with water, a grater is applied to them at the end and, moving it with slight pressure up and down, the cutting solution is rubbed in one plane or rounded off.
Husks and usenki are also pulled out according to two established rules. Since hanging the rules takes a lot of time, they use templates made of two profile boards fastened together, which are moved along a lighthouse frame made of two corners fastened at an angle. In this case, not individual rules are hung, but a whole frame, which increases labor productivity. However, the template and the lighthouse frame only form a right angle. To obtain an obtuse or acute angle, you have to manually correct one side of the husk, shoulder or chamfer, spending additional time. A hinged template with a sliding profile board allows you to pull out husks, grooves and chamfers at different angles without additional adjustments.
Mechanized application and leveling of the solution
Application of the solution
. Before application, the solutions are filtered through sieves. The mobility of the solution for spraying and soil without gypsum binder is 6-10 cm, for a covering layer containing gypsum binder - 9-12 cm, without binder - 7-8 cm. Solutions with a cone draft of 10-12 cm are applied with mechanical nozzles, with cone draft 7–9 cm - pneumatic.
When applying the spray and primer solution, the nozzles are held to the surface to be plastered at an angle of 60–90°; when applying the spray over shingles
- at an angle of 60°. The solution is applied from top to bottom and in layers of the following thickness: for spraying on wooden surfaces - no more than 9 mm, on stone, brick, concrete surfaces - no more than 5 mm. The soil layer should not exceed 8 mm for lime-gypsum mortars, 7 mm for lime and cement-lime mortars, 5 mm for cement mortars. To prevent the solution from slipping when re-applied, the previous layer of solution must harden.
The nozzle (Fig. 2.7, a...c) is held with your hands or placed on your shoulder during operation. When applying the solution to ceilings while working from the floor, the nozzle can be attached to a fork.
Rice. 2.7. Applying the solution with nozzles: a, b - on the wall; c - on the ceiling
The soil must be well leveled. The covering is sometimes applied manually: with a trowel from a falcon, a ladle or a scoop. The thickness of the covering after grouting should be no more than 2 mm, but if the soil is not accurately leveled, the thickness of the covering increases. The coating can also be applied with a nozzle, but in a very thin layer. The soil is moistened with water, which makes it possible to spread the covering solution into a thin layer.
The operator periodically checks the mobility of the solution with a reference cone.
Before applying the mortar, the plasterer selects and adjusts the length of the mortar jet and its spray pattern. With a long torch, the jet can be directed at an angle close to a right angle, with a short torch - only at a right angle.
The jet and spray pattern should be such that solution loss is minimal.
Solutions for spraying, priming and covering are applied in an even layer without skipping. When applying the solution in excessively thin layers, labor productivity decreases.
An hour before applying the solution, the plastered surface is moistened with water using a spray gun or brush so that the water is better absorbed into the surface. Plastering begins by applying a layer of spray to the ceilings and walls in one room, then moves to another, a third, etc. If the solution sets, the primer can be applied after 4-5 hours, and after the same time, the covering can be applied.
Leveling the solution.
When leveling the solution, various beacons are used. Mortar beacons are most often placed vertically, wooden and metal ones - vertically and horizontally.
On mortar and metal beacons, the mortar is leveled as a rule, on wooden ones - most often with screeds. To level the mortar on the ceiling, wooden handles are nailed to the rules or hooks, to which ropes are tied, and the rules and hooks are pulled along the beacons using the ropes. This work is performed by one or two workers.
To simultaneously level the mortar on ceilings and walls, two templates are used - upper and lower. First, the mortar is leveled on the top of the wall. When leveled, the upper template covers half the height of the wall. After finishing the upper part of the room with the lower template, the mortar is leveled and drawn out on the lower part of the wall. For templates, rules are hung on the walls and ceiling.
After leveling the mortar and correcting all defects on the ground, prepare a covering mortar, apply it, level it and smooth it or rub it.
Grout
. Electric and pneumatic troweling machines are used for grouting plaster.
Electric trowel
Designed for grouting various plaster solutions. The electric motor of the machine, through a gearbox, rotates supporting aluminum disks in opposite directions, to which grouting disks made of foam plastic or wood-based material are attached. Water is supplied to wet the leveled surface.
Pneumatic Trowel
consists of a pneumatic motor, gearbox and replaceable working disks. The motor housing serves as the handle of the machine. A replaceable trowel disk made of wood plastic or textolite or a traverse with blades is attached to the gearbox shaft. For ease of operation, the machine is equipped with an additional side handle. A sprayer is provided to supply water to the surface to be rubbed, and a protective disk is installed for safety purposes.
Pneumatic and electric grinding machines are also used for grouting plaster. The operating technique for all machines is the same. First, turn on the engine, place the discs of the machine against the surface of the plaster, apply appropriate pressure to the machine and drive it along the surface at the required speed. Grouting is stopped when it is ensured that the treated surface meets the requirements for it.
To obtain a cleaner grout, felt or felt pads are attached to the discs, which are nailed or glued.
If the machines have a device for wetting (spraying) the plaster being grouted with water, then the grouting work is carried out by one person; if there is no such device, they usually work together: one rubs the machine, the other wets
plaster surfaces with water and corrects defects by smearing them with a solution and troweling them, and also trowels places that cannot be troweled with a machine.
Instructions for painting plaster
There are several methods for painting a plastered surface. Each of them has some subtleties.
Plain coloring
This method is considered the simplest. To carry out the work, you can use a paint brush or roller. In addition, you need to prepare the entire volume of paint and varnish material necessary to cover the entire surface. After this, the composition is poured into the tray. It is better to have several rollers of different sizes to achieve uniform coloring of all areas. If it is necessary to apply 2 layers, it is important to wait at least 24 hours so that the first one has time to dry.
Several shades
This method is most often used for painting textured surfaces. First, it is coated with paint of a darker tone. Then you need to wait until this layer dries. Next, paint with a light-colored composition and grout the surface. This will help highlight the drawing.
Several shades are used for textured surfaces.
Dry brush
First, a uniform coloring is carried out. It is important that the layer is dry. After this, a new batch of paint is prepared, adding a smaller amount of color to it. The material should be 1–2 shades lighter. Then apply a second coat using a short-nap roller. A minimum amount of paint is applied to the instrument. In this case, only the protrusions of the texture will be painted.
Wash
This is another fairly simple way to decorate plastered surfaces. To form the background layer, waterproof paint of a lighter tone is used. There should be no untreated areas left on the surface. Then a layer of paint of a darker color is applied. You need to wait for it to dry.
After this, using sandpaper soaked in water or a hard sponge, carefully treat the surface. It is important that the first, lighter layer is not damaged during the work. Dark areas should remain only in depressions and recesses.
Gypsum plasters
such plaster in rooms where increased demands are placed on the decorative effect . Usually the mixture is laid in a 2-centimeter layer, which is enough to eliminate most damage. The end result is an almost perfectly smooth surface that does not require additional grouting or sanding. At the same time, finishing walls with gypsum plaster is not allowed in every room.
This material is sensitive to humidity, so a different solution should be used in the bathroom, kitchen and technical rooms. There are also restrictions on the use of this mixture, taking into account the expected mechanical effects.
The coating should only be laid on surfaces that will not experience physical stress. Application work can only be carried out after thoroughly priming the base . The temperature regime should also be taken into account - the optimal range varies from 18 to 23 °C. It is important that the surface to be treated is dry and unfrozen. There are different approaches and types of applying such plaster, but most often it is recommended to install pendulum guides and form strips between them 3-4 cm wide.
The advantages of gypsum-based solutions include:
- Ecological cleanliness . Since the mixtures are prepared based on natural ingredients , the coating does not evaporate harmful substances.
- Small mass . This advantage should be attributed to the factors that facilitate the installation process, since the weight practically does not affect the performance.
- Maintaining microclimate . Although it is not recommended to apply the gypsum mixture in conditions of high humidity, during operation the surface acts as a microclimate regulator. The porous structure absorbs excess moisture, which normalizes the temperature.
- Economical . During finishing work, you can limit yourself to applying one layer. This will not affect the function of the coating, since 0.6 cm is already enough to seal small defects.
- Insulating properties . The advantages of gypsum plaster include noise and heat insulation properties.
Disadvantages of gypsum plaster:
- Restrictions on use . For rooms with a constantly high humidity , this method of plastering is not recommended.
- High price . In terms of this indicator, gypsum mixtures are superior to almost all classical finishing methods - this applies to both traditional cement and lime mortars.
- Fast hardening . Primary setting occurs in a matter of minutes. This can be attributed to the positive aspects, but this “behavior” of the coating complicates the workflow.
Return to content
