Term "scrapbooking"
, or as it is also called “scrapbooking” comes from the English scrap - cutting and book - book, i.e.
it can be literally translated as “scrapbook
.
Scrapbooking is a type of handicraft art in which anyone can make and design a photo album
, telling the story of family history in the form of pictures, photographs, records, newspaper clippings and other items that
have memorabilia value
.
It is worth noting that scrapbooking can not only be tied to the creation of a classic photo album, but also an album in the form of an accordion, a house, a box, as well as postcards
.
The purpose of scrapbooking is to preserve photographs and various memorabilia of important, interesting and memorable events for future generations.
How to make wallpaper glue at home
Repairs are always troublesome undertakings, which, in addition to hard work, also involve large financial costs. Every person tries to save on every little thing. If you will be gluing wallpaper on the walls, you can make the glue yourself.
Ingredients for preparing the adhesive composition
The quality of the resulting product will not be inferior to ready-made adhesives, but you will definitely be able to save money.
The classic recipe for obtaining an adhesive composition
This wallpaper glue can be made from flour. It is actively used for gluing paper wallpaper. The main advantage of this composition remains its non-toxicity, so it is absolutely safe to use at home. As mentioned above, the main ingredient is flour, which can be found in any home. Before making glue, it is necessary to determine the consumption of the adhesive composition. To glue 2.3 rolls of wallpaper, you need 1 liter of glue.
The main component of the adhesive composition
To prepare the composition you need to take the following elements:
- container for receiving glue;
- flour in the amount of 60 g and 1 liter of water.
To make wallpaper adhesive at home, you can use the following action plan:
- Heat the water until it begins to boil. Take another container, combine flour and cold water to form a mixture with a consistency similar to sour cream. Make sure that there are no lumps in the prepared product.
- Pour hot water into the resulting mixture in a thin stream, stirring with a spoon all the time.
- When everything is stirred, put the container back on the fire, wait until it boils and use after cooling.
The resulting homemade glue should have a consistency similar to thick jelly. You can prepare wallpaper adhesive using not only flour, but also starch. In terms of their properties, these two adhesives are no different, but they can compete with many industrial compounds, such as CMC.
The required consistency of the adhesive composition, you can start repair work
If you are afraid to distribute glue on the canvas, you can test it a little first. Apply the composition to two small pieces of wallpaper, and then glue them together.
You can glue the canvases on any surface, and also achieve excellent adhesion of paper and cardboard. In general, conduct experiments and see for yourself the high quality of homemade wallpaper glue.
Other options for preparing glue
What other components can be used to make wallpaper glue at home? To choose an option convenient for you, we suggest that you familiarize yourself with the variations of various ingredients and proportions with which you can create your own recipe for preparing wallpaper glue:
- Keep in mind one rule: the denser the canvas, the thicker the adhesive composition should be, which will better hold the material on the wall. That is, for 1 liter of water you need to take not 200, but 400-500 grams of flour.
- For priming work you will need a smaller amount of paste, approximately 100 grams. We recommend adding 1 gram of copper sulfate to the composition to cover the primer with an antifungal and antiseptic solution. In general, it would be a good idea to add such a useful ingredient to any adhesive composition so that you are not bothered by unpleasant surprises.
- You can add denatured alcohol to the flour paste to strengthen it better. Previously, a recipe with potassium chloride and alum was widely used in the proportion: 100 g of flour + 50 ml of denatured alcohol + 200 ml of water. After this, 1 liter of already boiled water and 15 g of alum were added to the resulting solution (you can take 30 g of calcium).
- You can add turpentine to a homemade adhesive solution, which increases gluten well: for 200 g of flour in the basic recipe you need to take about 120 ml of turpentine and add a little glycerin and gelatin. These substances will increase adhesion several times, making the glue much stronger than the original one.
- But the next option for preparing paste can be used to plant even small tiles. It is prepared according to this recipe: take 150 g of flour, 200 ml of water, the same amount of ethyl alcohol and 3-4 g of glycerin. In another container, 800 g of water and 5 g of gelatin are heated. It is necessary to mix both mixtures, bring to a boil, cool, and then use superglue for repairs.
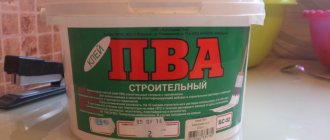
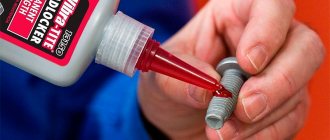
PVA glue
The next adhesive that you can make yourself is called PVA glue. Many people believe that at the factory this composition for gluing wallpaper is made using some special technology. This opinion is erroneous, since it is possible to make a similar composition at home and save money.
Factory packaging of PVA glue
This product is considered the most widespread today. In addition to wallpapering, it is actively used in office supplies and construction. For this reason, PVA glue can safely be called unique. If you are interested in such a product, then it is worth considering the recipe according to which it is prepared:
- purified water – 1 l;
- photographic gelatin – 5 g, you can really find it in a store that sells products for cameras;
- glycerin, sold in pharmacies – 4 g;
- wheat flour from the grocery store – 100-150 g;
- alcohol – 20 ml.
The process of preparing PVA glue is conventionally divided into two stages. The first is a pre-done job that involves the procedure of soaking gelatin. To do this, you need to take a glass of water and send the presented product there. The second stage is the actual preparation.
PVA glue for household use, for housework
When the gelatin has swollen (about a day), you can prepare the glue:
- Take distilled water and heat it in a water bath. After this, you should send the gelatin there, mix thoroughly with flour so that no lumps form.
- Place the resulting mixture in a container on the fire, wait until it boils, but do not boil. When the mixture acquires a thick consistency and turns white, constantly stir the wallpaper paste until it has a uniform structure and is free of clots.
- Now you can send glycerin and ethyl alcohol. It is very important to stir the mixture all the time so that it becomes as thick as possible. It is necessary to stir for 10 minutes so that you do not think that two stirrings will be enough.
- When the homemade glue has cooled, it can be used for gluing canvases.
How to prepare wood glue?
This is another way to make glue at home. As you know, wood glue is often used to install wooden materials, so gluing paper for it will be a piece of cake. Before starting the preparation of wood adhesive, we recommend that you familiarize yourself with the features of its use:
- It does not store for long, so it must be used immediately after preparation.
- It has a very pungent and unpleasant odor.
To prepare wood glue, you need to prepare the following:
- Wood glue (solid).
- Vodka.
- Container for its preparation.
- Water – 1 liter.
Step-by-step instruction:
- We take wood glue, chop it into small pieces and place the resulting parts in water to swell the glue.
- After softening the carpentry, move the resulting mixture into a pre-prepared pan. Place on the fire and cook until the glue is completely melted.
Important! At this stage, it is very important not to deviate from the cooking process and constantly stir the mixture. If wood glue burns, it will lose its adhesive ability.
- Add vodka to the composition, mix everything well and let the glue sit for a couple of hours, after which we immediately begin to spread the wallpaper with liquid wood glue.
Dextrin-based product
If you need to glue peeling wallpaper, then the presented composition will be an ideal option. It is very easy to make at home, spending a minimum of time and money. The glue is based on dextrin, which can also be made at home, rather than looking for it in the store. It can be prepared from starch.
The base element in this recipe is starch, not flour.
This ingredient is taken in the required volume, and then placed in a heat-resistant container, which is then placed in a slightly heated oven. Bake the starch at a temperature of 160 degrees for half an hour. Due to the influence of hot air, starch begins to disintegrate and turns into dextrin. After this, you can make homemade glue.
- dry dextrin - 60 g;
- water - 4-5 spoons;
- glycerin - 1 spoon.
To get glue, you need to mix dextrin and water. After setting it on fire, heat it slightly so that the powder dissolves thoroughly, stirring all the time. After this, you can add glycerin. That's all, the prepared composition can be used for gluing paper sheets.
Flour-based glue
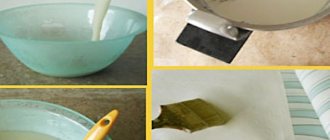
How to make paste yourself? The classic recipe for flour paste at home is easy to follow. To prepare 1 liter of paste we need 200 g of flour.
To avoid unnecessary time and material costs, you should adhere to the following instructions:
- sift the flour through a fine sieve;
- thoroughly dissolve the flour in a small amount of cold water;
- 1 liter of water must be boiled;
- pour boiling water in a thin stream into the flour solution; put the mixture on low heat and bring to a boil with constant stirring;
- remove from heat, let cool slightly and remove the resulting film;
- strain the prepared mixture through a sieve.
The glue is ready to use. If the composition is very thick, simply dilute with water. Checking the consistency is very easy. The solution should drain from your fingers.
If, when you unclench, your fingers stick together slightly, then everything is done correctly.
It is better to use flour 1, not premium. A coarse mixture will provide better adhesion.
The glue should be prepared immediately before use; the composition does not last long. Within a day, its adhesive properties will greatly deteriorate.
The temperature of the applied paste should be about 30 - 40 0 C. This composition can be used for priming walls, in which case a hot solution is better. It is also suitable for gluing wallpaper.
Moisture-resistant composition
When you are going to glue wallpaper in a room where there is a high level of humidity. If you glue wallpaper in the bathroom, you don’t have to worry that it will come off after a while, since this glue is highly moisture resistant.
Granular wood glue
To get it, you need to take regular wood glue and put it in water until swelling occurs. Now you need to pour it into a bowl with linseed oil and wait until the mass becomes gelatinous.
It’s easy to make homemade glue even at home. In addition to the fact that the composition is of high quality, it does not require much effort or money. All the components used can be found at home. Also, a homemade product is considered absolutely harmless, because it contains only natural ingredients. If you use the recipes presented, you will be pleasantly pleased with the results.
DIY glue
The modern range of wallpaper products will delight any owner of a future apartment or house. Today, each roll material produces its own adhesive. But there are situations when factory glue is simply not enough. There is only one way out - make your own glue.
The most affordable option is a paste made from starch and flour with the addition of wood glue, which provides better strength.
VIDEO
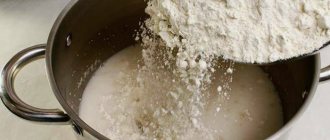
Wallpaper glue, made from flour, is most often used for wall decoration. It will help out if the store-bought compound has run out and you need to glue a few more strips. And one of the main advantages of such glue is the absence of components that can cause harm to health.
The ingredients necessary for its preparation can be found in every home.
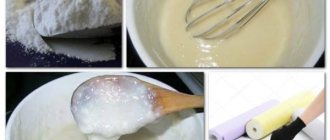
DIY glue recipe
To prepare the glue you need:
Prepare as follows:
- Pour some water into a container and add flour.
- Mix well with a whisk. There should be no lumps.
- Place the container on low heat and stir constantly.
- When the mass thickens, remove from heat and cool.
One liter of adhesive is enough for two or three rolls of wallpaper.
The finished glue should look like thick jelly. To improve adhesive properties, you can add carpentry or PVA glue to the solution.
In some respects, wallpaper glue made from flour is much better than ready-made dry mixtures. Wallpaper glued with it adheres well to any surface.
It is important to use homemade glue as quickly as possible. If there is any left after completing the planned work, be sure to put it in the refrigerator, otherwise it will disappear.
Scrapbooking (master class). DIY photo panel.
To create such an original panel, you will need a shoebox and your favorite photographs, as well as:
- paper for scrapbooking (can be replaced with old wallpaper)
- roll of paper (color: brown)
- glue
- lace
1. First, cover the shoebox with brown paper. You need to lay (glue) scrapbooking paper on the bottom of this box.
2. Use cardboard to make internal dividers.
3. Now insert the lace into the sides of the box.
4. If you wish, you can decorate the box (in this example we used paper flowers and butterflies).
You can find out how to make paper flowers and butterflies in our articles:
* How to make paper flowers
* Corrugated paper flowers
* How to make a paper rose
* How to make a butterfly with your own hands
5. It's time to glue the photos.
6. Prepare scrapbooking paper and cut out a rosette in a spiral. Next, wrap the rose around the pencil and secure with glue.
Universal glue made from flour for wallpaper
Main components of the compositions
In many old buildings, seeing perfectly papered rooms, we cannot imagine that twenty years ago the preparation of wallpaper glue was carried out in the kitchen of this apartment. The main components of the compositions were:
- potato starch;
- flour (rye or wheat).
The adhesive properties of potato starch and flour gluten have been known since ancient times, and when additional components are added, they increase significantly.
DIY wallpaper glue made from flour
If you spend a little time (about half an hour) you can produce an inexpensive, high-quality product that is not inferior to an industrial one. Its basis is wheat gluten flour, which is sold in stores and is very cheap.
The first composition is a paste for wallpaper and paper:
- take flour (calculation – 2 tablespoons per 1 liter of water);
- pour warm water into a container and stir the flour in it;
- put on low heat and cook for five minutes.
This product is used for gluing wallpaper, as well as joining paper and cardboard.
The second composition is wallpaper glue made from flour:
- take flour (calculation – 1 part to 3 parts water);
- pour the flour into a container (large pan or bucket);
- pour plain water and stir until the mass becomes homogeneous;
- put the container on the stove and cook over very low heat until it boils, stirring constantly;
- after boiling, remove from heat, strain and cool;
- the composition is ready.
As you can see, this work is not labor-intensive and simple. You can check the quality like this: take the resulting mass with two fingers. The composition should drain. If this is not the case, you need to add a little warm water and stir.
Squeeze the mixture between your fingers and then slowly unclench them. If you feel some stickiness and elasticity when you open your fingers, then the composition is ready. If this does not happen, you need to add flour and repeat the process again.
DIY wallpaper glue made from starch
Some ingredients (for example, turpentine) used in formulations based on potato starch are now very difficult to obtain. Therefore, it is easier to make glue using alcohol.
For regular walls:
- mix 750 g of potato starch in 200 ml of denatured alcohol or wood alcohol;
- pour in 1.5 liters of water and stir;
- add 8-9 liters of boiling water;
- bring the mixture to a boil;
- separately from this, dissolve 100 g of alum in 0.3 liters of water;
- add alum solution to the resulting mixture and stir;
- the resulting composition is cooled and filtered.
For damp walls.
- dilute 40 g of calcium chloride in 600 g of water;
- bring to a boil;
- Mix 400 g of water and 400 g of potato starch separately;
- A solution of boiling calcium chloride is poured into this mixture and mixed;
- the resulting mixture is heated and 4-5 liters of hot water are added;
- 2-3 boil.
- 1 kg of rye flour is soaked in 2 liters of water;
- add 8-9 liters of heated water;
- bring to a boil;
- filter;
- add 600 g of turpentine and stir.
How to make wallpaper glue from starch?
Now we will talk about the second method of making simple glue for wallpapering. But for this we want to introduce you to the main advantages of this composition:
- The adhesive mass is very environmentally friendly, as it is made from the most natural products - flour and starch.
- Manufacturers often add harmful chemicals to purchased glue: antifungal compounds, various antibacterial substances. And after pasting the walls, we breathe these unsafe fumes. Therefore, think carefully about what glue to use for repairs.
- It is very economical to make your own wallpaper glue from starch. Its components will cost you little. Sometimes you don’t even need to buy them - every housewife has them.
- This adhesive composition is suitable for all paper wallpapers, as well as vinyl and non-woven fabrics.
- It can even be applied to painted walls and varnished surfaces.
- Does not soak thin paper and does not damage wallpaper.
- No unpleasant smell.
- Does not leave any stains.
Glue made from flour and starch does not last long, but we don’t need this, because we can make the required amount and use it completely so as not to throw away the leftovers.
Important! Starch wallpaper glue can be stored in the refrigerator for about a day. Otherwise, the glue will sour.
Before you start, you need to prepare the following ingredients and auxiliary materials:
- 3 liter saucepan.
- 2.5 liters of water.
- 1 tablespoon flour.
- 2 tablespoons starch.
Important! In this case, you can use any flour, the type is not important here.
Step-by-step algorithm of actions:
- Take a three-liter saucepan, pour water into it, and wait for it to boil completely.
- Meanwhile, we need to pour all the flour and starch into a separate plastic bowl. Add regular cold tap water to this. You can use boiled or peeled, but the main thing is not from the refrigerator.
- Constantly stir the flour and starch until a homogeneous mass is formed.
- Now we need to pour the resulting mixture in a thin stream into boiling water, stir a little, turn it off after a couple of minutes, and remove the pan from the stove.
- When the glue becomes cool, strain it through a colander, thereby getting rid of any lumps that have formed.
That's the whole procedure! Now your glue is ready to begin its direct duties!
Important! Take the exact amount of flour (one glass without a slide) and starch (two spoons with a small slide), since this recipe must be carried out with particular precision in observing all the necessary proportions.
Wallpaper is peeling off: what to do, how to re-glue the peeled wallpaper?
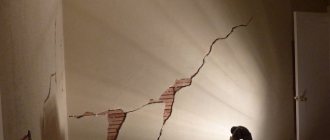
The renovation is complete, but not everyone can breathe a sigh of relief, as after some time the residents begin to notice that the wallpaper is peeling off. What to do if the wallpaper comes off the wall? You can simply carefully glue back the wallpaper that has come off, but the question arises: why did this happen and will the problem happen again?
Yes, if you don’t understand why the wallpaper peels off at the joints or comes off completely from the walls and ceilings, you can remain in the repair stage for a long time. Today you will learn about the most common reasons why wallpaper comes off and how to most reliably solve the problem.
The most common reasons why wallpaper comes off
It would seem that everything was done correctly during the renovation, but still a disaster happened and the wallpaper came off the wall. Let's look at the reasons why wallpaper peels off:
- Wall defects are a common occurrence in new buildings, but in old houses the walls continue to deform, so we cannot rule out a similar problem. Before starting finishing work, you should carefully check all surfaces, remove weak plaster, and repair even the slightest cracks.
- The plasterboard walls were installed without following technology. Particular attention is paid to how the joints between the sheets were processed.
- The walls are poorly prepared. There are remnants of old wallpaper or traces of whitewash and paint. It’s even worse if the walls are not pre-primed, and this is a mandatory step in the correct application of wallpaper. Wallpaper also peels off in case of haste, when it is applied to wet surfaces (the plaster or primer has not dried).
- Failure to comply with technologies and instructions is a problem for professionals rather than for beginners. It seems to you that you know everything and do not read the recommendations, but each manufacturer may have its own characteristics of applying specific finishing materials.
- Unevenness of the wallpaper glue layer is a frequent violation if the glue is distributed not with a roller, but with a brush. This is how glue gaps form on the canvas or very little of it is applied.
Particular attention should be paid to how the drying process proceeds after gluing. To prevent the wallpaper from coming off, you need to make sure that the moisture in the room does not evaporate very quickly:
- Doors and windows should not be opened for the first few days.
- We eliminate drafts and close the ventilation.
- If the windows are facing south, be sure to cover them to avoid direct sunlight.
Attention! Wallpaper often peels off and bubbles appear at very low room temperatures and high humidity at the same time, so you should not carry out repairs under such circumstances.
How to glue wallpaper so that it doesn't come off?
The main problem why wallpaper comes off is that wallpapering seems like an easy job and people start it without knowing all the rules and nuances. Indeed, in most cases, even beginners can apply wallpaper to walls, but only if they have first read the recommendations on how to properly glue wallpaper so that it does not move away from the walls.
You won’t find out why the wallpaper comes off or what to do if you don’t repeat the mistakes of others:
- Do not skimp on finishing materials, or rather, do not buy goods at a discount. We don’t know why it was discounted, but it could be, for example, due to poor quality or improper storage conditions.
- Do not begin gluing work until you have thoroughly studied all the instructions on the wallpaper and glue you purchased.
- To carry out quality repairs, you must have special spatulas and rubberized rollers. Have plenty of clean rags on hand.
- Once upon a time you glued wallpaper using diluted flour, but those were times of shortage, why do you need it now? Be sure to buy good wallpaper glue suitable for your rolls and special glue to seal the joints.
- Without properly preparing the walls, don’t even start gluing so that the wallpaper doesn’t come off. Apply both putty and primer strictly according to the instructions.
- Plan to stick before the start of the heating season. It is useful for finishing materials to dry in natural conditions, without exposure to elevated temperatures.
- Eliminate drafts completely. Avoid airing for a couple of days - this advice also applies if you need to re-glue up loose wallpaper so that the problem does not reoccur again and again.
Rules for wallpapering
Among the main reasons why wallpaper peels off is an irresponsible approach to the process itself. Undoubtedly, wallpapering walls is not very difficult, but still this work requires knowledge of some nuances:
- When purchasing a product, pay special attention to its quality. Opt for trusted manufacturers - on the advice of friends or in products that you are confident in.
- Before starting work, carefully read the instructions from the manufacturer.
- To work with wallpaper, purchase special tools that can facilitate the process and reduce the time of pasting walls.
- Finishing with wallpaper requires careful preparation of the walls - puttying, priming and other types of work.
Preparing walls before wallpapering
- Wall finishing should be carried out before the heating season, because drying is carried out under natural conditions.
- Eliminate drafts. A couple of days without open windows will help improve the quality of wallpaper adhesion to the wall surface.
Practical advice on how and with what you can glue peeled wallpaper
It’s great if you found out why the wallpaper peeled off before starting the repair work and were able to follow all our recommendations, but what to do when the repair is already completed and the errors are just beginning to appear? If the wallpaper has come off, you can fix the problem in the following ways:
- If the edges of the wallpaper come off, you just need to re-glue the joints. This is the simplest problem and you need to proceed in the same way as during repair. You need to make sure that there is no debris on the peeled edges. To glue up loose wallpaper, use only wallpaper glue that you have tested, but make it more liquid.
There is a great temptation to quickly use PVA glue, which you probably have in your home. Yes, such a universal glue will quickly solve the problem, but it may leave yellow spots, and during subsequent repairs it will be difficult to remove the panels from the walls. If this doesn't scare you, PVA glue works well if the wallpaper is peeling off.
- If the wallpaper has come off the wall and bubbles have formed, you can correct the defect without tearing the wallpaper from the walls using a regular medical syringe. First, the problem area is pierced with a needle to allow air to escape, and then the glue is carefully injected under the panel with a syringe. We wait a few minutes for the finishing material to become saturated with glue and press it against the wall.
If bubbles have formed on already dried wallpaper, do not try to release the air accumulated there by cutting it crosswise with a construction knife. This idea only works in the hands of real professionals and only in the case when there is no clear drawing, otherwise it will not be possible to combine all the fragments into a single image.
- If the wallpaper has not just peeled off the wall, but has come off with the plaster, then there is a high probability of tears occurring. The damaged area must be completely replaced with new plaster and new canvas, but for this you need to have a sufficient balance of finishing materials in stock. This option is suitable if not much time has passed since the repair and the wallpaper on the wall has not yet changed color under the influence of external factors.
Never buy wallpaper back to back. Choose such footage that after the repair work is carried out, at least a few linear meters remain for emergency situations. You can, of course, go to the store and find the same sample, but you need to understand that these will already be rolls from a different batch, which means there is a high probability that they will differ in shades.
How to properly glue different types of wallpaper
The overall impression of the room will depend on how you wallpaper the walls. Even the most expensive and beautiful wallpaper can ruin the interior if it is poorly glued. In order not to waste time and not spoil the wallpaper, listen to our advice.
- 1 of 1
On the picture:
You can often hear the question: how to glue vinyl wallpaper, paper or non-woven wallpaper? How to glue is not an idle question. The fact is that all of the listed types of wallpaper are glued differently.
General rules for all types of wallpaper
Removing old wallpaper. It is better to do this with a narrow spatula, slightly moistening them before doing this. For permanently “stuck” scraps, use special solutions for removing wallpaper (you must work with gloves).
Checking the walls. They must be dry, clean, without cracks (they must be puttied). And, most importantly, it absorbs moisture normally. To check the latter, spray the surface with water. Do the drops roll off? – Absorbency is reduced, it is necessary to paste it with paper “like wallpaper”. Did the splashes remain on the surface and form dark spots? – Absorbency is too high, apply a layer of paste, wallpaper glue or treat the wall with a primer.
- 1 of 1
On the picture:
How to hang wallpaper without bubbles? A bubble may appear due to an area not coated with glue. Use a wallpaper brush in places where it is difficult to apply glue with a roller.
How to hang wallpaper so that it doesn't wrinkle?
Bubbles and wrinkles need to be smoothed out. It is not recommended to use a damp cloth for these purposes, as it can damage the wallpaper itself. To easily smooth vinyl wallpaper, it is better to use a stiff brush or plastic spatula; for non-woven wallpaper, a rubber roller or a special spatula.
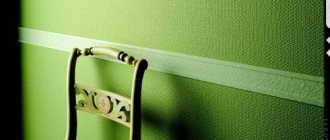
In the photo: Wallpaper Icones 651-04 from the Elitis factory.
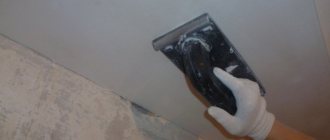
Preparation of glue. The type of glue depends on the type of wallpaper. The label on the wallpaper roll will tell you which adhesive you should buy. For gluing heavy types of wallpaper (vinyl or non-woven), specialized adhesives are used. Paper ones can be glued with any wallpaper composition.
To properly prepare the glue, it is necessary to continuously stir the water in the container and pour out the contents of the package. And mix the resulting mass until the glue is completely dissolved.
Preparing wallpaper. We cut the wallpaper into pieces with a small margin (5–7 cm).
Search for vertical. Before starting work, using a plumb line, we draw a vertical line on the wall, along which we will stick the first panel.
- 1 of 1
On the picture:
Before gluing, set the initial vertical line along a plumb line. For best results, use a pencil to draw guide lines directly onto the wall.
Advantages of homemade glue
In addition to the obvious advantages of simplicity and economy of preparation, homemade wallpaper glue has many other advantages:
| № | Excellent adhesion | Using paste, you can glue wallpaper to any type of surface, even if it is treated with drying oil or oil paint. |
| 1 | Safety and environmental friendliness | All components of the paste are not only safe, they are actually edible. This glue can be safely used in children's rooms and bedrooms. It will not cause allergic reactions, does not emit harmful substances or unpleasant odors. Absolutely harmless if it comes into contact with the skin during operation. |
| 2 | Versatility | Suitable for use with any type of wallpaper with the exception of heavy types. Dried glue is not inferior in strength to industrial mixtures. |
| 3 | Easy to remove | Despite its strength, wallpaper glued with paste can be easily removed from the wall, just wet the canvas. |
| 4 | Not aggressive | The paste does not destroy the structure of paper wallpaper and does not cause soaking, which reduces the risk of damage to the canvas when sticking to the wall. |
| 5 | Not noticeable | The paste solution has a slightly cloudy whitish color; it disappears when it dries. Once on the wallpaper, it leaves no traces. |
Paper wallpaper
- Apply glue to the inner surface of the wallpaper in a horizontal and vertical direction to distribute the glue evenly, fold the edges - top and bottom and leave for 10 minutes. Then lightly coat with glue again. The edges of the wallpaper must be smeared especially carefully, otherwise they will lag behind at the joints.
- If the fabric is wavy and curls at the edges, wait. It is not yet ready to be glued to the surface. You can stick it only when the panel becomes completely even.
- Paper-based wallpaper is applied with an overlap.
- 1 of 4
On the picture:
Paper wallpaper can be single-layer (simplex) or two-layer (duplex). Duplex wallpaper consists of two or more layers of paper, which significantly improves their quality characteristics.
Wallpaper with a pattern.
How to glue vinyl wallpaper with a pattern? Make sure that the pattern matches even when cutting the fabric. Keep in mind that some of the material will go to waste when cutting. The remaining short pieces will be useful for gluing surfaces under and above windows and for subsequent wallpaper repairs.
In the photo: Wallpaper 24 from the Eijffinger factory.
Vinyl wallpapers
- Apply primer to prepared walls. Choose a primer that is made specifically for preparing walls for wallpapering. The primer will help the vinyl wallpaper adhere better to the surface.
- The glue-smeared canvas should be left for several minutes. Afterwards, glue the wallpaper.
- In some cases, glue is applied only to the wall, in others - both to the wall and to the wallpaper. How to apply the adhesive composition correctly is indicated on the roll.
- Vinyl wallpaper is always glued end-to-end, i.e. the panels do not overlap each other.
- There is a danger: when pasted, this wallpaper can stretch greatly.
- 1 of 4
On the picture:
Vinyl wallpaper uses polyvinyl chloride as the top layer. The main distinguishing feature of vinyl wallpaper is moisture resistance. They can be washed even with detergents.
Smooth surface.
Non-woven wallpaper: how to glue it on a smooth surface? Take sandpaper and go over the entire surface, giving the walls some roughness.
In the photo: Stripes wallpaper from the Mr Perswall factory.
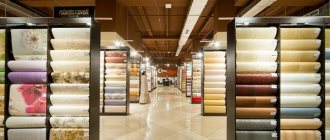
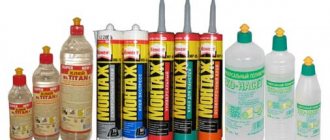
How to choose wallpaper glue
On September 26, 1876, Fritz Henkel created the company Henkel & Cie in the German city of Aachen. Since then, the history of one of the world's largest manufacturers of household chemicals and wallpaper glue began.
In 1953, Methylane wallpaper adhesive was developed, which today is familiar to almost everyone who has ever made repairs. The Methylane line produces a large selection of adhesives for working with different types of wallpaper.
Sealed and moisture-proof packaging with high barrier and protective properties reliably retains the properties of the adhesive until it is opened. Additionally, holographic logos are applied to the packaging, which makes it easy to distinguish the original from the fake.
A line of glue under the Moment brand was also released for the Russian market. The properties of the glue, as well as its packaging, are carefully tested in our own laboratory. The company's specialists are constantly working to improve the formula and quality of the compositions.
For all types of wallpaper, Henkel's product range includes high-quality, reliable adhesives.
In stores you can purchase:
- For all types of paper wallpaper - Moment Classic (preparing time is only 3 minutes, diluted even in cold water without lumps or odor).
- For any vinyl wallpaper - Moment Vinyl with a new enhanced formula that will help achieve a long-lasting effect from gluing.
- For felt, tufting and textile wallpapers – Moment Extra (due to enhanced additives in the composition, it can be used for gluing any types of heavy wallpaper).
- For non-woven ones - special glue Moment Non-woven (applied directly to the wall and removed dry).
Non-woven wallpaper
- If you have purchased non-woven wallpaper, how to glue it is a matter of paramount importance. After all, the glue is applied not to the wallpaper, but to the wall. Don’t skimp: apply the glue thickly, covering every centimeter of the wall.
- Non-woven wallpaper is glued end-to-end, so you can start from any corner.
- A big plus is that dry wallpaper will not tear when glued to the wall. If the sheet does not lie as desired, it can be carefully removed and re-glued without damaging the structure of the canvas.
- 1 of 3
On the picture:
Non-woven wallpaper is based on non-woven wallpaper - a material consisting of cellulose fiber, similar to paper, but with higher wear-resistant characteristics.
Dextrin glue
This option is suitable for all paper-related activities, be it quilling or origami. They can completely replace PVA glue.
The main ingredient is starch.
- Place the starch in a heated oven. We increase the temperature to 160 degrees and simmer it for about 1.5 hours. Hot air breaks down starch and it turns into dextrin.
- Take 3 tbsp. spoons of dextrin, mix with 5 tbsp. spoons of water and stirring continuously, heat until it is completely dissolved.
- Add glycerin and mix again.
- Let cool.